SEARCH FINESCALE.COM

Enter keywords or a search phrase below:

I have alot of scratchbuilding ahead of me (Academy CH-53E) FINISHED!

37662 views
99 replies
1 rating 2 rating 3 rating 4 rating 5 rating
  • Member since
    July 2003
  • From: Cincinnati, Ohio
I have alot of scratchbuilding ahead of me (Academy CH-53E) FINISHED!
Posted by ridleusmc on Wednesday, June 28, 2006 2:52 PM

Somehow, I have to turn this

into this

6 out the 7 main rotor blades need this treatment.  Does anybody have any good tips or ideas about how to pull this off?  I have a roll of 0.020 wire (lockwire).  But I think I may need some insight into scratchbuilding small hydraulic lines and wire harnesses. 

Semper Fi,

Chris 

  • Member since
    June 2005
  • From: MCAS Miramar
Posted by SSgtD6152 on Wednesday, June 28, 2006 3:46 PM
Man. that is going to make ya' get old before your time.
  • Member since
    November 2005
  • From: Newnan, GA
Posted by J.H. Primm on Wednesday, June 28, 2006 5:16 PM

If you can find some .010 and .020 copper shear wire, that might do the trick. Safety wire/Lock wire is probably too stiff to work with. Also you might want to find some small guage solder. That stuff is very maleable and does a pretty respectable jobe in replicating rigid hydraulic lines.For the electrical harnesses (depending on how small a diameter they are) you could use some fine guitar strings (I don't know a thing about guitars but I know some sizes of string make excellent oxygen hoses in 1/48th), short of that, All I can think of is using small guage wire with some thread wrapped tightly around it to replicate the look of an electrical harness.


HTH

I knew there was a good reason I picked 6112 as an MOS! Wink [;)]

Jonathan Primm

  • Member since
    July 2003
  • From: Cincinnati, Ohio
Posted by ridleusmc on Monday, July 3, 2006 9:41 AM

I guess I'll have to go to radio shack to get the solder.  This rotor head is going to be the death of me, but I just can't let the detail slide.  Thanks for the input about the solder, guitar strings (I can hit up my roommate for those) and thread. 

Semper Fi,

Chris

  • Member since
    December 2002
  • From: Modeling anything with "MARINES" on the side.
Posted by AH1Wsnake on Monday, July 3, 2006 5:06 PM

Good luck with that, Chris. I know you'll do the kit proud. Keep us updated.

SF,
Andy


"There are only two kinds of people that understand Marines: Marines and those who have met them in battle. Everyone else has a second-hand opinion."
  • Member since
    July 2003
  • From: Cincinnati, Ohio
Posted by ridleusmc on Tuesday, July 4, 2006 1:04 PM

Thanks Andy,

I need those words of encouragement.  The GF left me enough time to get a start on the sleave and spindle hydraulic lines.  I started with the blade lock hydraulic lines.  These lines drive hydraulic lock pins that lock the main rotor blades in the spread position.  These pins retract to allow the main rotor blades to fold.  Here's a pic, I'm just getting started.

SF

Chris

  • Member since
    April 2004
  • From: Paranaque, Philippines
Posted by f_baquiran on Wednesday, July 5, 2006 10:39 PM

The work you guys put on your projects are really outstanding!  Really inspires all of us to do better.  Please keep us posted on your progress Chris and take a lot of pictures.  We're all interested in how you 'll do it and how it turns out for future projects.


  • Member since
    April 2005
  • From: I am at play in the fields of the Lord. (Texas)
Posted by m60a3 on Monday, July 10, 2006 3:31 AM
 Man, what an undertaking! Hope it goes well. Look forward to the WIP pics!!

                                                                                                        -60
"I lay like a small idea in a vacant mind" - Wm. Least Heat Moon "I am at the center of the earth." - Black Elk My FSM friends are the best.
  • Member since
    July 2003
  • From: Cincinnati, Ohio
Posted by ridleusmc on Tuesday, July 18, 2006 9:27 PM

Progress has been slow, but I did get a little done.  They're rough representations of pitch locks (to lock the blades at a particular angle for blade fold), and their hydraulic lines. 

Semper Fi,

Chris

  • Member since
    November 2005
  • From: Newnan, GA
Posted by J.H. Primm on Wednesday, July 19, 2006 9:41 AM
 ridleusmc wrote:

Progress has been slow, but I did get a little done.  They're rough representations of pitch locks (to lock the blades at a particular angle for blade fold), and their hydraulic lines. 

Semper Fi,

Chris

Chris;

Looks like you have a good start on it! What did you use for the Hydraulic lines?

Jonathan Primm

  • Member since
    July 2003
  • From: Cincinnati, Ohio
Posted by ridleusmc on Thursday, July 20, 2006 3:20 PM

I used some .015 Solder from Radio Shack that you were kind enough to suggest at the beginning of this thread.  Thanks JH Primm

Semper Fi,

Chris

  • Member since
    May 2005
  • From: TAMPA,FL
Posted by CHRH53D on Monday, August 14, 2006 3:32 AM

hope you won't mind me adding something in here,Chris.

some of my local shops carry...plastruct products...and i have seen round rod pieces as

small as .010in(or 3mm). in the railroad side  i  have seen...detail associates.. model supplies

with brass wire as small as .006in.

i was  with -461 from '76-'80 and '81-84, did you have a relative there then?

  • Member since
    May 2005
  • From: TAMPA,FL
Posted by CHRH53D on Monday, August 14, 2006 3:48 AM

hey chris,

sorry, one more idea.

i read once where a fellow used old watch gears to make to blade fold

gears on the sleeve and spindles.

[i can't remember how your 1/72 e model looked] after seeing all the

pictures of other 1/72 mh-53e's and the new 1/48 ch-53e isn't everyone

building theirs with the rotor head standing too tall(cut the mast down easily

a quater inch) and the landing gear struts extended as if not a gallon of fuel

onboard?

do a spiral auto for me,brian

  • Member since
    July 2003
  • From: Cincinnati, Ohio
Posted by ridleusmc on Wednesday, August 16, 2006 4:09 AM

I do remember cutting the rotor head down a little bit on my 1/72 scale CH-53E, but I wasn't very happy with the detail on it.  That's why I'm determinted to fix up the Academy kit.  Lately, I've been working on the cabin and the cockpit of the Academy 1/48  kit.  The detail is good OOTB, but it's not quite 100%.  I'm adding tweaks here and there to spiffy it up a bit.  The solder works great for hydraulic lines.  I'll have to use something else for the insulated wire harnesses. 

I never had very much to do with HMH-461, but I got to know some of the guys over there.  464 and 461 are neighbors.  I have some good reference pics on my photobucket site.  I also have some pics of the 1/72 scale CH-53E and some progress pics of my current project. 

http://smg.photobucket.com/albums/v491/ridleusmc/

Semper Fi,

Chris


  • Member since
    July 2003
  • From: Cincinnati, Ohio
Posted by ridleusmc on Monday, August 21, 2006 5:05 AM

I found a few things to fix on this kit.  I added a "Hook Box" made from evergreen plastic sheet.  This box is used to hold the single point pendant for external loads.  The box behind the copilot's (left) seat is a winshield washer reservoir.  The windshield wipers and washer fluid are never used.  The smaller box attached to it is a peice of avionics gear which adjusts the instuments to light levels appropriate for night vision goggles. I fashioned this piece out of an .50 cal ammo box from a 1/35 tank kit.        


I added cushons made from tissue paper to the pilots' seats.  My best attempt at a five point harnes is masking tape with flattened solder buckles.  I have to give Academy credit on the instument panels.  They are dead-on down to the circuit breakers.   


The cabin troop seats are lacking.  The seat supports do not go into the floor as indicated by the kit.  The seat supports go to the side of the cabin.  I used .020 brass rod to make the proper seat supports, but I'll have to scratchbuild more seats.  There should be a shorter seat section forward of the last seat for both the right and left sides of the cabin.  There should also be another section of seats aft of the crew door (right side) and the A/O window (left side). 


It's a great kit, and it's well worth the money.  However, it could be more accurate with a little tweaking. 

Semper Fi,

Chris

  • Member since
    May 2005
  • From: TAMPA,FL
Posted by CHRH53D on Wednesday, August 23, 2006 1:57 AM

well alright, Chris,

way to go on the /72 53e, most of my kits are this scale and they can be trying at times.nice use of the real stuff 23699 and 5606(are those still the oil and hyd fluids used there?)

i've had ngb's leak just the same; i'd be having words with hyd shop with a rotor brake [better not be a aft servo]  leak like that!...but, realistic...

nice job are the /48 53e, hope you don'get tired of adding more and more detail. looks like you'll be adding the .50cals with the bulkhead mount brackets

installed on the no.1 side. do you still carry the kit2alphas in the cabin or up front somewhere? ya gotta be happy that igor never made a erh for your E model

exspecially since academy seems to have really gotten down the wet head here.

after watching you all here i need to pull out my /48 53d and finish ribbing the interior(i'm over half way  installing..all..the ribs and stringers.

i cut apart the upstairs and am trying to make cast masters for the mgb,agb and mgb oil cooler/blower assy's. i've gone through my old(antique now) bhc,rotors

and related,and my erh books trying to get references for all those parts..wish my wife would locate an old natops to help with the app/heater compartment.

thank goodness for copying machines and their ability to increase/decrease sizes.

brian 

  • Member since
    July 2003
  • From: Cincinnati, Ohio
Posted by ridleusmc on Thursday, August 24, 2006 5:03 AM

The Hyd fluid used is Mil-PRF-83282, I think.  I left the Marine Corps 4 months ago.  Some things I have forgotten.  I don't remember the engine or gear box oil Mil-specs, but I'm sure they still leak.  The Hyd leak on my 1/72 scale CH-53E is meant to represent a rotor positioner leak.  The night I added the finishing touches on my CH-53E there was a rotor positioner leak on an A/C we were trying to push out of phase.  It kept us at work for an extra couple of hours, so I had to include it on the model. 

I just keep chugging away at the 1/48 scale kit.  I hope that I'll be able to close up the fuselage soon, but It all depends on the upper sound-proofing and little things like the upper crew door/AO window, and other cabin details.  (I need to add the guns, and I think they'll need to detailed a bit.) 

I considered cutting the 1st Stage Hydraulic compartment/Main Gear Box Oil Cooler Compartment open.  However, I decided that there was enough work to do on this model without cutting open compartments.  (The 1st Stg Hyd compartment is located aft of the Main rotor head on the upper right side of the aircraft, opposite the #2 engine). 

Good luck to you on your 53D.  The Forward Hyd compartment on a 53D has 3 hyd systems as opposed to the 53E's 2.  I Couldn't cut open a Forward Hyd compartment.  There are just too many lines and components to scratchbuild.  It'd keep my busy to 2010, and I can't go 4 years without adding anything new to my shelf. 

I'm going to have to make some of my own decals for this project, which I'm sure will be fun.  The thing I hate about making decals is the time spent sorting stuff on the computer.  I'm not looking forward to that process, but I'll burn that bridge when I come to it. 

I'll keep updating my battle with the Academey 53E.  The Academy 53E isn't as frustrating as the Sikorsky 53E, but it still has me cursing form time to time. 

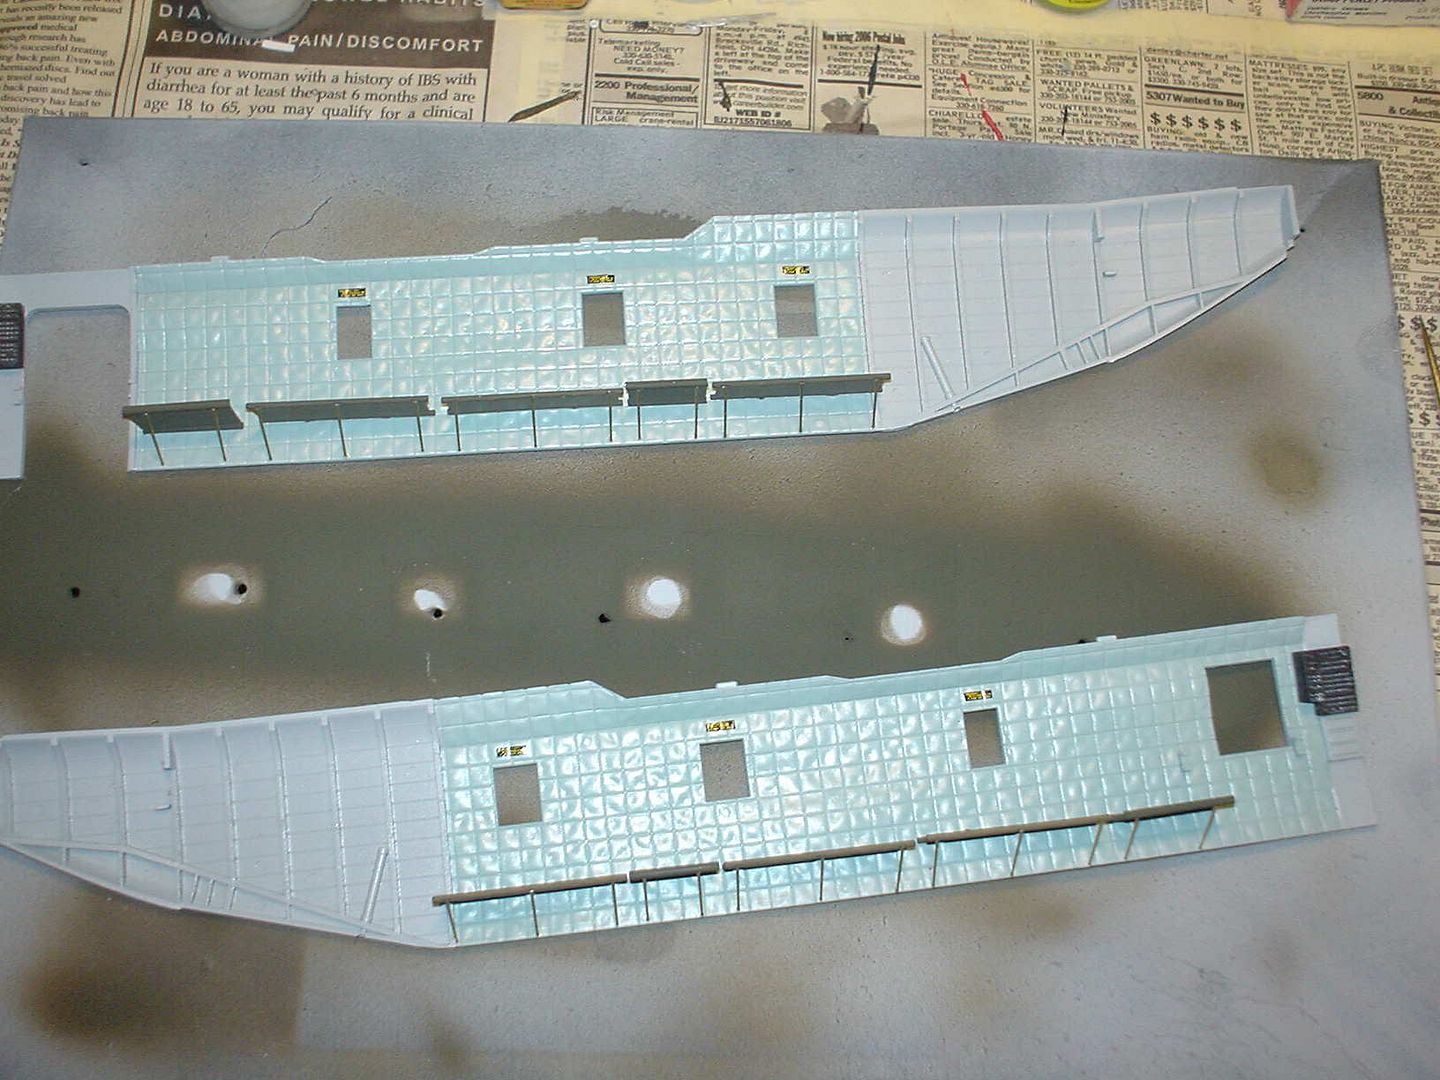
I added some seats to the cabin.  It's a better representation of the cabin, but it's not exactly perfect. 

Semper Fi,

Chris

  • Member since
    February 2004
  • From: Green Lantern Corps HQ on Oa
Posted by LemonJello on Thursday, August 24, 2006 10:07 AM
Looking real good there.  Keep the updates coming, I'm sure this one will be a beauty.  I haven't even taken the shrink wrap off of my box, been trying to get some others done first before I tackle this project.
A day in the Corps is like a day on the farm; every meal is a banquet, every paycheck a fortune, every formation a parade... The Marine Corps is a department of the Navy? Yeah...The Men's Department.
  • Member since
    July 2003
  • From: Piedmont Triad, NC (USA)
Posted by oldhooker on Thursday, August 24, 2006 10:24 AM

Outstanding work, Chris! Smile [:)]

Thank you for letting us see your progress shots of this great, and long awaited model!   Will be following your updates! Thumbs Up [tup]

Take care,

Frank

  • Member since
    July 2003
  • From: Cincinnati, Ohio
Posted by ridleusmc on Thursday, August 24, 2006 4:20 PM

Thanks guys,

I'll keep the progress pics coming.  It may be time to close up the fuselage soon. 

Semper Fi,

Chris

  • Member since
    July 2003
  • From: Cincinnati, Ohio
Posted by ridleusmc on Wednesday, August 30, 2006 12:58 AM

I got a little bit more done today, but not much.  The most important thing I did was order some new .50 cals at my LHS.  I ordered a Verlinden 1/48 scale WWII machine gun set.  It includes enough guns for a B-17.  They looked identicle to the modern XM218's on todays choppers, but I was looking at a rather small catalogue picture.  They may take some adjusting, but I think they'll work. 

This kit's rotor head support assembly only represents 2 Main Rotor Servos, when it should have 3.  These main rotor servos are hydraulically operated and they control the swashplate, which controls the pitch of the blades.  I consider it an important detail, so I"m going to have add a 3rd one.  This is where I cut the space for the new servo. 

I made a couple of "litters" for the aft sections of the cabin.  One is for the right and one is for the left.  The left side litter is used to store emergency MRE's, Water, cranials, and floatation devices for passengers.  The right side litters are used to store a big heavy raft.  The storage isn't made yet, but the litters are.  Here's a pic. 

Dual point external load pendants are usually stored on the aft cabin floor, under the seats.  These pendants are attached to the dual point hooks to lift loads externally.  The pendants are slung beneith the aircraft until they are attached to the load (M198 Howitzers, Hummers, etc).  I'm modelling them as they'd be stored in the cabin.  The hooks are actually trailer hitches taken from 1/35 shermans.  I love my parts box.  The sleeve is just evergreen styrene, and the canvas covered cable is just tissue paper.  I need to scrape away a CA buger, but that can wait until tomorrow. 


Semper Fi,

Chris

  • Member since
    March 2003
  • From: Brooklyn
Posted by wibhi2 on Wednesday, August 30, 2006 7:32 AM
Looks like you are doing a real bang up job on this.

For smaller guages of wire try a store that sells jewelry beads. I have wire that is 34 guage through 20 guage. They come in brass and copper.

For the insulators, either get a piece of evergreen/plastistruct rod or tube the appropriate size and drill or enlarge a hole through the middle.
3d modelling is an option a true mental excercise in frusrtation
  • Member since
    July 2003
  • From: Cincinnati, Ohio
Posted by ridleusmc on Wednesday, August 30, 2006 1:38 PM

Thanks for the tip.  There are a couple of craft stores around here that I can try.  I'm glad you like the work I've done so far.  Last night I test fitted the cabin floor and cieling and I enjoyed what I saw. 

I'll keep posting,

Semper Fi,

Chris 

  • Member since
    July 2003
  • From: Cincinnati, Ohio
Posted by ridleusmc on Sunday, September 3, 2006 1:11 AM

I got 2 things done today.  I finished the cabin with a liberal weathering treatment.  It really looks messy.  I also fixed the 2 fuselage halves together.  My major mistake was not taking pics of the completed and weathered interior sections. 

This pic doesn't do my weathering justice.  The angle and the flash doesn't show the wonderful heavy black wash I used to grime up the cabin.  The cabins are grimy. 

Here is the fuselage finally fixed together.  The fit was very good for 5  14" pieces of plastic (left fuselage, right fuselage, cabin ceiling, cabin floor/cockpit, and belly).   However, nothings perfect, and I'll be spending some time tomorrow sanding and shaping the seams. 

Semper Fi,

Chris


  • Member since
    July 2003
  • From: Cincinnati, Ohio
Posted by ridleusmc on Friday, September 8, 2006 3:10 PM

I've spent the last few days just piecing stuff together.  The sponsons are on and the Aux tanks are ready, but they aren't going on until after painting.  The #1 and #3 engines are also going to stay off until painting is complete.  I bought Verlinden's US WWII Aircraft Guns in 1:48 #1267.  The old .50's for the waist guns of a B-17 will look nice in the windows of a modern CH-53.  I ordered some custom decals from Custom Hobby Decals.  Their service was great and the decals are in the mail.  I can't wait to see them.  There's going to be a nice piece of crew door art with some unique squadron markings.


I'll keep ya'll posted. I may have to tweak a couple more parts, but I think the hard part is over.

UPDATE: The mail guy came.  I have my decals, and they look great. 

Semper Fi,

Chris  

  • Member since
    June 2005
  • From: MCAS Miramar
Posted by SSgtD6152 on Friday, September 8, 2006 11:21 PM
 ridleusmc wrote:

I've spent the last few days just piecing stuff together.  The sponsons are on and the Aux tanks are ready, but they aren't going on until after painting.  The #1 and #3 engines are also going to stay off until painting is complete.  I bought Verlinden's US WWII Aircraft Guns in 1:48 #1267.  The old .50's for the waist guns of a B-17 will look nice in the windows of a modern CH-53.  I ordered some custom decals from Custom Hobby Decals.  Their service was great and the decals are in the mail.  I can't wait to see them.  There's going to be a nice piece of crew door art with some unique squadron markings.


I'll keep ya'll posted. I may have to tweak a couple more parts, but I think the hard part is over.

UPDATE: The mail guy came.  I have my decals, and they look great. 

Semper Fi,

Chris  

Dog, how much did they charge you to make them? I need some made for my VMGR-352 KC-130J.

  • Member since
    July 2003
  • From: Cincinnati, Ohio
Posted by ridleusmc on Friday, September 8, 2006 11:57 PM

They charged me $15 per set, and $30 total for the decals that I specified (I bought 2 sets).  I had to supply them with reference photos and the deminsions of the markings.  I sent my first email to them 1 week ago.  I already have my decals, so I'm pretty happy with their service.  They sent me a proof pdf file to ensure that the fonts and artwork were the right size.  Here's a pic of the finished decal sheet.


And here's a link to their site.

http://www.customhobbydecals.com/

I originally saw them advertised on the decal section of this forum.

Hey SSgt, do you have online photo acount like photobucket?  I've seen your F-4 and F-18 on an aircraft thread, can I see some of your other work?

Semper Fi,

Chris

  • Member since
    June 2005
  • From: MCAS Miramar
Posted by SSgtD6152 on Saturday, September 9, 2006 1:11 AM
 ridleusmc wrote:

They charged me $15 per set, and $30 total for the decals that I specified (I bought 2 sets).  I had to supply them with reference photos and the deminsions of the markings.  I sent my first email to them 1 week ago.  I already have my decals, so I'm pretty happy with their service.  They sent me a proof pdf file to ensure that the fonts and artwork were the right size.  Here's a pic of the finished decal sheet.


And here's a link to their site.

http://www.customhobbydecals.com/

I originally saw them advertised on the decal section of this forum.

Hey SSgt, do you have online photo acount like photobucket?  I've seen your F-4 and F-18 on an aircraft thread, can I see some of your other work?

Semper Fi,

Chris

I use, ImageShack. I do not think you can look at them like you can in photobucket. I just started posting all my work, I'll put them in a P.M. for you in the some time on Sat.  Was it my 242 or 323 F-18, that your talking about? So I know what to give you.

  • Member since
    July 2003
  • From: Cincinnati, Ohio
Posted by ridleusmc on Saturday, September 9, 2006 11:39 AM

Thanks SSgt.

Semper Fi,

Chris

  • Member since
    June 2005
  • From: MCAS Miramar
Posted by SSgtD6152 on Saturday, September 9, 2006 5:49 PM
you, have pics in your inbox.
JOIN OUR COMMUNITY!

Our community is FREE to join. To participate you must either login or register for an account.

SEARCH FORUMS
FREE NEWSLETTER
By signing up you may also receive reader surveys and occasional special offers. We do not sell, rent or trade our email lists. View our Privacy Policy.