SEARCH FINESCALE.COM

Enter keywords or a search phrase below:

Update, 10-16 my First real base! Black Sludge Wash(WIP, a quick one)

4861 views
18 replies
1 rating 2 rating 3 rating 4 rating 5 rating
  • Member since
    January 2012
Update, 10-16 my First real base! Black Sludge Wash(WIP, a quick one)
Posted by I make stuff on Tuesday, October 13, 2009 1:09 AM

I'm entering the Sherman I did a WIP on in a local IPMS contest, and Schnobs helped convince me I needed something of a base to display it.  I found this Plastruct "stone wall" styrene sheets.

I used the pine wood base from Michael's for a template, and cut itt with an x-acto blade, it's pretty thin, and I had to run another bit adjacent to get complete coverage.

Then I glued it down with some contruction adhesive, and put a 25lb plate on it to hold it down.  I then dressed the edges with some sandpaper, and taped off the exposed wood, and sprayed it with Mr Surfacer 1000 primer.

I stuck the BA 20 chassis on there for some perspective.

And then I was out of ability.  I figure the space between the stones would be a dirt color, any ideas on a base or mixture for that?  Then I will dry brush the stones, again, color advice again would be appreciated.

Thanks

Bill


  • Member since
    April 2008
  • From: Ventura (at the beach) in California
Posted by *INDY on Tuesday, October 13, 2009 2:16 AM

~Right on BILL, jump in and get into the swing of a DIO !  One way you could do those cobbles

From my current Vignette post "Rudolf's Roadside Rant" 

You pretty much need to basecoat those cobbles in some kinda brown or grey after the surfacer.

I mixed up a medium grey from some Tamiya 'acrylic' for this one

A few heavy, dark grey washes & after it's dried,if you want, do some drybrushing with  lighter grey(S) (Enamel,or I like Floquil) THEN later add the dirt in between

A thick wash of Grungy Grey Doc O'brians pigment powder (or MIG of course) & alcohol is layed in wet, so it flows into cracks & lowspots

It lightens up alot when it dries, you can always re-apply if you want, and even varry the color 

Just one way to do it. It's worked for me a few times. Any questions--fire away !

Indy

"Well...you gunna pull them pistols, or just whistle Dixie?"

  • Member since
    December 2002
  • From: Massachusetts
Posted by ajlafleche on Tuesday, October 13, 2009 7:16 AM

While a base is nice to display a model, the judges will be instructed (or know) to ignore it using IPMS rules. In fact, AMPS judges also ignore the base whenjudging an armor piece.

Now, that doesn;t mean you shouldn't add a base, it will give the spectators and entrants more to look at, but the rules don't allow it to be judged. It will neither hurt nor help your chances in competition.

The same goes for a figure, though if I had my druthers, a figure would weigh as much in judging as any stowage (which is considered in judging) added to a vehicle.

Remember, if the women don't find you handsome, they should at least find you handy.

  • Member since
    January 2012
Posted by I make stuff on Tuesday, October 13, 2009 4:16 PM

Thanks, guys.

AJ, yes, to clarify, the base does not count toward scoring, but does ease the viewing, as I understand judges will spin a base to look from other angles, but generally will not touch a model itself.

As to the figures, I modeled the Sherman with 2 open hatches, and have since learned that there "Should be" an interior or a figure to account for the open hatches.  I already put one guy in the driver's hatch, so this guy will be the TC.  He's over in figures as a short WIP, only primed as of right now.

Bill  

  • Member since
    January 2012
Posted by I make stuff on Wednesday, October 14, 2009 12:13 AM

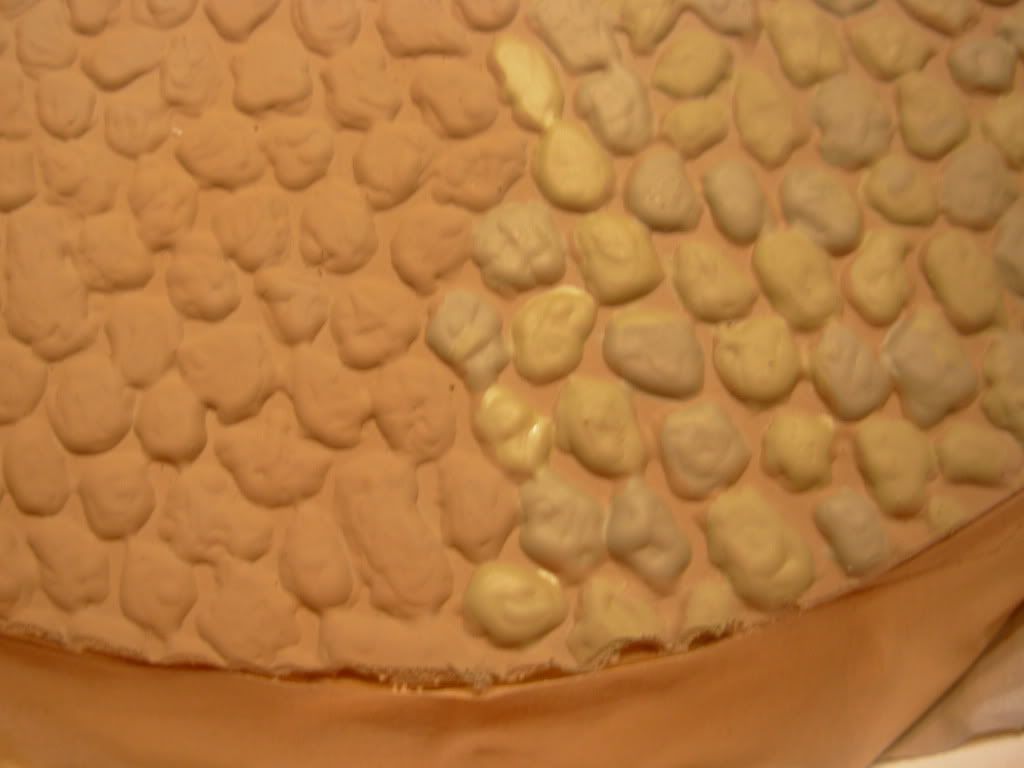
First update:  I looked at a couple methods, including Indy's, and decided to try them all in turn.  I sprayed some Tamita Buff and a drop of red/brown to represent teh dirt between the stones, and a drybrush of the stones themselves.

Here's the dirt coat:


I also sprayed a scrap piece, then I drybrushed the stones some Polly Scale concrete and old concrete, then hit it with a dark wash, acually too dark, I had some pinwash burnt umber lying around, I got it to flow well around the stones, but I don't think the contrast looks right, and the stones are too light in the conrete color.

So I am back to the drawing board again.

Edit, not sure why its color screwed, looks really orange, but the setting on the camer is correct.  Basically, the stones are lighter than the dirt color. 

Bill 

  • Member since
    April 2008
  • From: Ventura (at the beach) in California
Posted by *INDY on Wednesday, October 14, 2009 12:43 AM

~   Um........................................

                                                   keep going ?

"Well...you gunna pull them pistols, or just whistle Dixie?"

  • Member since
    April 2004
  • From: Boston MA
Posted by vespa boy on Wednesday, October 14, 2009 9:27 AM

A stone is not any one colour and cobble stones are not all the same colour, there are lots of variations of the same shade. Search for pics on places like flickr for reference.

Once you have primed the plastic, build up the colour with thin layers and lots of variety coping what you see in the photos. One of the best ways to fill the space between the cobblestones is to finely sift dirt and put it in place with dilute PVA that has been spritzed on.

You won't get it right first time, but don't give up.

http://public.fotki.com/nkhandekar

This ain't no Mudd Club, or C.B.G.B.,
I ain't got time for that now

  • Member since
    January 2012
Posted by I make stuff on Wednesday, October 14, 2009 8:02 PM

I pressed on, today I painted the individual cobbles, next time I will use Indy's method, paint the whole thing cobble color, then add the "dirt" between the stones.

Here's a progress shot

It was tedious work and hard for me to maintain a random look.

Then I hit it with a heavy burnt umber ol wash, and I am letting it dry naturally, because the dryer blew a lot of the pigment away.

Here's a smaller base for a single figure

Well, it's looking better than I thought, I'm glad I kept going.  

  • Member since
    January 2012
Posted by I make stuff on Wednesday, October 14, 2009 9:10 PM

Here's what it looks like in the glamor shots, this is the tank I plan to put on it Saturday.  All I've done is a single heavy burnt umber oil wash.

How does it look?  Should I try more washes, or pigments?

THanks

Bill

  • Member since
    April 2008
  • From: Ventura (at the beach) in California
Posted by *INDY on Wednesday, October 14, 2009 9:21 PM
 

How does it look?  It actually looks good   Should I try more washes, or pigments? Yes,definetly

Way too clean, like someone was out there with a pressure washer before parking the tank. I'd say you need something with some grit in it. I don't like using real dirt much myself, but Vespaboy knows his biz when it comes to road surfaces. The pigments in a wash/slurry would work perfect. They work in anything,water,turp,isoprop,white spirit,ect, and each one gives a slightly different result. Again, I'd say pig.powder in alcohol=perfect for this.           BTW the Sherman is NICE Thumbs Up [tup]

~Indy


"Well...you gunna pull them pistols, or just whistle Dixie?"

  • Member since
    January 2012
Posted by I make stuff on Thursday, October 15, 2009 11:41 AM

Thaks, Indy!

I added some mig pigments, conrete, Europe dust, and a touch of Russian Soil to darken it, in some thinner ( I need to grab some alcohol) to sort of match the stuff slopped on the Sherman, but it was so shiny last night I couldn't get any decent shots, I will post some tonight when it's dry.

Bill  


  • Member since
    January 2009
  • From: Everett, WA
Posted by Schnobs on Thursday, October 15, 2009 10:06 PM

Bill you old dog!  Figures and bases are no longer the boogy men they used to be. This is great and I am really pulling for you!!

Nice Job!!!!

"There is a principle which is a bar against all information, which is proof against all arguments and which cannot fail to keep a man in everlasting ignorance. That principle is contempt prior to investigation." Herbert Spencer
  • Member since
    January 2012
Posted by I make stuff on Thursday, October 15, 2009 11:38 PM

Thanks, Ed, the object of my fears and concern shrinks with every new frontier.

I'm calling this one "done for the contest," as I'm basically out of time.  Here's what the pigment sludge of Mig and odorless mineral spirits did for me:

Basically gave it a less smooth, more dusty appearance.  No more pressure washer?

Thanks Indy, I will use these skills frequently.

Bill

Mic
  • Member since
    June 2009
  • From: AusTx, Live Music Capitol of the World
Posted by Mic on Friday, October 16, 2009 8:46 AM

Looks really good, Bill. Well done!

Steve


Steve M.

On the workbench: every tool, paint, brush, glue I own

  • Member since
    April 2008
  • From: Ventura (at the beach) in California
Posted by *INDY on Friday, October 16, 2009 11:22 AM

~Bill~ I'm happy you feel I helped, and it's nice you seem to appeciate it it, but I don't see that you accomplished(even with your limited timeframe)what I was trying to relay, or what would look best / give some 'pop' to that base. You got it grunged-up a little more than the first attempt, but you didn't end-up with hardly any contrast between stones & gaps.Now, it's not the worst thing ever, but it could be way better, without much trouble. I think what happened is you have it your mind that a wash should be subtle, heavily diluted,ect. Not so with groundwork. The ground is a harsh place, and a stark contrast would make the base 'pop'. Every artistic persuit is a study in contrast & consistancy. Every one. Your base has too much consistancy.  In the pix at the top you can see me laying in a (Heavy) dark wash(you could even say filter)of very dark grey-black, which also gave varriation to the stones.(Vespa's advice was great too, the stones need to appear to have varriation, and you showed promise painting them at least 2 colors)
 

But then I think you went too light with whatever your wash mixture(s) was. The dirt mixture I showed was heavy & wet(the alcohol running inbetween the cobbles and carrying alot of color - but evaporating quickly)   


         A totaly different method, if you like, take some near black(grey,brown)Enamel, paint the ENTIRE thing down, then ball-up a rag and buff it over the stones,wiping near-all the paint off then, but leaving it in the cracks. Let it dry an hour or 2, and hit it with some Dull-coat.

~ Also, are you going to apply some stain to the wood plinth? I would. Or do want a natural wood look. Just a matter of taste,but it touches on composition too, do you really need that contrast- between one part of the small base and another?

~Still tryin' to help..............Indy


"Well...you gunna pull them pistols, or just whistle Dixie?"

  • Member since
    January 2012
Posted by I make stuff on Friday, October 16, 2009 5:19 PM

Indy,

Looking back, I totally agree.  I had great contrast, but the rocks were too clean.  My pigment wash looked filthy brown/black, but dried dusty tan all over everything and killing the nice contrast I had going.

Tonight, I will swing by and get some Isopropyl (is that the right one?) alcohol, and use some russian earth (which is basically black)  in a sludge wash, that should just run the grout areas.

Alternatively, I could take a black/brown oil wash and do the same thing?

I plan to hit the edges with either paint or some stain the problem with stain is it is very soft pine, and the edges are very rough in a couple spots.  I picekd a crappy one, live and learn.   

  • Member since
    January 2012
Posted by I make stuff on Friday, October 16, 2009 11:59 PM

I was re-doing a bunch of stuff before my first real contest, so I hit this with a black and gray oil wash, I mean it was like black pea soup in consistency.

THen when it was drying, I wiped it off some, but not all, the stones, leaving the black in the cracks and the stones, while not clean, a different color, for contrast, as I am learning is a good thing in groundwork

Pics

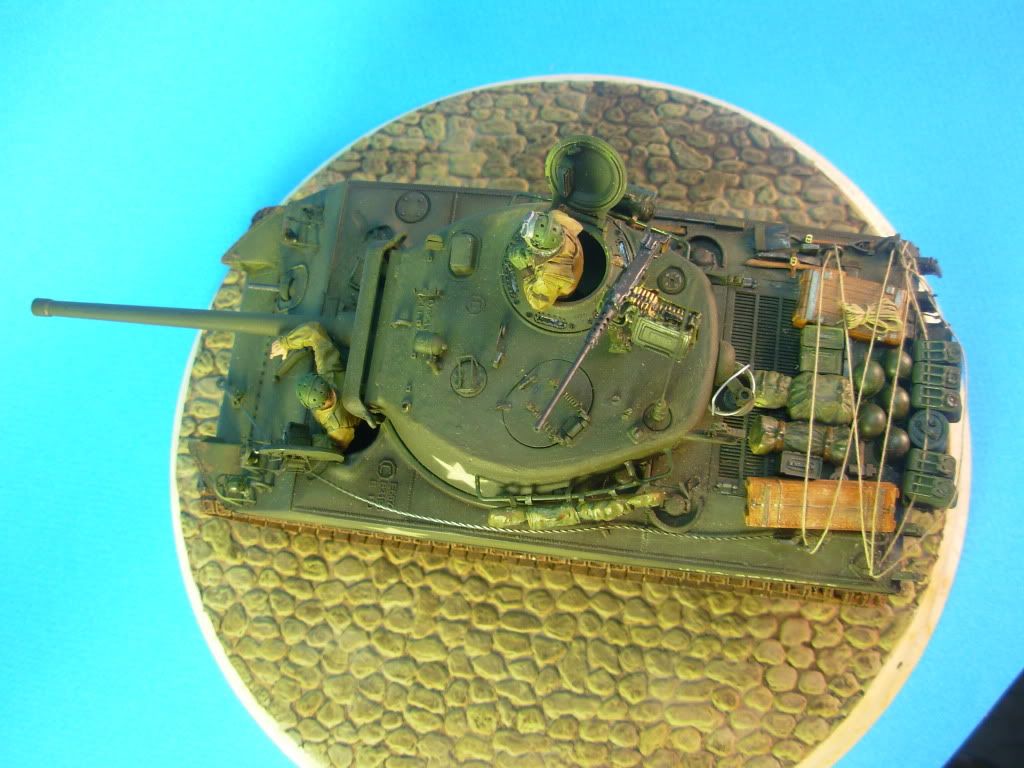
And with a tank on it

Still a bit shiny because the wash it wet, oh, and I hit it with some oil finish for the wood, too.\

Thanks, Indy, let me know what you think of it now.

Bill 


  • Member since
    April 2008
  • From: Ventura (at the beach) in California
Posted by *INDY on Saturday, October 17, 2009 12:55 AM

~ Bill ~ Dude, I'm in love with it !, No, really, that looks like something now. Very good. The wood disk looks nice too, much better fit.       So this show is tommarrow?! Is that oil gunna dry? You got it under a lamp or something? Stayin up all night with the blowdryer? Smile,Wink, & Grin [swg]  Besides the shiny -ness, it's working. Hopefully in the morning you can hit it with some Dull-coat and it'll kill that, that stuff dries fast(no reason to put it on thick either!) a dry, even pass(or 2) and that should do it. (You may consider lightly brushing on some (dry) pigment powder(especially if it still looks glossy) But Bill, Bro, You did it,      Glad you stuck with it.    Good Luck!Thumbs Up [tup]

~Indy

"Well...you gunna pull them pistols, or just whistle Dixie?"

  • Member since
    January 2012
Posted by I make stuff on Saturday, October 17, 2009 1:12 AM

I <THINK> it will dry, it's pretty hot out in the garage...I learned my lesson about a lamp on it already, I failed to document the event, but I managed to warp a good part up off the base right after the first oil wash, I slapped the weight back on it before it cooled. If it's not dry tomorrow early am, I will hit it with the hair dryer, then some flat coat.  Fingers crossed.

I really like the look of this, thanks for the encouragement and well wishes, yes, tomorrow am it is going on a table to be looked at under the Sherman.

Next time, it's most definately cobbles get the base coat, the area between the cobbles gets the washes after the coat is done.  Painting individual stones was a chore!

And there WILL be a next time, I have a new base all lined up.....

THanks, Indy.

Bill

JOIN OUR COMMUNITY!

Our community is FREE to join. To participate you must either login or register for an account.

SEARCH FORUMS
FREE NEWSLETTER
By signing up you may also receive reader surveys and occasional special offers. We do not sell, rent or trade our email lists. View our Privacy Policy.