SEARCH FINESCALE.COM

Enter keywords or a search phrase below:

1/72 Fast Roping Diorama Done 9 May 2010

77069 views
156 replies
1 rating 2 rating 3 rating 4 rating 5 rating
  • Member since
    June 2003
  • From: Caput Mundi
Posted by Avus on Wednesday, August 19, 2009 1:21 AM

Those tiny "Tie-fighter-pilots" look great!

Now you have to tell us how you painted the ACU-pattern in 1/72!!
(I missed it if you already did.)

Klaus

Thanks to ImageShack for Free Image Hosting

  • Member since
    March 2008
  • From: East TX
Posted by modelchasm on Friday, August 14, 2009 10:22 PM

Ark,

Your stuff is really coming along nicely. Don't get bummed about getting back to studies and getting back to the field. Modeling will ALWAYS be there for you. That's the nice thing about little plastic people .... they can't run very far. HAHA!

But seriously, a little advice before you pack things up .... take notes, notes, and more notes. Take note as to where you are and what you're working on. What changes you need to complete and ideas that you have NOW. That way you won't forget them later.

As for your base. I think that you've already got it. The building itself will make you a fine base. Besides the action is happening on top, right!?! In thinking about the base, here's what I do .... I let the model/ dio define the base type. Don't try and restrict the model by sticking it to a base .... let the action define everything that you do in the project. Check out the last few posts on my Mog build ... talking about my "building" base. I think that idea would work well for you as well.

This open/ flexible thinking will also take you a long way in your future military career as well.

"If you're not scratching, you're not trying!"  -Scott

  • Member since
    January 2009
  • From: clinton twp, michigan
Posted by camo junkie on Friday, August 14, 2009 9:54 PM
looks good ark. looks like your guys are ready for their paintball game. Big Smile [:D] j/k. your 1:35 head looks good 2!! Thumbs Up [tup]
"An idea is only as good as the person who thought of it...and only as brilliant as the person who makes it!!"
  • Member since
    August 2006
  • From: University of Dayton
Posted by arkhunter2002 on Friday, August 14, 2009 9:33 PM

Aight, well I need to give the ACU's a little bit of a wash, but for right now, they are done...

Here's the FE & gunner, again you won't see anything from the knees down, so it looks a little more "rough" than say the arms...

Then a little added bonus.  It's a 1/35th head that I painted (first one with Vallejo).  I used Buddho's tutorial, and decided to give it a shot...

Take care,

Austin

  • Member since
    August 2006
  • From: University of Dayton
1/72 Fast Roping Diorama 12 August 2009
Posted by arkhunter2002 on Wednesday, August 12, 2009 9:57 PM

Thanks guys! I'm glad its really starting to develop into something bigger now...

Well, whoops. I forgot to tell you guys, this is really 1/35 Laugh [(-D].  All of these "props" to show the size are really just photoshopped in Tongue [:P]. lol

I also forgot to update the title of the thread... I'm taking a break from the helicopter and started a little work on the building.  I want to get it all cut out and taped together before leaving for school in a week.  I am glad to go back to school and ROTC, but I'm kinda sad that I have to leave all of this progress behind me.  But oh well, it'll be here when I come back...

For the building, I got the main parts cut out, and am starting on some interior.  I'm not 100% on how I will do it, but I'm fairly sure it will look good regardless.  I plan on finishing it the same way as the garage, with the Mr. Surfacer 500 for the stucco.  I cut out the "block" where the arched porch should be as the arches will be cut out of styrofoam and then covered with Mr. Surfacer...

It's starting to get BIG.  I like the size/shape of the building.  The top of the roof is 8" x 6".  I'm not sure how I'm going to base this.  After all, this is my first diorama...

Take care,

Austin

  • Member since
    December 2008
  • From: Northern Va
Posted by psstoff995's lbro on Wednesday, August 12, 2009 10:40 AM
HOLY CRAP! Are you sure you're not replacing it with 1/35 when no ones looking? LOL! Great work overall, especially on those custom figs! 
-Will young modeler Test fit master
  • Member since
    October 2004
  • From: Katy, TX
Posted by jthurston on Wednesday, August 12, 2009 8:11 AM

Two things. One, I've always been impressed with helicopter dioramas, because of the additional planning and work involved, and because generally speaking, -Hawks and other military helicopters are such dramatic dio subjects. I spent a considerable amount of time standing there in Iraq and staring up at Blackhawks (etc) in action. Powerful imagery. And Two, I've also always been impressed by people who can pull off really good figures in 1/72.

From what I can see so far, you've nailed it on both counts. Really looking forward to seeing this one in its completion.

~Jerry

  • Member since
    June 2003
  • From: Caput Mundi
Posted by Avus on Wednesday, August 12, 2009 1:16 AM

 psstoff995 wrote:
That ammo feed looks amazing.... Nice work on the crew chief Thumbs Up [tup]

Sign - Ditto [#ditto]

Completely agree with psstoff995!

The ammo chute looks great!

Klaus

Thanks to ImageShack for Free Image Hosting

  • Member since
    December 2003
  • From: Colorado
Posted by psstoff995 on Tuesday, August 11, 2009 3:39 PM
That ammo feed looks amazing.... Nice work on the crew chief Thumbs Up [tup]

-Chris

US Army Infantryman

  • Member since
    August 2006
  • From: University of Dayton
Posted by arkhunter2002 on Tuesday, August 11, 2009 3:17 PM

Those lenses are pretty magnificent.  Almost makes me want to build a 1/35th M113 so I can use them properly....lol

Avus, I can't find a whole lot of evidence one way or the other.  I've seen them with them (the most recent pictures I've seen surface were an MH-60L with Iraqi SF and they had the chutes on it.  Again, I haven't seen too many pictures of Kilo's with chutes (well, I haven't seen too many pictures of Kilos in general...)  Instead of cutting off the ammo though, I decided to bend the ammo, giving it a 3D shape.  That way I can put two belts together (there are 9 belts in the set) and create an ammo feed.  I'll have to go back and check dilleon aero later to see which minigun reciever/lower half I'll be using.  Anyways, here's the other idea for the ammo feed with the hobby boss minigun.

Whistling [:-^]

The legs below the knees are going to be hidden inside so I'm not too worried if it looks a little off, but I need to touch up the camo a little bit.  I gave the vest a khaki grey wash and then a field drab wash in the front to make it a bit darker, although I'm not too sure about how it looks (I would imagine it to be darker, but I don't want to screw it up...lol)

  • Member since
    January 2009
  • From: clinton twp, michigan
Posted by camo junkie on Tuesday, August 11, 2009 9:25 AM
i give you credit ark...this just keeps getting better for the size. im glad u got those reflective lenses as i saw them and was thinking of getting some for my armor...its good to see them up close! Big Smile [:D]
"An idea is only as good as the person who thought of it...and only as brilliant as the person who makes it!!"
  • Member since
    June 2003
  • From: Caput Mundi
Posted by Avus on Tuesday, August 11, 2009 2:03 AM

All I can say is WOW!

It's starting to come together!

As for the miniguns I like the grey one better. The coil is great, but you might consider leaving it out since it's not always used. Acutally I've seen it used more by the AF then by the Army.
Those .50 ammo rounds might do the trick as ammo chutes, if you remove the bullets.

Klaus

Thanks to ImageShack for Free Image Hosting

  • Member since
    August 2006
  • From: University of Dayton
Posted by arkhunter2002 on Monday, August 10, 2009 7:16 PM

Okay so here's an update.  I got some (most) of the figures primed!  Dark pictures, I know, but there isn't much to see other than my mistakes (which is why there is Mr. Surfacer 500)...
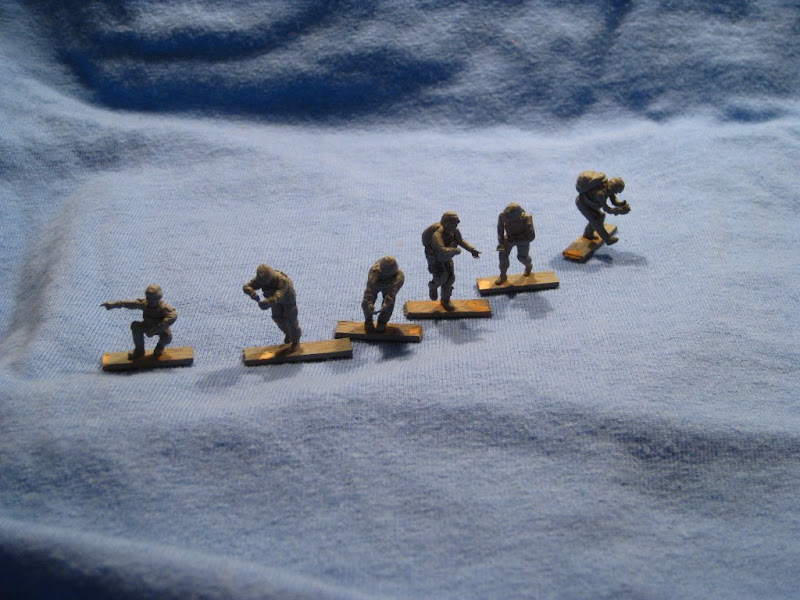
Work continues on the two figures hanging out the side of the chopper... And I also worked on the IP.  I painted the wires white, then I gave it a black wash, and then drybrushed it.

I messed up two of the rotors while gloss coating them today.  Thank goodness they weren't the two that I glued to the rotor head.  Here you can see the dust and then you can see my finger prints from when I tried to remove the dust.  I am going to sand the two blades back down and repaint them.  Should be an easy fix.

Then comes the minigun part.  I have three options.  My first option is the RoG minigun from the MH-47E kit.  My second option is from the hobbyboss HH-60H that I modified (has the newer style dilleon aero upgrades) and then a mix of the two (the HB barrel with the RoG reciever, as I'm not too sure which one is more accurate).

Then comes the ammo feed.  I have seen it both with a cover and without.  If I do it with a cover, I will probably use procreate a different ration mixture of procreate to make it flexible (the one in the picture is quite flexible).

If I choose to do it without a cover, I'm not  100% sure how I will do the chute, but I found some .50 cal PE from a P-47 that fits the ammo bill (or could be trimmed to fit the bill).  Either, way, I think this is a very nice thing to have in 1/72, could use it on some humvees too)...

Either way, I will use the brass wire that I coiled around a steel wire to make the empties chute.


Comments and Critiques welcome...


Take care,

Austin

  • Member since
    June 2003
  • From: Caput Mundi
Posted by Avus on Thursday, August 6, 2009 1:08 AM

It's proceeding splendidly!

I might get hold of one of these "vision blocks" ... if it looks that good in 1/72  it can't look bad in 1/35!

Klaus

Thanks to ImageShack for Free Image Hosting

  • Member since
    August 2006
  • From: University of Dayton
Posted by arkhunter2002 on Thursday, August 6, 2009 12:56 AM

Thanks!  I've been looking at ways to try and reproduce it, and well, Echelon came out with a very helpful product.  The M113 purple/pink vision blocks.  They have a good reflective quality.

  • Member since
    December 2003
  • From: Colorado
Posted by psstoff995 on Wednesday, August 5, 2009 7:12 PM
 modelchasm wrote:

Nice disco ball!

Sign - Ditto [#ditto] very cool to see that it even reflects enough to throw back a shine on your matte black roof! Impressive in any scale.

-Chris

US Army Infantryman

  • Member since
    March 2008
  • From: East TX
Posted by modelchasm on Wednesday, August 5, 2009 6:58 PM

Nice disco ball! Looks like things are coming together nicely. I'm stuck in the "figure phase" with mine .... but thanks for showing me there's "an out".

What is you use on the "ball"? Silver under clear red?

"If you're not scratching, you're not trying!"  -Scott

  • Member since
    August 2006
  • From: University of Dayton
Posted by arkhunter2002 on Wednesday, August 5, 2009 12:25 PM

Yeah, I got it at a thrift shop and it is like a foot and a half Big Smile [:D]


But yeah, the seatbelts were off a little (first picture is from my UH-60M walkaround showing how the seatbelt should be...)

Then I have pictures of both the rotor blade and the ALQ-144...


C&C welcome,

Austin

  • Member since
    December 2003
  • From: Colorado
Posted by psstoff995 on Tuesday, August 4, 2009 9:08 PM
Shock [:O] that pen's huge!!!

-Chris

US Army Infantryman

  • Member since
    August 2006
  • From: University of Dayton
Posted by arkhunter2002 on Tuesday, August 4, 2009 3:53 PM

I gave them a bath, well, I washed them Smile [:)]  Then I buckled them up and gave them the rest of their controls and PE pedals.  I also started work on the minigun.  I am going to see if I can make HobbyBoss's usable or not, as they start off way too long.  I picked up some .50 cal pre-painted ammo in 1/72, which should be good enough for .30, and if not, I could fold it in half or something, pictures of that coming soon...


  • Member since
    June 2003
  • From: Caput Mundi
Posted by Avus on Wednesday, July 29, 2009 1:14 AM
 modelchasm wrote:

As far as the the vest go. I think that a little washing will do the trick. I think thats what you need to bring out the folds and creases.

Looking good, so keep it comin'....

Sign - Ditto [#ditto]

Completely agree on both statements!

Klaus

Thanks to ImageShack for Free Image Hosting

  • Member since
    December 2003
  • From: Colorado
Posted by psstoff995 on Tuesday, July 28, 2009 9:37 PM
Wow, they look great... I bet you'll do some 1/48 or even 1/35 scale guys in the future and be able to paint the threads on their uniforms.

And that’s macro, blown up on my computer. I can’t imagine how good they’ll look 1:1 on your bench with the hawk covering them up- should really hide them and make a viewer thing –if there’s that much detail on these two pilots inside this little helicopter- there must be all kinds of things going on in here.

Kind of like when one of my so-so interior kit/paintjobs on my 1/35 tanks actually looks nice “through the hatch”

If it already looks nice, the sense of details that you can’t see due to everything in the way will surely make them look even nicer... IMO anyway.

-Chris

US Army Infantryman

  • Member since
    March 2008
  • From: East TX
Posted by modelchasm on Tuesday, July 28, 2009 8:29 PM

Good Lord, Son!!!! I have no idea how you're not in the mad house by this time ... after dealing w/ those little guys! They look great though.

As far as the the vest go. I think that a little washing will do the trick. I think thats what you need to bring out the folds and creases.

Looking good, so keep it comin'....

"If you're not scratching, you're not trying!"  -Scott

  • Member since
    January 2009
  • From: clinton twp, michigan
Posted by camo junkie on Tuesday, July 28, 2009 6:20 PM
ok, i see it now that you explained it. again its such a small scale my eyes have trouble adjusting. Whistling [:-^]
"An idea is only as good as the person who thought of it...and only as brilliant as the person who makes it!!"
  • Member since
    August 2006
  • From: University of Dayton
Posted by arkhunter2002 on Tuesday, July 28, 2009 5:15 PM

The guy on the left is wearing his visor and the guy on the right is wearing sunglasses Smile [:)].  The sunglasses are flesh based, but then I painted tamiya clear orange over it, and then visor is black (german grey) with tamiya clear green over it.

  • Member since
    January 2009
  • From: clinton twp, michigan
Posted by camo junkie on Tuesday, July 28, 2009 4:53 PM
i guess it works for being that small ark...they turned out good. its hard to see because i have to squint...are they wearing "goggles"/visors"? dont know how ya do it so small but...whatver! Wink [;)]
"An idea is only as good as the person who thought of it...and only as brilliant as the person who makes it!!"
  • Member since
    August 2006
  • From: University of Dayton
Posted by arkhunter2002 on Tuesday, July 28, 2009 3:53 PM

He used to be The Thing....lol

Here's those pilots I promised Smile [:)].  It seems as though macro is my enemy, it catches all the things that I can't. lol

That said, I think the vests need a little work and thne I'll call these pilots done!

  • Member since
    June 2003
  • From: Caput Mundi
Posted by Avus on Tuesday, July 28, 2009 1:07 AM

Amazing! You're sure it's 1/72 scale?!

I love that Mr.Fantastic figure that's about to rope down! (Sorry couldn't resist)

Klaus

Thanks to ImageShack for Free Image Hosting

  • Member since
    August 2006
  • From: University of Dayton
Posted by arkhunter2002 on Monday, July 27, 2009 10:43 PM

Thanks guys!

Just a teaser pic.  I should be able to put up a picture of the finished pilots tomorrow, and the progress on the figures.  Most of them have heads now...

And psst, yeah, it's slowly coming along, but my skills have gotten much better since I started this trek, so it's been worth it.  I doubt I'll finish it in time to go back to school.  I'm going to leave my modeling stuff at home, however, I am going to take my sculpting stuff to school and keep that up.  There's going to be a lul for a little while, but I might post my sculpting in this thread just to keep it alive, I'm working on a set to fit in the back of a Hasegawa UH-60.


Teaser pic:

  • Member since
    December 2003
  • From: Colorado
Posted by psstoff995 on Monday, July 27, 2009 4:32 PM
Sign - Ditto [#ditto] this is one amazing build, very nice work on the sculpted figures and love that ACU pattern- this one's going to be impressive when finished, are you taking it to school when you go back down or is there going to be a lul, I remember stumbling across this back (was it in 07??) when it started and I'm glad to see you're still going. At my own pace too! haha

-Chris

US Army Infantryman

JOIN OUR COMMUNITY!

Our community is FREE to join. To participate you must either login or register for an account.

SEARCH FORUMS
FREE NEWSLETTER
By signing up you may also receive reader surveys and occasional special offers. We do not sell, rent or trade our email lists. View our Privacy Policy.