SEARCH FINESCALE.COM

Enter keywords or a search phrase below:

1/48 Eduard YAK-3 WIP

19047 views
46 replies
1 rating 2 rating 3 rating 4 rating 5 rating
  • Member since
    March 2009
  • From: Wirral. UK
Posted by Spike190 on Friday, April 23, 2010 6:52 AM

FastEagle, the prop and hub look very nice, I can see how you've worked the paint. Nice kitty to

Cheers...

Mike  Toast


  • Member since
    February 2006
  • From: Smithers, BC, Canada
Posted by ruddratt on Friday, April 23, 2010 9:30 PM

Top-notch work all around, FastEagle! Yes Good to see you back at the bench, too. Have you decided on a paint scheme?

Mike

 "We have our own ammunition. It's filled with paint. When we fire it, it makes pretty pictures....scares the hell outta people."


  • Member since
    December 2009
  • From: Fort Worth, Texas
Posted by FastEagle1 on Saturday, April 24, 2010 3:14 PM

Cheers everyone,

I appreciate the feedback and it certainly is good to be back at the bench again.

Spike - That's my "production supervisor" who's always ready to donate the odd strand of fur to my builds.  As luck has it, I discover these contributions only after the paint is on and dry.  

Ruddratt - Thank you, sir.  I'm going to finish the Yak in one of the schemes provided in the kit; Red 12 of W. Nosow, Hero of the Soviet Union, as he flew with the 150 Guard Fighter Regiment.  It calls for a two-tone color scheme of grey over light blue, with a red spinner and nose.

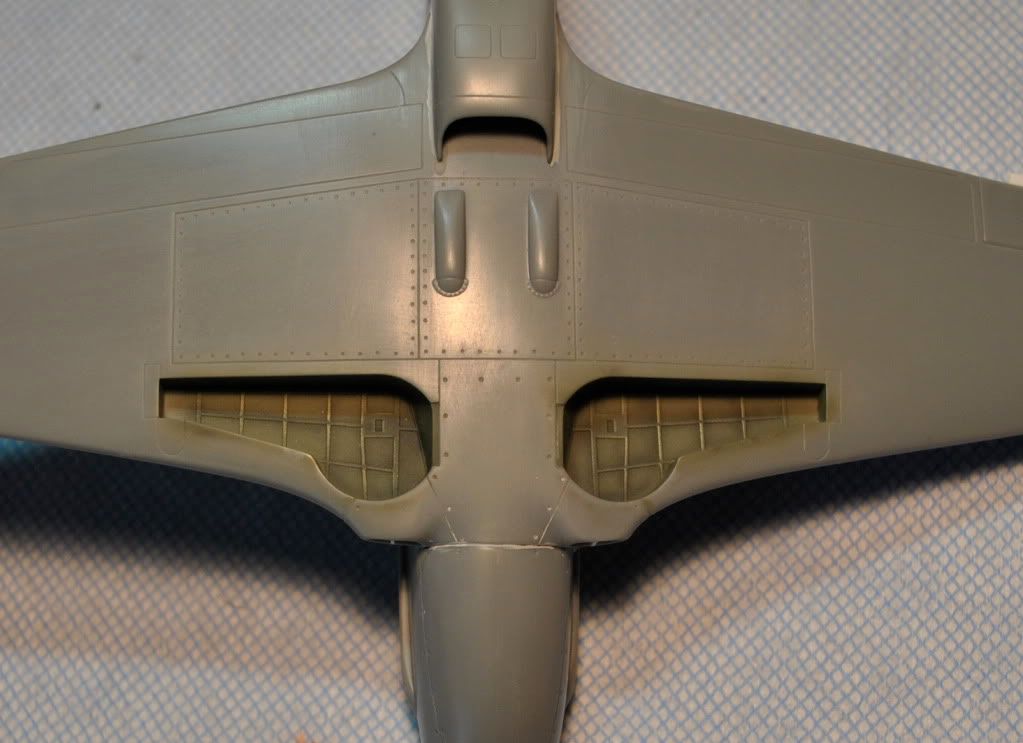
Getting us started today is a shot of the wheel wells:

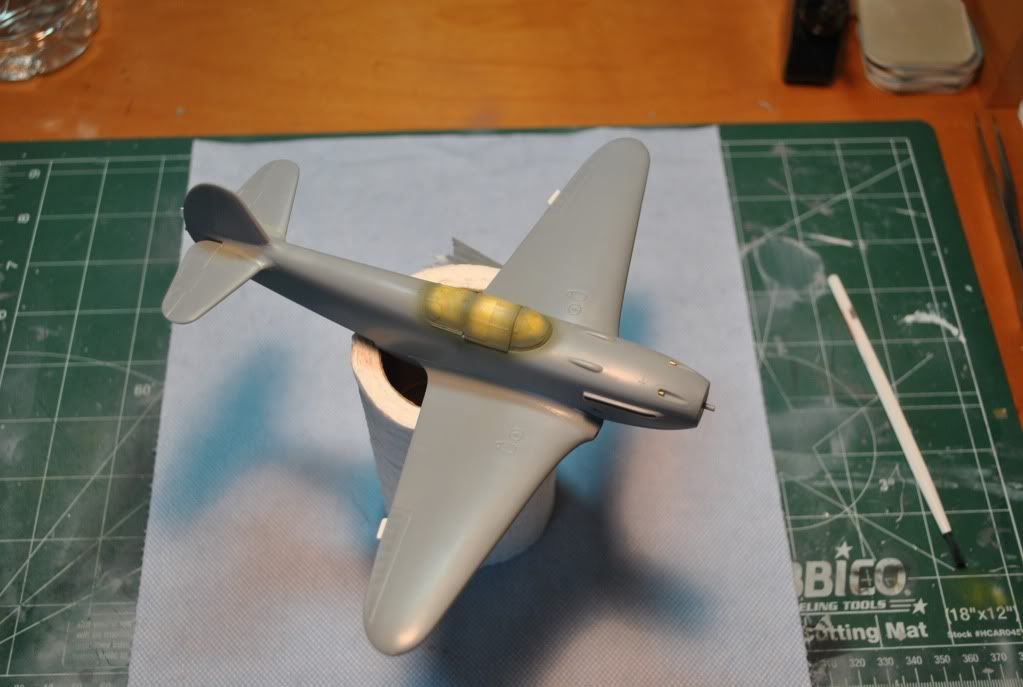
Now the fun begins - painting the fuselage begins with a coat of Tamiya XF-22 over the canopy and windscreen.  This allows me to get paint on the insides of the frame without actually painting the insides of these structures and to identify any seams that need to be cleaned up:

....as we see here on the rear portion of the canopy (the sliding portion of the canopy is placed here just to keep paint outside of the cockpit).  Indeed, these seams will get "the business" before we continue painting:

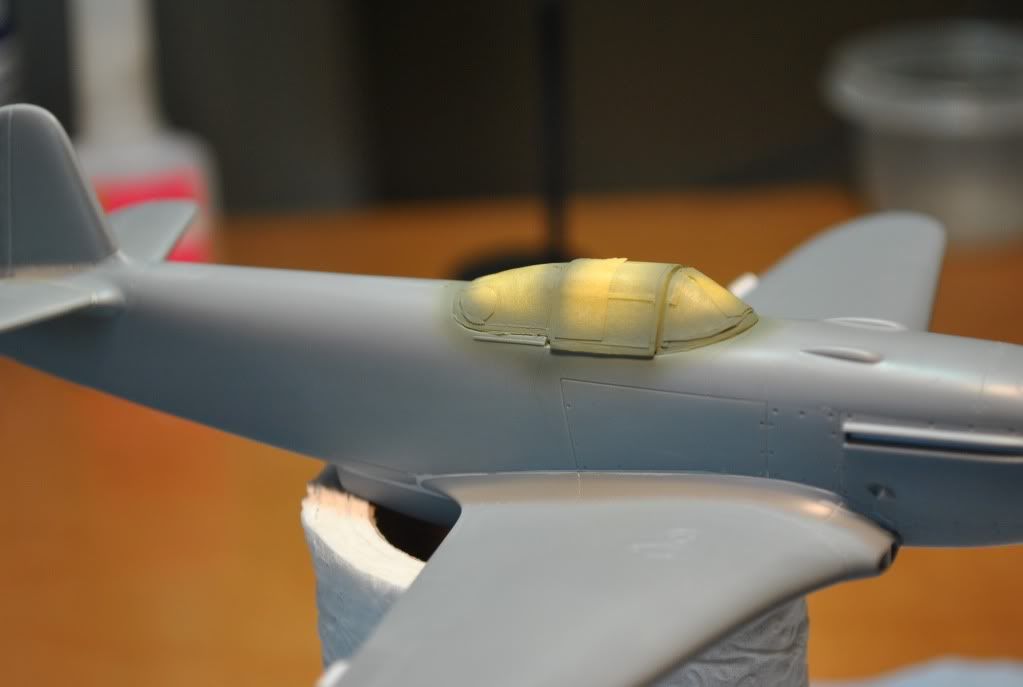
I'll use Mr. Surfacer 500 diluted with denatured alcohol to fill the seams around the canopy and blend them into the fuselage before reshooting the XF-22.  

Thanks again for dropping by.

Beer

  • Member since
    April 2010
  • From: jolly ol' eng-er-land
Posted by skater-x on Wednesday, April 28, 2010 7:31 PM

my friends daughter built this kit as a present for dad when she was six (yes-really) and usd no filler anywhere. i put the gunsight in but she did the rest-this says volumes about the buildability of a this lovely kit.

  • Member since
    December 2009
  • From: Fort Worth, Texas
Posted by FastEagle1 on Thursday, April 29, 2010 8:12 PM

Cheers Skater-x,

That's a great story - I can't imagine how happy your friend was to received such a cherished gift.  Awesome.

Certainly this little kit has been a joy to build.  And speaking of which, I've completed the seam clean-up around the canopy and hope to move it to the paint shop this weekend.  

Onward!

  • Member since
    December 2009
  • From: Fort Worth, Texas
Posted by FastEagle1 on Saturday, May 8, 2010 2:56 PM

Greetings everyone.  After far too long from the bench, I'm happy to report that painting has begun 

I now turn it over to the ayatollah of rock and rolla:

Pre-shading of the few panel lines on the bottom of the aircraft (note the high-tech masks for the wheel wells) with Tamiya flat black:

And the completed ventral side.  I used Tamiya XF-23, light blue for the base coat....

and added a touch of white for a weathered look on the metal panels.  Another view:

And a bonus view:  Woohooo!

I used this color as a base coat on the top side of the aircraft from which I will modulate various shades of grey.  

Happy Mother's Day to all our Mom's.  God bless them!

Thanks for stopping by!

  • Member since
    December 2009
  • From: Fort Worth, Texas
Posted by FastEagle1 on Monday, May 10, 2010 7:59 PM

Happy Monday everyone,

More progress to report as we continue the fun with our water colors.

I've completed the top of the fuselage with a diluted coat of Tamiya XF-66 Light Grey over the light blue I applied in the prior post.  To further distinguish the few metal panels, I added white to the light grey and applied it in light layers.  Once this was complete I post-shaded the panels with 10% Tamiya flat black and 90% alcohol.

Onward to the red cowling.  The first step was to measure and cut a template from a Post-It note:

I transferred this to a strip of Tamiya 18mm masking tape (I love this stuff) and prepared two mirror image shapes:

After applying the masks to the fuselage, Tamiya XF-9 Hull Red provided the base layer.  At this stage the pre-shading is still visible.  Notice the tape on the leading edge of the windscreen - this would later come to haunt me. Ugh!

And the finished result after two light coats of Tamiya XF-7 Flat Red:

I'll clean up the extra paint on the windscreen framing before applying a coat of Future.  We are almost ready for decals!

Thanks again for stopping by and feel free to leave a note.

Beer


  • Member since
    February 2006
  • From: Smithers, BC, Canada
Posted by ruddratt on Tuesday, May 11, 2010 9:47 PM

I've really enjoyed watching the progress on this one. Excellent paint work, and the construction so far looks flawless. Keep up the great work! Yes

Mike

 "We have our own ammunition. It's filled with paint. When we fire it, it makes pretty pictures....scares the hell outta people."


  • Member since
    November 2008
  • From: Crawfordsville, Indiana
Posted by Wabashwheels on Wednesday, May 12, 2010 7:21 AM

Great touch on the cowling, boy the preshading is really paying off.  The rivets and panel lines look great.  On to the homestretch.  Good luck,  Rick.


  • Member since
    December 2009
  • From: Fort Worth, Texas
Posted by FastEagle1 on Wednesday, May 12, 2010 7:58 PM

Cheers Gents,

You all are far too kind and I appreciate the feedback.  This kit has been a blast to build and I've learned a few things along the way.

I completed the airframe paint work today with touch ups to the red overspray and a seam on the top of the vertical stabilizer.  Next up is the gloss coat and decals; one of my favorite steps!

I hope to have another update ready soon - the weather folks are forecasting storms in the area this weekend which will force me to delay the yard work (darn).

Have a great day and happy modeling.

  • Member since
    December 2009
  • From: Fort Worth, Texas
Posted by FastEagle1 on Sunday, May 16, 2010 11:41 AM

Good Sunday everyone,

Well, Mother Nature came through with a wet, stormy weekend - perfect for logging time on the bench.  I present to you the completed Yak-3:  

If you are looking for that perfect simple kit to tackle as a break from a larger, more complicated build, I humbly recommend this one.  Bravo, Eduard!!!

Well, that completes this build.  I appreciate you stopping by and taking a look.  

Happy Modeling!

  • Member since
    August 2003
  • From: Connecticut, USA
Posted by Nachtflieger on Sunday, May 16, 2010 11:55 AM

Excellent build! Love the paint work.Big Smile

Nate


  • Member since
    October 2007
  • From: Rhode Island
Posted by jmabx on Sunday, May 16, 2010 5:24 PM

Beautiful!!! 

Well done! Toast

Jeremy    Propeller


  • Member since
    March 2009
  • From: Wirral. UK
Posted by Spike190 on Tuesday, May 25, 2010 4:01 PM

Well done FastEagle your YAK looks splendid, I love that red nose and the shading looks spot on to me Bow Down

Cheers...

Mike  Toast


  • Member since
    December 2002
  • From: Northern California
Posted by jeaton01 on Tuesday, May 25, 2010 4:09 PM

Very nice build.  Great shading and just the right amount of weathering.  Nice canopy work too.

John

To see build logs for my models:  http://goldeneramodel.com/mymodels/mymodels.html


  • Member since
    December 2009
  • From: Fort Worth, Texas
Posted by FastEagle1 on Tuesday, May 25, 2010 8:33 PM


Gents,

I certainly appreciate the kind words.  I would have replied sooner but am having some technical difficulty with the forum (the system logs me out each time I change pages or link onto a different forum).  

The kit was a joy to build and offered me the chance to experiment with the techniques perfected by the Spanish masters, Daniel Zamarbide and JM Villalba.  I've also picked up many techniques and have been inspired by the beautiful work I've seen here on the forum.  You all are really a talented group of chaps!

Cheers! Beer


  • Member since
    March 2010
  • From: Brisbane
Posted by Julez72 on Wednesday, May 26, 2010 6:50 AM

Superb buildYes very cool paintwork and weatheringToast


JOIN OUR COMMUNITY!

Our community is FREE to join. To participate you must either login or register for an account.

SEARCH FORUMS
FREE NEWSLETTER
By signing up you may also receive reader surveys and occasional special offers. We do not sell, rent or trade our email lists. View our Privacy Policy.