SEARCH FINESCALE.COM

Enter keywords or a search phrase below:

Accurate Miniatures SB2U-3 Vindicator 1/48 Completed

7338 views
34 replies
1 rating 2 rating 3 rating 4 rating 5 rating
  • Member since
    January 2015
  • From: Katy, TX
Accurate Miniatures SB2U-3 Vindicator 1/48 Completed
Posted by Aggieman on Tuesday, June 28, 2016 10:39 PM

I make my living writing software, but honestly this is not my passion.  I truly love history, particularly from the period of 1918 - 1945.  Once upon a time, I started building models because the subjects were oftentimes "cool looking".  Now when I build something, I like to find out as much as I can about the subject while I am building it.

The Vindicator is a seemingly insignificant warbird, relegated to the ash heap of history's failed and largely forgotten relics.  But I can trace my fascination with this aircraft back to 1976 when the movie Midway burst onto theater screens.  My dad took me to see that movie at the old Tower Theater in mid-town Houston, Texas, with a long line that snaked around buildings.  And what a movie that was for 9-year-old me!  There were several sequences depicting Vindicator attacks on the Japanese in that movie, and since then I had been a fan of the Vindicator.  Yet I had never before built a model of this warbird.

When I saw the Accurate Miniatures kit, it immediately found its way to my stash.  It languished there for many years, watching as I pulled other kits out for construction.  I wonder if its feelings were ever hurt ... nah, just kidding.  As I have been out of work for the last five months, I have had to select kits to build based largely on the supplies I have on hand.  I had plenty of USN colors, so out came, at long last, the Vindicator.  (There will be Wildcats coming out soon).

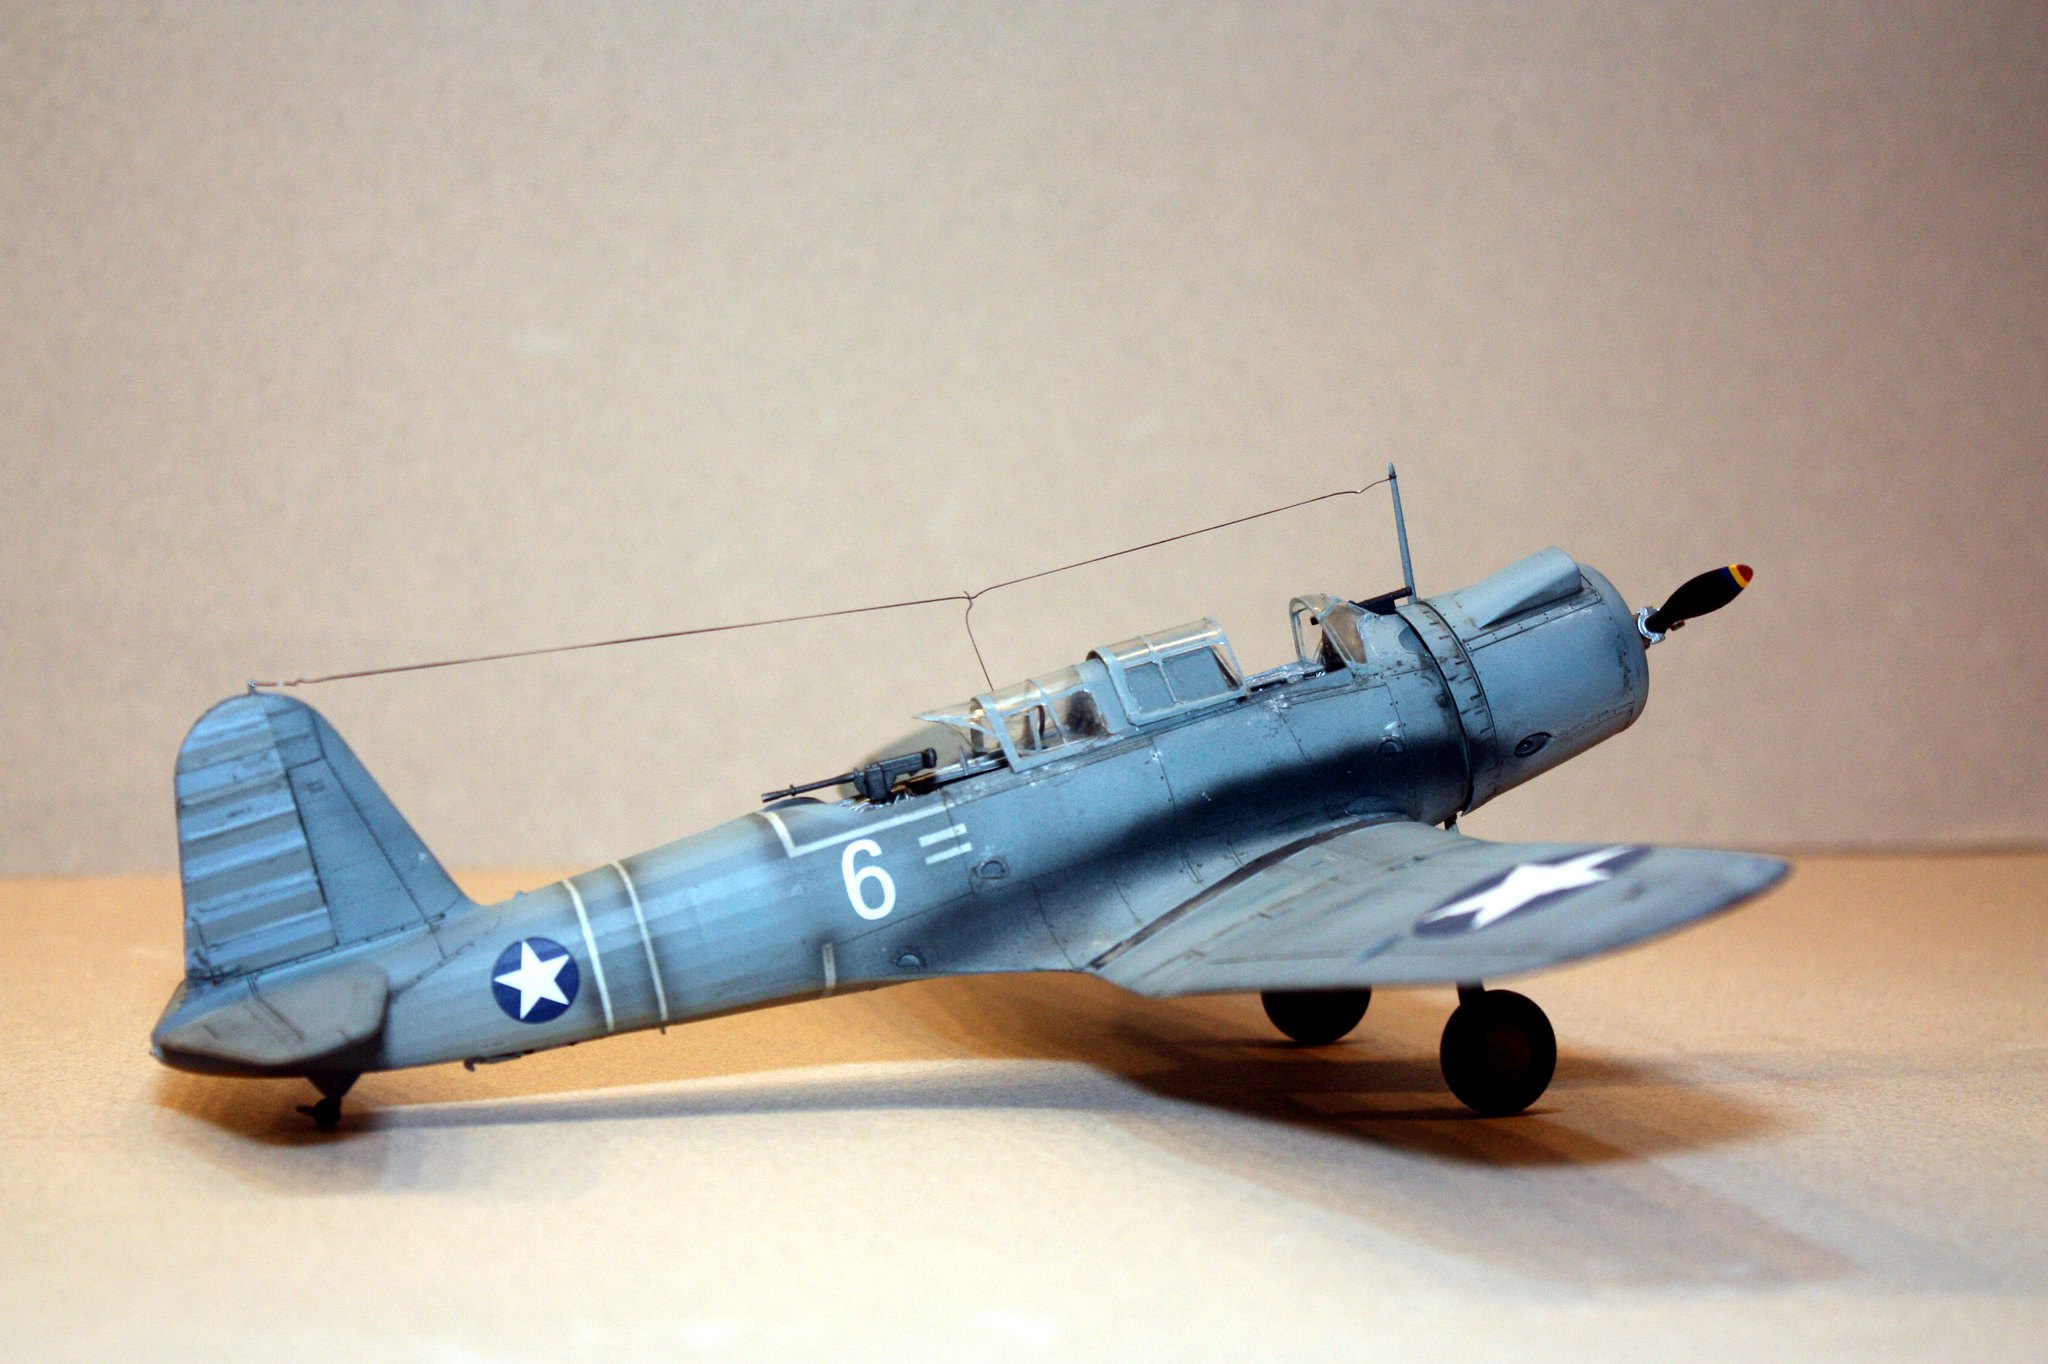
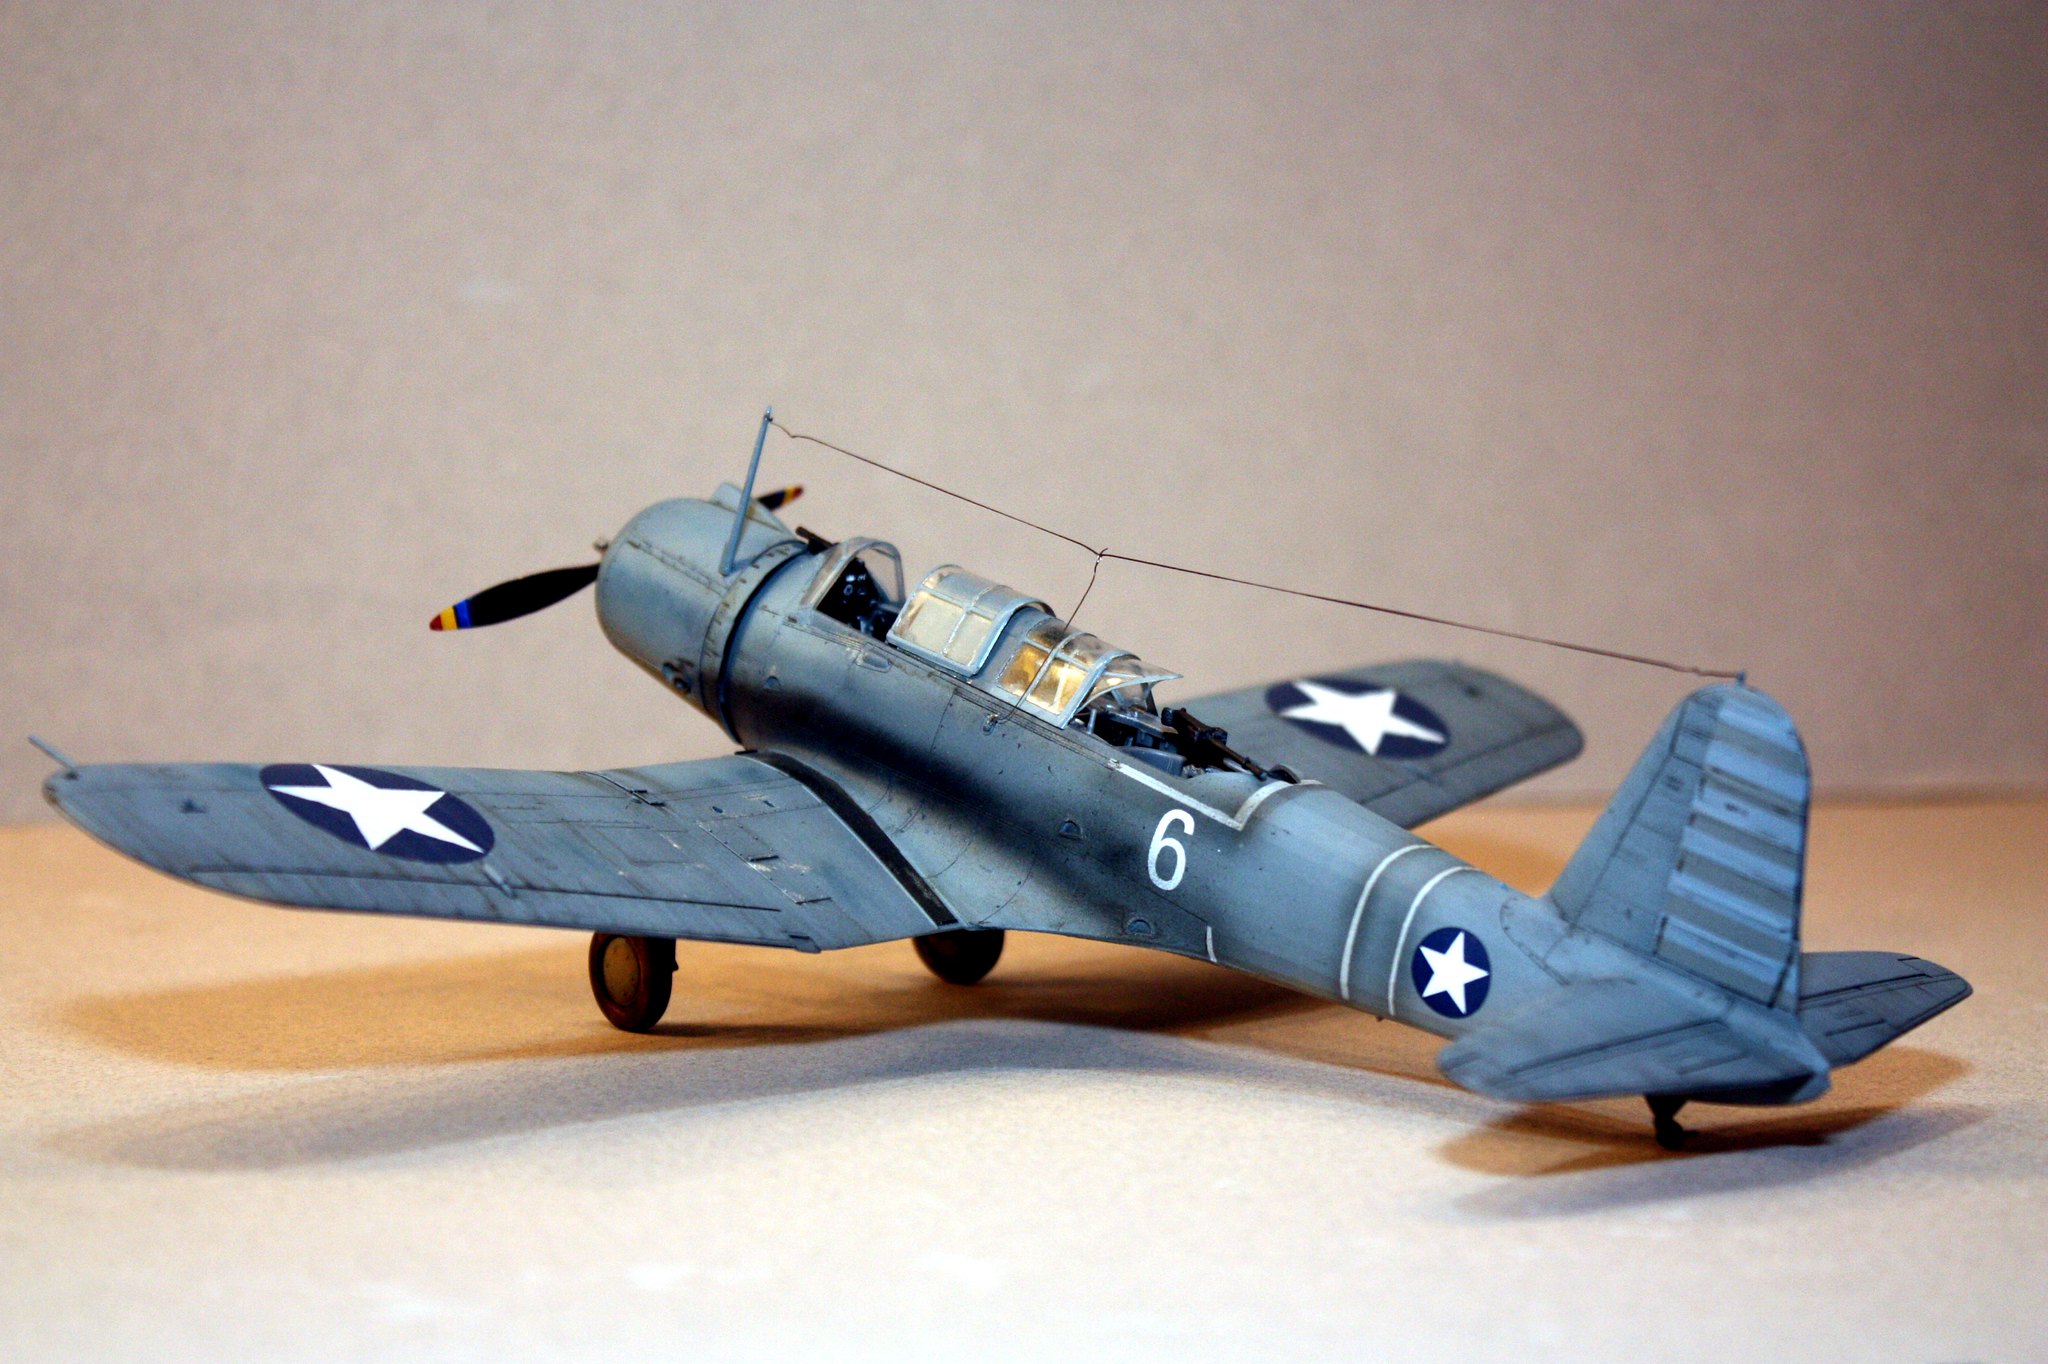
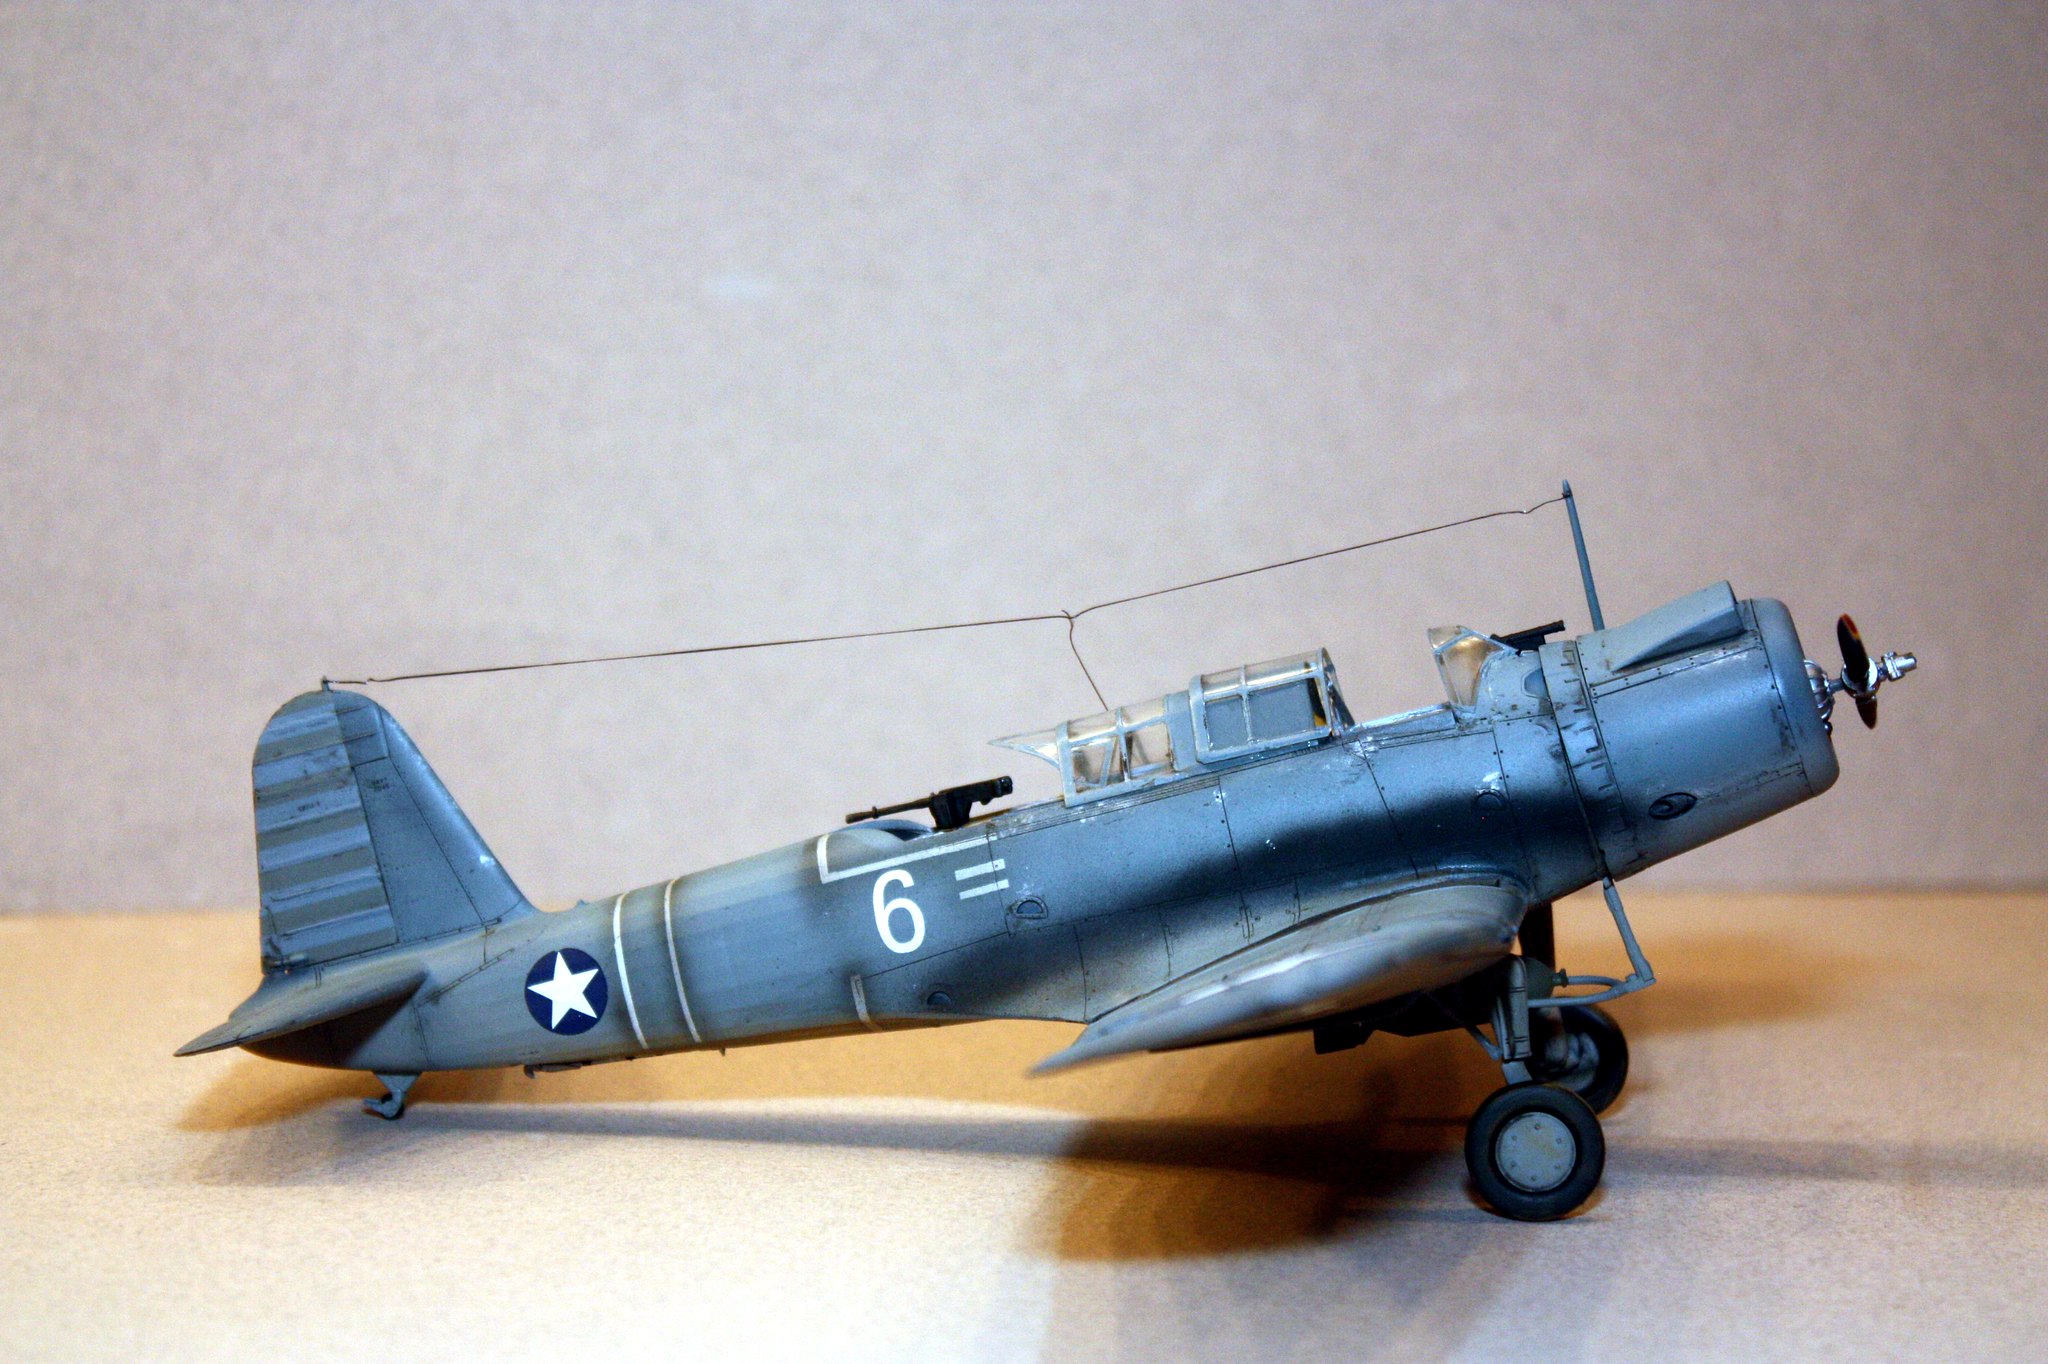
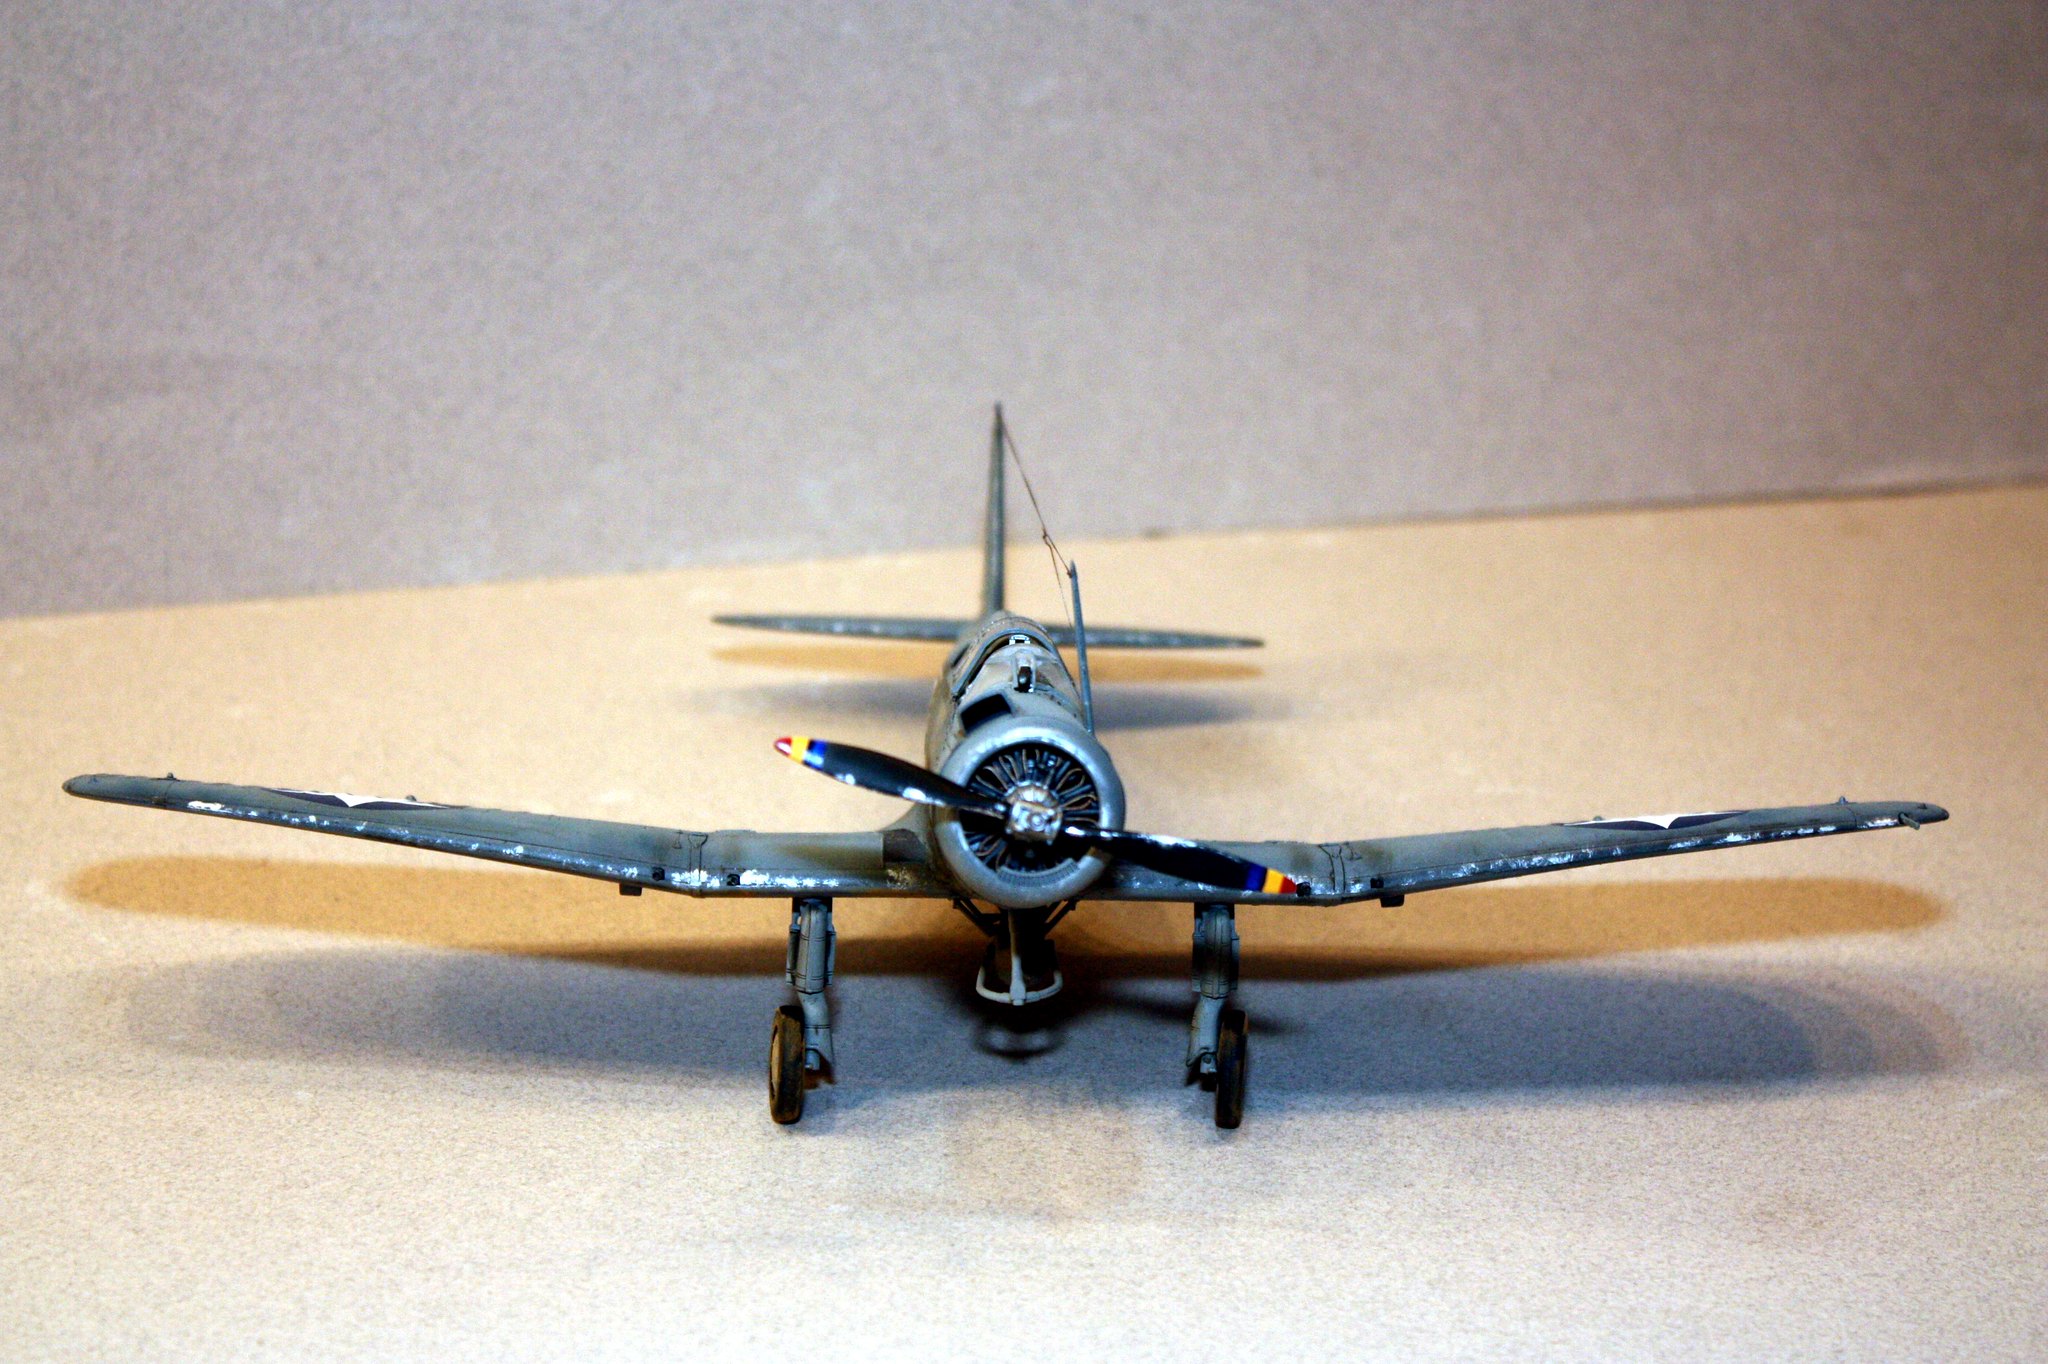
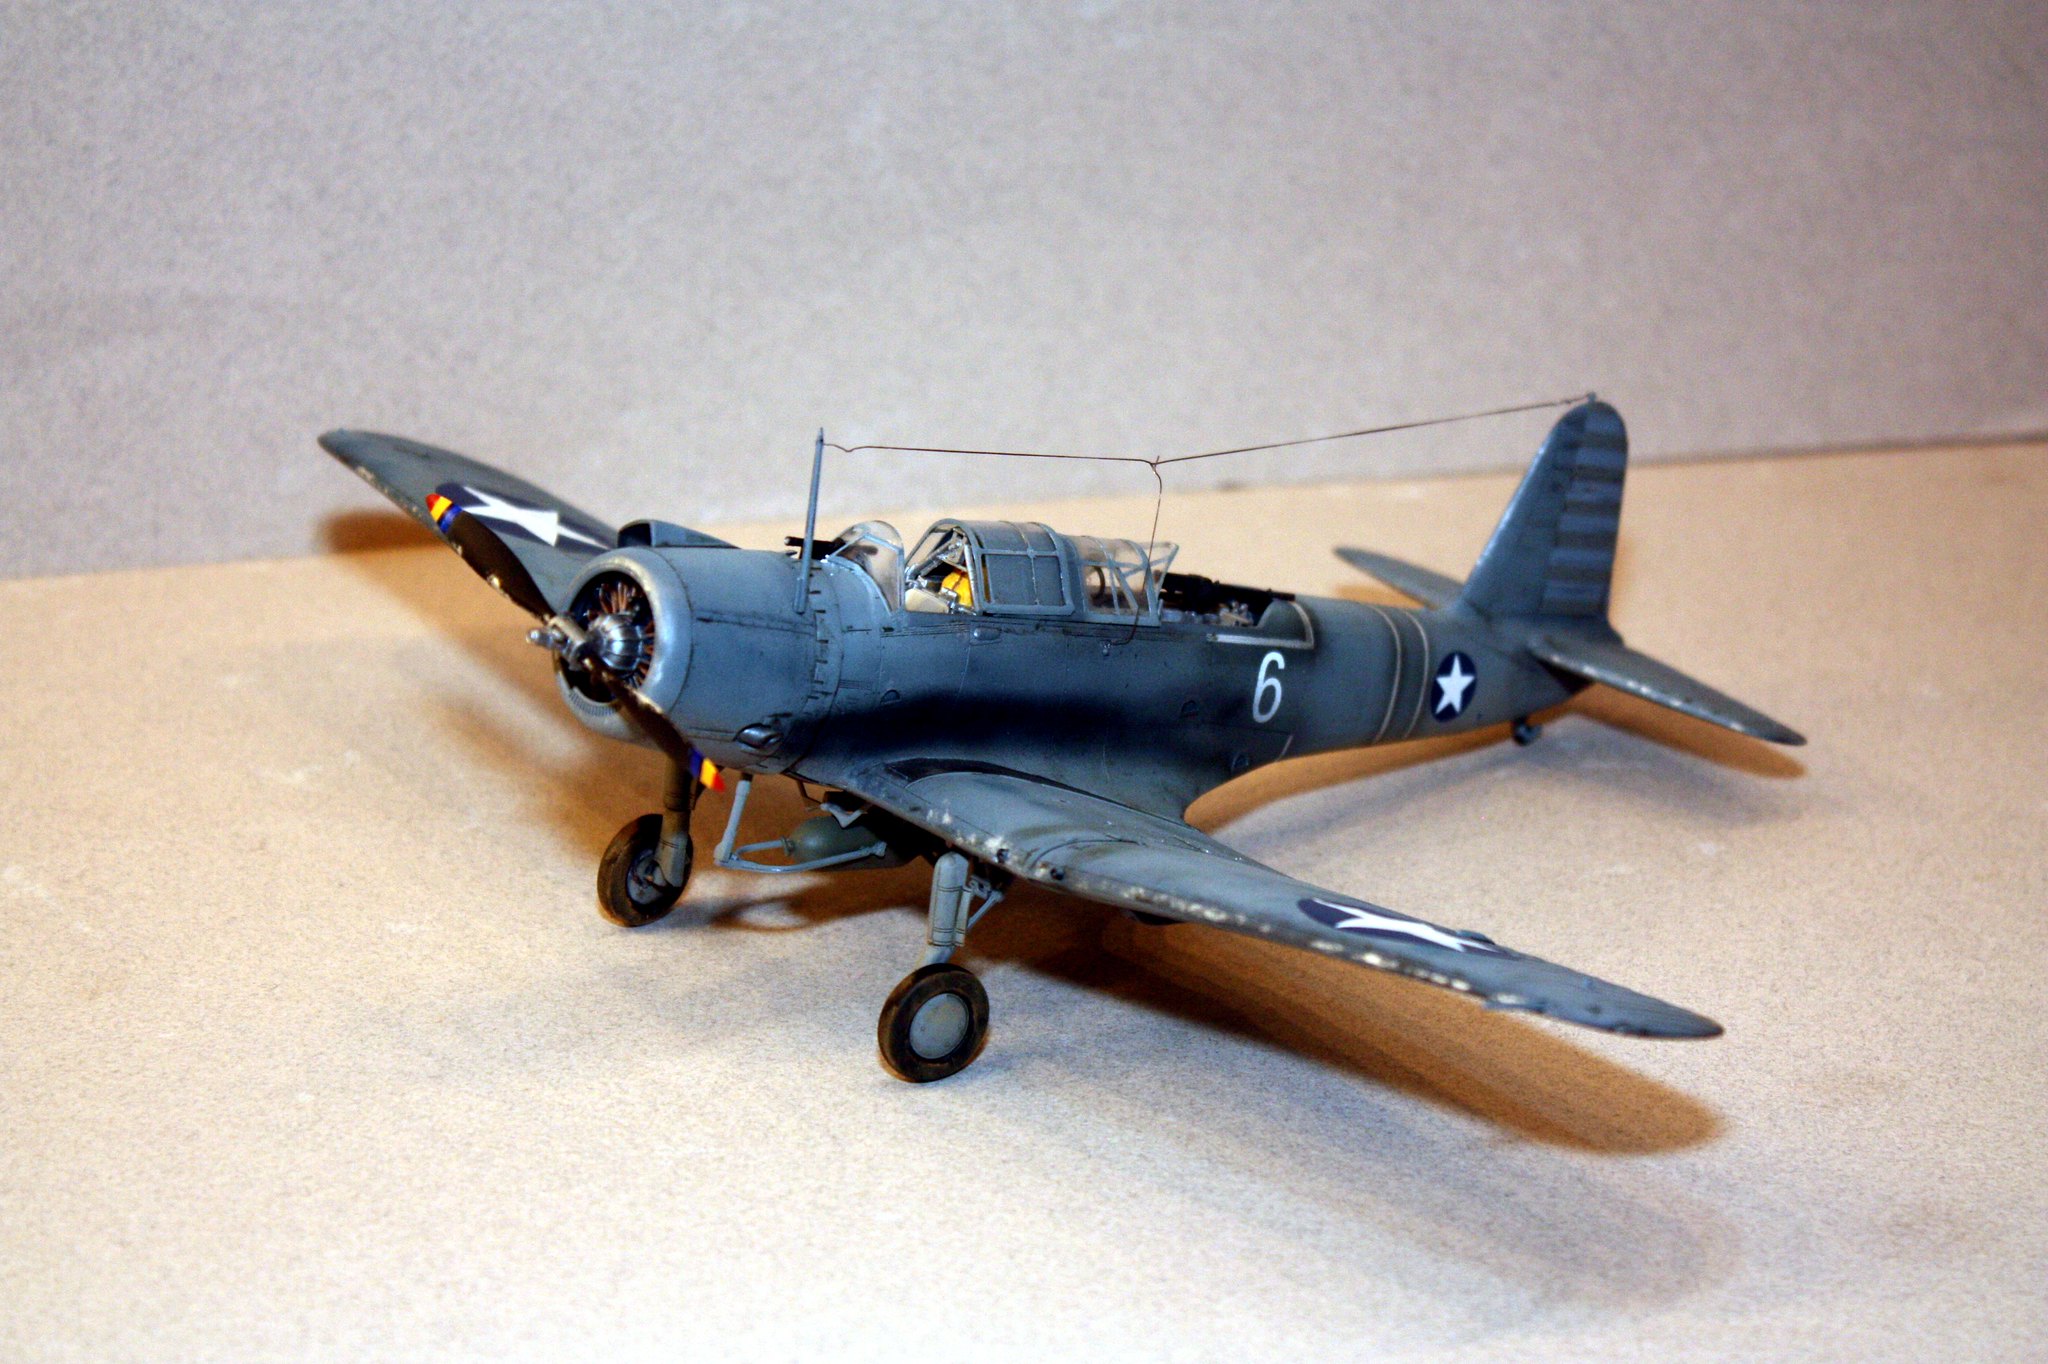
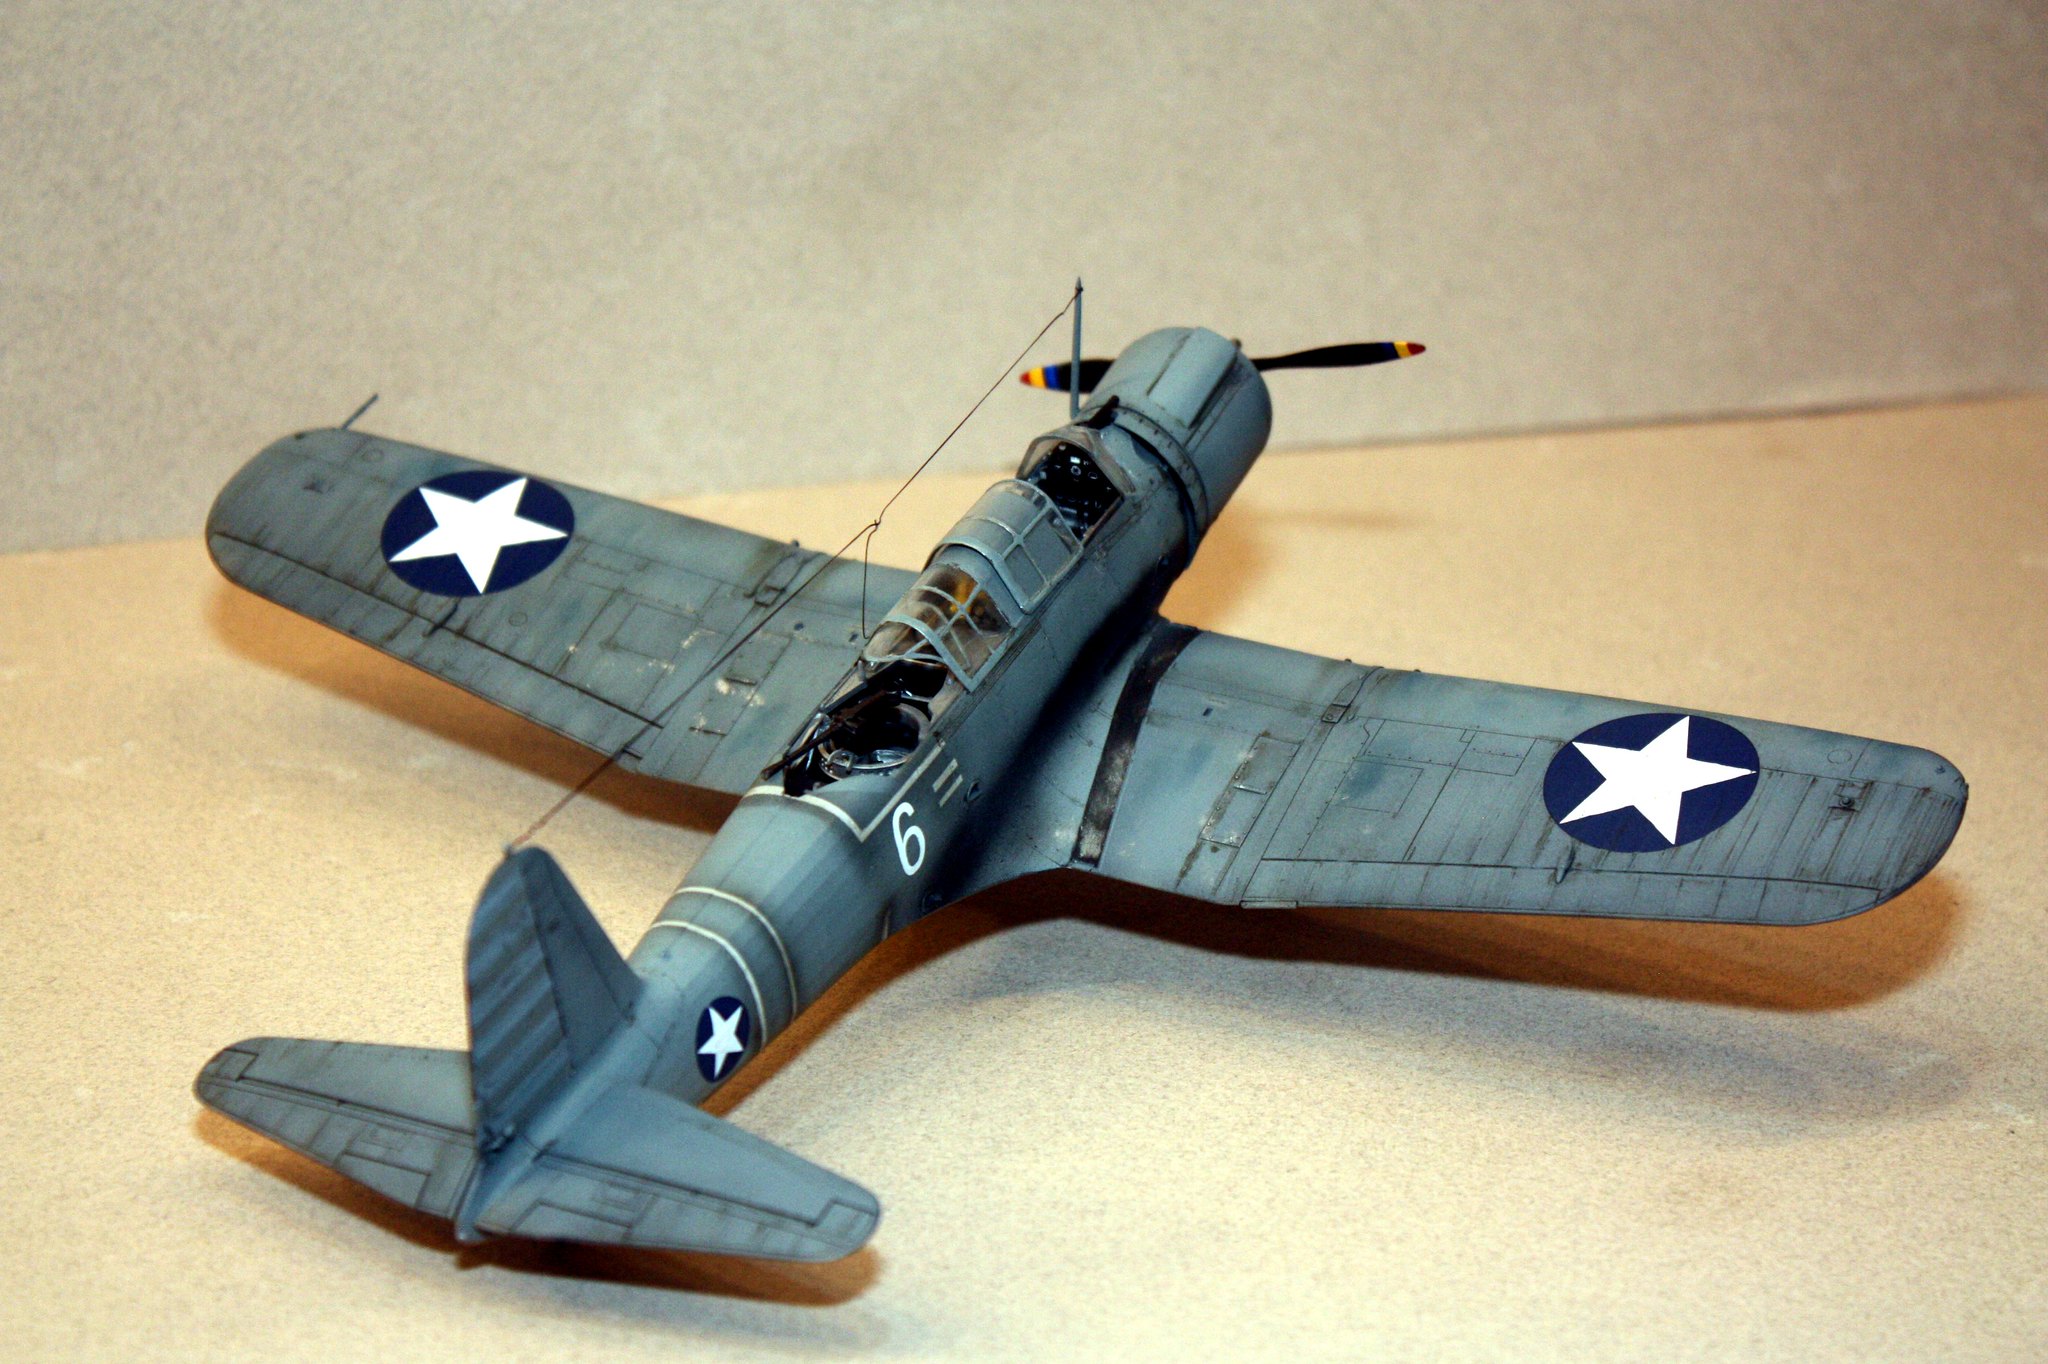
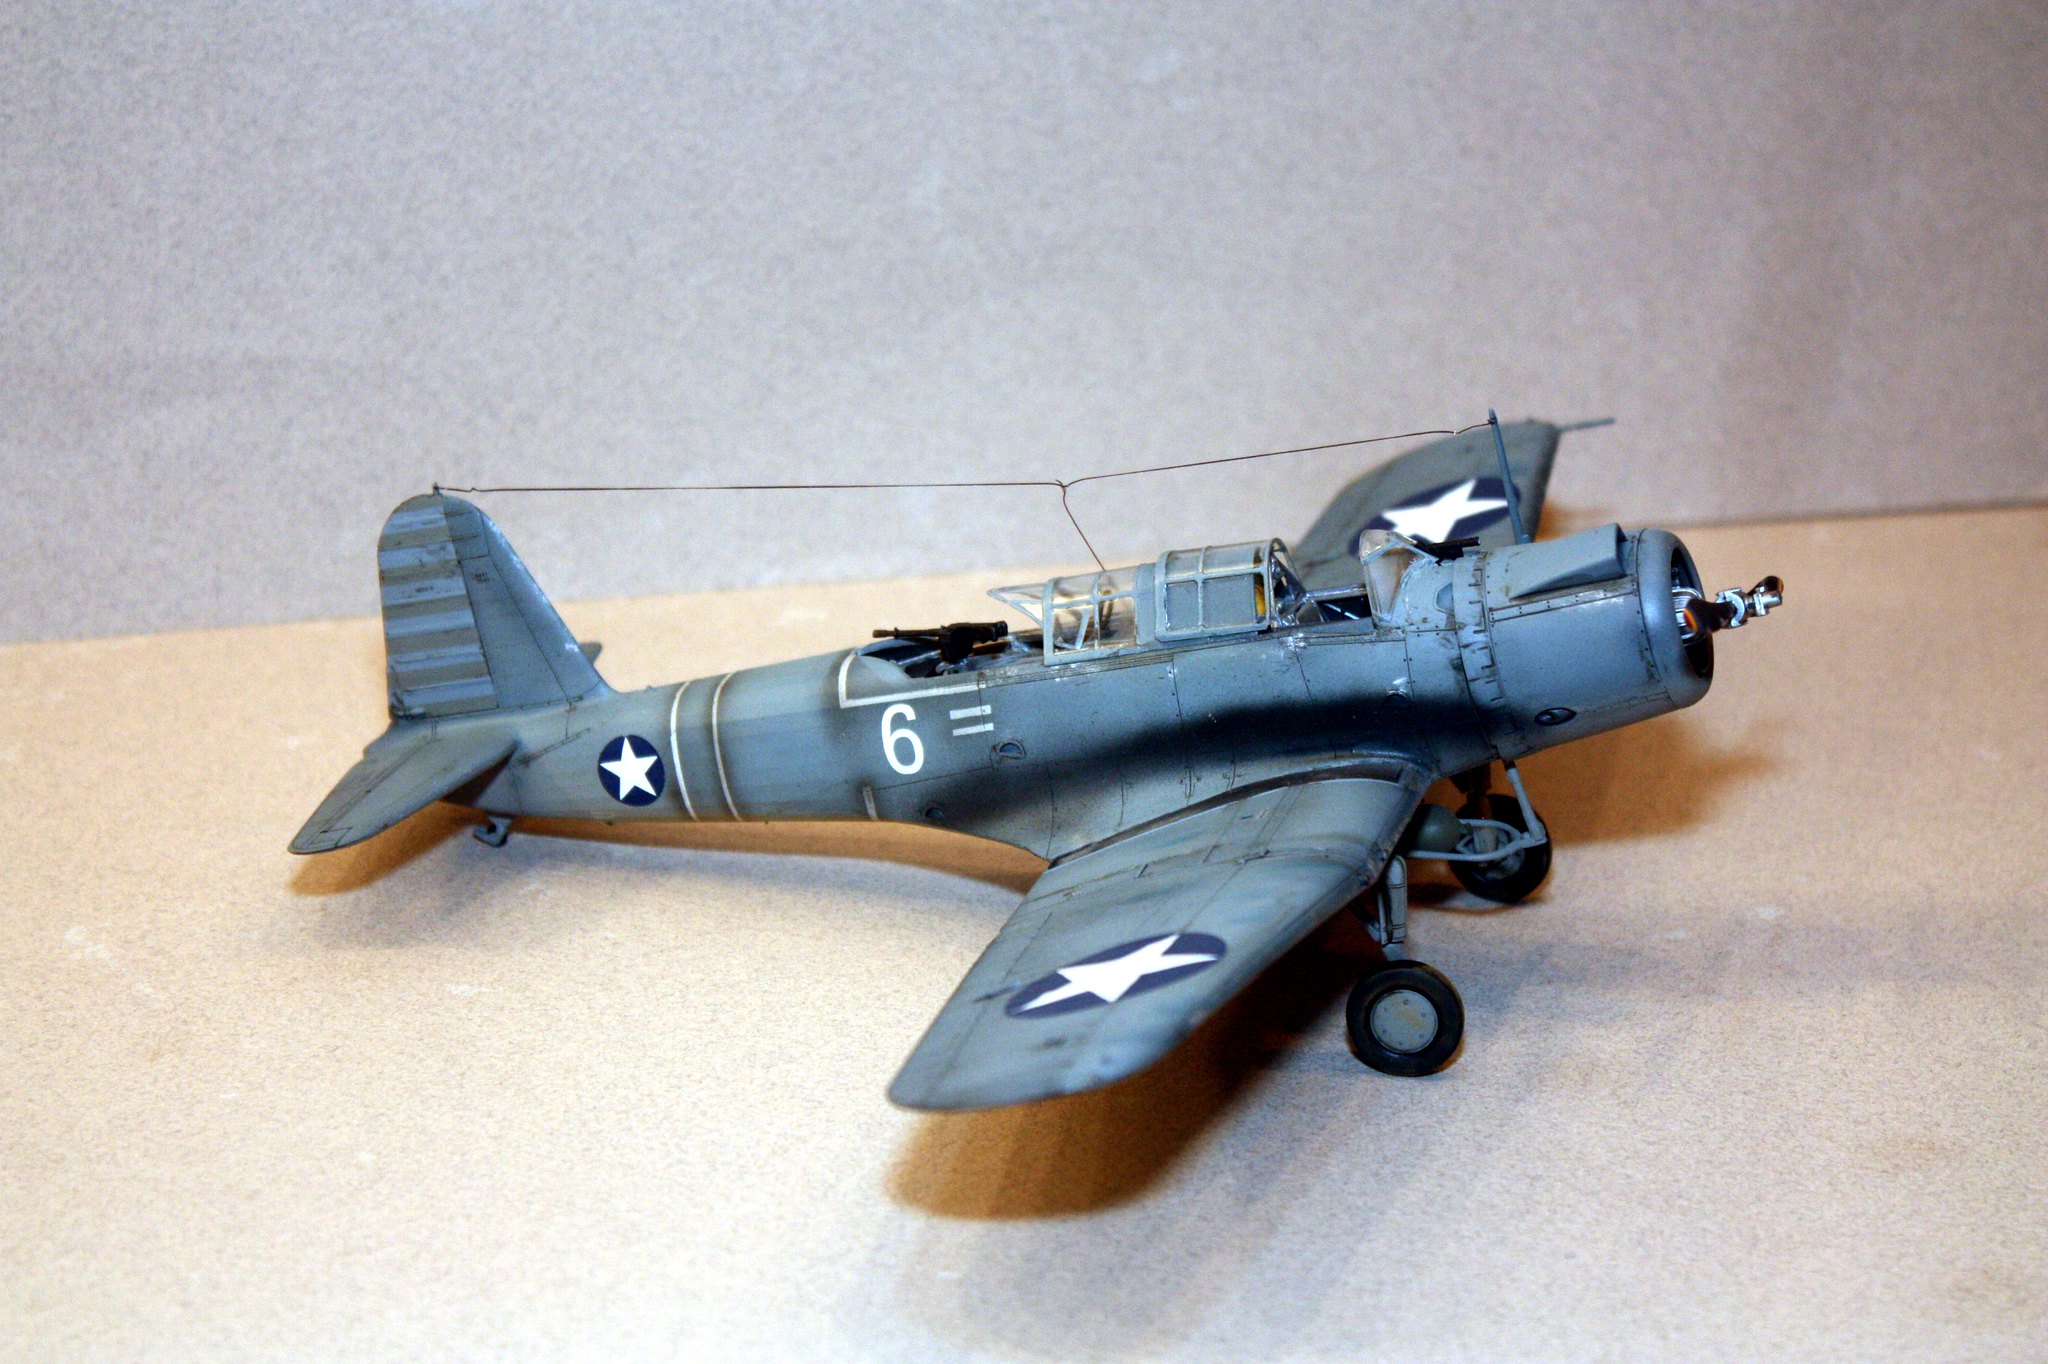
So the aircraft I have built is a Marine Corps bomber belonging to VMSB-241 based on Midway Island.  I chose to build aircraft #6, which was piloted by Captain Richard E. Fleming.  On the morning of June 5, 1942, a squadron of SB2U's and a squadron of SBD Dauntless dive bombers headed out to find the Japanese heavy cruiser Mikuma, reportedly afire somewhere northwest of the islands.  Upon locating the cruiser, the Americans split up their attack, with the Dauntless's coming in from up high while the Vindicators attacked near water level.

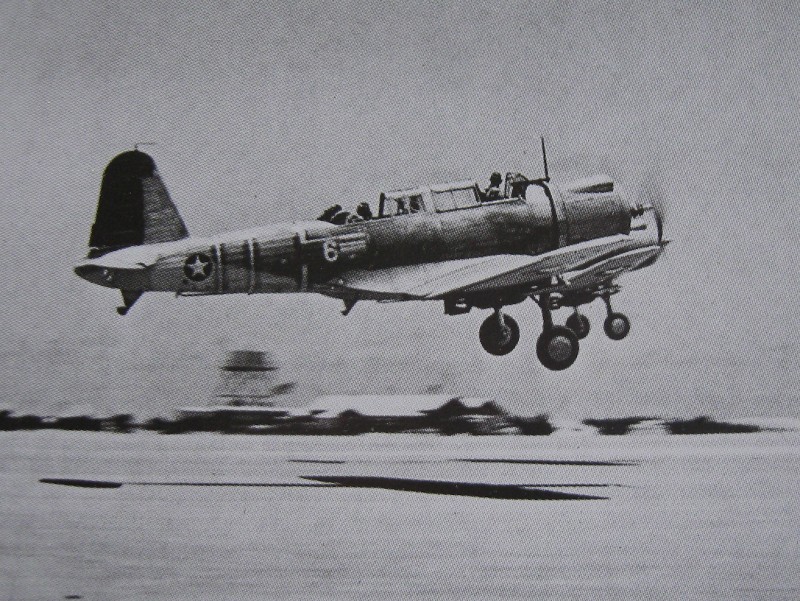
Fleming took an approach pattern roughly 400 feet off the water during his bombing run. He was hit, his engine caught fire, but he was able to release his bomb, which missed amidships.  What happened next is a bit of controversy.  The Japanese have claimed that Fleming dove his Vindicator into the Mikuma on a suicide run, whereas trailing American birds claim to have witnessed two parachutes after Fleming's Vindicator slammed into the ocean.  Regardless, Fleming died on that bombing run (as well as his gunner, whose name I have not been able to uncover).  Fleming received the Congressional Medal of Honor posthumously for his actions on that morning.

A photo of Fleming's Vindicator as he was lifting away from Midway Island.
The kit.
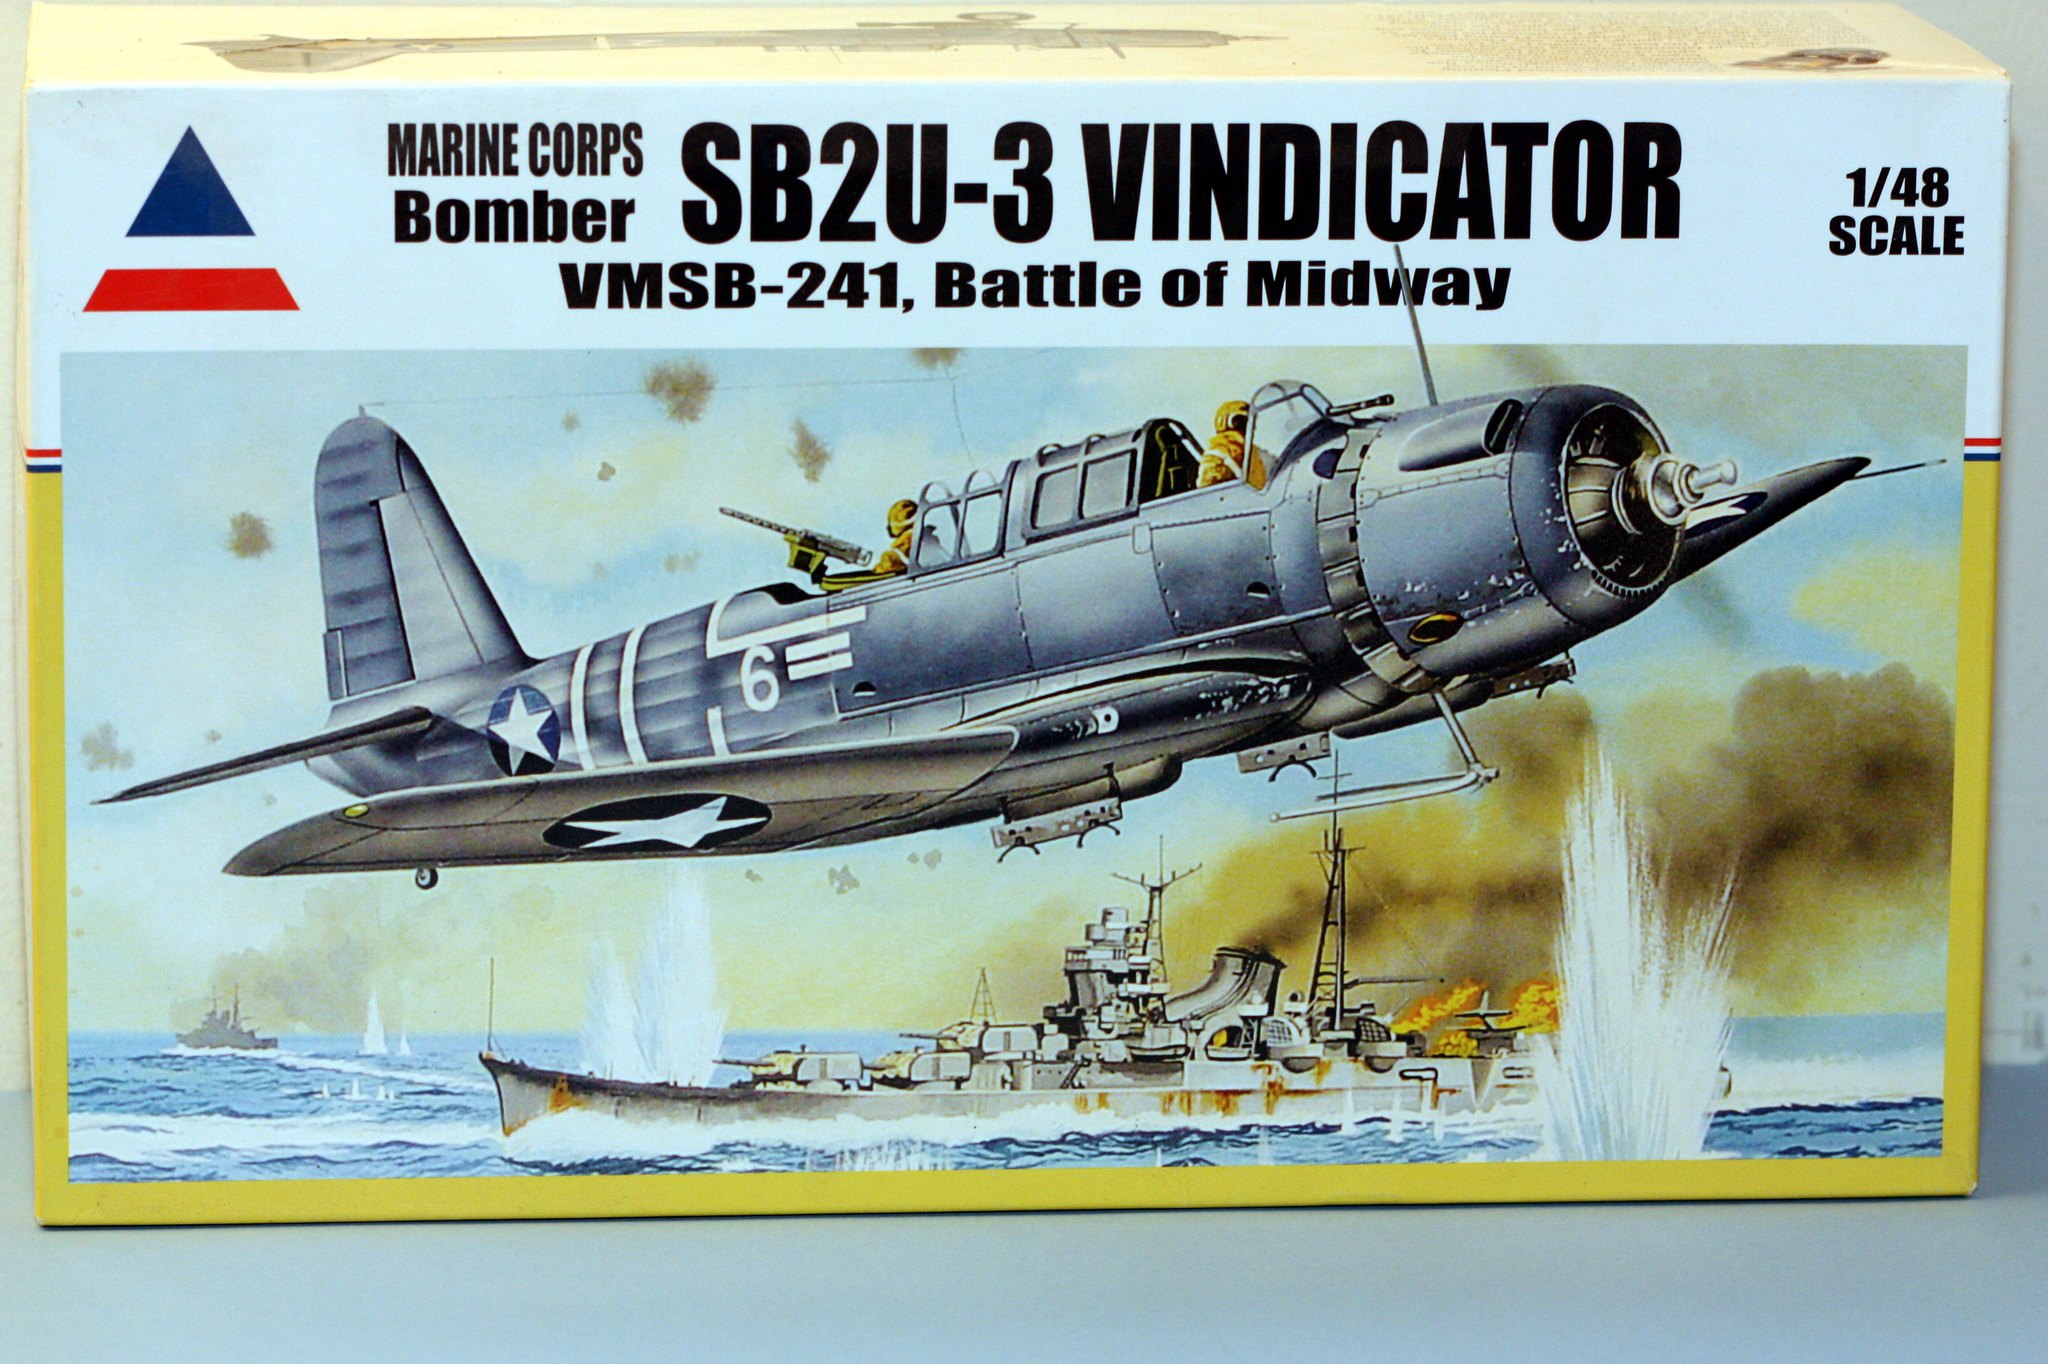
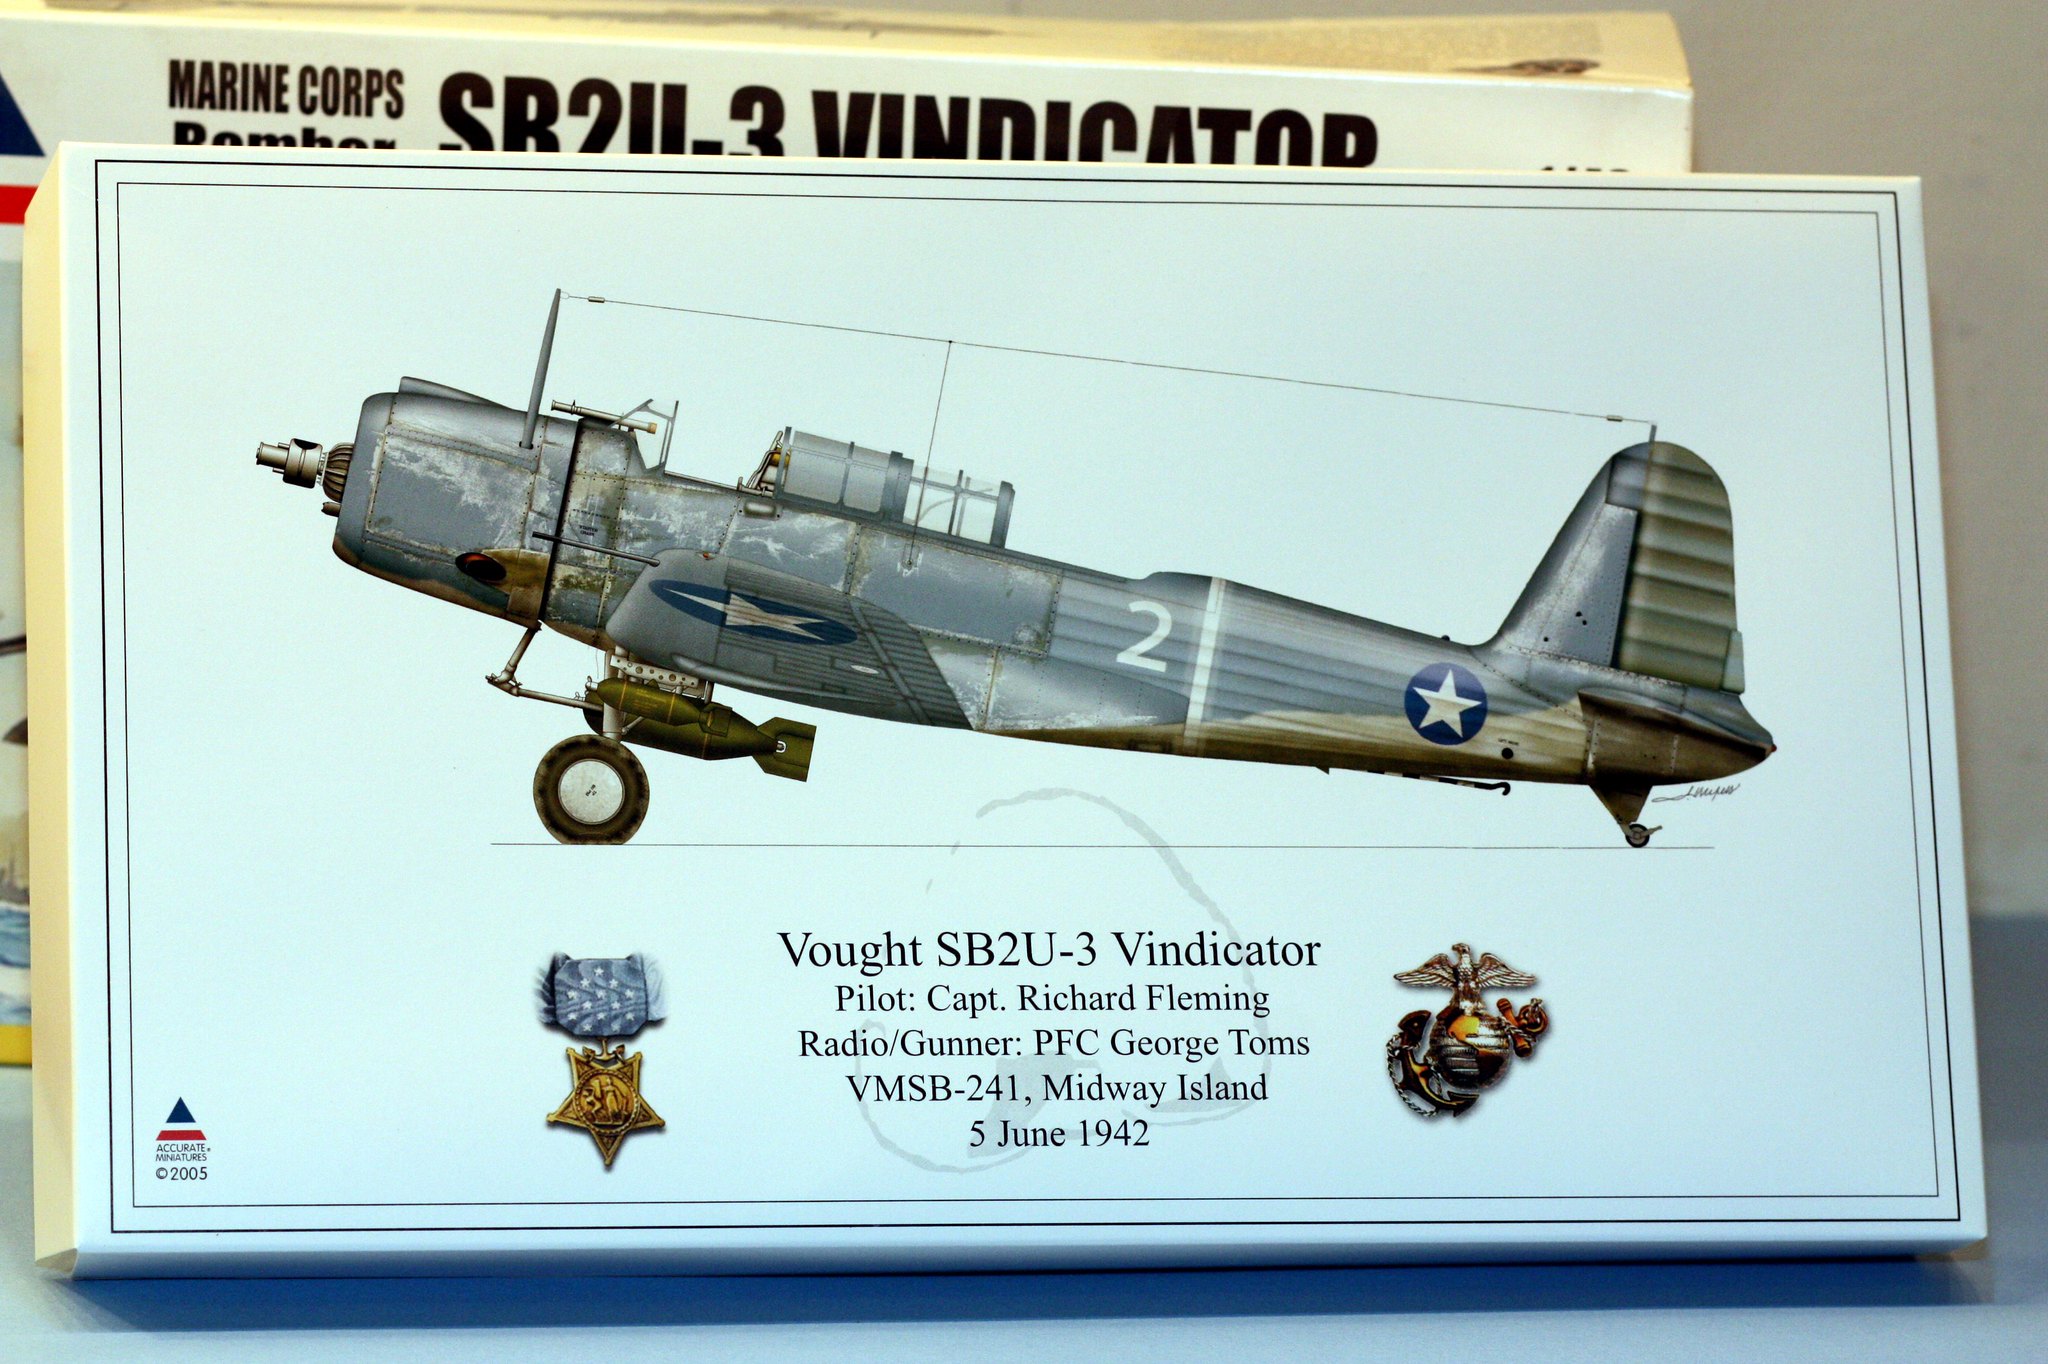
Accurate Miniatures is known for the way they box their kits, with a separate section for clear parts, instructions, decals, etc.  Here is the artwork adorning that interior part of the boxing.
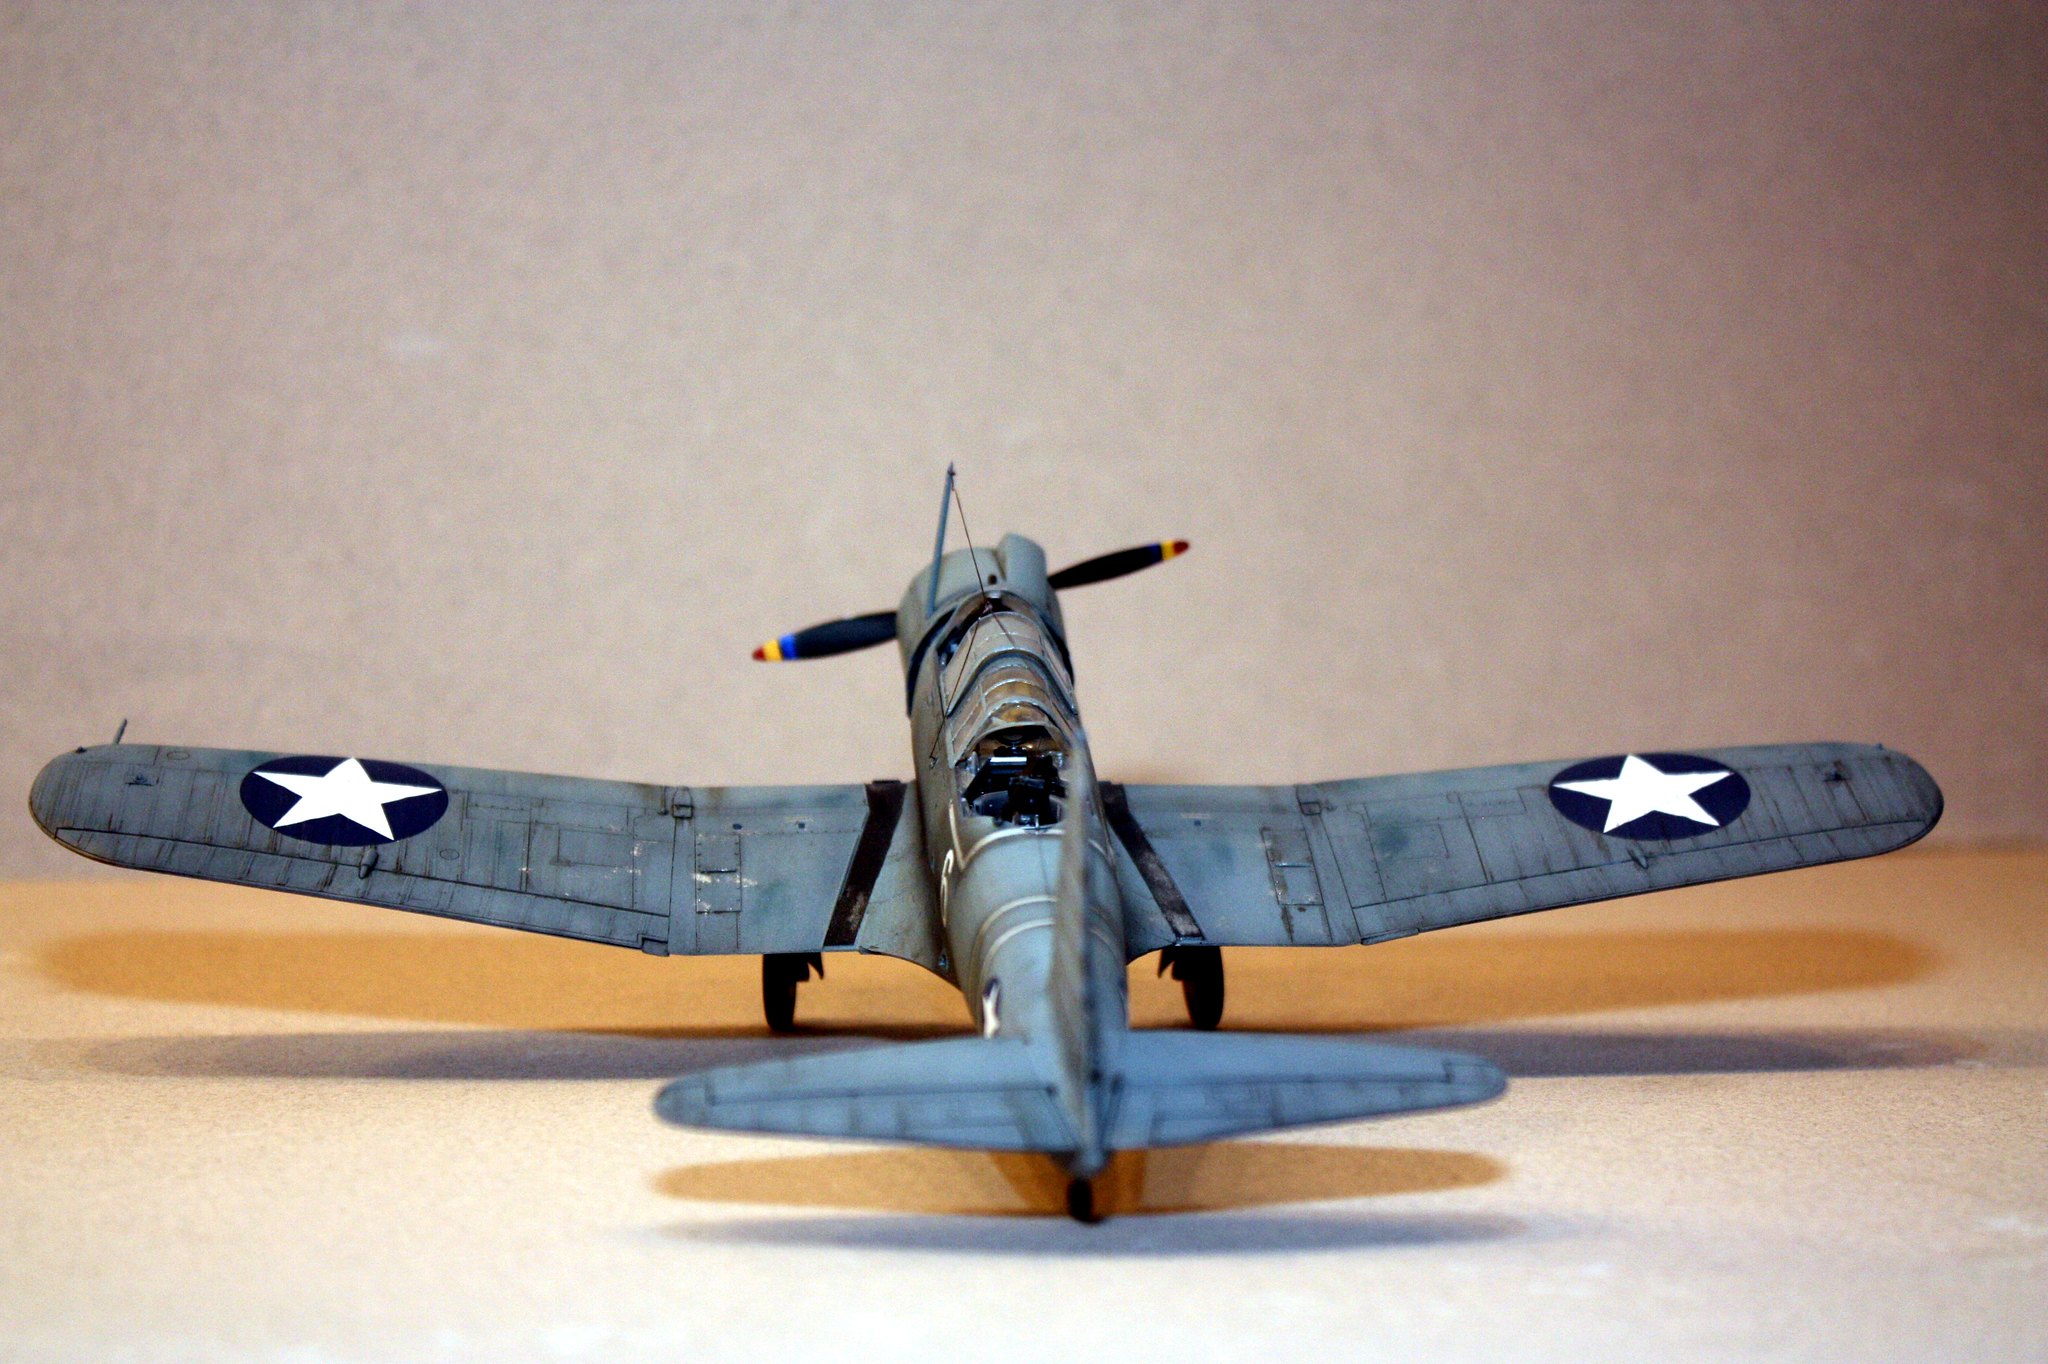
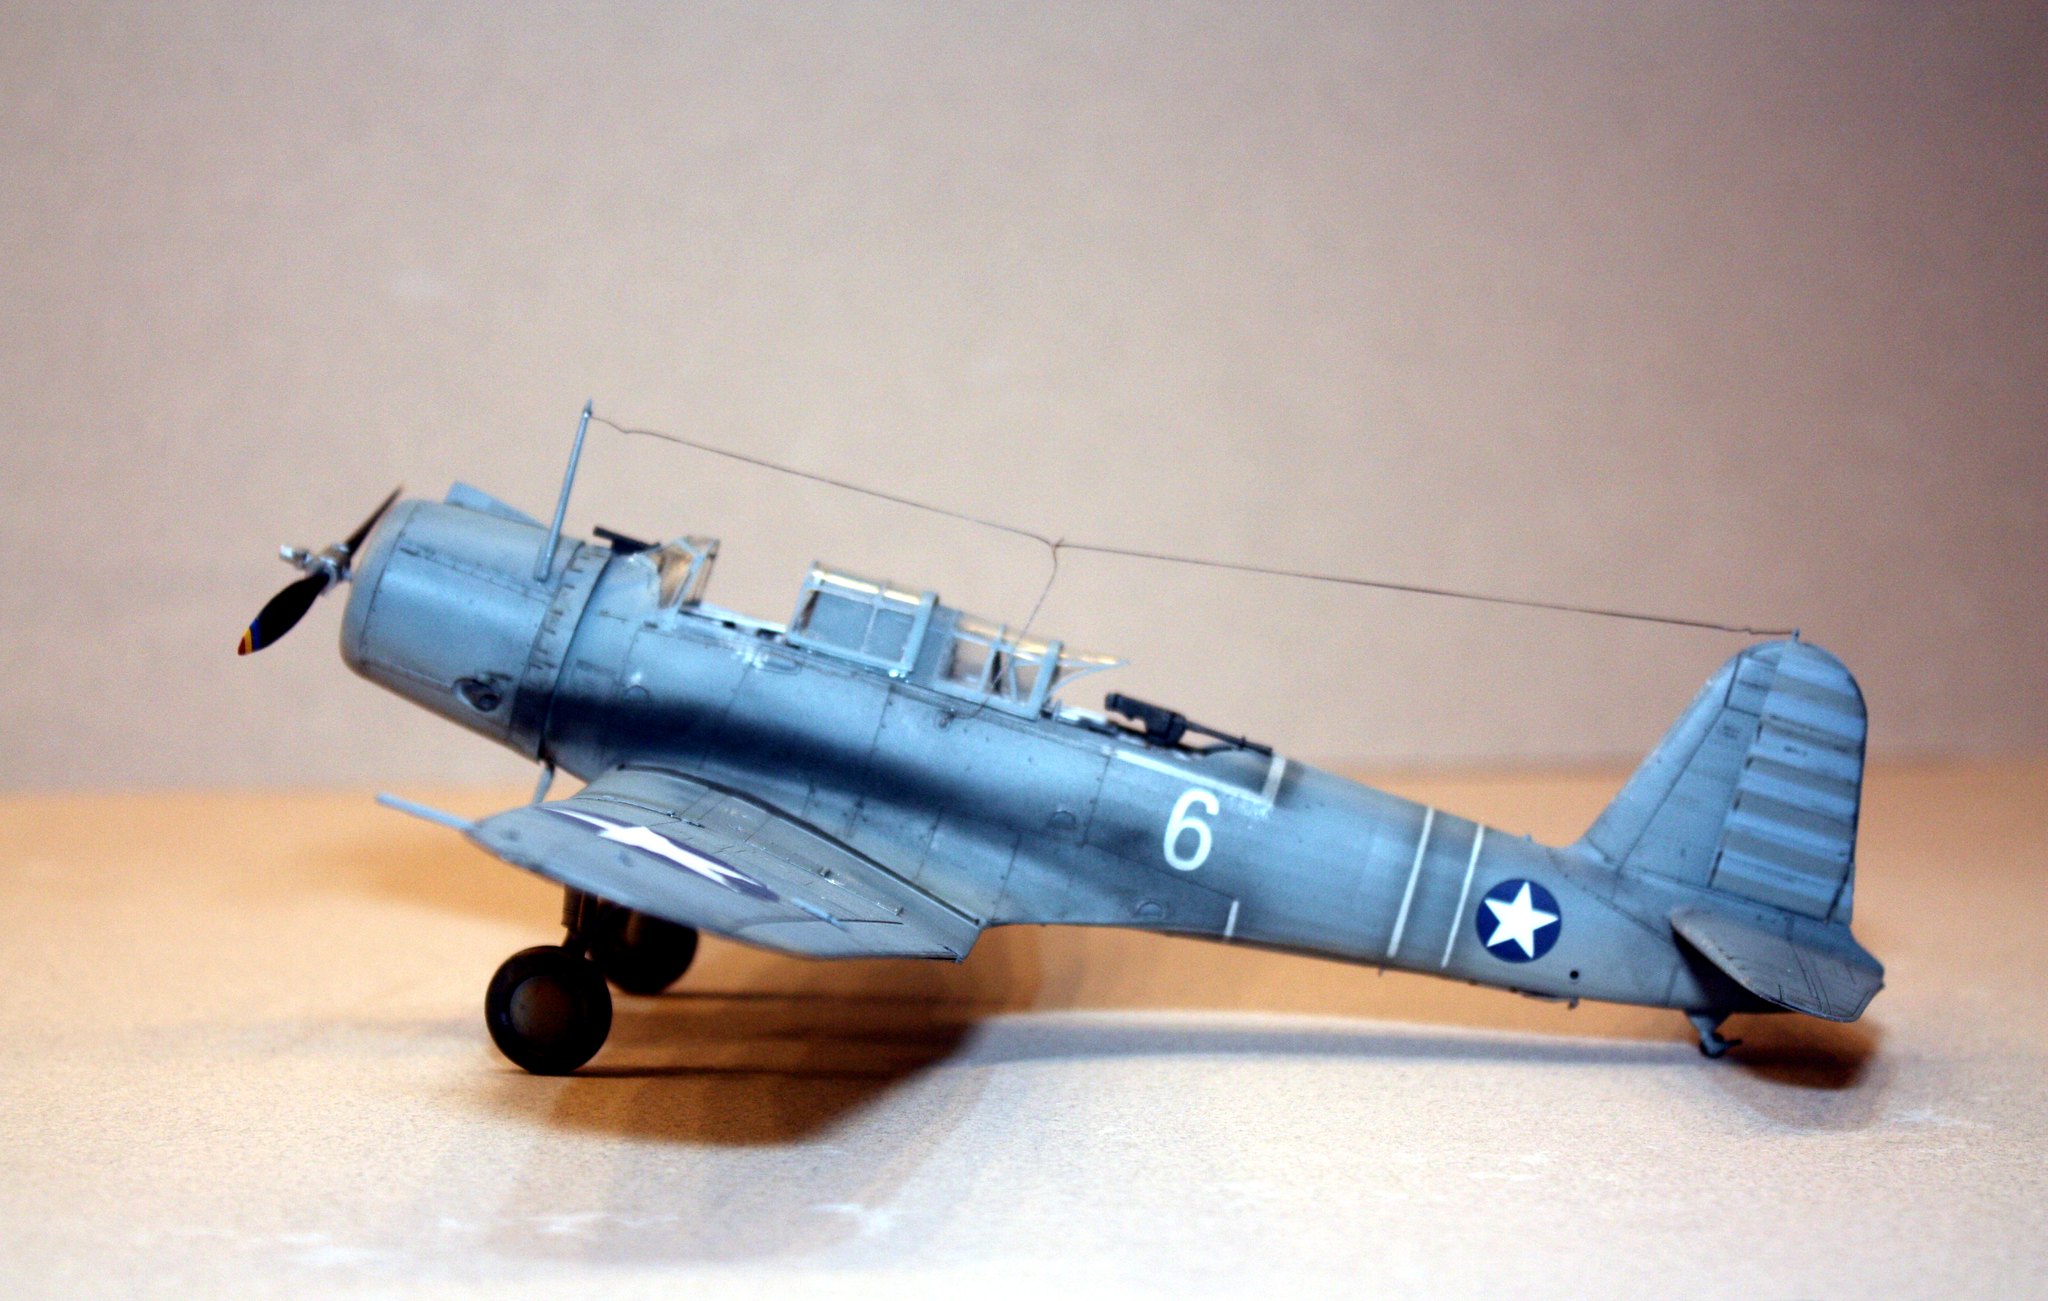
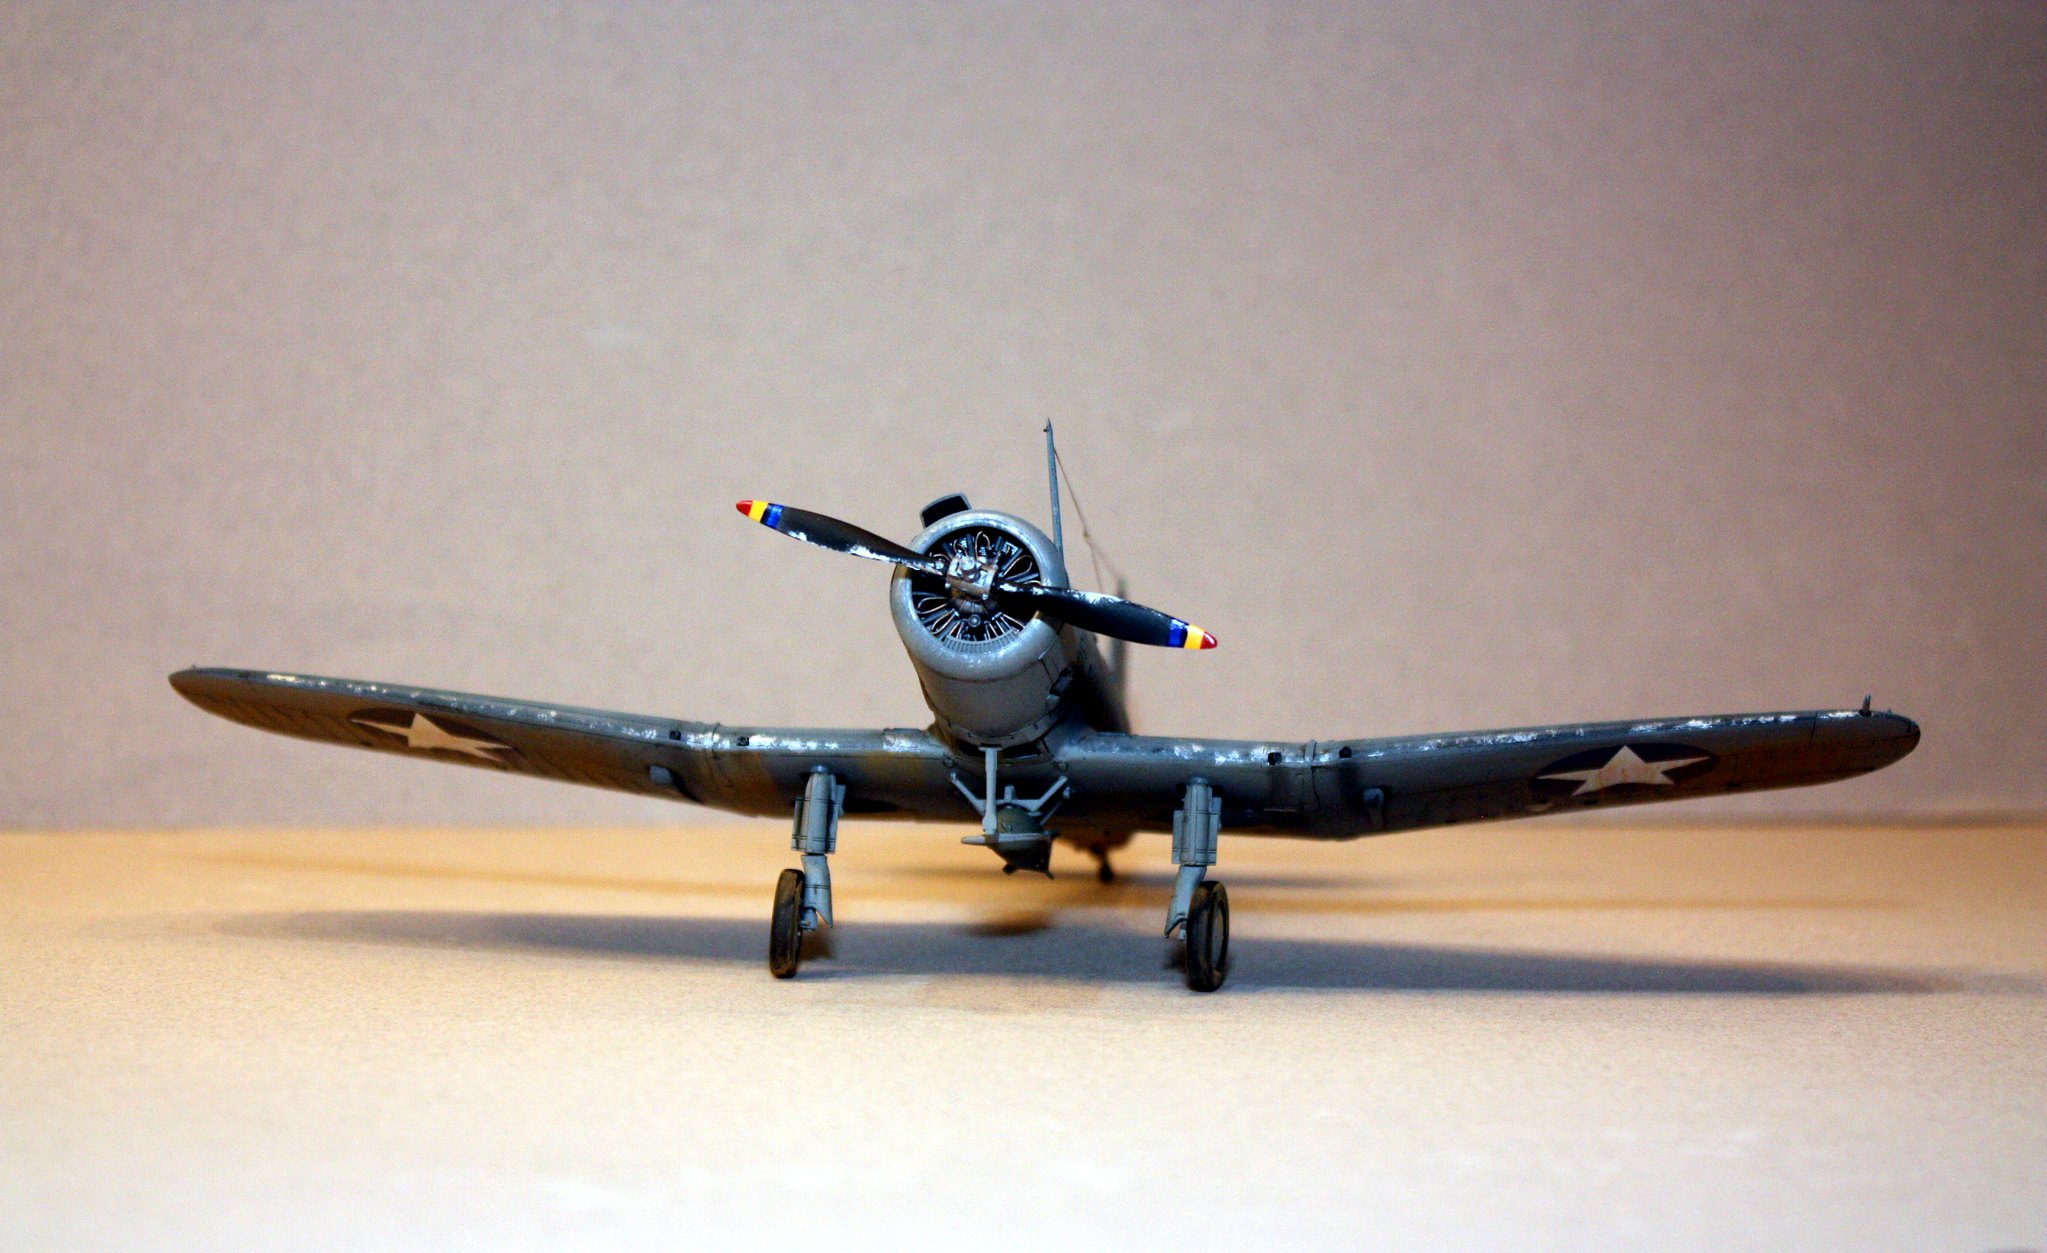
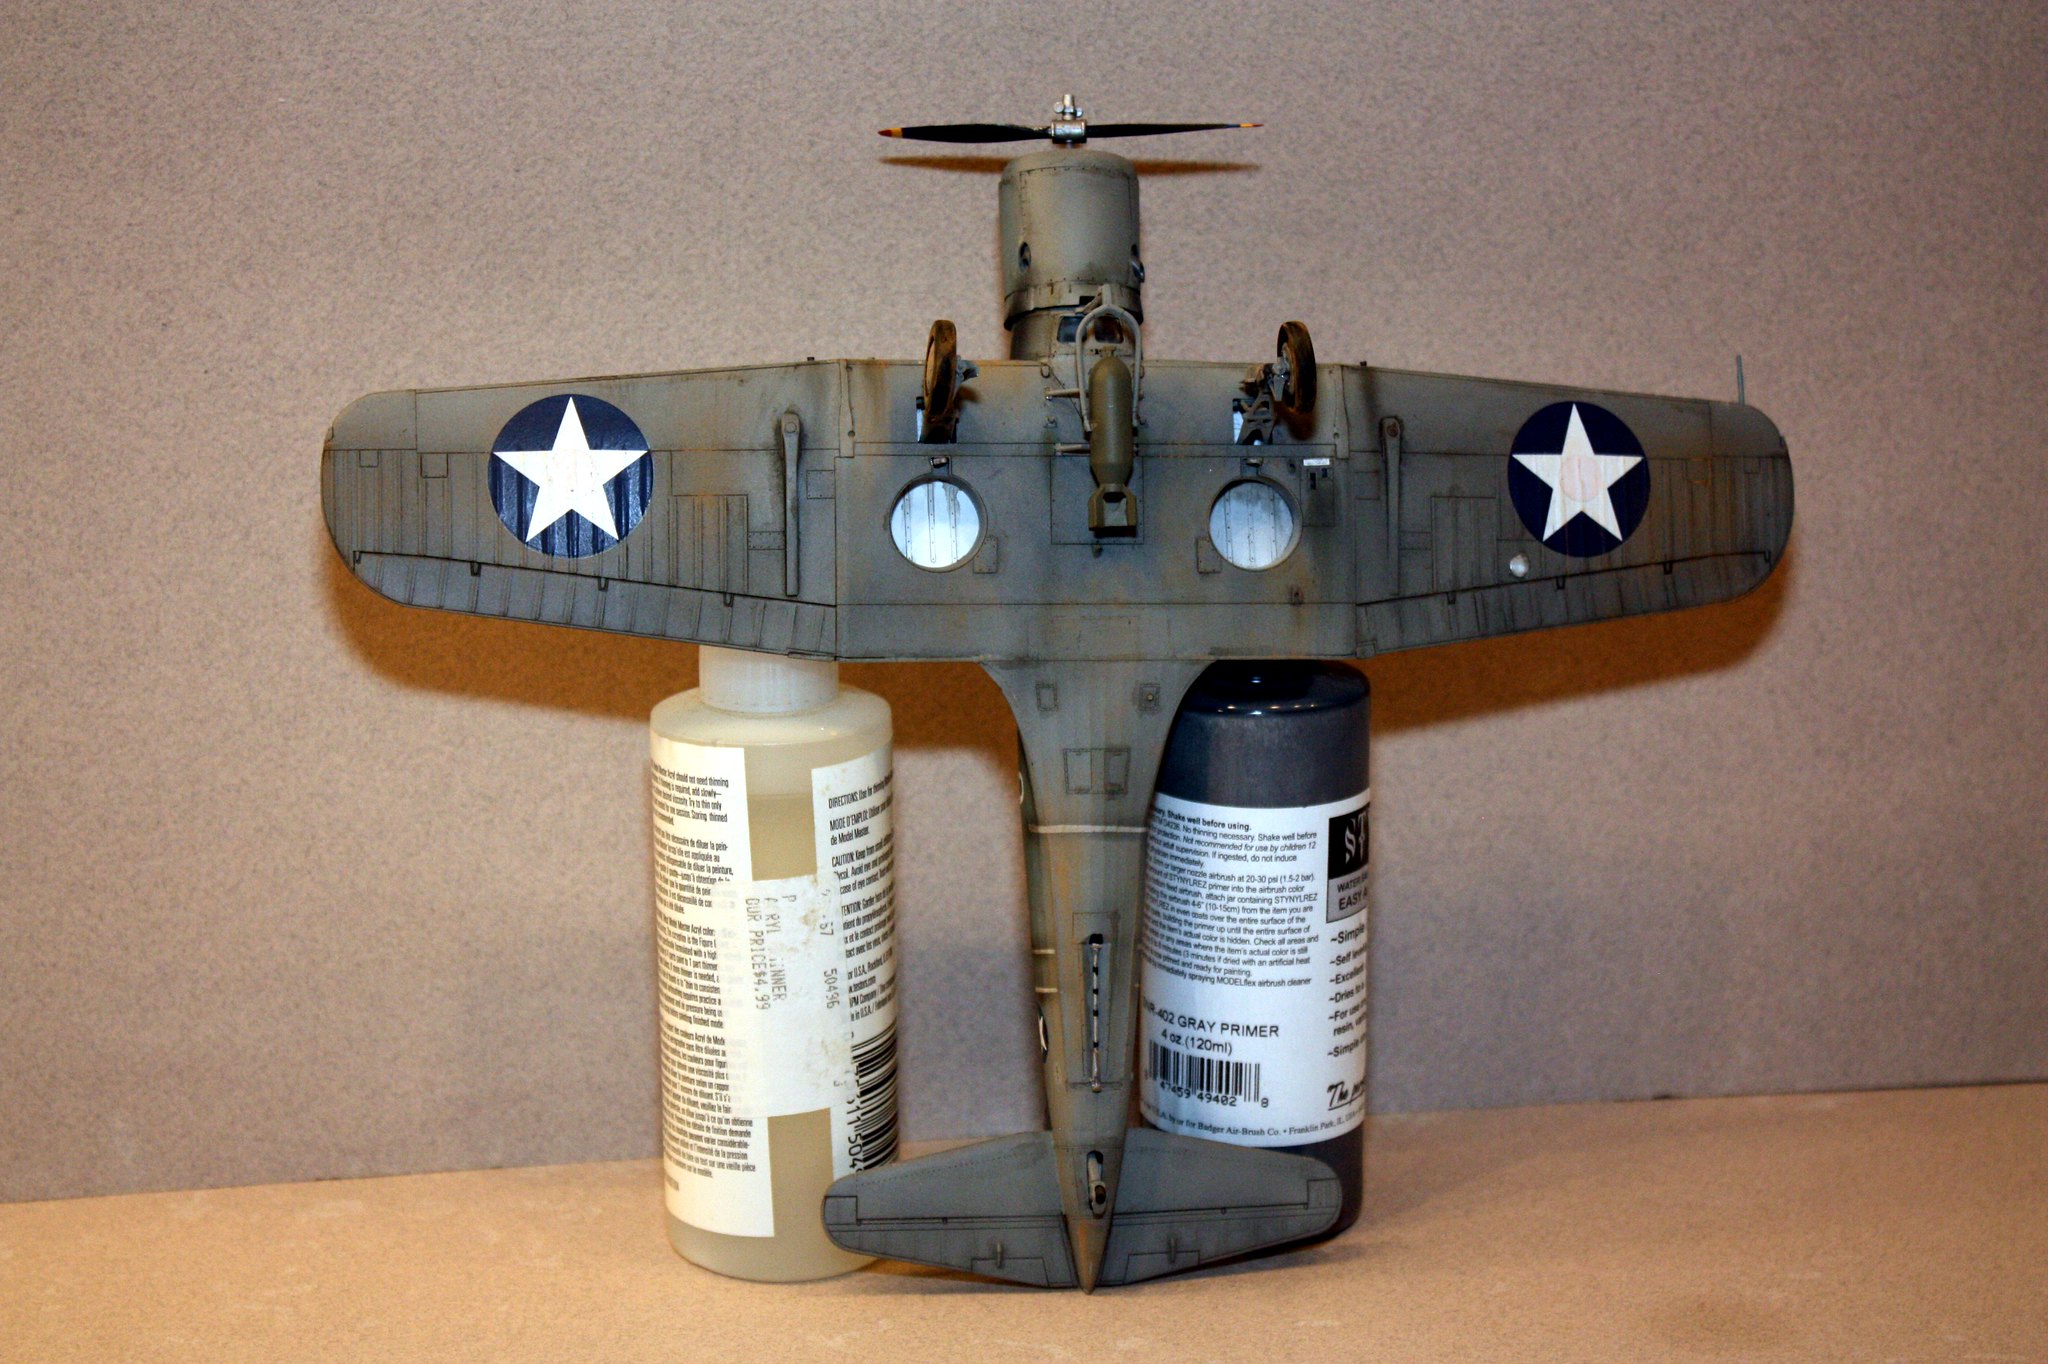
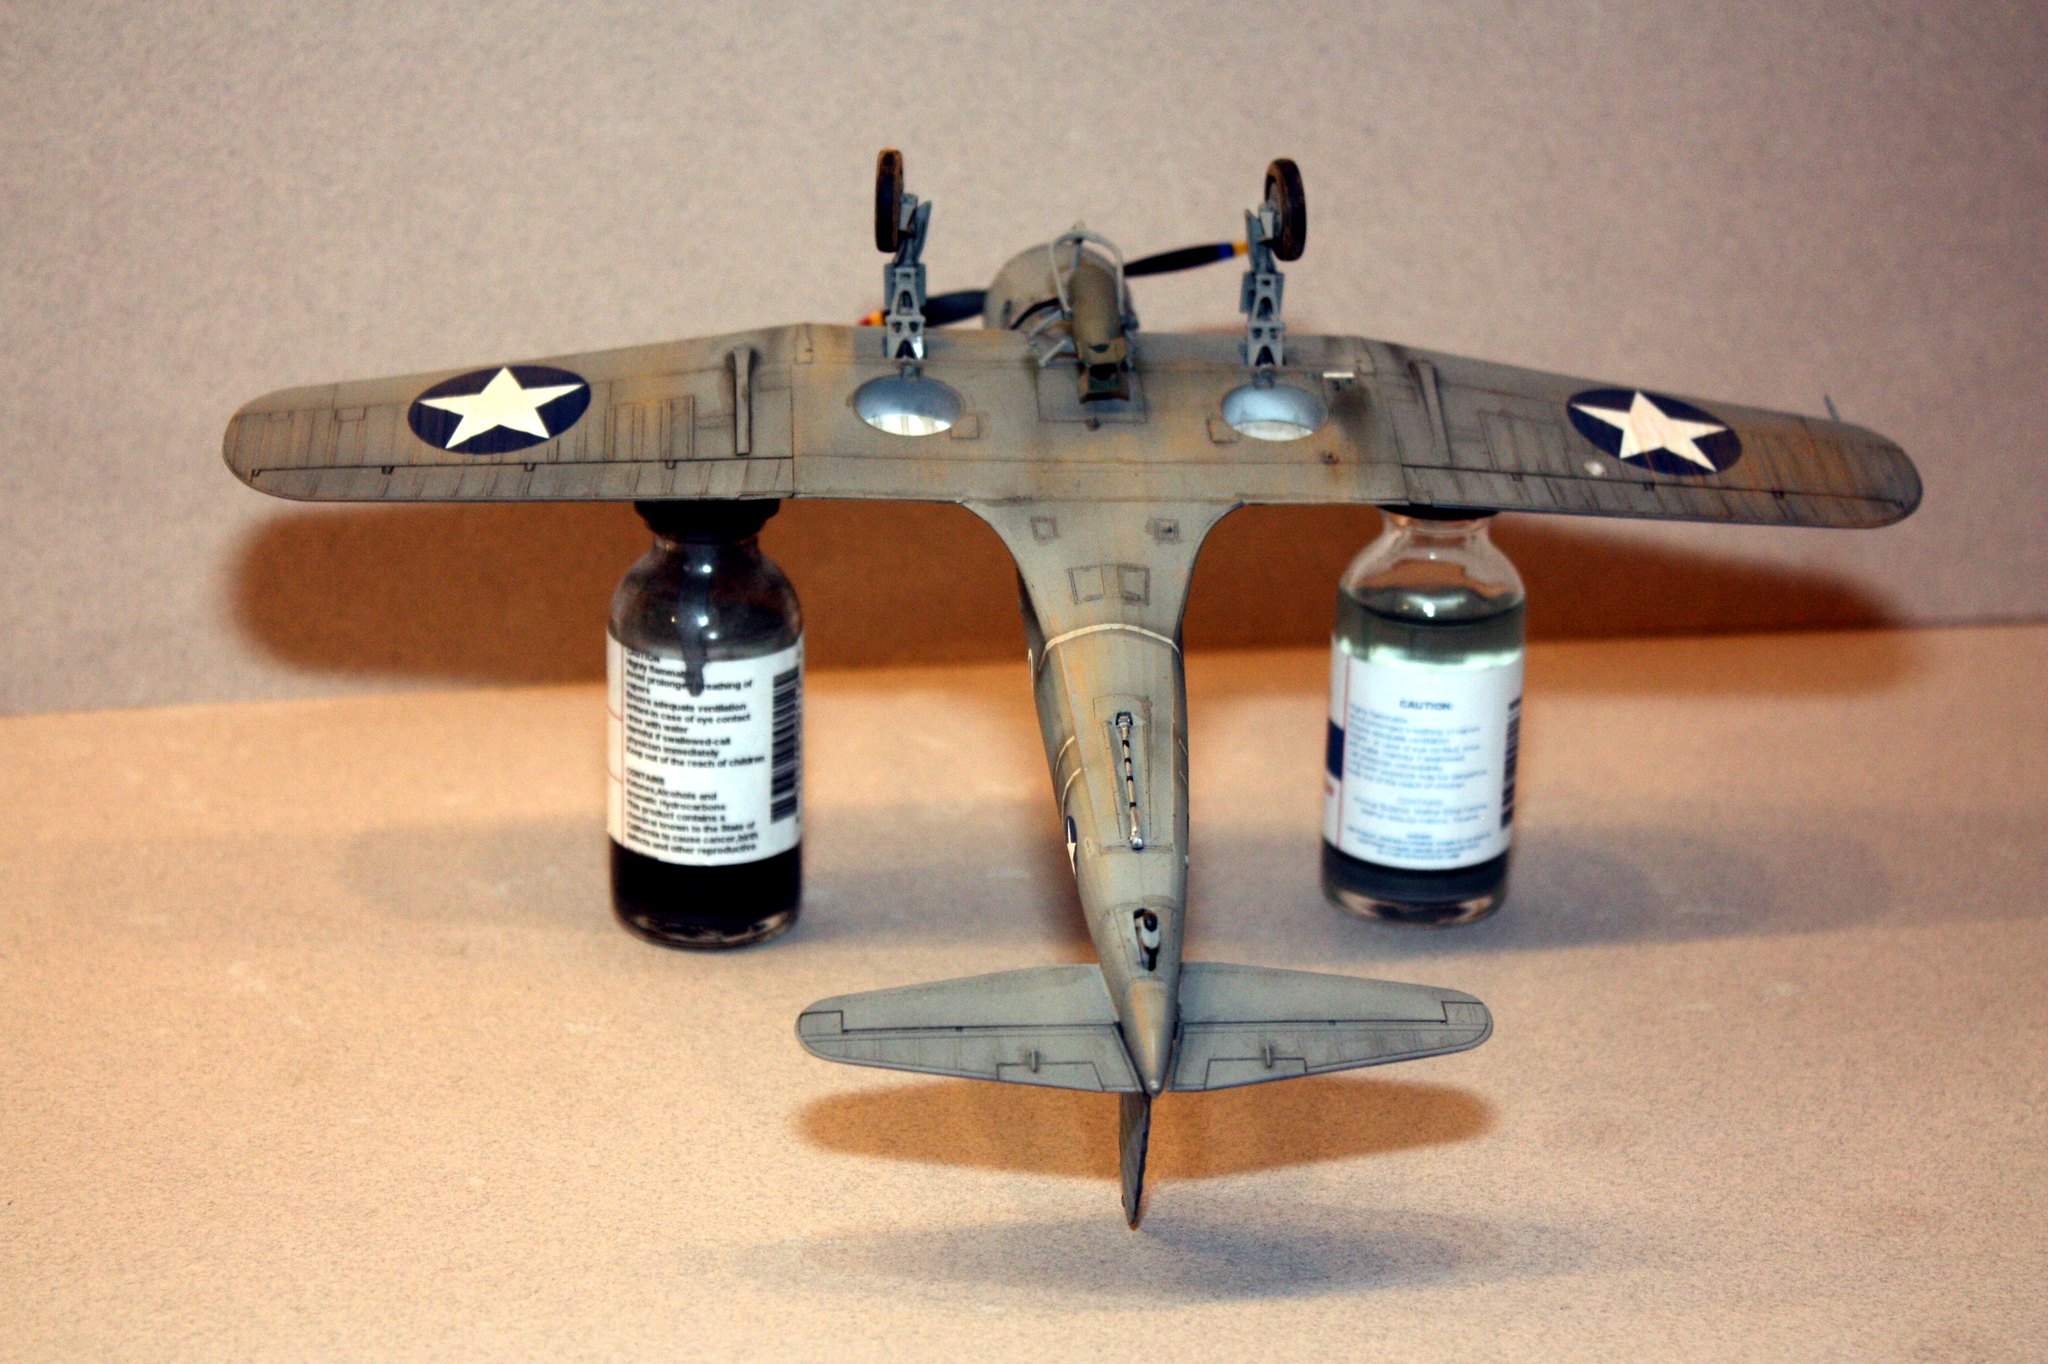
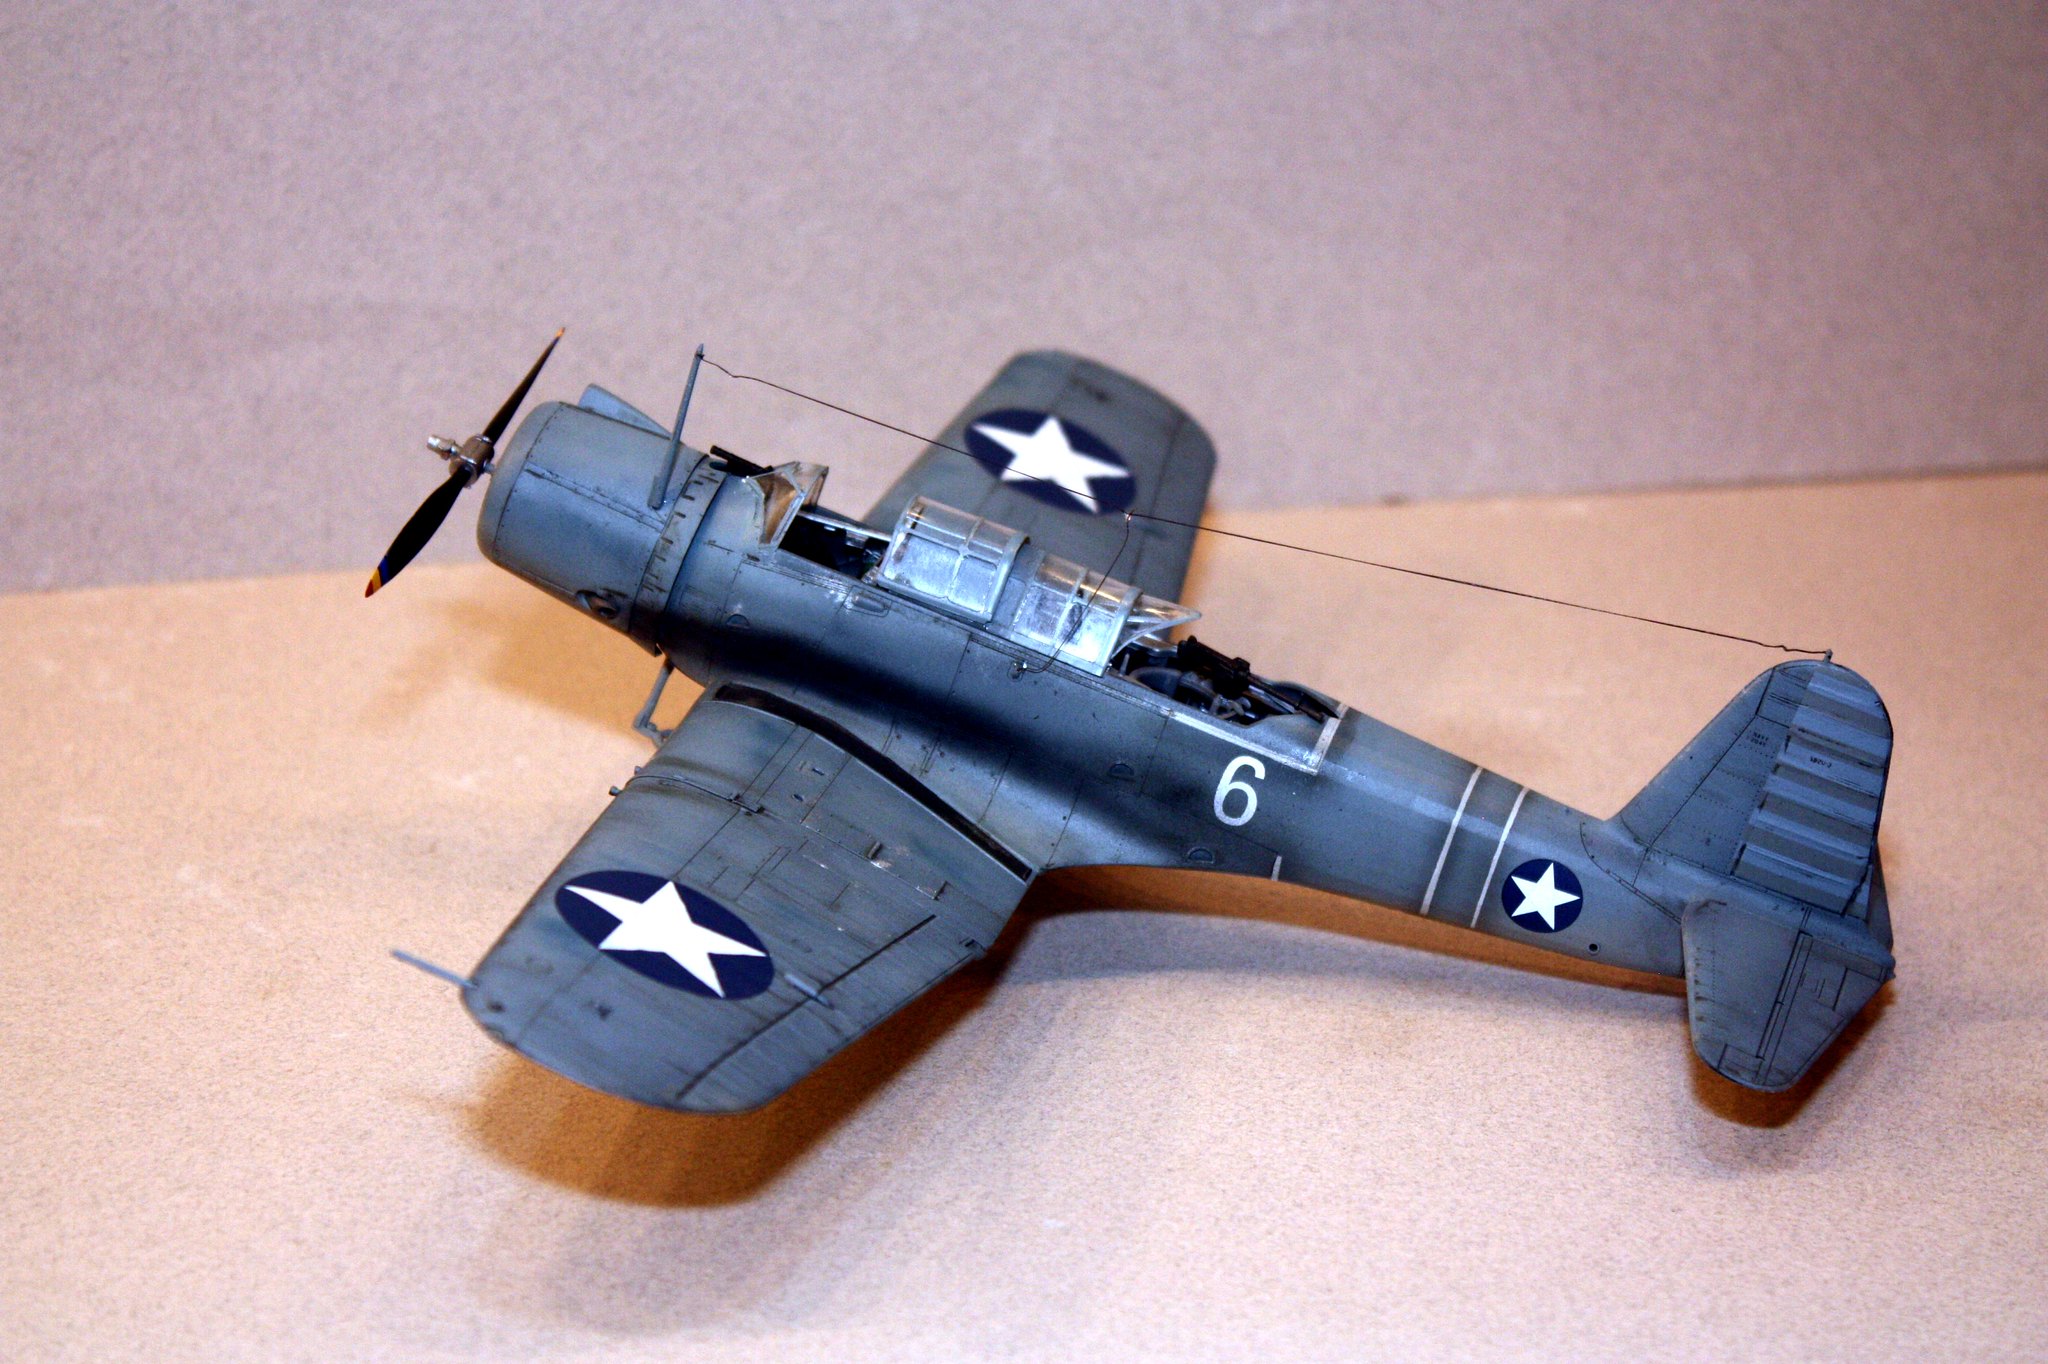
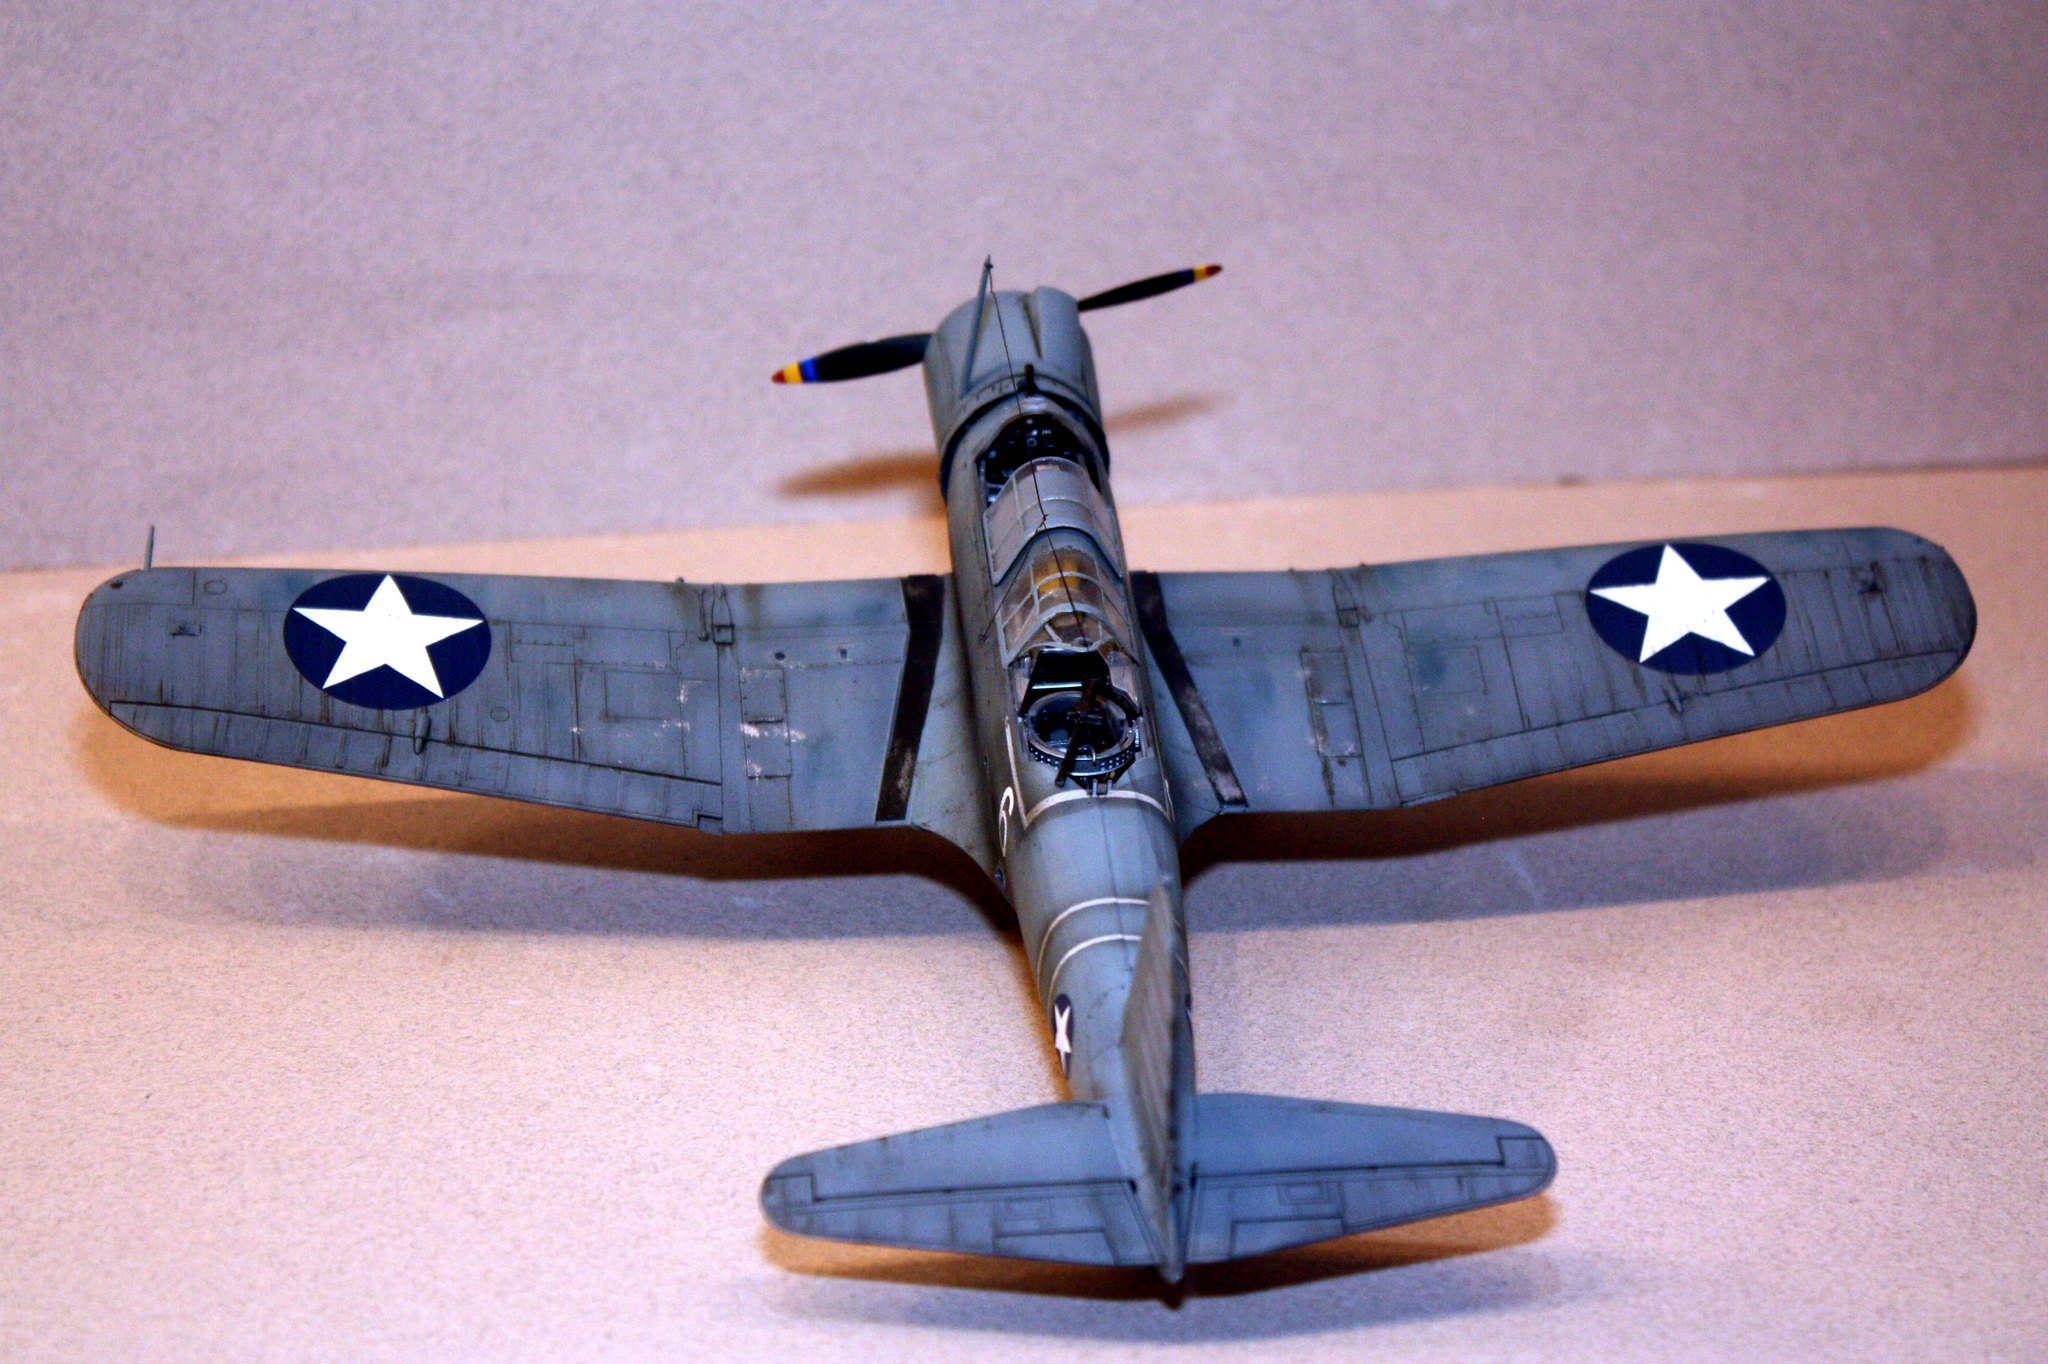
So now on to my build.  Paint is Tamiya, Aircraft Colors, and Model Master.  Weathering comes from Tamiya weathering compounds, ground-up pastel chalk, and Flory Dark Dirt wash.  I also bought a bottle of Stynlyrez gray primer.  This stuff is actually dark gray, but it works like a charm.  I have had lots of problems on recent builds with paint pulling up under Tamiya tape, and traced that back to lack of primer combined with Model Master acrylic paint.  The only place I saw any lifted paint was on the prop, which I did not prime. I cannot recommend this stuff enough.
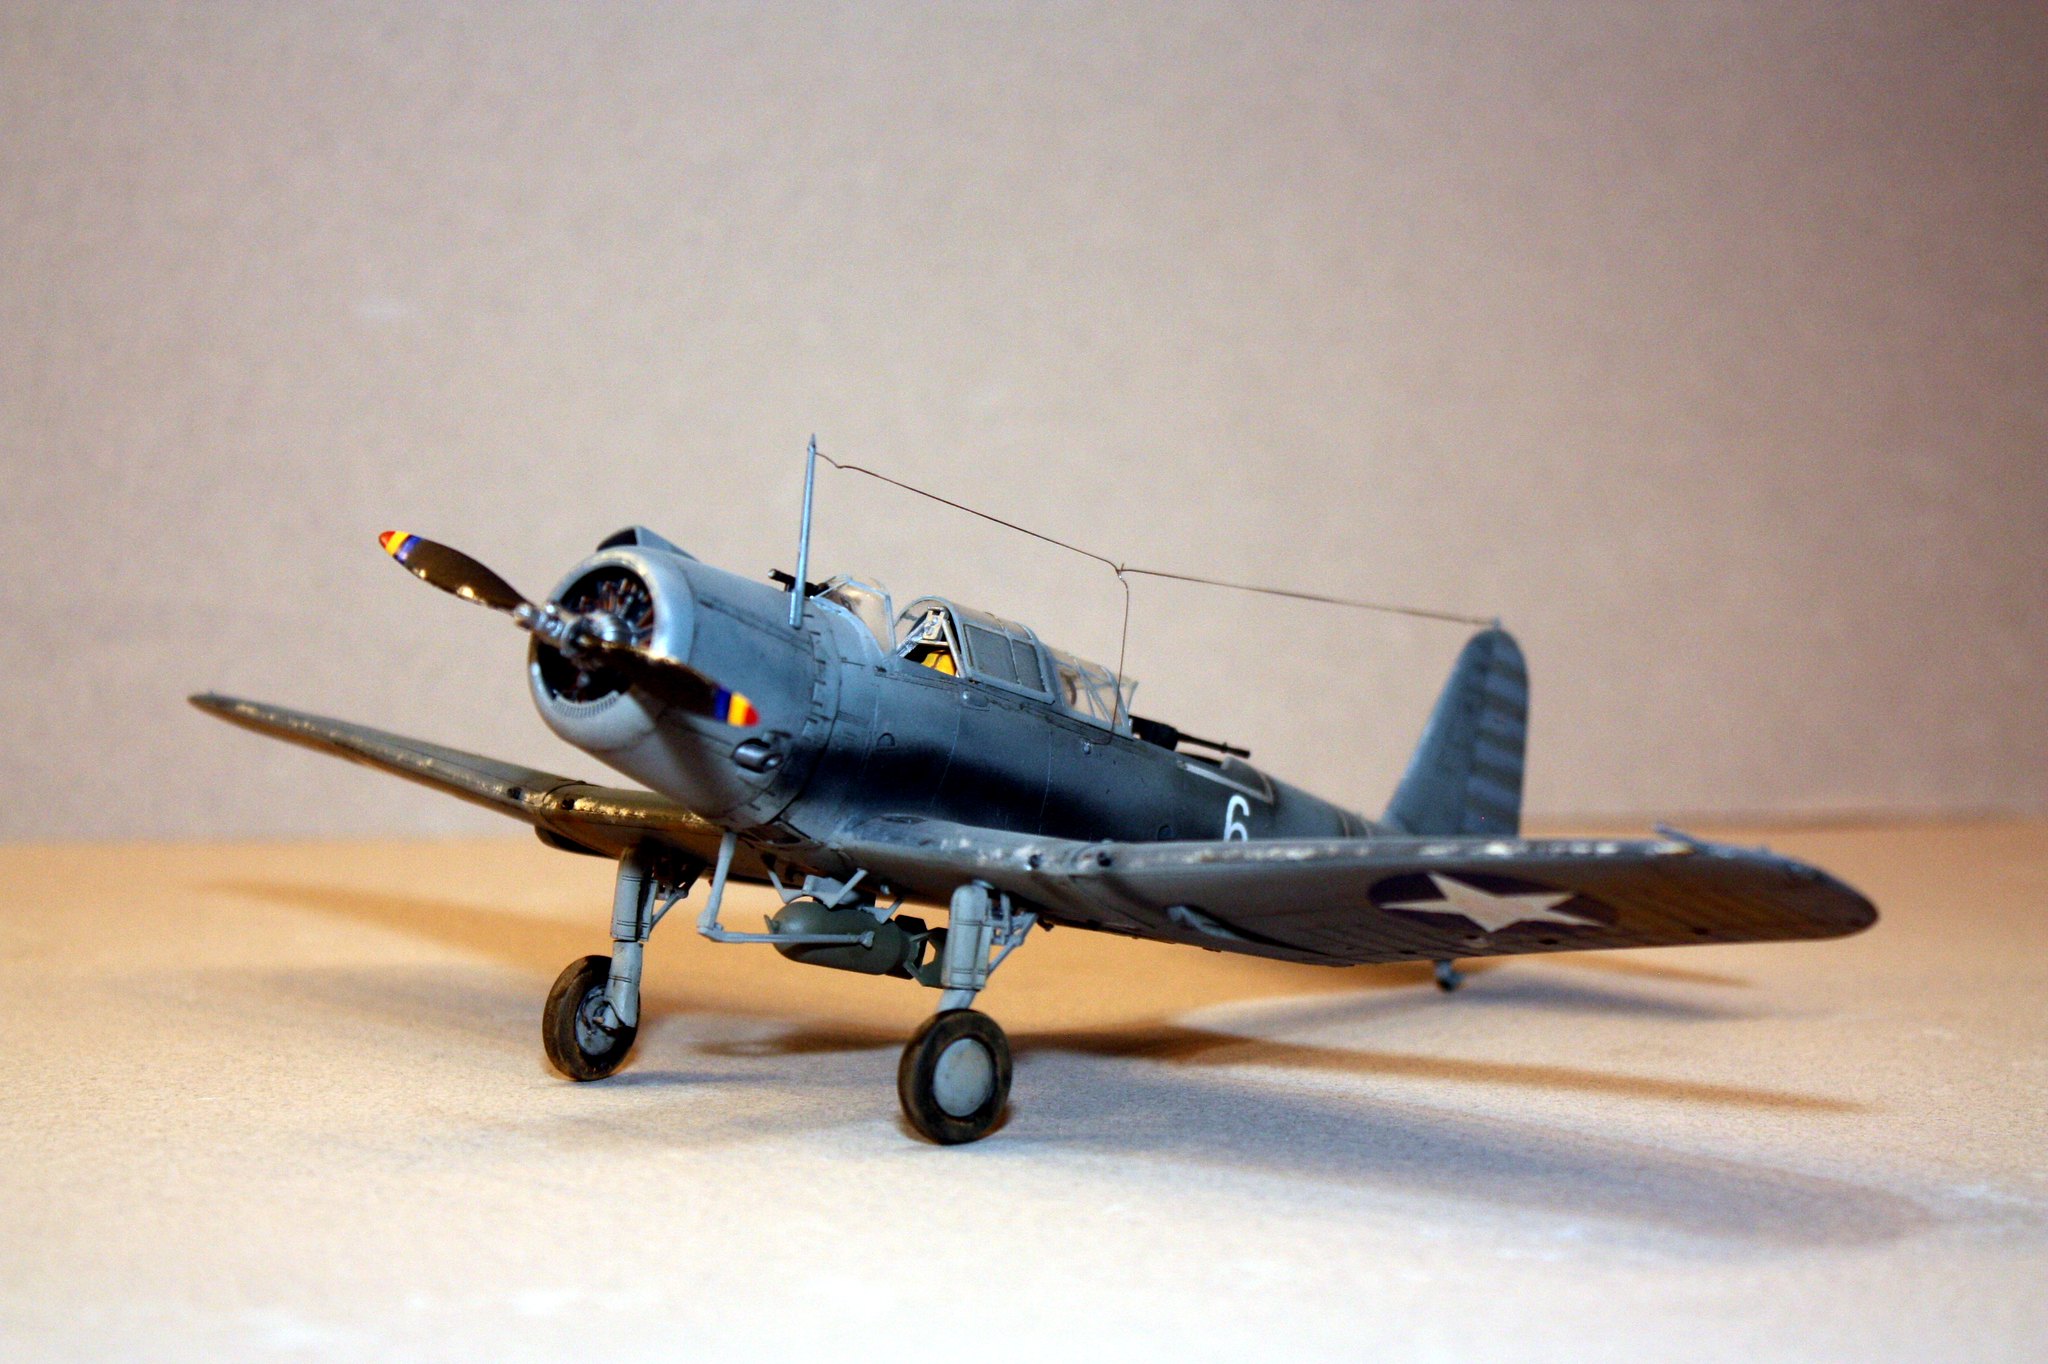
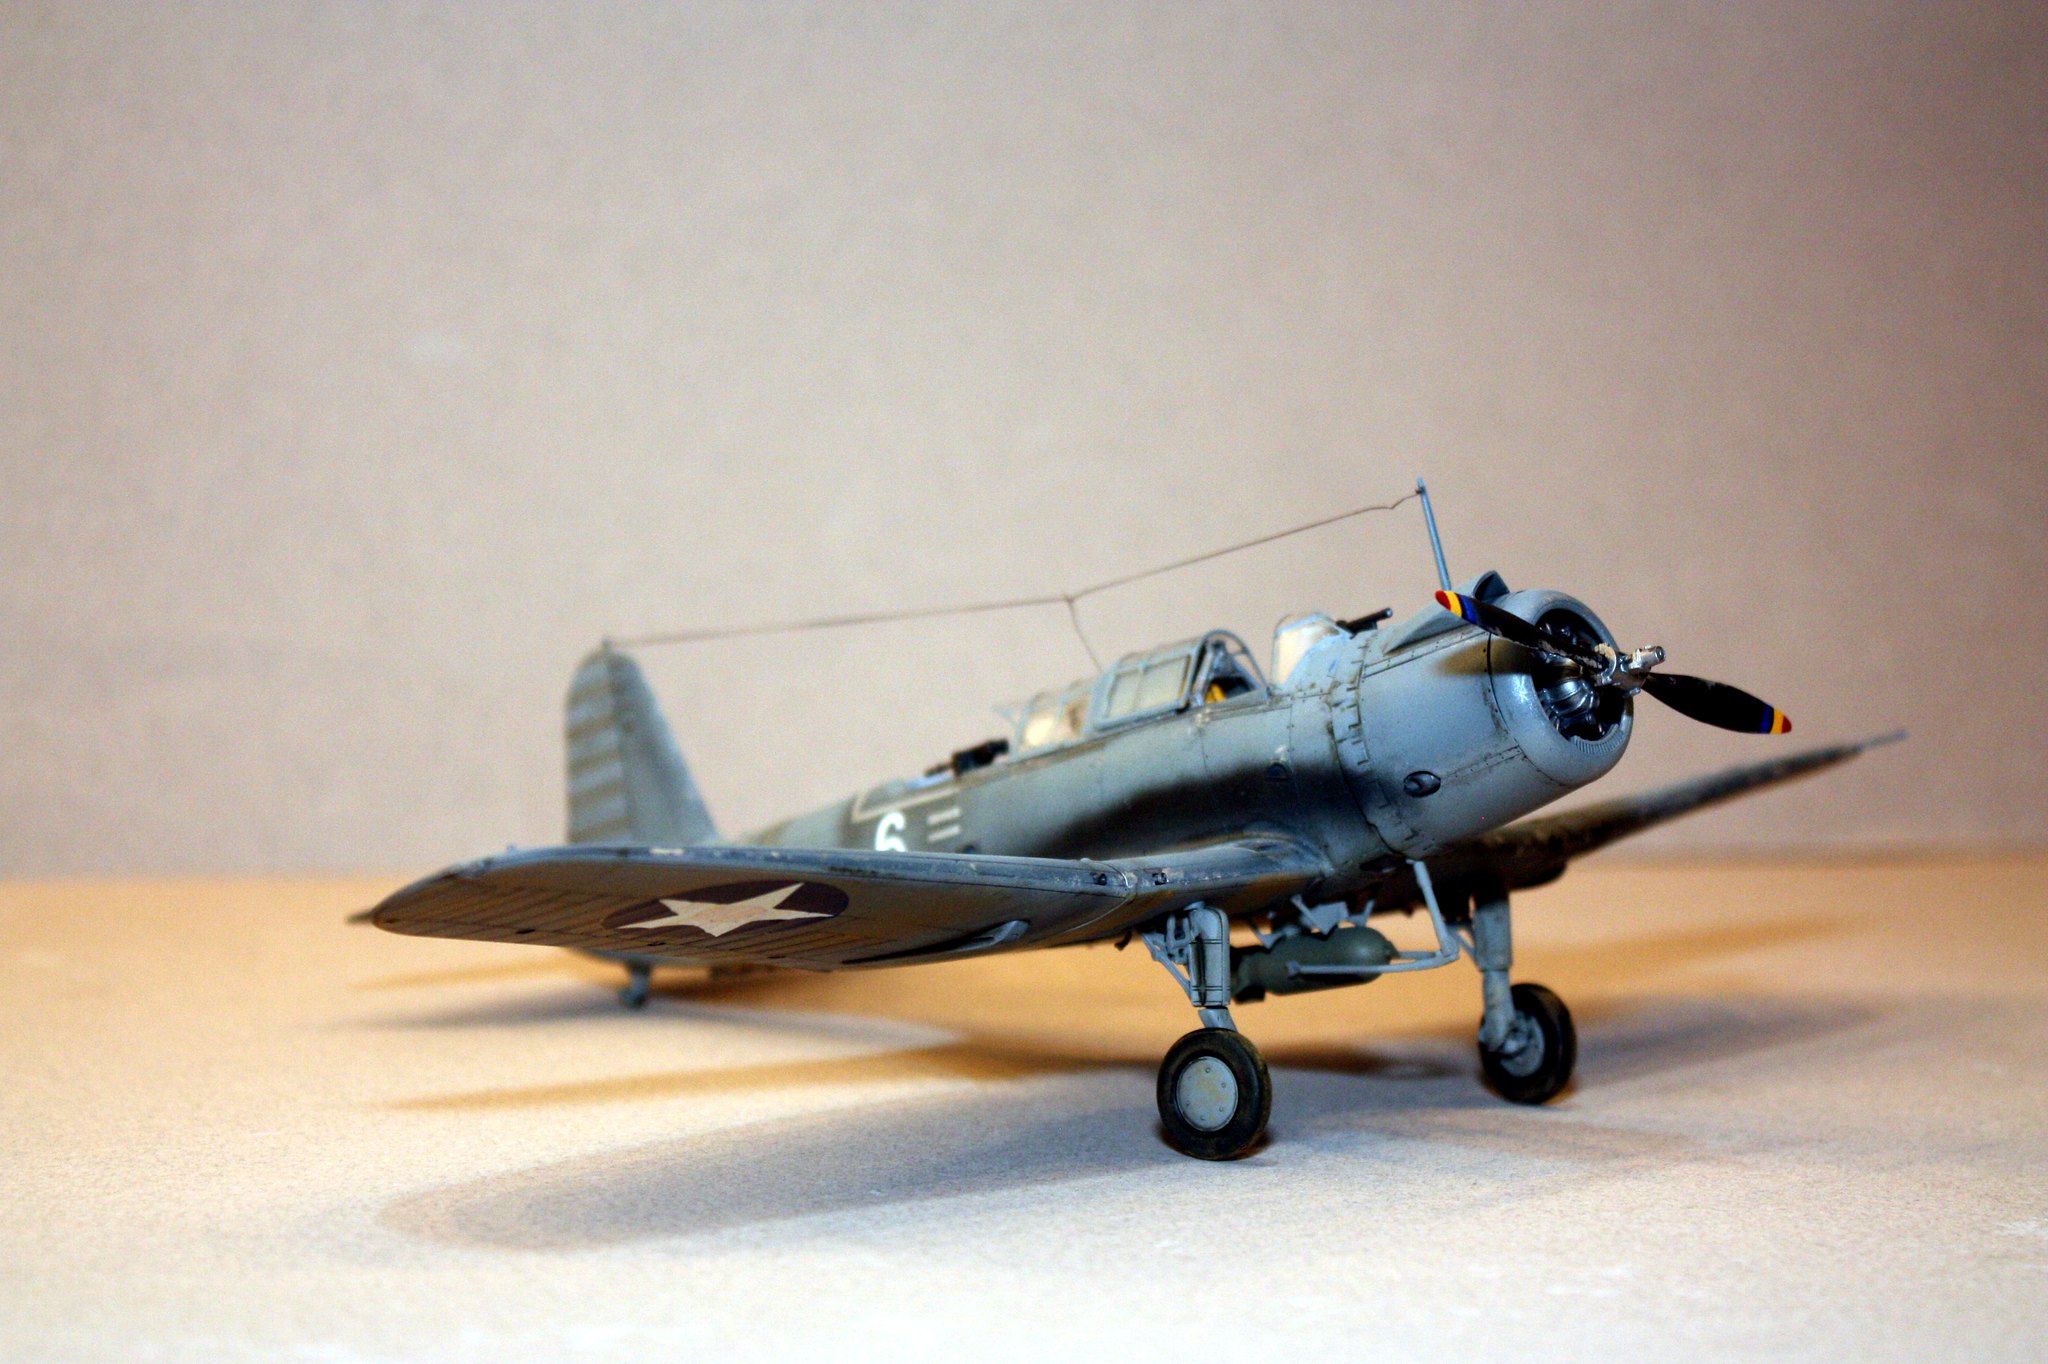
The white bands represent 4" tape that was applied to repair tears in the fabric that covered the rear parts of the fuselage.  They then put a coat of dope over the tape, which I was able to replicate by spraying a light band of Tamiya smoke over the white.  I was pleased with how this effect turned out although I did not do a great job of maintain "eye-ball" scale with the two rearward bands.

The bomb was not the one included with the kit.  The kit provided a 1000 lb bomb, but per research I did, the Marines never loaded anything heavier than a 500 lb bomb on the Vindicators due to the low power of its engine.  I had a left-over 500 lb bomb from one of the P-39s I recently completed.

The kit itself is actually not as good as other Accurate Miniature offerings.  There are sink marks on various parts where some are visible.  When I dry fit everything, I saw only one, one an O2 tank, that might be visible, so I simply ignored them, but they are prevalent. 

Now regarding the canopy.  It is absolute junk. Heck, the kit even includes a mask for all those panes, and after applying 3-4 of them, I noted that none of them fit at all.  I ended up trashing the mask and custom masking the lateral frames followed by the vertical frames.  The kit includes 2 canopies, one fully enclosed and the other in pieces so that it can be displayed open.  I was originally going to go with the fully enclosed version, but dry fitting revealed a horrible mis-match between the rear part of the canopy and the mounting area.  No amount of putty, shims, or half-hearted effort was going to fix this, so I ditched that and went with the open version.  But even that did not fit worth anything. You might note the hood sticking out of the rear-most part of the canopy, right in front of the gunner's station.  There is an entire section of canopy that slid into the adjoining part, and the hood then slid under that one.  The parts were simply too thick to allow for that, so I left the one section off completely.

The only other complaint, minor at that, is the wing insignia.  Per research, these are actually too large for what was on the Vindicators.  I searched through my spares box but could not find any that appeared correct per some of the photos I was able to find.

Aside from that, the Accurate Miniatures Vindicator goes together quite well.  I needed hardly any filler - mostly around the join of the forward wind screen to the fuselage.  The landing gear seems a bit fiddly but I think they are stronger than they look.

In my display case I have a row of Grumman cats, a row of P-40s and P-38s, and now am starting a Battle of Midway row.  Looks like I will actually add to two of those rows when I do my 4 Wildcats, soon.  Add a Devastator and I believe I'll have my Midway USN warbirds done.


  • Member since
    November 2003
  • From: State of Mississippi. State motto: Virtute et armis (By valor and arms)
Posted by mississippivol on Tuesday, June 28, 2016 10:43 PM
Well done!
  • Member since
    July 2004
  • From: Sonora Desert
Posted by stikpusher on Tuesday, June 28, 2016 10:53 PM

YesOverall, very sweet! The topside really looks great. Toast But the underside gray looks a bit dark for the N.S. Light Gray in use at that time. 

I am suprised to read that this kit had so many headaches during the build. I have it in my stash and also have a strong fascination for the Battle of Midway, also inspired by that movie from long ago... Whistling


F is for FIRE, That burns down the whole town!

U is for URANIUM... BOMBS!

N is for NO SURVIVORS...

       - Plankton

LSM


  • Member since
    January 2015
  • From: Katy, TX
Posted by Aggieman on Tuesday, June 28, 2016 11:02 PM

stikpusher

YesOverall, very sweet! The topside really looks great. Toast But the underside gray looks a bit dark for the N.S. Light Gray in use at that time. 

I am suprised to read that this kit had so many headaches during the build. I have it in my stash and also have a strong fascination for the Battle of Midway, also inspired by that movie from long ago... Whistling


You are correct about the gray paint. The only bottle of light gray that I had was no longer any good, so I went with the next option that I had available, Tamiya medium gray.

  • Member since
    July 2004
  • From: Sonora Desert
Posted by stikpusher on Tuesday, June 28, 2016 11:29 PM

Aw man, that's no good.... Black Eye Sorry to hear about that.


F is for FIRE, That burns down the whole town!

U is for URANIUM... BOMBS!

N is for NO SURVIVORS...

       - Plankton

LSM


  • Member since
    March 2012
  • From: Corpus Christi, Tx
Posted by mustang1989 on Wednesday, June 29, 2016 6:18 AM

A truly remarkable build and cool subject as well! I've always had a liking for this aircraft and did NOT know that AM cut out a kit for it. I'll be looking forward to one of these bad boys in the near future. Your use of color & weathering techniques are amazing!!!


 Forum | Modelers Social Club Forum (proboards.com) 

  • Member since
    March 2015
  • From: Streetsboro, Ohio
Posted by Toshi on Wednesday, June 29, 2016 7:04 AM

Like mustang1988 has said, that it is a truly remarkable build.  Excellent details!

Toshi

On The Bench: Revell 1/48 B-25 Mitchell


Married to the most caring, loving, understanding, and beautiful wife in the world.  Mrs. Toshi


  • Member since
    November 2009
  • From: SW Virginia
Posted by Gamera on Wednesday, June 29, 2016 7:58 AM

Despite your issues she turned out great! And thanks for the story behind your interest in her and Captain Fleming. 

"I dream in fire but work in clay." -Arthur Machen


  • Member since
    January 2015
  • From: Katy, TX
Posted by Aggieman on Wednesday, June 29, 2016 8:12 AM

mustang1989

A truly remarkable build and cool subject as well! I've always had a liking for this aircraft and did NOT know that AM cut out a kit for it. I'll be looking forward to one of these bad boys in the near future. Your use of color & weathering techniques are amazing!!!


Thanks Mustang!

AM went out of business a few years ago.  I'm thinking this was their last production run, but I also have an AM Helldiver that I believe is a re-pop of the Monogram Pro-Modeler kit that I got right before a trip to Disney World back in 2011.  You might have to scour eBay for one of these Vindicators.

  • Member since
    January 2015
  • From: Katy, TX
Posted by Aggieman on Wednesday, June 29, 2016 8:14 AM

Toshi

Like mustang1988 has said, that it is a truly remarkable build.  Excellent details!

Toshi


Thanks Toshi!  This one was (mostly) a relaxing build.  The kit is chock full of details and goes together mostly pain-free, but any mistakes are mine alone.

  • Member since
    August 2013
Posted by Jay Jay on Wednesday, June 29, 2016 8:16 AM

Oh Man that's a jaw dropping build, Superb I tell ya !

The weathering and fading of the paint is beyond my capability for sure and I am truly amazed at how you pulled this off. I would certainly score this high in any contest.


 I'm finally retired. Now time I got, money I don't.

  • Member since
    January 2015
  • From: Katy, TX
Posted by Aggieman on Wednesday, June 29, 2016 8:17 AM

Gamera

Despite your issues she turned out great! And thanks for the story behind your interest in her and Captain Fleming. 


Thanks Gamera!

The whole time I was building this, I was thinking about the particular aircraft that I was building that something sounded familiar about it.  I knew there was a story to this aircraft, and that did not hail from the movie Midway.  I only re-learned the story right as I was putting the finishing touches on my build when I got on-line and researched this aircraft.  And I am certain that I had read about it before, probably in one of the books on Midway that I have read.

  • Member since
    November 2009
  • From: Twin Cities of Minnesota
Posted by Don Stauffer on Wednesday, June 29, 2016 8:39 AM

Looks great!

I have that kit in my stash, and hope to get working on it this summer.  Hope it turns out as nice.

Don Stauffer in Minnesota

  • Member since
    March 2012
  • From: Corpus Christi, Tx
Posted by mustang1989 on Wednesday, June 29, 2016 8:44 AM

" You might have to scour eBay for one of these Vindicators."


I figured as much so I've already got one on "Watch" status. Cool


 Forum | Modelers Social Club Forum (proboards.com) 

  • Member since
    January 2015
  • From: Katy, TX
Posted by Aggieman on Wednesday, June 29, 2016 8:51 AM

Jay Jay

Oh Man that's a jaw dropping build, Superb I tell ya !

The weathering and fading of the paint is beyond my capability for sure and I am truly amazed at how you pulled this off. I would certainly score this high in any contest.


Thanks Jay Jay!

The only fading I attempted was through the random placement of blue Tamiya weathering pastel, although I'm not sure that shows up real well in the photos.  But I do believe in weathering these pretty heavily, perhaps too heavily at times, though when you consider the conditions WWII aircraft often operated out of, it would be a wonder that there would ever be even a part of the aircraft that did not have some dirt on it.

  • Member since
    January 2015
  • From: Katy, TX
Posted by Aggieman on Wednesday, June 29, 2016 8:53 AM

Don Stauffer

Looks great!

I have that kit in my stash, and hope to get working on it this summer.  Hope it turns out as nice.


You will do great work on it given other work I have seen from you.  Just watch out for the problem areas with the canopy.

  • Member since
    June 2014
Posted by BrandonK on Thursday, June 30, 2016 9:05 AM

Great work on a personal fave from the early war. Super good looking build.

BK

On the bench:

A lot !! And I mean A LOT!!

2024 Kits on deck / in process / completed   

                         14 / 5 / 2  

                              Tongue Tied

  • Member since
    May 2013
  • From: Indiana, USA
Posted by Greg on Thursday, June 30, 2016 10:16 AM

Real nice work. And you intoduction is interesting too.

AM is great, you are lucky to have  a couple in your stash. I am lucky to have one (not a Vindicator), a gift from a friend.

  • Member since
    June 2013
Posted by bvallot on Thursday, June 30, 2016 12:46 PM

Way to fight through it. =] Great subject, great plane, and great job! Stik's right, you're grey is a bit too dark, but you did do an excellent job on the taping around the fuselage. I'll keep that Smoke trick in mind. It seems to have work nicely. This is one of the first planes I built when I first started modeling. I used actual athletic tape torn into strips to simulate this. LOL. It wasn't too bad actually, but I've been itching to do another one and paint it with something other than a brush. =]

Again, nice job Aggieman. Way to pick up the little guy with this one.

On the bench:  

Tamiya F4U-1  Kenneth Walsh


  • Member since
    January 2015
  • From: Katy, TX
Posted by Aggieman on Thursday, June 30, 2016 9:50 PM

BrandonK

Great work on a personal fave from the early war. Super good looking build.

BK


Thank you for your kind words, Brandon.

  • Member since
    January 2015
  • From: Katy, TX
Posted by Aggieman on Thursday, June 30, 2016 9:55 PM

Greg

Real nice work. And you intoduction is interesting too.

AM is great, you are lucky to have  a couple in your stash. I am lucky to have one (not a Vindicator), a gift from a friend.


Yes, they are really good kits. I have previously built their Avenger, Sturmovik and Mitchell kits, but a couple of those suffered a crushing fate - the Sturmovik succumbed to a shelving collapse back in 2006, and the Mitchell did not survive my wife and a flung file folder a couple years later. I have since acquired new copies of those, added another Avenger, a Dauntless, a Helldiver, and a MiG (or is it a Yak).

  • Member since
    January 2015
  • From: Katy, TX
Posted by Aggieman on Thursday, June 30, 2016 9:59 PM

bvallot

Way to fight through it. =] Great subject, great plane, and great job! Stik's right, you're grey is a bit too dark, but you did do an excellent job on the taping around the fuselage. I'll keep that Smoke trick in mind. It seems to have work nicely. This is one of the first planes I built when I first started modeling. I used actual athletic tape torn into strips to simulate this. LOL. It wasn't too bad actually, but I've been itching to do another one and paint it with something other than a brush. =]

Again, nice job Aggieman. Way to pick up the little guy with this one.


I can't claim credit for the smoke trick; I found that on another site as a solution another builder employed to achieve that effect. Well, the gray is the biggest issue with my build, but being out of work means I have to use what I have on hand. This lack of a job thing is a double edged sword - I have been more productive at my bench than I have been in many years, but the $$$$$ issue constrains me.

  • Member since
    February 2012
  • From: Olmsted Township, Ohio
Posted by lawdog114 on Friday, July 1, 2016 6:31 PM
Outstanding work and tribute to those brave men. Reference the underside, its looks fine to me, but Im no expert. In the future try lightening the Tamiya grey base coat with XF-2 flat white. I do it all the time. This will help you achieve the color your looking for. Again, thanks for sharing...

 "Can you fly this plane and land it?...Surely you can't be serious....I am serious, and don't call me Shirley"


  • Member since
    January 2015
  • From: Katy, TX
Posted by Aggieman on Friday, July 1, 2016 10:07 PM

lawdog114
Outstanding work and tribute to those brave men. Reference the underside, its looks fine to me, but Im no expert. In the future try lightening the Tamiya grey base coat with XF-2 flat white. I do it all the time. This will help you achieve the color your looking for. Again, thanks for sharing...
 

Thanks Lawdog. Honestly I never considered the option to lighten the gray with white. I do think it looks good even though I knew the gray was too dark.

  • Member since
    December 2010
  • From: Salem, Oregon
Posted by 1943Mike on Friday, July 1, 2016 10:22 PM

I think you did a really fine job with this kit. I'm not knowledgeable enough about aircraft in general to comment on how you overcame the various deficiencies of the AM kit but, your end result is very nice indeed.

After I build one jet (for a friend - I'm concentrating on prop aircraft for my own pleasure) I may - finally - get to one of my 1/48 AM kits. Either the TBM-3 or SBD-5.


Mike

"Le temps est un grand maître, mais malheureusement, il tue tous ses élèves."

Hector Berlioz

  • Member since
    January 2015
  • From: Katy, TX
Posted by Aggieman on Saturday, July 2, 2016 9:55 AM

1943Mike

I think you did a really fine job with this kit. I'm not knowledgeable enough about aircraft in general to comment on how you overcame the various deficiencies of the AM kit but, your end result is very nice indeed.

After I build one jet (for a friend - I'm concentrating on prop aircraft for my own pleasure) I may - finally - get to one of my 1/48 AM kits. Either the TBM-3 or SBD-5.


Thank you for the kind comments Mike. I have not yet built the AM Dauntless but I have built their Avenger. It is one of the best kits that money can buy. Enjoy!

  • Member since
    November 2003
  • From: Naples, FL
Posted by tempestjohnny on Saturday, July 2, 2016 10:52 AM

Very nicely done. I'm building the -2 right now. Definitely not one of their best. Very fiddly build. But will look good when done.  Also a lot of errors in the instructions.   John


  • Member since
    January 2015
  • From: Katy, TX
Posted by Aggieman on Saturday, July 2, 2016 1:00 PM

tempestjohnny

Very nicely done. I'm building the -2 right now. Definitely not one of their best. Very fiddly build. But will look good when done.  Also a lot of errors in the instructions.   John


John, you are absolutely correct. There are lots of problems in the instructions, parts mis-numbered, etc. But there are no issues that relegate this kit to unbuildable status. I am looking forward to seeing your -2.

  • Member since
    January 2015
Posted by BrandonD on Sunday, July 3, 2016 1:45 AM

Nice job. You did it proud. Sad to hear about the masks for the canopy, but I ran into the same with my AM B-25B masks. They were too big. Or too small, depending on the window.

-BD-

  • Member since
    January 2015
  • From: Katy, TX
Posted by Aggieman on Sunday, July 3, 2016 8:56 AM

BrandonD

Nice job. You did it proud. Sad to hear about the masks for the canopy, but I ran into the same with my AM B-25B masks. They were too big. Or too small, depending on the window.

-BD-


Thanks Brandon. I believe the Dauntless kit includes a similar mask, so I wonder if that one is going to present the same problem. In any event, this one was actually pretty simple to mask. I did all of the horizontals exclusively, then after that dried well, I came back and masked for the verticals.

JOIN OUR COMMUNITY!

Our community is FREE to join. To participate you must either login or register for an account.

SEARCH FORUMS
FREE NEWSLETTER
By signing up you may also receive reader surveys and occasional special offers. We do not sell, rent or trade our email lists. View our Privacy Policy.