Well here it is, my final Wildcat. This is the original Revell release of the famed US Navy fighter, dating to 1969. I got the kit via eBay. When it came to me it still contained all the original inserts, including an offer to buy a record (45rpm) of a Wildcat engine recording. I believe that's what it was; I wondered for a moment if that offer was still good. 
The box and its contents.


I always loved the box art on these Revell 1/32 kits released in the late 1960s. I think these remain among the best ever produced.
Interior work.
This kit is pretty detailed right out of the box for its era, but it leaves some room for improvements. The wheel well is light on detail. I scrounged through the spares box for some parts that could fit the bill, and found pieces to play the role of the fuel or oil tank that takes up the space at the top of the well, and the rear side of the engine. The pieces I put in don't really look right for the parts they represent but on the other hand, they are not real visible either.


I added the belts.


The landing gear mechanism is not quite as flimsy in this scale as it is in 48 scale but it was still a point of concern during construction. Unlike the other kits I finished recently, this Revell kit requires the gear to be installed prior to buttoning up the fuselage.

The engine looks decent out of the box. The kit even includes cowling panels that can be left off to give a different view of the engine. I opted to glue those panels in place since I would likely lose them otherwise - now if this had been a Tamiya 32nd scale kit, there undoubtedly would have been magnets included to allow for either posing option.


Here is everything installed into the fuselage. You can see the part I used for the fuel/oil tank. Looks like a canopy from a Devastator perhaps. I added the rods as well. Those are not accurate in terms of position and the number of rods as well, but I worried about having sufficient room for everything else that needed to go in there.


All buttoned up. You only get a sense of something being in there, even with a light shining on that area.


The wings.
Like the Monogram, this kit also includes a folding wing option. Unlike the Monogram, this kit includes decent detail of the wing fold area. I test fitted everything and did not like the appearance of the wings fully extended. There was not a flush fit between the inner and outer panels. I opted to build this with the wings in the folded position, which also saves some display space.


Here it is folded in a test fit shot. I have not yet installed the lower wing panels.

I drilled out lightning holes to match reference photos.


I added metal tubing for the machine guns. The kit does not include anything replicating this, only 3 big holes. I saw photos depicting such an approach, but I believe those were later FM-1's and FM-2's. Thach's Wildcat was an earlier model that according to photos that I found featured blast tubes that were visible just beyond the wing's leading edge.

Note in this photo how the outer wing does not properly align with the inner wing (even though the wing is "locked" in place.

The rudder.
Ok, this kit is old. The decals included provided only one option - John Thach's US Navy Wildcat with the red-and-white striped rudder. The decals appeared to be a real good shape considering their age - no yellowing or curling. But even had this kit been brand new, there is not a chance I would have used the included decals for the rudder. Those never go on just right. I opted for paint. I used my caliper to determine how wide each stripe would be based on the kit decals then taped accordingly, with an initial coat of white, followed by a generous coat of Future to help prevent paint lifting, then the red.


The reveal.


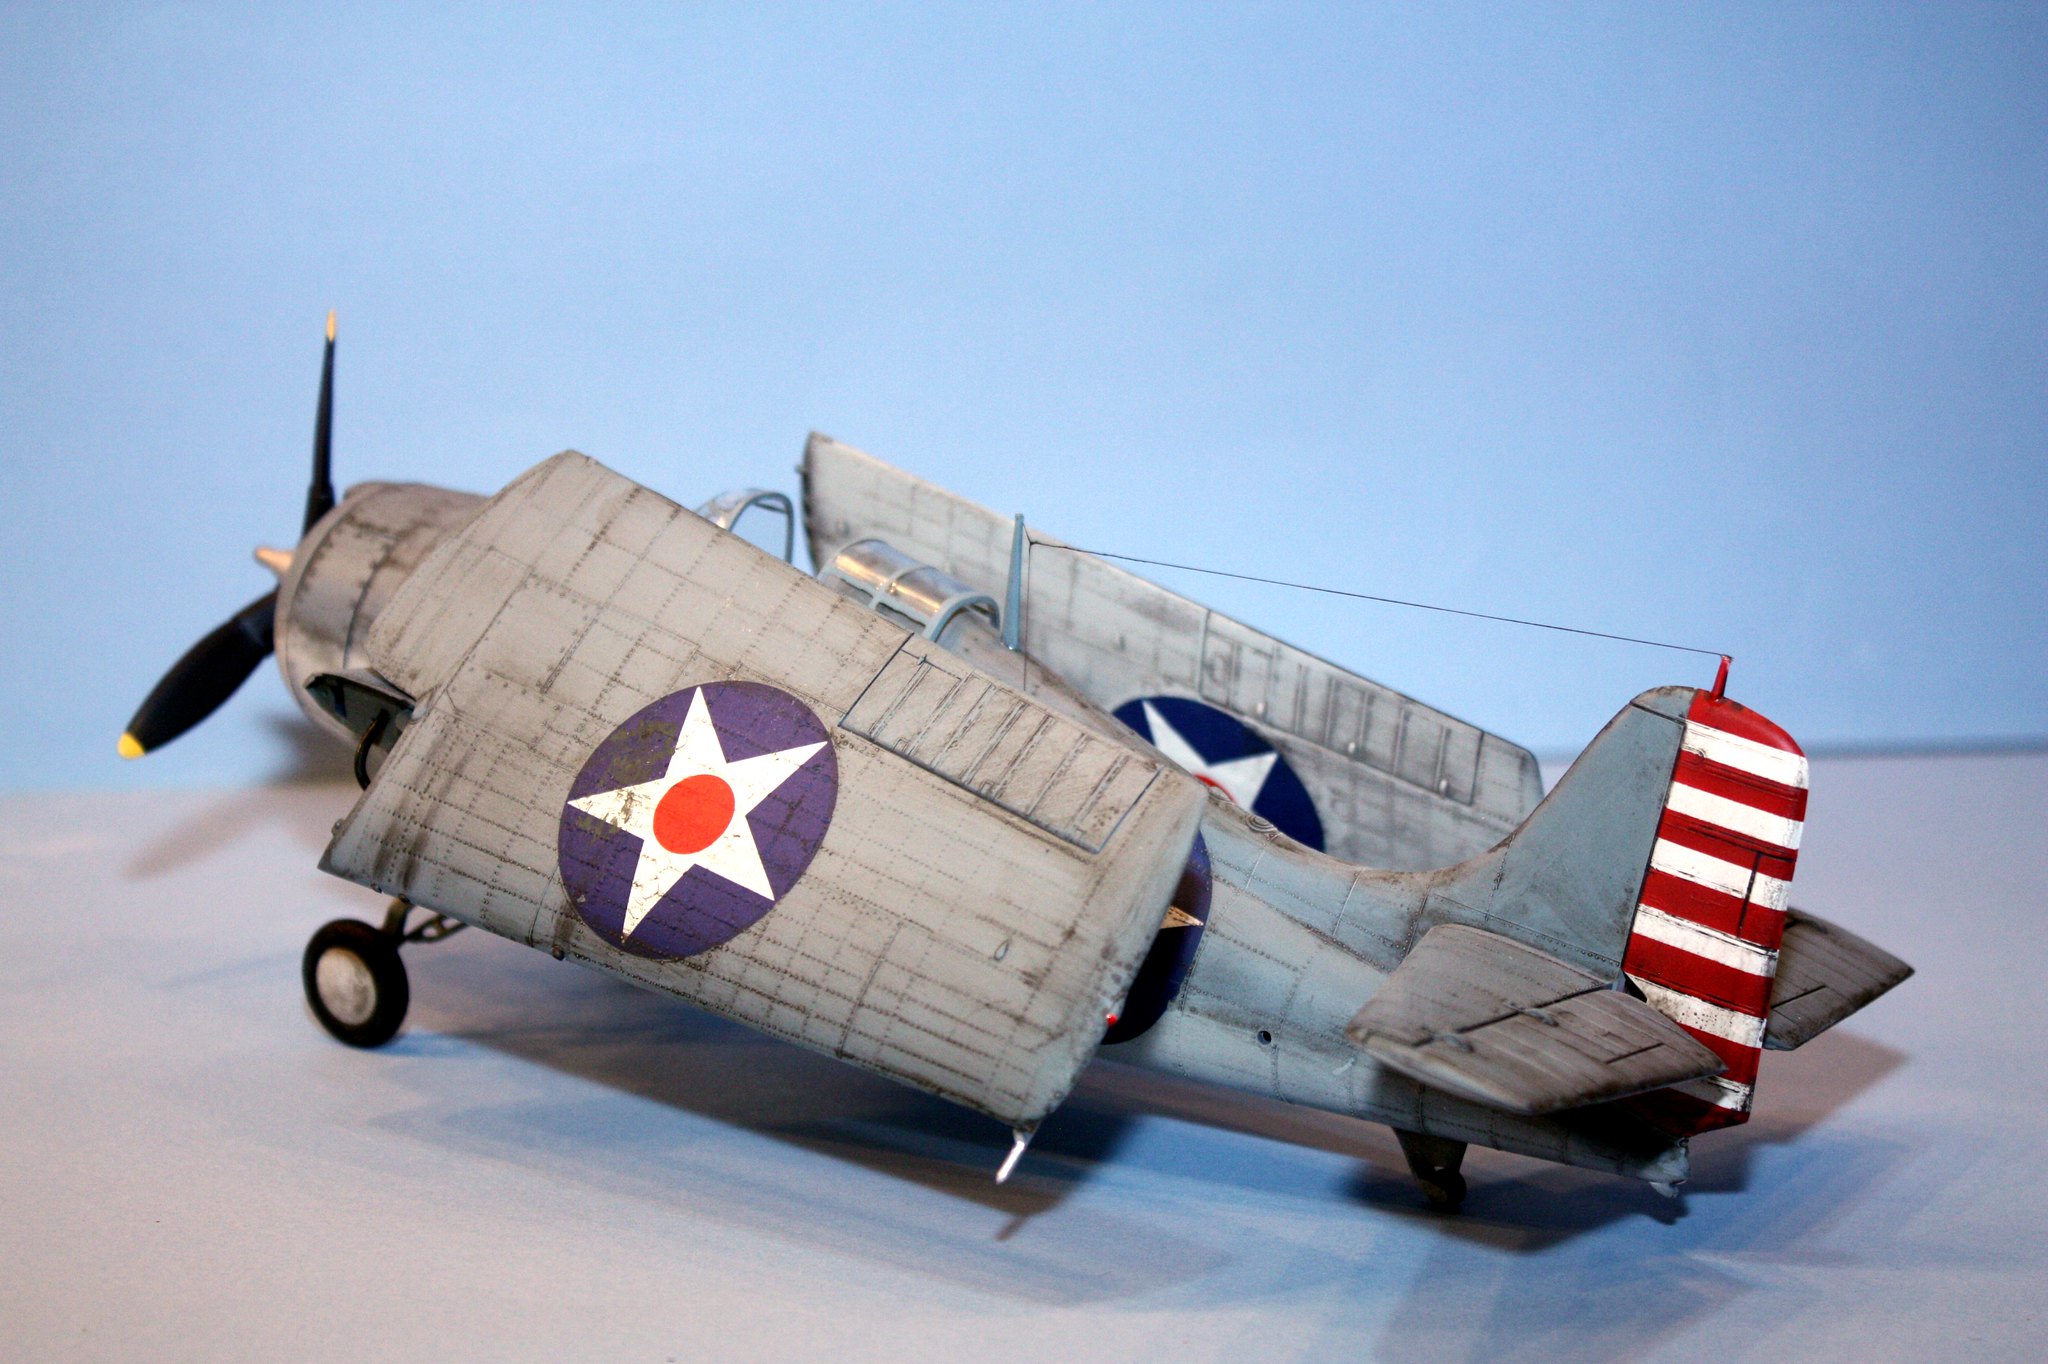
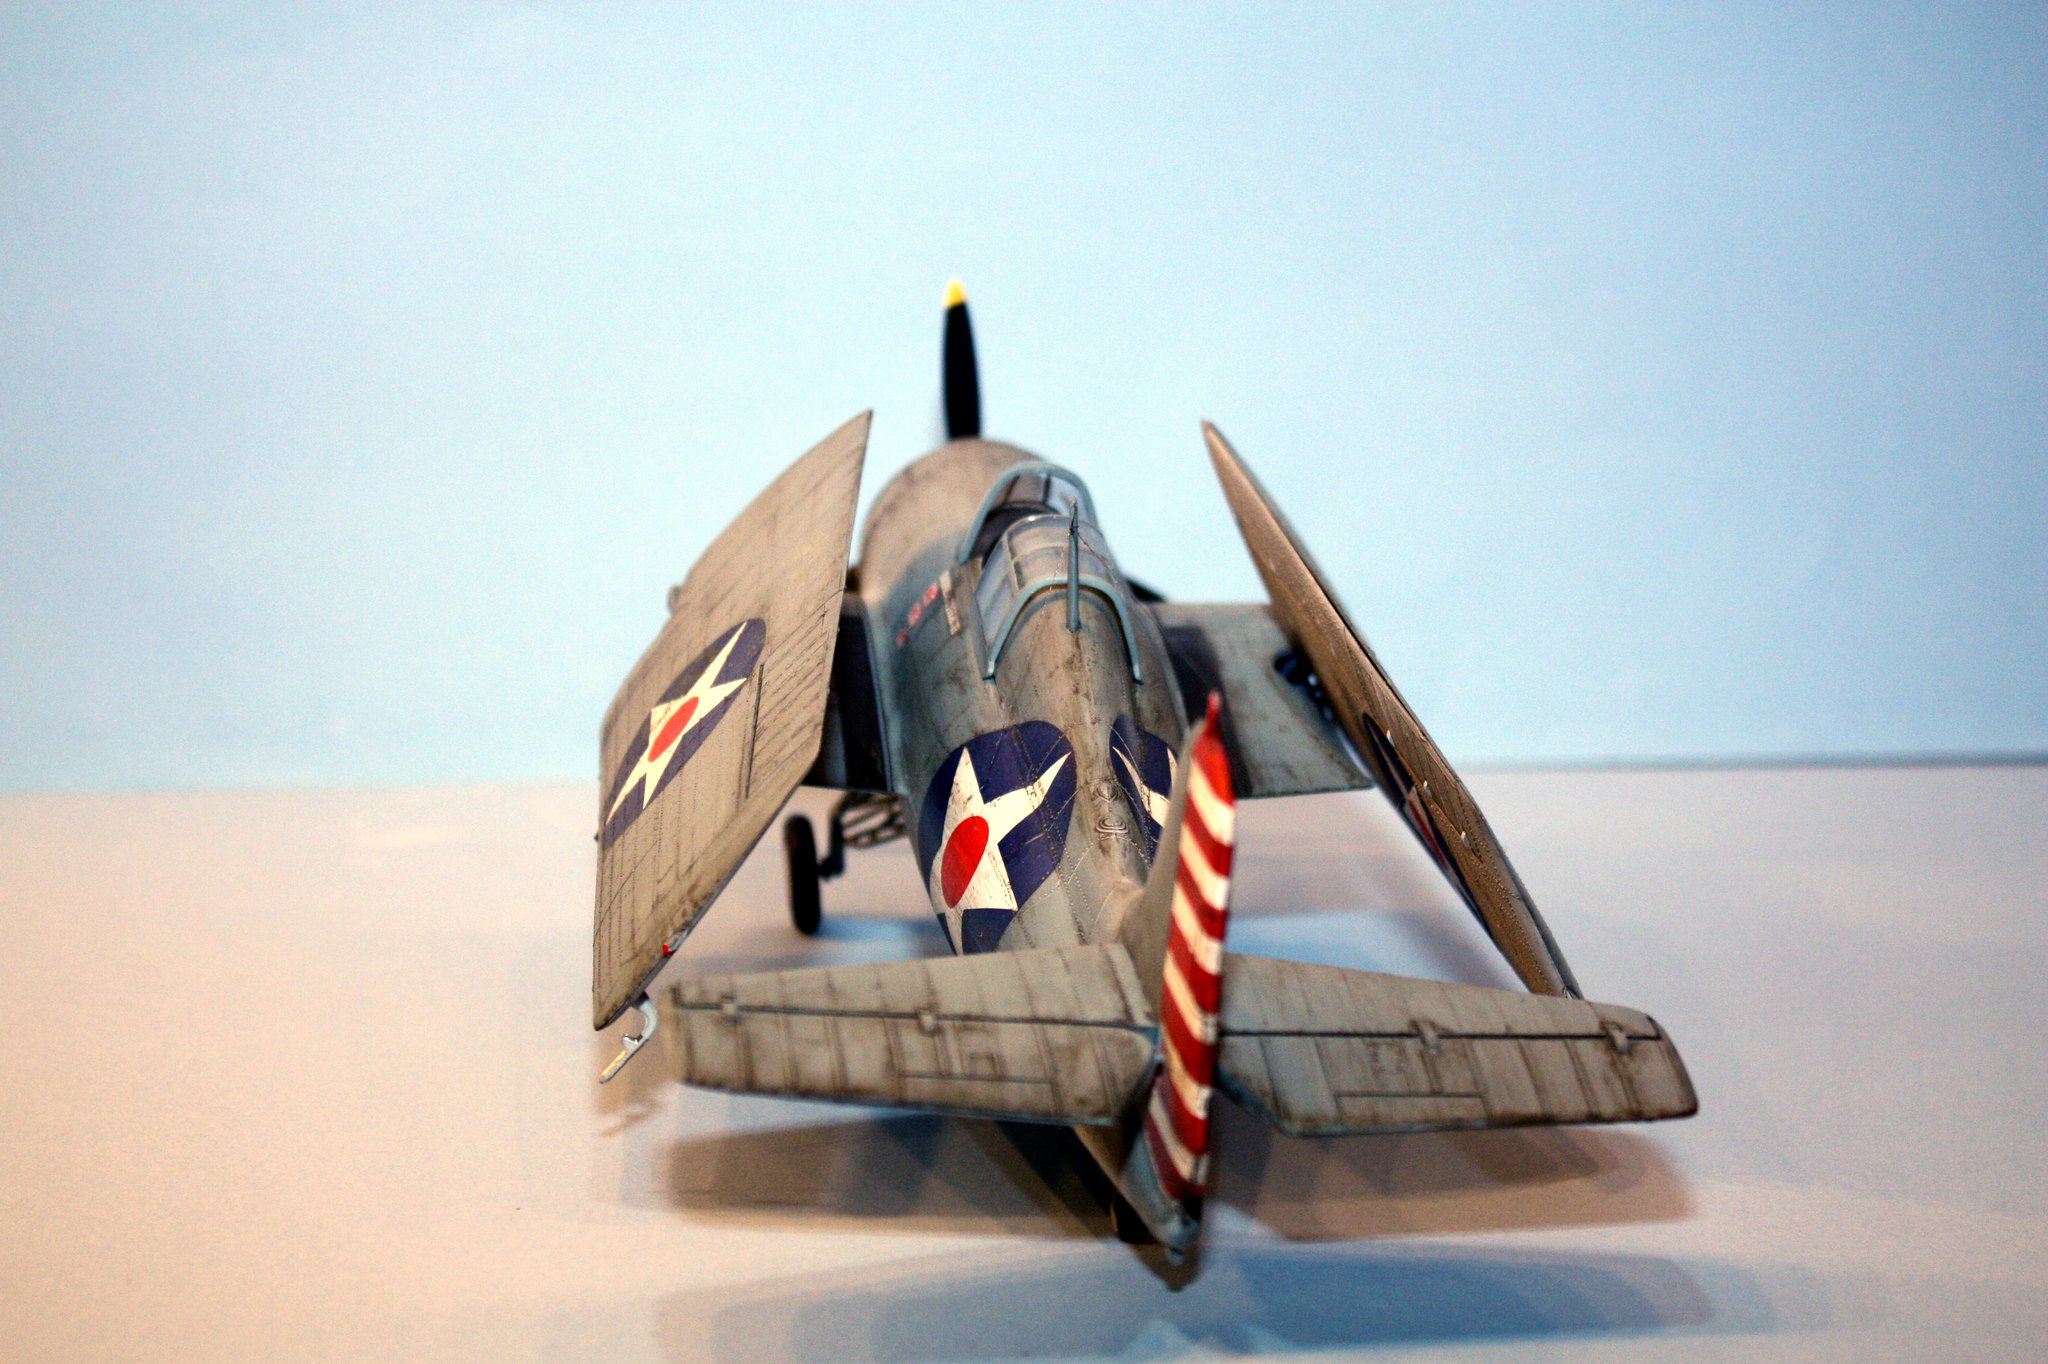


Paint was Vallejo Blue Gray with Model Master Acryl light gray. Heavy use of Flory dark dirt wash (maybe to the point of overdone). The kit features raised details as was customary for the time, but I don't think that was overdone. This one goes together pretty well with the only challenges being the wing folds and the landing gear struts.