SEARCH FINESCALE.COM

Enter keywords or a search phrase below:

1/32 Trumpy AV-8B WIP(finished)

3915 views
49 replies
1 rating 2 rating 3 rating 4 rating 5 rating
  • Member since
    January 2009
  • From: hamburg michigan
Posted by fermis on Tuesday, November 8, 2016 9:59 PM

Here's something stupid...


Not only does the part between the pods not fit...it cockeyed as all get out...and wrong.


I'm no Harrier expert, but this didn't make sense to me.

Another goof...they have you put guns in both pods. I know the gun is on port and the other pod is for ammo...I just filled and sanded the hole on the ammo pod. Did a little diggin and found that that part is supposed to represent the "chute"(?) for the ammo to get to the gun. I scratched up a more accurate part with some sheet.


  • Member since
    May 2016
Posted by Revenant on Tuesday, November 8, 2016 8:15 AM

Stick out tongueInteresting...

  • Member since
    January 2009
  • From: hamburg michigan
Posted by fermis on Monday, November 7, 2016 2:28 PM

Thanks dudes!Toast


Back at this one for a bit!


Some intake work.

The intake "trunk" has a fat, flat front to it, as does the fuselage part, that goes around the intake trunk. The two combined leaves a blunt 3/16th inch flat spot. Not a problem, if the little vent doors are to be closed. I've seen plenty of pics with them closed, plenty open, and a couple few that have the top 4 open, while the bottom 3 are closed. I'm going for the later.


 You can see, in this pic, what I'm talking about, with the flat spot.


The trunk piece barely makes contact with the fuselage piece...I did some grinding and filling and sanding and filling and sanding.....

I only did the area were the vents will be open...


Also went ahead and painted the inside of the intakes, as it would be a major PITA to get the angle to paint em after being installed.


In that condition, I can just stuff a wad of whatever in there to plug it up.

  • Member since
    February 2007
  • From: Brunswick, Ohio
Posted by Buckeye on Wednesday, October 26, 2016 11:29 AM

That looks amazing!  I really like that marbling technique and will have to give it a try.

Mike

  • Member since
    August 2013
Posted by Jay Jay on Wednesday, October 26, 2016 7:34 AM

Ty so much for sharing this amazing transformation from the bare plastic kit parts to an incredably realistic looking pit. Your skills are outta this world.


 I'm finally retired. Now time I got, money I don't.

  • Member since
    March 2012
  • From: Corpus Christi, Tx
Posted by mustang1989 on Tuesday, October 25, 2016 3:34 PM

fermis

Thanks dudes!Toast

Been a long while since I've done much in 1/32...been down in the 72nd world for a long time now! I can't say that I'm a big fan of Trumpeter, something very toy-like, kinda clunky with the details. Challenge will be to make it look like a real model...(Propellerreal model...genuine immitation!!!)...and make the toyishness of it go away!

 
Nathan T

 Why the cross country trip? Comission work?


Yup
 

I was gonna say, "What tha hell's the matter with you???? ". This'll be fun watching you build something outside of the 72nd scale realm and you're already tearin' it up with the details I see. They are alot easier in the larger scales aint they? Good show Fermis.Yes


 Forum | Modelers Social Club Forum (proboards.com) 

  • Member since
    December 2006
  • From: N. Georgia
Posted by Jester75 on Tuesday, October 25, 2016 10:41 AM

Would have to agree with Rev, super amount of detailing you've added there. 

Eric


  • Member since
    May 2016
Posted by Revenant on Tuesday, October 25, 2016 6:21 AM

ConfusedPIT looks great!

  • Member since
    January 2009
  • From: hamburg michigan
Posted by fermis on Monday, October 24, 2016 10:03 PM

Details all painted up!


That was fun!!!

  • Member since
    January 2009
  • From: hamburg michigan
Posted by fermis on Monday, October 24, 2016 9:58 PM

Painting the pit!


Started with my pre-shade...very dark grey...over all.


Then, "marble" on some white...


Then some highly thinned color...probably 50-60% thinner. Built up slowly.

Kinda hard to see the subtlety in pic.


Back to the bench for detail painting!

  • Member since
    January 2009
  • From: hamburg michigan
Posted by fermis on Monday, October 24, 2016 9:51 AM

SaltydogII

what size wire is that, like lamp extension cord? what did you use for the seat belt buckles? I would really like to learn some of this scratch building in the cockpit areas. You have made chicken salad out of chicken *&^%$ there fermis! Great job.


I have a few sizes of copper wire, from various sources...most of it came from some of the old runway/taxiway lighting wires from the airport I "part time" at. Any cordage wiring works just the same. The buckles are bits and pieces of plastic and aluminum (6 individual pieces each). I also use aluminum tubing (Albion, from Sprue bros), sized .04-.06-.08., for some of the plumbing.

  • Member since
    September 2016
  • From: L.A. (Lower Alabama)
Posted by SaltydogII on Monday, October 24, 2016 9:25 AM

what size wire is that, like lamp extension cord? what did you use for the seat belt buckles? I would really like to learn some of this scratch building in the cockpit areas. You have made chicken salad out of chicken *&^%$ there fermis! Great job.

Chris

  • Member since
    January 2009
  • From: hamburg michigan
Posted by fermis on Monday, October 24, 2016 8:32 AM

roony

great start. The landing geat do not look very toyish.  Can you tell us which squadron?


Kit markings for VMA-223 "Bulldogs".


Have moved on to the cockpit!

The seat is pretty basic, for 1/32...


The real thing...


I added some texture to the seat cushions, Tamiya tape for the harness and various do-dads elsewhere...


Added some plumbing/wiring to the rear bulkhead. The canopy frames detail is pretty sucky...I cut all of it off.


After removing the molded detail, I made it more better-er!


That took a LOT more time than it looks like it should...at least 10-12 hours. 

The side walls won't need much, if even anything other than paint!

  • Member since
    July 2010
Posted by roony on Saturday, October 22, 2016 12:27 PM

great start. The landing geat do not look very toyish.  Can you tell us which squadron?

  • Member since
    January 2009
  • From: hamburg michigan
Posted by fermis on Saturday, October 22, 2016 10:48 AM

Thanks dudes!Toast

Been a long while since I've done much in 1/32...been down in the 72nd world for a long time now! I can't say that I'm a big fan of Trumpeter, something very toy-like, kinda clunky with the details. Challenge will be to make it look like a real model...(Propellerreal model...genuine immitation!!!)...and make the toyishness of it go away!

Nathan T

 Why the cross country trip? Comission work?


Yup

  • Member since
    April 2016
  • From: Parsons Kansas
Posted by Hodakamax on Saturday, October 22, 2016 9:01 AM

What fun, it looks to be a cool project. Your usual good work on the gear, looking forward to the cockpit. A good scale for extreme detail work as a Harrier has lots of and shows better on the final product at the bigger size. This should be a good one! Carry on! Smile

Max

  • Member since
    May 2016
Posted by Revenant on Saturday, October 22, 2016 8:42 AM

Stick out tongueOutstanding!  Wow, that light technique makes the part look just like glass!!!

  • Member since
    March 2015
  • From: Streetsboro, Ohio
Posted by Toshi on Saturday, October 22, 2016 4:10 AM

Another fantastic start to another great build!

Toshi

On The Bench: Revell 1/48 B-25 Mitchell


Married to the most caring, loving, understanding, and beautiful wife in the world.  Mrs. Toshi


  • Member since
    February 2012
  • From: Olmsted Township, Ohio
Posted by lawdog114 on Friday, October 21, 2016 11:17 PM
Looks great. Love the landing light idea.

 "Can you fly this plane and land it?...Surely you can't be serious....I am serious, and don't call me Shirley"


  • Member since
    March 2010
  • From: MN
Posted by Nathan T on Friday, October 21, 2016 11:00 PM

Holy smokes sweet start! Nice work on the pylons and rails. They really add the extra realism to a build. Why the cross country trip? Comission work?


  • Member since
    January 2009
  • From: hamburg michigan
1/32 Trumpy AV-8B WIP(finished)
Posted by fermis on Friday, October 21, 2016 9:52 PM

Started this a little bit ago...just cementing some parts together at the coffee table...small sub assemblies, ordnance, anything that didn't require paint or modification.


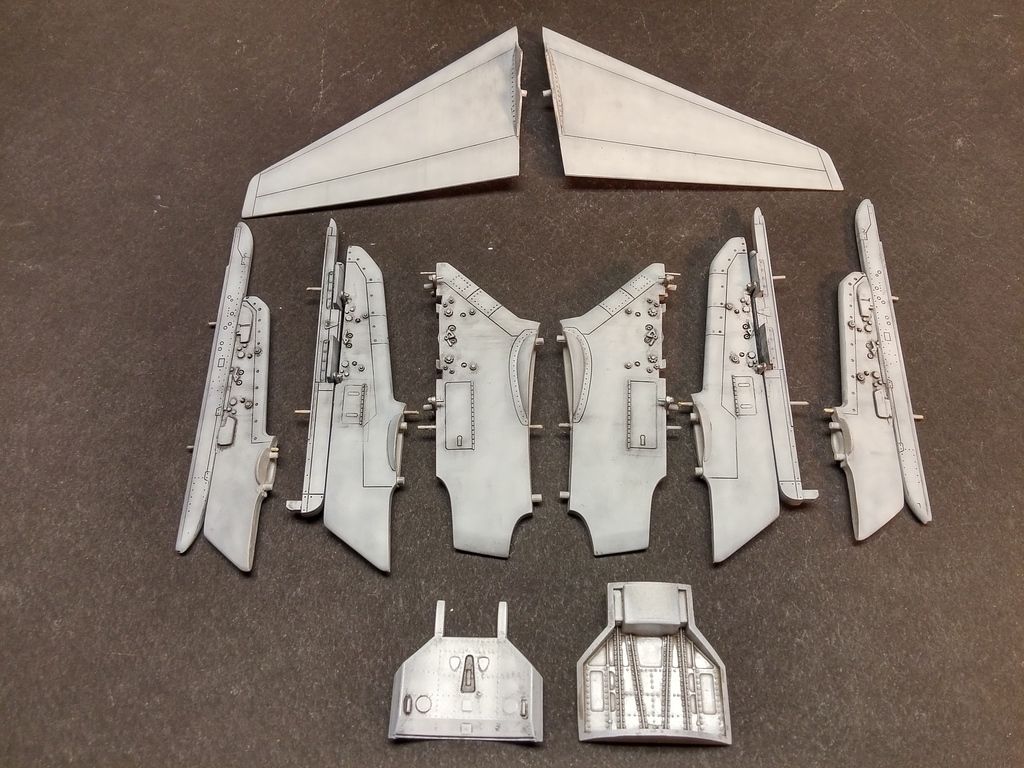
First bit of real work was with the pylons. Trumpeter, in all their greatness included Mavericks and Sidewinder missiles, but did NOT include the rails that those missiles require. I nabbed some extras from Academy's F-18 kit. (The Sidewinder rails are actually Sparrow rails, a bit modified...better than nothin!). Being that this build will be traveling across the country via the US Postal Service, extra measures are required. Brass pins were used to pin the rails to the pylons as well as the ordnance(coming later), there's also a pin the runs all the way through, from ordnance, through the rail, through the pylon and into the wing.
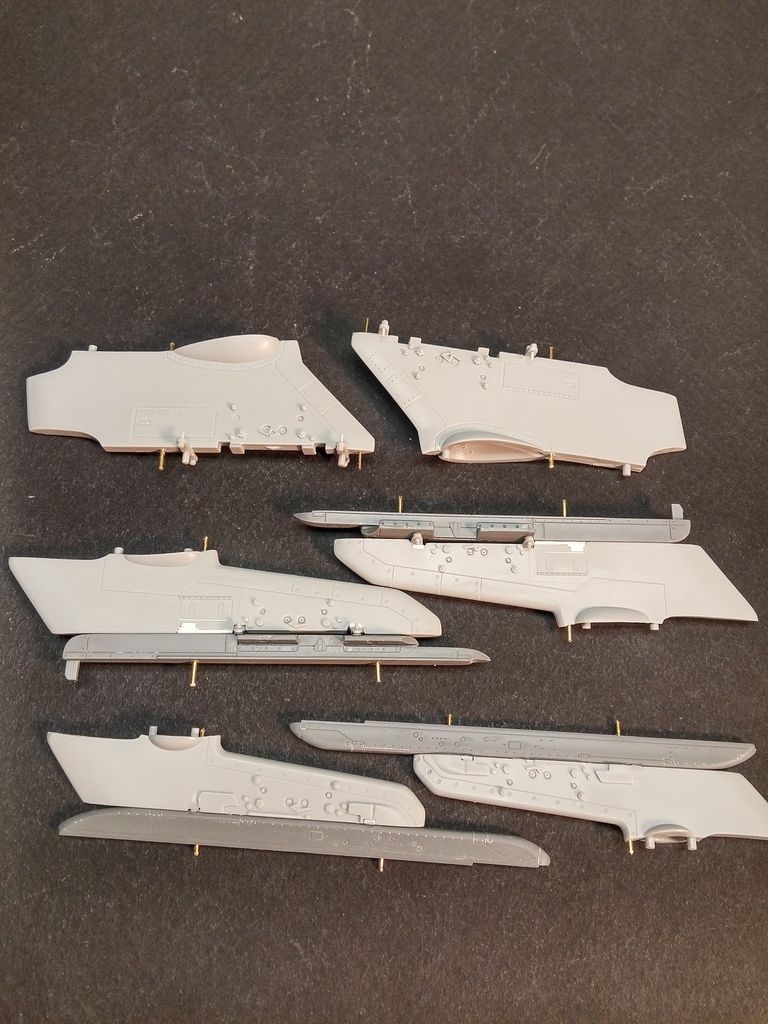


I went ahead and got these painted and weathered (as well as some other stuff not pictured) to save myself the trouble later. There's a lot of plane here!


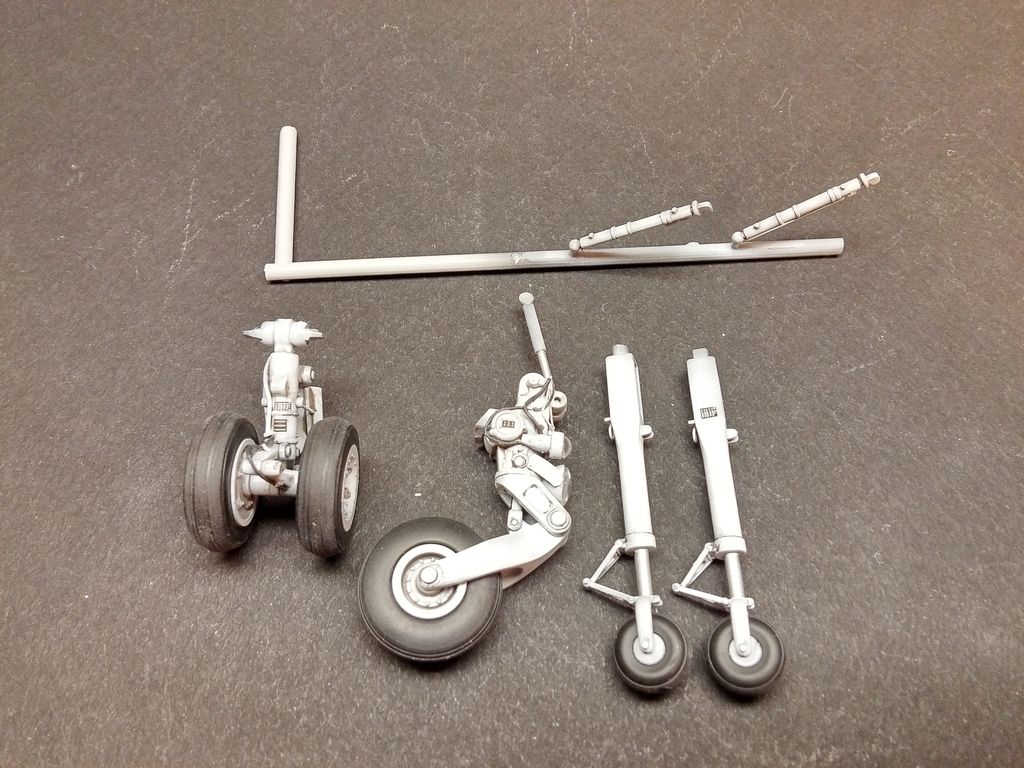
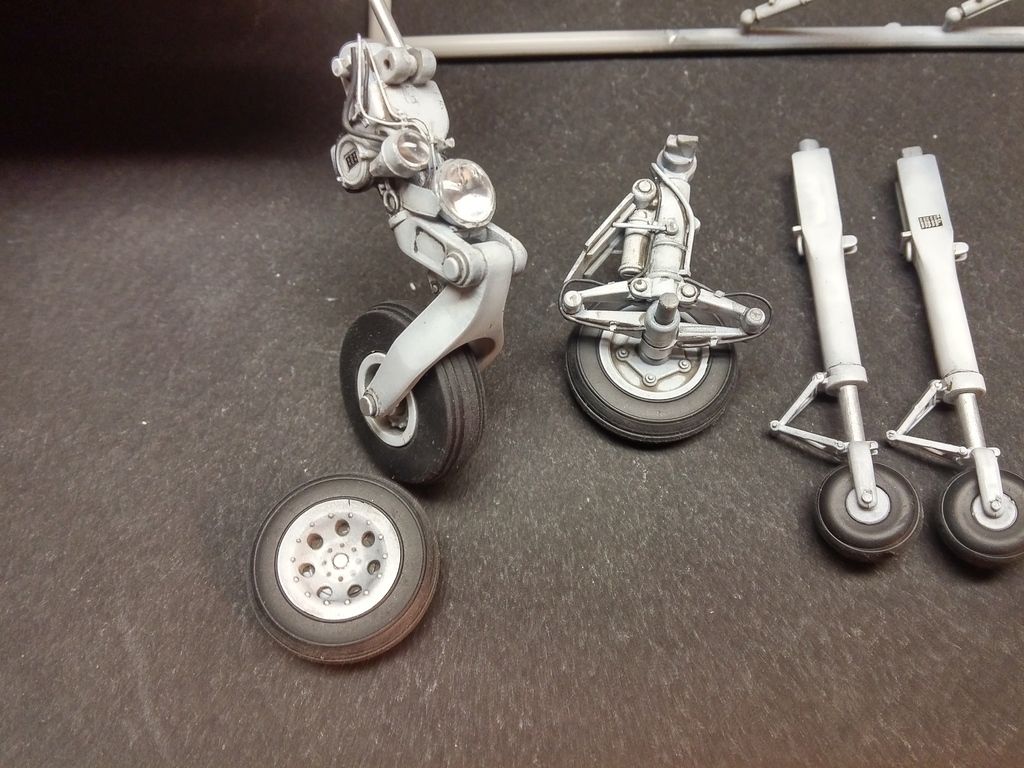
Also got the landing gears done. I shaved off the molded on plumbing/wiring and replaced it with copper wire. The gear door that was molded as part of the gear was cut off...it was stupid thick and clunky. I scratched up a new one, as well as the actuator arms.
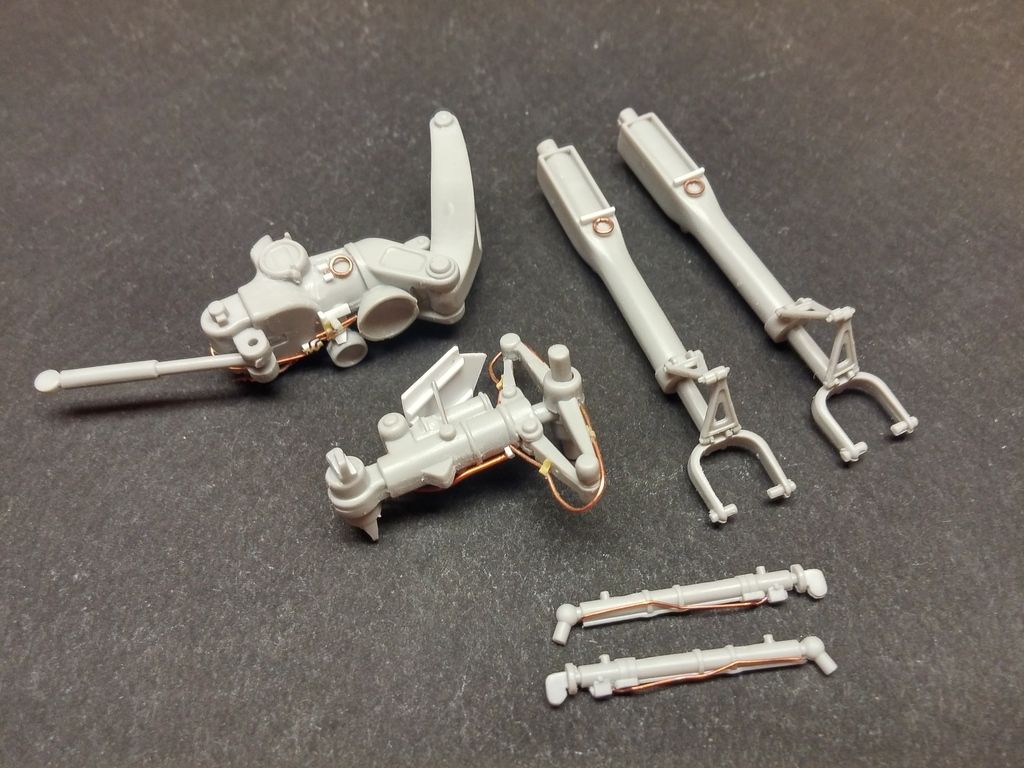
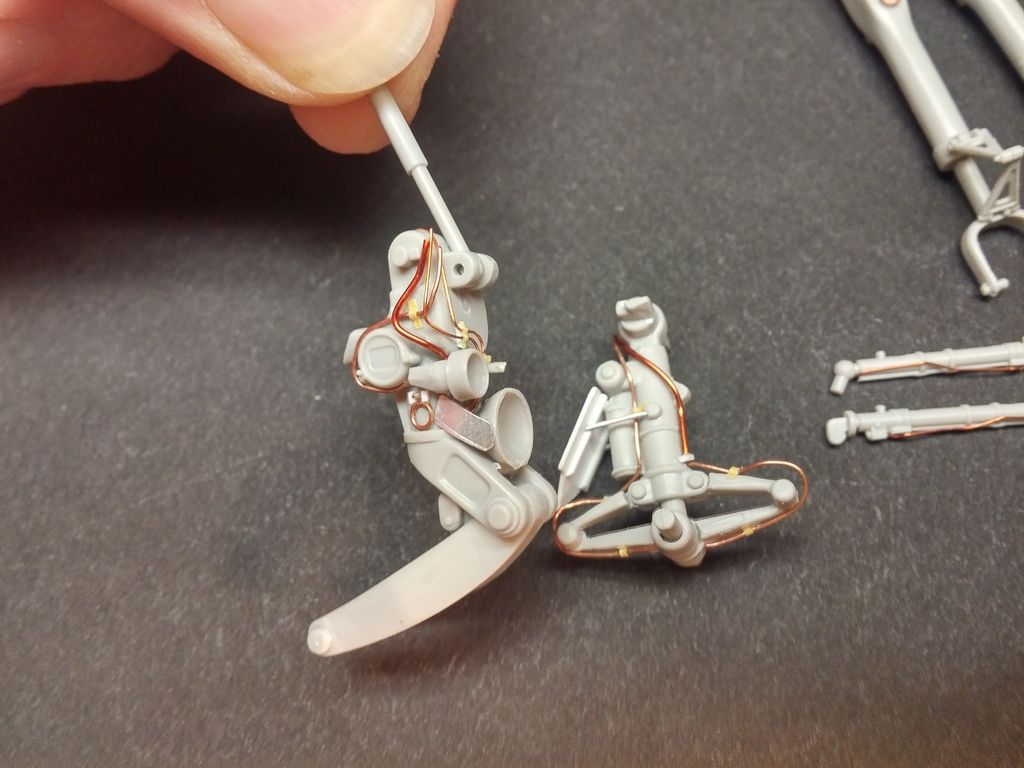


Painted up...


For the landing and taxi lights, I used a bit of aluminum foil, burnished in with a q-tip. Nice and shiny!


Next will be the cockpit!

JOIN OUR COMMUNITY!

Our community is FREE to join. To participate you must either login or register for an account.

SEARCH FORUMS
FREE NEWSLETTER
By signing up you may also receive reader surveys and occasional special offers. We do not sell, rent or trade our email lists. View our Privacy Policy.