SEARCH FINESCALE.COM

Enter keywords or a search phrase below:

Accurate Miniatures 1/48 TBM-3 Finished

9700 views
111 replies
1 rating 2 rating 3 rating 4 rating 5 rating
  • Member since
    December 2010
  • From: Salem, Oregon
Posted by 1943Mike on Friday, May 26, 2017 10:35 PM

Steve,

Thanks - and I hope you know that I'm learning from you about rigging ships!

Chris,

Thank you. I just keep bumbling along hoping that I'll retain some inkling of the lessons I've learned from my previous builds. Sometimes it's two steps forward and one step back but that's life in a learning curve.

Mike

"Le temps est un grand maître, mais malheureusement, il tue tous ses élèves."

Hector Berlioz

  • Member since
    December 2010
  • From: Salem, Oregon
Posted by 1943Mike on Wednesday, May 31, 2017 12:54 PM

Here's an example of my progress from my last post: "two steps forward and one step back ..."

In trying to be conservative when masking the model for airbrushing I suppose I did not cover enough of the fuselage. At any rate I wanted to paint the white under the horizontal stabilizers/elevators which I'd forgotten to do in my last paint session. The result was a bunch of white speckles around the fuselage near the tail on both sides. A result from my not paying enough attention to where I was aiming the airbrush while I was painting.

Being annoyed no end at myself for this lack of concentration, and not wanting to screw things up more but with a desire to get it fixed NOW! I handbrushed the white speckles out. Today, after several light coats of Future on the offending area, it looks OK.

Concentrate, concentrate.......Embarrassed


Mike

"Le temps est un grand maître, mais malheureusement, il tue tous ses élèves."

Hector Berlioz

  • Member since
    December 2010
  • From: Salem, Oregon
Posted by 1943Mike on Thursday, June 1, 2017 7:14 PM

Got the folded wings painted, decaled, washed, and glued together. Next is the landing gear. After that I'll finish working on the fuselage - decals, future, wash, flat clear. Then re-install the turret and install the canopy.


Mike

"Le temps est un grand maître, mais malheureusement, il tue tous ses élèves."

Hector Berlioz

  • Member since
    July 2013
Posted by steve5 on Thursday, June 1, 2017 11:58 PM

your doing some really nice work mike . looking forward to seeing this baby done .


  • Member since
    August 2013
Posted by Jay Jay on Friday, June 2, 2017 8:25 AM

The wash you used is just right, it makes the details really pop with out being too obvious.


 I'm finally retired. Now time I got, money I don't.

  • Member since
    July 2010
  • From: Tempe AZ
Posted by docidle on Monday, June 5, 2017 11:53 PM

You are doing a heck of a job on it Mike! I have the AM TBF-1 Atlantic version in my stash so I have been following along with great interest. Although I do not have the guts to attempt the surgery you have done.

Steve


  • Member since
    March 2015
  • From: Streetsboro, Ohio
Posted by Toshi on Tuesday, June 6, 2017 4:58 AM

You're on the homestretch it seems.  Everything is pulling together just fantastic.  I love what you're doing!

Toshi

On The Bench: Revell 1/48 B-25 Mitchell


Married to the most caring, loving, understanding, and beautiful wife in the world.  Mrs. Toshi


  • Member since
    June 2014
Posted by BrandonK on Tuesday, June 6, 2017 10:04 AM

I really like how this is coming along. You really are making me think about moving mine higher on the list of must do's. Well done on the paint.

BK

On the bench:

A lot !! And I mean A LOT!!

2024 Kits on deck / in process / completed   

                         14 / 5 / 2  

                              Tongue Tied

  • Member since
    December 2010
  • From: Salem, Oregon
Posted by 1943Mike on Tuesday, June 6, 2017 12:07 PM

Steve,

Thank you but I've not done any "surgery" except for cutting off the wings spars on part #19. That's not really "surgery", it's just a simple saw cut so that the resin folded wings from the set I bought at Lone Star Models will fit into the very, very slight depressed area on each side of the fuselage. No, I didn't use the styrene wings in the kit - I used the resin kit I mentioned above.

Mike

"Le temps est un grand maître, mais malheureusement, il tue tous ses élèves."

Hector Berlioz

  • Member since
    December 2010
  • From: Salem, Oregon
Posted by 1943Mike on Tuesday, June 6, 2017 12:18 PM

Toshi,

Thanks for the kind words. I must tell you though that I'm not really on the home stretch yet - at least as far as my normal pace of building goes. I have hours of decals to do, then sealing them, then touch ups (I've already screwed up the fuselage stars and bars and will have to use some paint to "heal" the torn decal and can't get the "bubbles" out of them. I've used more Solvaset than I believe is prudent and I'll just let the ridges/bubbles go) and then I have to work on the landing gear, re-attach the turret, attach the bomb bay doors, attach the canopy, prop, and all the final details.

After all the above I have to begin working on the figures - I'll be asking Mike Brindos for help there - and setting up the aircraft on the flight deck for a small diorama. I'd say I'm about half way to where I hope to end up. 

Mike

"Le temps est un grand maître, mais malheureusement, il tue tous ses élèves."

Hector Berlioz

  • Member since
    December 2010
  • From: Salem, Oregon
Posted by 1943Mike on Tuesday, June 6, 2017 12:20 PM

Brandon,

Thank you. I'd love to see what you do with yours. Please post a WIP when you get to it.

Mike

"Le temps est un grand maître, mais malheureusement, il tue tous ses élèves."

Hector Berlioz

  • Member since
    January 2015
  • From: Tumwater, WA.
Posted by M. Brindos on Tuesday, June 6, 2017 1:38 PM

Since you're already having to paint/repair the decals anyways, you may consider using TET to snuggle the decals down. Just be prudent with the applications. 

It will help give you that painted-on look for the decals you're already getting from your current repairs.

Go slowly and cautiously. It can be scary, but you must let the TET dry between applications or it will do more harm than good.

***Edit:  CAUTION NEEDED

One last thing about using TET. Don't flood the area. Be sparing with your usage. The TET has a habit of melting through paint if you flood an area.

- Mike Brindos "Lost Boy"

  • Member since
    December 2010
  • From: Salem, Oregon
Posted by 1943Mike on Friday, June 9, 2017 8:44 PM

A little more incremental progress. Some decals (wings are done) and a check for the fit of the wings to fuselage - for the umteenth time. I added the landing gear and the starboard and port wing lights along with the landing light under the port wing. I'm saving the pitot tube and under the wing radar for near the finish since I don't really want to break them too many times Smile.

The fit of the wings seems OK. They're a bit too close to the vertical stabilizers/elevators but c'est la vie - nothing I can do about that and it still seems good enough for me. I just stuck them in the very shallow recess on the fuse for taking pictures. Fortunately they held in place for a few minutes.

On to the remaining work on the fuselage.


Mike

"Le temps est un grand maître, mais malheureusement, il tue tous ses élèves."

Hector Berlioz

  • Member since
    August 2016
Posted by Keyda81 on Friday, June 9, 2017 9:25 PM

Very nice!  You literally reminded me I broke a piece of the Sabre Dog, and forgot to glue it back on!  I'm great a knocking off pitot tubes, or anything else sticking out even the slightest bit.

  • Member since
    December 2010
  • From: Salem, Oregon
Posted by 1943Mike on Sunday, June 25, 2017 5:51 PM

Sorry for the slow updates. I've had lots of self-induced problems with this build. I have screwed up the decals (some of them) badly and attempted to fix them by painting in the white - just didn't want to strip everything and start over. Also I used several decals from my third TBM-3 kit which, if I ever attempt to build it, will need aftermarket decals. It's always the white ones I mess up - if I'd needed to do the black ones I'd have printed my own on my clear decal paper. In addition I was out of white decal paper when I had my problems with them. Anyway I probably wouldn't have attempted to do my own white decals - just not good at cutting that close to the image.

I'm almost there with the aircraft part of this dio but have also made some unforgivable errors with the forward section of the canopy. I've attempted to bend it so it fit properly on the fuselage where it's supposed to sit but in doing so I cracked it. I have stripped it, re-Futured it, and painted it and tomorrow I'll see if I can get away with using it.

You fine folks here on FineScale simply have to understand I'm in the amateur leagues with this hobby and aspiring for class "A" modeling - not "AA" or "AAA" and certainly not "The Show", but I do try my best and have a lot of enjoyment along the way.

Next update will be a small one when I get the canopy on.


Mike

"Le temps est un grand maître, mais malheureusement, il tue tous ses élèves."

Hector Berlioz

  • Member since
    June 2014
Posted by BrandonK on Sunday, June 25, 2017 7:09 PM

Well Mike, you mention all these mistakes and corrections but I honestly can't see them. It looks pretty spectacular to me and I'm a tad picky. So, Kudos to you on a fine build, it is beautiful.

BK

On the bench:

A lot !! And I mean A LOT!!

2024 Kits on deck / in process / completed   

                         14 / 5 / 2  

                              Tongue Tied

  • Member since
    March 2015
  • From: Streetsboro, Ohio
Posted by Toshi on Sunday, June 25, 2017 7:24 PM

I concur with Brandon K!  All these issues you so described are not visible and your build is just superb.

Toshi

On The Bench: Revell 1/48 B-25 Mitchell


Married to the most caring, loving, understanding, and beautiful wife in the world.  Mrs. Toshi


  • Member since
    February 2014
  • From: Michigan
Posted by silentbob33 on Sunday, June 25, 2017 7:28 PM
This looks really good Mike! I wouldn't have noticed most of the mistakes if you hadn't pointed them out. Keep up the good work!

On my bench: Academy 1/35 UH-60L Black Hawk

  • Member since
    July 2012
  • From: Douglas AZ
Posted by littletimmy on Sunday, June 25, 2017 7:38 PM

Mistakes happen to the best of us but if you had'nt said anything we would have never known!

I still cannot tell anything went wrong. Thats a testement to your skills. I know the fault is there but cant find it. BRAVO!!

I'm not saying this just because the Avenger is my favorite plane (it is ) But when I get around to building mine I'm definitly going to be using your photos for reference!

 Dont worry about the thumbprint, paint it Rust , and call it "Battle Damage"

  • Member since
    July 2013
Posted by steve5 on Sunday, June 25, 2017 10:03 PM

mike

gee I wish I could stuff up a project like that ,  that is some very nice work mate

steve


  • Member since
    December 2010
  • From: Salem, Oregon
Posted by 1943Mike on Sunday, June 25, 2017 10:36 PM

Brandon, Thanks for the kind words. (I try not to show too many boo boos in the images I post Smile).


Toshi, Thank you. Guys like you give me the impetus to continue trying to better my skills - I am always amazed at the speed, volume, and care with which you complete your kits.


Bob, Thanks!


Tim, Thank you. I hope you post pictures of yours when you've built it! Although the Avenger is not my absolute favorite aircraft, it's right up there among my favorites so your words mean a lot to me.


Steve, Thanks for the thoughts. I'm taking much longer than I'd thought I would in the world of model aircraft but I'm enjoying it. Back to ships by the end of the year.

Mike

"Le temps est un grand maître, mais malheureusement, il tue tous ses élèves."

Hector Berlioz

  • Member since
    August 2013
Posted by Jay Jay on Monday, June 26, 2017 10:11 AM

I think you did a very good job on this Avenger. I hope mine (which is on hold )will look near as good. I finally started my first ship ( A resin 1/350 scale CL-81 Light Cruiser Houston )and I will be building it for a long time considering how many parts are involved. Any tips would be extremely helpful.


 I'm finally retired. Now time I got, money I don't.

  • Member since
    December 2010
  • From: Salem, Oregon
Posted by 1943Mike on Monday, June 26, 2017 10:45 AM

Thanks Jay Jay.

As to building your ship, there are many different practices in building 1/350 ship models but the main thing is to go through all the instructions thoroughly - (in my case several times) - to familiarize one's self with the order of construction and to plan ahead for the painting, attachment of any PE, and the final details. Some suggest generalizations such as starting with inside to out, bottom to top, etc., etc. but, as logical as that may appear on the face of it, some steps may have to be done out of that order to be successful. You simply have to practically build the kit in your mind as much as you can envision before commencing the actual build. But, since you likely knew all this, I can't really be of much help with your resin kit since I've only worked with resin a bit on this Avenger and one or two other kits with minor AM parts in that material.

As to the ship herself, can't help you there - ask in the ship forum and you may get more helpful responses. You might try The Ship Model Forum. I noticed you'd jumped in one of their threads back in 2013 and mentioned your kit. Also try the Steel Navy and try to find the CL-81 there.


Mike

"Le temps est un grand maître, mais malheureusement, il tue tous ses élèves."

Hector Berlioz

  • Member since
    December 2010
  • From: Salem, Oregon
Posted by 1943Mike on Sunday, July 2, 2017 7:38 PM

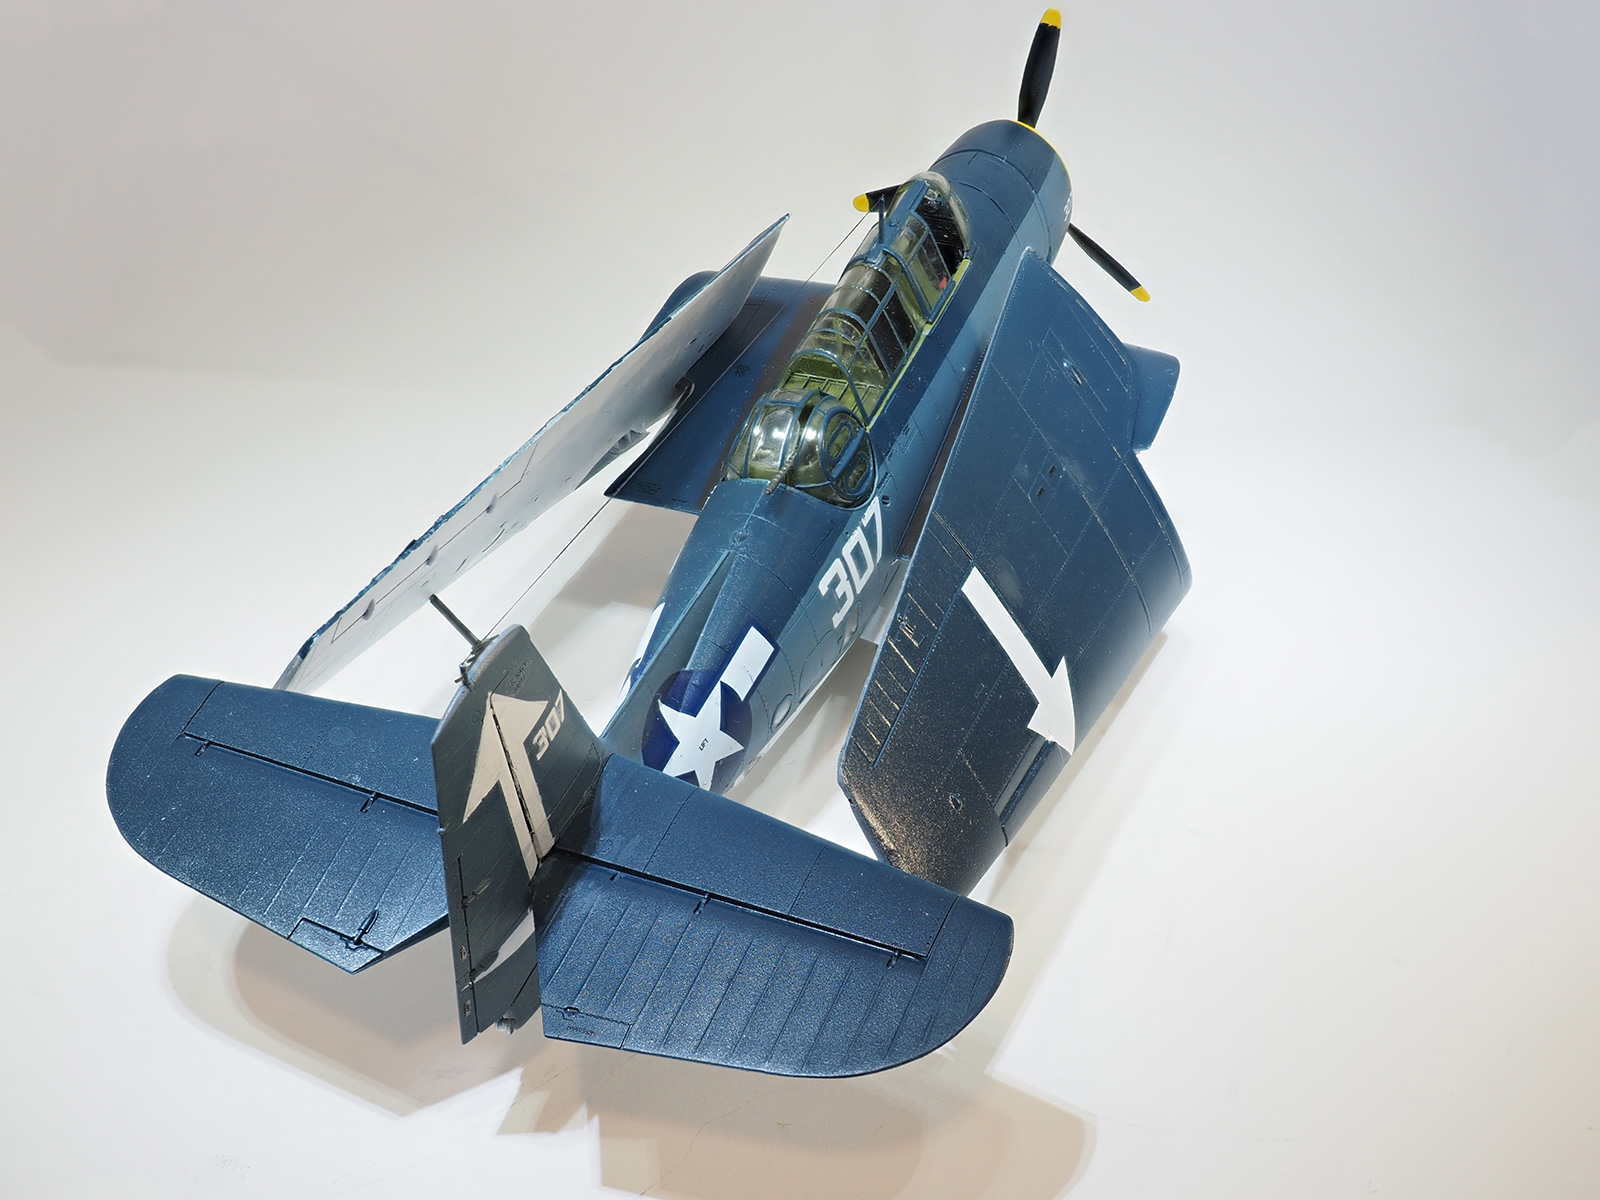
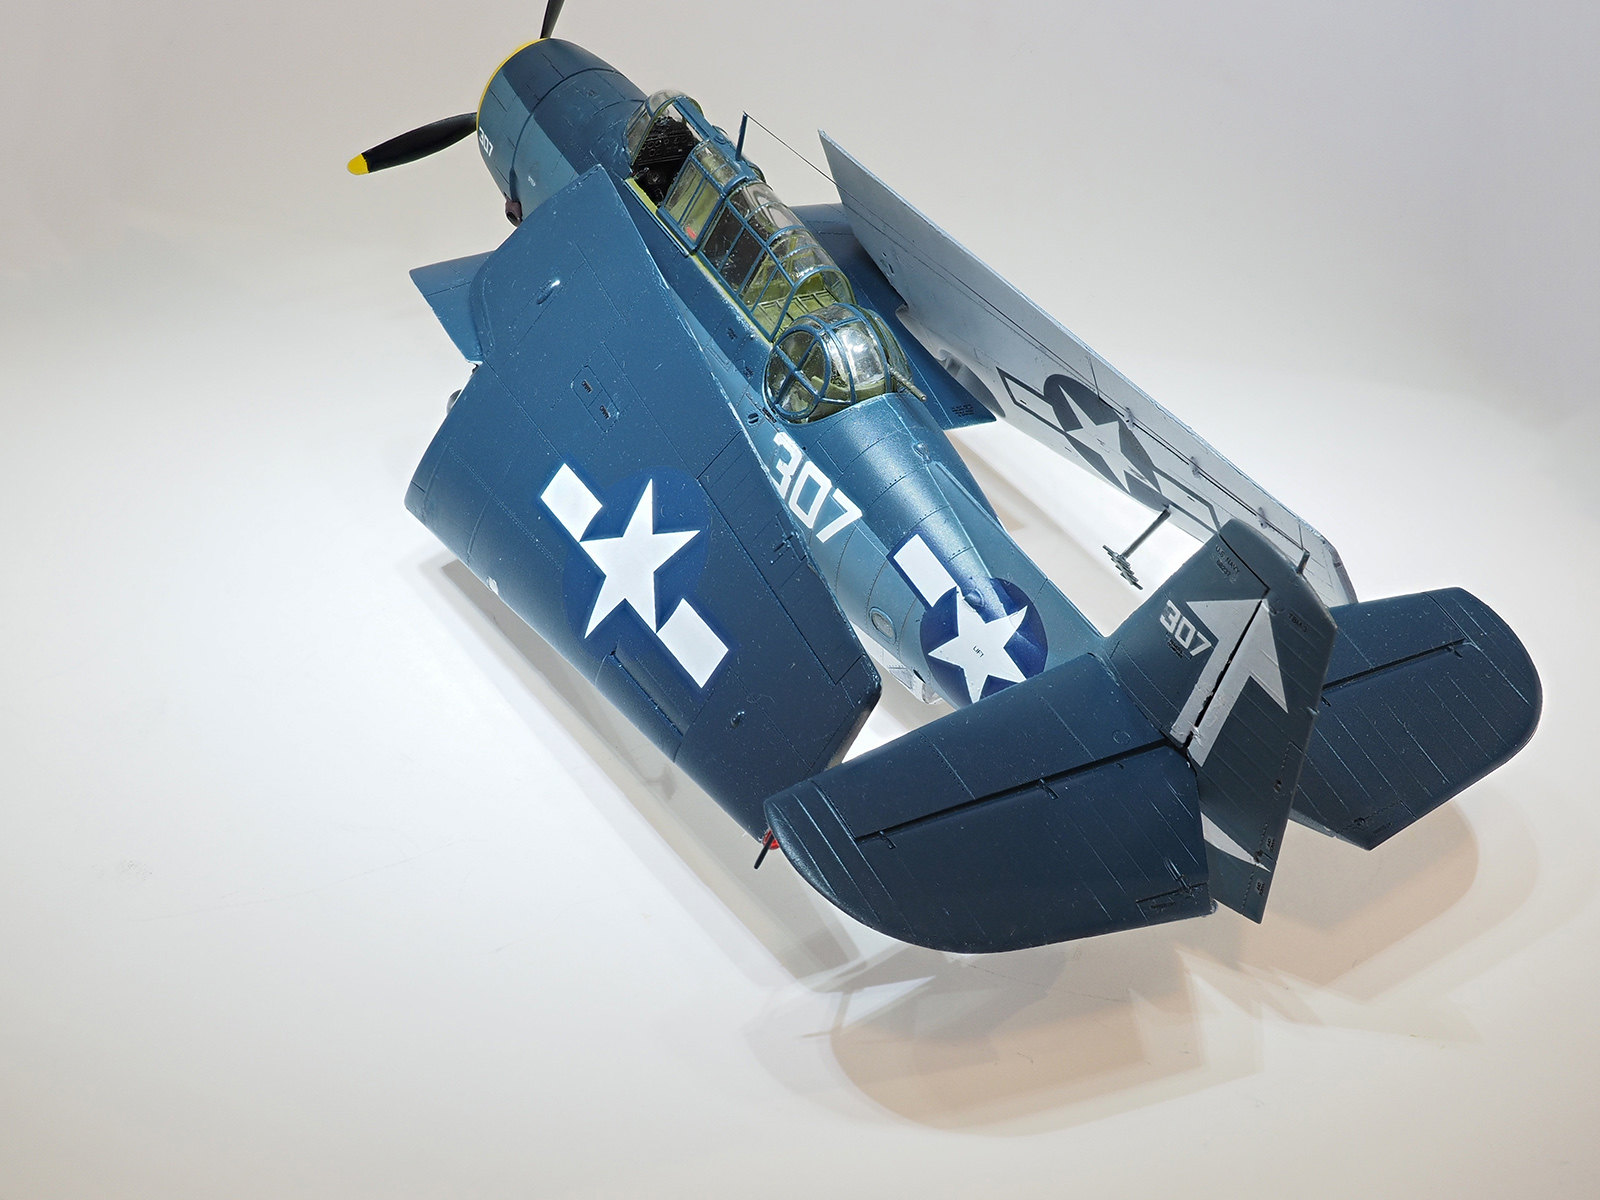
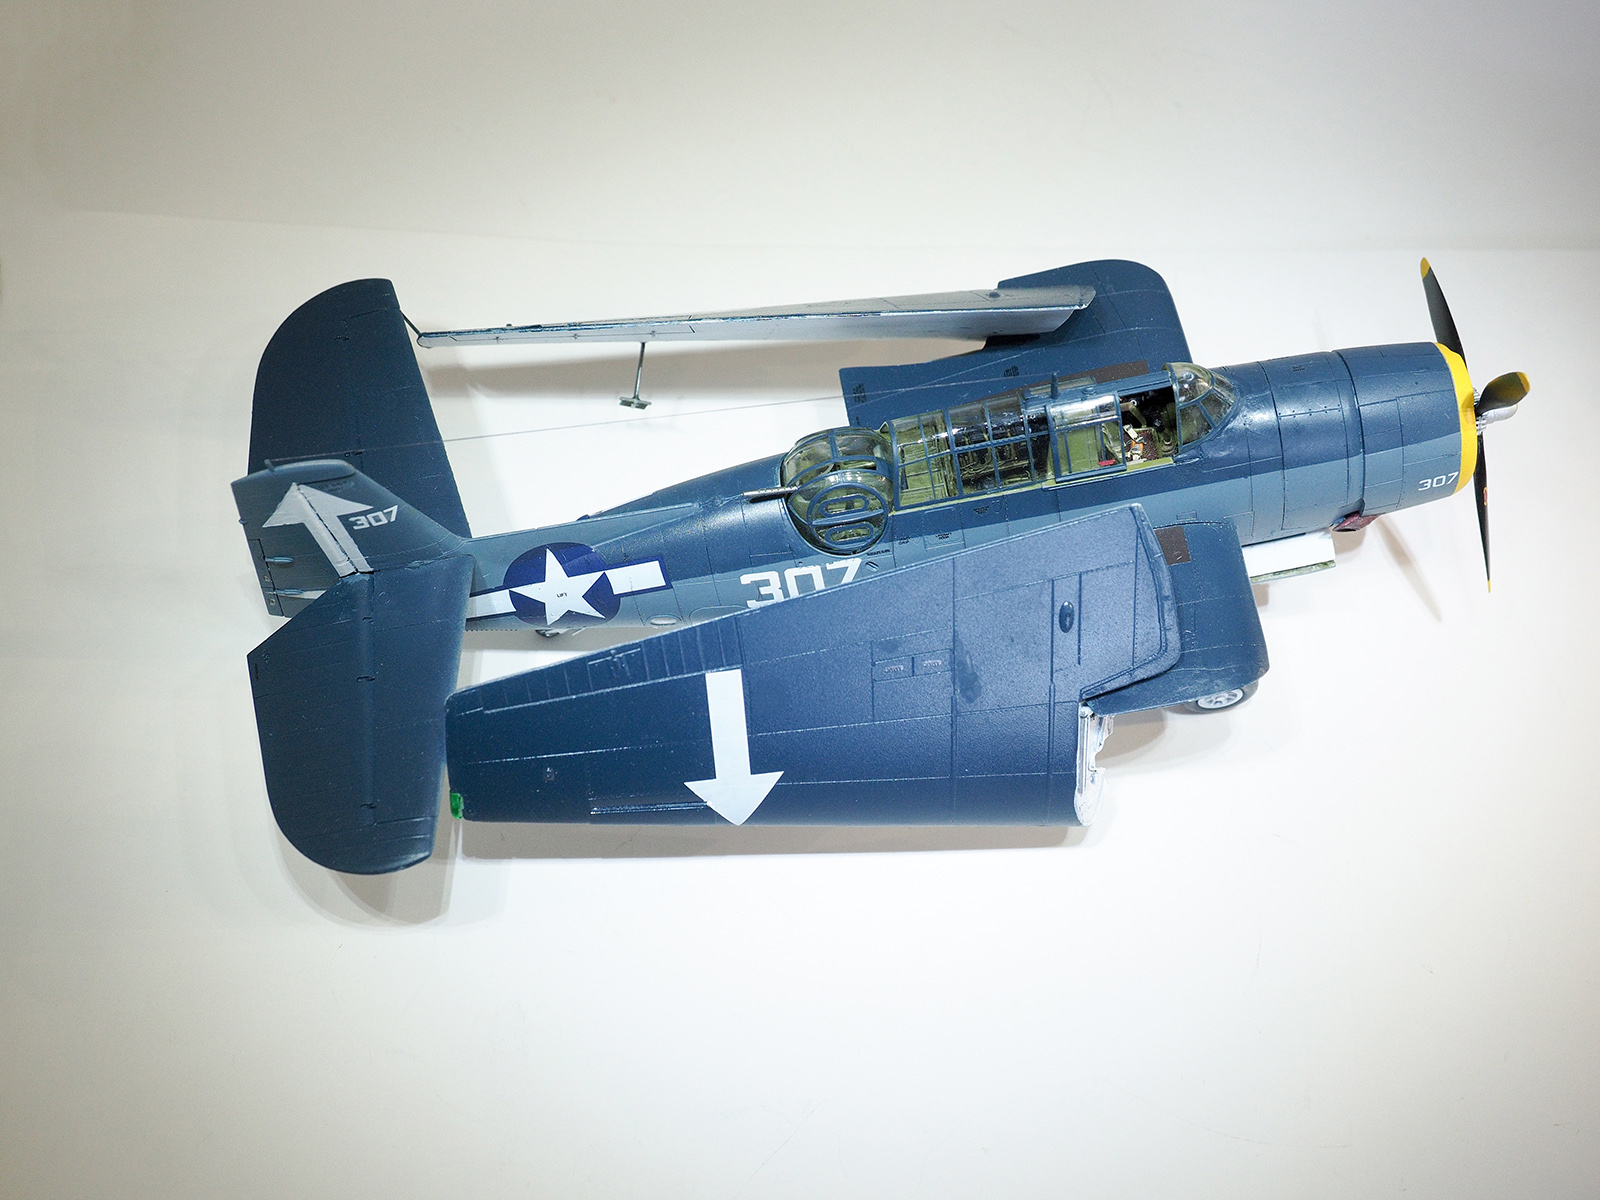
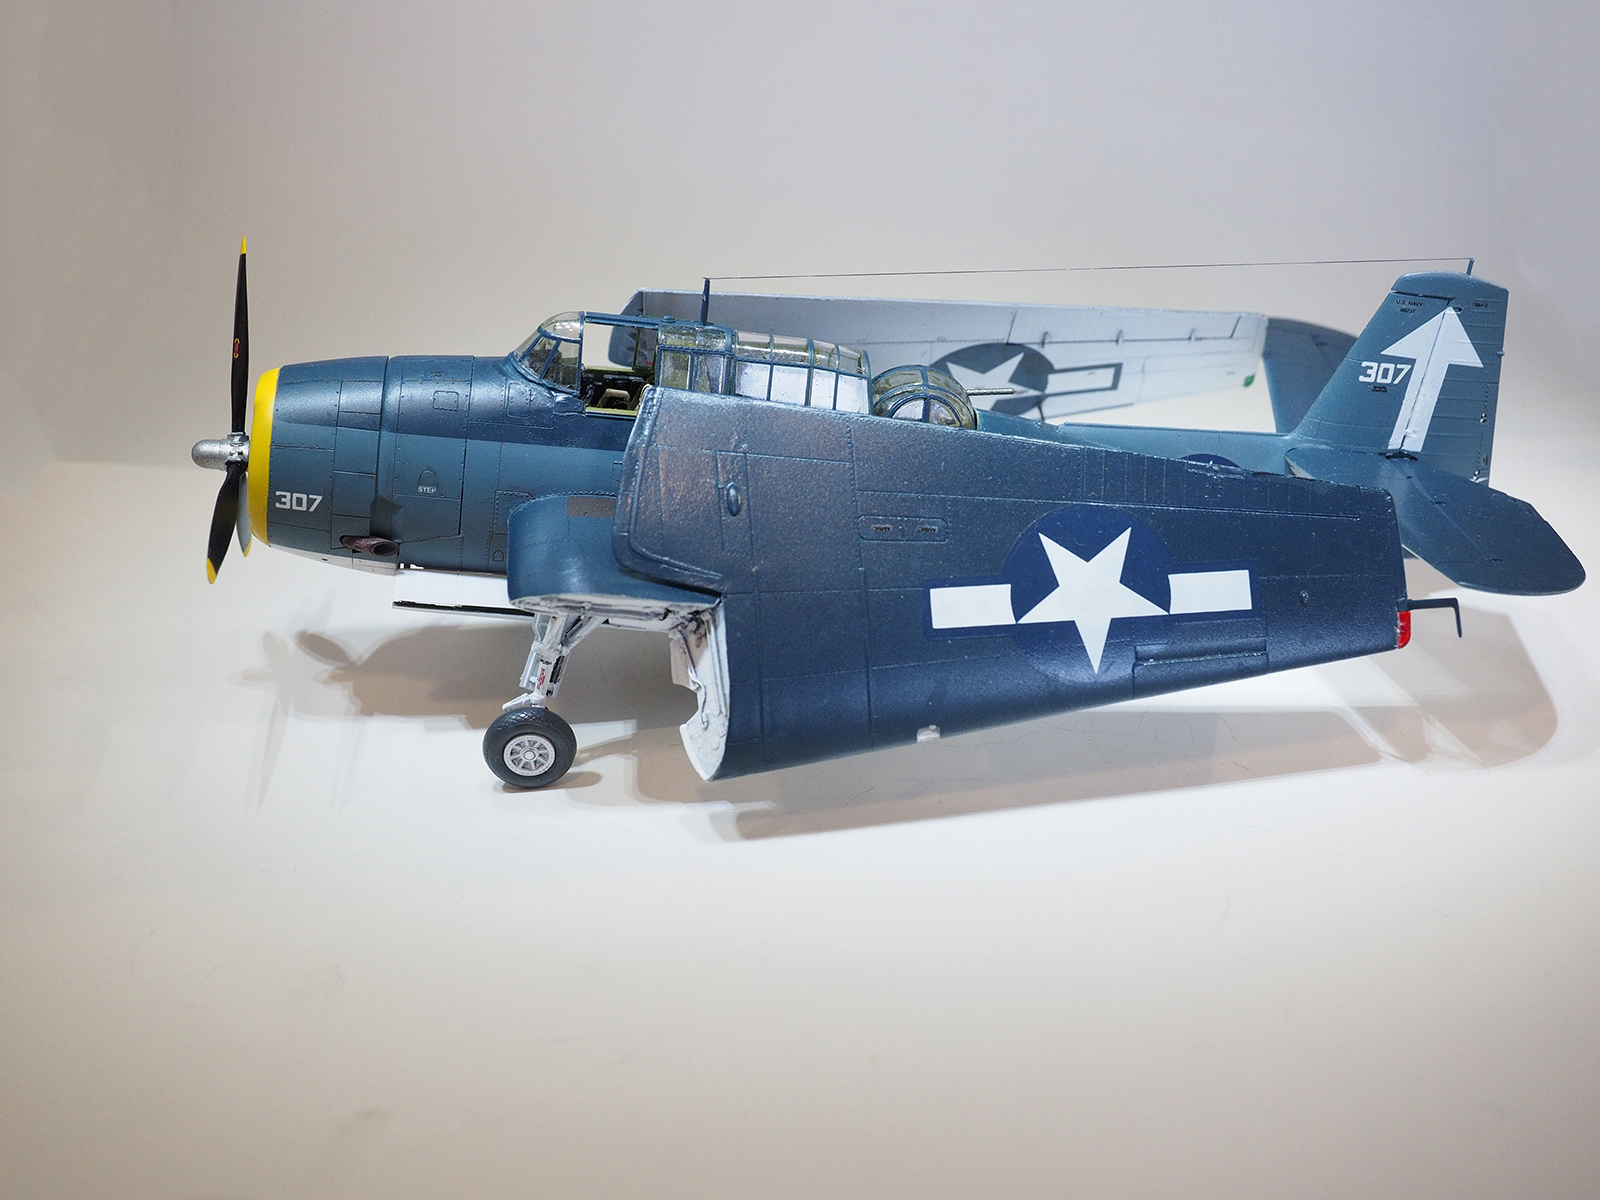
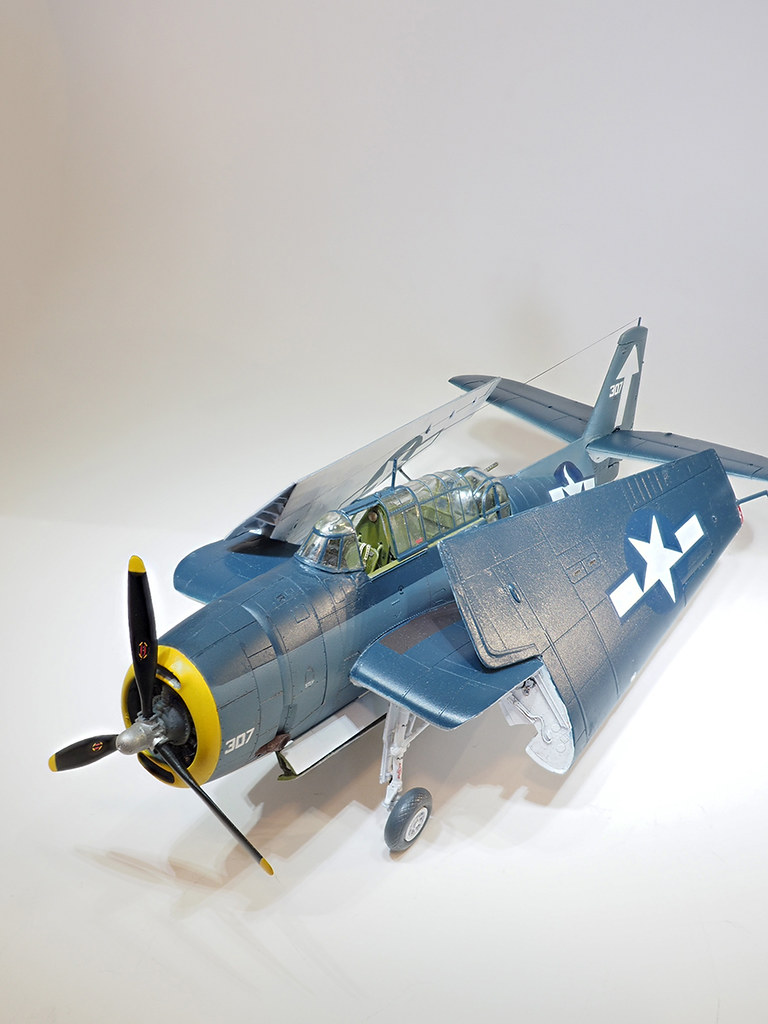
I must apologize to all who have been so kind and whose encouragement I very much appreciate. I ran into a problem I'd not experienced with my last build of the same kit. I just couldn't get the forward section of the canopy to fit properly. Perhaps it had something to do with the way the two fuselage halves were joined in this build .. I just don't know.

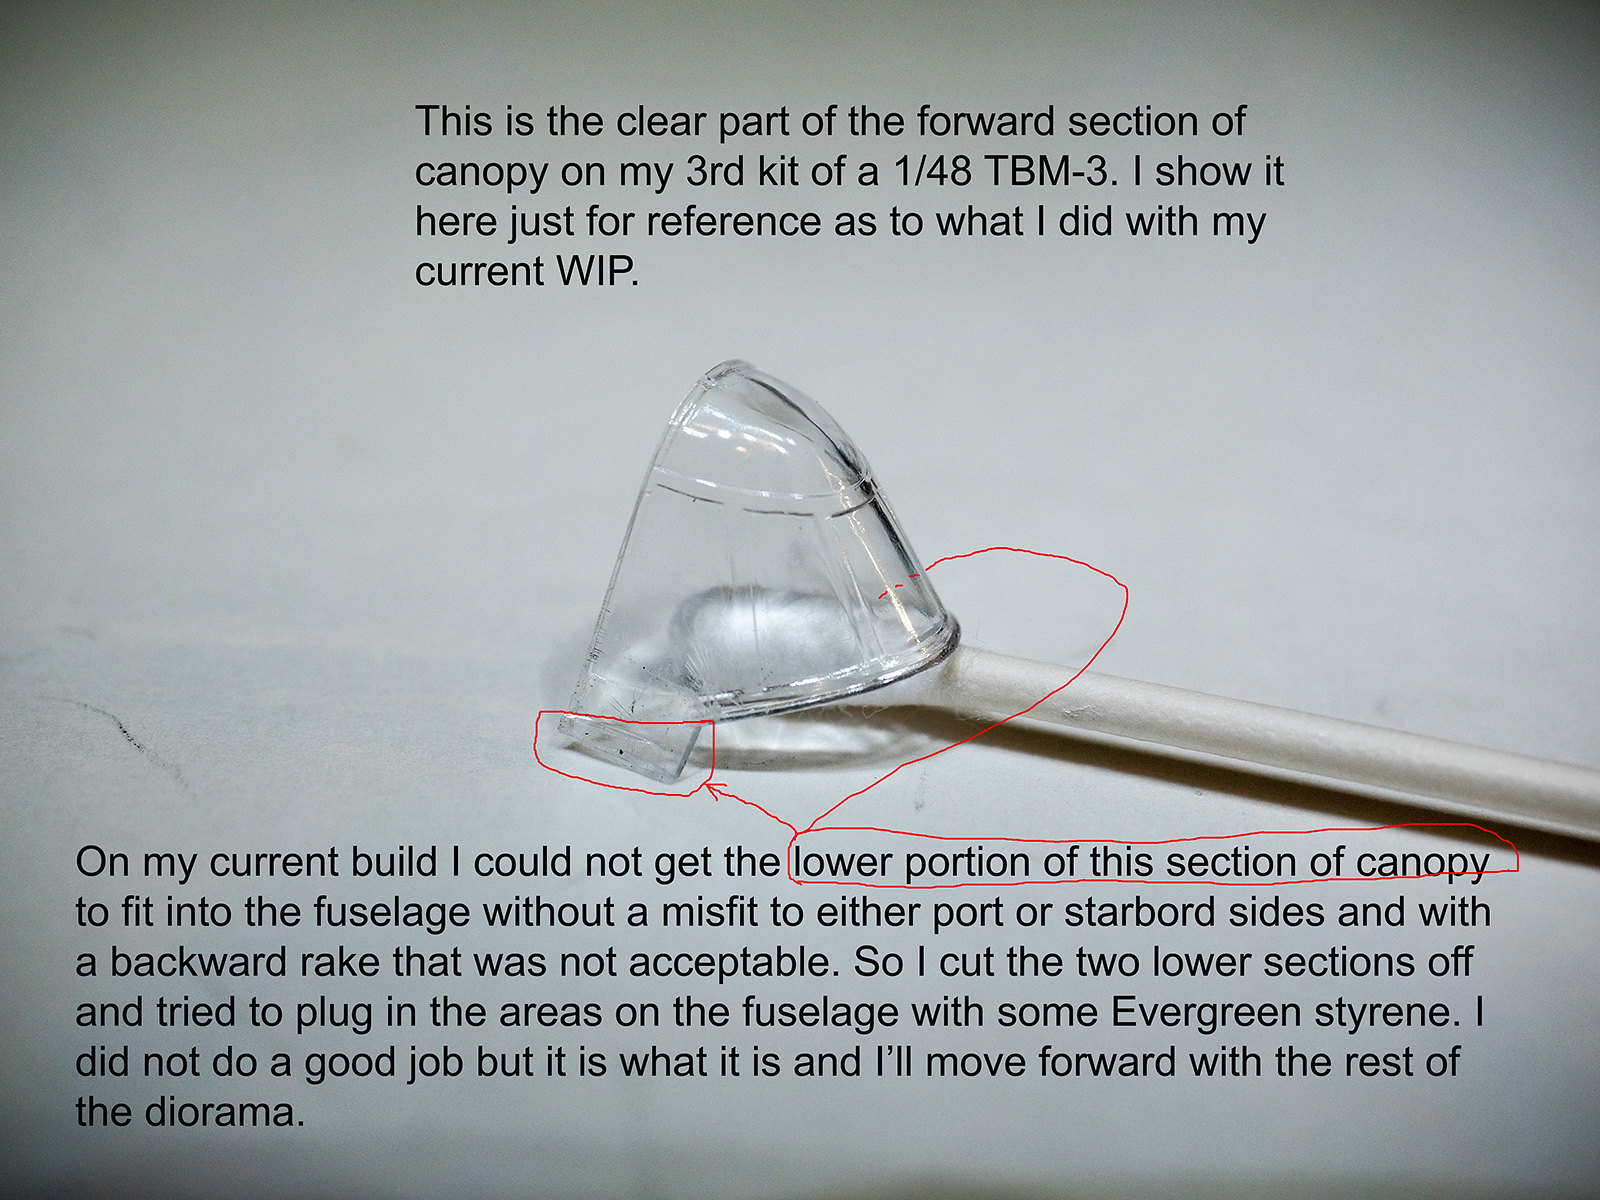
The problem was that I couldn't make the little lower "ears" of that section of canopy fit into the areas they are supposed to fit in. They were far enough off so that attempting to get them to fit made that section tilt rearward too much - way too much. Like I said, I don't know how I screwed up. My "fix" was to cut off the "ears" (see picture below) of that section on both sides and try to fill in the open area with styrene. I did my best but it's a glaring mistake and it shows badly.

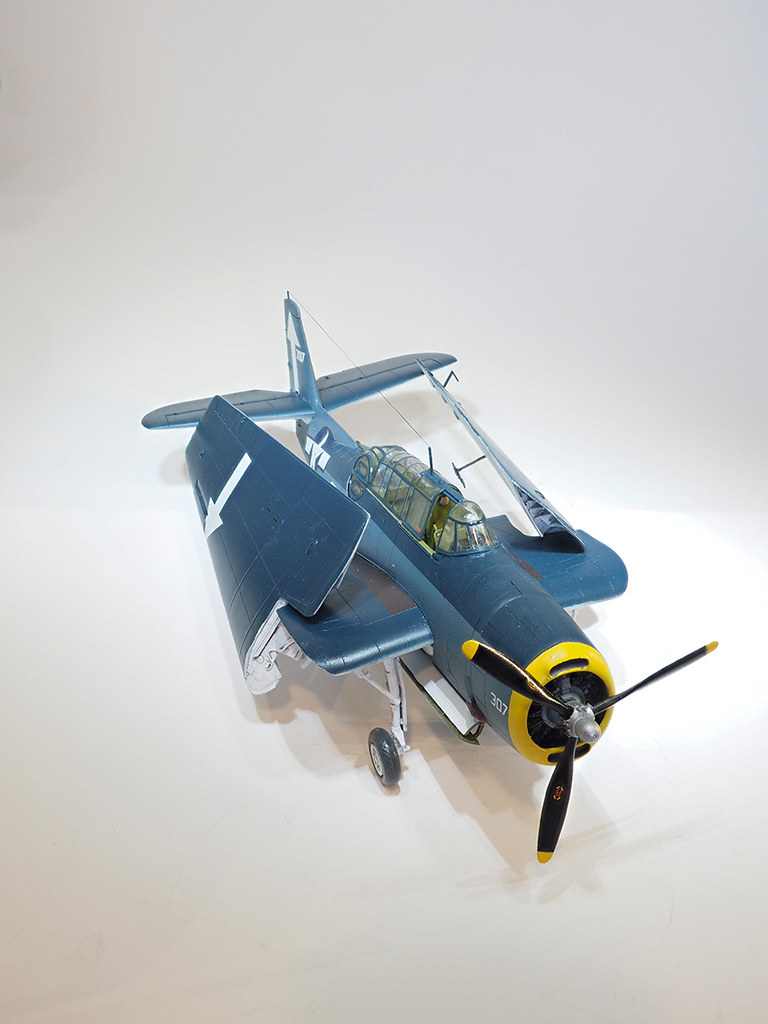
I am, however, going to continue with this diorama. I've liked building a small diorama with the TA-4F I did last year and I'll finish this one to the best of my ability.

Next updates will be for the Moto tug, figures, torpedo on its cart, etc.


Mike

"Le temps est un grand maître, mais malheureusement, il tue tous ses élèves."

Hector Berlioz

  • Member since
    July 2013
Posted by steve5 on Sunday, July 2, 2017 8:40 PM

mike

I think you did a grand job , the only way I know , is you pointed the change out to me ,

steve5


  • Member since
    December 2010
  • From: Salem, Oregon
Posted by 1943Mike on Monday, August 14, 2017 4:54 PM

Thanks Steve. I've since my last post returned to the forward section of the canopy and tried - without much success - to make it look better. No more work on the aircraft - now it's on to the minimal diorama I had planned for this puppy.

Does anyone know what, if any, would be the proper amount (and kind) of weathering on a moto tug of WWII ilk? My dio will have a torpedo lying in a cart near the aircraft ready to load, a moto tug with the towing arms still attached to the wheel(s) - not sure if I'll have it being towed from the front or rear - with some pilots standing/kneeling/squatting around a map of the day's assignment. It's from the Tamiya 1/48 kit.

Should I show some rust? Some scratches? Just not sure how well maintained these workhorse vehicles were while the war (WWII) raged on. Any help appreciated.

Mike

"Le temps est un grand maître, mais malheureusement, il tue tous ses élèves."

Hector Berlioz

  • Member since
    June 2014
Posted by BrandonK on Monday, August 14, 2017 7:02 PM

She is really starting to shape up now. I love this kit and what you've done with it. Nice work, Sir!

BK

On the bench:

A lot !! And I mean A LOT!!

2024 Kits on deck / in process / completed   

                         14 / 5 / 2  

                              Tongue Tied

  • Member since
    December 2010
  • From: Salem, Oregon
Posted by 1943Mike on Monday, August 14, 2017 8:10 PM

Thanks Brandon.

I guess I'll just figure that the tug was painted on a regular basis but would have had dents and scratches from use. I'll make the weathering minimal.

I must confess that my hand painting is not allowing me to get perfect lines between the wheels and tires - far from perfect but, at this stage of my modeling I'm going to have to be happy with what I've done so far. I should have been more careful when masking the wheels but I goofed there and each time I've gone to hand paint a correction I seem to make it worse. Lesson learned.


Mike

"Le temps est un grand maître, mais malheureusement, il tue tous ses élèves."

Hector Berlioz

  • Member since
    February 2012
  • From: Olmsted Township, Ohio
Posted by lawdog114 on Tuesday, August 15, 2017 2:24 AM
That turned out fantastic Mike. Thanks for taking us along...

 "Can you fly this plane and land it?...Surely you can't be serious....I am serious, and don't call me Shirley"


  • Member since
    February 2014
  • From: Michigan
Posted by silentbob33 on Tuesday, August 15, 2017 8:45 AM
Looks pretty good to me Mike, unless I look really close I can't see the problems with the canopy so I'd say you did a pretty good job of fixing it up

On my bench: Academy 1/35 UH-60L Black Hawk

JOIN OUR COMMUNITY!

Our community is FREE to join. To participate you must either login or register for an account.

SEARCH FORUMS
FREE NEWSLETTER
By signing up you may also receive reader surveys and occasional special offers. We do not sell, rent or trade our email lists. View our Privacy Policy.