My original post was getting too long, so I decided to start a new Post. Part One can be found here http://cs.finescale.com/fsm/modeling_subjects/f/2/t/174977.aspx
Okay, on with the build starting with the tail stabilizer wings 

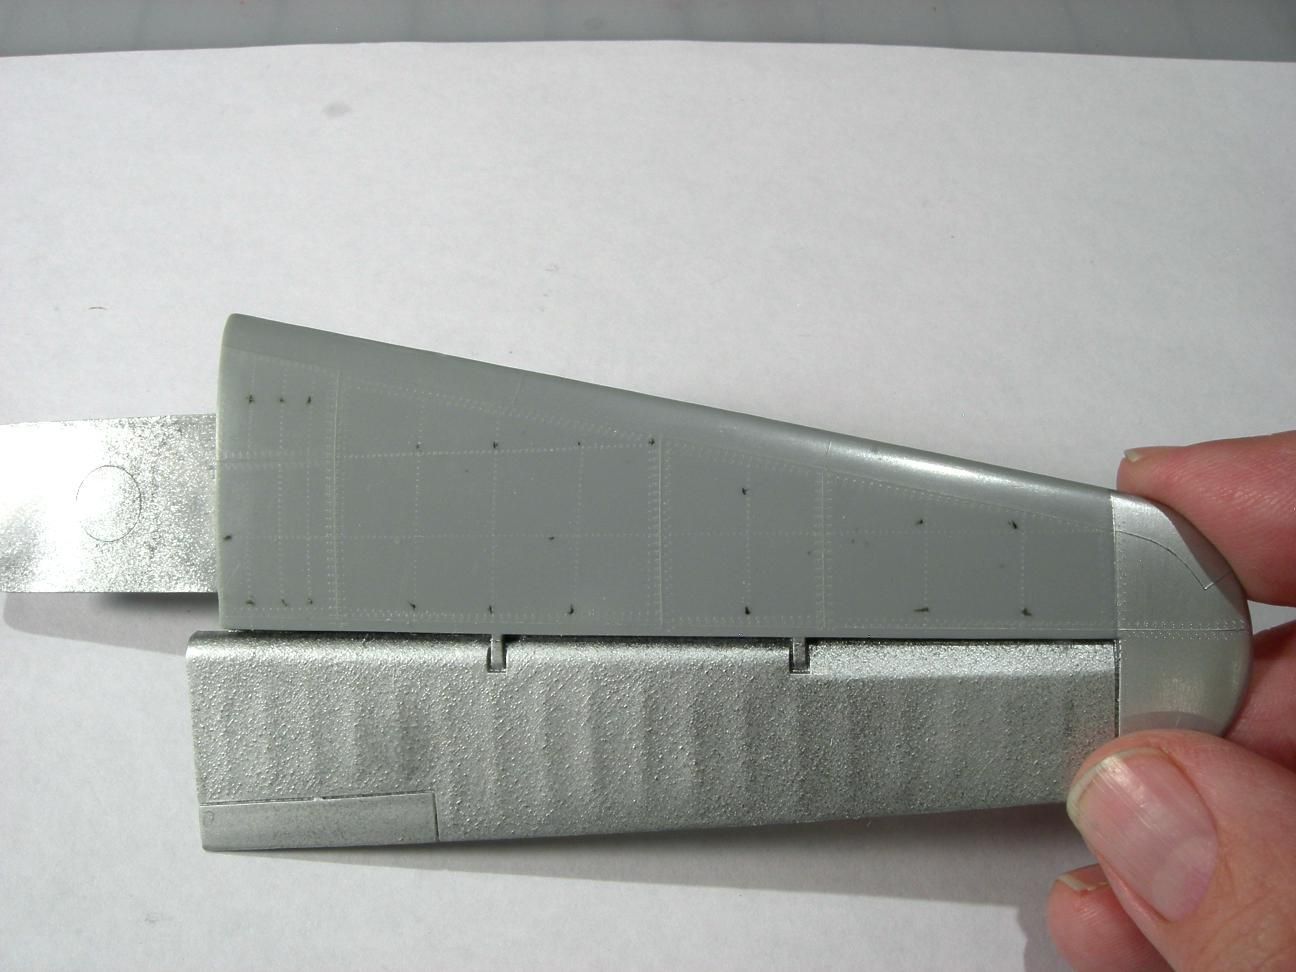
On the real aircraft the elevator of the rear stabilizer wing was covered in fabric. The elevator on the Revell kit has a textured finish. I painted the elevator with Testors' Metallic Aluminum and Testors' Metallic Sealer. The tip of the wing was also painted with Testors' Metallic Aluminum. After the paint dried I burnisihed it with a paper blending stick then painted it with Testors' Metallic Sealer. The kit's wings and body do not have rivets so I decided to add rivets. Usually I add rivets after I apply the Bare Metal Foil, but this time I tried something different. I added the rivets before I applied the foil. That way if I screwed up with the rivets I could correct the mistake without having to remove the foil. The black tick marks help me keep the rivets straight.

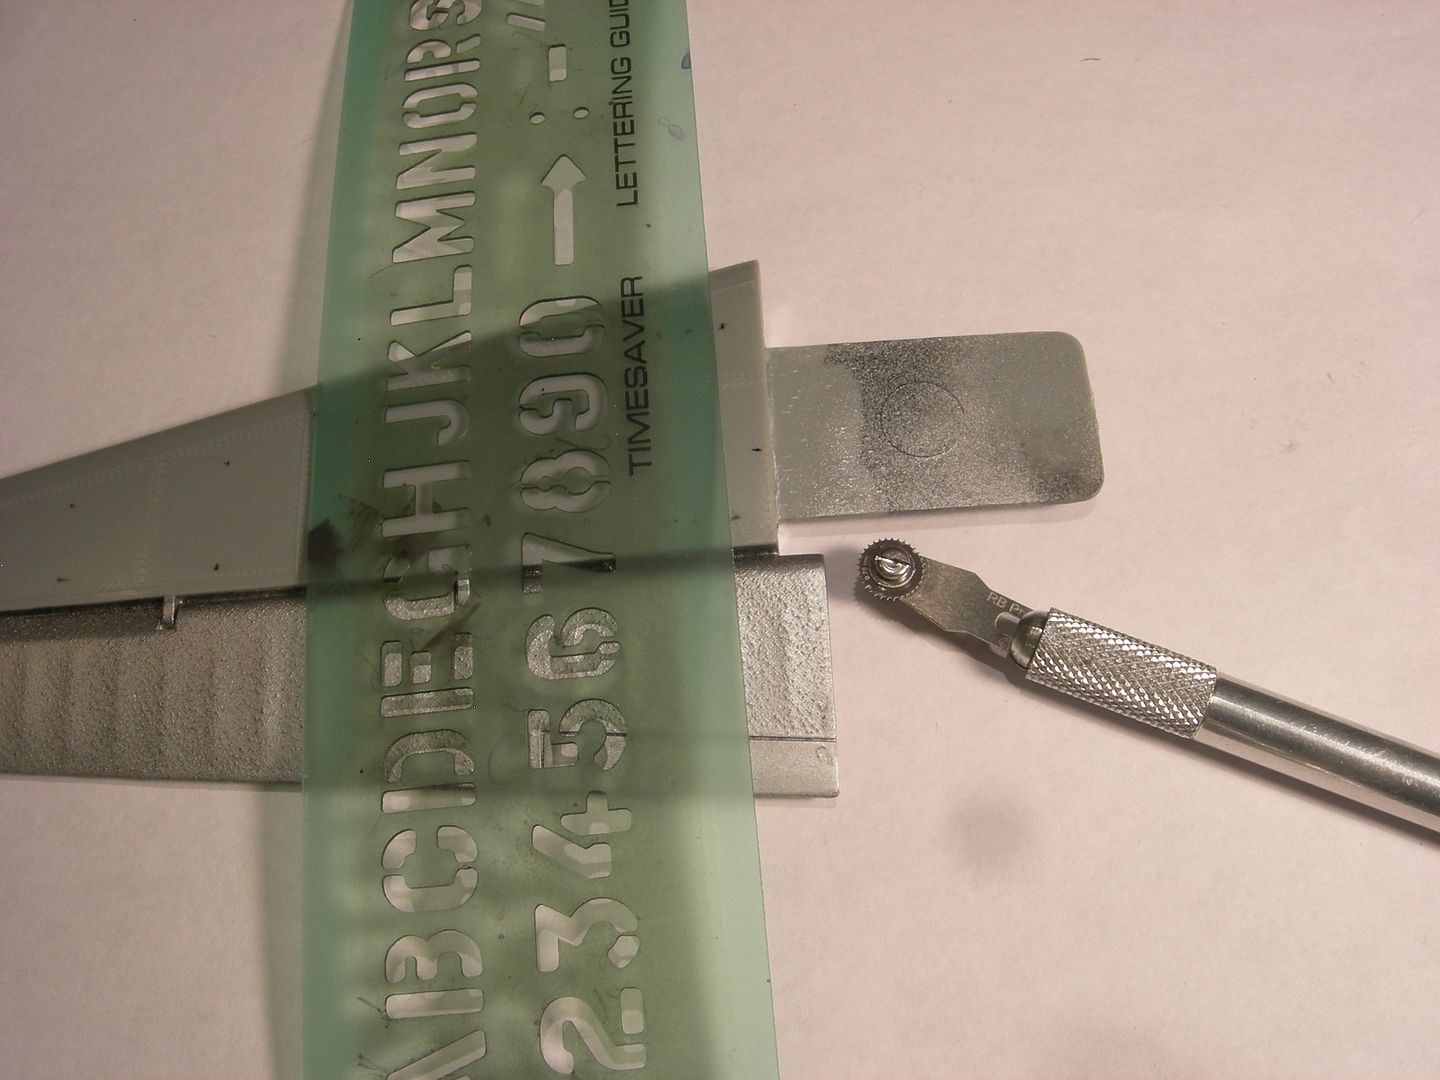
I ran my rivet tool along my high school lettering guide to make sure that the rivets stay in a straight line.

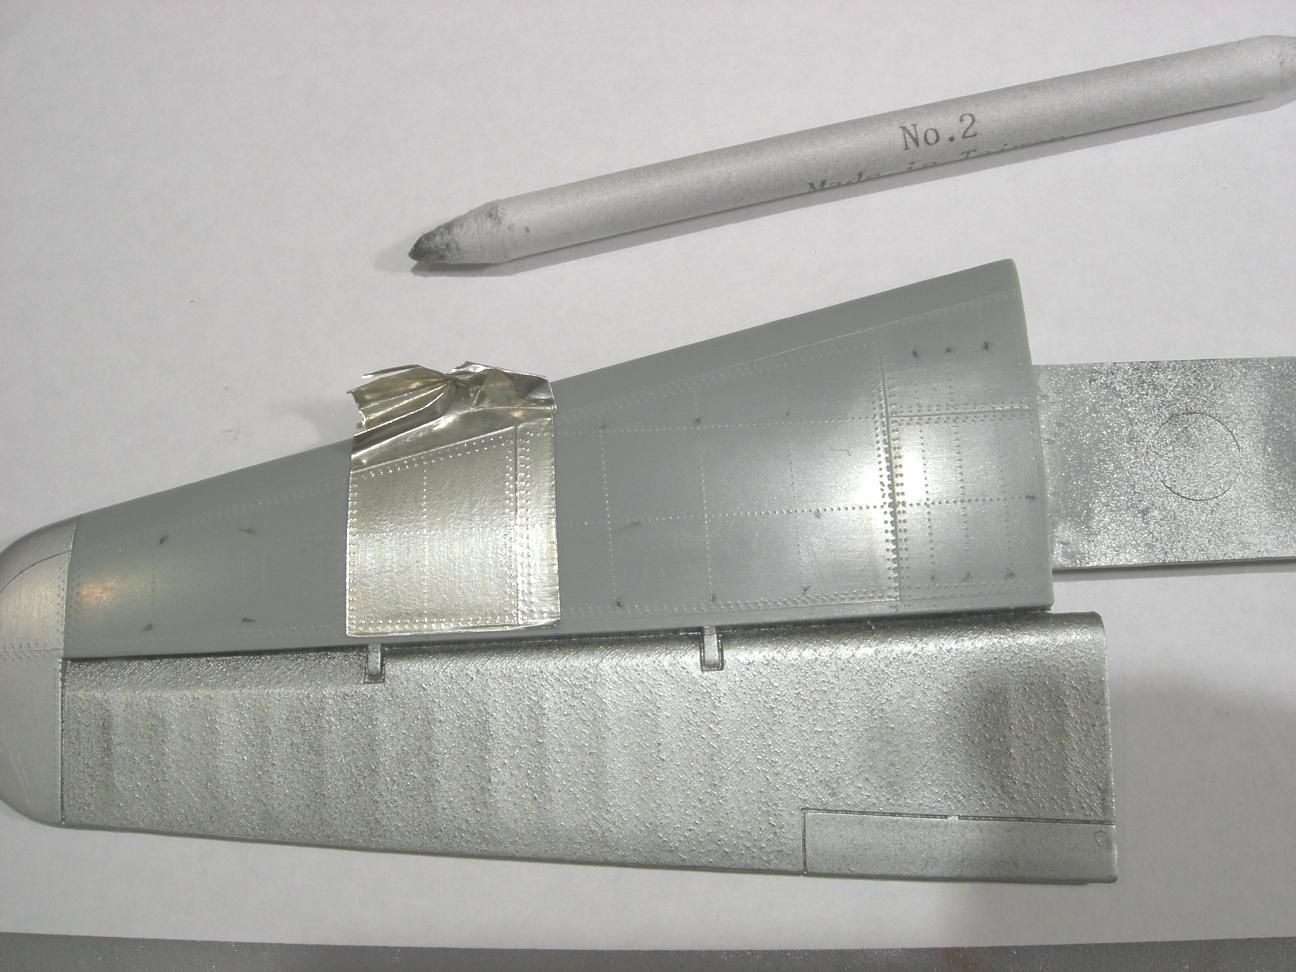
After the rivets were finished I started applying the Bare Metal Foil panel by panel. After the foil is applied it is burnished with a paper blending stick to remove wrinkles. The paper blending stick is very soft so no matter how hard it is pressed against the foil it will not tear the foil. Notice how the rivets telegraph through the foil. The Bare Metal Foil is way to shiny so I sprayed the entire sheet with "Simple Green" which knocks down the shine.

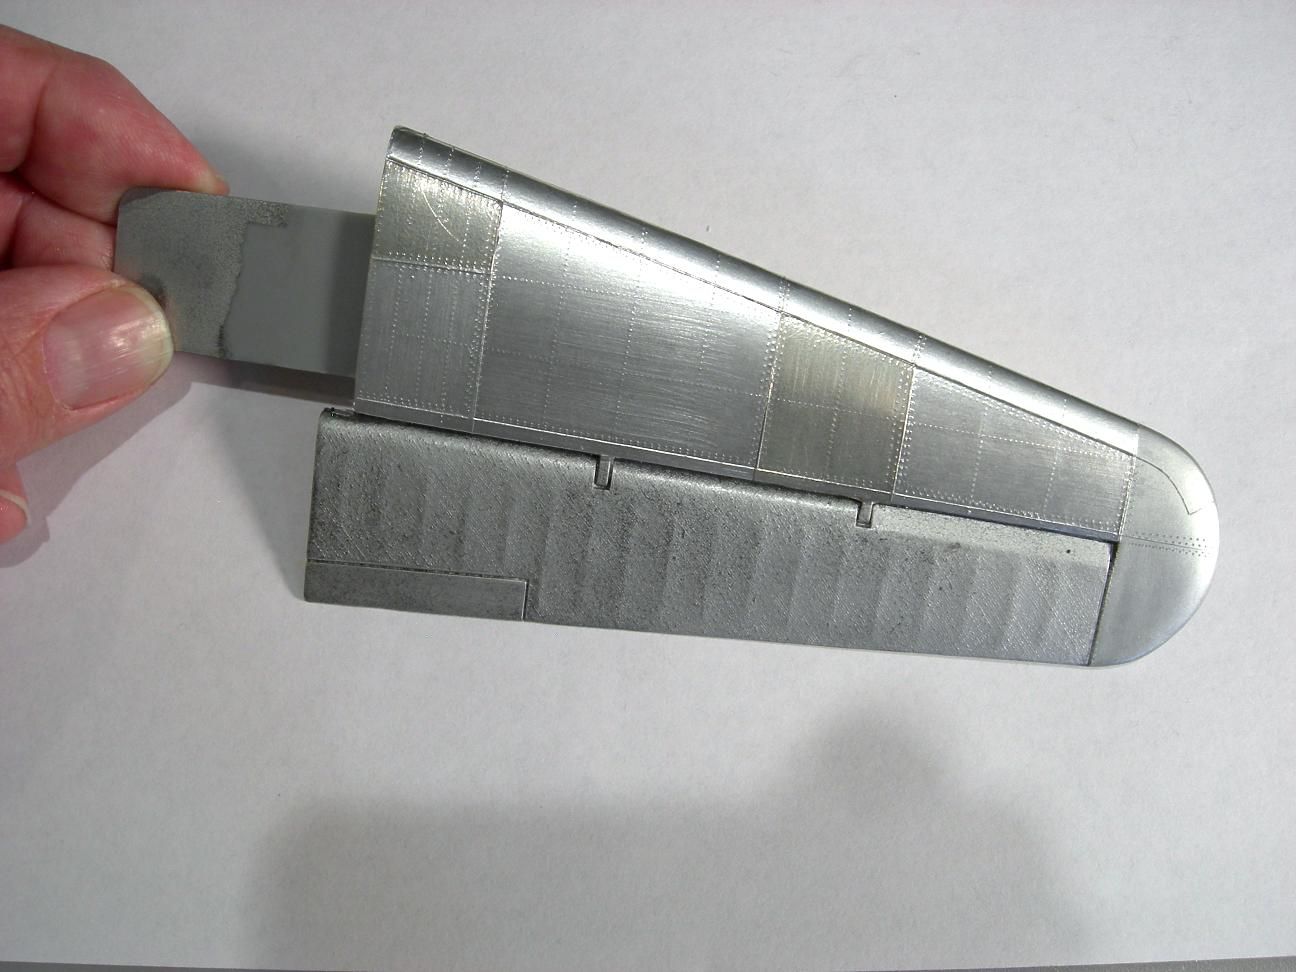
This is the final result. I used two types of metal foil, Matt Aluminum Plate and Bright Chrome. I used the Bright Chrome on two panels to add visual interest. I also ran 0000 steel wool across each panel to replicate the natural grain of aluminum plates. The finished wing is not as shiny and bright as indicated in the photo. I used a bright light to enhance the grain in the metal foil.