SEARCH FINESCALE.COM

Enter keywords or a search phrase below:

Revell P-51D Mustang 1/32 Scale

3795 views
39 replies
1 rating 2 rating 3 rating 4 rating 5 rating
  • Member since
    February 2015
  • From: California
Posted by PA24-250Flyer on Tuesday, June 18, 2019 7:18 PM

Thanks for the kinds words guys!

  • Member since
    August 2015
  • From: the redlands Fl
Posted by crown r n7 on Tuesday, June 18, 2019 10:22 AM

OUT standing 


 Nick.

  • Member since
    January 2015
Posted by TheMongoose on Tuesday, June 18, 2019 8:39 AM

Really super job on this. I loved the demarcation line between nmf and od!

In the pattern: Scale Shipyard's 1/48 Balao Class Sub! leaning out the list...NOT! Ha, added to it again - Viper MkVii, 1/32 THUD & F-15J plus a weekend madness build!

fox
  • Member since
    January 2007
  • From: Narvon, Pa.
Posted by fox on Monday, June 17, 2019 8:04 PM

Toast Toast Toast

Jim  Captain

 Main WIP: 

   On the Bench: Artesania Latina  (aka) Artists in the Latrine 1/75 Bluenose II

I keep hitting "escape", but I'm still here.

  • Member since
    February 2015
  • From: California
Posted by PA24-250Flyer on Monday, June 17, 2019 6:48 PM
Thanks so much for the kind words! I appreciate it! I did really enjoy the kit. The aftermarket stuff not only presented an additional challenge, but a very nice reward in appearance in my opinion. Best Regards, George
  • Member since
    March 2012
  • From: Corpus Christi, Tx
Posted by mustang1989 on Monday, June 17, 2019 11:15 AM

I've really gotta hand it to you for making such a great build out of this kit. Very nicely put together and fantastic job on the paint, decaling and weathering.


 Forum | Modelers Social Club Forum (proboards.com) 

  • Member since
    February 2015
  • From: California
Posted by PA24-250Flyer on Sunday, June 16, 2019 9:33 AM
Thank you Steve! I appreciate the feedback! Best Regards, George
  • Member since
    February 2018
  • From: North Carolina, USA
Posted by Model Monkey on Sunday, June 16, 2019 7:21 AM

Brilliantly done!  Truly inspirational Mustang.

  • Member since
    February 2015
  • From: California
Posted by PA24-250Flyer on Wednesday, May 15, 2019 2:17 PM

Hi Don,

I found this kit to be more enjoyable than the Tamiya kit. I hope you will also. I will say that I don’t think it is cheaper if you add all the detail. I will say that once it is done with those details I would not go back to the Tamiya kit unless I wanted to display the engine and gun bays. I put together the following as a description of what it all included in this build:

Revell P-51D-5NA 1/32 scale


Depicting Happy Jack’s Go Buggy flown by Major Jack M. Ilfrey. 79th Fighter Squadron, 20th Fighter Group. December 1944.


Aftermarket details:

BarracudaCals cockpit decals.

Eduard 632117 Propeller

Eduard 632116 wheels

Special Hobby Q32322 Tail Wheel

Cmk 5123 Main Undercarriage 

Cmk 5128 Metal Drop Tanks

Cmk Q32319 N-9 Gunsight

Cmk 32316 Control Column

Eduard 32420 Undercarriage bay details

Eduard 33186 Cockpit detail set

Master Model AM-32 Armament & Gunsight detail set

A.M.U.R. Reaver RC3217 P-51 Flaps

Alclad and Mission Models paints


All the Best!

George

  • Member since
    November 2009
  • From: Twin Cities of Minnesota
Posted by Don Stauffer on Wednesday, May 15, 2019 11:50 AM

Tosh

The challenge building a all chrome plated Mustang is that, how do you glue things together.  I had to use a #7 blade and carefully scrape off the chrome in every area that was supposed to be fused.  As for 1/32 Tamiya kits, you can see below a Tamiya 1/32 Zero.  I also built the Spitfire, Corsair, and Mosquito.

Anyway, Here you go!

Your Friend, Toshi
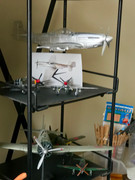


To me, this is no different than regular paint.  I never trust a glue joint if I do not scrape the paint away, so the use of a metalizer for me entails no extra work. BTW, this thread convinced me to order the kit.  Got the kit the other day, still waiting for some of the third party detail.


Don Stauffer in Minnesota

  • Member since
    February 2015
  • From: California
Posted by PA24-250Flyer on Tuesday, May 14, 2019 8:21 PM
Thanks Don!
  • Member since
    November 2009
  • From: Twin Cities of Minnesota
Posted by Don Stauffer on Tuesday, May 14, 2019 8:47 AM

looks great!

Don Stauffer in Minnesota

  • Member since
    November 2004
Posted by snapdragonxxx on Monday, May 13, 2019 5:51 PM

All the builds I do and the pics I post are Imgur ones.

I wash through photoshop and resave as a JPEG and then upload to my Imgur account, having a new album for each build.

My camera is a big professional one with a full frame shutter/sensor and so when I upload I use the ability on the website to change the size to one for 19 inch monitors as I figure that's what most of forum members will have.

I moved when Photoshop stated dmanding money with menaces!


  • Member since
    February 2015
  • From: California
Posted by PA24-250Flyer on Monday, May 13, 2019 2:51 PM

   Hi Folks, sorry for not getting any updates over the last few months. My job has been keeping me from being home and now have finally been able to finish. I hope you enjoy. I am actually quite pleased but welcome any and all constructive criticism you can offer. Thanks! George

  • Member since
    February 2015
  • From: California
Posted by PA24-250Flyer on Monday, May 13, 2019 2:48 PM

  • Member since
    February 2015
  • From: California
Posted by PA24-250Flyer on Monday, February 18, 2019 9:18 PM

Well, I managed to get home for a few days and made some progress. I did not coat the NMF with clear before I applied the OD paint and stripes. I used Mission Models acrylic paint for the OD. It dries to a low sheen, rather than a dead flat so I made an attempt at decaling without a gloss coat. I got most of the large decals on with no silvering but did have some appear on the small placards at the wing fuel filler caps. I got through it ok with some light scuffing and micro sol applied a few times. I think before I finish with the rest of the small placards I will be gloss coating just to be safe then weather it down from there. I am one of those builders that just plows ahead sometimes in the excitement of seeing it come together. I had to get back on the road for my job so it will be back to a slow pace for a while. Just thought I would share...

George


  • Member since
    February 2015
  • From: California
Posted by PA24-250Flyer on Wednesday, February 13, 2019 5:24 PM

UKguyInUSA

Quote: "If your house is like mine I actually don’t look forward to holidays when I have to clean the table of my stuff so we can entertain! Lol!"

Cheers!

George


That is too funny...that is exactly how I am..everytime we have guests or family come for dinner, too...I have to clear all my stuff away into storage, clean and polish the dining table, reset it, then when everyone has left...take everything back out of storage and set my space up again! Stick out tongue

Do you have a YouTube channel, and if so, do you upload any modeling videos? 
Drop me a link if you do and I'll reciprocate the honor and subscribe to you.

Cheers,  Smile Beer Beer


[/quote]

LOL! I am glad I am not alone in this world of kitchen table comendearing! Is it bad to wish I had a bigger kitchen table? I digress. You are way ahead of me with YouTube at this stage. Maybe someday. In the meantime I will continue to learn from you I suppose.

George


  • Member since
    February 2015
  • From: California
Posted by PA24-250Flyer on Wednesday, February 13, 2019 5:18 PM

Tosh

The challenge building a all chrome plated Mustang is that, how do you glue things together.  I had to use a #7 blade and carefully scrape off the chrome in every area that was supposed to be fused.  As for 1/32 Tamiya kits, you can see below a Tamiya 1/32 Zero.  I also built the Spitfire, Corsair, and Mosquito.

Anyway, Here you go!

Your Friend, Toshi


 That looks really cool! Like a ghost ship or something. I’ll bet it was scary putting it together without an option to repair the chrome plating if damaged. Thanks for sharing!
 
George

  • Member since
    April 2015
  • From: New Hampshire, USA
Posted by UKguyInUSA on Wednesday, February 13, 2019 2:02 PM

Quote: "If your house is like mine I actually don’t look forward to holidays when I have to clean the table of my stuff so we can entertain! Lol!"

Cheers!

George


[/quote] That is too funny...that is exactly how I am..everytime we have guests or family come for dinner, too...I have to clear all my stuff away into storage, clean and polish the dining table, reset it, then when everyone has left...take everything back out of storage and set my space up again! Stick out tongue

Do you have a YouTube channel, and if so, do you upload any modeling videos? 
Drop me a link if you do and I'll reciprocate the honor and subscribe to you.

Cheers,  Smile Beer Beer

  • Member since
    December 2018
Posted by Tosh on Wednesday, February 13, 2019 9:50 AM

The challenge building a all chrome plated Mustang is that, how do you glue things together.  I had to use a #7 blade and carefully scrape off the chrome in every area that was supposed to be fused.  As for 1/32 Tamiya kits, you can see below a Tamiya 1/32 Zero.  I also built the Spitfire, Corsair, and Mosquito.

Anyway, Here you go!

Your Friend, Toshi


Reside in Streetsboro, Ohio


  • Member since
    November 2009
  • From: Twin Cities of Minnesota
Posted by Don Stauffer on Wednesday, February 13, 2019 9:15 AM

Tosh

Try postimage.org.  Everything looks fantastic, can’t wait for the Finnish!

Your Friend, Toshi


Ditto

Don Stauffer in Minnesota

  • Member since
    February 2015
  • From: California
Posted by PA24-250Flyer on Wednesday, February 13, 2019 7:49 AM

Hi Toshi,

I bet the chrome Mustang does look awesome! If you have a link I would love to see it. Ironically my first experience doing Alclad is with the Tamiya Mustang about a year ago. That is where I learned a lot about patience with the dry times, especially in winter. I remember doing research on other sites about using it and how fast it was to dry and mask off panels, etc. My experience was a lot more frustrating. I did get through the build and it turned out ok, but only because I got lucky in being able to cover up a lot of handling marks and self-inflicted damage under decals and weathering, and invasion stripes. I vowed I would take this one much slower and give it a fair shot. So far I am much happier giving it time to dry. My job takes me out of town for weeks at a time lately so the cure time is excellent while I’m gone. It also makes for frustrating progress but I can say I am happier so far. I may try the Tamiya kit agin someday as it does have incredible details. 

Thanks!

George

  • Member since
    December 2018
Posted by Tosh on Wednesday, February 13, 2019 2:09 AM

Looking awesome.  I’ve never tried Alclad, I should give it a try.  I built the Tamiya 1/32 Mustang twice.  My first Tamiya 1/32 Mustang was donated to my local VFW in Streetsboro, Ohio.  The second one I built was the limited edition all Chrome Mustang.  Every part that was not chromed was painted/AB with Model Master silver.  Even the interior, cockpit, and engine was done in Model Master Silver.

It is one of my most prized build.  At first when I posted my WIP, Forum members wished me luck as it seem like a challenge.  Several members noted that it looked like something you see on the desk of a aircraft companies CEO/Executive.  Lol!

Keep up the great work, I’m hungry for more of your WIP.

Your friend, Toshi

Reside in Streetsboro, Ohio


  • Member since
    February 2015
  • From: California
Posted by PA24-250Flyer on Tuesday, February 12, 2019 9:29 PM

Thanks Martin! I just subscribed to your channel. I look forward to checking out your videos! Funny you should mention the dining room table...that is exactly where I do my building...then out to the garage to spray. I definitely use a cartridge type respirator when working with Alclad. I don’t want to take chances with my health when I am trying to enjoy my hobbyYes. If your house is like mine I actually don’t look forward to holidays when I have to clean the table of my stuff so we can entertain! Lol!

Cheers!

George

  • Member since
    April 2015
  • From: New Hampshire, USA
Posted by UKguyInUSA on Tuesday, February 12, 2019 9:04 PM

Looking really nice...the Tamiya 1/32 kit is one I'd love to have a go at...but not until I have a work area other than the dining table, wherein I can safely airbrush Alclad metal colors and vent the fumes away....a kit of that caliber would require the best paints available for BMF's.

Cheers,

Martin Smile

  • Member since
    February 2015
  • From: California
Posted by PA24-250Flyer on Tuesday, February 12, 2019 7:50 PM

The Tamiya kit has more rivet details on the canopy and other areas than this kit. I am attempting to overcome that using Archer Details resin detail decals. I think they turned out great and wish I had learned of these earlier.


  • Member since
    February 2015
  • From: California
Posted by PA24-250Flyer on Tuesday, February 12, 2019 7:42 PM

After the first coat of primer, then some wet sanding of the primer, a gloss black coat, then the beginning of Alclad. Base overall is polished aluminum. Then some assorted finishes for panels, with the wings in high speed silver.


  • Member since
    February 2015
  • From: California
Posted by PA24-250Flyer on Tuesday, February 12, 2019 7:37 PM

With the resin flaps on and the base coat of Alclad black microfill primer. The key with Alclad I find is let the base coat cure at least 24 hours and you don’t get damage from handling. Also, I always wear disposable gloves that I change regularly to prevent contamination.


  • Member since
    February 2015
  • From: California
Posted by PA24-250Flyer on Tuesday, February 12, 2019 7:32 PM

Thanks so much for the feedback! I think the postimage.org site is really doing the best so far using the iPad. As far as the paint goes, I am using mostly Alclad. I tested a little of the mig ammo metals but found that they did not have good adhesion for masking panels if I used the Alclad as a base. I am sticking with Alclad going forward...I am going to post some more of the process...

JOIN OUR COMMUNITY!

Our community is FREE to join. To participate you must either login or register for an account.

SEARCH FORUMS
FREE NEWSLETTER
By signing up you may also receive reader surveys and occasional special offers. We do not sell, rent or trade our email lists. View our Privacy Policy.