SEARCH FINESCALE.COM

Enter keywords or a search phrase below:

1:24 Airfix Hawker Typhoon Car Door Version Start-to-Finish Build

10749 views
69 replies
1 rating 2 rating 3 rating 4 rating 5 rating
  • Member since
    March 2012
  • From: Louisville, KY
Posted by Builder 2010 on Monday, February 3, 2020 5:26 PM

Happy Monday. My Monday's are happy because my wife and I have a deal that I don't work in the shop on weekends. So Mondays mean getting back to the Typhoon.

I masked the for engine compartment to paint the firewall semi-gloss black. I decided to not paint the cockpit side since it wil be almost entirely obscured by the instrument panel and masking in there was much more difficult than the engine compartment. In addition to Tamiya tape I used some Microscale liquid mask to close off any missed areas around the tube joints. After painting I went back and touched up the flat aluminum and got a decent job. The paint seemed pretty flat.

I then used one of my disposable eyeliner brushes (Amazon 100 for $7.99). They're very, very pointy for great detail work. And at 8 cents a piece, while I do clean them, I don't clean them very often. Some of the piping was hard to reach and I was reconsidering my decision to glue it all in before painting. But I perservered and got the job done. I dealing with the masking tape I partially broke the flight stick. With some Bondic and then thin CA, I did get it glued tightly. If it breaks again, I'm making a new one out of soldered brass.

Since I'm displaying the model with all the covers off the front end to show off the Napier Saber engine and all it's plumbing, having a pilot in the cockpit wouldn't be appropriate, so I used the option where you glue the seat belts in. The upper seat belts are the kit's molded styrene. I broke one of the lap belts and thought I lost the other (found it later). Therefore; I made new ones out of wine bottle foil. The seat "leather" color is Tamiya Nato brown. The seat belt buckles are picked out with the Molotow Chrome Pen.

The last thing I did (not shown) was paint the compass and it's support struts. The part is all transparent so I used liquid mask to protect the clear lens and painted the bottom with the chrome pen to give it some more interest.

Work continues tomorrow on more cockpit details.

  • Member since
    March 2012
  • From: Louisville, KY
Posted by Builder 2010 on Friday, January 31, 2020 10:14 PM

Day 2 Typhoon construction. 

More framing pieces. The beauty of building a large scale kit is that you're really building an airplane. You might get some of this detail in 1:32 (See my Tamiya Corsair build), but small than that you'll build skin, but not much guts. This plane is ridiculous. Engineering is pretty good and confirms what I've been told about new Airfix kits. It compares nicely to Tamiya with clean parts with little or no flash. 

When I was attempting to install the X-bracing in the bow, it wasn't going in right. Problem? I had installed the main spare reversed. Good have been a disaster, but with careful weakening of the lap joint with the #11, I was able to wiggle it apart without breaking anything, turned it around and glued it in correctly. When I did that, the front under-engine bracing went in perfectly. The arrow points to this spar, now placed correctly.

The rear area also has lots of X-bracing/trusses. These went in without difficulty. These steps also included the hydraulic emergency hand pump which actually has piping molded leading to it. It included the rudder pedals and its trim wheel and the elevator trim wheel. I used some medium CA on a few critical joints that I felt needed some more boost, and this included the flight stick.

The armor plate behind the pilot seat must have been different in the "Car Door" version than the later one which Airfix came out with first. I know this, because there was an added sprue, "Z", that was out of alphabetical order. The letters ended in Sprue "R" and then there was Z. So Z includes all the Car Door variations from the other model. The arrow points to this part.

It's getting to the point where I have to start painting something. If I wait much further I will be unable to reach certain parts. But it's clear that painting the frame parts before gluing would have been a mess since every glue point would have to be cleaned for good adhesion. The level of detail is so intense that you feel like you want to jump in and fly it.

  • Member since
    March 2012
  • From: Louisville, KY
Posted by Builder 2010 on Thursday, January 30, 2020 9:43 PM

Typhoon construction has begun! Page one has you building the inner framing of the fuselage. I had at least three parts reversed due to my inability to clearly see just how they were orienting the images in the plan. Nothing was irreparable. You have to stare at the drawings with serious concentration to see which direction they're actually facing the image. It's very much like the psychological figure/ground illusions. You can see it facing in two directions, however, only one is correct. I almost finished the first page.

In this image you see an X-bracing that sits at the bottom of the cockpit floor. At first it looked like it sat on top of the frame, but after closer inspection, it dropped down into the bowels of the frame and latched onto some tabs jutting out of the side rails. The arrow shows this piece.

The bulkhead (firewall) is supposed to be semi-gloss black. All the frame materials, aluminum. Becuase I wanted to have all the glue surfaces pristine in these critical parts, and the glue surfaces are small at best, I decided to asseble the frame, air brush the aluminum and then with some careful masking, air brush the firewall.

The parts are pretty clean and have very finely molded details. I've been using a micro-razor saw more and more to cut parts from sprues since it leaves almost nothing left to file off. I spend a lot of time to do parts cleanup. It makes a better job and ensures good glue contact area.

  • Member since
    March 2012
  • From: Louisville, KY
Posted by Builder 2010 on Thursday, January 30, 2020 9:31 AM

Thanks!

When I saw that picture of the Bear bomber I thought that was one of the 1:24 kits in your stash and I freaked... trying to imagine how big that model would be. Then I came to and saw it was in your signature line. Whew!


  • Member since
    August 2014
  • From: Willamette Valley, Oregon
Posted by goldhammer on Wednesday, January 29, 2020 10:57 PM

Great idea, mental note made for when I start the 1/24 F6F.  Will try out on another kit before then

Have 5 other 1/24's in the stash besides the' 'Cat, so it will come in handy.

  • Member since
    March 2012
  • From: Louisville, KY
Posted by Builder 2010 on Wednesday, January 29, 2020 9:59 PM

Hey gang, I'm back. My last post in November was when I picked up the Typhoon. Since then I finished two projects: the massive engine house and a cute little appliance store.

Today I installed the "chain link" fence (bridal tulle and soldered brass). There's still some odds and ends detail work, but for all intents and purposes, it's done.

The appliance store is one of the few structures on my model RR that I did not build. But i did do and entire 1970s ish interior. I 3D printed all the appliances and painted them an anachronistic mix of 1970s Havest Gold and Avocado and some modern stainless. 

The sign flashes and is an electro-luminescent product from Miller Engineering. I bought the sign nearly 10 years ago just for this project.

So the Typhone project is now officially underway. First up was creating another sprue rack. I learned from the one I created for the Corsair to make the slots wider. And instead of working with real wood and wood glue, I just cut up a couple of cardboard cartons left over from two Costco LED shop light fixtures. I'm pretty good at "cardboard engineering." This time I cut the slots with my paper cutter and used hot glue to put it all together. It really didn't take long. 

After opening up the box I laid out 1 inch spacing for the separators.

I hot glued the side tabs to form a 90 degree angle. The separators are 6.5" inches and I folded over the 1/2" to make one of the glue tabs. The other tab was a separate piece of cardboard bent at 90 degrees.

Work continued until the rack was filled. I needed something like this to organize the massive sprues in this big kit. Even so, they are enormous and hang way out of the rack. I found with the Corsair that it really speeds up the build when you're not fiddling through all those sprues to find the one you need. 


Here it is all loaded. One inch spacing was not a guess. I actually measured the thickness of some of the sprues with the curvy parts. I made the slots to tight on the Corsair rack. Nice thing about cardboard, if it gets wrecked, I just glue together another one. Cost? About a 1/2 of a hot glue stick.

Now that my sprues are in control, making the plane will begin. You need a big space just for the sprue rack.

Until next time...

  • Member since
    March 2012
  • From: Louisville, KY
Posted by Builder 2010 on Monday, November 18, 2019 8:50 PM

I was looking into any aftermarket for the kit, but after looking at all the Eduard stuff in detail, I don't think the kit really needs it. PE for PE's sake is not always a good or thrifty decision. Some remarks were made about plastic landing gear versus metal, but even there, the decision was to stay with the kit gear. Any thoughts? I am going to buy the Eduard mask set. I have found that masking sets do make building more fun.

  • Member since
    November 2009
  • From: Twin Cities of Minnesota
Posted by Don Stauffer on Sunday, November 17, 2019 6:36 AM

Beautiful engine house!  That engine is terrific.  Love building engines myself. 

Don Stauffer in Minnesota

  • Member since
    February 2012
  • From: Olmsted Township, Ohio
Posted by lawdog114 on Sunday, November 17, 2019 1:17 AM
Nice lathe set up in there! I used to operate a turret lathe. The memories......

 "Can you fly this plane and land it?...Surely you can't be serious....I am serious, and don't call me Shirley"


  • Member since
    December 2002
  • From: Northern California
Posted by jeaton01 on Sunday, November 17, 2019 12:41 AM

Ochen Eenteresno!

John

To see build logs for my models:  http://goldeneramodel.com/mymodels/mymodels.html


  • Member since
    March 2012
  • From: Louisville, KY
1:24 Airfix Hawker Typhoon Car Door Version Start-to-Finish Build
Posted by Builder 2010 on Saturday, November 16, 2019 11:10 PM

Today I picked up the last Airfix 1:24 Typhoon in the USA according to the proprietor of Scale Reporductions Inc., here in Louisvile. I've been eyeing this kit for a while specifically to build that marvelous engine, the Napier Sabre. The kit dedicates 83 parts just to it which is why I'm going to build it with all the panels off the engine and radiator which is one of the options. I'm also going for version D, the D-Day version that has a brace of rockets under. I'm going with the cockpit open and the pilot seated. And of course I'm going to open the gun bays. It will be fun. I won't be starting for a bit since I'm finishing up some railroad projects. I have have been busy since the Corsair. In this plastic model hiatus I've acquired a high-res LCD Matrix UV 3D Resin Printer. For those of you not following this technology in the last couple of years due to a change in tech, the price for these printers has dropped 10X, going from starting in the $3k range to under $300. It was the LCD matrix that did the trick. They're basically using a cell phone screen with a UV LED below it to expose each layer in the photopolymer resin.

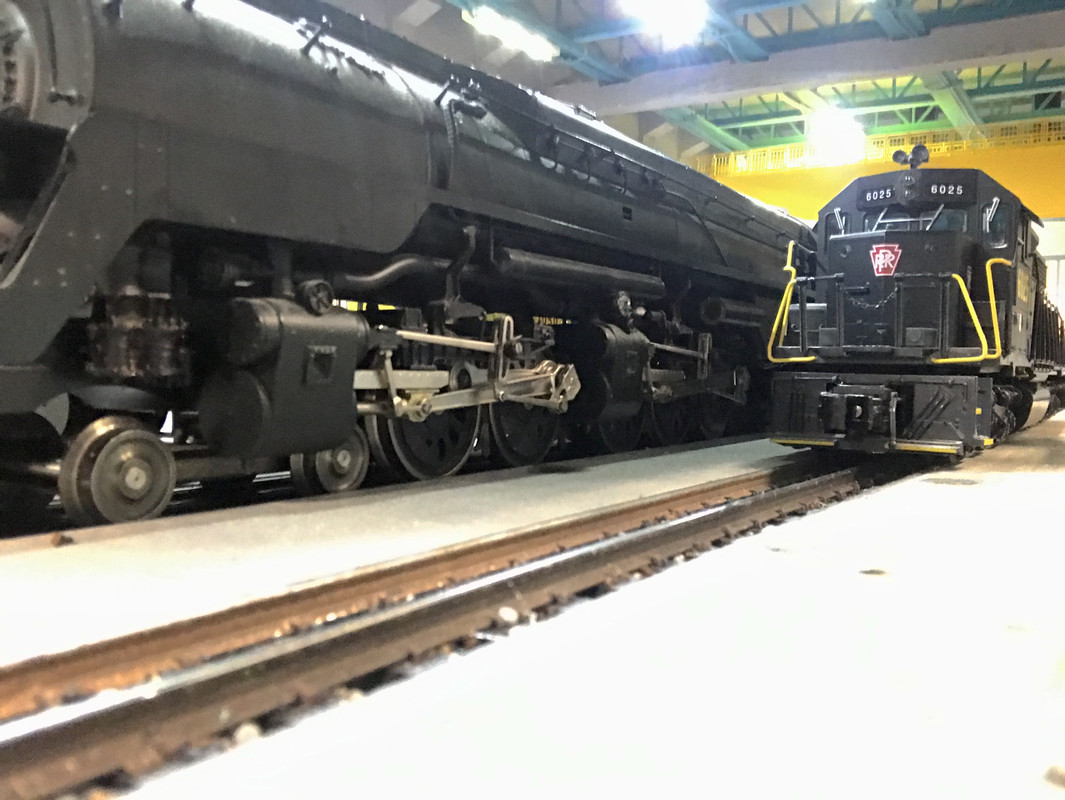
Some of the projects I've been working on are a huge 40" engine house with 3D printed components.
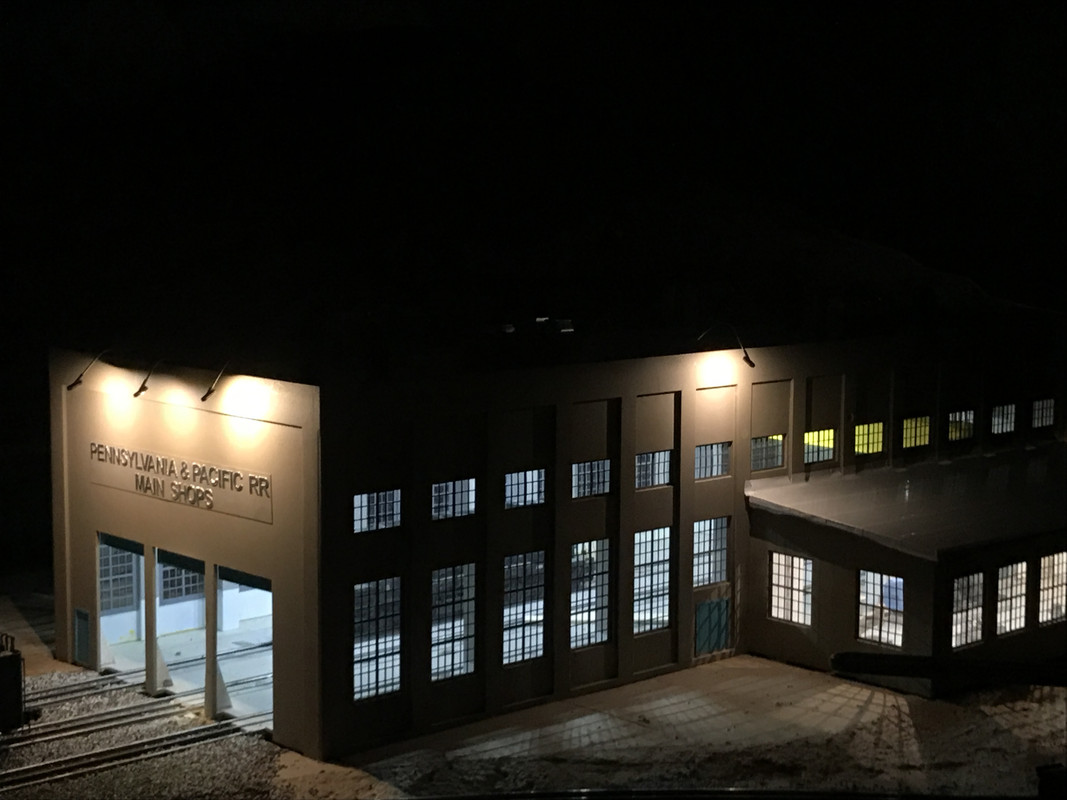
Here's a couple of interior shots.
 

The model of an Electromotive Division of GM 567 locomotive prime mover was created by me from drawings done on SketchUp and then printed in 7 parts on the Elegoo Mars 3D Printer. The open valve cover shows all the rocker arms, cylinder bolts, injectors, cams and throttle rack. 

Next to the engine house is a machine shop that I'm populating with 1:48 scale machine tools. Most are originally found on the SketchUp 3D Warehouse, but I drew from scratch the radial drill and large locomotive wheel lathe. I'm currently designing a vertical turret lathe. I'm also printing benches, small tools and other stuff that will make it more real. This is a long-term project with lots more things to be made plus some nasty weathering.

The last thing I've been working on is a solid bronze 1:21 scale Sikorsky S-38 seaplane. It was atop of a memorial in the old admin building at Bowmen Field airport in Louisville. The memorial was dedicated in 1937 to Robert Gast who was one of the founders of the airfield in 1919. He was lost in an S-38 in 1934. Four years ago in an effort to replace the bronze hemisphere on which the model was situated, the model fell off and dropped the 7 feet to the concrete floor. It came apart violently. This was one hour before a re-dedication ceremony where guests were invited. In their panic, the Heritage team glued it back together with hot glue! The wing span is 41" and it weighs 50 pounds. Hot glue didn't cut it.

I was commissioned to attempt to bring it back together in a way that would extend its life another 80 years. That meant soldering it all back togeter. Parts were missing. After getting it sand blasted, I was able to start reconstruction. I needed to use an acetylene/air torch to get enough heat to melt basic solder. It was a challenge all the way, but the end was worth it.

The landing gear were missing, destroyed in a fall that happened a number of years before the last crash. I drew them on SketchUp and then printed them. After painting with Venetian Gold and weathered it to attempt to match the real metal.

And finally, I've been continuing to design and print locomotive prime movers for use as diorama pieces and flat car loads. This one, which I just finished is a Baldwin VO-1500 Turbodiesel used in the late 40s and 50s.

So stay tuned. Typhoon work will commence in a couple of weeks.

JOIN OUR COMMUNITY!

Our community is FREE to join. To participate you must either login or register for an account.

SEARCH FORUMS
FREE NEWSLETTER
By signing up you may also receive reader surveys and occasional special offers. We do not sell, rent or trade our email lists. View our Privacy Policy.