SEARCH FINESCALE.COM

Enter keywords or a search phrase below:

Hasegawa P-40E cockpit finished

10043 views
30 replies
1 rating 2 rating 3 rating 4 rating 5 rating
  • Member since
    November 2005
Hasegawa P-40E cockpit finished
Posted by Anonymous on Wednesday, August 10, 2005 3:18 AM
I finished the cockpit today. Parts of the PE set are prepainted (instrument panel, placards, belts, and some dials and controls). I like the fact that the instrument panel has stencils added, but the black looks grainy. Not an orange peel, but it's covered with spots of a lighter black. I couldn't repaint it without destroying the stenciling, so I left it alone. It looks good in the cockpit, but the spots show under magnification and in large pics. I hope I just got a "bad" set.

I added some wiring and linkages that were missing from the kit and PE set. I used Model Mastrer enamels, and my usual washes and drybrushes. I shaved off the gunsight's poor representation of the sighting glass, and I'll add pieces of clear sheet just before I glue the windscreen in place. They will only get lost if I add them any sooner.

I gotta say that I really like those placards !


For larger pics of the instrument panel and seat/floor, you can click on my site: http://www.pix.prettyneatinc.com/p40build.htm

Now to put together this puppy and start spraying some paint !
  • Member since
    April 2003
  • From: NSW, Australia
Posted by pingtang on Wednesday, August 10, 2005 4:00 AM
It's looking great pix. Those PE parts look great, especially all those placards. Looking forward to seeing it painted.Thanks for sharing.Thumbs Up [tup]
-Daniel
  • Member since
    December 2004
  • From: Haninge, Sweden
Posted by Gilmund on Wednesday, August 10, 2005 7:13 AM
You did a fantastic job on that cocpit. Great job, Pix. You just gotta love the P-40...
- Johan Byberg -</font id="blue"> "Who´s the most foolish, the fool or the fool who follows?"</font id="size1">
  • Member since
    February 2003
  • From: Northeast Bavaria, Burglengenfeld, Germany
Posted by kielers on Wednesday, August 10, 2005 7:38 AM
Hi Pixilator,

This cockpit looks great, It's got your touch.

What PE set is it? I like the placards too, and especially the detail on the instrument panel.

Thanks
Steve

"To stand upon ramparts and die for our principles is heroic, but to sally forth to battle and win for our principles is something more than heroic." -- Franklin Delano Roosevelt. "Never in the field of human conflict was so much owed by so many to so few." -- Winston Churchill

  • Member since
    May 2004
  • From: Dallas
Posted by KINGTHAD on Wednesday, August 10, 2005 8:25 AM
The office looks great Pix, Who's placecards are you using?

Thad
  • Member since
    July 2004
  • From: Northern KY
Posted by mucker on Wednesday, August 10, 2005 8:27 AM
Pix:
I recently finished my Trumpeter P-40B interior OOB...you know, spartan, shallow cockpit, Lay-Z-Boy pilot seat...Your cockpot is simply amazing. I can't wait to see the completed plane. Which decals will you be using? Any particular plane?

  • Member since
    November 2005
Posted by Anonymous on Wednesday, August 10, 2005 8:29 AM
It looks great
  • Member since
    January 2005
  • From: Ohio
Posted by mikepowers on Wednesday, August 10, 2005 9:00 AM
Looks really good.
The detail that were able achieve with todays kits are really amazing.
Makes me want to start a P-40.
  • Member since
    February 2003
  • From: A Spartan in the Wolverine State
Posted by rjkplasticmod on Wednesday, August 10, 2005 9:27 AM
Looking great Pix. I used the same Eduard set on my build & the finish was fine. You may have got a bad copy, but makes you wonder about Eduard Quality Control.

Regards, Rick
RICK At My Age, I've Seen It All, Done It All, But I Don't Remember It All...
  • Member since
    November 2005
Posted by Anonymous on Wednesday, August 10, 2005 10:38 AM
Thank you pingtang, Gilmund, kielers, Thad, mucker, Dragan, mikepowers, and Rick !

kielers - the PE set is from Eduard. I have pics of the frets and instructions here: http://www.pix.prettyneatinc.com/p40build.htm


Thad - the placards are included with the Eduard PE set. I have the full detail set, but the smaller fret is their prepainted "Zoom" set, which you can get separately.

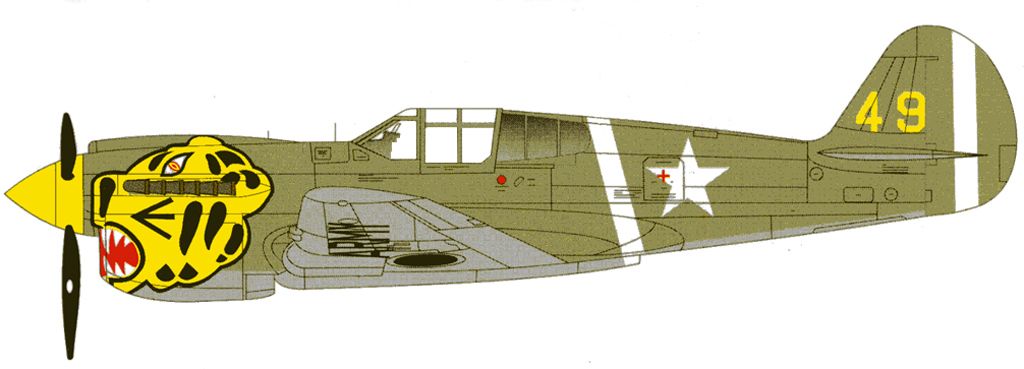
mucker - I'm using decals from Eduard for an Aleutian Tiger. The National Insignia are erroneously missing the blue discs. I'll be replacing those.


mikepowers - this is a great kit. Some (who probably don't dryfit parts) have whined about the fuselage plugs that were used so that a few different versions could be built from the basic molds. Dryfitting the parts prevents any surprises. You can see what I did with them here: http://www.pix.prettyneatinc.com/p40build.htm

Rick - I've used dozens of Eduard PE sets, and this is the first time I've been disappointed (although it's only slightly and only from from a couple of parts). Nobody (and no company) is perfect, I guess that the odds just cought up to me. I'll still buy their sets for every kit I build !

Thanks again !
  • Member since
    November 2004
  • From: Columbia Gorge
Posted by brain44 on Wednesday, August 10, 2005 11:07 AM
Pix,

Once again, a masterpiece to inspire us all! The placards come with the Eduard set? I have not used any of their sets as yet, so when I do my AMT P-40E. I'll try theirs! Again, superb work!

Brian Bow [bow]Bow [bow]Bow [bow]
"I won't be wronged, I won't be insulted, and I won't be laid a hand on. I don't do these things to other people and I expect the same from them." John Bernard Books (The Shootist)
  • Member since
    December 2002
  • From: NYC, USA
Posted by waikong on Wednesday, August 10, 2005 12:40 PM
All I can say is WOW! Your detailing just looks better with each build. I just finished the Amtech P-40E myself, looking forward to the rest of the build.
  • Member since
    January 2003
  • From: 40 klicks east of the Gateway
Posted by yardbird78 on Wednesday, August 10, 2005 1:17 PM
Fabulous work on the P-40 cockpit, as per your usual work.

Darwin, O.F. Alien [alien]

 ,,

The B-52 and me, we have grown old, gray and overweight together.

  • Member since
    December 2002
  • From: A secret workshop somewhere in England
Posted by TANGO 1 on Wednesday, August 10, 2005 1:29 PM
Very, very good work Pix. I just wish I could do it as well as you-with every build, you impress me more and more. Thanks for sharing this build with us,

Darren.
Regards, Darren. C.A.G. FAA/USNFAW GB
  • Member since
    November 2005
Posted by Anonymous on Wednesday, August 10, 2005 5:44 PM
Thanks Brian, waikong, yardbird, and Darren !

Brian - this set is designed for the Hasegawa kit. You can check Eduard's website, they probably have one for the AMT (or AMTech) kit. There can sometimes be scale differences or parts breakdown that necessitates getting the set designed for a particular kit.

Darren - I'm just getting back up to speed. I built, as a kid, from the early sixties until about 1971. I got back to the hobby in '93, and stopped from 2001 to 2003. Sometimes, it takes this "old man" (I'll be 50 on Saturday) a while to get moving.

Thanks again !

  • Member since
    September 2003
  • From: N.E. Ohio
Posted by dragonfly on Wednesday, August 10, 2005 6:10 PM
Once again Bill, you're blowin us away. Them placards do look awesome. Another great start. Keep us posted.

Jerry
  • Member since
    November 2005
Posted by Anonymous on Wednesday, August 10, 2005 8:10 PM
Thanks Jerry !

Glad you like it so far !
  • Member since
    February 2005
  • From: Cleveland, OH
Posted by RadMax8 on Thursday, August 11, 2005 12:12 AM
Let's just say the IP is weathered... great stuff pix!
  • Member since
    November 2005
Posted by Anonymous on Thursday, August 11, 2005 10:34 AM
Thanks RadMax !

Well, if the panel is "weathered," it will be the only part that is. This won't be on a base or part of a dio, so there won't be any environmental effects applied. Purely a display aircraft.

Thanks again !
  • Member since
    November 2003
  • From: Virginia
Posted by JoeRugby on Thursday, August 11, 2005 12:39 PM
Bill,

Great work...again! It has inspired me to roll up my sleeves and challenge myself. Starting with a P40C...opening flaps, closing in wheel wells etc. When I grow up and want to be just like you!
Check out the WW I Special Interest Group @ http://swannysmodels.com/yabb/YaBB.pl?board=WW1SIG
  • Member since
    November 2005
Posted by Anonymous on Thursday, August 11, 2005 9:29 PM
Thanks Joe !

I believe that it's important to challenge yourself. That's how you acquire skills. If you don't leave your comfort zone, you may never build some of the kits that you want to have on your shelves. Good for you ! I'm looking forward to seeing some pics.

Thanks again!
  • Member since
    April 2003
  • From: Charlotte, NC
Posted by armorman on Thursday, August 11, 2005 9:35 PM
Noice work pix! I think there si one on the shelf at the LHS- might have to take a closer look at it!
Next Up: 1/35 Tamiya Merkava 1/48 Tamiya King Tiger 1/35 Dragon M1A1 AIM
  • Member since
    October 2004
  • From: Northern Virginia
Posted by ygmodeler4 on Thursday, August 11, 2005 9:38 PM
Pretty Sweet Pix.

-Josiah

  • Member since
    November 2005
Posted by Anonymous on Thursday, August 11, 2005 9:53 PM
Happy 50th! And great work on the interior.
  • Member since
    November 2005
Posted by Anonymous on Friday, August 12, 2005 9:35 AM
Thanks armorman, ygmodeler, and jdh !

Glad you like it so far !
  • Member since
    November 2005
Posted by Anonymous on Friday, August 12, 2005 10:12 AM
Great looking job on the interior.
  • Member since
    April 2005
  • From: Piscataway, NJ!
Posted by wing_nut on Friday, August 12, 2005 10:25 AM
Pix... great looking pit.

AndHappy B-Day [bday]

Don't feel bad about getting long in the tooth... you are not alone... I just turned 50 yesterday.

After seeing what you have done here... I know what I am going to get with LHS gift certificate I got. Is that a single detail set? or 2 seperate ones?

Marc  

  • Member since
    May 2003
  • From: Malaysia
Posted by obiwan on Friday, August 12, 2005 12:27 PM
Stunning stuff , Pix .Happy 50th too!
What baby wants baby gets
  • Member since
    November 2005
Posted by Anonymous on Friday, August 12, 2005 3:57 PM
Thanks Bryan, Marc, and obiwan !

Marc - The detail set that I used (#49 314) includes two frets. One is the prepainted "Zoom" set, while the other fret includes unpainted detail parts. You can get the placards, instrument panel, belts, etc. by just buying the prepainted Zoom set (#FE 314). These are the two frets:

to enlarge, click here: http://img.photobucket.com/albums/v280/Pixilater/p40/p40e003.jpg

Marc - happy 50 from one "old fart" to another !

Thanks again !
  • Member since
    March 2004
  • From: Placerville, CA USA
Posted by Mark Joyce on Saturday, August 13, 2005 11:25 AM
Beautiful looking cockpit, Bill. It is very realistic, just like a miniaturized version of the real thing!

And happy birthdayHappy B-Day [bday]. I'm not 50 yet; let's just say I'm 40+ and leave it at that!

Mark
Ignorance is bliss
JOIN OUR COMMUNITY!

Our community is FREE to join. To participate you must either login or register for an account.

SEARCH FORUMS
FREE NEWSLETTER
By signing up you may also receive reader surveys and occasional special offers. We do not sell, rent or trade our email lists. View our Privacy Policy.