SEARCH FINESCALE.COM

Enter keywords or a search phrase below:

Hobby Desk Modification

11299 views
23 replies
1 rating 2 rating 3 rating 4 rating 5 rating
  • Member since
    October 2005
  • From: New Port Richey
Hobby Desk Modification
Posted by deattilio on Thursday, December 6, 2007 8:43 PM

It finally got to the point that I had to do something with my hobby desk. My previous three paint shelves that ran the full width but didn't hold enough of my paints and I wound up with more than a quarter of the desk top taken up by paint bottles.

The new shelves - out of all things are bamboo silverware trays (slightly modified). I fastened them together with brackets and then mounted it to the desk with a slight tilt to hold the bottles without needing restraints of any sorts.


WIP:
Trying to get my hobby stuff sorted - just moved and still unpacking.


"Gator, Green Catskill....Charlie On Time"


  • Member since
    November 2007
  • From: Vancouver, WA
Posted by modlvr on Thursday, December 6, 2007 9:16 PM

I'm jealous.

 Where di yiu get the silverware trays?

Andy Creativity is allowing yourself to make mistakes. Art is knowing which ones to keep. Scott Adams, 'The Dilbert Principle' www.andyshobbies.com (Not a store) modeler@andyshobbies.com On the bench. Tamiya F4U Corsair
  • Member since
    August 2007
  • From: Southeast Wisconsin
Posted by MaxSheridan on Thursday, December 6, 2007 9:18 PM

Sweet!Thumbs Up [tup]

But, tell the truth.....its never really that neat......is it?Big Smile [:D]

-Mark

  • Member since
    September 2012
Posted by namrednef on Thursday, December 6, 2007 9:19 PM


 Have to have a place to work....nice modification....a bit crowded for my taste, but then I knock things to the floor with my elbows!

 Building a bench from scrap 2x4 I've collected and a nice piece of 3/4" plywood I bought. Building it in an 'L' shape....to keep the paint away from my elbows! 

  • Member since
    July 2013
Posted by IL2windhawk on Thursday, December 6, 2007 10:53 PM

That's very creative.

By incredible coincidence, I spent 10 minutes drawing up a simple
wall-mounted rack earlier today.  Your idea looks easier though :). 

Where can I find those trays?

  1/32 Revell Duo Discus
  1/32 Revell ASK-21
  1/48 Ardpol SZD-51 Junior
  1/48 Czech Models Grumman Goose
  1/144 FineMolds Millennium Falcon

  • Member since
    October 2005
  • From: New Port Richey
Posted by deattilio on Thursday, December 6, 2007 11:24 PM

Thanks for all the positive comments. You can probably blame the OCD but for the most part it looks that clean through the week, the weekends a different story though.

I got the first three trays at Wal-Mart for $7.50 per, but that was all they had. I went home thinking I only needed three, after all this was a unplaned impulse project. I had to venture back out for a fourth tray which I found at Bed Bath and Beyond - but at $14.99 per. Had to cough up the cash as I was already committed. 

The whole project only chewed up about three hours of my time. That was less time than what I spent mounting my original three shelves. Be fore warned though, bamboo proved tempermental to being screwed, nails are definately a no go. I fastened the first three together then mounted that in place. Then I mounted the fourth into its position (not to mention having to hack off about 1/3 of it for proper fit) to the wall then to the previously mounted trays.

Good luck to anyone tackling this simple project and be sure to share the handy work.


WIP:
Trying to get my hobby stuff sorted - just moved and still unpacking.


"Gator, Green Catskill....Charlie On Time"


  • Member since
    February 2007
  • From: Casa Grande, Az.
Posted by DesertRat on Friday, December 7, 2007 1:42 AM
Well nonetheless, that is sheer genius!Cool [8D]

Warmest regards,

Roger

  • Member since
    July 2013
Posted by IL2windhawk on Monday, December 31, 2007 5:41 PM

Well, after being inspired by deattilio's idea, I made a paint rack too!

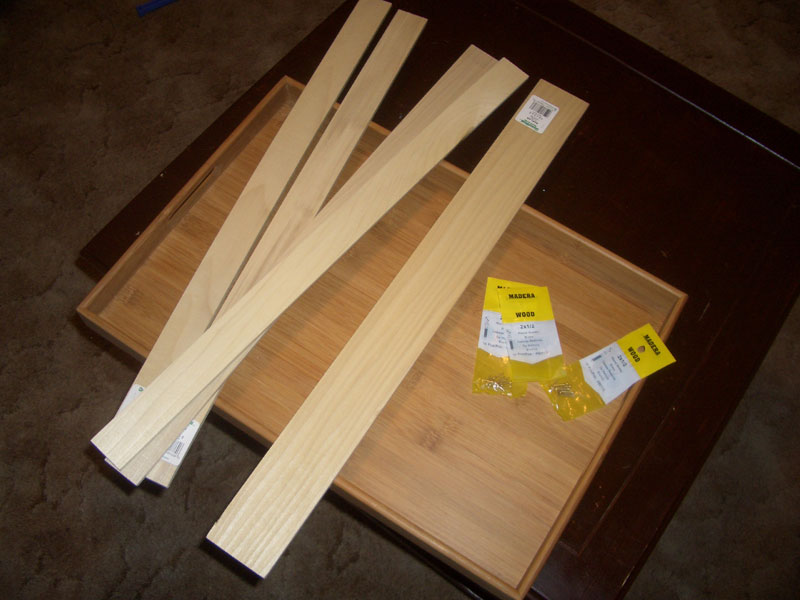
Here's most of the materials.  $10 bamboo serving tray, $5 in wood, $3 for fasteners.

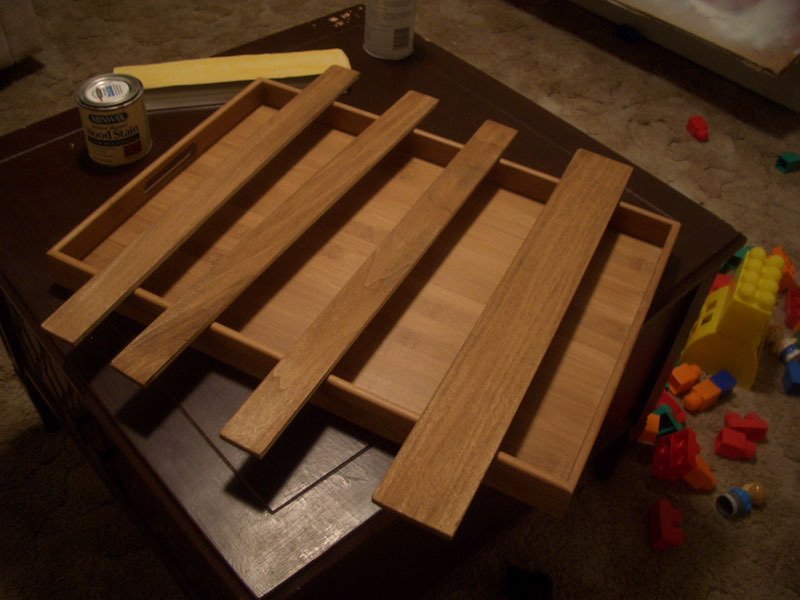
I sanded the wood, stained with a MinWax water-based stain that
I like to use for my model bases.  It turned out to be a close match!
Then I clear-coated with spray can for protection.

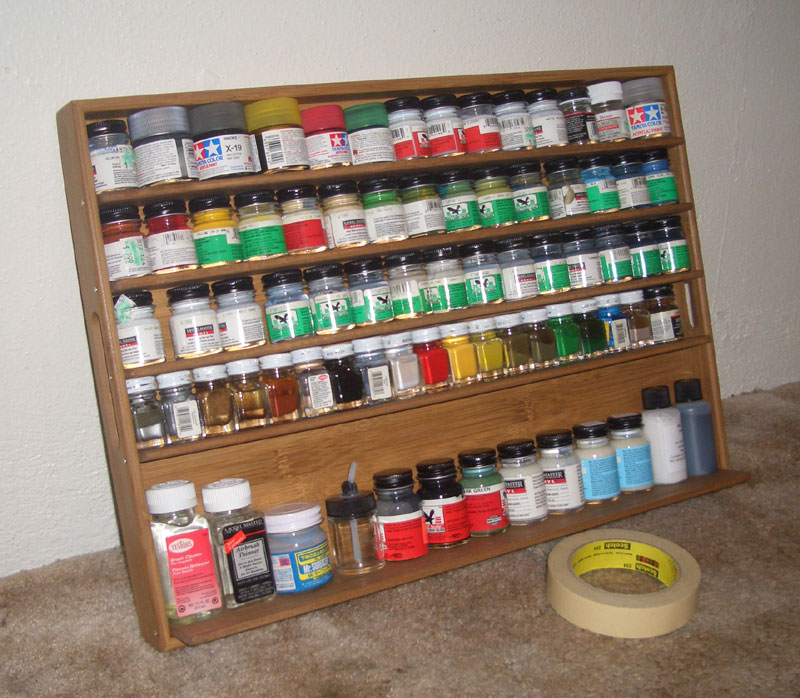
Tada!  Fits almost all of my paints.  Now I can see them much better.
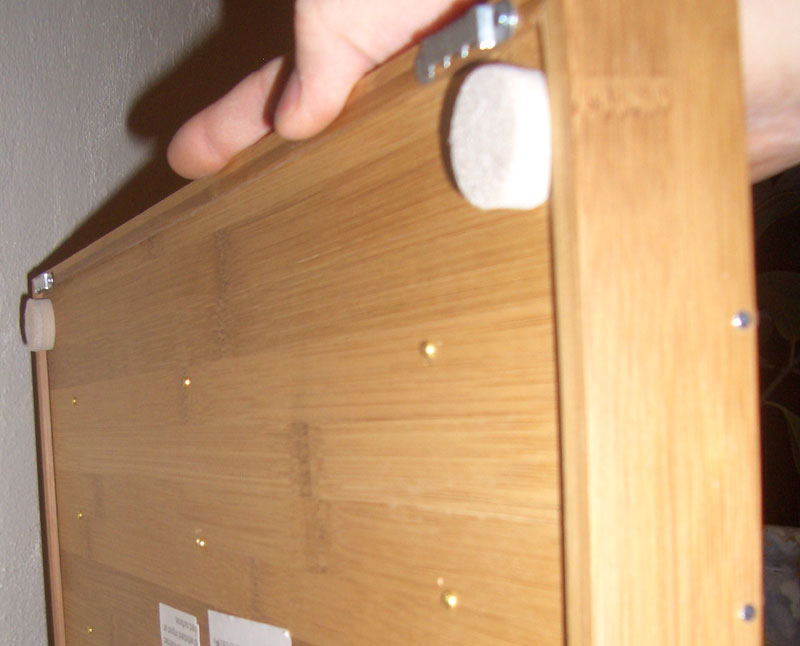
Note the handles on the sides, which will allow me to easily take the
rack on/off the wall, and carry it to a working table.  I also slightly
angled the wood peices backwards, similar to what deattilio did, to
keep the paint bottles from sliding off.

Shelves were match-drilled.  Like deattilio stated, you have to be careful
with the bamboo splitting.  You have to pre-drill every hole.  The
rack has wall hanging hardware, and some sticky pads so I can rest it
on a table without scratching things up.


Thanks for the idea, D

  1/32 Revell Duo Discus
  1/32 Revell ASK-21
  1/48 Ardpol SZD-51 Junior
  1/48 Czech Models Grumman Goose
  1/144 FineMolds Millennium Falcon

  • Member since
    February 2003
  • From: Sandusky Ohio, USA
Posted by Swanny on Monday, December 31, 2007 7:32 PM
That's brilliant! I would never have thought of that.
  • Member since
    June 2007
Posted by squeakie on Tuesday, January 1, 2008 2:05 PM
 deattilio wrote:

Thanks for all the positive comments. You can probably blame the OCD but for the most part it looks that clean through the week, the weekends a different story though.

I got the first three trays at Wal-Mart for $7.50 per, but that was all they had. I went home thinking I only needed three, after all this was a unplaned impulse project. I had to venture back out for a fourth tray which I found at Bed Bath and Beyond - but at $14.99 per. Had to cough up the cash as I was already committed. 

The whole project only chewed up about three hours of my time. That was less time than what I spent mounting my original three shelves. Be fore warned though, bamboo proved tempermental to being screwed, nails are definately a no go. I fastened the first three together then mounted that in place. Then I mounted the fourth into its position (not to mention having to hack off about 1/3 of it for proper fit) to the wall then to the previously mounted trays.

Good luck to anyone tackling this simple project and be sure to share the handy work.

You know I build off my fly tying bench whenever I can actually see it. I thought I had a nice one at one time, but yours puts mine to shame! Where did you round up the actual desk? I'm so impressed with it, that I may just make a move in that direction.

gary

  • Member since
    August 2007
  • From: Shakopee, MN
Posted by Reload on Tuesday, January 1, 2008 2:12 PM
 squeakie wrote:
You know I build off my fly tying bench whenever I can actually see it. I thought I had a nice one at one time, but yours puts mine to shame! Where did you round up the actual desk? I'm so impressed with it, that I may just make a move in that direction.

gary


I'm not even sure if I have a desk under all my fly tying stuff.........Whistling [:-^]

As for thoses paint shelves..........I forsee one in my very near future.

1 VP - PPCLI 89-92 A Coy RED DEVILS

 I mean, I had fast motor cars and fast motor bikes, and when I wasn't crashing airplanes, I was crashing motor bikes. It's all part of the game. — Sir Harry Broadhurst, RAF, 12 victories WWII


  • Member since
    October 2005
  • From: New Port Richey
Posted by deattilio on Tuesday, January 1, 2008 10:09 PM
 squeakie wrote:

You know I build off my fly tying bench whenever I can actually see it. I thought I had a nice one at one time, but yours puts mine to shame! Where did you round up the actual desk? I'm so impressed with it, that I may just make a move in that direction.

gary

The desk is a computer desk I picked up at Wal-Mart for under $100, I've had it several years now and works pretty good.

I like the portable paint rack, that is cool.

If enough people similarly modify their hobb desks does that qualify as a group build - loosely any way?


WIP:
Trying to get my hobby stuff sorted - just moved and still unpacking.


"Gator, Green Catskill....Charlie On Time"


  • Member since
    October 2007
  • From: Ontario, New York
Posted by 12Wings on Wednesday, January 2, 2008 4:01 PM
Looks nice and neat. Is that Italeri's C-47?
... Ryan a.k.a. #12 Whoever invented soccer should be worshipped as a god!!
jwb
  • Member since
    February 2006
  • From: Parkton, NC
Posted by jwb on Wednesday, January 2, 2008 5:58 PM
 deattilio wrote:

If enough people similarly modify their hobb desks does that qualify as a group build - loosely any way?

Only if you add some weathering and a panel wash, and someone points out the actual shelves were a scale foot wider..... 

Smile,Wink, & Grin [swg] 

Jon Bius

AgapeModels.com- Modeling with a Higher purpose

"For I know the plans I have for you," declares the Lord, "plans to prosper you and not to harm you, plans to give you hope and a future." ~ Jeremiah 29:11

  • Member since
    October 2005
  • From: New Port Richey
Posted by deattilio on Wednesday, January 2, 2008 6:07 PM

#12Wings, 

This is actually the Monogram 1/90 AC-47, slow and steady progress. I've chopped the molded in figures out of the seats, added generic bulkheads and a floor, some fuselage ribs in the area visible behind the door mounted mini-gun, kevlar blanket over the port windows and new hinges for the one remaining cargo door. Building this to give to my dad as he flew aboard these with the 4th Air Commando Squadron in Viet Nam. Once the build is complete I will post it in its own topic.


jwb,

Without attempting I managed to apply a wash while working on the Spooky, looking further worn with a miserable attempt at cleaning it. What a hobby.


WIP:
Trying to get my hobby stuff sorted - just moved and still unpacking.


"Gator, Green Catskill....Charlie On Time"


  • Member since
    February 2006
  • From: Southeast Louisiana
Posted by Wulf on Wednesday, January 2, 2008 8:17 PM

Dude, you need more paint! Not nearly enough. Laugh [(-D]

Andy 

  • Member since
    January 2007
  • From: Glue and paint smeared bench, in La La Land
Posted by dahut on Wednesday, January 2, 2008 9:01 PM

Very nifty, although I should like to see that shelf come off the wall without a bottle or two spilling off in the jostle.

The tilted shelf is a start, but why not employ an old seafaring trick if you want to add mobility? To the tilted shelves, add a keeper across each shelf's length, about 1/3 up the bottle height. A few lenghts of hardwood dowel would suffice, judging by your good skills.

Cheers, David
  • Member since
    August 2006
  • From: The Great State of Wyoming
Posted by wyoroy on Wednesday, January 2, 2008 9:17 PM
 dahut wrote:

Very nifty, although I should like to see that shelf come off the wall without a bottle or two spilling off in the jostle.

The tilted shelf is a start, but why not employ an old seafaring trick if you want to add mobility? To the tilted shelves, add a keeper across each shelf's length, about 1/3 up the bottle height. A few lenghts of hardwood dowel would suffice, judging by your good skills.

Sign - Ditto [#ditto]

Roy


Roy (Capt. Wyoroy FAAGB/USNFAWGB)

John 3:16

  • Member since
    July 2013
Posted by IL2windhawk on Thursday, January 3, 2008 12:05 AM

Nah.. it's a piece of cake taking the rack on/off the wall.
Couldn't be easier.

The shelves are tilted about 10 degrees relative to the bamboo tray.

  1/32 Revell Duo Discus
  1/32 Revell ASK-21
  1/48 Ardpol SZD-51 Junior
  1/48 Czech Models Grumman Goose
  1/144 FineMolds Millennium Falcon

  • Member since
    February 2007
  • From: S.E. Michigan
Posted by 2/20 Bluemax on Thursday, January 3, 2008 8:45 AM
TJ Max has the bamboo silverware trays for about the same price. Also look into using the oversize paint stirring sticks to build shelves-they're free at home centers.
  • Member since
    January 2008
  • From: Adelaide, South Australia
Posted by somenewguy on Wednesday, January 9, 2008 10:29 PM

That's a lot of model master paint you've got there and model master isn't cheap.                      

I don't suppose you could build a 1/32 jet on that, eh? neat setup. 

At the end of the day one's work may be completed but one's education never!
  • Member since
    July 2013
Posted by DURR on Wednesday, January 9, 2008 10:44 PM

AWESOME 

does it have a place for your ref materials and spare parts

  • Member since
    February 2003
Posted by Jim Barton on Friday, January 18, 2008 5:31 PM
The paint shelf set-up is similar to mine. I got my silverware-drawer dividers at a back-yard sale for a buck apiece. I've also seen new ones at Target.

"Whaddya mean 'Who's flying the plane?!' Nobody's flying the plane!"

  • Member since
    October 2005
  • From: New Port Richey
Posted by deattilio on Saturday, January 19, 2008 12:41 AM

Model Master paints are my preferred, even if they are a bit pricey. Testors was the first model paint I ever used and after 25 years its hard to teach an old dog new tricks. I do try other brands but always wind up relying on Model Master. I try to keep one enamel and one acryl per color.

I prefer draging my better half to the hobby shop than going alone because she provides the reality check and keeps the kitchen cubbards from becoming paint storage lockers and me being in debt.

The desk can hold all my building materials but all my references have to go on the book shelves.

I've never maxed out table space on one kit, but thats because I build primarily 1/72 and 1/144 kits, 1/32 would probably be a tight fit.  


WIP:
Trying to get my hobby stuff sorted - just moved and still unpacking.


"Gator, Green Catskill....Charlie On Time"


JOIN OUR COMMUNITY!

Our community is FREE to join. To participate you must either login or register for an account.

SEARCH FORUMS
FREE NEWSLETTER
By signing up you may also receive reader surveys and occasional special offers. We do not sell, rent or trade our email lists. View our Privacy Policy.