SEARCH FINESCALE.COM

Enter keywords or a search phrase below:

The Race Into Space GB, October 2018 - July 2019 (Ended)

56834 views
1682 replies
1 rating 2 rating 3 rating 4 rating 5 rating
  • Member since
    January 2015
Posted by PFJN on Tuesday, November 6, 2018 9:09 PM

Hi,

Sorry this image is a lttle fuzzy, but it shows where I currently am.  I may try and dig out my camera for future pictures instead of just using my phone.

Anyway, I found parts from an old 1/72 scale Airfix kit (a TBD Devastator, I think) to use as the base for my landing gear.  In addition to that I tried to 3D print some tires.  Unfortunately at this scale I had a little trouble getting something to work out OK.  Although my printer is reasonably precise in what it does, sometimes whatever you print may melt at its base just a little and the actual thickness of an item may be +/- a fraction of a millimeter.  So, if what you are trying to print is only 5-6 mm in diameter and a mm or two thick its hard to get clearances just right sometimes.

Anyway, I'm letting the glue dry and will take a closer look at it tomorrow.  

PF

LG

1st Group BuildSP

  • Member since
    March 2010
  • From: Boston
Posted by mach71 on Wednesday, November 7, 2018 10:31 AM

Gary, 


Thanks for the link! Thats an amazing build!

I found this in his thread:


And this online:


Looks like dark grey/metalic to me.

  • Member since
    June 2018
  • From: Ohio (USA)
Posted by DRUMS01 on Wednesday, November 7, 2018 10:44 AM

Mach, during my research I looked into Lancair's build and thought it was amazing too. Enough about his build, I think that with your skills and dedication to the build, yours will look just a good or better. I am watching your thread with interest as I have the same kit. You are doing great and I appreciate you showing us the challenges with the kit or instructions as it will aide me when I finally get mine started.

PFJN, The shuttle is coming along nicely I see. Show us more pictures!....

Both ot you keep up the GREAT work.

Ben

"Everyones the normal until you get to know them" (Unknown)

LAST COMPLETED:

1/35 Churchill Mk IV AVRE with bridge - DONE

NEXT PROJECT:

1/35 CH-54A Tarhe Helicopter


  • Member since
    November 2009
  • From: SW Virginia
Posted by Gamera on Wednesday, November 7, 2018 11:40 AM

Ben: Ohhhhhhh, looks cool, really nice set of decals. 

PF: She looks great!!! 

Steve: Good luck with the new job. 

"I dream in fire but work in clay." -Arthur Machen


  • Member since
    March 2010
  • From: Boston
Posted by mach71 on Wednesday, November 7, 2018 1:02 PM

Thanks Drums01!

Those decals are excellent!


PFJN, Your shuttle is looking really cool!


  • Member since
    July 2014
  • From: Franklin Wi
Posted by Bakster on Wednesday, November 7, 2018 8:20 PM

Freedom 7 capsule is done. Now onto the rocket tube and its wonky lines. Blah.

  • Member since
    January 2015
Posted by PFJN on Wednesday, November 7, 2018 9:45 PM

Hi,

Its great getting to see more and more of everyones builds.  My progress has been a little slow as of late, probably in large part to my lack of real planning on this build.  I kind of just started it thinking that I could convert a kit of the larger real shuttle into the smaller "mini-shuttle" and hoped to use as many existing parts as possible.  Along the way, I've been doing a lot of trail and error type testing of ideas on how to do different parts, and every now and then realize that I either messed something up a little (like the forward landing gear bay location) or that I maybe should have painted some stuff before installing it.

As for the windows on the canopy, I haven't really thought everything through fully yet, but I do have some ideas that I want to try and, and will hopefully post something on them soon.

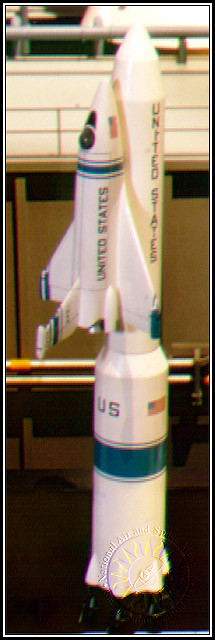
Right now though, my biggest issue is painting.  One thing that I am not sure of yet is what the crfat should look like.  The few sketches that I have come across on the internet tend to suggest just a white and black appearance, much like th real full-size shuttle.  However, I have come across some images, like the one posted previously by GAF, of a white craft with either blue or red stripes, like shown below.

B&W

Blue StripeRed Stripe

In addition, painting has always been an issue for me.  I once tried airbrushing when I was much younger but never really got the hang of it.  In addition, I often like to try to wait about a day between coats and on such a relatively small model, I fear the set up and clean up between coats, using an airbrush may take more time then the time spent actually painting.  On the other hand, I also never have really gotten the hang of spray can painting either, so most of the stuff I do is by brush, though with brush painting I sometimes have issues with glossy paints.  

As such, I'm still experimenting a little and progress is slow Sad.

Hopefully in a day or two though I may have more to show.

PF

PS. Bakster, your capsule looks great, and I am really looking forward to seeing more of Mach71s build too.


1st Group BuildSP

GAF
  • Member since
    June 2012
  • From: Anniston, AL
Posted by GAF on Wednesday, November 7, 2018 10:35 PM

JJFlyer>  The Saturn V is coming along nicely!  As I said before, I sure wish I still had the parts for mine.  50 years and it's gone!  Sad

Modelcrazy> Decided to go with the Saturn V also?  Glad to hear you can scratch out a fin.  Shouldn't be too hard.

PFJN> That mini-shuttle is quite a little gem.  Sometimes some of the coolest spacecraft were things that never made it off the drawing boards.  Have you considered decals for the stripes if the painting is too difficult?  And please don't talk about "slow" progress!  I'm in a search for parts in my scratch-building, and coming up empty handed.

Bakster>  That's a great looking Mercury capsule! Glad you overcame the problems you were having.  No luck on finding a tube for replacement?

Mach71>  Glad you found some reference images.  I know Lancair IV does a lot of research on his builds, so if he has a color for items then it's probably correct.

Ben> Hope to see those decals on soon!  I think you're going to have one of the best LM models out there!

Project Report:

I am in a search for items I can use to finish up the LES at the moment.  The nozzles need to be fabricated and attachment points for the capsule need to be made for the tower.  I also need to begin drilling out the nozzles in the side of the LES that were used to jettison the tower after liftoff.  Boxes of parts, and nothing that I can see being suitable.  Well, lots to work on.

Mission Director (GAF)

Today in Space History:

1962 November 7 - . Selection of Grumman to build the Apollo lunar excursion module - . Nation: USA. Related Persons: Webb. Program: Apollo. Spacecraft: Apollo LM, Apollo Lunar Landing, LM Source Selection.

NASA announced that the Grumman Aircraft Engineering Corporation had been selected to build the lunar excursion module of the three-man Apollo spacecraft under the direction of MSC. The contract, still to be negotiated, was expected to be worth about $350 million, with estimates as high as $1 billion by the time the project would be completed.

  • Member since
    June 2018
  • From: Ohio (USA)
Posted by DRUMS01 on Thursday, November 8, 2018 3:22 AM

Bakster, it is coming along well, nice job on the Mercury capsule section.

PFJN, I like the red or blue stripe option myself (something different).

v/r,

Ben

"Everyones the normal until you get to know them" (Unknown)

LAST COMPLETED:

1/35 Churchill Mk IV AVRE with bridge - DONE

NEXT PROJECT:

1/35 CH-54A Tarhe Helicopter


  • Member since
    July 2014
Posted by modelcrazy on Thursday, November 8, 2018 8:48 AM

Bakster, very nice looking capsule, it looks outstanding.

PF, you are really screaming along.

A glossy finish is almost impossible for me to paint or  airbrush. Starting with a flat finish first usually works for me.

Thanks Gary, I haven't worked on anything on the bench for several days now. Once I get back to the bench the SV should move along nicely.

Steve

Building a kit from your stash is like cutting a head off a Hydra, two more take it's place.


http://www.spamodeler.com/forum/

  • Member since
    July 2014
  • From: Franklin Wi
Posted by Bakster on Thursday, November 8, 2018 9:37 AM

Thanks MC, PF, GAF and Drum about my capsule. Just a couple of notes about it. 

1. I am on the fence about toning down the gloss. I experimented with using Testers Dullcote but I didn't like how it looked. It was too flat, and it made the piece look very 1 dimensional. Maybe if I mixed dull with gloss I could get a happier result. I am open to opinions.

2. The images that I posted make the piece look a bit wonky. The macro distorts things. The tower looks bent and I was amazed at the second image. You can see both of the hatches that I made and one looks higher/lower than the other. I noticed that when I posted the image. I wondered if I made that terrible error. I looked at the piece and nope--they are both perfectly in-line on that axis. Amazing what macro does.

Thanks again, and good work guys.

  • Member since
    July 2014
Posted by modelcrazy on Thursday, November 8, 2018 10:59 AM

I have the same problem with my ships. The masts and railings look all out of plumb but they're dead on.

Steve

Building a kit from your stash is like cutting a head off a Hydra, two more take it's place.


http://www.spamodeler.com/forum/

  • Member since
    November 2009
  • From: SW Virginia
Posted by Gamera on Thursday, November 8, 2018 11:47 AM

Those look great guys!!! 

PF: Hmm, you could probably put USAF decals on your micro-shuttle if you wanted...

Bakster: She looks perfect to me but I know what you mean about the photos. I've had some matte finishes look so flat before that they look dull and 'dead'. So sometimes I'll mix in about 10% or so gloss with the matte just to give it a little more 'life'. 

"I dream in fire but work in clay." -Arthur Machen


  • Member since
    July 2014
  • From: Franklin Wi
Posted by Bakster on Thursday, November 8, 2018 5:28 PM

Gamera
Bakster: She looks perfect to me but I know what you mean about the photos. I've had some matte finishes look so flat before that they look dull and 'dead'. So sometimes I'll mix in about 10% or so gloss with the matte just to give it a little more 'life'. 

Gamera, thanks. Hey, question for you. You changed the picture that comes with your posts. Who is that dude?

  • Member since
    January 2015
Posted by PFJN on Thursday, November 8, 2018 9:36 PM

Hi,

After putting on a few lite coats of white I have found that I kind of like the looks of the model that way.  So I think I will go for overall white with either the red or blue stripes, rather than a white model with a black bottom. Big Smile

Hopefully I may also be able to slavage some decals from either the original kit, or a similar scale revell Snaptite kit that I have.

Here are a couple quick images for now.

PF

TopBottom

1st Group BuildSP

  • Member since
    June 2018
  • From: Ohio (USA)
Posted by DRUMS01 on Thursday, November 8, 2018 10:26 PM

Well everyone I did it.... I broke apart my decent module legs to rebuild and allign the landing struts with the Monogram moon base. It took me several hours and further modifications, but I think I have everything finally alligned properly. Some repaint will be needed, but that is the easy part.

I also broke down and ordered some 1/48 astronauts from Shapeway (some stuff from Max Grueter). I hope to be getting them soon. 

I believe I am done with the lunar base and MESA test equipment (they were all modified in some way). I've attached them to the surface.

I have most of the decals on the upper and lower stages with just a few to finish. After that I will seal the upper stage, reattach it to the decent stage, and wait for the figures. I am on the home stretch now and hoping the rest will go smoothly....

Pictures very soon I hope.

Ben

"Everyones the normal until you get to know them" (Unknown)

LAST COMPLETED:

1/35 Churchill Mk IV AVRE with bridge - DONE

NEXT PROJECT:

1/35 CH-54A Tarhe Helicopter


  • Member since
    July 2014
  • From: Franklin Wi
Posted by Bakster on Friday, November 9, 2018 9:18 AM

GAF
Bakster>  That's a great looking Mercury capsule! Glad you overcame the problems you were having.  No luck on finding a tube for replacement?

No sir, no luck. I will move forward with filling the joins. I will try sprue-goo to fill them. Then, I will sand the tube and rescribe. That's the plan for now.

  • Member since
    July 2014
  • From: Franklin Wi
Posted by Bakster on Friday, November 9, 2018 9:20 AM

PFJN

Here are a couple quick images for now.

PF

TopBottom

It looks really good with your landing gear installed. 

  • Member since
    November 2009
  • From: SW Virginia
Posted by Gamera on Friday, November 9, 2018 9:28 AM

PF: Looks perfect to me. Really nice smooth gloss paint, I think I'd go with the white too. 

Ben: Ouch! But better go ahead and make the corrections than finishing her and then everything you look at her wishing you'd made the modifications to the legs. 

"I dream in fire but work in clay." -Arthur Machen


  • Member since
    November 2009
  • From: SW Virginia
Posted by Gamera on Friday, November 9, 2018 9:34 AM

Bakster


Gamera
Bakster: She looks perfect to me but I know what you mean about the photos. I've had some matte finishes look so flat before that they look dull and 'dead'. So sometimes I'll mix in about 10% or so gloss with the matte just to give it a little more 'life'. 


Gamera, thanks. Hey, question for you. You changed the picture that comes with your posts. Who is that dude?


He's Reggie from the 'Phantasm' series of horror movies. Probably the only bald, middle-aged, former ice cream salesman action hero I can think of. I grabbed him as an avatar since if I ever become an action hero I'd probably look a lot like Reggie. (Though I am thinner, wear glasses, and have yet to drive a Good Humor ice cream truck).


"I dream in fire but work in clay." -Arthur Machen


  • Member since
    July 2014
  • From: Franklin Wi
Posted by Bakster on Friday, November 9, 2018 10:30 AM

Gamera
He's Reggie from the 'Phantasm' series of horror movies. Probably the only bald, middle-aged, former ice cream salesman action hero I can think of. I grabbed him as an avatar since if I ever become an action hero I'd probably look a lot like Reggie. (Though I am thinner, wear glasses, and have yet to drive a Good Humor ice cream truck).


LOL.  You are a hoot, sir.

Hey--there is hope for us balding guys. Good to know.

GAF
  • Member since
    June 2012
  • From: Anniston, AL
Posted by GAF on Friday, November 9, 2018 7:51 PM

Modelcrazy>  Good luck on the Saturn V!  I know you've got a ton of other stuff going on, so I understand how precious is bench time.

Bakster>  I think Gamera has the right idea about mixing a bit of gloss in the dull coat.  I wonder if there is something like a satin finish?  I've seen Lawdog use a slightly glossy finish on his aircraft models.  Sorry about the tubes!  I found some nice tubing for model rockets, but don't know if they would be the right size, so good luck on getting the rocket body straightened.

PFJN>  That does look good.  Look forward to see what you do with decaling and final paint.

Ben>  That sounds like a lot of work, but I understand.  Glad you found some astronaut figures, as I thought I saw some that matched the originals from the kit.  Expensive though.  Can't wait for some pictures!

Gamera>  I was wondering what that (your icon) was!

Project Report:

Well, we had a setback at the Cape...  The tower structure I built out of plastic rod turned out to be too wide for the attachment points on the capsule.  I thought it was going to work from a preliminary fitting, but it turns out I was optimistic.  After drilling out the holes in the cover, I found the legs would have to bend inward too much to fit correctly.
Another million dollars down the hatch!  So this means I will have to redo the support structure.  This time I will attach the four support tubes to the capsule cover and then attach the nozzle skirt at the top before adding in the additional tubing members.  Should work better than the original plan (I hope).  After a month, I've made little progress on this.  I need to give this some serious bench time as I've made little progress.  Lots of thinking, not much doing.

Good luck to everyone else!

Mission Director (GAF)

Today in Space History:

1967 November 9 - . 12:00 GMT - . Launch Site: Cape Canaveral. Launch Complex: Cape Canaveral LC39A. Launch Platform: LUT1. Launch Vehicle: Saturn V.

  • Apollo 4 - . Payload: Apollo CSM 017 / LTA-10R / S-IVB-501. Mass: 36,656 kg (80,812 lb). Nation: USA. Agency: NASA Houston. Program: Apollo. Class: Moon. Type: Manned lunar spacecraft. Spacecraft: Apollo CSM. Duration: 2.35 days. Decay Date: 1967-11-09 . USAF Sat Cat: 3032 . COSPAR: 1967-113A. Apogee: 371 km (230 mi). Perigee: 370 km (220 mi). Inclination: 32.7000 deg. Period: 91.90 min.

  • Apollo 4 (AS-501) was launched in the first all-up test of the Saturn V launch vehicle and also in a test of the CM heatshield. The Saturn V, used for the first time, carried a lunar module test article (LTA-10R) and a Block I command and service module (CSM 017) into orbit from KSC Launch Complex 39, Pad A, lifting off at 7:00:01 a.m. EST - one second later than planned. The launch was also the first use of Complex 39. The spacecraft landed 8 hours 37 minutes later in the primary recovery area in the Pacific Ocean, near Hawaii, about 14 kilometers from the planned point (30.06 N 172.32 W). CM, apex heatshield, and one main parachute were recovered by the carrier U.S.S. Bennington

  • Main objectives of the mission were to demonstrate the structural and thermal integrity of the space vehicle and to verify adequacy of the Block II heatshield design for entry at lunar return conditions. These objectives were accomplished.

    The S-IC stage cutoff occurred 2 minutes 30 seconds into the flight at an altitude of about 63 kilometers. The S-II stage ignition occurred at 2 minutes 32 seconds and the burn lasted 6 minutes 7 seconds, followed by the S-IVB stage ignition and burn of 2 minutes 25 seconds. This series of launch vehicle operations placed the S-IVB and spacecraft combination in an earth parking orbit with an apogee of about 187 kilometers and a perigee of 182 kilometers. After two orbits, which required about three hours, the S-IVB stage was reignited to place the spacecraft in a simulated lunar trajectory. This burn lasted five minutes. Some 10 minutes after completion of the S-IVB burn, the spacecraft and S-IVB stage were separated, and less than 2 minutes later the service propulsion subsystem was fired to raise the apogee. The spacecraft was placed in an attitude with the thickest side of the CM heatshield away from the solar vector. During this four-and-one-half-hour cold-soak period, the spacecraft coasted to its highest apogee - 18,256.3 kilometers. A 70 mm still camera photographed the earth's surface every 10.6 seconds, taking 715 good-quality, high-resolution pictures.

    About 8 hours 11 minutes after liftoff the service propulsion system was again ignited to increase the spacecraft inertial velocity and to simulate entry from a translunar mission. This burn lasted four and one half minutes. The planned entry velocity was 10.61 kilometers per second, while the actual velocity achieved was 10.70.

  • Recovery time of 2 hours 28 minutes was longer than anticipated, with the cause listed as sea conditions - 2.4-meter swells.

  • Member since
    May 2011
  • From: Honolulu, Hawaii
Posted by Real G on Saturday, November 10, 2018 1:40 AM

Bakster


Gamera
He's Reggie from the 'Phantasm' series of horror movies. Probably the only bald, middle-aged, former ice cream salesman action hero I can think of. I grabbed him as an avatar since if I ever become an action hero I'd probably look a lot like Reggie. (Though I am thinner, wear glasses, and have yet to drive a Good Humor ice cream truck).


LOL.  You are a hoot, sir.

Hey--there is hope for us balding guys. Good to know.


Ah, I thought it might have been Ash at retirement age from yet another sequel to “The Evil Dead”.

The original “Phantasm” scared the bejeezus out of me.  I watched it on TV back when the networks (all 3 of them) aired late nite horror flicks on weekends.

“Ya ya ya, unicorn papoi!”

  • Member since
    November 2009
  • From: SW Virginia
Posted by Gamera on Saturday, November 10, 2018 8:07 AM

Real G: Yeah, my sister and I rented I think the second film way back then from a video retal store way back in the '80s-early '90s and it really creeped us out. I found all the movies on sale at Halloween for cheap and picked them up- I'm on number three out of five right now. I really underappriated horror series in my opinion. 

And I was thinking while watching them that Ash and Reggie should have teamed up. The attitude of both series, what Rami called spat-stick, aka gore mixed with humour were pretty much the same. That would have been an amazing movie. 

Hope you don't mind Gary but I'm going to post a clip of Reggie's big chainsaw fight in P2 here and them I'm going to shut up before I totally derail your thread...Embarrassed


Gary: Ack that sucks to have to rebuild all of that!!! 

"I dream in fire but work in clay." -Arthur Machen


  • Member since
    November 2010
  • From: Florida-West Central
Posted by Eagle90 on Saturday, November 10, 2018 8:20 AM

Wow!  What great work being done here!  I'm really enjoying this GB!  Just the historical info is awesome!

Here is a quick update pic of the Apollo 7.  Doing MANY coats of Micro Sol to get the decals to lay down over the areas with ridges, but she is looking nice.  Going to do a few more coats of Sol and a couple of clear coats to seal everything in and then work on the base for display.  I hope to have it finished this weekend.  Enjoy.


  • Member since
    July 2014
Posted by modelcrazy on Saturday, November 10, 2018 8:50 AM

Eagle, that S1B looks so great 

Steve

Building a kit from your stash is like cutting a head off a Hydra, two more take it's place.


http://www.spamodeler.com/forum/

  • Member since
    October 2010
Posted by hypertex on Saturday, November 10, 2018 9:00 AM

Update on my Lunar Module Eagle:

This is my fourth attempt at turning an RCS thruster skirt. I'm almost there, but I'm not sure I've got the shape quite right. This is turned by hand from aluminum rod.

  • Member since
    November 2009
  • From: SW Virginia
Posted by Gamera on Saturday, November 10, 2018 9:46 AM

Bobby: She looks friggin' fantastic!!! 

Hypertex: Looks amazing to me. I'm really impressed what can be done on a lathe.


Anyway great to see people getting stuff done that's more useful than watching horror movies like me... Embarrassed

"I dream in fire but work in clay." -Arthur Machen


  • Member since
    July 2014
  • From: Franklin Wi
Posted by Bakster on Saturday, November 10, 2018 10:22 AM

[quote user="Eagle90"

[/quote]

Eagle, it looks really good! Question: How are you painting it? Are you using an airbrush? Or are you hand painting? Just curious. It looks great!

  • Member since
    July 2014
  • From: Franklin Wi
Posted by Bakster on Saturday, November 10, 2018 10:25 AM

That looks cool, Hypertex. I wish I had a small lathe. 

JOIN OUR COMMUNITY!

Our community is FREE to join. To participate you must either login or register for an account.

SEARCH FORUMS
FREE NEWSLETTER
By signing up you may also receive reader surveys and occasional special offers. We do not sell, rent or trade our email lists. View our Privacy Policy.