SEARCH FINESCALE.COM

Enter keywords or a search phrase below:

60th Anniversary Korean War Group Build- extended for the duration

765823 views
3335 replies
1 rating 2 rating 3 rating 4 rating 5 rating
  • Member since
    September 2003
  • From: Australia
Posted by Helo H-34 on Friday, June 10, 2011 8:20 AM

Excellent work on the F-94B Doc Toast

I'll have to go back a couple of pages and check again how you drilled out for the gun ports .

I'm yet to do that to my F-94 Build .

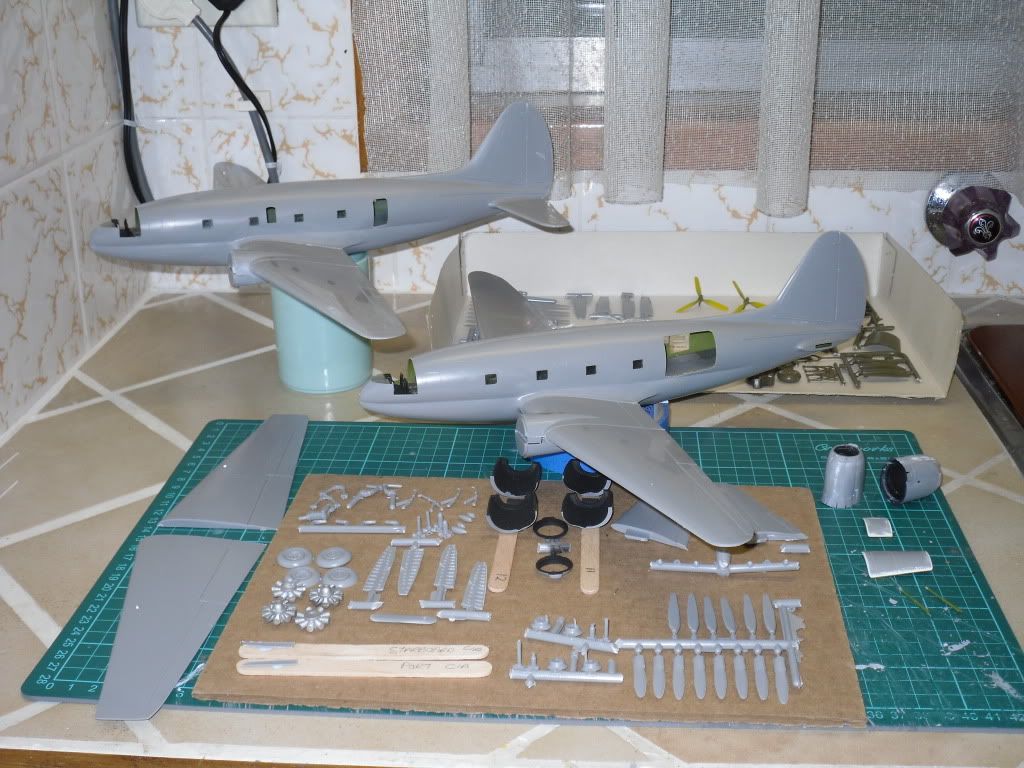
Andy , it sounds like you making good progress with the C-46 . However have the putty at the ready for those gaps on the wing leading edge between the fuselage and engines .

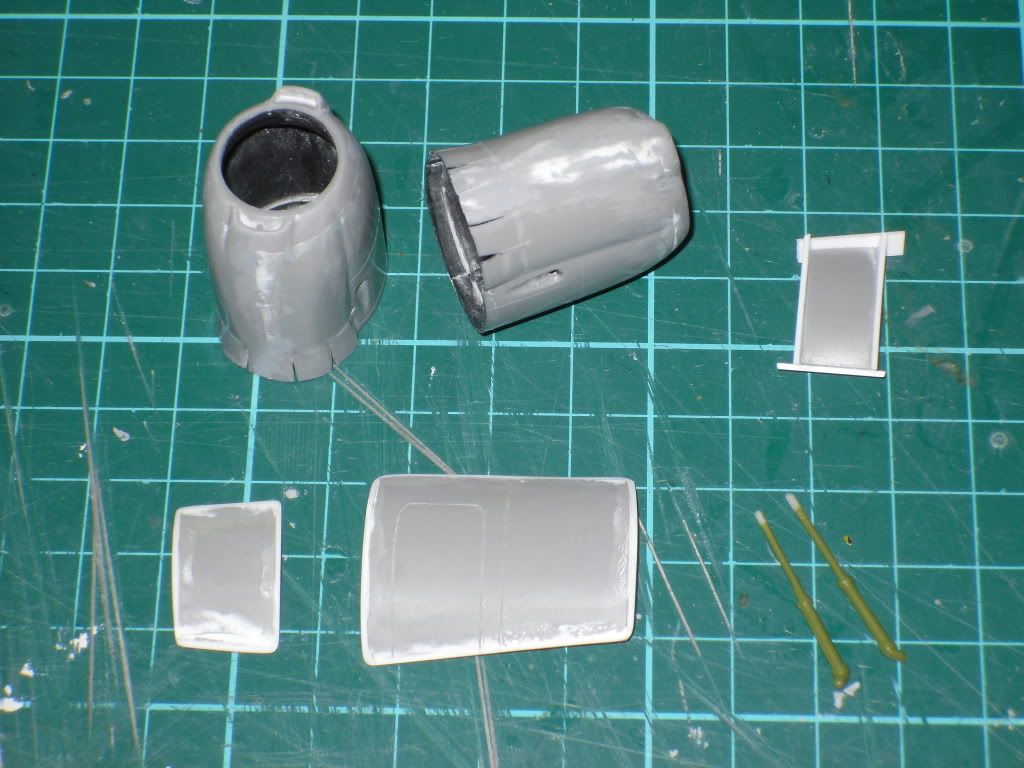
Did you cut the lower flaps on the cowl and gently ply them open slightly ???

As for me , it has been a bit of a slow week getting stuff done ; I'm not much further progressed from where I was this time last week ....

I airbrushed the Heller AD-3 Skyraider , gloss sea blue and have only managed to mask the leading edge on the Banshee and I'm about to start the same on the Panther .

I still haven't painted the Yak-18 or the other Mach 2 S-51 and the two PB-1W AEW Fortress's are still sitting in the spraybooth desperatly waiting for some paint . Hopefully I can get the two jets and helo masked tomorrow and I can have a big paint session spraying gloss sea blue on everything .

That's the plan for the weekend , I guess we'll see what happens !

                                        John .

  • Member since
    December 2010
  • From: Yangju, Gyeonggi-Do, Korea
Posted by the_draken on Friday, June 10, 2011 1:05 AM

Beautiful Starfire, Doc!  It's definitely gonna add to the front page of the group.  I've got mine on the shelf beside me and I've got the same decal set that you used.  I'll probably be swapping around the serial numbers on mine, Then I'll give it a different colour radome and I'm giving incredibly serious though to opening the canopy.  I did that with my ND ANG kit a few years back and it really made the kit look nice.  In the mean time, I'm making progress on the C-46.  I finished the majority of the interior and glued the fuselage together last night.  I was giving some incredibly serious thought to putting some internal ribs in the fuselage, but I chickened out.  So far it's turning out really good.  I've got the cargo doors open, the passenger door on the starboard side, and the over wing ports have been taken out.

Had I noticed them before I glued the fuselage together, I might have even opened up the under floor cargo doors on the starboard side.  Helo was right, the fuselage is going together wonderfully, only a wee bit of super glue and filler putty needed.  Hopefully I can get a majority of the engines/wings done this weekend and start on something else by the middle of next week.

________________________________________________________________________________

Andy Hill (the_draken) landrew.hill(at)live.com <*> ASE Master Auto Tech, Imaca certified.  >^.^<

PADI OWSI Certified, BA Poli Sci (NDSU), BS Secondary ED-Social Studies MSUM (Sigma *** Laude)

  • Member since
    October 2009
  • From: Texas
Posted by Gregbbear on Thursday, June 9, 2011 9:20 PM

Good looking Starfire Doc!

Cheers,

Greg

- yat yas!


  • Member since
    December 2010
  • From: Leicester, UK
Posted by Dr Win on Thursday, June 9, 2011 5:22 PM

Stikpusher, score up another one for the braille scalers - heres my finished F-94B. Enjoy...

Now, whatever next... (though it will have to be a slow one, have a TON of other stuff to build now)

Doc

"When the going gets weird, the weird turn pro..."

/]

  • Member since
    December 2002
  • From: Northern California
Posted by jeaton01 on Tuesday, June 7, 2011 9:08 PM

The decals for the F-82 are from an old Microscale sheet, 72-183.

Now we're doubled down on page 1Cool

John

To see build logs for my models:  http://goldeneramodel.com/mymodels/mymodels.html


  • Member since
    October 2009
  • From: Texas
Posted by Gregbbear on Tuesday, June 7, 2011 4:08 PM

Stik, I never realized that Capt Fernandez's planes weren't available.  I have 4 F-86's in the stash, and other than the "Mig Mad Marine" Fujimi, I hadn't paid attention to the markings. 

Jeaton, where did you get the decals for your F-82? 

My main purpose for this post was to put us back on page one.

Cheers,

Greg

- yat yas!


  • Member since
    July 2007
  • From: Southern New Jersey
Posted by troublemaker66 on Monday, June 6, 2011 8:55 AM

Helo,

Didn`t know about you guys and 72 scale...now you know how much I pay attention to things  Big Smile...I`d be using my magnifier all the time instead of part time with my 48 scale kits..lol. I have a dozen or so 72 scale kits only `cause I can`t get`em in 1:48. I`d love to see a Commando in 1:48, besides vacuform.

Your kits looking good, keep up the good work!

Len

Len Pytlewski

  • Member since
    December 2010
  • From: Yangju, Gyeonggi-Do, Korea
Posted by the_draken on Monday, June 6, 2011 8:31 AM

Len,

Ha ha ha ha!  Helo and I only build in one scale, 1/72 scale (God's OWN scale!).  Smile Burger  The first pic is of the Williams' Bros. kit.  It's only available in 1/72.  Not being a jerk, just thinking that it's funny because he and I go back and forth all the time about what we build and often leave out the scale.

I've already gotten pretty far in one night.  Cutting out the flaps on top and bottom, opening up the gear bays all around, filling in the trench in the main deck, and getting the prop hubs ready for assy.  I'd love to have the engines painted tonight, but I'm thinking that tonight is going to be all about basic assy.

________________________________________________________________________________

Andy Hill (the_draken) landrew.hill(at)live.com <*> ASE Master Auto Tech, Imaca certified.  >^.^<

PADI OWSI Certified, BA Poli Sci (NDSU), BS Secondary ED-Social Studies MSUM (Sigma *** Laude)

  • Member since
    July 2007
  • From: Southern New Jersey
Posted by troublemaker66 on Monday, June 6, 2011 8:09 AM

Helo,

What scale is your Commando? I`m sure you posted that info but I can`t seem to find it.

Thanks,

Len

Len Pytlewski

  • Member since
    December 2010
  • From: Yangju, Gyeonggi-Do, Korea
Posted by the_draken on Monday, June 6, 2011 7:55 AM

Big Smile Thanks a bunch John! Big Smile

I've saved the post, and will try to print out the pics at work as I don't have a printer here at home.  I've started by opening up the tail wheel area and main gear bays.  Also trimming some flash from all over the fuselage.  Step two was to make a very unplanned detour and cut out the flaps.  Time will tell if this was a wise decision or not.  Also taken care of was assembling the horizontal stabilizers.  Easy, quick, and now done.  I've trimed the flash from the four prop hubs and will be assembling them with the props next.  I didn't know which ones you went with (both three and four prop hubs were used throughout WWII, Korea, and post conflict) but would have preferred to be different.  Since I wasn't knowledgeable of the facts...  I went with the four prop hubs since that's what the one in my photo of a RoK Commando had.  For the back deck of the floor, I'm just going to hang an OD green canvas curtain at the bulkhead.  I'm going to leave the passenger doors off of both sides of the fuselage and open the cargo doors as if for loading.  It would be cool for a diorama!  The Squadron/Signal InAction book shows a GMC CCKW- 2/5t truck with the sides of the bed gone and a wooden ramp for use in cargo loading. I'm going to have mine hanging from the ceiling (due to size) so that's not going to help me any.  I've noticed that I'm going to be using a lot of filler plastic and putty on this already.  Test fitting the stabilizers to the hull showed massive gaps on mine due to sinking of the plastic, and I'm glad that I got the metal gear from SAC, mine all are messed up with sink holes and injector pin marks.

Anyway, I'm already starting!

________________________________________________________________________________

Andy Hill (the_draken) landrew.hill(at)live.com <*> ASE Master Auto Tech, Imaca certified.  >^.^<

PADI OWSI Certified, BA Poli Sci (NDSU), BS Secondary ED-Social Studies MSUM (Sigma *** Laude)

  • Member since
    September 2003
  • From: Australia
Posted by Helo H-34 on Monday, June 6, 2011 6:48 AM

Jeaton , excellent work Sir on the F-82 Twin Mustang Toast

Andy I found the WIP pic's I originally posted and uploaded them into photobucket and will re-post them here ;

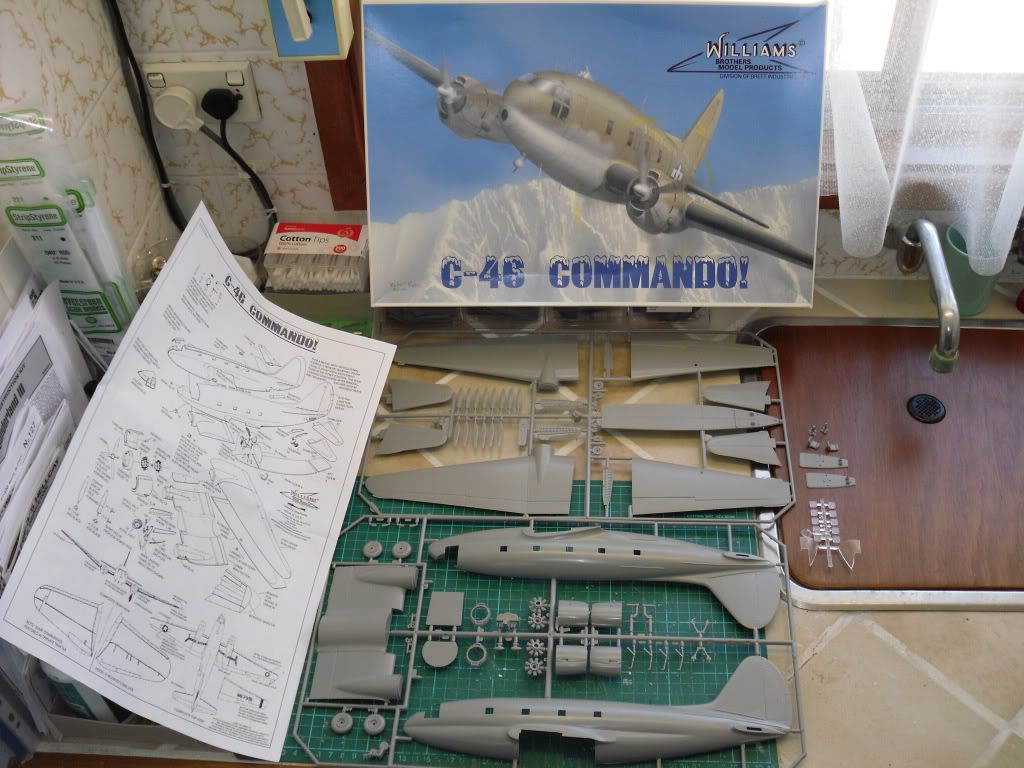
Fist up is the main sprue pic
next I cut out for the landing gear wells and inserts ,
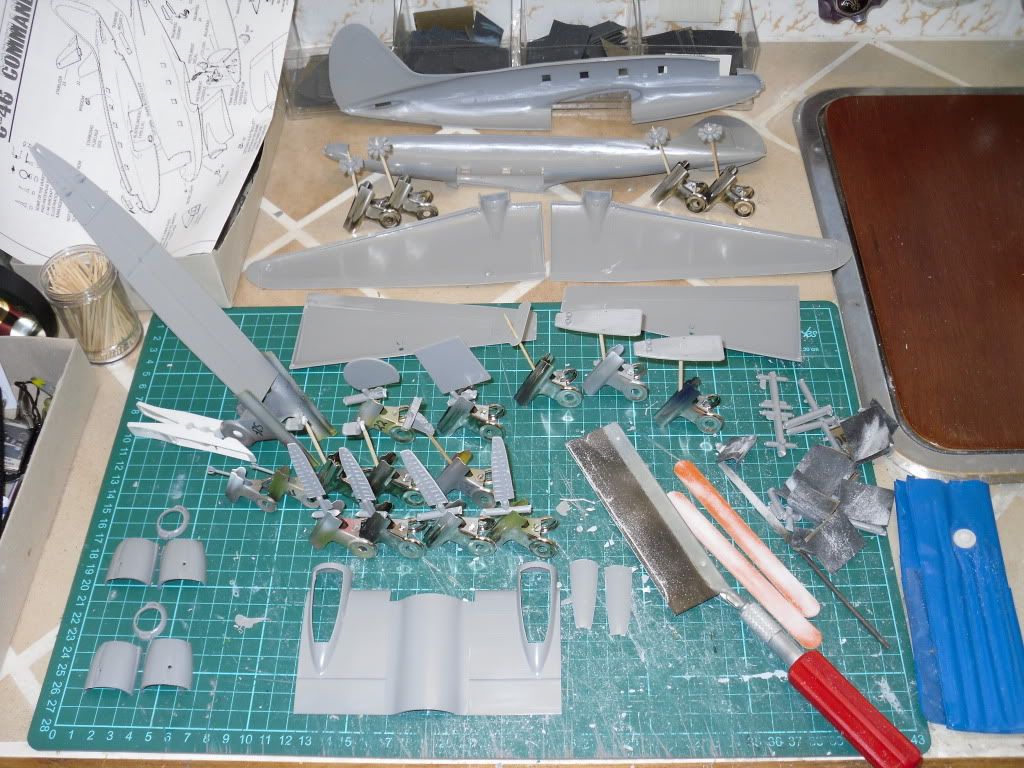
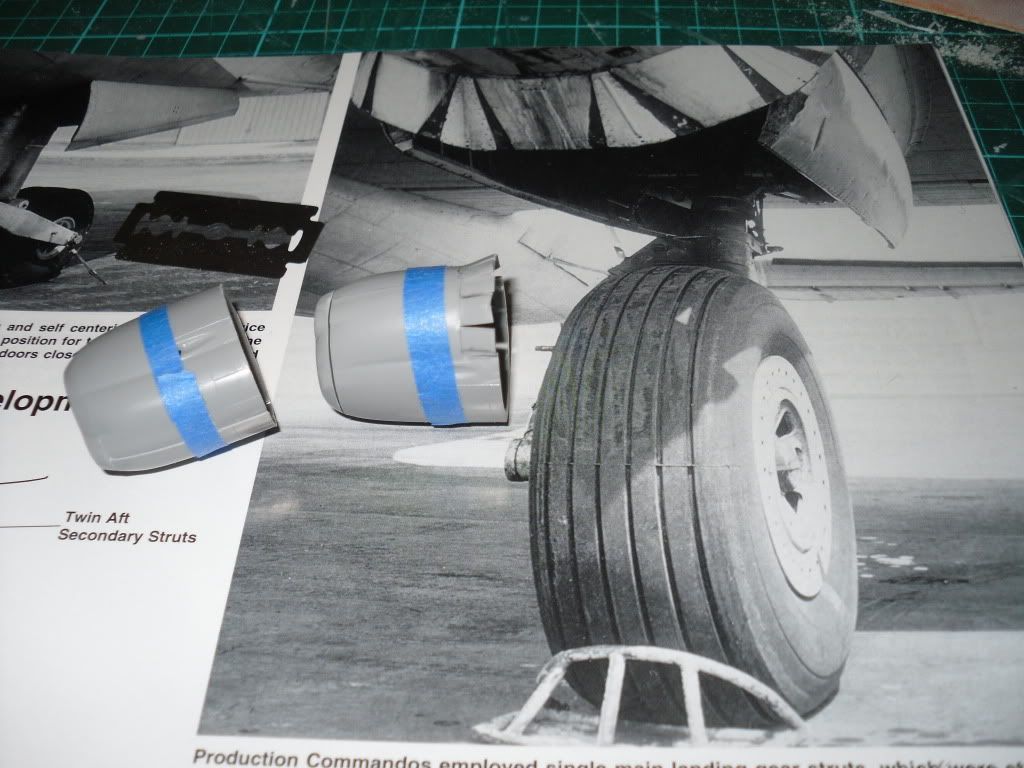
After glueing the engine nacelles together , I then cut the bottom cowl flaps to pose them open
I then cut open both fuselage side doors ,
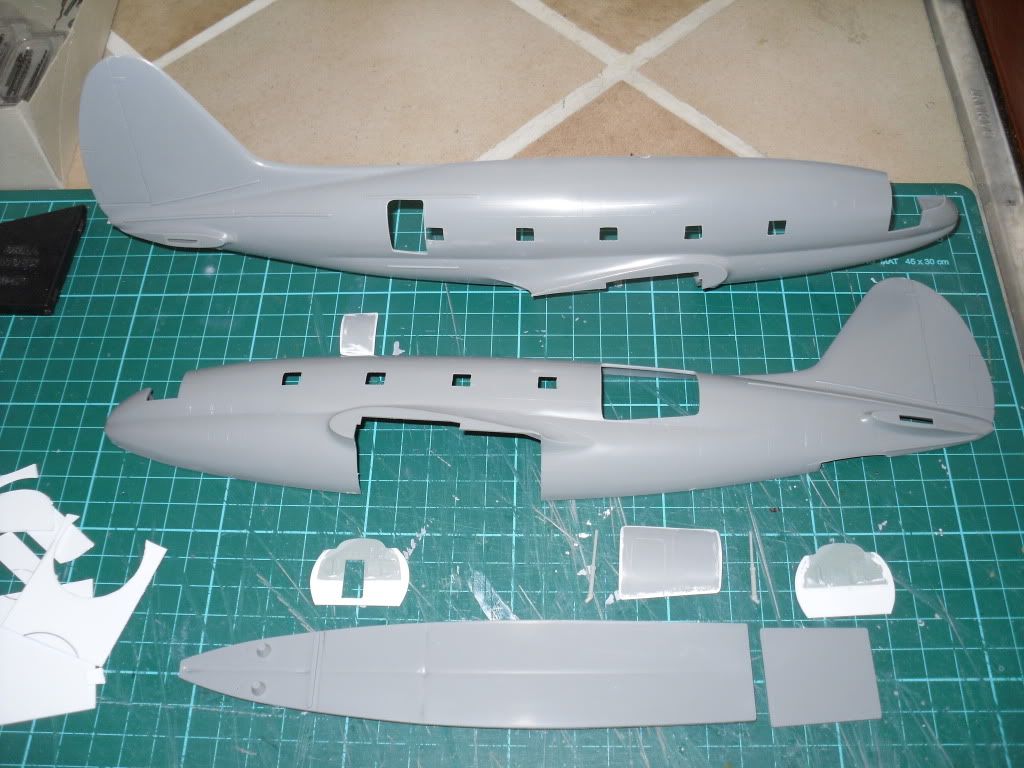
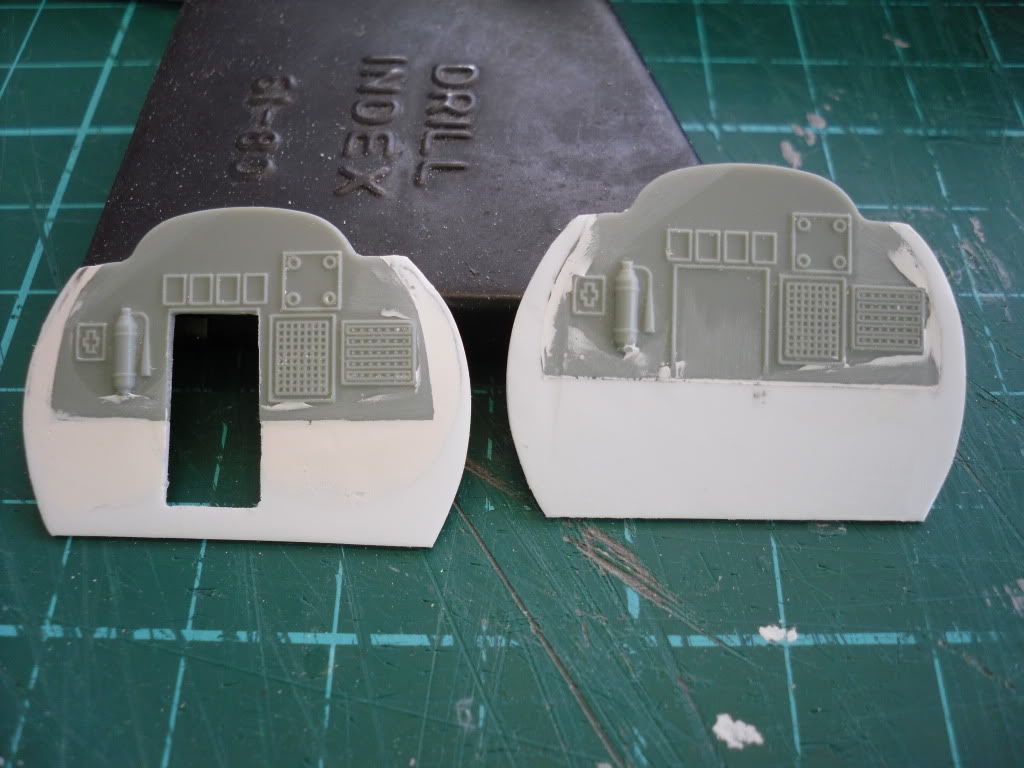
I made some interior bulkheads from two spare pieces from Academy's B-17 kit and added some sheet plastic ,
I also cut a new piece of plastic sheet to extend the cabin/cargo floor passed the rear door opening ,
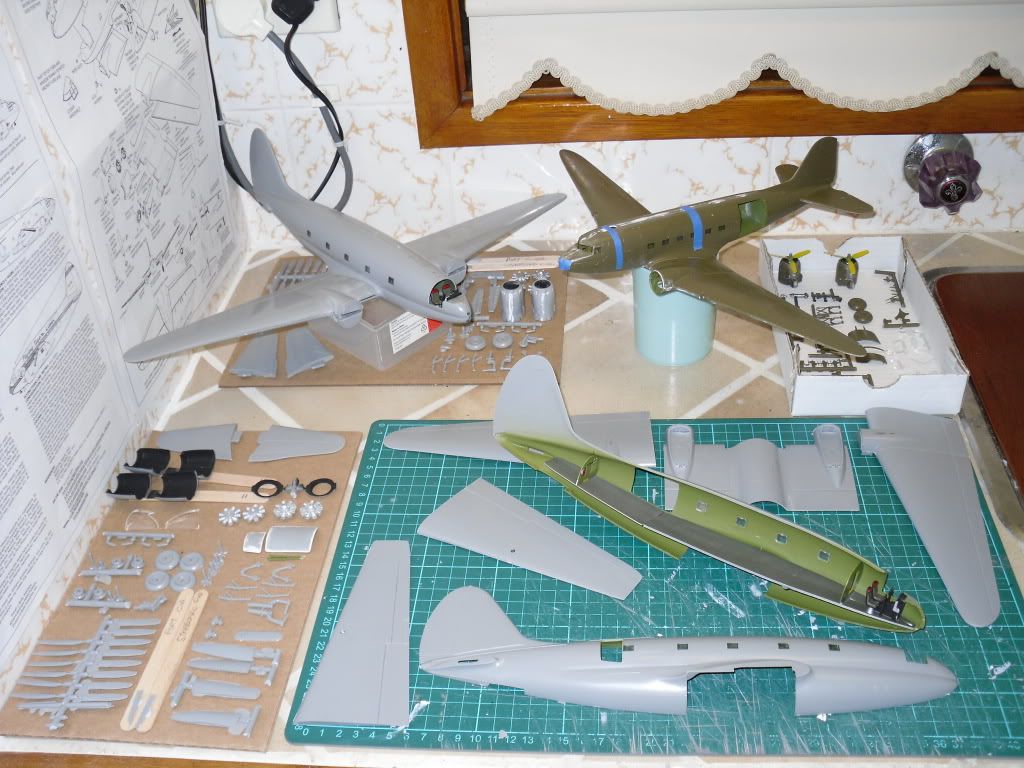
Another rear view ,
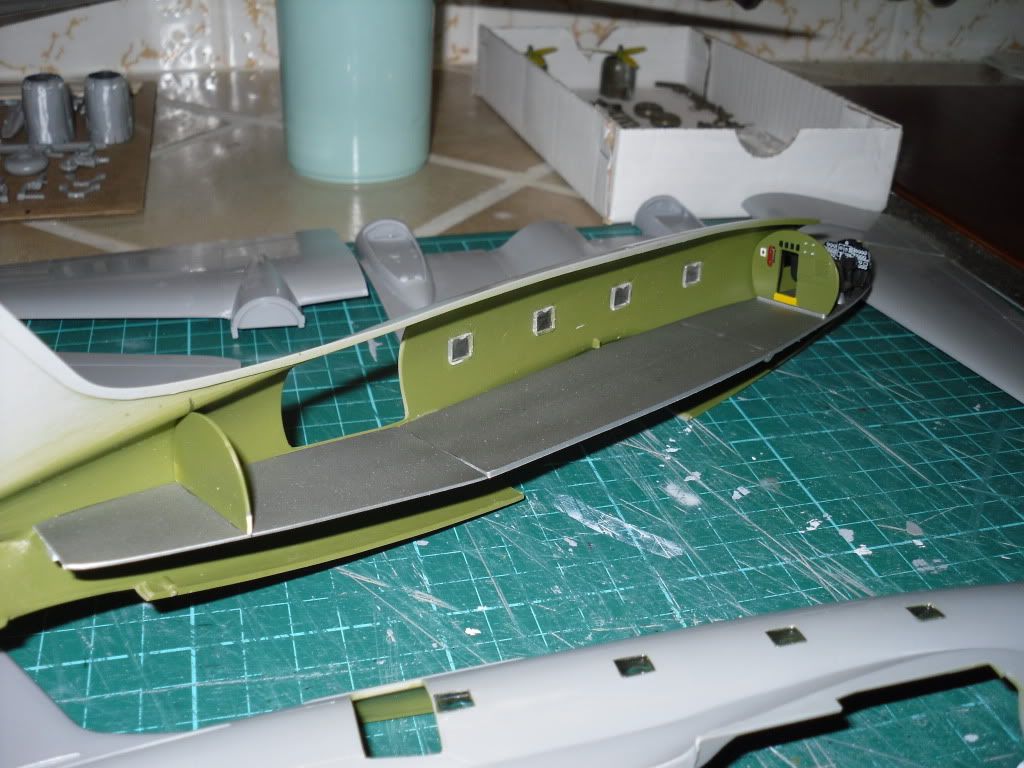
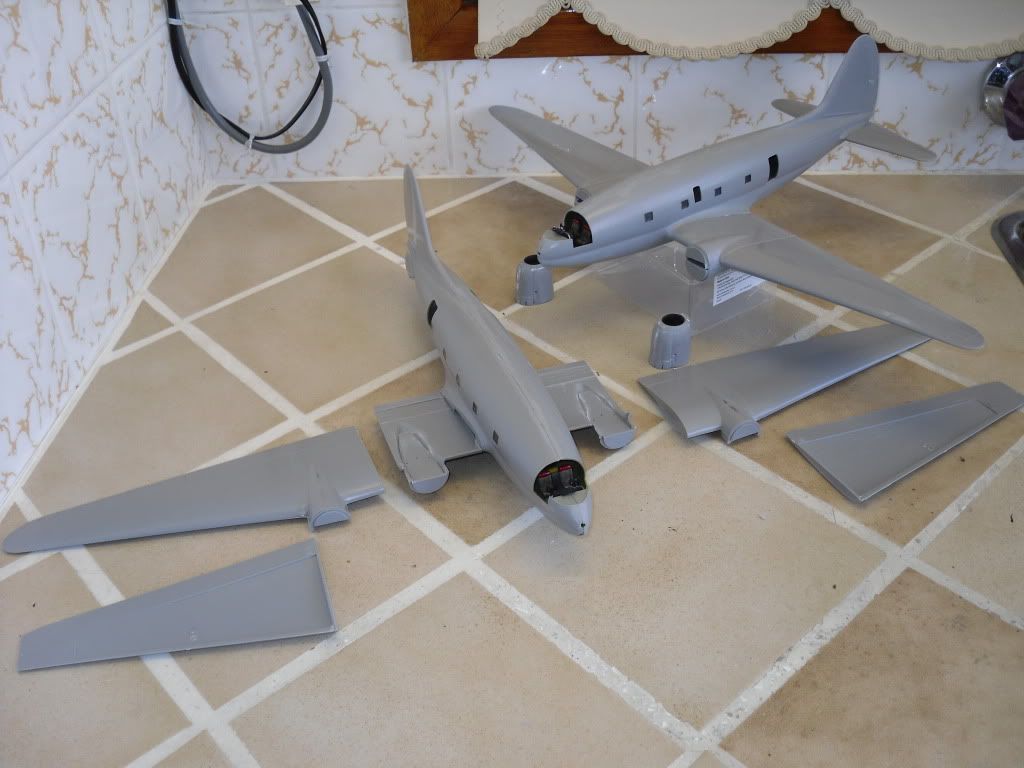
The fuselage halves fit together quite well , HOWEVER , the wings are a frightning affair ,
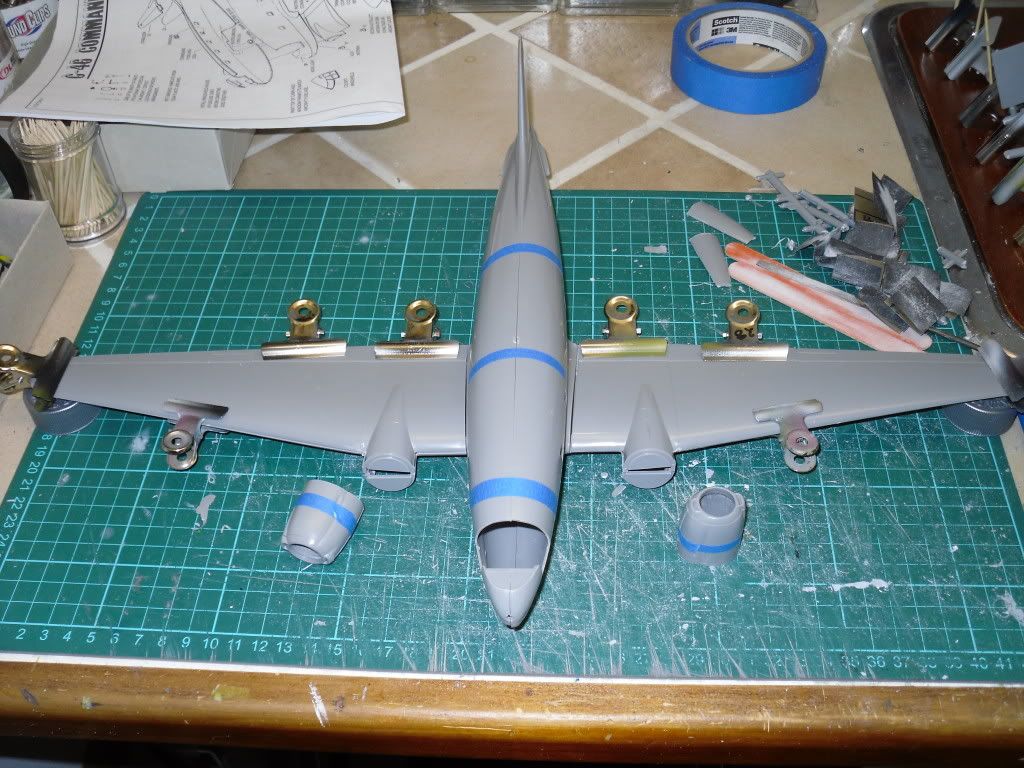
The bottom center piece is not too bad a fit ,
I used an old tissue box to position the C-46 on her side while I glued the starboard wing in place ,
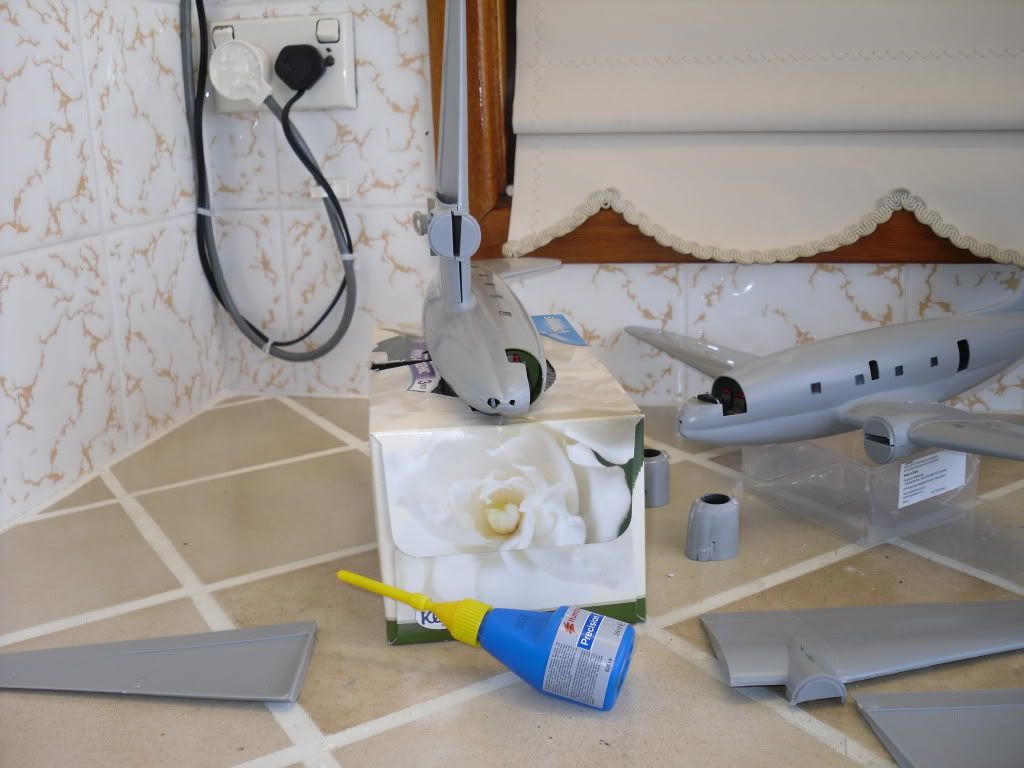
Another view ,
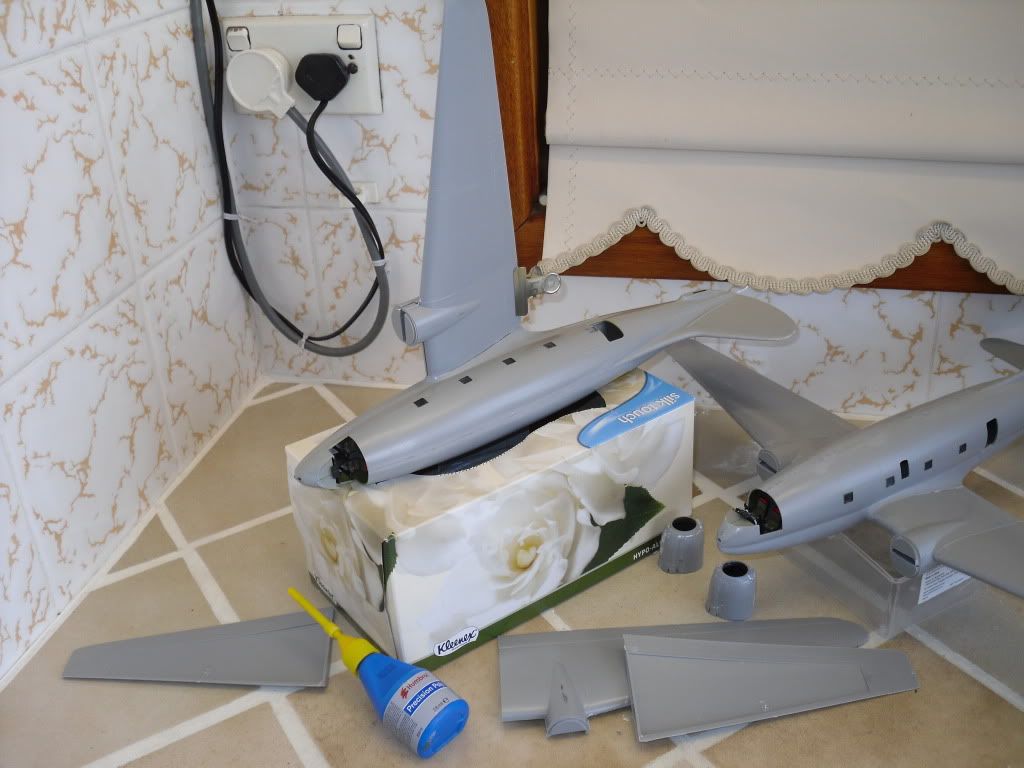
There are some huge gaps on the wing leading edge as it fit up to the engine nacelle ,
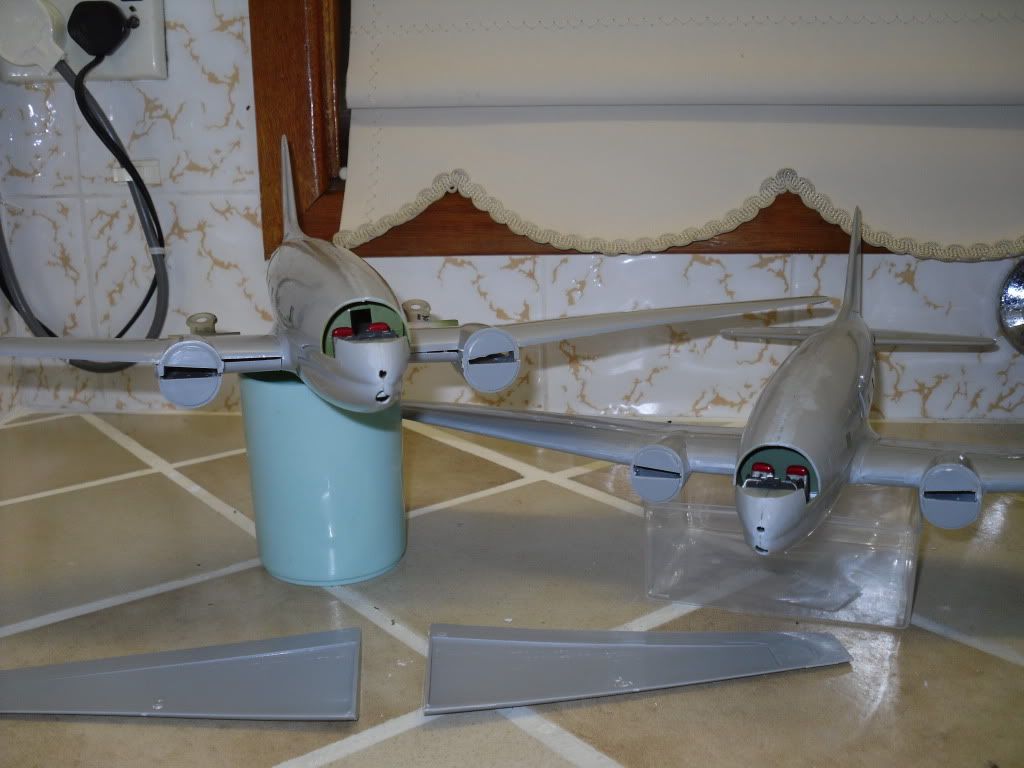
Here's the fuselage and wings glued on , the second C-46 is an Air America bird ,
I was going to use a couple of F-15 speed brake struts on the main cargo door opening ,I also added plastic strip to the top and side of the doors to make up the difference from the saw cut and filing ,
I did struggle with getting the two front canopy halves to join up properly , I ended up getting two Squadron Vacuform C-46 canopies to use instead . I haven't as yet cut them to fit , I was thinking of masking and airbrushing the Commando first and fit the Vacuform canopy after .

Don't forget to cut out the opening for the tail wheel when the fuselage halves a still two seperate pieces .

My C-46 has been in the spraybooth for quite a while now , unfortunatly she keeps getting pushed aside for other aircraft which seem to take prioity , It's a shame , especially after all the work I did to get her together ;

She really deserves better !!!

I'll try and get some paint on the 'old girl' sometime this week Embarrassed

If I think of anything else about the build I'll let you know or if you have more questions please don't hesitate to ask , I'm more than happy to help .

HTH ,

                   John .

  • Member since
    December 2010
  • From: Yangju, Gyeonggi-Do, Korea
Posted by the_draken on Monday, June 6, 2011 1:11 AM

@ Jeaton:

Awesome quick build.  Toast  I do all of mine in 1/72 in about that time, usually.  Given my situation and whatnot here in Korea, it only makes sense, though.  Cool

@ Helo:

I've decided to work on my C-46 next, do you have any suggestions?  What are the worst bugs, and what should I watch out for?  I'm going to have it as sitting on the ramp in the summer:  Open up the two over wing window panels, leave the cargo doors off, gear down.  I've got metal gear from SAC, do you suggest using the plastic or vinyl tires?  Thnx in advance!

Draken (Andy #2)

________________________________________________________________________________

Andy Hill (the_draken) landrew.hill(at)live.com <*> ASE Master Auto Tech, Imaca certified.  >^.^<

PADI OWSI Certified, BA Poli Sci (NDSU), BS Secondary ED-Social Studies MSUM (Sigma *** Laude)

  • Member since
    December 2002
  • From: Northern California
Posted by jeaton01 on Monday, June 6, 2011 12:29 AM

Thanks for the compliment.

I didn't think it was too bad to assemble, the only fit problem I had was with one of the four wing root fits.  If I had used the kit canopies instead of the Falcon vac canopies, that might have caused more issues.  Getting it to sit on all four wheels, well I didn't quite but it's not noticeable.  It is a nice kit, really.  It was easier to work with than most P-38's.  A real 1/72 modeler might wish for better cockpit detail.  The wheels could use some help as well.  All in all I had a good time.

John

To see build logs for my models:  http://goldeneramodel.com/mymodels/mymodels.html


  • Member since
    November 2009
  • From: SW Virginia
Posted by Gamera on Sunday, June 5, 2011 7:32 PM

Hey Jeaton, wow she looks great!

Is this the Monogram kit? FSM ran a repeat review a few months ago and the kit sounds like a bear to assemble.


"I dream in fire but work in clay." -Arthur Machen


  • Member since
    December 2002
  • From: Northern California
Posted by jeaton01 on Sunday, June 5, 2011 7:24 PM

I have finished the F-82, it was part of a 1 week build at Swanny's that took me 11 days.  Gloss black finish  quick builds may be one of your basic oxymorons.  Sorry about the pictures all in one post, but it was either build or write, not both.  One thing I did find was that building faster makes one think harder and puts pressure on a person to find ways to build better.  Does that make sense?  It may be Helo John's big secret!

I took progress pictures so here are some.  Notes are on my web site here:

http://www.yolo.net/~jeaton/mymodels/f82/1f82/1f82.html

John

To see build logs for my models:  http://goldeneramodel.com/mymodels/mymodels.html


  • Member since
    December 2010
  • From: Leicester, UK
Posted by Dr Win on Sunday, June 5, 2011 3:31 PM

Greg,

I bought a set of those decals to do my Skyraider (a Hasegawa AD-6, backdated to a late war AD-4), they go on very nicely, if I remember you don't even need setting solution. 

Helo - I need to get that squadron armour in Korea book! Keep seeing photos I've not encountered before!

Draken - I hate to nit pick but weren't the M5 tractors out of use by Korea? I think you need the M4 instead. If anyone does it...

I found a nice shot of HMS Belfast on Wikipedia commons, thought I'd post the link up - 

http://commons.wikimedia.org/wiki/File:HMS_Belfast_in_Korea.jpg

The F-94 is almost finished, just waiting for the varnish to set, may have to rub down a few drips and re spray before I can get the parafilm off the canopy. Had a bit of a disaster with it earlier in the week, after carefully masking off a few panels to do in a different metal shade, take of the Tamiya tape and big chunks of my nicely airbrushed silver paint came with it. Much cursing ensued believe me! Still shes looking ok now. Not my best work, but not my worst either.

Doc.

"When the going gets weird, the weird turn pro..."

/]

  • Member since
    September 2003
  • From: Australia
Posted by Helo H-34 on Sunday, June 5, 2011 2:51 PM

Excellent post Greg ;

I'm masking the Heller Skyraider right now and need a set of 'AK' markings , so I'll pick some up for sure .

The Heller kit is quite basic compared to Fujimi's and Hasegawa's Skyraider kits but it's a fun quick build .

You also have me thinking about a M4 Sherman with a 105mm Howitzer and I might pick up one of those M5 Tractors as well .

Starting painting the F2H-2P Banshee and F9F Panther , some silver along the wing leading edges now there both ready for gloss sea blue .

                                 John

  • Member since
    October 2009
  • From: Texas
Posted by Gregbbear on Sunday, June 5, 2011 12:45 PM

Cool armor and arty Draken.

John, tanks for the image.  I might give that Sherman a try then. 

I found these from a company called Fantasy Printshop in England.  They also have a Navy set, and are both in 1/48th and 1/72.  I ordered the 48th scale for my Monogram, and I am thinking about buying a set in 72 for future use.  Other than the Eaglestrike set with an AD-4N, and two others, this is the only KW skyraider sheet(s) I have found.  If interested, they are seller- fantasyprintshop on ebay.

Cheers,

Greg

- yat yas!


  • Member since
    December 2010
  • From: Yangju, Gyeonggi-Do, Korea
Posted by the_draken on Sunday, June 5, 2011 10:36 AM

Yo, Doc and Helo!

I was surfing teh intertubez this evening and found a really cool web site for 1/72 Shermans.  I was particularly looking to see what Brit armour was involved in the war, as I recalled seeing a sherman described as a 'Commonwealth Sherman' in a photo.  Turns out it was Canadian, so I can add that into vehicles from my stash.  I've got an M-4A3(76) Eduard ProfiPack that's begging to be built (all that fiddly PE scares the tar outta me!) and I wondered if I could add it in. 

http://www.172shermans.com/Korean%20war%20shermans.htm

While we're on the subject of Canucks; how do you spell Canada with three letters?  C, eh?  N, eh?  D, eh?

*BADUM bum TISS!*  Big Smile  Thanx everybody!  I'll be here through Tuesday, try the veal!

________________________________________________________________________________

Andy Hill (the_draken) landrew.hill(at)live.com <*> ASE Master Auto Tech, Imaca certified.  >^.^<

PADI OWSI Certified, BA Poli Sci (NDSU), BS Secondary ED-Social Studies MSUM (Sigma *** Laude)

  • Member since
    December 2010
  • From: Yangju, Gyeonggi-Do, Korea
Posted by the_draken on Sunday, June 5, 2011 2:35 AM

Heya Helo!

I bought the chain from Milicast.  Same time that i bought all the rest of my resin kits and a few extras (the M-3 Halftrack stowage and 50 jerry cans).  I've seen that short barreled 155 and had been wondering what it was!  Matchbox/Revell did the M-40 which was the long barreled version.  I suppose that you could cut the barrel down modify a Chaffee hull, and call it an M-41.  The M-40's were from the Arkansas National guard, which were called up to active duty for the war.  I've got one built and on display at school with a Fujimi M-30 behind it for ammo supply.  I've got the Nitto/Fujimi and the Matchbox/Revell M-7's, I'm going to build at least one of them with the hoops and canvas cover, and the other is going to have an M-30 with it.  I've got LOTS of shells left over from Hasegawa M-2 Long Tom kits (I also have that on display at the school being towed behind an M-5 HST).  One of these days I'll get around to posting pictures of those combos.  For the Longtom and HST, I used the 'mini-diorama' that Matchbox provided with the M-19.  I painted it like a Korean road and on the sign I put (in English and Hangeul!) "Yangju 12 Km ->".  It looks really cool!

Found these on my model web site and put them onto Photobucket to post here: 

The first two are of the -36 Jackson by Nitto/Fujimi.  The first shot shows the interior that I had to build for it!  You could see daylight through the hull because of how it had been designed as a kit.  I also made bulk heads for the engine bay, turret area, and driver's area.  They all got painted aircraft Vietnam Camouflage Grey (Academy Aero White) and then I went to work assembling the rest of it.

The second shot shows a really nice closeup of the added engine details.  I added hoses, spark plug wires (cables for you limeys and aussies!) as well as a distributor, coil, and battery.  I never did get around to battery cables.  Sad  I also added the back end of an MG for the hull gunner's position!

The next three are of the M-2 155mm and the HST from Hasegawa.  The gun is really nice with lotsa moving parts.  But it only shows in the directions how to build it in the traveling position!  Since that's how I was going to display it, it didn't bother me much.  But I can raise and lower the gun and slide it back for traveling.

I was wondering what looked wrong with the pictures and just realized that they were taken before decals were put on. 

Anyway, just wanted to show these off...  Big Smile

________________________________________________________________________________

Andy Hill (the_draken) landrew.hill(at)live.com <*> ASE Master Auto Tech, Imaca certified.  >^.^<

PADI OWSI Certified, BA Poli Sci (NDSU), BS Secondary ED-Social Studies MSUM (Sigma *** Laude)

  • Member since
    September 2003
  • From: Australia
Posted by Helo H-34 on Sunday, June 5, 2011 1:45 AM

Awesome stuff Andy ; Bow Down

You mentioned before about the M-46 being chained down to the Dragon Wagon but I can't remember where you said you got the chain from !

The field guns look great too , your the only one so far who has done artillary pieces ( I think ) .

Here's a pic from the book I mentioed earlier of a M-41 155mm Howitzer and a British Centurion ;

Do have these as 1/72 kits in the stash and are they readily available , I would certainly like both .

                              John .

  • Member since
    December 2010
  • From: Yangju, Gyeonggi-Do, Korea
Posted by the_draken on Sunday, June 5, 2011 1:17 AM

And some more!  I was going to wait until I had the Su-76 and my two M-7's done, and changed my mind.  On the left (front to back) are the Revell M-101 105mm howitzer from the CH-46 Tarhe kit and the Ace M-101 105mm Howitzer.  Note the difference in size and the different splinter shields.  I was reading one book which stated that the South Korean Army only had light weight 105mm howitzers for arty at the start of the war.  I wonder if the Revell kit is what's meant by that terminology.  On the Right are the UM 76mm field gun and limber (the same gun used in the SU-76), the PST 122mm Field Gun, and the PST 152mm Field Gun.  These wer used later in the war by the CCF.  They were used in conjunction with ISU 122's and ISU-152's of which, only a very few were ever fielded.  In the book "Final Crucible:  The USMC in the Korean War Part II" the author quotes Ted Williams describing a bombing run on an ISU-152.  Take note that the 122 and 152 can both rotate and elevate on their carriages.  These two kits were kind of a pain to build; although the fit and parts looked wonderful in the box, in construction the fit was horrible and I basically cut off any locating tabs in order to get stuff to line up.

A nice little note to the Ace kit, despite the bad fit and heavy flash, they include 5 rounds of ammo for a diorama!  And the smallest of the guns (the 76mm field gun) has a photo etched brass splinter shield.

________________________________________________________________________________

Andy Hill (the_draken) landrew.hill(at)live.com <*> ASE Master Auto Tech, Imaca certified.  >^.^<

PADI OWSI Certified, BA Poli Sci (NDSU), BS Secondary ED-Social Studies MSUM (Sigma *** Laude)

  • Member since
    December 2010
  • From: Yangju, Gyeonggi-Do, Korea
Posted by the_draken on Sunday, June 5, 2011 12:45 AM

First off, Helo, that is an awesome book, I'm going to have to pick up a copy sometime!  I especially like the photo of the Ba-65 in US markings.  Cool

Here's some pics of the finished, COMPLETELY, Dragon Wagon and Patton.  I added some stowage to the Patton and chained it to the trailer.  My only disappointment with the chain from Milicast is that it's a copper tone and I had to paint it, although, having painted it with Testors' flat steel, the copper that shines through looks a lot like rust!

________________________________________________________________________________

Andy Hill (the_draken) landrew.hill(at)live.com <*> ASE Master Auto Tech, Imaca certified.  >^.^<

PADI OWSI Certified, BA Poli Sci (NDSU), BS Secondary ED-Social Studies MSUM (Sigma *** Laude)

  • Member since
    September 2003
  • From: Australia
Posted by Helo H-34 on Saturday, June 4, 2011 11:38 PM

Hi Greg ;

My knowledge on Armor in general is quite limited , however I found this pic in Squadron's Armor in Korea book ...

As you can see by the caption it states it's a M4 Howitzer , I could be wrong but I alway's thought that the Howitzer is refered to as the 105 ???

I'm sure others with a lot more experiance with Armor will be able to answer the question more fully .

HTH .

                          John.

  • Member since
    October 2009
  • From: Texas
Posted by Gregbbear on Saturday, June 4, 2011 11:00 PM

Draken, the M-32 came out great.  Your extra stowage adds even more interest. 

I too have a question about KW usage.  A few days ago in the LHS, I noticed a 1/72 Sherman by Eduard.  It said it was 105 version, and it was used in WWII.  Beyond that, it didn't give much info, such a model number.  Is anyone familiar with this model, and if, so was it used in Korea?  Everything in small scale in my LHS is pretty much all German. 

Cheers,

Greg

- yat yas!


  • Member since
    December 2010
  • From: Yangju, Gyeonggi-Do, Korea
Posted by the_draken on Saturday, June 4, 2011 10:21 PM

Crappy pics, but it's done.  Stik, if you wanna put it up, go ahead!  I'd prefer using the previous pics though, they're much better.  Unless you might wanna use one of these...

And one of the fluffeh Whitey kitteh who is constantly trying to interrupt my modelling to play and disperse hair...

________________________________________________________________________________

Andy Hill (the_draken) landrew.hill(at)live.com <*> ASE Master Auto Tech, Imaca certified.  >^.^<

PADI OWSI Certified, BA Poli Sci (NDSU), BS Secondary ED-Social Studies MSUM (Sigma *** Laude)

  • Member since
    September 2003
  • From: Australia
Posted by Helo H-34 on Saturday, June 4, 2011 4:07 PM

I really like the M-32 with all the added stuff Andy .

The canvas rolls and netting from toilet paper and gauze are awesome ; I will try that sometime in the future .

I ordered the M-32 and LTV-3 from Millcast , hopfully I can make a fair go of them both , I copied a couple of pic's of yours along with some pic's of the Dragon Wagon you posted earlier for reference and inspirarion , I really like all of your 1/72 Armor builds .

I also ordered the Mach 2 LCT6 Landing craft , the kit is a litttle expensive but I think because I buy a lot of stuff from Hannants , they seem to give me a bit of a discount on some items when they go over $100.

Anyway the Landing Craft will be my watercraft offering to the Korean War GB , I was thinking about the Dragon 1/700 U.S.S. Bon Homme Richard , that greg mentioned earlier but the aircraft just look too tiny for me and I didn't see anything in 1/350 scale ;

However I like the fact the Mach 2 LCT6 is in 1/72 scale , like the rest of my Korean War kits  Smile

                                           John .

  • Member since
    December 2010
  • From: Yangju, Gyeonggi-Do, Korea
Posted by the_draken on Saturday, June 4, 2011 8:08 AM

Here we are, a few extras on it, and no decals or figures added as of yet.  The Milicast M-32 Sherman ARV:

So far, I think that this is one of the best shots.  It shows off the un-ditching beams, the tree trunk, the camo netting, and has proper lighting for the rest of the vehicle.  I'm actually kinda proud of the rope.  I couldn't find my grey thread so I left the tan thread 'rope' instead of steel cables.  Otherwise, I'm waiting to paint the figures and maybe paint the thread grey.

I also added some track links for the T-26E tracks from the Trumpeter M-26 and M-4A3E8 kits.  The pioneering tools and the barbed wire rolls came from the Airfix Forward Command Post Kit.  The canvas rolls were made from OD spray painted toilet paper (A single ply is better than 700 grit!  It's John Wayne Style!  Rough and tough and doesn't take *** off of anything!).  The Camo netting was made from spray painted gauze.  Overall, I'm happy with the result.  The kit was rather difficult due to the fact that the bubbles in the resin made some 'poles' shorter than others.  It was also made harder due to a crappy bottle of super glue!

As soon as I get some figures painted and decals on it, I'll post some more pics.

________________________________________________________________________________

Andy Hill (the_draken) landrew.hill(at)live.com <*> ASE Master Auto Tech, Imaca certified.  >^.^<

PADI OWSI Certified, BA Poli Sci (NDSU), BS Secondary ED-Social Studies MSUM (Sigma *** Laude)

  • Member since
    December 2010
  • From: Yangju, Gyeonggi-Do, Korea
Posted by the_draken on Saturday, June 4, 2011 7:19 AM

You are correct!

Helo,

The LCT-6 was used in the Korean War, and I've come THIS '' close to buying one, but with my meager resources, I've forgone it until the future.  BTW!  I've just finished the M-32 (minus decals) and will be posting pics of it tonight sometime.  I've added a crap load of extras, because the engineers are WELL known to add stuff to anything that moves because we "might just need it later on..."

If you buy it, lemme know how it turns out, I desperately want one!  Geeked


________________________________________________________________________________

Andy Hill (the_draken) landrew.hill(at)live.com <*> ASE Master Auto Tech, Imaca certified.  >^.^<

PADI OWSI Certified, BA Poli Sci (NDSU), BS Secondary ED-Social Studies MSUM (Sigma *** Laude)

  • Member since
    September 2003
  • From: Australia
Posted by Helo H-34 on Saturday, June 4, 2011 6:29 AM

I was thinking of buying the Mach 2 1/72 scale LCT6 Landing craft ;

According to the kit description it say's the LCT6 was used in the Korean conflict ?

As I know absolutly nothing about ships , boats or any type of watercraft I was wondering if anyone could confirm what the kit states .

It also say's that the landing craft could carry up to six tanks or quite a few trucks , it seems this would be a great place to park some of my armor builds ?

As always I appreciate any help with my question ;

                                      John

JOIN OUR COMMUNITY!

Our community is FREE to join. To participate you must either login or register for an account.

SEARCH FORUMS
FREE NEWSLETTER
By signing up you may also receive reader surveys and occasional special offers. We do not sell, rent or trade our email lists. View our Privacy Policy.