SEARCH FINESCALE.COM

Enter keywords or a search phrase below:

The Ostfront (eastern front) GB 2010/11

106900 views
900 replies
1 rating 2 rating 3 rating 4 rating 5 rating
  • Member since
    June 2010
  • From: Austin, TX
Posted by DoogsATX on Sunday, September 19, 2010 1:37 PM

JMart
DoogsATX – nice Lav so far, look forward to the rest! Look forward to your Yak; I have that kit in the stash, have read many good things about it. I usually build em’ couple at a time, different markings or whatevers, saves time on the painting stages, which is my bottleneck. And GREAT photography, may I ask what is your photo settings?


Thanks man! My photo setup is pretty simple. Two of those clamp-on worklights with 60W daylight bulbs and a posterboard. The camera is a Nikon D300s with a Nikkor 35mm lens.


As for settings, I shoot in full manual at ISO 200. Aperture and shutter speed shift a bit, but I'm usually shooting around f/5.6 and 1/60. I don't really worry about white balance, since I'm shooting in RAW and tweak that on the back end. 


Hopefully I'll be back to the Soviet birds tonight. Had a second really bad encounter with Tamiya white primer on the Wildcats last night, and I'm not sure if I'm up for hours of wet sanding tonight!

On the Bench: 1/32 Trumpeter P-47 | 1/32 Hasegawa Bf 109G | 1/144 Eduard MiG-21MF x2

On Deck:  1/350 HMS Dreadnought

Blog/Completed Builds: doogsmodels.com


  • Member since
    March 2007
  • From: NJ
Posted by JMart on Sunday, September 19, 2010 12:57 PM

DoogsATX – nice Lav so far, look forward to the rest! Look forward to your Yak; I have that kit in the stash, have read many good things about it. I usually build em’ couple at a time, different markings or whatevers, saves time on the painting stages, which is my bottleneck. And GREAT photography, may I ask what is your photo settings?


Kermit – nice job on the IL-2… look forward to the rest! And thanks for the welcome! Ill post more WIP pics once I finish cleaning up and drying my workbench/basement, we had a minor flash flood during the recent NE (NY/NJ/CT) micro storms.


Johan – nice little info blurb!


Aaron – Sweet Mig!


Jeff – Welcome!


Cheers all   GO NY GIANTS BIG BLUE


  • Member since
    November 2009
  • From: LaSalle, Ontario, Canada
Posted by bouttime on Sunday, September 19, 2010 8:47 AM

I guess I've been lurking around these threads long enough. Since the boat comes out of the water soon it's time to get back to the modelling bench.

I would like to join with a Tamiya Panzerkampfwagen 111 Ausf. N.

Will be my first attempt at winter camo and should be fun.

Will call the LHS tomorrow to order the kit and will check back soon.


Jeff


  • Member since
    June 2009
  • From: Netherlands
Posted by kermit on Sunday, September 19, 2010 4:57 AM

Aaronw,

Black/ green works for meWink Looking great there my friend. Did their 1:72 Zero fighter once... basic kits but great fit and fun builds. Are you gonna wear and tear her or leave it " new"?

Jmart,

Put you on the roster a bit ago. Have fun! The Tamyia T34/76 1943 kit was my very first and potentially most fun armor build. Really loved the treelog and dented oilbarrelsBig Smile

Richard

"Success is the ability to go from one failure to another with no loss of enthusiasm." - Sir Winston Churchill

  • Member since
    September 2015
  • From: The Redwood Empire
Posted by Aaronw on Sunday, September 19, 2010 2:31 AM

I got more work done on the MiG, the painting instructions said solid green, but while looking for more detail color info (cockpit, wheel wells etc) I started to find info that the Hobby boss scheme may not be accurate. After looking at a number of sites for Soviet aircraft schemes, I found the solid green schemes were primarily pre-war and early war more appropriate for a MiG-1. It was mentioned that the green / black scheme frequently appears solid green in B&W photos due to the low contrast, leading to debate on the actual scheme. I decided to go with the black and green since it is a bit more interesting and it will make it different from an earlier aircraft if I find a MiG-1 kit some day.


It's all futured and decaled, just need to get the canopy done and add a coat of dull coat.

  • Member since
    June 2009
  • From: Netherlands
Posted by kermit on Saturday, September 18, 2010 1:52 PM

Jmart,

OFCOURSE you're welcome buddy. Sorry i did not catch your post earlier. Have fun with your buildWink

JohanT,

Thank youSmile It is a real treat this kit. Did not expect anything less from AM... Your build seems to go well for you too. Like the way you explain with pictures exactly what you are altering/ enhancing. Looking forward to your progress.

Cockpit is joined to the fuselage now and wings are glued on drying up:

If you see any kind of flaw on the pictures that's my bad and not the kit as it is one of the best i had in my hands for quite awhile nowBig Smile

Richard

"Success is the ability to go from one failure to another with no loss of enthusiasm." - Sir Winston Churchill

  • Member since
    April 2005
  • From: Gothenburg
Posted by JohanT on Thursday, September 16, 2010 4:50 PM

Love that IL-2.

  • Member since
    April 2005
  • From: Gothenburg
Posted by JohanT on Thursday, September 16, 2010 4:41 PM

Good progress all arround, this is going to be good fun!

I have a minor issue, # 6264 has a recognized problem, the final assembly of the drive sprockets sits to low.
Here is the fix I am going to apply;

Reduce or replace the kit supplied return rollers with parts that are a match to scale, they are out of scale and have been sigificantly reduced in the later kits, so its not adding but fixing a problem (Red to Blue).

Rotate the housing uppwards about 1 mm, this will require sanding down some of the hull detail.
Sand away what is left in limbo at 6 a clock and fill what needs to be filled at 12 a clock.
(Red to Blue) 
Should be a 70% fix.

And if not I am going to enjoy building it anywayCool

Very Best Regards

Johan

  • Member since
    April 2009
  • From: Carmel, IN
Posted by deafpanzer on Wednesday, September 15, 2010 7:13 PM

Hello JMart!  Great work on the fender damage and scratchbuilt barrel!  I don't see any problem for you to join... the more the merrier! Yes

Andy

  • Member since
    March 2007
  • From: NJ
Posted by JMart on Wednesday, September 15, 2010 5:46 PM

Great idea! I have a Tamiya  T34/76 which I started for Winter Warriors II, and a Tamiya Sturm IV (basically a Stug III in a Pz IV chasis) WIP. Maybe a third to half the construction has been done; no painting nor weathering. So overall, it is less than a third done? I think so, but here are the pics for you to decide either way…

Here is the T 34/78

Did the back PE grills:


Some fender damage:


Scratchbuilt a new barrel:

So, let me know if either is permitted for this GB...cheers


  • Member since
    June 2009
  • From: Netherlands
Posted by kermit on Wednesday, September 15, 2010 12:08 PM

Doogs,

work on the lavochkin looks top notch sofar and your yak.... suhweet. Especially considering the low parts countWink. Looking forward to any and all progress...

Told you guys i would take a shot or two of the boxart and such on the reboxed IL-2...:

Together with the version depicted on the boxart you get decals for four more planes:

Been working on it for a day now and came up with this sofar:

Just like i expected this is a real Accurate miniatures gem. Detail is great and everything fits like a glove. Just like their Avenger kit this IL2 is a delight to work with sofar.

Richard

"Success is the ability to go from one failure to another with no loss of enthusiasm." - Sir Winston Churchill

  • Member since
    June 2010
  • From: Austin, TX
Posted by DoogsATX on Wednesday, September 15, 2010 1:19 AM

So I decided to start the Yak-3 tonight, and man am I glad I did!

This Eduard kit leans heavily on the simple side, but the detail is solid and the fit - so far - is Tamiya good.

Here's a quick tour:

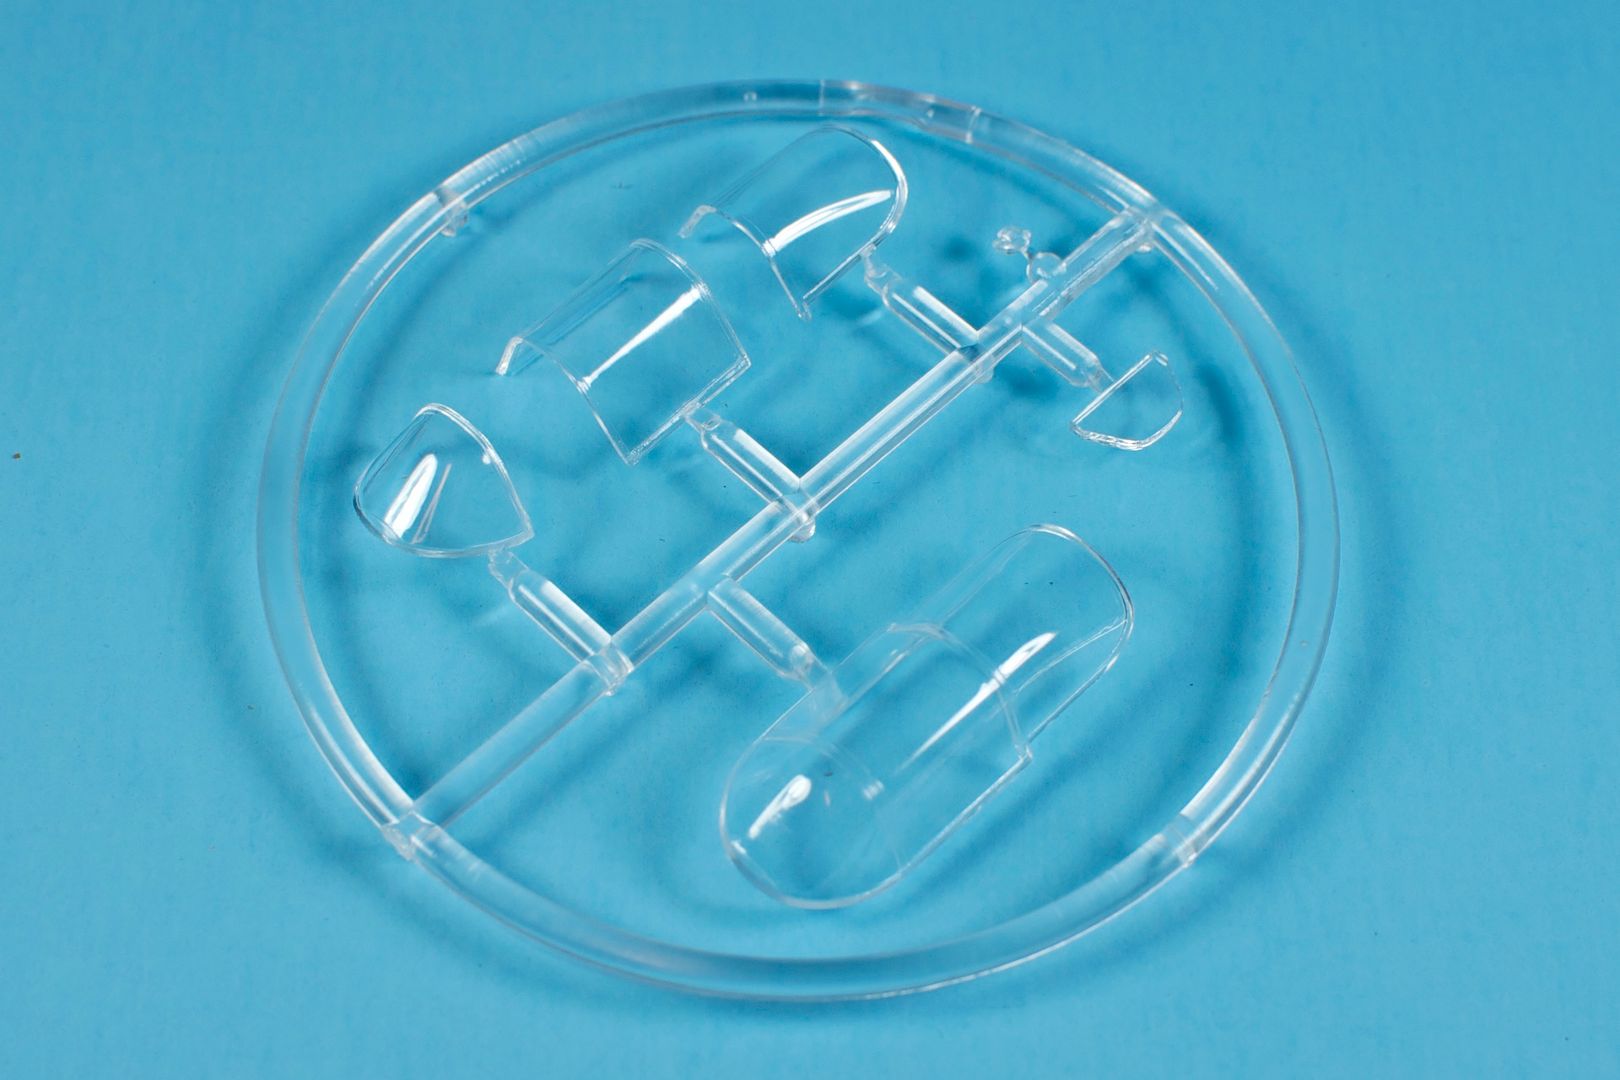
Told ya it'd be quick!

Since I'm planning to paint both cockpits the same grey, I mostly gave the La-5 the night off so I could prep and prime the Yak-3. 

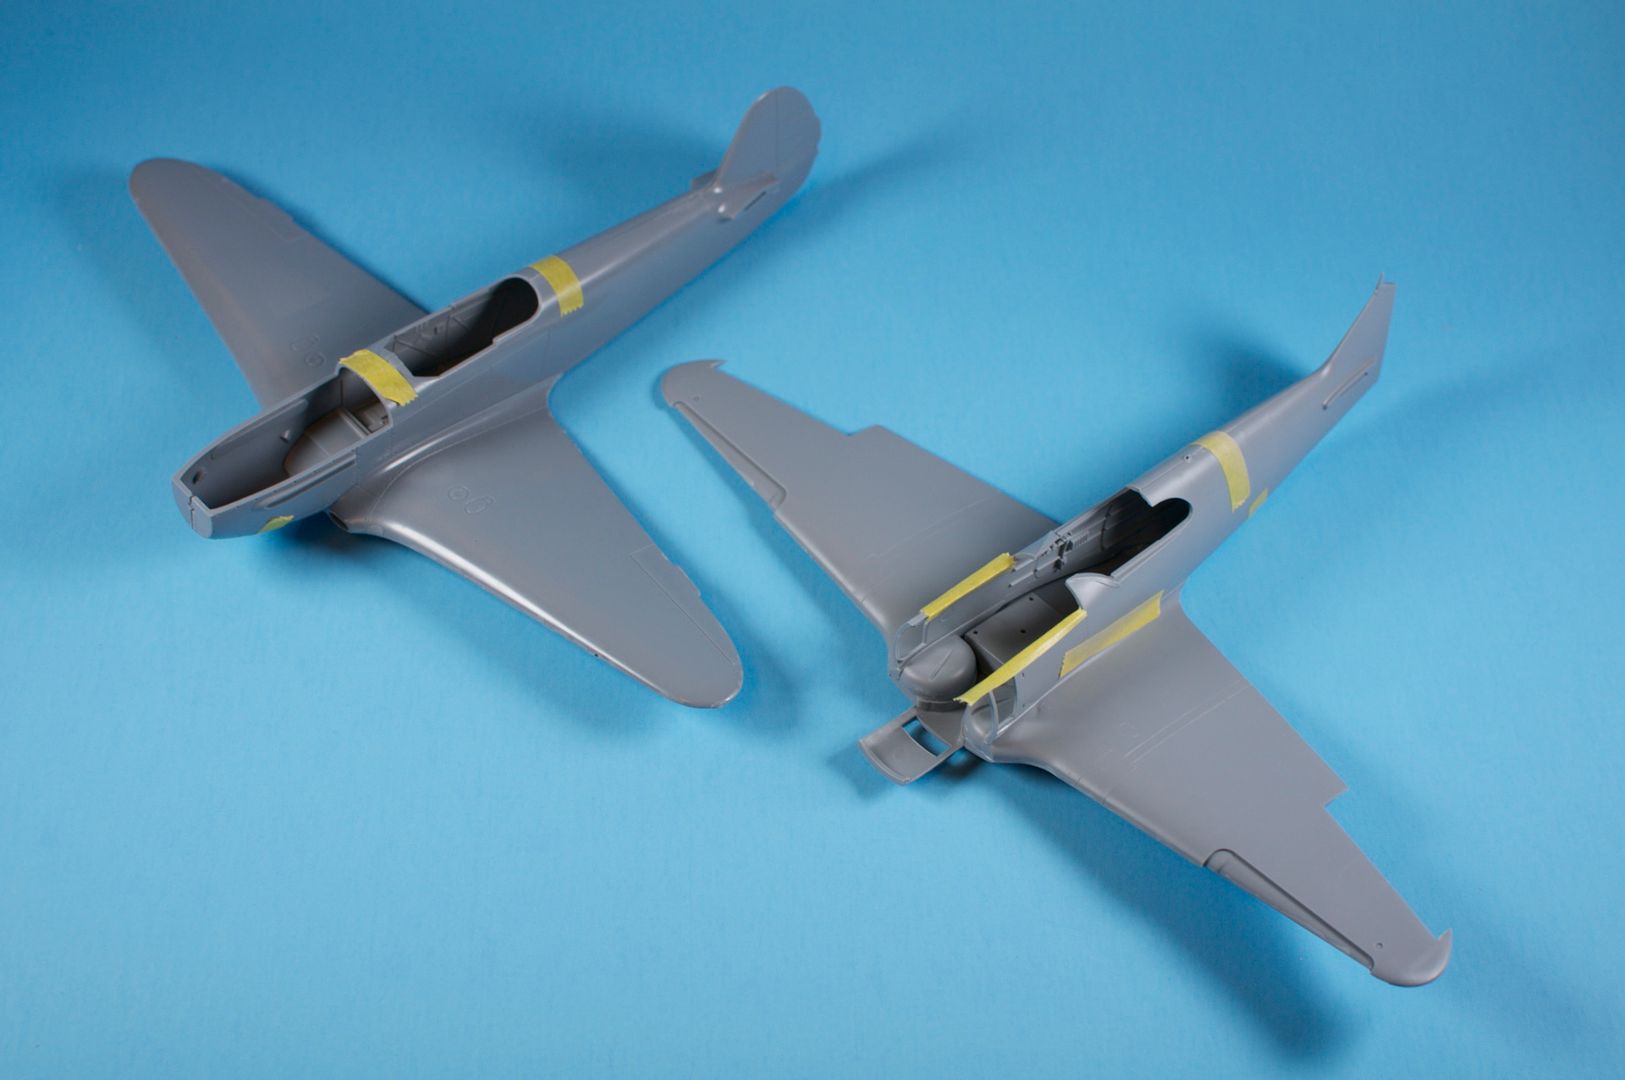
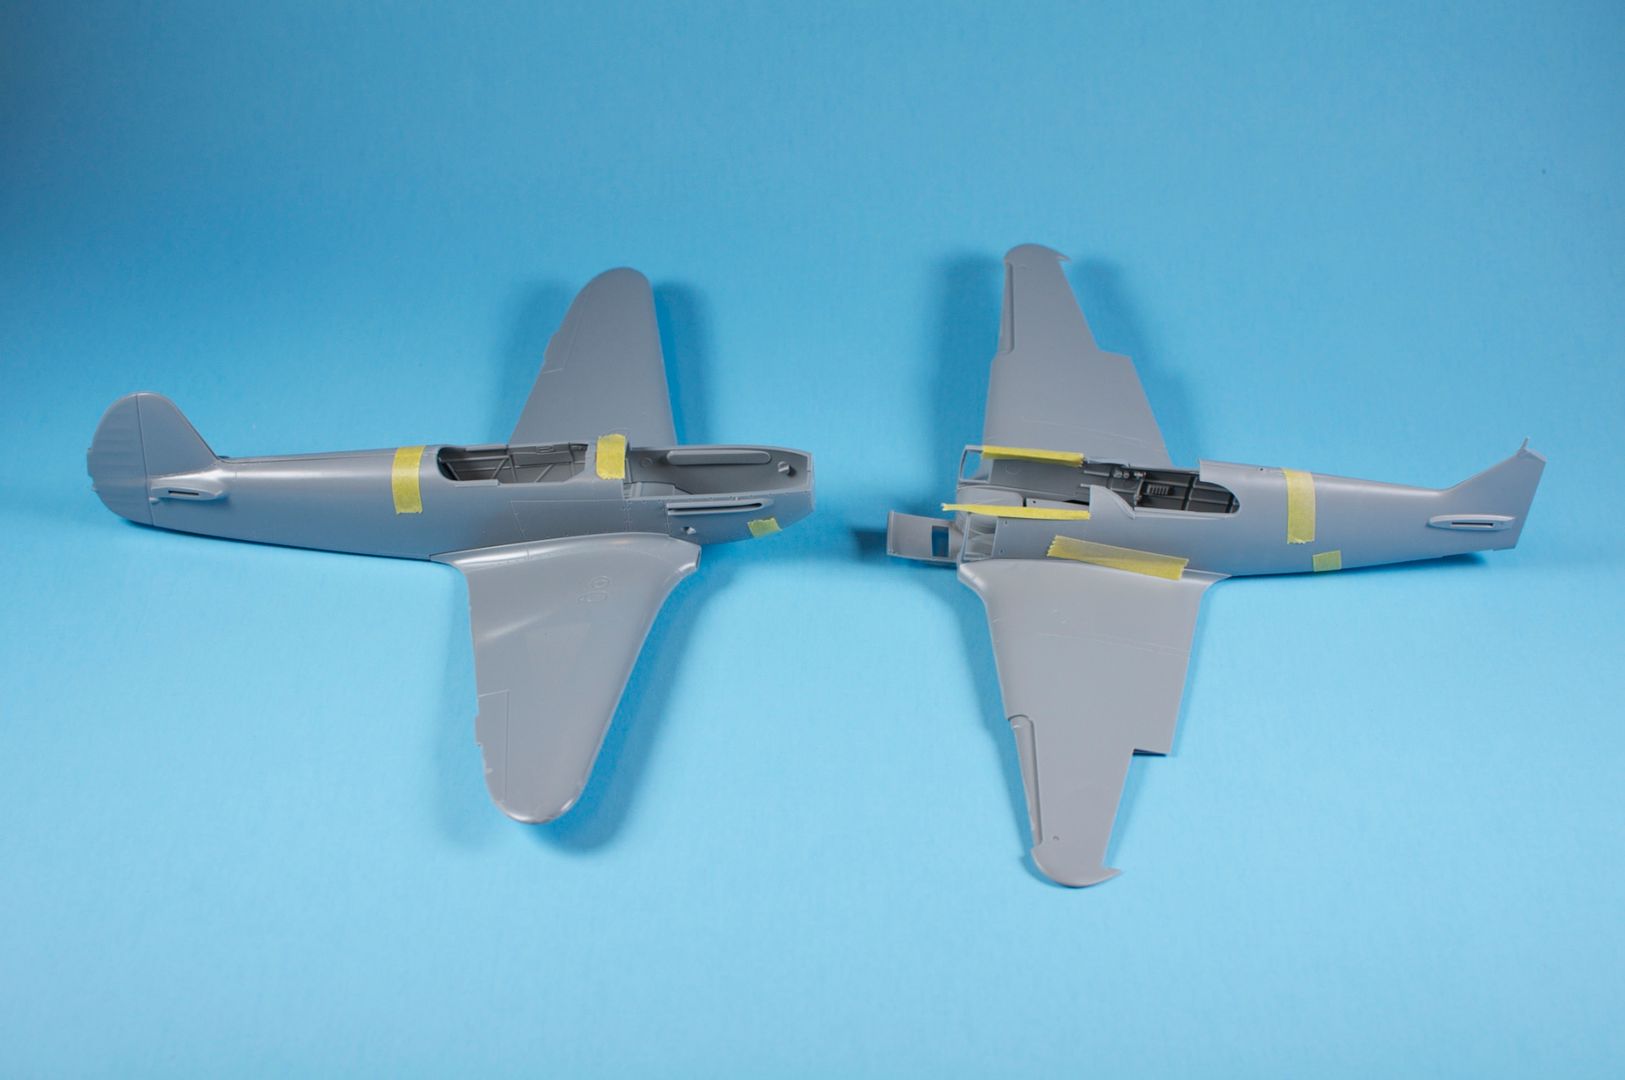
Priming didn't take very long, though, so I went ahead and assembled the wings of both planes. Each is a bit unique in its own way.

With the Yak, the wings come in two parts - top and bottom. That's it. The cockpit floor is molded into the upper wing, and the fuselage just snuggles down right on top. The fit here is excellent.

With the La-5, the wing comes in six parts - a single lower surface, and each upper wing surface divided into two. The rationale for this? Beats the hell out of me. Both surfaces have lips at the back that lock over the trailing edge of the lower wing. I read a review of the Zvezda kit that recommended gluing the upper surfaces together first since otherwise they have a tendency to develop steps. I didn't want to use even the Touch-n-Flow on so tight a seam, so instead I located the surfaces on each wing, taped the hell out of the join line from the top, then took them off the lower wing and applied Tenax to the join from the inside. After that, it was dry fit, tape to hold, then Touch-n-Flow. And viola, the wings are done! 

So far, I'm really digging both kits. The Zvezda is certainly involved, but well made, and the Eduard Yak is a totally pleasant surprise in terms of detail and fit.

Tomorrow - cockpits!

On the Bench: 1/32 Trumpeter P-47 | 1/32 Hasegawa Bf 109G | 1/144 Eduard MiG-21MF x2

On Deck:  1/350 HMS Dreadnought

Blog/Completed Builds: doogsmodels.com


  • Member since
    June 2010
  • From: Austin, TX
Posted by DoogsATX on Tuesday, September 14, 2010 7:55 PM

Got my Great Models shipment today - and I have to say I'm very impressed with Eduard's Yak-3. There's an elegant simplicity to the kit (just two sprues...maybe 40 parts total). Think I may go ahead and kick it off tonight, since it'll be getting a similar cockpit treatment to the La-5.

Decisions, decisions...

On the Bench: 1/32 Trumpeter P-47 | 1/32 Hasegawa Bf 109G | 1/144 Eduard MiG-21MF x2

On Deck:  1/350 HMS Dreadnought

Blog/Completed Builds: doogsmodels.com


  • Member since
    August 2010
Posted by skaggs on Tuesday, September 14, 2010 12:56 PM

mannnn i want thanksgiving break to come so I can get home and get started on my t34. Im going crazy watching all the progress made. really enjoying it though. Nice work everyone cant wait to contribute my bit .

adam

  • Member since
    June 2010
  • From: Austin, TX
Posted by DoogsATX on Tuesday, September 14, 2010 7:26 AM

Johan -  I can totally see how the engine mount and wheel bays could interfere with one another, especially considering how vague the construction of the internal frame seems to be. And...I'm not out of the woods yet! This is still sans cockpit floor and other goodies...

On the Bench: 1/32 Trumpeter P-47 | 1/32 Hasegawa Bf 109G | 1/144 Eduard MiG-21MF x2

On Deck:  1/350 HMS Dreadnought

Blog/Completed Builds: doogsmodels.com


  • Member since
    April 2005
  • From: Gothenburg
Posted by JohanT on Tuesday, September 14, 2010 2:34 AM

Glad to see the kit going together so well, and good to know that it was me. Embarrassed
Looking good, what a gem!

Very Best Regards
Johan

  • Member since
    June 2010
  • From: Austin, TX
Posted by DoogsATX on Tuesday, September 14, 2010 1:26 AM

Kermit - looking forward to the Sturmovik! I'll be disappointed if you don't get it done before I finish up principal construction on the Lavochkin!

Aaron - For some reason, Polly and I don't get along very well...but I think I may look at that topside green and see about color matching opportunities. Also...my AML decals have color codes for a few different paints and they're all over the map! 

vetteman - Yep, the Zvezda is soft gray plastic. I'm a bit hesitant to say they're similar from an engineering standpoint, though, since I've never built anything quite like this before.

Speaking of which...got the main interior structure assembly put together tonight. Talk about interesting. It doesn't hold itself together real well at all, so there were a few hairy moments keeping everything in place and then hitting joins with Tenax. In the end it all went together though, so no complaints. 

I also test fit everything to make sure I wasn't setting myself a big ol' trap, and what do you know, things seem to go together pretty well. Though the advice I've read about installing the interior into the fuselage first? Yeah, that doesn't work.

Finished up the night with a big priming party...the interior structure, cockpit bits, and sidewalls. Looking forward to getting on with cockpit work tomorrow!

On the Bench: 1/32 Trumpeter P-47 | 1/32 Hasegawa Bf 109G | 1/144 Eduard MiG-21MF x2

On Deck:  1/350 HMS Dreadnought

Blog/Completed Builds: doogsmodels.com


  • Member since
    July 2008
  • From: USA California
Posted by vetteman42 on Monday, September 13, 2010 11:33 PM

DoogsATX  that Zvezda kit looks like it is very similar to the way the ICM kits are engineered, is that a soft gray plastic ? I will be watching this build closely.

Kermit your I-16 looks great, I like the camo scheme too YesYes It sure does look tiny next to the P-51

Randy So many to build.......So little time

  • Member since
    October 2007
  • From: Rhode Island
Posted by jmabx on Monday, September 13, 2010 7:05 PM

Nice work on the little I-16 Kermit! Yes  I really like the camo on it. Cool

I started a Hobbycraft I-16 many years ago and put it away for some reason or another but seeing yours finished has given me the incentive to pull it out of the pile again.

Jeremy    Propeller


  • Member since
    September 2015
  • From: The Redwood Empire
Posted by Aaronw on Monday, September 13, 2010 4:11 PM

Pollyscale has quite a few WW2 Soviet colors, I have one called USSR topside green that might work for you. It is a medium olive color that is probably meant for use with USSR dark topside grey. The green was much too light for the plane I'm building which is a solid dark green scheme, but looks like it might be about right for the green / grey scheme in your picture. 

  • Member since
    June 2010
  • From: Austin, TX
Posted by DoogsATX on Monday, September 13, 2010 2:46 PM

Yeah, I've heard about Floquil Pullman Green...going to keep it in the back of my mind if I end up doing the Zvezda 109 in a scheme that calls for RLM71.

The La-5 calls for a much more medium green, alas:

On the Bench: 1/32 Trumpeter P-47 | 1/32 Hasegawa Bf 109G | 1/144 Eduard MiG-21MF x2

On Deck:  1/350 HMS Dreadnought

Blog/Completed Builds: doogsmodels.com


  • Member since
    June 2009
  • From: Netherlands
Posted by kermit on Monday, September 13, 2010 2:32 PM

For paints i use the revell acrylics almost exclusively because of ease of use, superfast drying times and wide availability here in holland. Sometimes i take a sidestep to their enamels or humbrols.

Color research and paint mixing is usually a matter of trying to get as much photo's, fs numbers and what not as i can and then mix it up myself using my gut feeling. Usually works out great. Also screenshots taken inside simulation games are a valuable source of color info.

Ok,... next build for this group.... Took my time in deciding between a P39 and an IL2 i have in my stash and i decided on the sturmovik. Being a reboxing of the accurate miniatures kit by Italeri i expect nothing else than a great model to work with. Probably will attempt recreating the mount of captain Emelyanenko. It has a very distinct musically inspired marking on the side:

Will start off with some box/ sprue shots tomorrow after workWink

Richard

"Success is the ability to go from one failure to another with no loss of enthusiasm." - Sir Winston Churchill

  • Member since
    September 2015
  • From: The Redwood Empire
Posted by Aaronw on Monday, September 13, 2010 2:32 PM

If you are using Acrylics, you might try looking at the Floquil rail road acrylics. Their Pullman green apparently manages to be a good match for a Luftwafe green (RLM71 I think) and the Dark Green used by the RAF. It also looks close to the Soviet dark green used for some aircraft schemes.  

  • Member since
    June 2010
  • From: Austin, TX
Posted by DoogsATX on Monday, September 13, 2010 1:51 PM

Went paint shopping today. In my research I've been discovering that VVS colors are the source of far more controversy than interior green, olive drab, and non-specular blue grey combined. The lack of any definitive resources is frustrating, but the freedom to kind of wing it is highly liberating.

Here are the colors I'm going with...not sure if they're right, but they're certainly close. All paints are Vallejo acrylics.

AMT-4 (the green of the 1943 green/black camo): Either 823 - Luftwaffe Camo Green or 894 - Camo Olive Green. The paint chips online are pretty far off from what the actual paints look like...but I held these both up against a Yak in the store's display shelf and they both seemed really, really close.

AMT-6 (the black in the green/black camo): 862 - Black Grey. Couldn't bring myself to go with absolutely flat black. Think I may tint this with a bit of whatever I choose for AMT-4.

AMT-7 (pale blue underside color): 50/50 mix of 973 - Light Sea Grey and 907 - Pale Greyblue, with a splash of 961 - Sky Blue

AMT-11 (light grey of '44/'45 schemes): 990 - Light Grey

AMT-12 (dark grey of '44/'45 schemes): 866 - Grey Green

Anyone who's doing Soviet aircraft - what are you using for the colors? I know White Ensign makes special VVS enamels, but I really don't want to go the enamel route.

On the Bench: 1/32 Trumpeter P-47 | 1/32 Hasegawa Bf 109G | 1/144 Eduard MiG-21MF x2

On Deck:  1/350 HMS Dreadnought

Blog/Completed Builds: doogsmodels.com


  • Member since
    September 2015
  • From: The Redwood Empire
Posted by Aaronw on Monday, September 13, 2010 1:26 PM

DoogsATX

Aaron - is that fuselage one piece?!?!?!


Yep, the assembled plane in my photos consists of 4 parts, the fuselage (including cockpit), wings (all one piece), the lower nose in front of the wings, and a radiator / intake (?) under the wing. It is a bit odd if you are used to the typical 2+ piece fuselage and 3+ piece wings. Surprisingly detail isn't bad for a simple 1/72 kit, equal or better than your standard 1970s kit from Airfix, Revell or Matchbox. The interior has a resonable amount of detail with a well formed seat, control yoke and some detailing behind the seat (radios maybe?). My only complaint being the complete lack of instrument panel detail, not even a decal. Considering many kits in this scale at this price (under $10) don't have any interior detail that is a minor gripe.

If you are in the mood for a bunch of detailing, this is probably not going to be your choice of kit, but it does make a nice quick build. From what I've heard from those who are into Soviet aircraft this kit makes the most accurate MiG-3 in 1/72.

  • Member since
    April 2009
  • From: Carmel, IN
Posted by deafpanzer on Monday, September 13, 2010 11:52 AM

Nice work on I-16... placing it next to Mustang was a great idea because it made me realize how tiny it was.  Well done! Yes

Andy

  • Member since
    June 2010
  • From: Austin, TX
Posted by DoogsATX on Monday, September 13, 2010 11:29 AM

kermit

Doogs,

Looking good sofarWink Really interested in your experiences with this Zvezda kit. Have yet to try my first one and your build will give me a good inside look.

Good to know! Unlike the other kits I've built so far, the Zvezda seems like it's (relatively) untrod ground, so I'll be sure to relay a pretty thorough account of what's going on.

And man...I can't believe you're already done with the I-16! 

On the Bench: 1/32 Trumpeter P-47 | 1/32 Hasegawa Bf 109G | 1/144 Eduard MiG-21MF x2

On Deck:  1/350 HMS Dreadnought

Blog/Completed Builds: doogsmodels.com


  • Member since
    June 2009
  • From: Netherlands
Posted by kermit on Monday, September 13, 2010 11:02 AM

Doogs,

Looking good sofarWink Really interested in your experiences with this Zvezda kit. Have yet to try my first one and your build will give me a good inside look.

I know it's really crazy but umm...... the I-16 is done...

for fun and giggles i placed it next to a P51 i recently completed....

and an artists impression/ sepiatone:

Wing/ fuselage fit among some other issues were not really that good but i did have fun with it. It is better detailed than the Academy I-16 i built a year ago and the PE goodies are really fun and easy to work with. If you order some putty along with it i would certainly recommend it to other modellers interested in this subject.

Well,... since this one went so fast i really had to contemplate on a next build earlier than expected but i think i will go for a red star P39...

Richard

"Success is the ability to go from one failure to another with no loss of enthusiasm." - Sir Winston Churchill

  • Member since
    June 2010
  • From: Austin, TX
Posted by DoogsATX on Monday, September 13, 2010 9:55 AM

Thanks for the heads up, Johan! Still trying to work out how I'm going to test fit everything...but with all the internal structure bits it seems like it'll be critically important.

On the Bench: 1/32 Trumpeter P-47 | 1/32 Hasegawa Bf 109G | 1/144 Eduard MiG-21MF x2

On Deck:  1/350 HMS Dreadnought

Blog/Completed Builds: doogsmodels.com


  • Member since
    April 2005
  • From: Gothenburg
Posted by JohanT on Monday, September 13, 2010 9:38 AM

DoogsA TX,
just a quick heads up, I had to thin down the top of the wheel housings to foil thickness since they where in conflict with the engine and engine mounts.
Might have been me, but anyway...I will post the details when I am back from work. 

Very Best Regards
Johan

JOIN OUR COMMUNITY!

Our community is FREE to join. To participate you must either login or register for an account.

SEARCH FORUMS
FREE NEWSLETTER
By signing up you may also receive reader surveys and occasional special offers. We do not sell, rent or trade our email lists. View our Privacy Policy.