SEARCH FINESCALE.COM

Enter keywords or a search phrase below:

The group build to end all group builds - THE GREAT WAR

156450 views
1091 replies
1 rating 2 rating 3 rating 4 rating 5 rating
  • Member since
    April 2005
  • From: Piscataway, NJ!
Posted by wing_nut on Friday, May 27, 2011 8:09 PM

Jack, a very interesting read. That this would be taken from pointillism never occurred to me.  A Google search of pointillism brings up some interesting pages.  Some of the closeups of  Grande Jatte and Circus are strikingly similar.

http://www.webexhibits.org/colorart/jatte.html


Imagine of the trend of art to camo had continued.  Late 60's century jets painted like a can of tomato soup.

Marc  

  • Member since
    April 2008
  • From: Philadelphia PA
Posted by smeagol the vile on Friday, May 27, 2011 11:00 PM

Id still like to see somoene do a what if build of WWII planes with that camo scheme


  • Member since
    August 2003
  • From: Connecticut, USA
Posted by Nachtflieger on Saturday, May 28, 2011 10:06 AM

OMG Marc! That looks incredible!!!

Nate


  • Member since
    April 2005
  • From: Piscataway, NJ!
Posted by wing_nut on Saturday, May 28, 2011 1:05 PM

Thanks Nate... appreciate that.

Doogs... This is what I did.  I think I said i put a pot-it on one side of the rib.  maybe if I could type and said post-it, which is what I used, it might have made more sense.Wink

A buff filter fist the lighten/fade the lozenge because the smoke spray darkened it up again.


Marc  

  • Member since
    October 2009
Posted by PANZERWAFFE on Saturday, May 28, 2011 11:27 PM

Marc your work on this is fantastic!  I get closer and closer to trying out one of these aircraft.  All of the different color schems and art work applied to these early birds is cool.

This update should have been this morning but troubles were with me today.  Had two goals for today, put on large call sign numbers and clean up all of the track pieces.  The kit comes with only one set of large numbers (decals) and looking on line, everyone who builds this kit uses those numbers.  Wanted mine to be different, the kit supplied ones are F 56.  Went about making some on the computer and printed some on decal paper.  everything looked good after spraying the bonder so went to put them on the MK IV.  Come to find out they were to light in color once off the paper and would not show when on the tank.  Next, thought would look through the spare decals.  Had srayed a coat of future last night so went about putting on the decals. Was using Micro Solto try to get the decal to conform arond all of the rivets but the more I tryed the worst things became.  Eventually decided to give up on the decal because it was turning into a real mess and still would not shape to the features.  Removed the decal but there was so much Micro Sol it removed some of the paint and made sticky splotches of the future.  Went at it with a scrub brush and removed the whole mess.  Back to square one, had to paint the pre shade and the base coat over again. Bang Head  Was going to give up but.. was insistent on getting my numbers. 

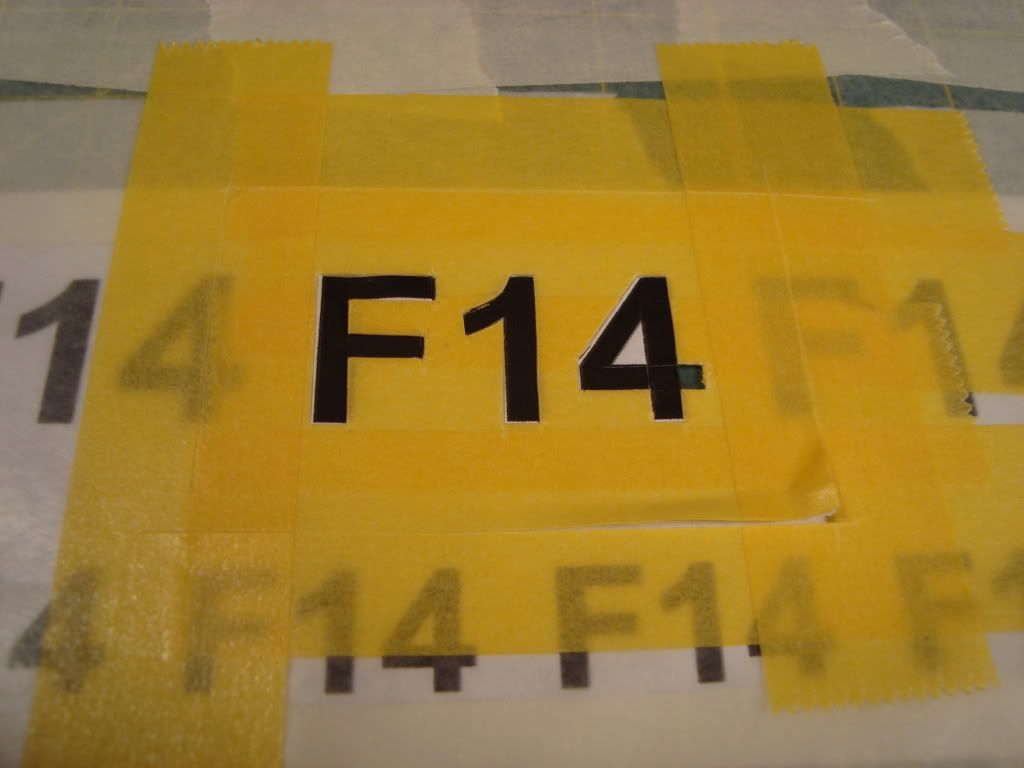
What I did was print the size numbers wanted in black, taped onto workbench put wax paper on top of that then put down Tamiya masking tape on top of that.  That way could see the black numbers through the tape.  Used #11 blade and cut a stencile.

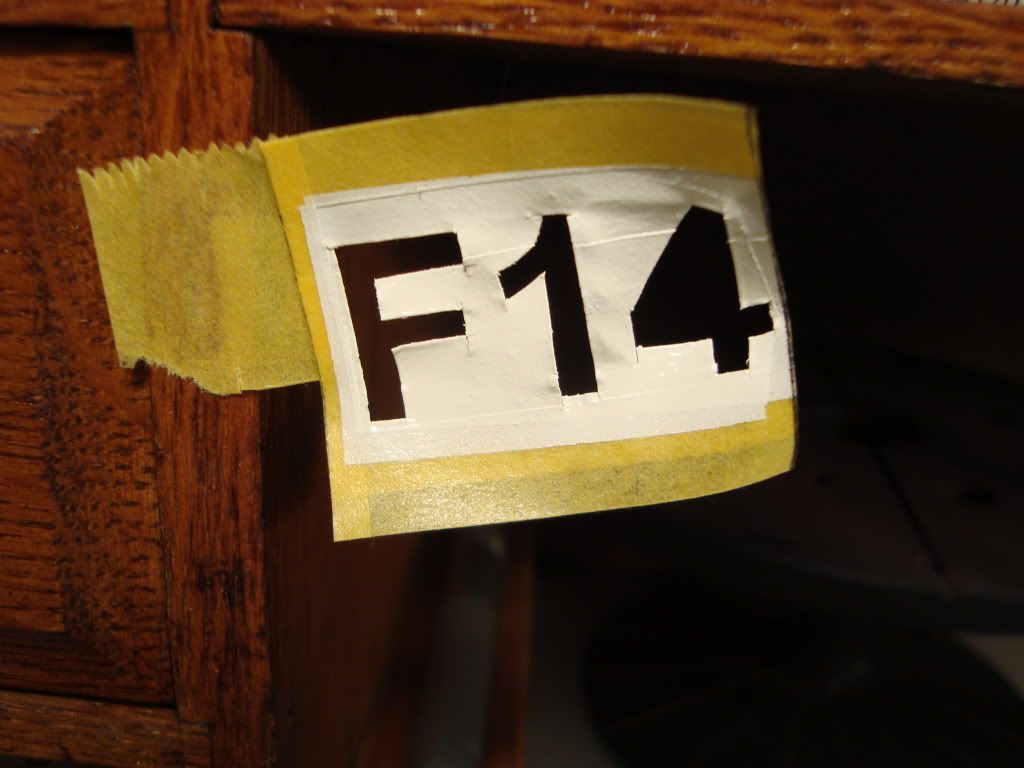
Put in place and sprayed away. 

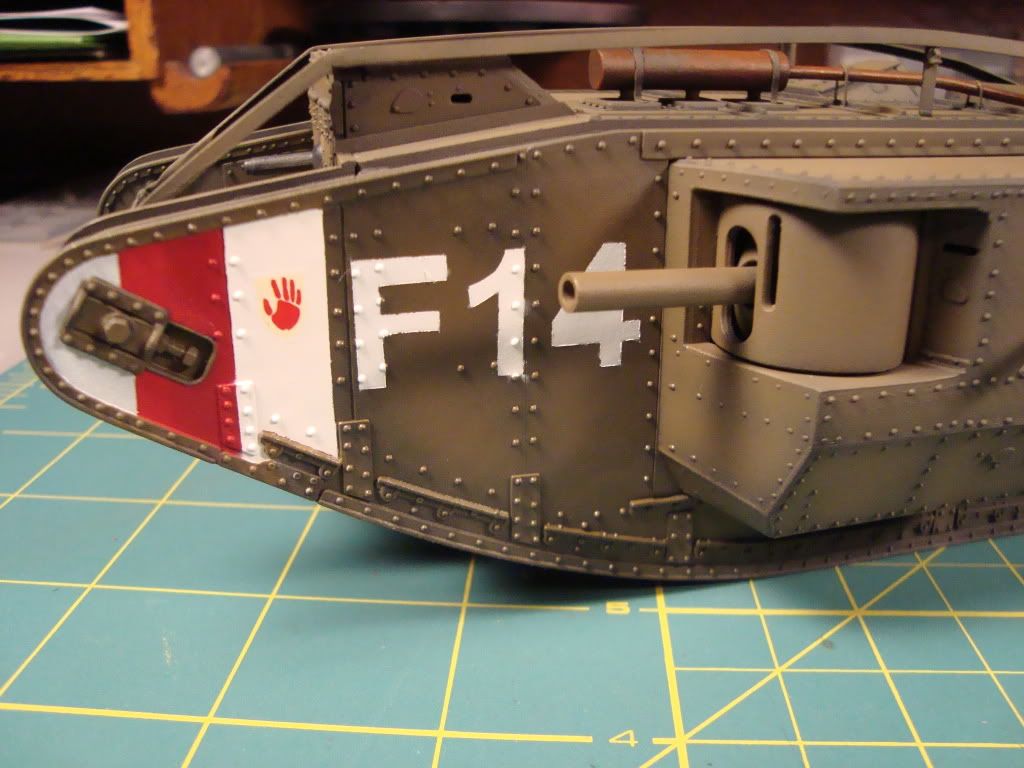
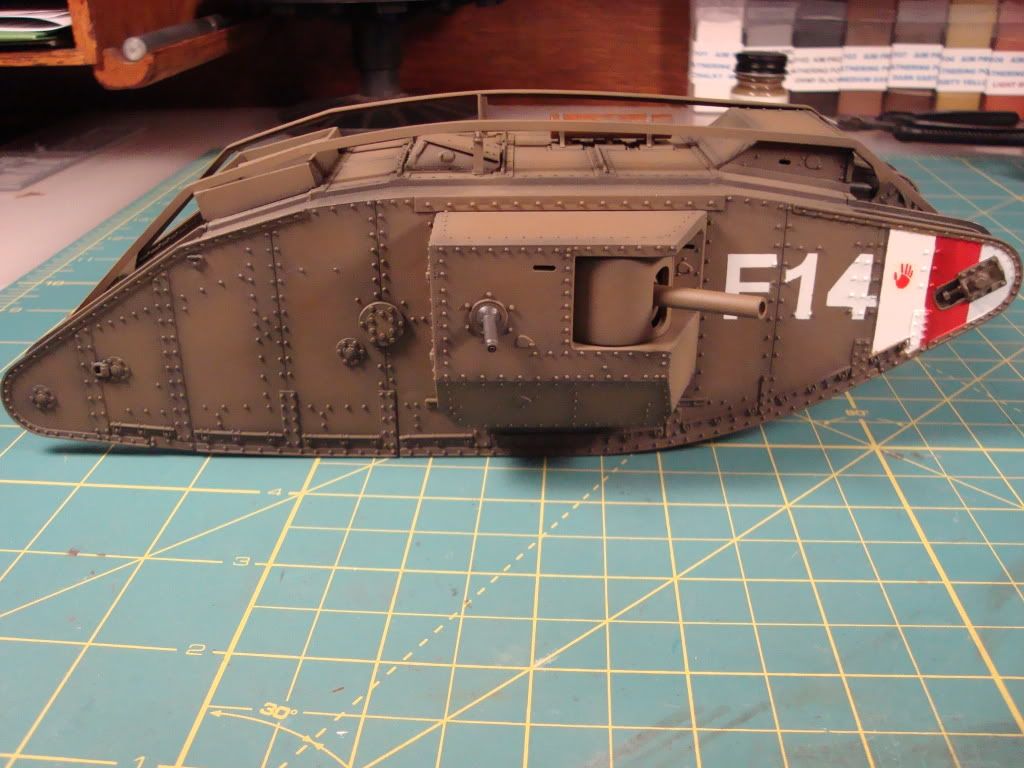
Still some touch ups to do around the numbers in some spots but over all am pleased with the results.  Also have to paint the center of the four.  Will do this when everything is good and dry tomorrow.  Had also painted the exhaust and MG they just dont show in these pics.

Started work on the tracks between paint drying.  Was able to get all shoes and tread plates for one track cut of the sprue.  Thats 92 shoes and 92 tread plates for one track.  Cleaned all the one tracks shoes and now will continue with the tread plates.

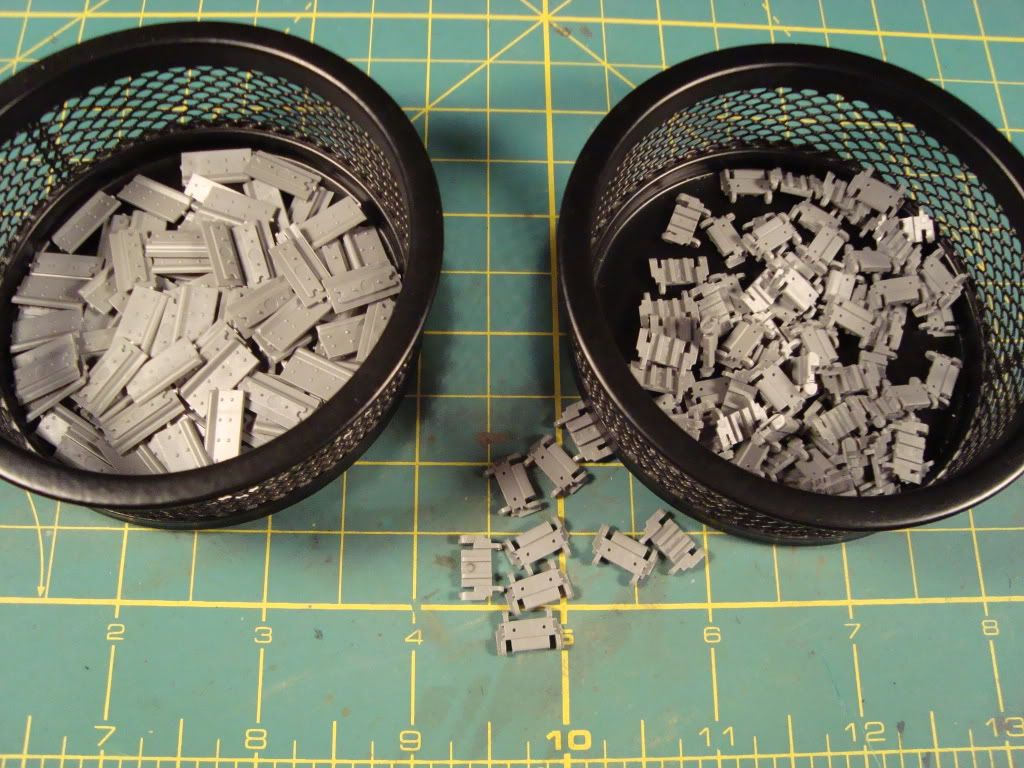
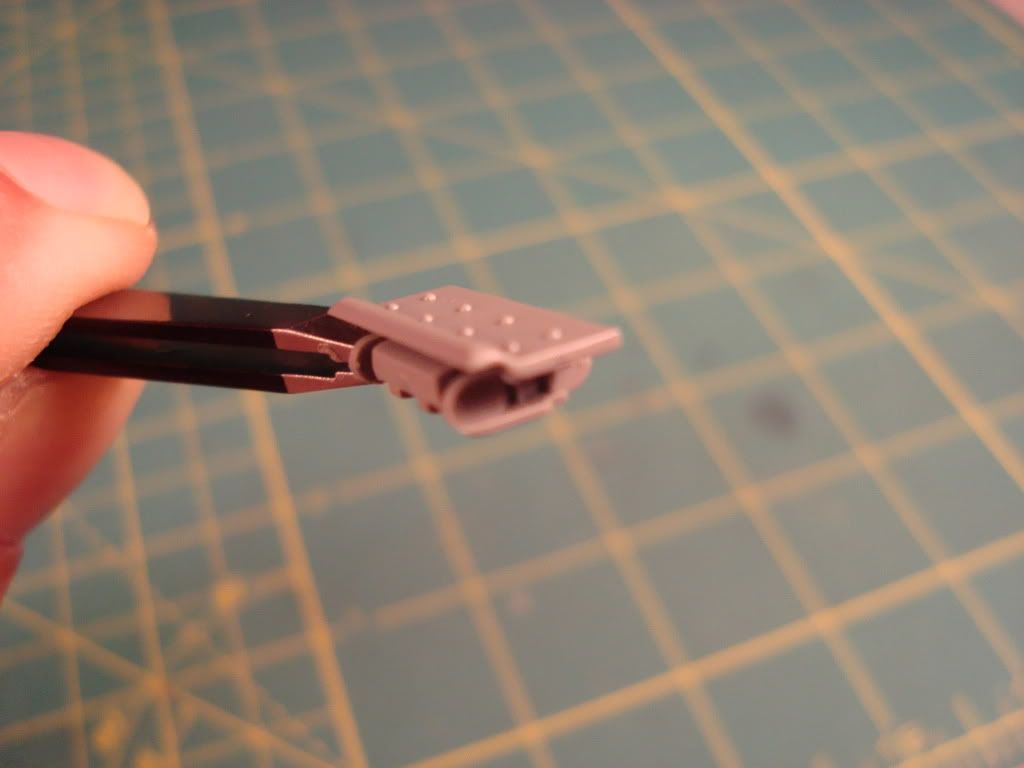
Finish these and tomorrow will work on the other track.  Seems to be a bit of work but the two part link will make a nice track and they fit perfectly on the MK IV.  Here is a link put togther.

Forgot to mention power here went out today and temperature in the house got up to 99 degrees was not able to stay at the bench for long periods of time. Tongue Tied

Rob

  • Member since
    October 2009
Posted by PANZERWAFFE on Sunday, May 29, 2011 1:42 AM

Does anyone know of some good figures.  Was thinking of a German MG team running off as the MK IV was coming over the trench or some Tomies following in trail of the MK IV as it makes its way through barbwire.  Just need to find some figs before anything I suppose?

Rob

  • Member since
    April 2006
  • From: ON, Canada
Posted by jgeratic on Sunday, May 29, 2011 5:01 AM

Rob - I think your armoured tank is coming along nicely.  That pre-shading really enhances it visually and having to make your own stencil worked to your favour.  The slightly irregular sides on the numbers give it a decent field applied look.

You ask if there are some good figures out there - some but not much.  The subject is not as popular as some other eras.  There are quite a few individual figure kits out there if you include 54mm, but that might be a tad too big (and the figures themselves tend to be more pricey as they are cast in metal or are limited runs).    A  website you can try is Coloradominatures

Emhar has made both a British and German infantry figure set, but I have no idea of the quality. 

ICM has a plastic injected set of British infantry and apparently a German one too:

Masterclub has some nice individual resin figures of Germans.  Some that you might consider:

A  Polish manufacturer,  Adalbertus:

There is a new company in the UK called Tommy's War . Figure's are 54 mm but they sure do look nice:

...and while looking for the above images, found this list:

The Great War (World War I) Era Index Page


regards,

Jack


  • Member since
    October 2009
Posted by PANZERWAFFE on Sunday, May 29, 2011 10:03 AM

JACK - Thanks and think will take your advise and not clean up the numbers, will just paint the center of the four.  Once the weathering starts the irregular shape will fit in nicely.

Theres not much out there but you put up more than I thought there was.  Big thanks for that.  Will do some looking and see what catches my eye for a dio.  Really like the Masterclub sets. 

Have another question for you.  Your figure that you had completed already, how did you make the name plate for the base?  Thought it was well done (the whole thing was well done) and would like to try something like that.  When I start the figures hope can get them half as good as yours.  Enjoy painting them but mine still need a lot of work to be convincing.  Still learning on all subjects but especially with figures.

Rob

  • Member since
    April 2006
  • From: ON, Canada
Posted by jgeratic on Sunday, May 29, 2011 2:29 PM

Rob - no problem, most of what I found was when I was searching for my own ideas for a figure(s).  If you chose an offering from Masterclub, order from HobbyEasy based in China.  Just can't beat their prices at an average of US$11 per figure.

For the name plate I used Corel's Photo-Paint program.  
First I created a new file in the dimensions required to fit the base and set the resolution really high (2400 pixels) since I know my printer can handle it.  
For the background I did an image search on the net for "old paper".  Saved the image to hard drive. Then I just copied and pasted the image a few times till the background was filled.  Same thing with the flags, just images found on the net - save, copy and paste. If the image is too small, you can resample them to the same dpi as your main work file and manipulate it from there.
Finally, use the text tool to write what you want on the name plate.  If you don't have a particular font you like on your list, there are plenty on the net you can download for free. The Windows program is kind enough to install it in the proper folder.

Once all that is done save the file and it is ready to print.  Since it already was out I used white decal paper, but any thick or photo paper will do.  Printing preferences are set to the highest quality for both print and media type(paper).  From the local art shop, I got a can of Krylon matte finish spray and applied one coat.  Once dry, brushed on a coat of future.  Once this is dry cut out with a straight edge and blade and affix to base with white glue and let dry at least 30 mins.  Then seal it with a liberal coat of future - I brushed it over all of the wood part of the base as well.

regards,
Jack

  • Member since
    June 2010
  • From: Austin, TX
Posted by DoogsATX on Monday, May 30, 2011 1:22 AM

The masking is finally off the Pup!

Still have numerous little bits (gun, landing gear...) to deal with, then it's on to the struts and rigging. I have to admit, I'm very nervous about rigging up the elevators and rudder...the rudder especially is barely held in place...takes almost nothing to break it off (as I've already done once!). I think I may end up running EZ line out back, and on the ailerons, then using monofilament for the main wing rigging.

On the Bench: 1/32 Trumpeter P-47 | 1/32 Hasegawa Bf 109G | 1/144 Eduard MiG-21MF x2

On Deck:  1/350 HMS Dreadnought

Blog/Completed Builds: doogsmodels.com


  • Member since
    March 2006
Posted by TD4438 on Monday, May 30, 2011 4:55 AM

Lookin' good Doogs.

Here's my current progress.Four straight hours of painting.My kinda night off!

  • Member since
    April 2005
  • From: Piscataway, NJ!
Posted by wing_nut on Monday, May 30, 2011 9:59 AM

Excellent work on all fronts guys.  Multiple SCHWINGS go out to you all.

I think the fuselage is officially done.  It's been flat coated and then a light buff to bring a slight sheen. 

Had I remembered to do it before putting on the bottom wings, the largest of the rivet wheels would likely have worked well for the nail heads.  I made pencil marks spaced 1/16" on tape and cut a thin strip, applied to the model and made the dimples with a sharp probe.  Went surprising fast.  Some dark gray oils rubbed in with a Q-Tip and wiped clean.  I did screw on thing up with the nails though.  Anyone? ;)

And next Albatros I build... and there will be more... oh yes, there will be more ==)  I iwll fill the panel lines and have a smooth fuselage and mask off th wood panels.

Prop is ready for a bunch of clear coats.

Marc  

  • Member since
    March 2006
Posted by TD4438 on Monday, May 30, 2011 10:25 AM

That is looking awesome wing!

  • Member since
    December 2002
  • From: NYC, USA
Posted by waikong on Monday, May 30, 2011 7:19 PM

Rob, that landship is really coming along very nicely.

Doogs, I love what you did with the cowling, the weathering/fading paint on metal look great.

Marc, that is one awesome looking woodwork painting on the prop!

My website: http://waihobbies.wkhc.net


  • Member since
    April 2005
  • From: Piscataway, NJ!
Posted by wing_nut on Monday, May 30, 2011 8:05 PM

TD, Waiknog... Thansk guys.

I had to strip the prop and start again.  The clear lacquer bubble the paint.  Same stuff Iused every wher else so I am SO glad that it only happened to the prop.

Marc  

  • Member since
    March 2006
Posted by TD4438 on Tuesday, May 31, 2011 4:49 AM

Possibly stupid question,but is that prop plastic?Sure looks like wood to me!

  • Member since
    April 2005
  • From: Piscataway, NJ!
Posted by wing_nut on Tuesday, May 31, 2011 6:45 AM

TD4438

Possibly stupid question,but is that prop plastic?Sure looks like wood to me!

That's the nicest thing anyone has ever said to me.Wink

Thanks TD... plastic.

Marc  

  • Member since
    June 2010
  • From: Austin, TX
Posted by DoogsATX on Tuesday, May 31, 2011 7:44 AM

Morning Pupdate.

At long last, confirmation that the Pup is, in fact, a biplane. Finally got to that point where I could test fit the struts, and the entire thing is remarkably solid! I wouldn't go so far as to say I could pick it up by the top wing, but, well, maybe...

Here's a look-see. Shot with the iPhone, and it seems to have decided that tons of contrast is the best contrast, but you can still see what's going on. Also, the cowl keeps falling off. It'll glue on easy enough when the time's right, but I can't get it to just chill in place for the life of me!

Let's see...what else? Oh yes...found out yesterday that the wife and kids are heading to Houston not this weekend, but the next. So I now have a target date for rigging things up...I can swear as often and loud as I want, and nobody can do a thing about it!

On the Bench: 1/32 Trumpeter P-47 | 1/32 Hasegawa Bf 109G | 1/144 Eduard MiG-21MF x2

On Deck:  1/350 HMS Dreadnought

Blog/Completed Builds: doogsmodels.com


  • Member since
    March 2006
Posted by TD4438 on Tuesday, May 31, 2011 10:08 AM

Mo' current progress.It's almost looking like something.

  • Member since
    March 2006
Posted by TD4438 on Tuesday, May 31, 2011 4:54 PM

  • Member since
    March 2006
Posted by TD4438 on Wednesday, June 1, 2011 8:02 PM

  • Member since
    April 2005
  • From: Piscataway, NJ!
Posted by wing_nut on Thursday, June 2, 2011 6:53 AM

Doogs I am really lovin' that.  The wear on the cowl looks terrific.

TD great progress.  You are really moving through that.


My 1st WWI rigging :) But I already have to make a decision. My choice of material may be nice in theory, it is difficult to work with.  I am using .007"  Ultra Wire.  I think I had it in my head that using real wire would be cool.    The plan was to get one end of the cable all fixed up with eyelets and turnbuckles and get that glued in place.  Then the other end would go through an eyelet already in place, looped back through and another piece of brass tube and pulled taught.  the problem is even through it fist through the tube doubled it does not slide very easily which is going to be very problematic when I am trying to fix the 2nd end once the upper wing is fixed in place.  So the decision is... do i take off the few that I have done and change to invisible thread or take my lumps and muddle through and see what happens.

Anyway... just a few cables done... on the front of the fuselage, the elevators and the spinner.  I am real happy with the way the spinner turned out.  The beck outside edge of the spinner was beveled so when glue to the back plate there was a groove.  But as described above what a PITA it was to get the cables linked.

Marc  

  • Member since
    March 2006
Posted by TD4438 on Thursday, June 2, 2011 7:54 AM

Whatever you do wingnut,that is going to be one stellar build!

  • Member since
    August 2005
  • From: Oshawa, Ontario
Posted by u-69 on Thursday, June 2, 2011 9:53 AM

Hi Marc;

I've never worked with wonder wire, so I can't speak for it's properties, BUT, what I have found with the 1/32 scale WWI aircraft is that the rigging adds an AMAZING amount of structural integrity to the model. I prefer to assemble everything first [wings gear framing] then start rigging. Before rigging everything is very wobbly and moves around quite a bit, after rigging - absolutely rigid, no movement in the wings or landing gear at all. For this reason alone I like to use something with a little elasticity  but not too much [like 5-10%] - I've started using Unimono thread [fly tying store] colored with a silver sharpie - it's easy to work with, has about the right elasticity and is incredibly thin. 

The other fun thing about using something like this is you can adjust the tension to realign things that may be out of true [like gear framing]

hope it helps.

Remarkable build BTW.... have you caught the bug yet?


-sean 

BigBlock Studios web design:
http://www.bigblockstudios.ca

My Models:
http://www.onetofortyeight.com

  • Member since
    June 2010
  • From: Austin, TX
Posted by DoogsATX on Thursday, June 2, 2011 10:16 AM

Ugh, the internet ate my big long post.

TD - ship is looking great! I'm having fun watching it come together!

Marc - That thing gets prettier with every pic! How are you finding rigging the control horns? I'm concerned about knocking or pulling them off. Those and the ailerons. And the rudder. And the landing gear...

Speaking of landing gear, I assembled and installed it last night. Talk about wobbly. If there was ever a case for metal gear, I think this is it. But, the morning after, the Pup is still on its legs.

I'm not quite to the rigging stage yet...still have some bits I need to paint and install, but soon now. I'm also expecting a shiny new macro lens today, so hopefully I'll be able to post some up close images of the rigging and my dusty, dusty paint job.

On the Bench: 1/32 Trumpeter P-47 | 1/32 Hasegawa Bf 109G | 1/144 Eduard MiG-21MF x2

On Deck:  1/350 HMS Dreadnought

Blog/Completed Builds: doogsmodels.com


  • Member since
    August 2005
  • From: Oshawa, Ontario
Posted by u-69 on Thursday, June 2, 2011 10:46 AM

Hi Doogs;

see my post above - rig up those 3 little cables in your gear.... it will 'stiffen' right up.  no need for metal gear.

-sean

BigBlock Studios web design:
http://www.bigblockstudios.ca

My Models:
http://www.onetofortyeight.com

  • Member since
    April 2005
  • From: Piscataway, NJ!
Posted by wing_nut on Thursday, June 2, 2011 11:01 AM

Td... thanks for the vote of confidence.

Sean, I have heard that the rigging is almost as much functional as it is an appealing detail on a model.  I have a store near me that has a gigundo fishing dept. and will look into that Unimono thread.  Thanks for the tip.

Marc  

  • Member since
    August 2005
  • From: Oshawa, Ontario
Posted by u-69 on Thursday, June 2, 2011 11:33 AM

wing_nut

Td... thanks for the vote of confidence.

Sean, I have heard that the rigging is almost as much functional as it is an appealing detail on a model.  I have a store near me that has a gigundo fishing dept. and will look into that Unimono thread.  Thanks for the tip.

Hi Marc;

Actually in the larger scales it's absolutely critical to rig them, there's just no stability without [well I suppose it depends on the subject too, FI/DI,DVII etc have pretty beefy struts and not much rigging anyway, but things like the Albatros, roland & Pfalz... absolutely necessary]

You'll be amazed once you are done - I guarantee it. [small footnote - when rigging alternate the sides of the plane you are doing, 1 wire right side - same wire left side - etc. that way you can maintain an even tension and not pull the wings out of alignment - ask me how I know :) ]

Best to look in the fly tying section [if they have one] but the product is here: http://www.uniproducts.com/ - just look for Uni-Mono under products ...  I'm sure it wouldn't be hard to find on the internet... 


BTW - my first few builds were done with nylon thread teased out of an old sock....  so there's other options ;)

http://www.onetofortyeight.com/Assets/Galleries/LVG_CVI_BUILD/

http://www.onetofortyeight.com/Assets/Galleries/LVG_CVI/

http://www.onetofortyeight.com/Assets/Galleries/WNW-Albatros/IMG_0102.jpg

http://www.onetofortyeight.com/Assets/Galleries/BristolFighter/


Can't wait to see when you are done... 

-sean

BigBlock Studios web design:
http://www.bigblockstudios.ca

My Models:
http://www.onetofortyeight.com

  • Member since
    December 2002
  • From: NYC, USA
Posted by waikong on Thursday, June 2, 2011 12:36 PM

Marc, I'll chime in with Sean's advice.  I use 4lb fishing wire, also colored with a sharpie to string my previous biplanes. It's astounding the rigiditly it adds to your model. I use the through the bottom wing method and have once put too much pressure and actually warped the upper wing downwards.

My website: http://waihobbies.wkhc.net


  • Member since
    October 2009
Posted by PANZERWAFFE on Thursday, June 2, 2011 1:22 PM

Excellent progress to all of you!  Ships and planes, Oh myStick out tongue

Know only one thing about the rigging, looks awesome!

Here is the scratchbuilt unditching beam, still needs chains.

Guns look a bit better now that they received paint and drybrushing.

Finished paining all of the numbers.

And now the weathering has begun.

Will now start putting the first weathering steps onto the top of the MK IV and then start assembly of the tracks.

Rob

JOIN OUR COMMUNITY!

Our community is FREE to join. To participate you must either login or register for an account.

SEARCH FORUMS
FREE NEWSLETTER
By signing up you may also receive reader surveys and occasional special offers. We do not sell, rent or trade our email lists. View our Privacy Policy.