SEARCH FINESCALE.COM

Enter keywords or a search phrase below:

Japanese GB 2011-2012

204425 views
2250 replies
1 rating 2 rating 3 rating 4 rating 5 rating
  • Member since
    November 2009
  • From: SW Virginia
Posted by Gamera on Wednesday, September 12, 2012 1:01 PM

Hey that's looking good Theuns! Good luck with the canopy, that's going to be fun to paint!

"I dream in fire but work in clay." -Arthur Machen


  • Member since
    August 2009
  • From: Borlando Fla home of the rat
Posted by TREYZX10R on Wednesday, September 12, 2012 9:10 PM

Looking good Theuns

  • Member since
    October 2008
  • From: italy
Posted by bsyamato on Thursday, September 13, 2012 3:30 AM

Nice chippin

  • Member since
    April 2010
Posted by Theuns on Thursday, September 13, 2012 11:15 AM

Just call me Mr. Chipps LOL!

I have put the final dullcoat on, but the decals were very thick and did not seat nicely, even several applications of micro sol did nothing to better the situation. :-(

Theuns

  • Member since
    November 2009
  • From: SW Virginia
Posted by Gamera on Friday, September 14, 2012 11:50 AM

Hmm, don't think I've ever used Arii/Otaki decals. I've always replaced the decals when on the kits I built. Good luck with them, after the decals silvered on the zero I'm working on I set her aside and gee it's been months - really, really need to finish her. Just don't want to go back and repaint over the decals...

"I dream in fire but work in clay." -Arthur Machen


  • Member since
    April 2010
Posted by Theuns on Sunday, September 16, 2012 8:39 AM

Dinah completed.

1/72 Ki 46

1/72 Ki 46

Theuns

  • Member since
    October 2008
  • From: italy
Posted by bsyamato on Sunday, September 16, 2012 9:20 AM

well done Theuns Toast

  • Member since
    November 2009
  • From: SW Virginia
Posted by Gamera on Sunday, September 16, 2012 10:36 AM

Wow Theuns- she looks great!! Wish I could build that fast! (Ok, I can but the results won't look that good!)

Photo posted to the roster. And thanks again for joining us!

"I dream in fire but work in clay." -Arthur Machen


  • Member since
    April 2010
Posted by Theuns on Sunday, September 16, 2012 11:11 AM

Thanx guys.

Theuns

  • Member since
    August 2011
  • From: Perth, WA
Posted by NeedBeer on Sunday, September 16, 2012 6:16 PM

Yet another fine specimen to come off the production line from Theuns

Good looking craft & well done

WiP

1/24 Hawker Hurricane Mk I

1/48 F-22 Raptor; F-22 Idolmaster,  DH Vampire, Saab Gripen 

1/72 C-130 Hercules; Vulcan 

1/350 Bismarck


  • Member since
    April 2005
  • From: Australia
Posted by taxtp on Sunday, September 16, 2012 6:58 PM

That looks really good Theuns, almost enough to make me pull out my Dinah. Your freehand canopy frames look pretty good.

Cheers

Tony

I'm just taking it one GB at a time.

  • Member since
    April 2010
Posted by Theuns on Monday, September 17, 2012 1:09 AM

I must admit that I cheated a bit on the "free hand" canopy painting. After thinking I would in all likelyhood mess it up I masked each canopy frame individually and brush-painted them,except for a few small pieces on the front windshield.

It was a fun build and I am glad I didn't get the all glazed Dinah, that would have been tough!

Theuns

  • Member since
    July 2004
  • From: Sonora Desert
Posted by stikpusher on Tuesday, September 18, 2012 6:50 PM

Theuns, your Dinah looks real good!Yes That is an unusual shade of green gray on her to my eye.Hmm

Well I was able to get back on the workbench today and get some airbrushing in. I airbrushed on a primer coat of Tamiya surface primer thinned with generic lacquer thinner on all cockpit area. Boy that stuff is no joke-quite an odor and it sticks to everything! Great for priming PE!

and I airbrushed on a base coat of MM Acrylic Steel on the engine face

I am planning on getting cockpit and engine interior base colors down tomorrow.


F is for FIRE, That burns down the whole town!

U is for URANIUM... BOMBS!

N is for NO SURVIVORS...

       - Plankton

LSM


  • Member since
    November 2009
  • From: SW Virginia
Posted by Gamera on Tuesday, September 18, 2012 6:55 PM

SP: Looking good! Keep the pics coming!

"I dream in fire but work in clay." -Arthur Machen


  • Member since
    July 2004
  • From: Sonora Desert
Posted by stikpusher on Tuesday, September 18, 2012 7:39 PM

Thanks Gamera. I am hoping that tomorrow I will be able to post more progress pics.


F is for FIRE, That burns down the whole town!

U is for URANIUM... BOMBS!

N is for NO SURVIVORS...

       - Plankton

LSM


  • Member since
    April 2010
Posted by Theuns on Wednesday, September 19, 2012 1:21 AM

The grey does look a little strange in the pix, the sun was very bright when I took the pix. It is actually Tamiya IJN Grey straight from the pot and is a little greyer than green  LOL!

Theuns

  • Member since
    October 2008
  • From: italy
Posted by bsyamato on Wednesday, September 19, 2012 10:14 AM

Quote Cliff!! keep on japanize!!

  • Member since
    July 2004
  • From: Sonora Desert
Posted by stikpusher on Wednesday, September 19, 2012 12:35 PM

Theuns, is that the new IJN Gray that Tamiya released around the same time as their 1/32 A6M2, XF-76?


F is for FIRE, That burns down the whole town!

U is for URANIUM... BOMBS!

N is for NO SURVIVORS...

       - Plankton

LSM


  • Member since
    July 2004
  • From: Sonora Desert
Posted by stikpusher on Wednesday, September 19, 2012 7:57 PM

More progress on my Frank. Tamiya Cockpit Green (which looks extremely close to RAF interior gray green) airbrushed to all areas of the fuselage that will be visible  thru the cockpit opening

And then Gunze Aotake airbrushed on the wheel wells, interior sides of the landing gear doors, and the inner surfaces of the engine cowling

Next up is washes and detail painting...


F is for FIRE, That burns down the whole town!

U is for URANIUM... BOMBS!

N is for NO SURVIVORS...

       - Plankton

LSM


  • Member since
    April 2010
Posted by Theuns on Thursday, September 20, 2012 12:52 AM

I don't know when it came out but the pot says "JN Grey  XF-12"

If it is to green I will just say it is moss growing on the plane from all the rain LOL!

Theuns

  • Member since
    July 2004
  • From: Sonora Desert
Posted by stikpusher on Thursday, September 20, 2012 1:13 AM

XF-12 is one of their original colors... very interesting... Must have been the rain


F is for FIRE, That burns down the whole town!

U is for URANIUM... BOMBS!

N is for NO SURVIVORS...

       - Plankton

LSM


  • Member since
    November 2009
  • From: SW Virginia
Posted by Gamera on Thursday, September 20, 2012 9:54 AM

The paint looks pretty close to me in the photos. Considering the different shades used plus weathering and sun fading I've gotten to the point that I'm not too terribly anal about an exact match.

Sp: Nice! Moving right along there!

"I dream in fire but work in clay." -Arthur Machen


  • Member since
    July 2004
  • From: Sonora Desert
Posted by stikpusher on Thursday, September 20, 2012 12:43 PM

Thanks Gamera. Next week's days off should have some real progress to post. I am with you about paint shades, close enough works.


F is for FIRE, That burns down the whole town!

U is for URANIUM... BOMBS!

N is for NO SURVIVORS...

       - Plankton

LSM


  • Member since
    July 2004
  • From: Sonora Desert
Posted by stikpusher on Tuesday, September 25, 2012 8:33 PM

Today I made some major progress. First up I did all the detail painting colors on the interior. Then it was time for washes and dry brushing of highlight.

Engine colors are based off a few color photos of a Homare engine that I found online.

painted

and washed

cockpit floor and seat

and finally cockpit sidewalls- the color came from my interpretation of some post war B&W photos of a Ki-84 that had been captured and test flown by the Allies. The photos show each item such as levers, switches and instruments labeled with something like dymo tape in English... The whites and reds are guesses based off their contrast to the interior green, while black and bare metal were obvious.

left sidewall

right sidewall

for such minimal molded on detail, the old kit cockpit detail, while basic, compares favorably well with the real thing. If I was not trying to get this done in the next month or so I was quite tempted to improve the detailing there by scratch,,,


F is for FIRE, That burns down the whole town!

U is for URANIUM... BOMBS!

N is for NO SURVIVORS...

       - Plankton

LSM


  • Member since
    July 2004
  • From: Sonora Desert
Posted by stikpusher on Thursday, September 27, 2012 9:28 PM

Banzai! Some actual assembly today! Not much really, but a huge step forward after all the painting.... if this was a tank it would be nearly done after one month of building! Whistling

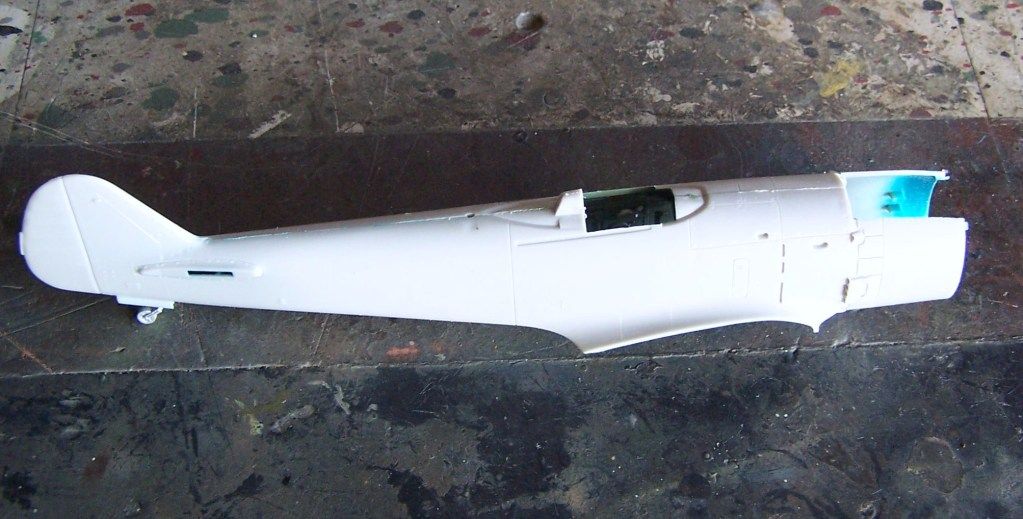
Well I actually got the cockpit floorboard glued in last nite, and today was gluing the fuselage together

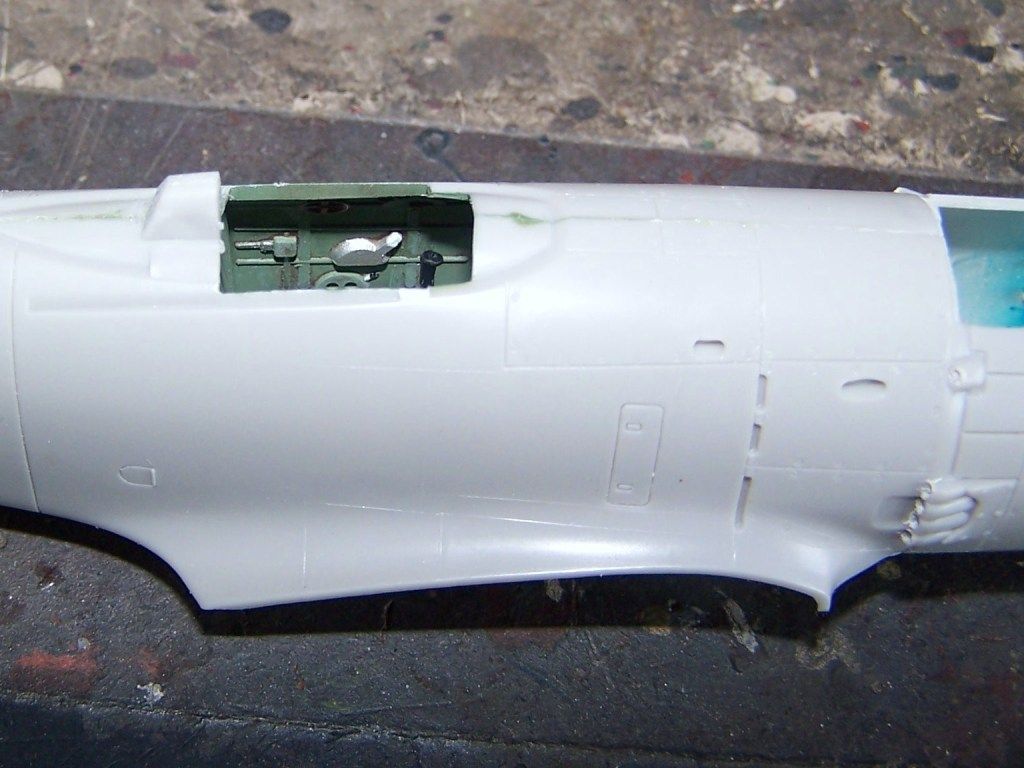
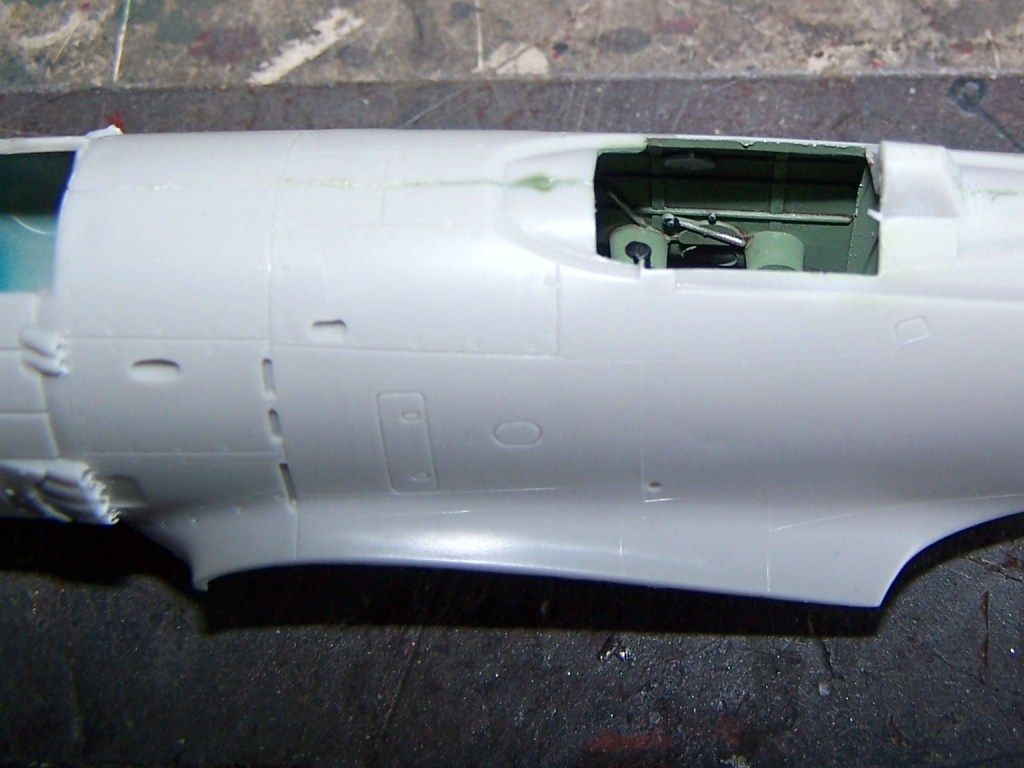
And then once the glue had dried, it was time to hollow out the the ends of the exhaust pipes. For a double whammy with the pics I also tried to get the cockpit sidewall details in the shots...

and now it's "Back to the 60's!" Tamiya gives a decal for the IP. No plastic IP with raised detail for painting and drybrushing... just a decal to attach to either fuselage half, or follow the directions, cut it in half and attach each half to the respective fuselage side...Tongue Tied  really?Hmm

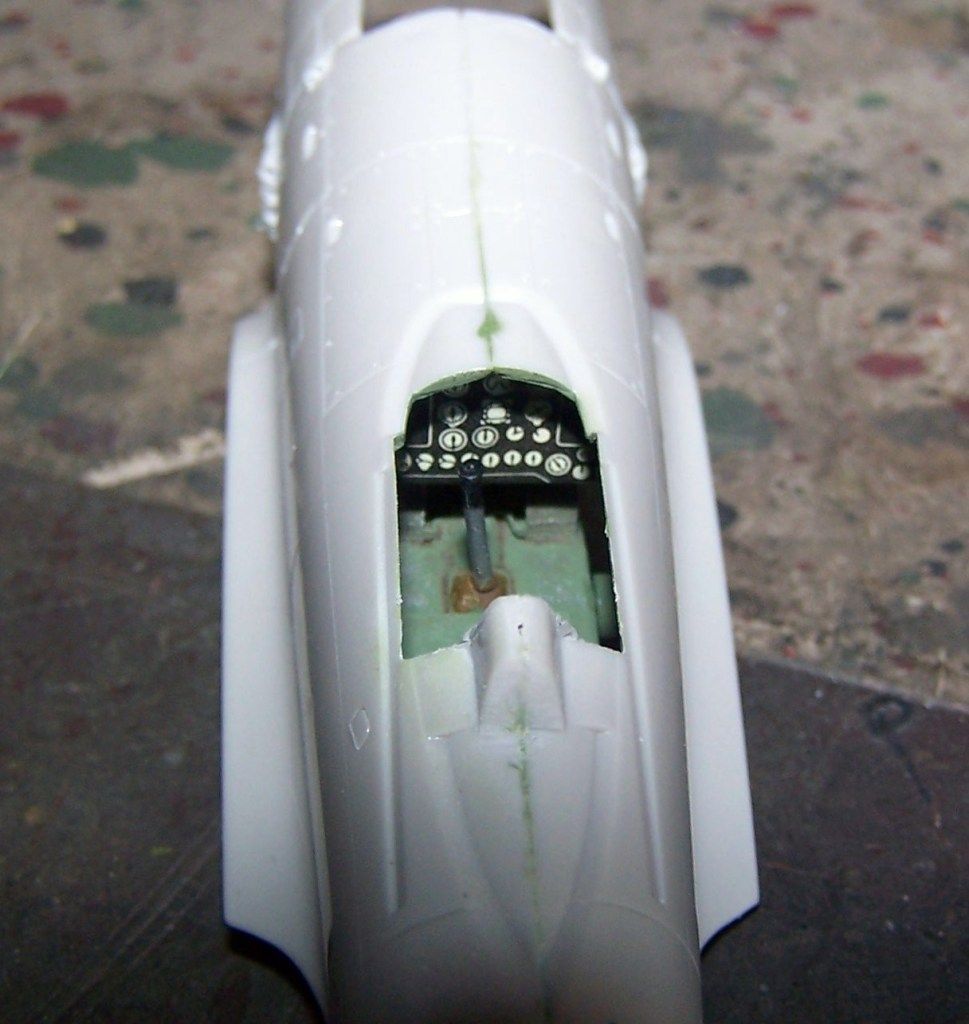
All that glitters Tamiya is not gold...  and to think that at the same time Monogram kits of the same vintage were giving us cockpits with killer IPs that are still pretty dang good today...Whistling Now before you Tamigawaphiles get your knickers in a wad, I am just poking fun at ya...Wink Everybody had to start somewhere.


F is for FIRE, That burns down the whole town!

U is for URANIUM... BOMBS!

N is for NO SURVIVORS...

       - Plankton

LSM


  • Member since
    February 2011
  • From: Bent River, IA
Posted by Reasoned on Thursday, September 27, 2012 9:38 PM

Wow stik, an IP decal is a little lame for a Tamiya kit, when was that molded?  On the other hand, your seams sure look minimal.Geeked

Science is the pursiut of knowledge, faith is the pursuit of wisdom.  Peace be with you.

On the Tarmac: 1/48 Revell P-38

In the Hanger: A bunch of kits

  • Member since
    July 2004
  • From: Sonora Desert
Posted by stikpusher on Thursday, September 27, 2012 9:42 PM

I wanna say it is mid 70's vintage... 1974 or so...  I tend to sand seam mating surfaces ahead of time to make sure that they fit properly when I do assemble them.


F is for FIRE, That burns down the whole town!

U is for URANIUM... BOMBS!

N is for NO SURVIVORS...

       - Plankton

LSM


  • Member since
    November 2009
  • From: SW Virginia
Posted by Gamera on Friday, September 28, 2012 8:57 AM

Looking good SP! Not sure you'll even be able to see much of the IP when she's closed up with the canopy in place anyway.

I've heard that this is one of the earlier Tamiya kits that's closer to 1/50th than 1/48th- still as said the fit is pretty solid and detail is good.Yes

"I dream in fire but work in clay." -Arthur Machen


  • Member since
    July 2004
  • From: Sonora Desert
Posted by stikpusher on Friday, September 28, 2012 12:43 PM

Actually the kit does give an open canopy option and I will be using that. So some of the IP and cockpit will be more visible than the rest. But yes for the most part the detailing quite nice (a mix of raised and recessed panel detail) and fit is good. Test fitting reveals some gaps at the wing roots and around the cowling. But this kit cost under $15 and the molds are almost 40 years old, so I am not complaining. Just making observations. I don't know about the scale on this one. I do know that Tamiya did do a series of 1/50 kits back in the day, I want to say late 60's or so. I did build a Val and a Tony of those, and they did have a Pete and Tojo as well, IIRC. Those ones are certainly a step or two behind this one in terms of finesse with movable control surfaces, rotating wheels, being more akin to the old Revell and Monogram kits of the same time period.


F is for FIRE, That burns down the whole town!

U is for URANIUM... BOMBS!

N is for NO SURVIVORS...

       - Plankton

LSM


  • Member since
    July 2004
  • From: Sonora Desert
Posted by stikpusher on Monday, October 1, 2012 6:20 PM

A little progress over the past few days on my Frank. I glued in the engine face and the front of the cowl

It is just too dang hot to get in my work area right now and do more at this time... October 1st here and it feels like August 1st...


F is for FIRE, That burns down the whole town!

U is for URANIUM... BOMBS!

N is for NO SURVIVORS...

       - Plankton

LSM


JOIN OUR COMMUNITY!

Our community is FREE to join. To participate you must either login or register for an account.

SEARCH FORUMS
FREE NEWSLETTER
By signing up you may also receive reader surveys and occasional special offers. We do not sell, rent or trade our email lists. View our Privacy Policy.