SEARCH FINESCALE.COM

Enter keywords or a search phrase below:

Japanese GB 2011-2012

204596 views
2250 replies
1 rating 2 rating 3 rating 4 rating 5 rating
  • Member since
    March 2010
  • From: Democratic Peoples Republic of Illinois
Posted by Hercmech on Sunday, October 30, 2011 2:03 PM

Thanks for the compliments fellas. This build had its share of challenges jist glad i was able to overcome most of them


13151015

  • Member since
    October 2008
  • From: italy
Posted by bsyamato on Sunday, October 30, 2011 7:15 PM

LOL Trey , probably you used chinese surveillance kits on THI facilities Big Smile

Fishing wires probably are better for 1/48 subjects, i used normal fabric wires for the little 1/144 mavis, his weight was not so much. On the photoshop the wire used is indifferent, i used the "patch" tool to remove the sky zones and the "clone" tool for the aircraft zones. Also i blurred the props in one or two pictures to simulate the movement.

Your boy start with one of my favourite subject , the "tiffy"!! Wishing to teach something to my nephew when she grow (i fear to give her a kit at only 14 months old Propeller )

  • Member since
    August 2011
  • From: Panhandle Fl
Posted by Noah T on Sunday, October 30, 2011 9:45 PM

Wow what an awesome GB. This is a cool experience guys thanks for letting me be a part.

Potchip: Ships! It blows my mind to even think of a ship project but would love to try one. What would be your all time add glue and shake cool ship build?

Hercmech: That Dinah is one of the best looking builds on here. Really, Really Great Job. What was the mix on the IJA Brown?

Trey: Good times with you and your son. Mine is four and he loves to go through the stash and is learining all sorts of WW2 trivia! lol. Great pics.

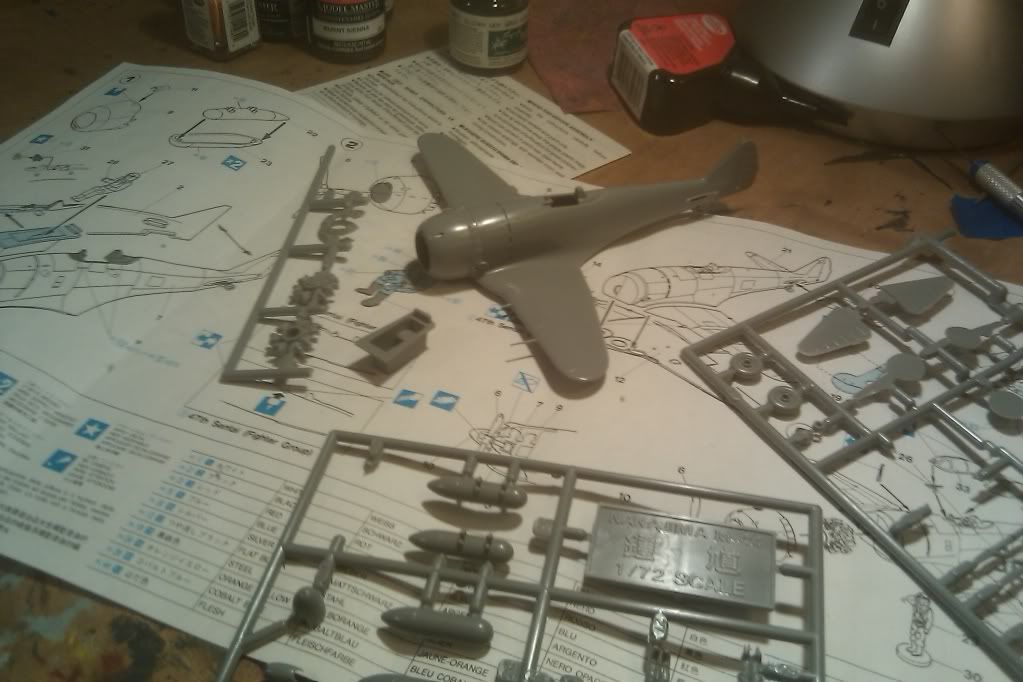
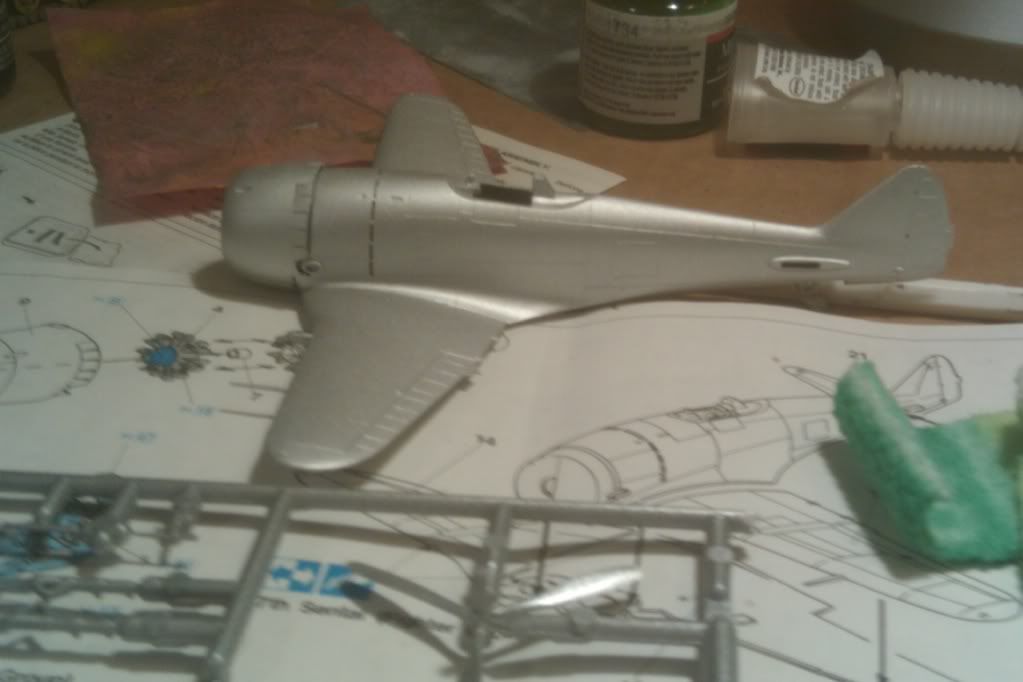
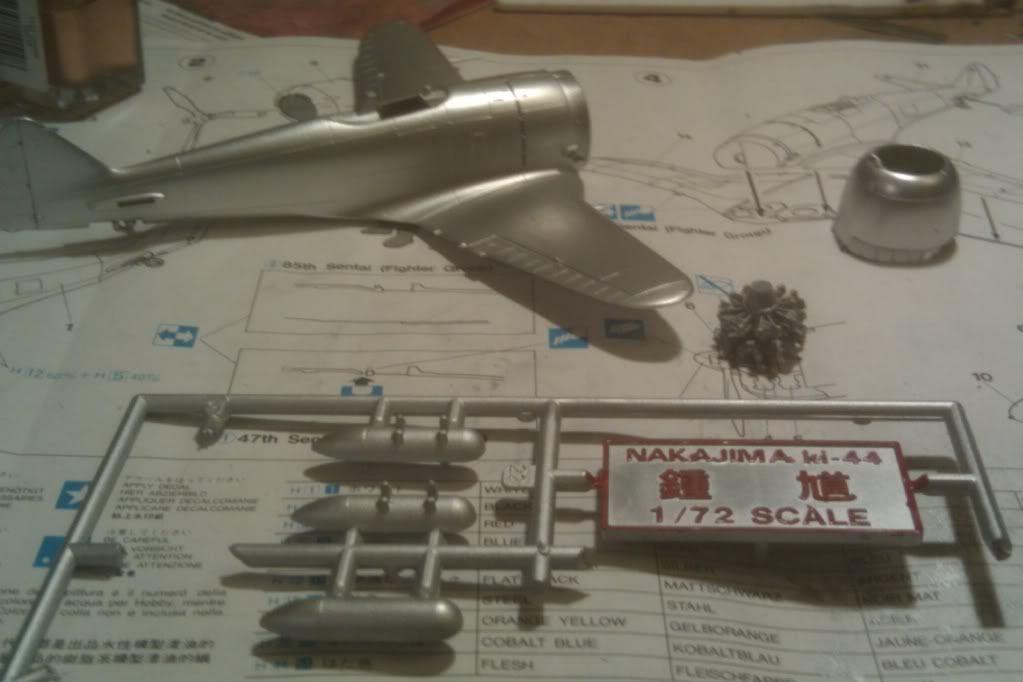
Gamera: yeah i wussed out on that zero trainer. Too bad too, I got a jar of reefer orange and saw the post of the pink primar. That blew my mind! Great thinking there. So here is my progress on the Tojo. This has been a very crisp build. Highly reccomed the kit.
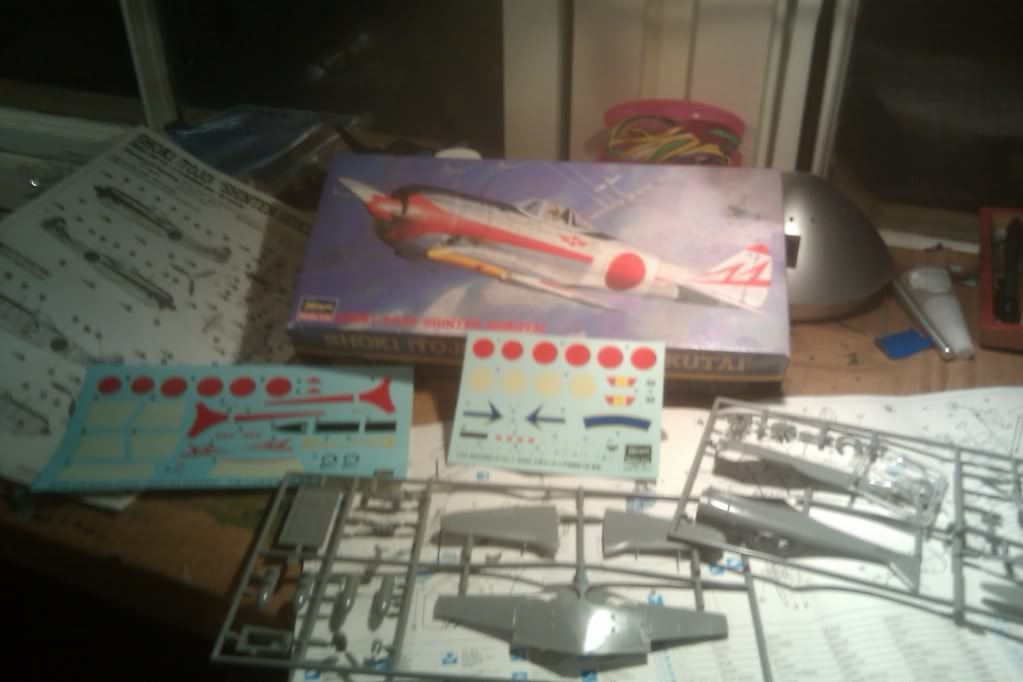
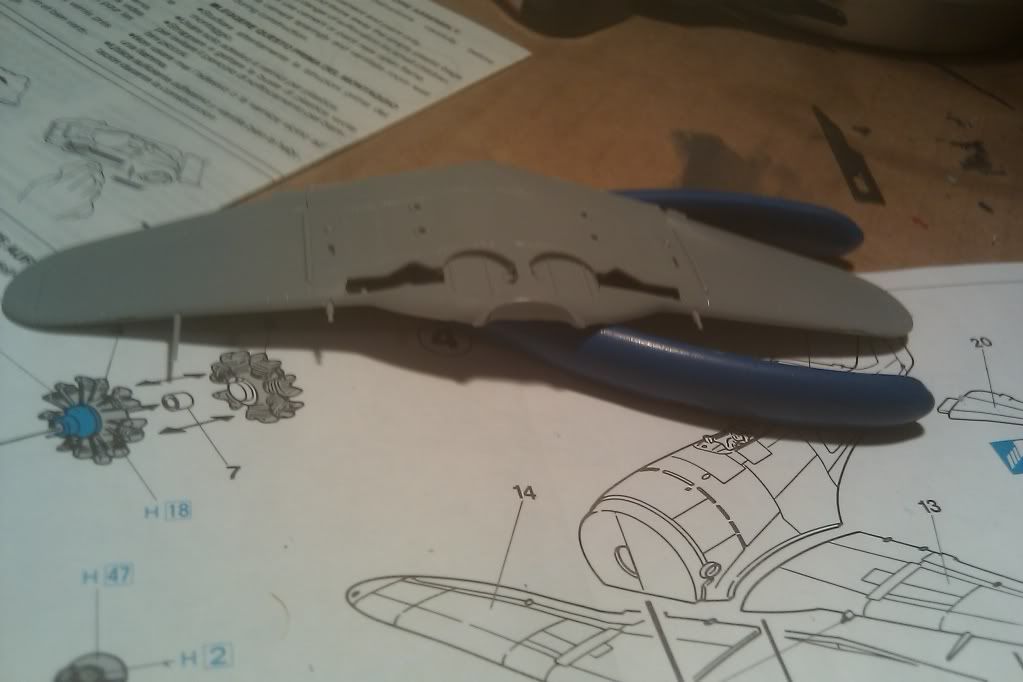


Boy when they said silver shows your sins they were right! First time using the MM Al plate buffing spray. Put two coats on, and then buffed it up with a worn piece of thick flannel. Came off much brighter with a lot of almost peral to its shine. Used the metalizer sealer afterwords.

This thing has a interesting amount of large decals that may overlap ceratin large viz areas. The instructions dont give an order of operations. Im doing the Shinten Sekutai, gears down, with both drop tanks.

I put this next to some other which are compete, this thing seems tiny.
 

On the bench: 72nd scale P51D, P47D Razorback

---Everything Is What It Is, And Not Another Thing.---

  • Member since
    March 2003
  • From: Rain USA, Vancouver WA
Posted by tigerman on Sunday, October 30, 2011 10:57 PM

Trey, it looks like your son has a future in the hobby. Keep it going!

   http://i7.photobucket.com/albums/y269/wing_nut_5o/PANZERJAGERGB.jpg

 Eric 

  • Member since
    August 2009
  • From: Borlando Fla home of the rat
Posted by TREYZX10R on Sunday, October 30, 2011 11:19 PM

Bsyamato thanks luv the Tiffy too,thanks for the photoshop tips! Your Nephew starts building half as good as you do we're all going to half to set the bar higher;)!

Noah thanks and keep up the great work the Tojo is looking great,yes silver does show up all the sins do'nt it! I like the MM metalizers they work awesome ,still the ts-30 rattle can has been my go to base as it has a slight higher viscosity and hides a few of the smaller sins a tad better.

Eric thanks ,the little dude is well on his way but is showing a disturbing trend in liking armor.;) I might have a tread head on my hands

  • Member since
    March 2003
  • From: Rain USA, Vancouver WA
Posted by tigerman on Monday, October 31, 2011 12:55 AM

TREYZX10R

Eric thanks ,the little dude is well on his way but is showing a disturbing trend in liking armor.;) I might have a tread head on my hands

Big Smile nothing wrong with that. Yes

   http://i7.photobucket.com/albums/y269/wing_nut_5o/PANZERJAGERGB.jpg

 Eric 

  • Member since
    March 2010
  • From: Democratic Peoples Republic of Illinois
Posted by Hercmech on Monday, October 31, 2011 8:05 AM

Trey: Good to see that the next generation is getting a head start, and with a teacher like you I am sure he will be off to a great one.

Noah:  Thanks for the huge compliment!  The upper color is Vallejo 825 German pale brown camo, the bottom was vallejo primer gray. The upper was supposed to be a match for the original color but the bottom just looked right to me. I am sure it is not 100% accurate but it is good enough for me


13151015

  • Member since
    November 2009
  • From: SW Virginia
Posted by Gamera on Monday, October 31, 2011 8:31 AM

Trey: Very cool! I'd like to get my nephews into modeling but don't think they'd sit still long enough. If I had ten percent the energy they have... well I'd get a lot more done.

Noah: It's good to have you aboard! And the NM looks good to me. Very sharp work there Yes


BTW: If you see the Waffen SS werewolf lock the door! Happy Halloween guys!


"I dream in fire but work in clay." -Arthur Machen


  • Member since
    August 2009
  • From: Borlando Fla home of the rat
Posted by TREYZX10R on Monday, October 31, 2011 8:45 PM

Thanks for all the positive response Fellas! Connor says thanks as well! Hercmech I just found the rest of the Dinah pics in the other thread,man that came out sweet.

I'm on to the dry fit and there are a few issues ,nothing major thankfully. The wing to fuse joints have some gaps and the Pilot looks like he took a large calibre hit to the mid section!

  • Member since
    March 2010
  • From: Democratic Peoples Republic of Illinois
Posted by Hercmech on Tuesday, November 1, 2011 7:27 AM

TREYZX10R

Thanks for all the positive response Fellas! Connor says thanks as well! Hercmech I just found the rest of the Dinah pics in the other thread,man that came out sweet.

I'm on to the dry fit and there are a few issues ,nothing major thankfully. The wing to fuse joints have some gaps and the Pilot looks like he took a large calibre hit to the mid section!

Thanks Trey for the kind words.

I always get a huge chuckle when I see a pilot like that.


13151015

  • Member since
    October 2008
  • From: italy
Posted by bsyamato on Tuesday, November 1, 2011 7:56 AM

Noah Nice work on the tojo Yes on the kit just the wells seems too few deep Huh? but rarely a ww2 have corrected space for gears. The metal coat looks great.

Trey sorry for the pilot but nice strt on the 100 Beer

  • Member since
    July 2007
  • From: Southern New Jersey
Posted by troublemaker66 on Tuesday, November 1, 2011 8:22 AM

[quote user="TREYZX10R"]

Len I can copy the instruction sheet for ya or post a pic which ever you prefer


Trey, a copy would be awesome....sending you my addy back-channel. Thanks!

Len Pytlewski

  • Member since
    November 2009
  • From: SW Virginia
Posted by Gamera on Tuesday, November 1, 2011 7:16 PM

Trey: Nice work! Don't you ever sleep??? Big Smile


Well, the decals are on the Suisei and I'm hoping to get the panel lines done tomorrow. Meanwhile the Zero cockpit is done. I decided to got with an out-of-box build so I took the seat-belt decal and stuck it to a small piece cut from the instruction sheet (hey, if it comes in the box you can use it in an out-of-box build). Yeah, it looks pretty krappy in the close-up but doesn't look too bad in person.

"I dream in fire but work in clay." -Arthur Machen


  • Member since
    July 2003
  • From: Pennsylvania
Posted by jay12472 on Tuesday, November 1, 2011 7:32 PM

Herc Great job on Ki-46!

gamara Nice looking office

Got the dio base finished will get pics up tomorrow

Jason

  • Member since
    August 2009
  • From: Borlando Fla home of the rat
Posted by TREYZX10R on Tuesday, November 1, 2011 8:56 PM

Cliff I'll get all the sleep I need when I'm dead lol,but no I really do'nt sleep much. The seat belts look awesome ,do'nt sell yourself short (even close up) and the IP is friggen' awesome nicely done Sir!!!

  • Member since
    March 2003
  • From: Rain USA, Vancouver WA
Posted by tigerman on Tuesday, November 1, 2011 9:37 PM

Great pit there Cliff. Those belts are super.

   http://i7.photobucket.com/albums/y269/wing_nut_5o/PANZERJAGERGB.jpg

 Eric 

  • Member since
    October 2008
  • From: italy
Posted by bsyamato on Wednesday, November 2, 2011 4:53 AM

Perfect cockpit Gamera Stick out tongue

  • Member since
    March 2010
  • From: Democratic Peoples Republic of Illinois
Posted by Hercmech on Wednesday, November 2, 2011 7:29 AM

Nice pit Gamera!


13151015

  • Member since
    November 2009
  • From: SW Virginia
Posted by Gamera on Wednesday, November 2, 2011 8:06 AM

Hey thanks guys. Embarrassed

"I dream in fire but work in clay." -Arthur Machen


  • Member since
    February 2011
  • From: Bent River, IA
Posted by Reasoned on Wednesday, November 2, 2011 11:50 AM

Hercmech

Nice pit Gamera!

Ditto

So Gamera, (I'm too lazy to search) what size kit is that and you just used the belt decal on a piece of paper or tape?  I think it looks pretty darn good.

Science is the pursiut of knowledge, faith is the pursuit of wisdom.  Peace be with you.

On the Tarmac: 1/48 Revell P-38

In the Hanger: A bunch of kits

  • Member since
    November 2009
  • From: SW Virginia
Posted by Gamera on Wednesday, November 2, 2011 2:04 PM

Reasoned: It's Tamiya's new 1/48th late model Zero kit:

I swear this may be the nicest kit I've ever built. Not sure it's worth the difference in price from the older kit or the Hasegawa model but if you can find it on sale it's pretty darn close to perfect. I bought a PE set to use with it but the kit really doesn't need anything so I decided to go with an out-of-box build.

I think decal seat-belts look kinda two-dimensional in 1/48th so I'd heard a trick to stick it to a piece of paper the same way you'd make seat-belts out of painted tape. Plus IPMS rules allow you to use anything that came inside the box in the out-of-box category so cutting a piece out of the corner of the instructions will still qualify.

Edit: Though the box says 'Mitsubishi' the kit comes with a pile of extra parts to do the Nakajima version as well plus several options. Not quite as many extra parts as a Dragon tank kit but still you'll end up with a bunch of extra stuff you can use on another Zero when you're done.

"I dream in fire but work in clay." -Arthur Machen


  • Member since
    February 2011
  • From: Bent River, IA
Posted by Reasoned on Wednesday, November 2, 2011 4:22 PM

Excellent! Thanks for the info and that's a slick trick on the belts. Idea

Science is the pursiut of knowledge, faith is the pursuit of wisdom.  Peace be with you.

On the Tarmac: 1/48 Revell P-38

In the Hanger: A bunch of kits

  • Member since
    July 2003
  • From: Pennsylvania
Posted by jay12472 on Wednesday, November 2, 2011 4:33 PM

Well I got the base finished and here is the final product

gamera yo can use the first pic

Jason

  • Member since
    August 2011
  • From: Panhandle Fl
Posted by Noah T on Wednesday, November 2, 2011 5:03 PM

Jay, that looks great. Well done.


On the bench: 72nd scale P51D, P47D Razorback

---Everything Is What It Is, And Not Another Thing.---

  • Member since
    August 2011
  • From: Perth, WA
Posted by NeedBeer on Thursday, November 3, 2011 6:00 AM

Very impressive Cliff

I must say Tamiya is my favourite brand at the moment

WiP

1/24 Hawker Hurricane Mk I

1/48 F-22 Raptor; F-22 Idolmaster,  DH Vampire, Saab Gripen 

1/72 C-130 Hercules; Vulcan 

1/350 Bismarck


  • Member since
    August 2011
  • From: Perth, WA
Posted by NeedBeer on Thursday, November 3, 2011 6:54 AM

Cliff - please put me down for this little beauty!

Picked it up 2nd hand for a couple of $, a 1960's offering from Tamiya ,1/50 Type O Pete

It is missing the clear parts / windshields - guys, any suggestions on how to scratch build or replace these? I thought I might be able to modify a spare if I can find one?

As you can see the cockpit detail is not quite in the same league as your Zero Cliff ( it also sits unnaturally deep inside the fuselage).

Otherwise very impressive panel line details & a nice fit!

WiP

1/24 Hawker Hurricane Mk I

1/48 F-22 Raptor; F-22 Idolmaster,  DH Vampire, Saab Gripen 

1/72 C-130 Hercules; Vulcan 

1/350 Bismarck


  • Member since
    November 2009
  • From: SW Virginia
Posted by Gamera on Thursday, November 3, 2011 7:55 AM

Jason: That looks great! Love the trees. Kudos sir! Yes

Needbeer: Very cool! As to the cockpit I would'nt expect too much of a fifty year old kit, heck the thing is older than even me! Still, I don't think you'd see too much with the model closed up and a little detailing she should come out great.

"I dream in fire but work in clay." -Arthur Machen


  • Member since
    October 2008
  • From: italy
Posted by bsyamato on Thursday, November 3, 2011 9:05 AM

Noah T

Jay, that looks great. Well done.

Ditto

NeedBeer good choice Beer

  • Member since
    July 2003
  • From: Pennsylvania
Posted by jay12472 on Thursday, November 3, 2011 3:12 PM

Thanks Guys

Jason

  • Member since
    August 2009
  • From: Borlando Fla home of the rat
Posted by TREYZX10R on Thursday, November 3, 2011 8:48 PM

Jason awesome looking Dio great job!!!

Needbeer you could make some balsa plugs and vac form the canopy parts or do a push mold with clear plastic soda bottles..Nice old kit looking forward to seeing it come to life!

I got a little more done on the 100 ,still researching which paint scheme,so far nothing is really catching my eye any suggestions?

JOIN OUR COMMUNITY!

Our community is FREE to join. To participate you must either login or register for an account.

SEARCH FORUMS
FREE NEWSLETTER
By signing up you may also receive reader surveys and occasional special offers. We do not sell, rent or trade our email lists. View our Privacy Policy.