SEARCH FINESCALE.COM

Enter keywords or a search phrase below:

Imperial Japanese Group Build Part II

93233 views
746 replies
1 rating 2 rating 3 rating 4 rating 5 rating
  • Member since
    March 2010
  • From: MN
Posted by Nathan T on Saturday, September 28, 2013 11:36 AM

Got the resin pit Primed and painted in Alclad Aluminum. I'm gonna try some chipping fluid to create wear and tear:

Now I just need to come up with a decent mix for the cockpit brown/khakit color.


  • Member since
    July 2004
  • From: Sonora Desert
Posted by stikpusher on Saturday, September 28, 2013 3:44 PM

What brands of paint do you have? I might suggest wood tan or khaki from Humbrol, or khaki or desert yellow from Tamiya.


F is for FIRE, That burns down the whole town!

U is for URANIUM... BOMBS!

N is for NO SURVIVORS...

       - Plankton

LSM


  • Member since
    March 2010
  • From: MN
Posted by Nathan T on Saturday, September 28, 2013 5:24 PM

I was thinking along the same lines Stik. I use Gunze aqueous and was thinking of mixing Dark Yellow with RLM 79 sandy brown. then adding some red brown and yellow green


  • Member since
    July 2004
  • From: Sonora Desert
Posted by stikpusher on Saturday, September 28, 2013 9:30 PM

I want to say that the kit directions say to use RLM 79. And the IJA did use a Khaki Brown color as base color on much of their ground equipment. Strictly guess work along those lines for the color suggestions that I made. 

Well here is pahse one of handbrushing Mr Color for the hard edged camo pattern. The Brown came out good enough


Now the green turned out ok, but it showns brush marks and has some thinner areas that are transluscent compared to the brown. I will have to go back and touch up those areas another day soon


F is for FIRE, That burns down the whole town!

U is for URANIUM... BOMBS!

N is for NO SURVIVORS...

       - Plankton

LSM


  • Member since
    April 2013
Posted by SchattenSpartan on Saturday, September 28, 2013 9:42 PM

Stik: Great work there! I'm glad that paint problem wasn't that hard to solve!

Surfsup: I'm totally digging that Yamato! It looks simply awesome!

Nathan: Great work on your side as well!

  • Member since
    July 2004
  • From: Sonora Desert
Posted by stikpusher on Saturday, September 28, 2013 9:50 PM

I am not 100% satisfied with the results. I do wish that early war Japanese armor had soft edge camo like much of the late war armor did. Then I could have airbrushed it all and been happy with it. But this brushpainting Mr Color leaves something to be desired. Too many visble flaws in the green in both texture and opacity. I hope that as it cures overnite things change for the better.


F is for FIRE, That burns down the whole town!

U is for URANIUM... BOMBS!

N is for NO SURVIVORS...

       - Plankton

LSM


  • Member since
    April 2006
  • From: Denver, Colorado
Posted by waynec on Saturday, September 28, 2013 10:07 PM

picked up another JGSDF 6x6 command vehicle at >50% off. that's 2 of those and the similar NBC vehicle. may do one in an urban camo for a Godzilla movie. maybe make a small base as a big footprint and park it in the middle. may not get another one done for II but have a change of philosophy on GBs and could get a few done oif there is a III (since i have 9)

Никто не Забыт    (No one is Forgotten)
Ничто не Забыто  (Nothing is Forgotten)


  • Member since
    July 2004
  • From: Sonora Desert
Posted by stikpusher on Saturday, September 28, 2013 10:21 PM

Careful now sir, these GBs are addicting...


F is for FIRE, That burns down the whole town!

U is for URANIUM... BOMBS!

N is for NO SURVIVORS...

       - Plankton

LSM


  • Member since
    April 2006
  • From: Denver, Colorado
Posted by waynec on Saturday, September 28, 2013 11:39 PM

that tank is looking sharp, the build that is. the actual tank looks like a POS.

now i know you aren't talking to me. i think i will do all my committments but next year be more selective but do 2 builds in each, assuming it isn't a ship or a plane. i do have a ww1 KONIG dreadnought ready for ww1 and a ju-52 for cargo planes. if he includes trucks i have 8 or 9 military trucks. will also look for crossovers like JGSDF TYPE 87 SPAA

Никто не Забыт    (No one is Forgotten)
Ничто не Забыто  (Nothing is Forgotten)


  • Member since
    March 2010
  • From: MN
Posted by Nathan T on Saturday, September 28, 2013 11:44 PM

Looks good from here stik. I'm sure a light sanding and a second coat will take care of the flaws. You know I'm starting to buy some Vallejo brand paints in the colors I usually end up haveing to brush on, such as cockpit colors and a few base colors, just to eliminate the hassle.


  • Member since
    April 2006
  • From: Denver, Colorado
Posted by waynec on Sunday, September 29, 2013 10:09 AM

did you silly putty mask? i always like painting the road wheels to match the pattern even if it isn't practical. but  they have to be one color. multiple color wheels are bad.

Никто не Забыт    (No one is Forgotten)
Ничто не Забыто  (Nothing is Forgotten)


  • Member since
    July 2004
  • From: Sonora Desert
Posted by stikpusher on Sunday, September 29, 2013 11:45 AM

No silly putty masking-I dont own any of the stuff. This was done the old fashioned way, with a paint brush. But yes I did the road wheels as solid colors to match th pattern of whatever camo color was above them: tan, green, or brown.


F is for FIRE, That burns down the whole town!

U is for URANIUM... BOMBS!

N is for NO SURVIVORS...

       - Plankton

LSM


  • Member since
    November 2009
  • From: SW Virginia
Posted by Gamera on Sunday, September 29, 2013 5:12 PM

SP: Looks good in the photos. I also use the Silly Putty masking technique. I'm tried brushing on camo like that but SP and spraying seems easier to me. And though I don't use a lot of it isn't Gunze more like Tamiya in being more designed for airbrushing? Anyway sand out the marks and repaint. Maybe a few mist coats of tan to blend everything together she'll be looking fine.

Wayne: Funny a few months ago I was thinking of painting something up as one of the 'G-Force' anti-Godzilla units sometime!

Ok,ok,ok, if I can get five entries I'll go ahead with Japanese GB Part III, I'll see about posting the tread for sign-ups after Thanksgiving (late November).

"I dream in fire but work in clay." -Arthur Machen


  • Member since
    July 2004
  • From: Sonora Desert
Posted by stikpusher on Sunday, September 29, 2013 5:26 PM

Yes, I think a few swipes of a fine or extra fine snding stick to get the worst offenders gone. I defintely could have done a better job brushing with Humbrols. Live and learn. I will grab up some silly putty nexy time I am somewhere that I see selling the stuff. I still have a Ha Go light tank in my stash for building. And pleny of these Mr Color IJA paints left in the bottles.


F is for FIRE, That burns down the whole town!

U is for URANIUM... BOMBS!

N is for NO SURVIVORS...

       - Plankton

LSM


  • Member since
    April 2006
  • From: Denver, Colorado
Posted by waynec on Sunday, September 29, 2013 5:53 PM

hey gamera

i have never hosted a GB but would be willing to try my hand cohosting a japanese III. i, of course, will be doing modern japanese stuff. i can make a badge too.

Никто не Забыт    (No one is Forgotten)
Ничто не Забыто  (Nothing is Forgotten)


  • Member since
    November 2009
  • From: SW Virginia
Posted by Gamera on Monday, September 30, 2013 8:09 AM

Wayne: Hey thanks for the offer! GBs aren't that hard to run though, it just looked like interest was slacking off since this one wasn't as busy as the first one so I thought maybe I'd let it lie fallow a year and pick up Part III in 2015. But if you guys are interested I certainly don't mind running another in 2014.

I'd kinda been kicking around the idea of either an all Sherman GB or an American tank/AFV GB to follow Tigerman's Big Cat GB but we've already got Hans/Bish's D-Day GB so I don't think there's much point now.

I don't think I really need a co-host but if you want to run one of your own and need any advice drop me a line, as I said they're not that hard to do.

"I dream in fire but work in clay." -Arthur Machen


  • Member since
    March 2010
  • From: MN
Posted by Nathan T on Tuesday, October 1, 2013 8:26 AM

Got the base color on the pit last night. Custom mixed but in the end it turned out just looking like a glorified RLM 79 sandy brown anyway... Here's what I used:

But the chipping fluid went on first and I let it dry about 30 min.

Then color with some yellow/green hightlights:

I will post the chipping effects later on when the camera is fully charged again... 


  • Member since
    November 2009
  • From: SW Virginia
Posted by Gamera on Tuesday, October 1, 2013 11:40 AM

Nathan: That looks good! I've tried chipping cockpits with drybrushing and a silver pencil but haven't tried chipping fluid/hairspray yet. Looking forward to your results!

"I dream in fire but work in clay." -Arthur Machen


  • Member since
    March 2010
  • From: MN
Posted by Nathan T on Tuesday, October 1, 2013 1:29 PM

...and we have chips! ...No, not Pringgles

I still have another layer of chipping fluid to apply on top of this because the gun deck will be all black, and I want to show that chipped too. I still need to paint on small detail spots and get the instrument panel assembled. Then on to washes. Is it better than drybrushing and other methods? Well, for large area chips and wear and tear such as Japanese cockpits, yes it is, but for the average pit it think its overkill, but I really want to weather the heck outa this bird. Curious to hear other comments.


  • Member since
    April 2013
Posted by SchattenSpartan on Tuesday, October 1, 2013 1:43 PM

That chipping effect looks great, Nathan!

  • Member since
    November 2009
  • From: SW Virginia
Posted by Gamera on Tuesday, October 1, 2013 2:08 PM

Looks good! Couldn't you paint the black on and then do the chipping? Since the fluid is underneath I think both layers of paint should come off though I haven't tried it.

"I dream in fire but work in clay." -Arthur Machen


  • Member since
    March 2010
  • From: MN
Posted by Nathan T on Tuesday, October 1, 2013 2:13 PM

thanks guys. Gamera-don't know I've never tried either, haha. but that's what I see guys online doing. They will apply another layer of fluid before each subsequent paint layer.


  • Member since
    November 2009
  • From: SW Virginia
Posted by Gamera on Tuesday, October 1, 2013 2:15 PM

Actually you're probably better off staying on the safe side and doing it the way you are. I'm just lazy and want to skip a step or two!

"I dream in fire but work in clay." -Arthur Machen


  • Member since
    November 2009
  • From: United Knigdom
Posted by Alex Shaw on Tuesday, October 1, 2013 7:08 PM

I agree with the others,  the chipping and all round weathering on that cockpit is fantastic!

  • Member since
    October 2008
  • From: italy
Posted by bsyamato on Friday, October 4, 2013 5:53 AM

Stik almost finishe the great little tank :) nice!!

Good chipping on the cockpit Nathan Toast

Cliff i started two speed builds kits latest nights .. one is the Jack from hasegawa 1/72 :) if theres no problem will post here too.

At the next

  • Member since
    March 2010
  • From: MN
Posted by Nathan T on Friday, October 4, 2013 8:19 AM

Oh that should be a nice kit Bsyamato!


  • Member since
    November 2009
  • From: SW Virginia
Posted by Gamera on Friday, October 4, 2013 9:24 AM

Oh you're more than welcome Bsyamato! Looking forward to seeing you work your magic on her.

Keep at least something around for Japanese Group Build Part III though!

"I dream in fire but work in clay." -Arthur Machen


  • Member since
    October 2008
  • From: italy
Posted by bsyamato on Friday, October 4, 2013 10:05 AM

The kit is not so bad Nathan but the old mould shows some imperfection on fitting :)

Dont't fear Cliff.. i have more japanese in the stash Propeller

the second copy

-----------

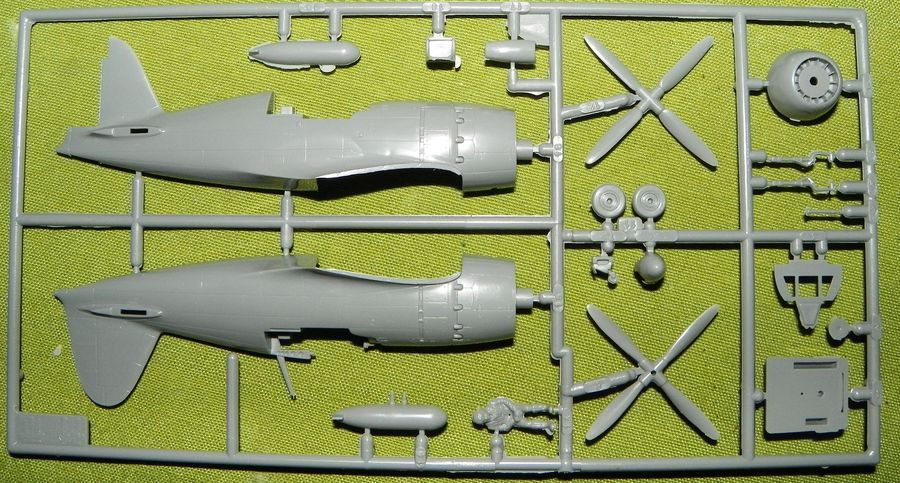
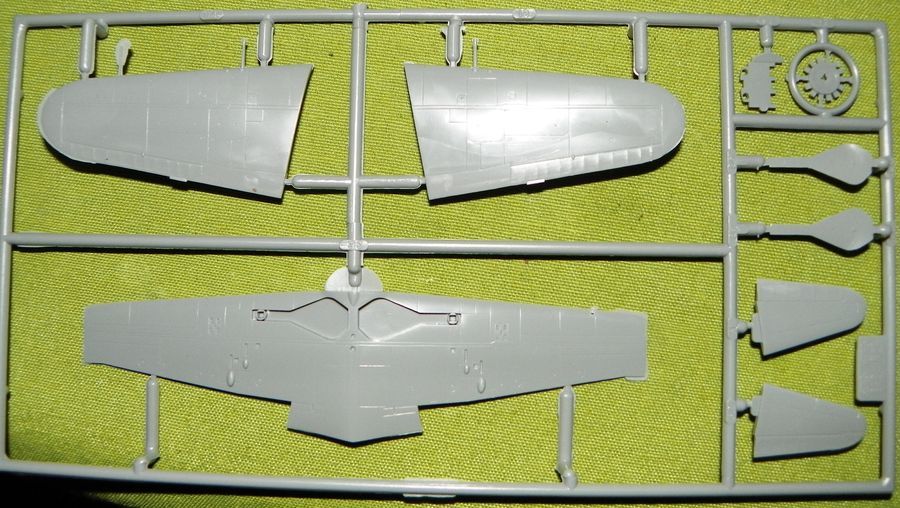
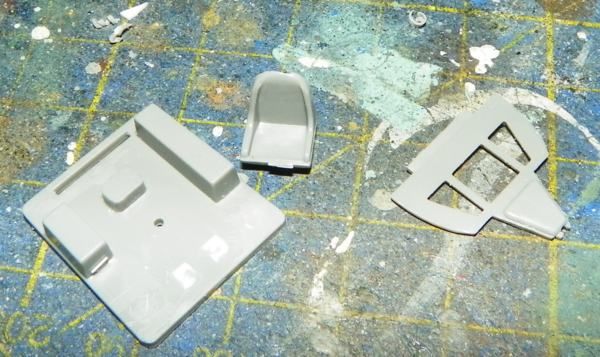
so here the sprues:
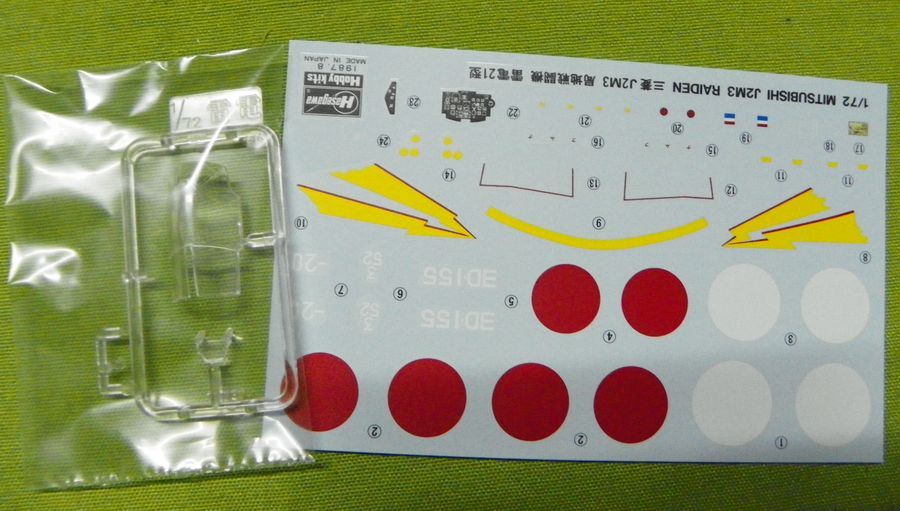
decals and single piece canopy (cut in four pieces last night..)
inner fuselage is out of details.. well to open for right dept
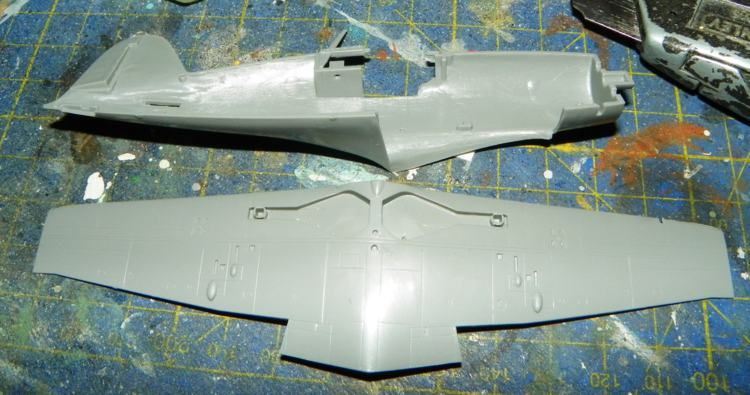
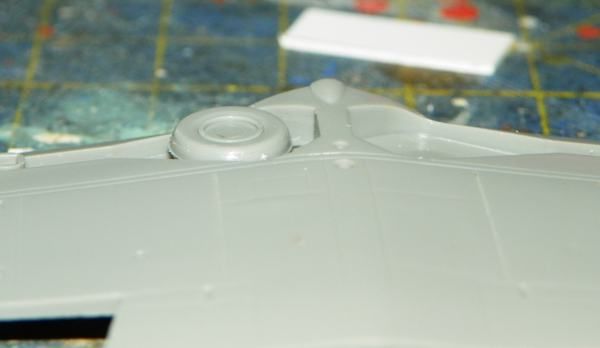
starting to open wells
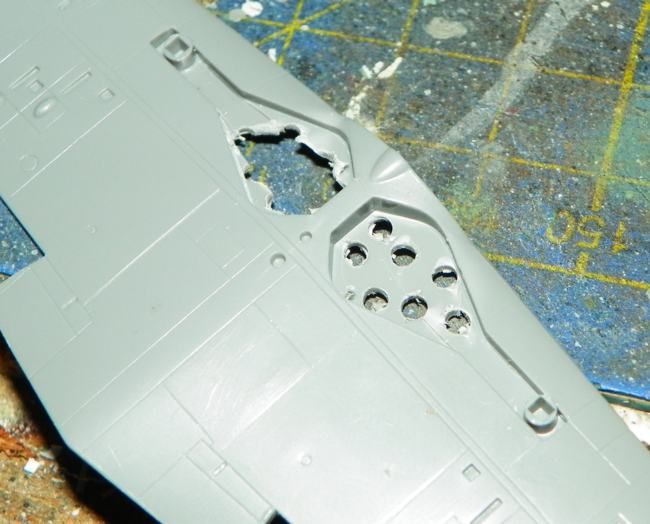
and find a strange way to gle wings, the floor already with some cut and rearranging
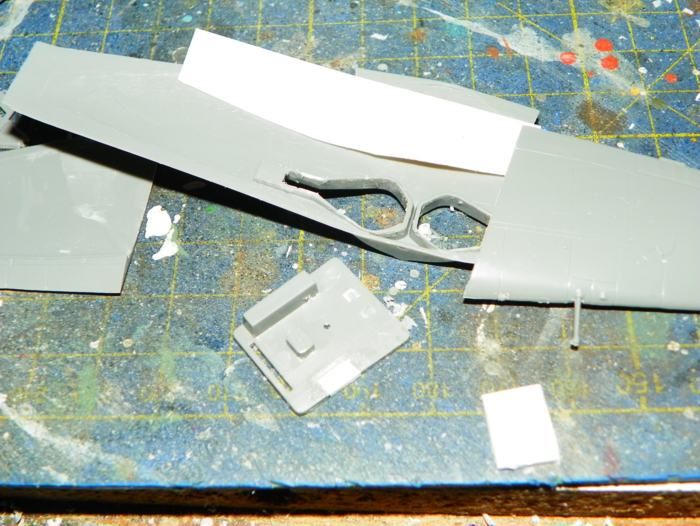
glue'n'dry
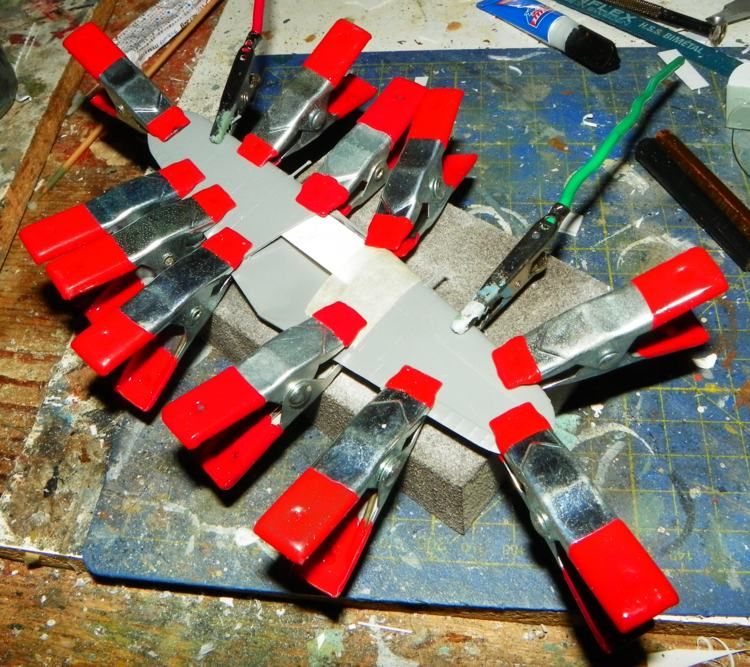
Adding structures on the fuselage

original pieces of cockpit, IP are with decals, not in picture
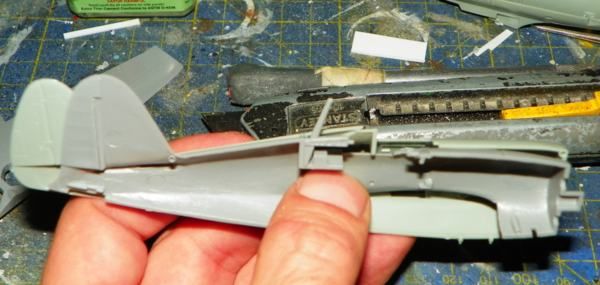
Apparently the Jack seems a little fighter but is not so thrue ... compare with academy P-47 started too in the same day
At the next!

  • Member since
    March 2010
  • From: MN
Posted by Nathan T on Friday, October 4, 2013 10:43 AM

Nice start BS. I too am trying to deepen the wheel wells on the tony. They were molded way too shallow, but there's hardly any room to go once the top wing half is on. Its a lot of work so far to change...


  • Member since
    July 2004
  • From: Sonora Desert
Posted by stikpusher on Friday, October 4, 2013 10:52 AM

Gamera, since I did an aircraft for pt I and am doing a tank here for pt II, if there is a pt III, I just may have to do a ship. I did just recently make an accquisition in that area that was a killer bargain...

BSY, yes the basic camo scheme is done and now it I am in the process of painting the detail parts, etc. I should have those done today and then be able to post a few update photos by tomorrow evening.


F is for FIRE, That burns down the whole town!

U is for URANIUM... BOMBS!

N is for NO SURVIVORS...

       - Plankton

LSM


JOIN OUR COMMUNITY!

Our community is FREE to join. To participate you must either login or register for an account.

SEARCH FORUMS
FREE NEWSLETTER
By signing up you may also receive reader surveys and occasional special offers. We do not sell, rent or trade our email lists. View our Privacy Policy.