SEARCH FINESCALE.COM

Enter keywords or a search phrase below:

US CARRIER AVIATION GROUP BUILD 2013

145163 views
1622 replies
1 rating 2 rating 3 rating 4 rating 5 rating
Dre
  • Member since
    June 2007
  • From: here, not over there
Posted by Dre on Tuesday, July 30, 2013 1:13 PM

Greg, that Avenger is looking better and better.   I'm happy that you fought through the paint issues and are getting it finished.

Alas and alack, my weekend turned out to be really restful (read, lazy) and all I got accomplished was to work out some seams on the main landing gear, test fit the gear to the resin wells and to think about what plastic surgery is needed to fit the resin wells to the fuselage.   But, the intent to be productive was there but not the effort.

  • Member since
    April 2013
Posted by SchattenSpartan on Tuesday, July 30, 2013 1:27 PM

Greg: I'm glad I could help you, buddy!

Dre: Don't worry about that. I'm kinda lazy as well ATM. Waiting for those rivets is really frustrating...

Dre
  • Member since
    June 2007
  • From: here, not over there
Posted by Dre on Tuesday, July 30, 2013 3:01 PM

I'd say that it is probably more frustrating to try each different method and have none of them work out.

Hope the resin rivets work out for you- I'd have long since moved on.

  • Member since
    April 2013
Posted by SchattenSpartan on Tuesday, July 30, 2013 3:31 PM

Yes, it was indeed frustrating, but I want those rivets to be there...It just looks odd with raised rivets everywhere and 2 areas without them on the fuselage...

  • Member since
    May 2013
  • From: Indiana, USA
Posted by Greg on Tuesday, July 30, 2013 7:43 PM

Dre, your ongoing encouragement has been and continues to be appreciated my friend. Sorry about the lazies, they come and they go. Sometimes I find I am content just to go to the bench and wander about, see where I'm at.

Clemens, am almost embarrassed to post this, but I told you I'd explain. On the oil wash, I hadn't really gone beyond slopping it on in interior details. I've read about the rubbing it down part, but it wasn't working for me.

Anyway, I think the error of my ways was I thought it was like slop it on, run a rag over it and done way of thinking. Your idea of streaking led me to take some time, go through a lot of q-tips, and see what happens. Also, have read about mixing brown with black but never really tried it. You're right, it works!

Anyhow, this is what I ended up with. The flaps actually look much better in real life than in the pic, the pic shows almost too much detail

And if these suck, I hope I don't give you a bad name. But regardless, a giant learning step for me so thanks again, Clemens.

I think you were talking more specifically of streaking the business side of the flaps, and that's next. But my point is I listened to you and applied some techniques new to me and good or bad, at this stage of the game, I'm a happy camper!

  • Member since
    April 2013
Posted by SchattenSpartan on Tuesday, July 30, 2013 8:04 PM

Greg, i am truly impressed! Those flaps look gorgeous! I love the subtile streaking on the large flat areas! I am really looking forward to the streaking you are going to do on the other side! I'd suggest you do more - and less subtile streks on the outside. The insidde looks perfect to me though!

  • Member since
    April 2013
Posted by SchattenSpartan on Tuesday, July 30, 2013 8:05 PM

Really impressive work on gluing them together as well!

  • Member since
    May 2013
  • From: Indiana, USA
Posted by Greg on Tuesday, July 30, 2013 8:51 PM

Thanks Clemens! Really pleased that you like them. And thanks again for the help!!

.....and I wish those rivets would get delivered to you. Sometimes waiting isn't fun, especially when it is holding up a project.

  • Member since
    April 2013
Posted by SchattenSpartan on Tuesday, July 30, 2013 9:38 PM

Yep, and that is the second thing holding up this project already... (the other one being the broken canopy)

Dre
  • Member since
    June 2007
  • From: here, not over there
Posted by Dre on Wednesday, July 31, 2013 11:10 AM

That wash/streaking looks good, Greg.  You've got game.Yes

  • Member since
    May 2013
  • From: Indiana, USA
Posted by Greg on Wednesday, July 31, 2013 11:14 AM

Thanks, Dre!

  • Member since
    May 2013
  • From: Indiana, USA
Posted by Greg on Wednesday, July 31, 2013 7:41 PM

Aside from waiting for a product I ordered to try my hand at running an antenna, time to call her done.

I posted these bigger than my usual 800 pixels wide, so a click on an image will show better rez.

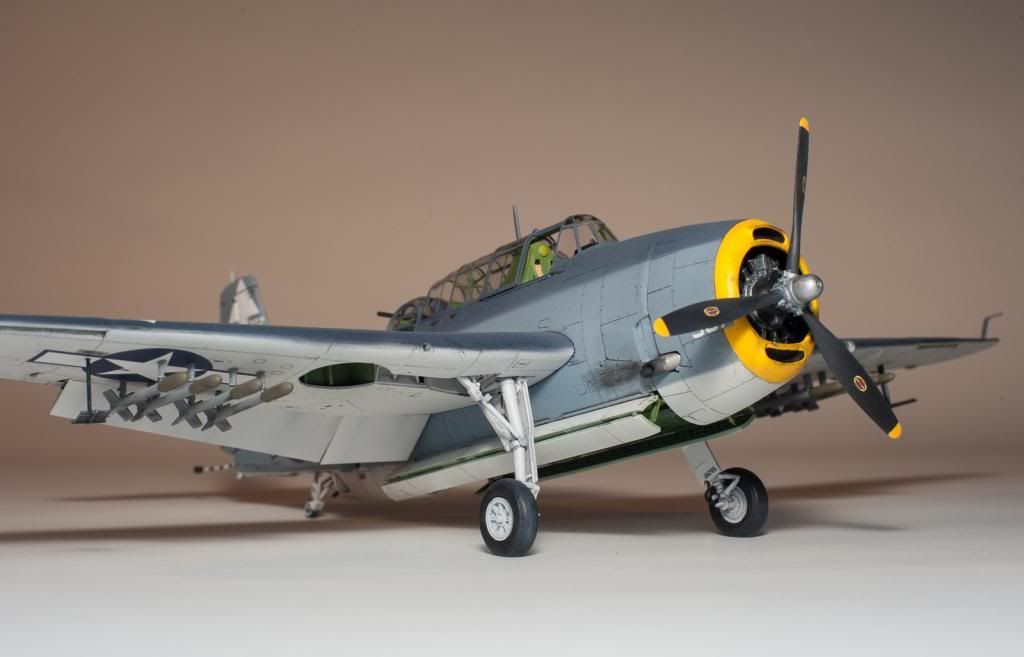
This is, boo-boo's and all, the best aircraft I've built by far. Being able to build this as a part of this GB has been an amazing and enlightening experience. Thanks to Clemens for letting me into my first ever group build, and to everybody for your incredible help and encouragement.

And thanks for putting up with my rambling.

FWIW, my favorite features;

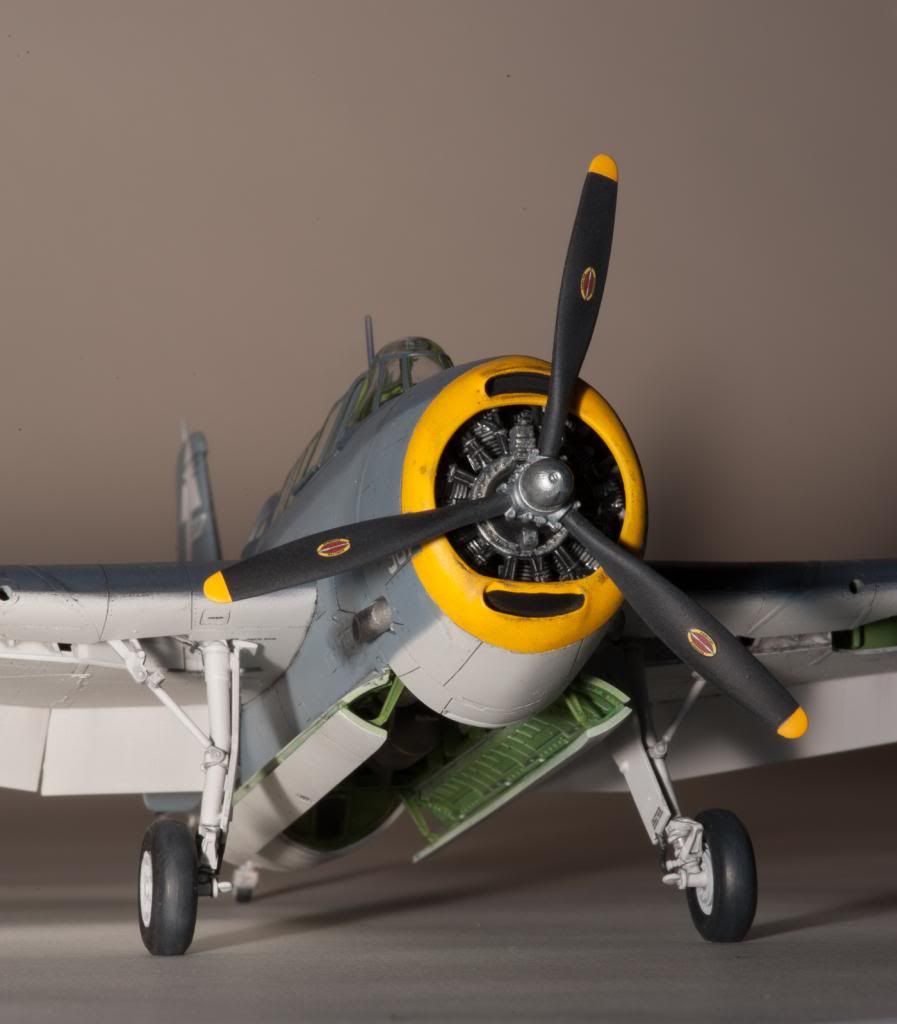
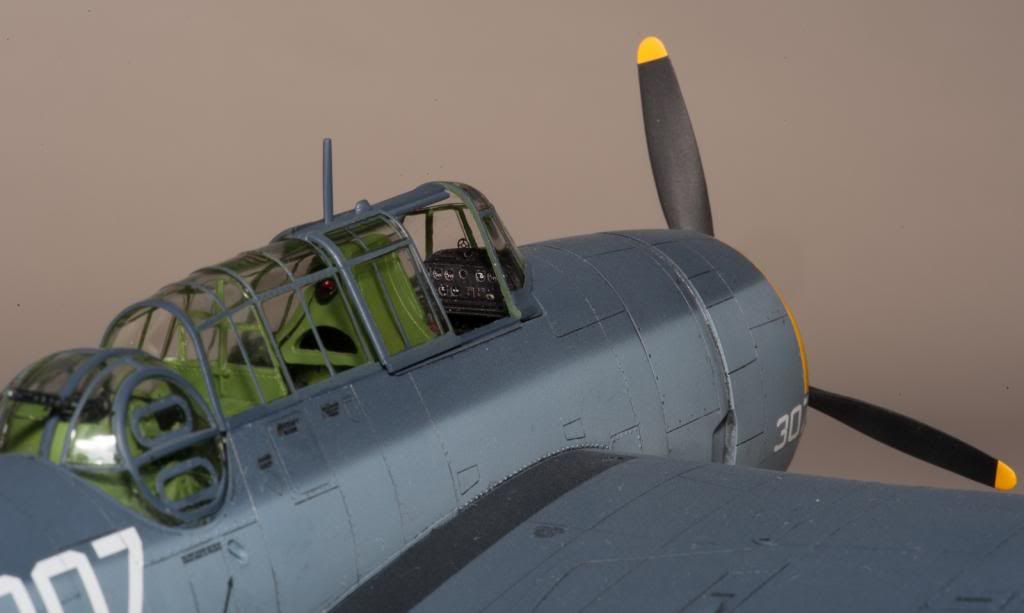
the propeller (hadn't tried one since a kid, finally got one right!)

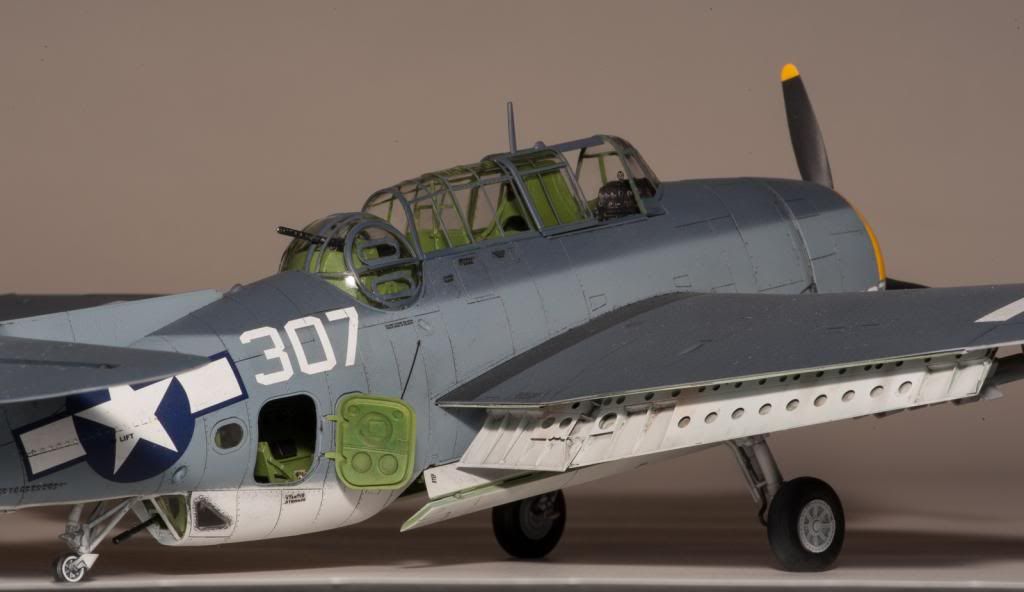
Bomb bay (got LOTS of help from y'all in there, big thanks)

Dipping clear parts in Future. Absolutely amazed me how well it works

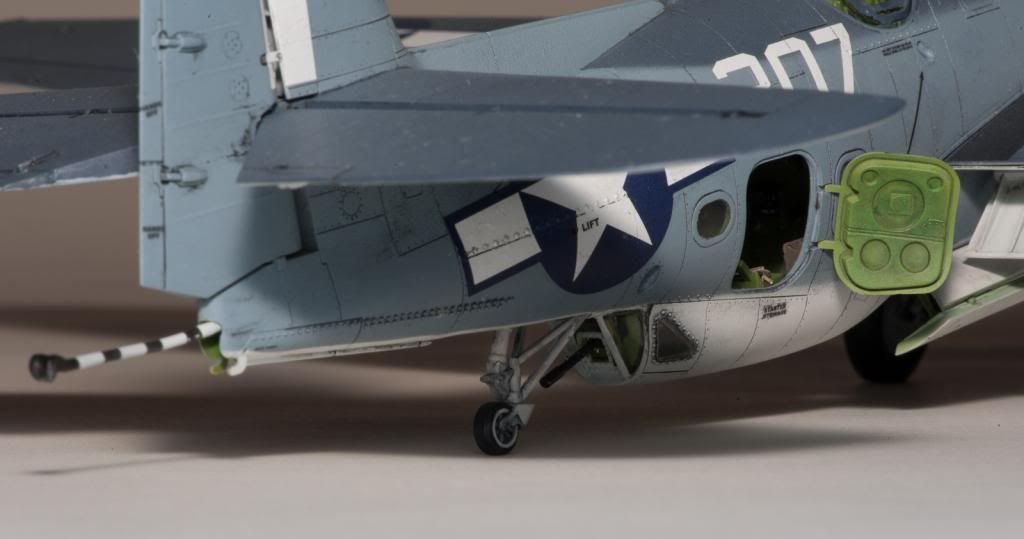
The arresting hook, because I managed not to break it during all those months of construction

Office interior, because it was my first shot at PE and I had a blast with it

Least favorite features:

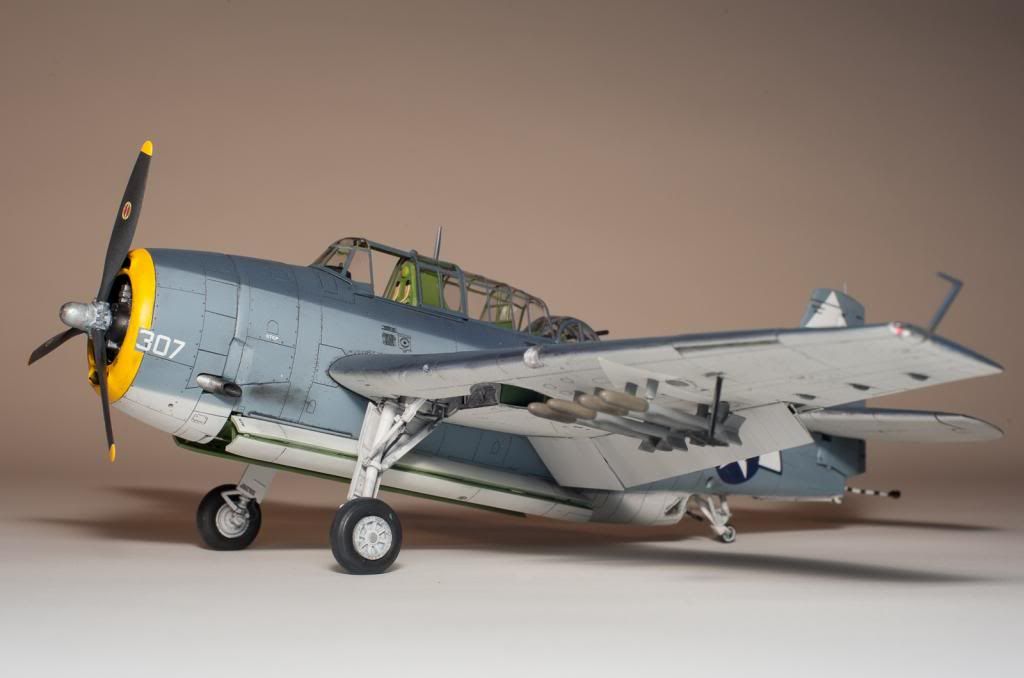
My sandpaper-like paint job

Some messed up decals, mostly because of the sandpaper paint job

Exhaust stains. Hey, I tried. Whistling

....and perhaps the 'arrow' decals, which I realised after flat-coating I had applied upside down

Now I wonder, will the Focke Wulf also take me 5 months???? Hmm

I cannot believe how much I learned by participating here. You guys are incredible!!!!

  • Member since
    April 2013
Posted by SchattenSpartan on Wednesday, July 31, 2013 8:28 PM

Your avenger looks incredible, mate! You really inspired me to build mine! I guess it will be my next project  after the Wildcat is finished... I'll build it completely OOB though, so my cockpit interior won't look as nice as yours...

Just send me a PM with the pic you want me to put on the front page and I add your amazing model to the "Completed Builds"-section.

  • Member since
    July 2004
  • From: Sonora Desert
Posted by stikpusher on Wednesday, July 31, 2013 9:21 PM

That's beautiful work there. I really like those dropped flaps!


F is for FIRE, That burns down the whole town!

U is for URANIUM... BOMBS!

N is for NO SURVIVORS...

       - Plankton

LSM


  • Member since
    April 2003
Posted by shivinigh on Wednesday, July 31, 2013 9:29 PM
Greg- firstrate build. Very well done and I do like how flaps sit as well. Looks like its anxious to take off and show the Japs what for. Again well done.


  • Member since
    April 2007
  • From: Twin Towns, MN
Posted by MAgather on Wednesday, July 31, 2013 11:04 PM

Wow Greg, fantastic job, particularly for just having come in from the cold!

Good Modeling,
  • Member since
    April 2007
  • From: Twin Towns, MN
Posted by MAgather on Wednesday, July 31, 2013 11:10 PM

My apologies guys, life just sometimes gets in the way.  That and I was questioning my sanity for attempting to go so far beyond my skill set. That doubt was compounded by the realization that I was scratching an EW panel from diagrams from the early 60's for an airframe in the 80's.  My inner 'it's got to be perfect' got fired up and I was really in a rut.

Finally have gotten some time, and squared my head away, so progress slow that it may be is underway.  I've got some pics to upload and show you.  More after a word from our sponsor.

John Cameron Swayzee says: "Timex takes a licking and keeps on ticking!"

So what you see in this photo is that the bulkheads, cockpit and EW compartment are now painted.  Below the fuse is the floor (light gray), with the 'l' shaped desk sitting on top, and the lower EW panel (now preshaded) sitting where it will be when complete.  Inbetween the lower panel and the fuse is the , unpainted and unfinished upper EW panel that will sit in the open area above the lower panel.  It is shaped to match the slope of the ceiling of the compartment. The square brass rod will be CRT's when all is finished.  Note that 2nd CRT from rt is still rough and doesn't have the 'tuning knob' installed yet. 

I'm about finished mentally with the "drill tiny hole, cut .020 rod or bend wire to make handle, fill hole, repeat". I hope like hell that when all is said and done, this is at least somewhat visible.  Other thing to notice is that I had to modify the ingress tunnel because my research tells me that this area was open to crew moving btw flight deck and EW compartment. The seats are just for effect as those are the flight crew seats and I've cast some replica's in resin that will be for in the EW compartment.

 And after a half dozen tries, I actually have 2 nacelles that I can use. Exhaust cans have been painted and so I might be assembling some engines here soon. 

Ah such is modeling.  Thanks for looking!


Best, Marty

Good Modeling,
  • Member since
    September 2003
  • From: AandF in the Badger State
Posted by checkmateking02 on Wednesday, July 31, 2013 11:31 PM

Gosh, Greg, that is one great-looking Avenger.  Congratulations!  What an outstanding job you've accomplished!!


  • Member since
    April 2013
Posted by SchattenSpartan on Thursday, August 1, 2013 8:13 AM

Marty, your scratch-built stuff looks really good! Even if nothing of it is visible, at least WE all know that it is there, thanks to your pics!

  • Member since
    March 2003
  • From: Towson MD
Posted by gregbale on Thursday, August 1, 2013 9:13 AM

Greg - The Avenger is awesome. It's just a beauty to behold, and one you should be deservedly proud of. [I keep going back and looking at the weathering on those flaps; for something so "simple" (yeah, right....), they really just help "sell" the whole thing.] A hearty well-done.

Marty - Have been following your WIP post with great interest and empathy. Having a kit "bully" you into added detail (and expansion of modeling horizons) is an all-too-common experience, for most of us, probably, but I'm enjoying the ride (and the growing passive-aggressive relationship Wink) with your Whale. Keep up the inspiring work.

Greg

George Lewis:

"Every time you correct me on my grammar I love you a little fewer."
 
  • Member since
    May 2013
  • From: Indiana, USA
Posted by Greg on Thursday, August 1, 2013 9:15 AM

Clemens, Stik, shivinigh, Marty, CMK....

Thank you for your kind words, and all the support throughout my first GB. Truly appreciated! One heckuva learning experience for me. I was pondering last night, wonder how many years of building 'alone' all those years ago it might have taken me to learn what I learned in months here?

Marty, your scratch building in progress is way over my head but it sure is looking impressive! FWIW, perfectionism gets in my way too. Sometimes it creates a stall, so I understand what you are talking about.

Paraphrasing what is, IMO the most awesome advice I got during this GB, take your time but keep going. Good to see you are back at it!!!

  • Member since
    January 2011
  • From: Commonwealth of Virginia
Posted by Tal Afar Dave on Thursday, August 1, 2013 10:30 AM

Hey Clemens,

I see this one doesn't end until December; are you still taking sign ups??  May possibly do a 1/72nd scale Revell F-4B (yes, ancient, kit from the 60s), or another still yet undecided....what do you think??

2022 New Year's Resolution:  Enter 1 group build and COMPLETE a build this year!!  Why Photobucket did you rob me of my one Group Build Badge???  Must be part of the strong anti-Monogram cartel!!!

 ]

  • Member since
    May 2013
  • From: Indiana, USA
Posted by Greg on Thursday, August 1, 2013 10:43 AM

Greg, we apparently cross-posted. Thank you so much for your kind words, sir!  Being as this is the first kit I've ever built beyond OOB and painting stuff the color that the instructions say to, it is indeed a source of pride for me.

Dave, as soon as Clemens sees your post, I am sure you can look forward to being welcomed with open arms! Look forward to following your build!

  • Member since
    January 2011
  • From: Commonwealth of Virginia
Posted by Tal Afar Dave on Thursday, August 1, 2013 12:17 PM

Sounds good, Greg.  BTW, your TBF Avenger is pretty dang awesome; one of the reasons I wanted to get on board with this build!!  Till then, I'll be lurking...LOL

2022 New Year's Resolution:  Enter 1 group build and COMPLETE a build this year!!  Why Photobucket did you rob me of my one Group Build Badge???  Must be part of the strong anti-Monogram cartel!!!

 ]

  • Member since
    August 2010
  • From: Beaverton, OR
Posted by Ghostrider114 on Thursday, August 1, 2013 12:44 PM

yeah, that avenger looks awesome, I can only hope mine looks that good when I get back around to working on it.

Dre
  • Member since
    June 2007
  • From: here, not over there
Posted by Dre on Thursday, August 1, 2013 1:44 PM

Greg, to simply say that Avenger is great would be damning it with faint praise.

That Avenger is freaking awesome, you have every reason to be proud of that model and the effort you put into it.   I think that you may have set the benchmark for this GB.

Really, really well done.  What will we see next from your bench?

  • Member since
    April 2013
Posted by SchattenSpartan on Thursday, August 1, 2013 7:33 PM

Dave: Sorry for the late reply. As Greg mentioned already, you (and everyone else joining this) ARE welcomed with open arms by me. Big Smile I put you on the list.

Greg: I put your pic on the front page, in case you didn't look at it since then.

  • Member since
    May 2013
  • From: Indiana, USA
Posted by Greg on Thursday, August 1, 2013 9:04 PM

Ghost, thank you! I've been hoping you get back at your Avenger soon. Hope you have as much fun with yours as I did with mine.

Dre, you are far too kind, sir. Thank you! Embarrassed My next will be a 190-f8 I believe it is, 1/48th Hasegawa (my first Hasegawa .....for the Butcher Bird GB ....my first Luftwaffe aircraft, far as I recall). I'm scared of it because goal of this one is first freehand camo, and it is so small I thought it was 1/72nd when I cracked open the box!!!

Clemens, thanks, mate! I did go look. Toast

And Dave, officially welcome to Clemens GB!

  • Member since
    April 2013
Posted by SchattenSpartan on Thursday, August 1, 2013 9:07 PM

You are right, Greg. It is an F-8. Don't worry too much about the camo. I'm sure you can do it!

I'll try to get some work on my Jug done tomorrow and then I'll start something for this GB for the time the rivets take to get here.

  • Member since
    November 2010
  • From: Florida-West Central
Posted by Eagle90 on Thursday, August 1, 2013 9:10 PM

Wow!  There is some really great work here!  You guys rock!

Here is a quick update on the Dauntless.  It's not a detail enriched kit, but she is cute and has been good to me for a return to hobby build.  The decals did not set well, and I did a double dose of Micro Sol.  Of course my Micro Set and Sol are old, so it my not be very effective! Embarrassed

Anyway, here are a couple of pics.  She is close to being finished!  Maybe this weekend!

Eagle90


JOIN OUR COMMUNITY!

Our community is FREE to join. To participate you must either login or register for an account.

SEARCH FORUMS
FREE NEWSLETTER
By signing up you may also receive reader surveys and occasional special offers. We do not sell, rent or trade our email lists. View our Privacy Policy.