SEARCH FINESCALE.COM

Enter keywords or a search phrase below:

Japanese Group Build Part III

90129 views
946 replies
1 rating 2 rating 3 rating 4 rating 5 rating
  • Member since
    February 2007
  • From: Bronze Squadron - Battlestar Cerberus
Posted by Lodni Kranazon on Wednesday, June 18, 2014 9:15 PM

Nice tank & congratulations!

[Admiring Starbuck's space fighter] Cassiopeia: It's a perfect machine! Born to dance amongst the stars! Starbuck: Yeah, it's bumping into them that has me worried.

  • Member since
    April 2006
  • From: ON, Canada
Posted by jgeratic on Wednesday, June 18, 2014 9:53 PM

Terry - I like how that turned out, nice one! Yes

regards,

Jack

  • Member since
    July 2004
  • From: Sonora Desert
Posted by stikpusher on Thursday, June 19, 2014 1:57 AM

Oh that looks sweet! Excellent work jibber!


F is for FIRE, That burns down the whole town!

U is for URANIUM... BOMBS!

N is for NO SURVIVORS...

       - Plankton

LSM


  • Member since
    March 2006
Posted by simpilot34 on Thursday, June 19, 2014 3:09 AM

Nice finish Terry!!! Look forward to seeing the diorama in the future.

Cheers, Lt. Cmdr. Richie "To be prepared for war, is one of the most effectual means of preserving the peace."-George Washington
  • Member since
    January 2013
Posted by jibber on Thursday, June 19, 2014 6:55 AM

Thanks for the nice comments, this one took a while.

Terry

  • Member since
    February 2014
  • From: Michigan
Posted by silentbob33 on Thursday, June 19, 2014 7:18 AM

Great work Terry!

On my bench: Academy 1/35 UH-60L Black Hawk

  • Member since
    November 2009
  • From: SW Virginia
Posted by Gamera on Thursday, June 19, 2014 8:44 AM

Yeah Terry she's fantastic- I love the weathering!!! I'll get you posted to the front page tonight.

I hope you'll post your diorama here too when you get to it.

"I dream in fire but work in clay." -Arthur Machen


  • Member since
    January 2013
Posted by jibber on Thursday, June 19, 2014 9:26 AM

I'm tied down with GB's and other commitments right now that has me working into the fall, but I'm planning to complete 5 Dio's over the winter months. Thanks for the nice comment and I'd love to post it when I'm through. My original thought is a beach scene where the Japanese are dropping the pontoons while advancing through some jungle inward.  

  • Member since
    November 2009
  • From: SW Virginia
Posted by Gamera on Thursday, June 19, 2014 10:10 AM

Five dios!?! Wow! Well if you don't get to her by the end of the year if you don't mind at least post her over on the diorama forum. I love your idea and want to see how she works out.

"I dream in fire but work in clay." -Arthur Machen


  • Member since
    April 2006
  • From: ON, Canada
Posted by jgeratic on Thursday, June 19, 2014 10:24 AM

Indeed, the diorama idea would be keen too see that.

I was just wondering about the weathering, would there be any salt staining from the seawater?

regards,

Jack

  • Member since
    January 2013
Posted by jibber on Thursday, June 19, 2014 11:16 AM

Jack I thought so, so I checked a lot of landing craft and the only salt stains that were really visible were ones modelers put on. I did see some that were pretty subtle but that was about it. I tried on a damaged sub but it just didn't look right so I passed on that idea and stuck with stuck sand, dust and grime. These things were really beat up, if I had followed some of these pics it would have looked like garbage. I'll find one as an example and post it.

  • Member since
    January 2013
Posted by jibber on Thursday, June 19, 2014 11:31 AM

  • Member since
    November 2009
  • From: SW Virginia
Posted by Gamera on Thursday, June 19, 2014 11:46 AM

Terry: What you've done looks pretty darn close to the real thing in your photos to me.

"I dream in fire but work in clay." -Arthur Machen


  • Member since
    April 2006
  • From: ON, Canada
Posted by jgeratic on Thursday, June 19, 2014 11:48 AM

Jibber, great pics ... and I know what you mean about choosing a finish that combines looking good as well as real.

Just had another thought, how about preparing a salt bath for your build?  Try it first  on something you don't mind experimenting on.  Dip in the saltwater for a bit, and then let it drip dry and see if any salt  accumulates around details or creates stains  to determine if it's worthwhile?

One more out of the ordinary detail,  a seagull dropping or two?

regards,

Jack

  • Member since
    December 2002
  • From: NYC, USA
Posted by waikong on Thursday, June 19, 2014 11:54 AM

Some great weathering there!  Salt bath, that's a very interesting idea - perhaps a bath with some other 'whitish' substance will work also.

My website: http://waihobbies.wkhc.net


  • Member since
    January 2013
Posted by jibber on Thursday, June 19, 2014 1:07 PM

I tried some whitish pigment but I couldn't get the horizontal lines right, maybe thats a technique I need to work on. I may have to draw the line on the bird poop……..

  • Member since
    December 2002
  • From: NYC, USA
Posted by waikong on Thursday, June 19, 2014 1:24 PM

If you want bird poop, let me park my car under a tree, wait an hour, and I can give you some great reference photos :)

My website: http://waihobbies.wkhc.net


  • Member since
    January 2013
Posted by jibber on Thursday, June 19, 2014 1:33 PM

Thats funny….

  • Member since
    November 2009
  • From: SW Virginia
Posted by Gamera on Thursday, June 19, 2014 7:56 PM

Terry- you sir are posted, again kudos, excellent job!

Now I'm tempted to put my tank in a small dio with a large parrot sitting in a tree near the tank and the CO with his pistol out staring the bird down- 'you poop on my shiny new tank and by golly I'll cap your @#E...'.

"I dream in fire but work in clay." -Arthur Machen


  • Member since
    January 2013
Posted by jibber on Thursday, June 19, 2014 8:05 PM

Now that funny….and thanks GREAT GB.

  • Member since
    October 2008
  • From: italy
Posted by bsyamato on Sunday, June 22, 2014 8:00 AM

Excellent tank Jibber Yes realistic finish touch !

My updates about the sonia

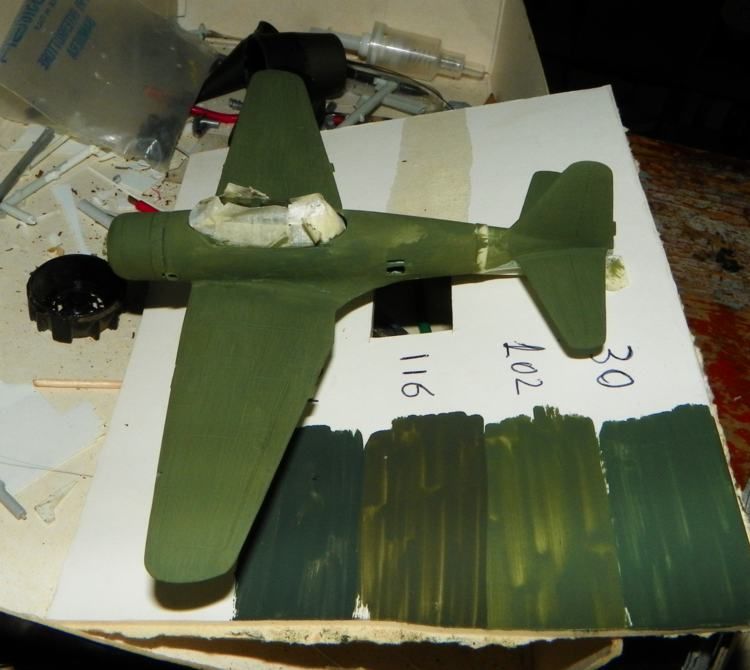
first passes with 102 humbrol and the white stripe on the fuselage

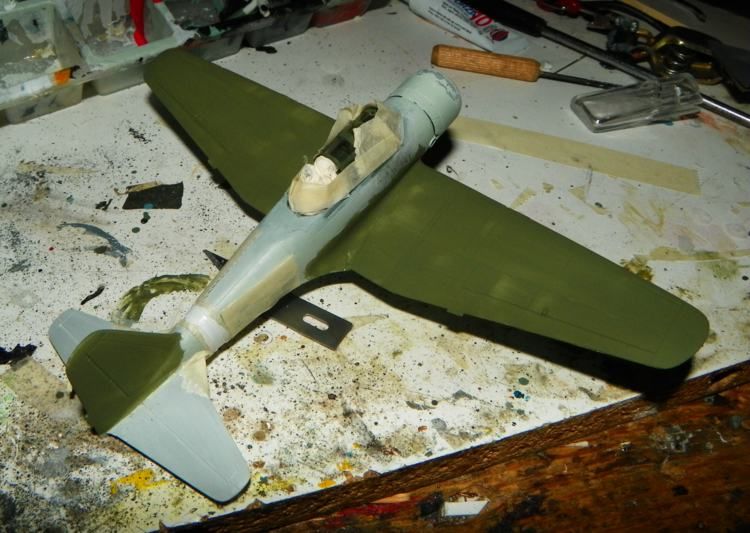
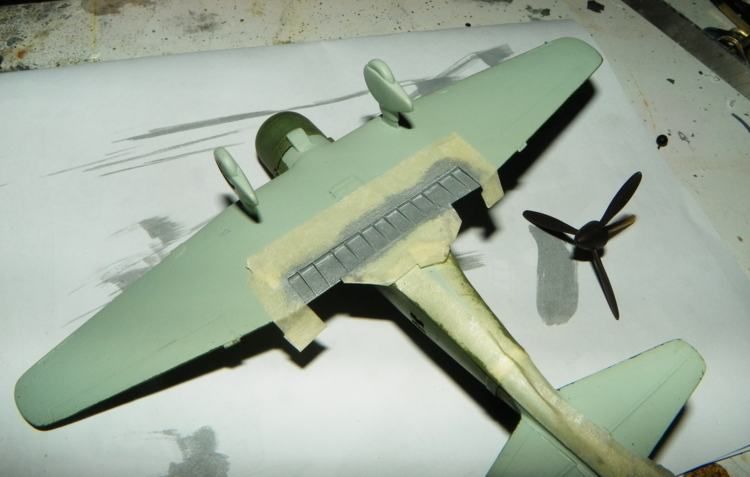
the green reveals some needed sanding and putty work
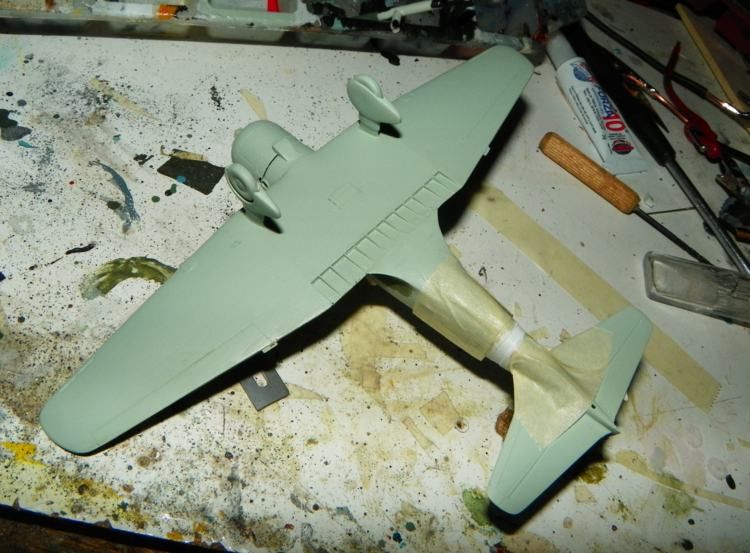
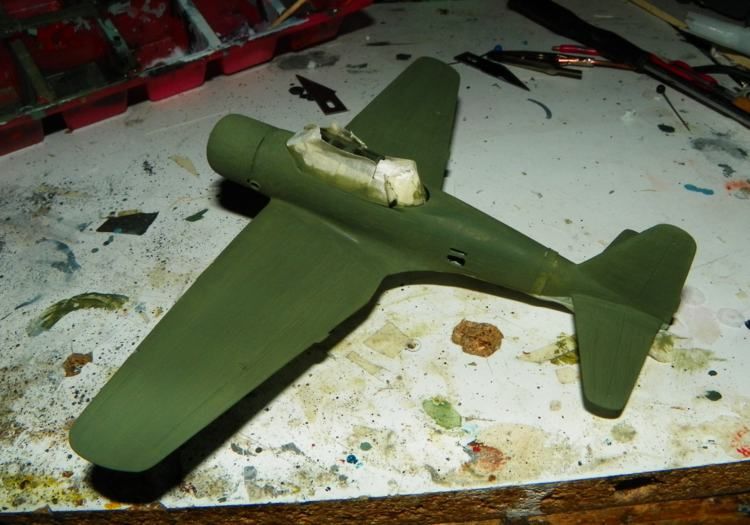
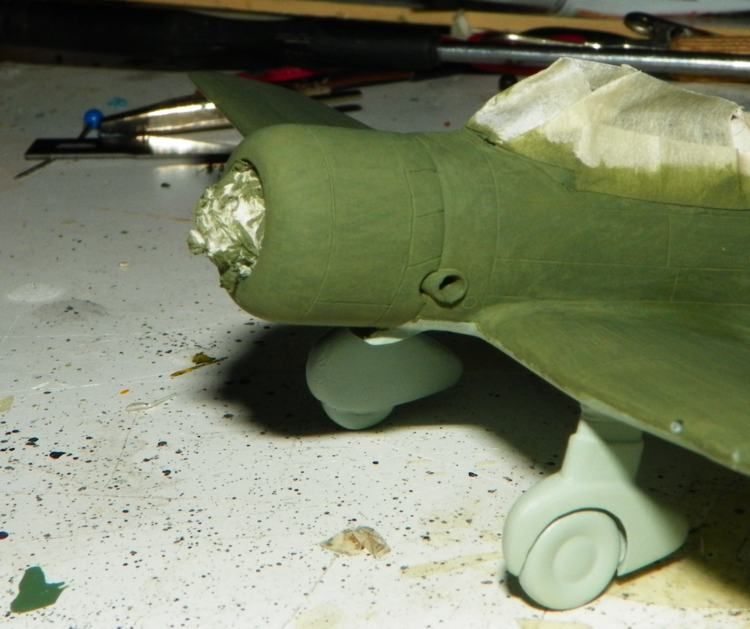
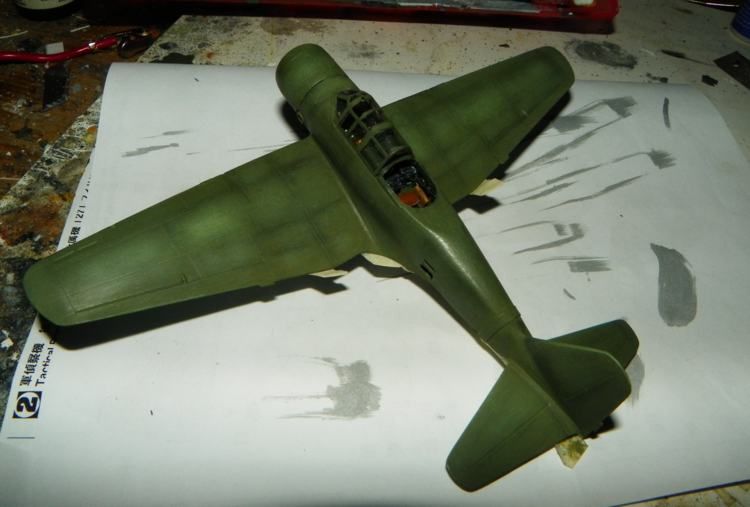
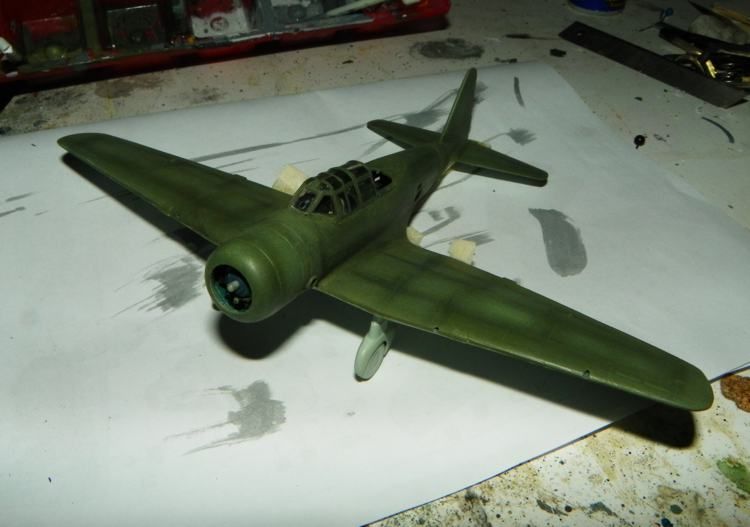
green on

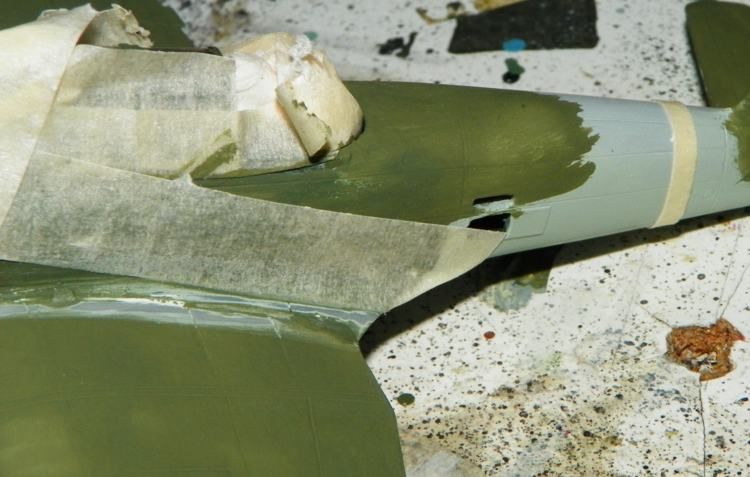
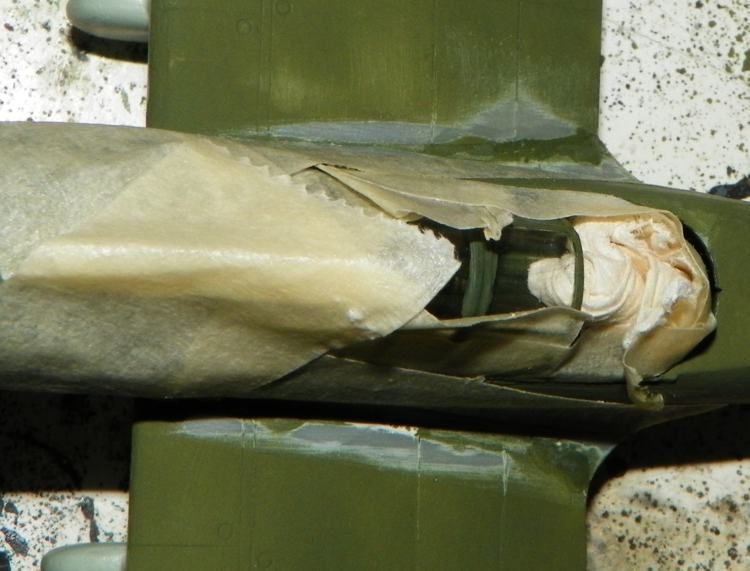
a mix for the metal base on inner flap parts and the propeller

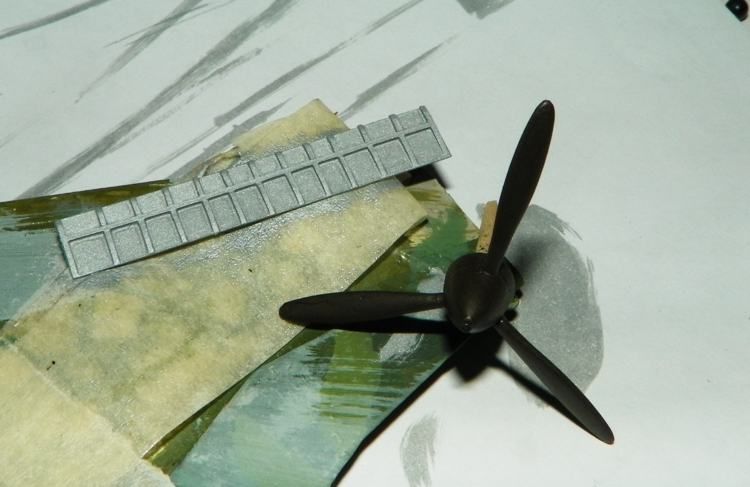
and drybrush passes on the top

At the next :)

  • Member since
    November 2009
  • From: SW Virginia
Posted by Gamera on Sunday, June 22, 2014 4:35 PM

Another great job there Bsyamato- again I love the way you do your pre-shading.

"I dream in fire but work in clay." -Arthur Machen


  • Member since
    March 2006
Posted by simpilot34 on Monday, June 23, 2014 2:34 AM

Looking good mato!!

Cheers, Lt. Cmdr. Richie "To be prepared for war, is one of the most effectual means of preserving the peace."-George Washington
  • Member since
    October 2008
  • From: italy
Posted by bsyamato on Monday, June 23, 2014 3:53 AM

Thanx guys :)

LOL postshading (and highlights) Cliff :) all i can do with brushes is only post working Embarrassed

asap will ad some other kit, or a rufe, a kurogane staff car ,also i started  ... the starter truck toyota

one or more i'll put in :)

  • Member since
    November 2009
  • From: SW Virginia
Posted by Gamera on Monday, June 23, 2014 7:39 AM

Ah, wrong term- guess I meant post-shading there, still very impressive work - I've never seen anyone else do it that well with a brush.

The Rufe, Kurogane, and starter truck are pretty cool. Do you want me to go and put them down for you?  

"I dream in fire but work in clay." -Arthur Machen


  • Member since
    September 2011
  • From: Milaca, Minnesota
Posted by falconmod on Monday, June 23, 2014 7:40 AM

Now that I finished my Stuka and can work on my Zero a little more.  Got the pre shade on the bottom. And painted the cowling,  I use the hair spray method on the cowling,  I need more practice with this,  the acrylic paint over the hair spray seemed to be a little sticky.    Any suggestions?  does enamel work better of hair spray than acrylic?

 I still need to chip some more paint off to get it where I want it.

John

John

On the Bench: 1/72 Ki-67, 1/48 T-38

1/144 AC-130, 1/72 AV-8A Harrier

  • Member since
    January 2013
Posted by jibber on Monday, June 23, 2014 1:59 PM

Bysamato I'm always in awe at great plane builders, this will be a nice addition to your collection.  

  • Member since
    November 2009
  • From: SW Virginia
Posted by Gamera on Monday, June 23, 2014 10:52 PM

John: Nice work there on the pre-shading!

I've tried the hairspray several times and the stickiness usually goes away as it dries, I set aside my kit for a little while to make sure it was completely dry.  I've tried it both by spraying out of the can and by decanting it and airbrushing. I'm not sure about enamel paint, I've used acrylic every time I tried it. The chipping looks fine, I mean you can always take a little more off, you can't put the paint back without redoing the whole thing so you're doing it right in taking it slowly.

"I dream in fire but work in clay." -Arthur Machen


JOIN OUR COMMUNITY!

Our community is FREE to join. To participate you must either login or register for an account.

SEARCH FORUMS
FREE NEWSLETTER
By signing up you may also receive reader surveys and occasional special offers. We do not sell, rent or trade our email lists. View our Privacy Policy.