SEARCH FINESCALE.COM

Enter keywords or a search phrase below:

Japanese Group Build Part III

90691 views
946 replies
1 rating 2 rating 3 rating 4 rating 5 rating
  • Member since
    January 2004
  • From: VARNA, BULARIA
Posted by congo79 on Thursday, July 3, 2014 2:37 AM

If i'm not mistaken the prop blades should be painted brown /i can't check my refrences at the moment, so i'm not 100 % sure/. Nice job on the Shinden so far! I can't wait for Zukei Mura to release their 1/48 kit.

  • Member since
    September 2011
  • From: Milaca, Minnesota
Posted by falconmod on Thursday, July 3, 2014 7:16 AM

falconmod

Ok, So I got the decals on and I started to do the chipping/flaking  weathering which i've never done before like this on the Zero.  So what do you think?  Surprise  This was done with the hair spray method,  1st time for that too.
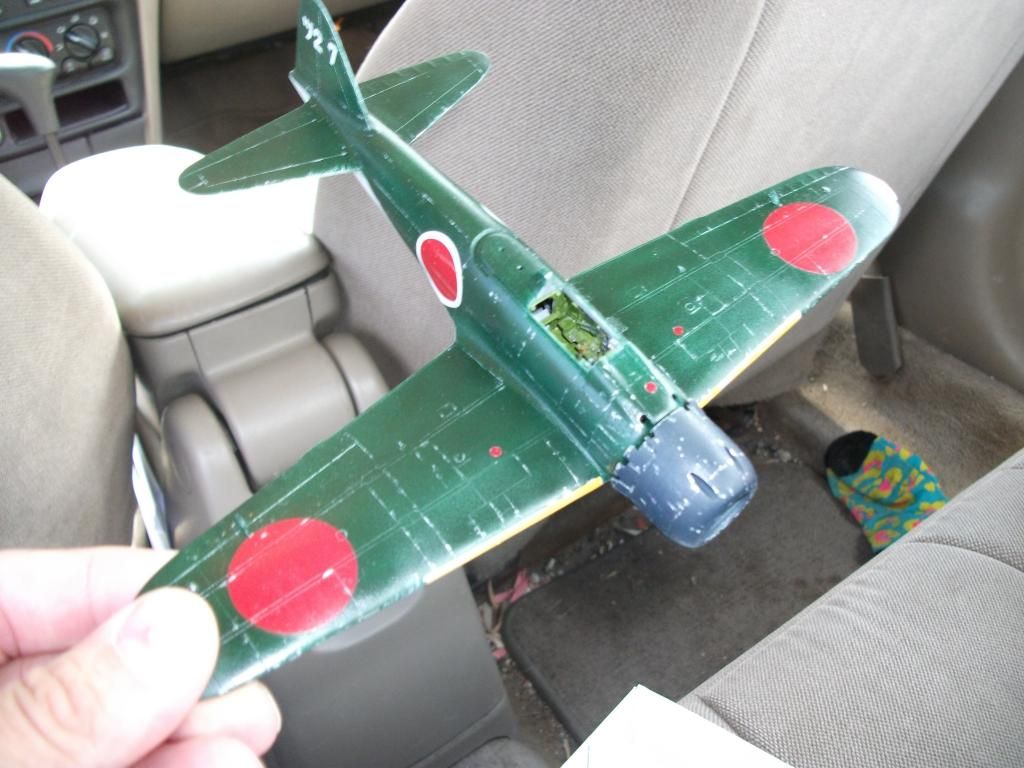
I haven't put any clear flat on it yet.  That begs another question  were Zero's flat or semi-flat paint?

John

I have another question,  what color is the back deck on the zero?  the portion behind the pilot seat that is under the canopy.   is it the interior cockpit color?

John

On the Bench: 1/72 Ki-67, 1/48 T-38

1/144 AC-130, 1/72 AV-8A Harrier

  • Member since
    November 2009
  • From: SW Virginia
Posted by Gamera on Thursday, July 3, 2014 7:30 AM

Doug: Nice work there the Shinden is coming right along.

John: Oh gee, I can't remember now, I'd guess interior cockpit colour though it might be aotake. Anyone else want to chip in?

"I dream in fire but work in clay." -Arthur Machen


  • Member since
    October 2008
  • From: italy
Posted by bsyamato on Thursday, July 3, 2014 9:54 AM

falconmod

falconmod

Ok, So I got the decals on and I started to do the chipping/flaking  weathering which i've never done before like this on the Zero.  So what do you think?  Surprise  This was done with the hair spray method,  1st time for that too.

I haven't put any clear flat on it yet.  That begs another question  were Zero's flat or semi-flat paint?

John

I have another question,  what color is the back deck on the zero?  the portion behind the pilot seat that is under the canopy.   is it the interior cockpit color?

John

Not 100% sure but on my japanese subjects i paint this part normally with interior cockpti color

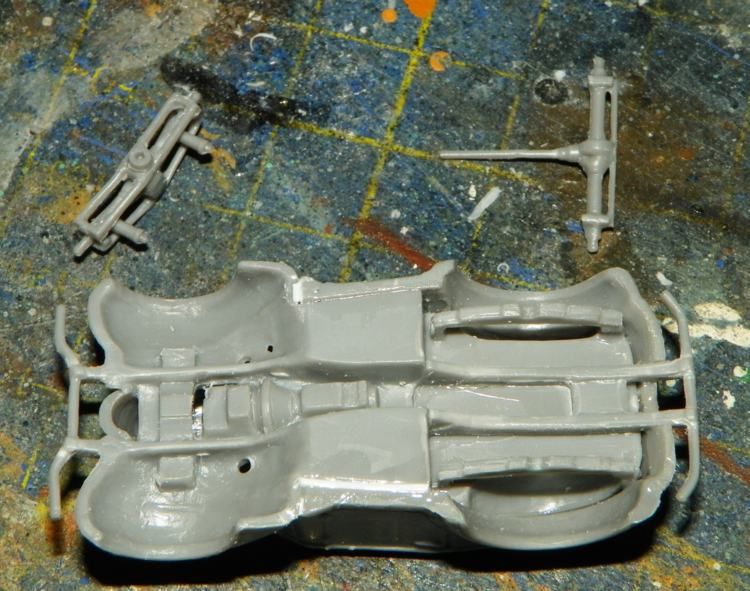
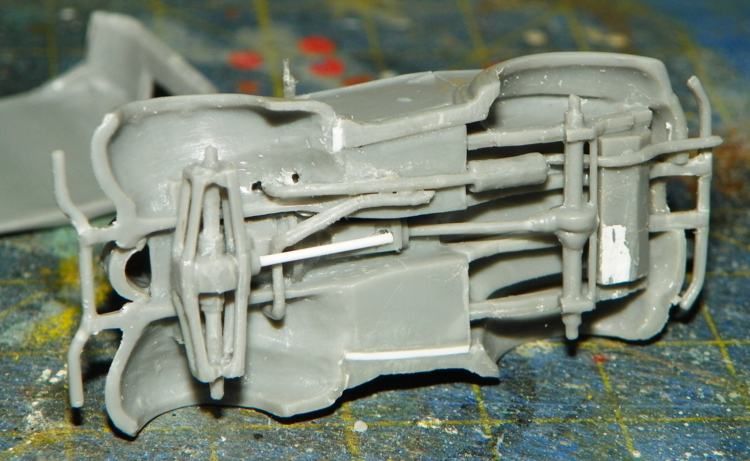
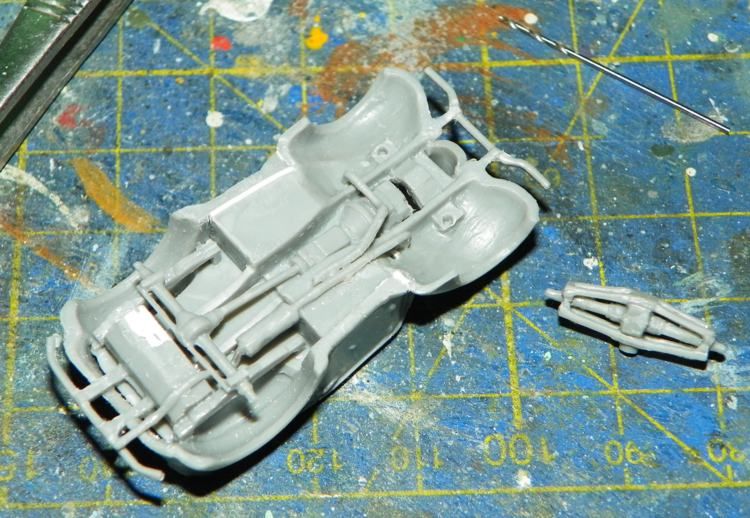
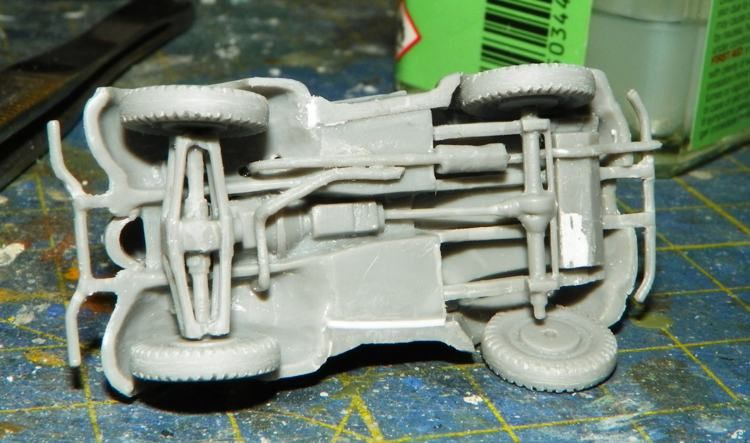
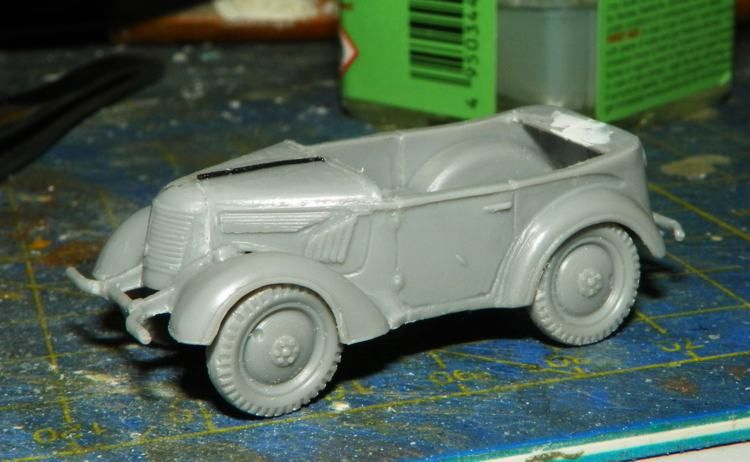
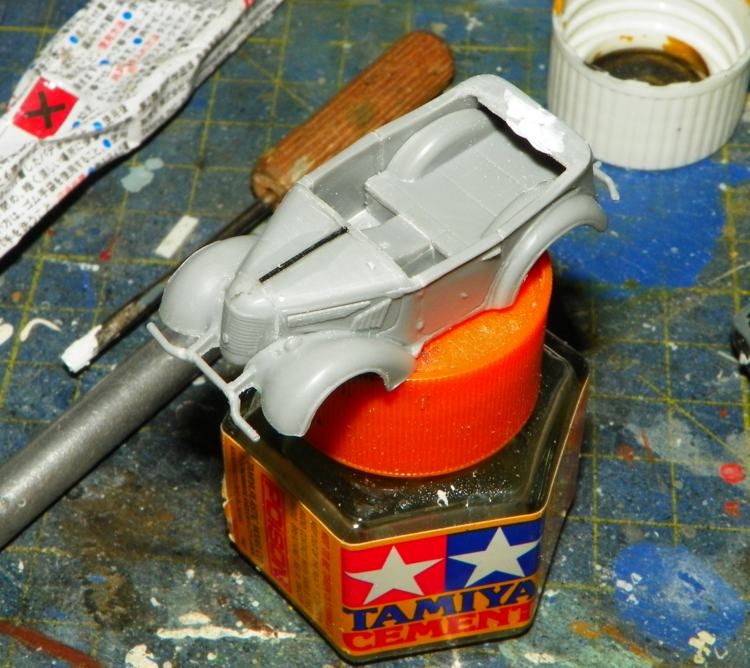
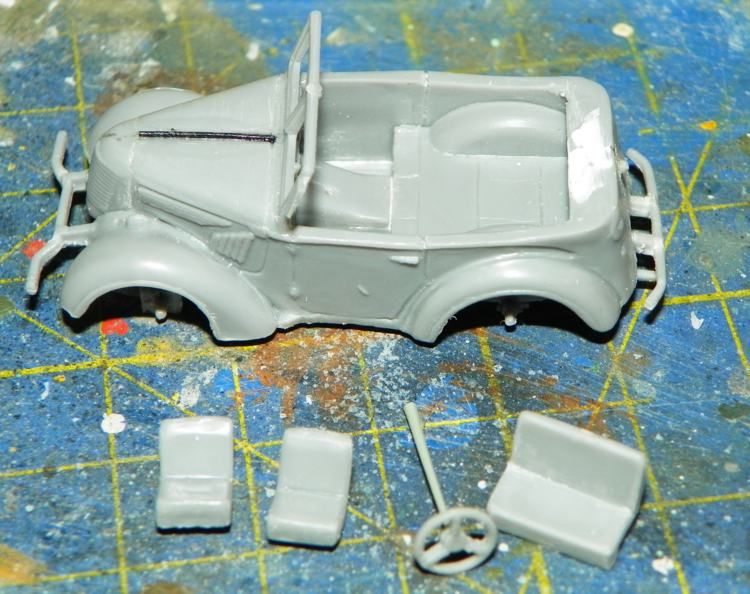
Finally few time to post updates, kurogane first:

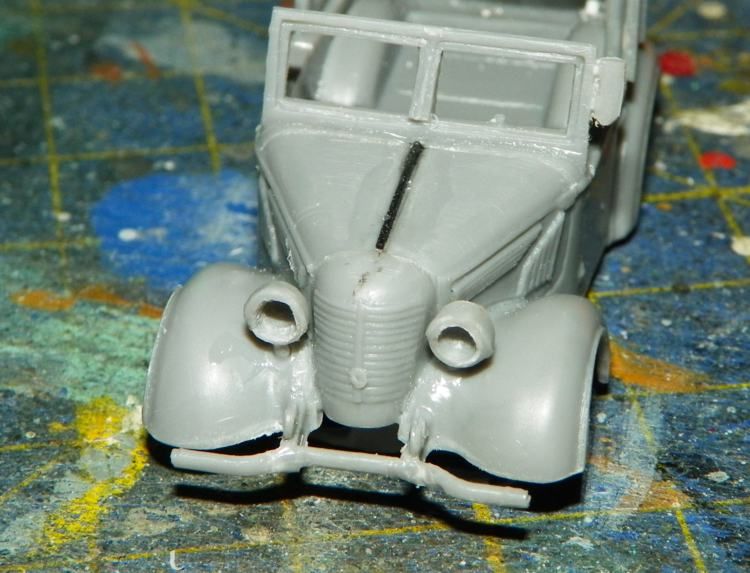
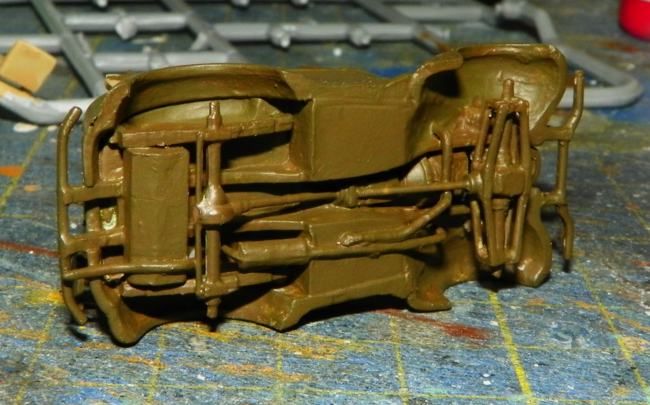
plastic surgery to fill some gap
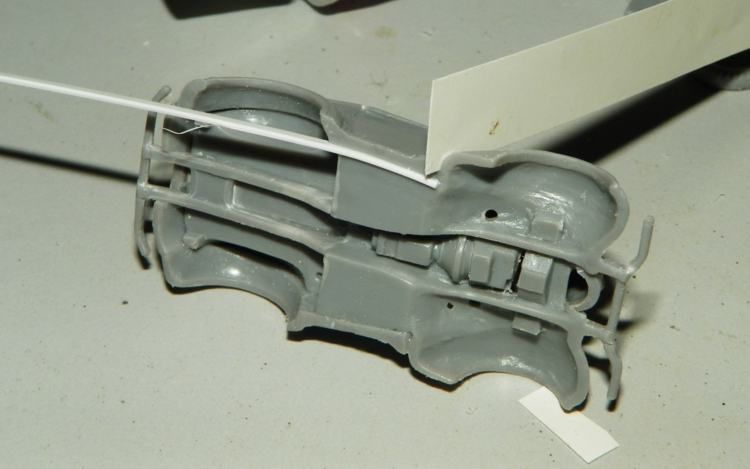
adding more pieces
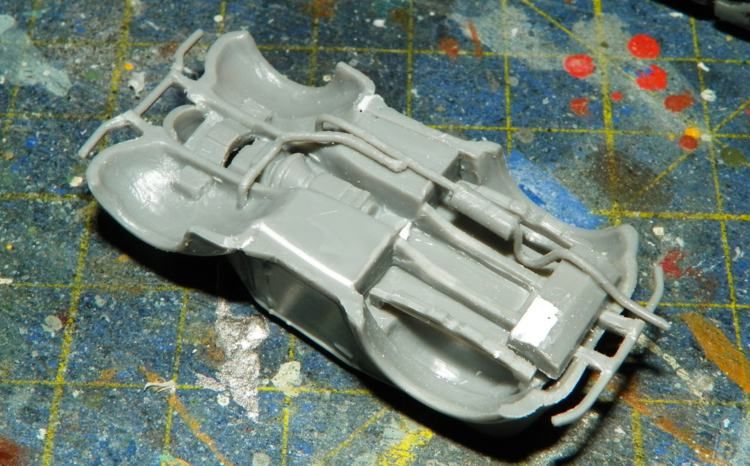

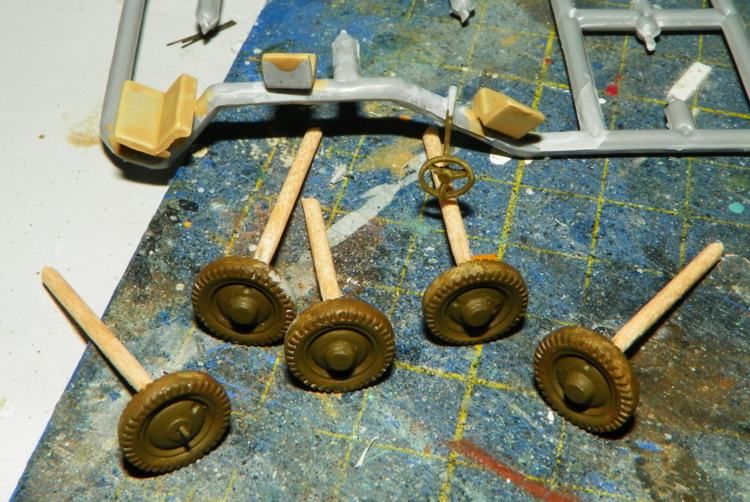
free wheels and seats from sprues
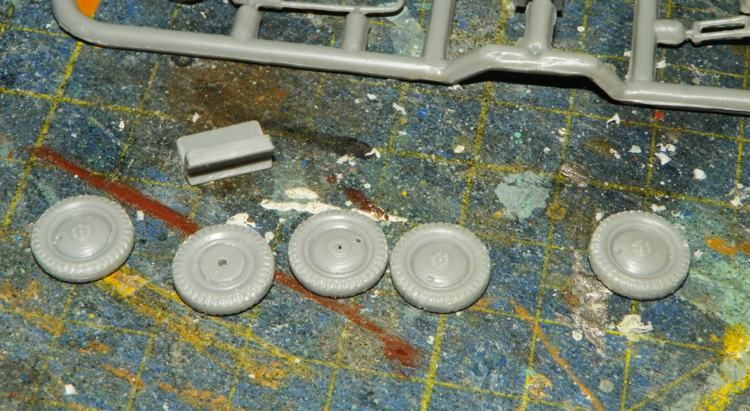
stretched sprue for the "cowling" top detail, original gone with sanding work
Added the ror at the steering wheel , no pieces provided in the box as the front transmission shaft 
the front wheel gear , also a correction to the under fuel tank and the silencer, glued more backward  than before Surprise

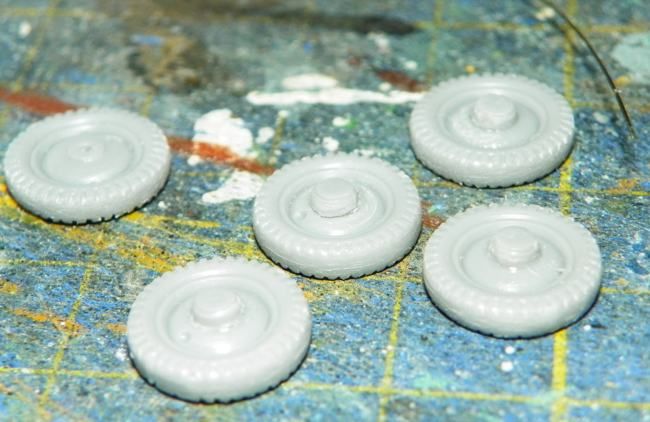
wheels test fitting

other pieces on the wheels, this version have bolts covered
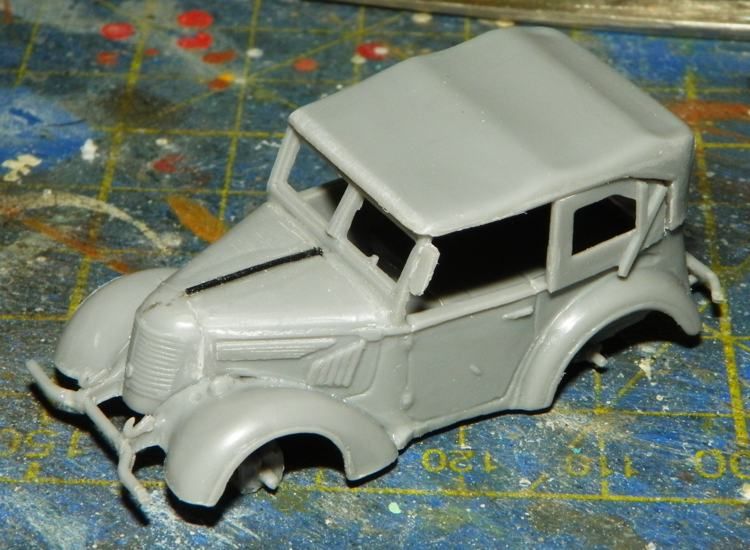
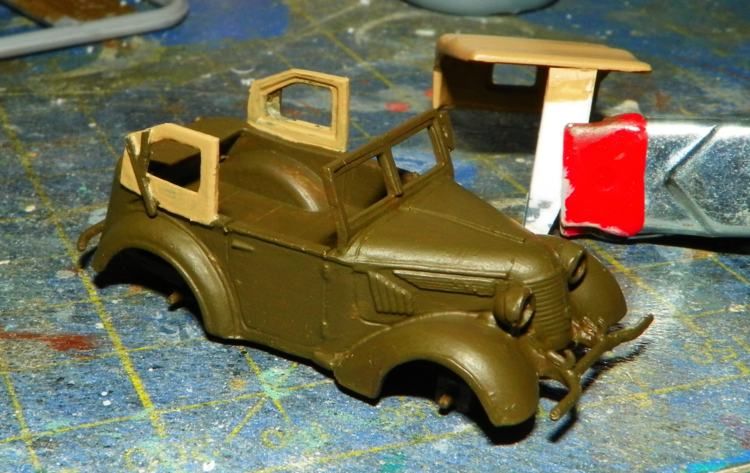
lateral back windows and windscreen glued
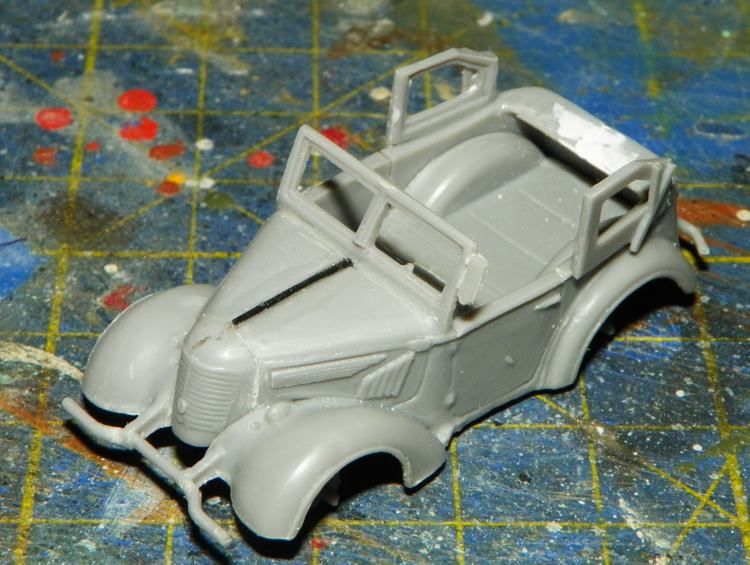
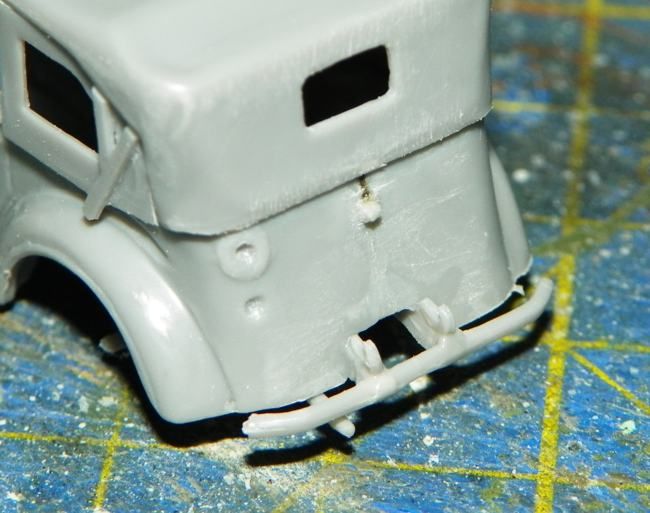
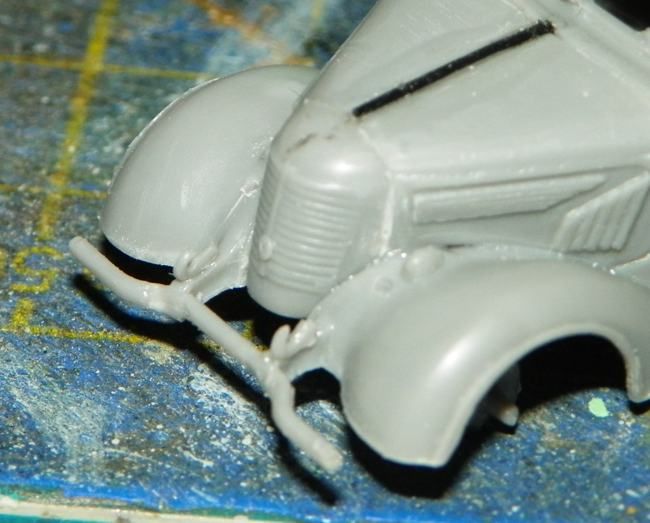
the top testing, after this one of side windows results in wrong place and a correction needed, theres no pins in the kit for right gluing position Hmm and added front and back hooks

headlights drilling and gluing
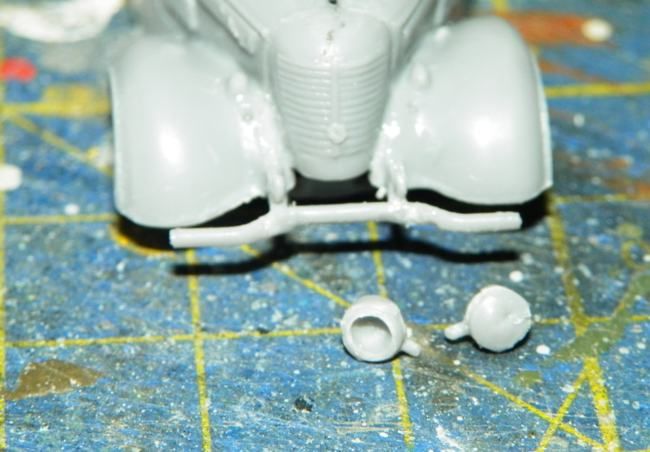
and refuelling probe.. missing in the kit, plastic ror with top flatten by heat and glued the ID plate
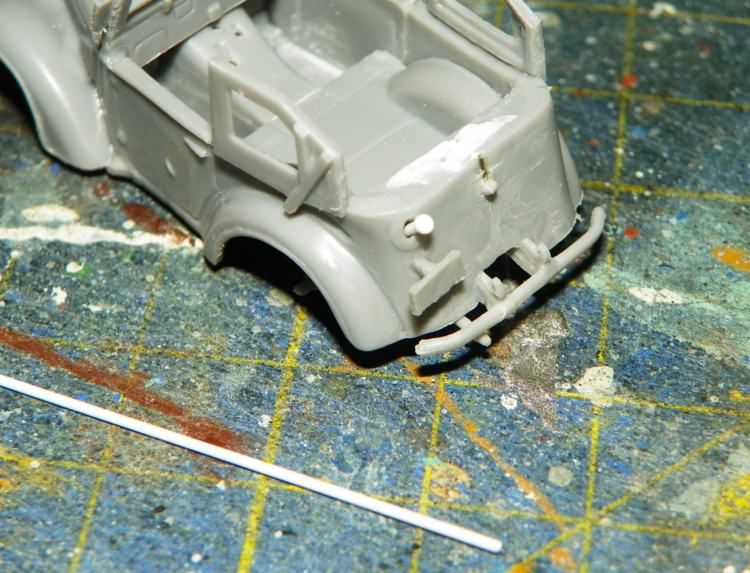
some diggin with cutter to improve the dope
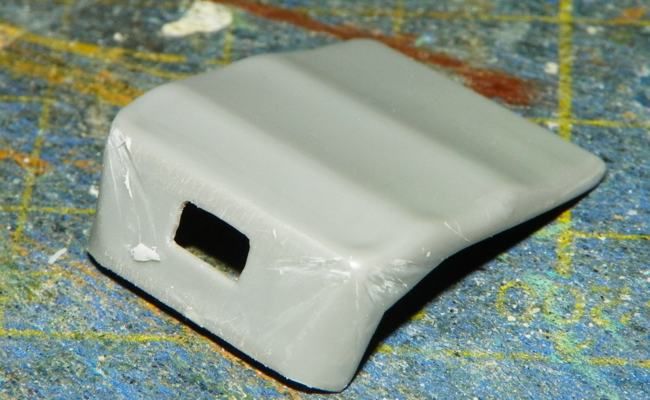
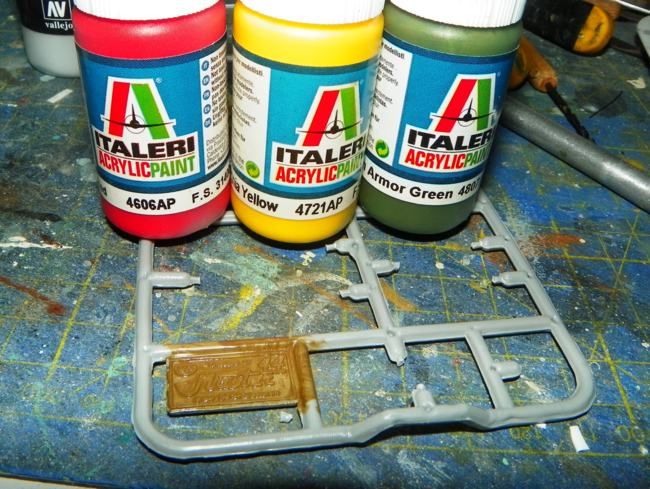
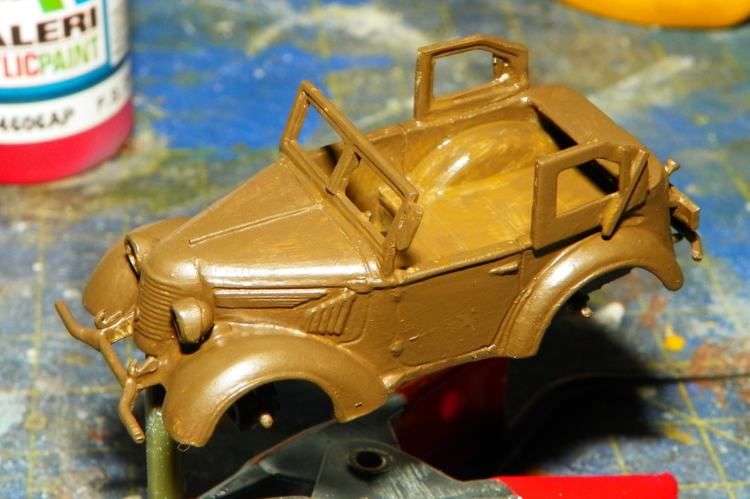
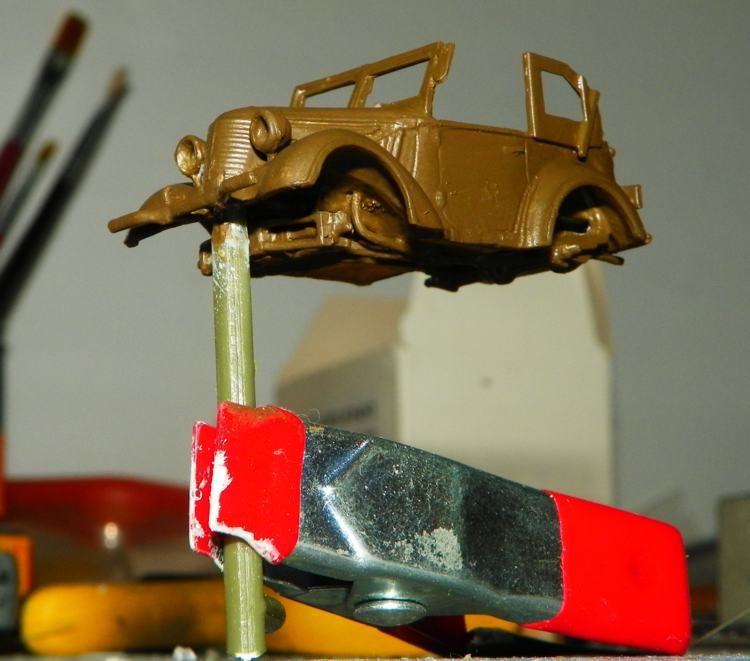
ready for paint:
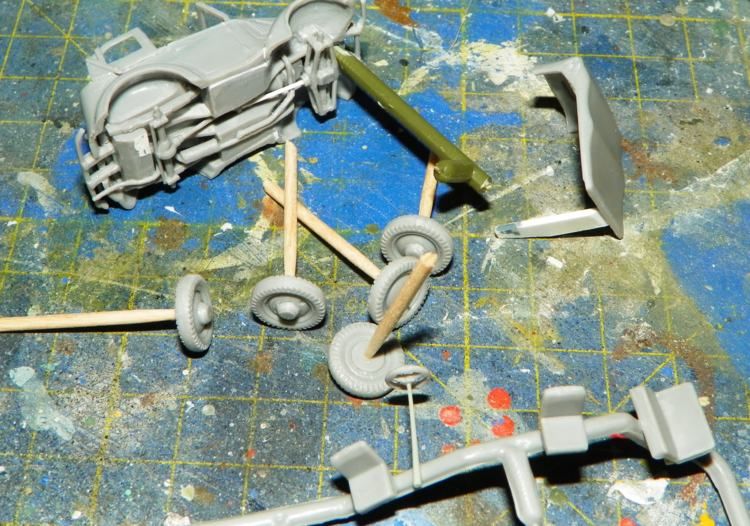
homemade khaki color Propeller

and go with brushes, at the end about 4 layer of khaki after the primer i did
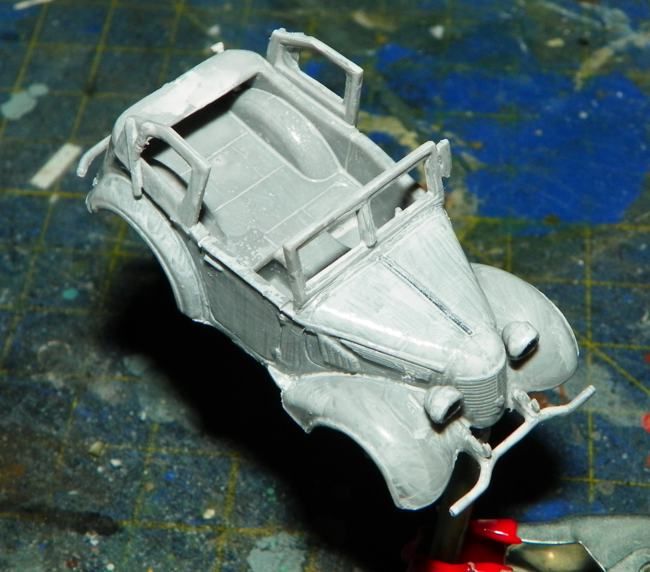
homemade dope color too
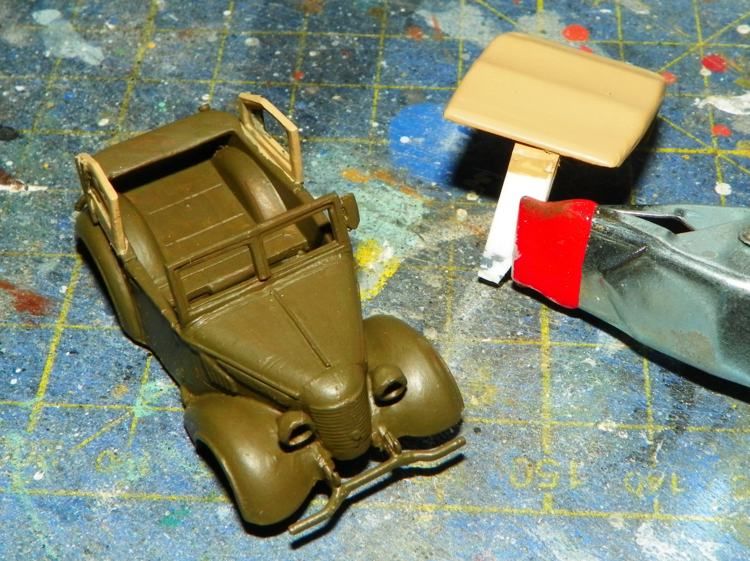
Asap the sonia too, right today i painted it with first glossy layer for decals :)

At the next!

  • Member since
    April 2006
  • From: ON, Canada
Posted by jgeratic on Thursday, July 3, 2014 10:38 AM

According to this j-aircraft.com research, the rear canopy deck should be the same colour as the cowling - so insert your favourite cowling black here.

----------------------------------------------

Great updates everyone!

regards,

Jack

  • Member since
    October 2008
  • From: Georgia
Posted by Rigidrider on Thursday, July 3, 2014 11:35 AM

Hey John... I agree with Jack, everything I have ever seen has stated that most all single engine naval fighters had either a black cowling or a black anti glare strip between the cowl and the windscreen from the assy point and the area just to the rear of the cockpit under the canopy glass was that color.

Doug

When Life Hands You A Bucket Of Lemons...

Make Lemonade!

Then Sell It Back At $2 Bucks A Glass...

  • Member since
    November 2009
  • From: SW Virginia
Posted by Gamera on Thursday, July 3, 2014 1:41 PM

Thanks guys, I think I've been painting mine all cockpit interior though!

"I dream in fire but work in clay." -Arthur Machen


  • Member since
    October 2008
  • From: Georgia
Posted by Rigidrider on Friday, July 4, 2014 8:18 PM

OK friends, Got a bit more done today, I am putting some light chipping on the finish even though she only flew twice...

Got all her legs on and starting to fit the doors...

Thats about a funky looking angle the rear gear legs are at, but thats how they show in the picture...

Well, shes able to stand on her own now...

And the obligatory yellow on the leading edges of the wings...

Well thats about all for now, Tomorrow I start the decals...  Happy 4th all!

Doug 

When Life Hands You A Bucket Of Lemons...

Make Lemonade!

Then Sell It Back At $2 Bucks A Glass...

  • Member since
    October 2008
  • From: Georgia
Posted by Rigidrider on Sunday, July 6, 2014 7:23 PM

OK gents, I was able to finish up this weekend...

Decals appiled, but had alot of trouble getting them th suck down. Had to work them for quite a while with Micro sol ans Micro set to get them to take... Never did like Hasagawa or Tamiya decals...

Once they began to adhere and take to the surface detail, they were OK.

Dont know why the color changed in the photo, its still a nice dark IJN Green, possibly the way the dull coat absorbes the light or the lighting?

This one (outlinde) hatch looks like it silvered but it didnt, I lightly chipped the panel to simulate inspection wear.

Again, No idea why the color did this, its as I said, still a nice dark green.

All in all, This was a nice well designed kit. I had virtually no problems and for an older kit, I am pleased with the outcome.

Thanks...

Doug 

When Life Hands You A Bucket Of Lemons...

Make Lemonade!

Then Sell It Back At $2 Bucks A Glass...

  • Member since
    February 2014
  • From: Michigan
Posted by silentbob33 on Sunday, July 6, 2014 7:59 PM

Looks good Doug!  Job well done on a cool-looking plane

On my bench: Academy 1/35 UH-60L Black Hawk

  • Member since
    April 2006
  • From: ON, Canada
Posted by jgeratic on Monday, July 7, 2014 1:57 AM

Doug, really nice work on this. Yes

Can't deny it's a really unique design.

As for the pics, looks like the light source shifted - were you walking around the subject as you took photos?

regards,

Jack

  • Member since
    April 2006
  • From: ON, Canada
Posted by jgeratic on Monday, July 7, 2014 2:29 AM

A few pages back, there was a brief topic on why Japanese paint peeled so badly.   I remember reading about this somewhere before, and had more to do with primer, or rather lack of it.  In a nutshell, it was really poor manufacturing standards, as laid out here, thanks to j-aircraft once  again:

http://www.j-aircraft.com/research/weathering_question.htm

regards,

Jack

  • Member since
    October 2008
  • From: Georgia
Posted by Rigidrider on Monday, July 7, 2014 4:44 AM

Thanks Jack, thats my thoughts too, no not walking around, but it was on my lazy susan table, and was being turned, so your most likely right about that.

Thanks to you too Bob, Yeah, it is a pretty cool looking little plane.

Doug

When Life Hands You A Bucket Of Lemons...

Make Lemonade!

Then Sell It Back At $2 Bucks A Glass...

  • Member since
    November 2009
  • From: SW Virginia
Posted by Gamera on Monday, July 7, 2014 7:30 AM

Doug: Really nice work there- I wish I could move half as fast!

"I dream in fire but work in clay." -Arthur Machen


  • Member since
    October 2008
  • From: italy
Posted by bsyamato on Wednesday, July 9, 2014 4:51 AM

Great work Doug Toast another beauty jap  on the wall :)

Updates on the Sonia:

Drybrushed the bottom light grey/green too, just changed the the percentage of humbrol 78 to have ha darker color for panel lines and pure white fo highlight on panels center, the drybrush, done after few minutes of last grey layer bring a curious semiglossy finish on the bottom :)

Yellow stripes with 154, lots of thinned layers, at the end i refined the border steps formed by the tape masking, also painted black on wheels and homemade aotake on inner flaps

And after two layer of glossy coat for decals, a third was already done and this afternoon counting to put on the decals :)

At the next :)

  • Member since
    November 2009
  • From: SW Virginia
Posted by Gamera on Wednesday, July 9, 2014 7:36 AM

Again, looking good Bsyamato!

"I dream in fire but work in clay." -Arthur Machen


  • Member since
    October 2008
  • From: italy
Posted by bsyamato on Friday, July 11, 2014 12:35 PM

Thank you Cliff :)

Decals on

At the next!

GAF
  • Member since
    June 2012
  • From: Anniston, AL
Posted by GAF on Friday, July 11, 2014 6:05 PM

bsyamoto,

That is nicely done!  You do such great work on esoteric kits.  Lots of tender loving care!  :)

Gary

  • Member since
    November 2009
  • From: SW Virginia
Posted by Gamera on Friday, July 11, 2014 6:38 PM

Yes, very nice work Bsyamato- you're almost done now!

"I dream in fire but work in clay." -Arthur Machen


  • Member since
    July 2004
  • From: Sonora Desert
Posted by stikpusher on Saturday, July 12, 2014 12:50 AM

BSY's work is always a feast for the eyes. He takes kits that are not the same everyday thing, details the snot out of them with all sorts of improvised scratch work, then finishes them off beautifully. And often photogaphs them with a gorgeous Mediterranean shoreline background just to make us more jealous... Salud my friend!


F is for FIRE, That burns down the whole town!

U is for URANIUM... BOMBS!

N is for NO SURVIVORS...

       - Plankton

LSM


  • Member since
    October 2008
  • From: italy
Posted by bsyamato on Thursday, July 24, 2014 12:02 PM

Thanx for comments Guys expecially for the Stk special  words Bow Down

Heres actually full summer time (ok.. some day seems to be autumn..) and the workbench times are scarce  Paradise

Here the updates of the Sonia of two weeks Dead

Glossy clear to seal decals and washings for panel lines

And final coat of semigloss coat , two thinned layers .. it seems more like matt coat Huh?

Flap and propeller received same steps but no pictures i took Sad

At the next!

  • Member since
    November 2009
  • From: SW Virginia
Posted by Gamera on Thursday, July 24, 2014 10:42 PM

Very nice work! Almost done now!

"I dream in fire but work in clay." -Arthur Machen


  • Member since
    October 2008
  • From: italy
Posted by bsyamato on Friday, July 25, 2014 5:26 AM

Thanx Cliff

LOL .. it's about 3weeks that is almost done Embarrassed

  • Member since
    February 2014
  • From: Michigan
Posted by silentbob33 on Friday, July 25, 2014 7:49 AM

Looks really good, I can't wait to see it finished!  I love the amount of detail you put into it.

On my bench: Academy 1/35 UH-60L Black Hawk

  • Member since
    November 2009
  • From: SW Virginia
Posted by Gamera on Friday, July 25, 2014 8:20 AM

bsyamato

Thanx Cliff

LOL .. it's about 3weeks that is almost done Embarrassed

LOL, you've still made more progress than I have! 

"I dream in fire but work in clay." -Arthur Machen


  • Member since
    October 2008
  • From: italy
Posted by bsyamato on Tuesday, July 29, 2014 10:14 AM

Big SmileBig Smile

More works today and yesterday, asap will post pictures, hope few more steps and the Sonia is finished

  • Member since
    October 2004
  • From: Northern Virginia
Posted by ygmodeler4 on Tuesday, July 29, 2014 10:27 AM

Its looking gorgeous! can't wait to see her finished

-Josiah

  • Member since
    November 2009
  • From: SW Virginia
Posted by Gamera on Tuesday, July 29, 2014 1:29 PM

Yeah, looking forward to the photos Bsyamato.

"I dream in fire but work in clay." -Arthur Machen


  • Member since
    April 2006
  • From: Denver, Colorado
Posted by waynec on Tuesday, July 29, 2014 5:01 PM

ok my SPAA is on hold because i hate indy track so i will be doing something in 1/72 or a 1/35 TYPE 82 6x6 C&C vehicle, probably with  crew and a very interesting base.

Никто не Забыт    (No one is Forgotten)
Ничто не Забыто  (Nothing is Forgotten)


  • Member since
    January 2004
  • From: VARNA, BULARIA
Posted by congo79 on Wednesday, July 30, 2014 3:06 AM

The work on the Val continues. One of our respected club members turned the kit decals into custom masks wihich i didn't hasitate to use. The photos bellow are from a couple of weeks ago so they doesn't show where i'm at  the moment. All of the markings and the wing walkway are allready painted on and now it's time to fix all the boo-boo's that were inevitable /mainly lifted up paint, for my surprise there was absolutely no paint bleed under the masks/. I hope that in a few days everything will be up to scratch and i will be able to put some gloss on and start with the weathering. For the markings i used only lacquers and the red is from the outstanding range of Zero paints and is Alfa Romeo red which in my eyes is a perfect match for hinomaru red. So, enough chit chat, let's have some photos Stick out tongue !

JOIN OUR COMMUNITY!

Our community is FREE to join. To participate you must either login or register for an account.

SEARCH FORUMS
FREE NEWSLETTER
By signing up you may also receive reader surveys and occasional special offers. We do not sell, rent or trade our email lists. View our Privacy Policy.