SEARCH FINESCALE.COM

Enter keywords or a search phrase below:

Japanese Group Build Part III

90679 views
946 replies
1 rating 2 rating 3 rating 4 rating 5 rating
  • Member since
    November 2008
  • From: Central Florida
Posted by plasticjunkie on Monday, January 20, 2014 8:56 AM

bsyamato

Great scratch work on this Tenzan, it greatly improves the kit. I have a Hasegawa Jake in 1/72 that needs tons of scratch work in the cockpit. Only a resin set in 1/48 is available.  Not too much info on Jakes out there. There's only one Nakajima Tenzan left in the world and it's at the Air and Space Museum in DC.

 GIFMaker.org_jy_Ayj_O


Too many models to build, not enough time in a lifetime!!

  • Member since
    November 2008
  • From: Central Florida
Posted by plasticjunkie on Monday, January 20, 2014 8:44 AM

plasticjunkie

johnsan

Plasticjunkie - yes, 72nd. 99% of my work is in this scale. I find it more challenging than other scales and because of the challenge more rewarding. It also has a much smaller footprint on the shelf.


If my eyes Geeked and fingers would cooperate, I would build mostly in that scale. True that about the display space gained. The detail and quality of some of the kits in this scale are the same as the larger scales. 


 GIFMaker.org_jy_Ayj_O


Too many models to build, not enough time in a lifetime!!

  • Member since
    November 2009
  • From: SW Virginia
Posted by Gamera on Monday, January 20, 2014 8:33 AM

That looks really cool Bsyamato though that canopy looks like a pain to paint! I have the Hasegawa kit in 1/48th but everytime I pull it out I look at the canopy and put it back in the box!

Haven't seen you in a while, glad to see you've got your new bench up and ready.

"I dream in fire but work in clay." -Arthur Machen


  • Member since
    November 2008
  • From: Central Florida
Posted by plasticjunkie on Monday, January 20, 2014 8:27 AM

johnsan

Plasticjunkie - yes, 72nd. 99% of my work is in this scale. I find it more challenging than other scales and because of the challenge more rewarding. It also has a much smaller footprint on the shelf.


If my eyes Geeked and fingers would cooperate, I would build mostly in that scale. True that about the display space gained. The detail and quality of some of the kits in this scale are the same as the larger scales. 


 GIFMaker.org_jy_Ayj_O


Too many models to build, not enough time in a lifetime!!

  • Member since
    October 2008
  • From: italy
Posted by bsyamato on Monday, January 20, 2014 8:22 AM

Great work on markings and camo Doug :) one of my missing jap planes!

Actually out of my original workbench, arrenged a smaller one ..but is not the same thing :(

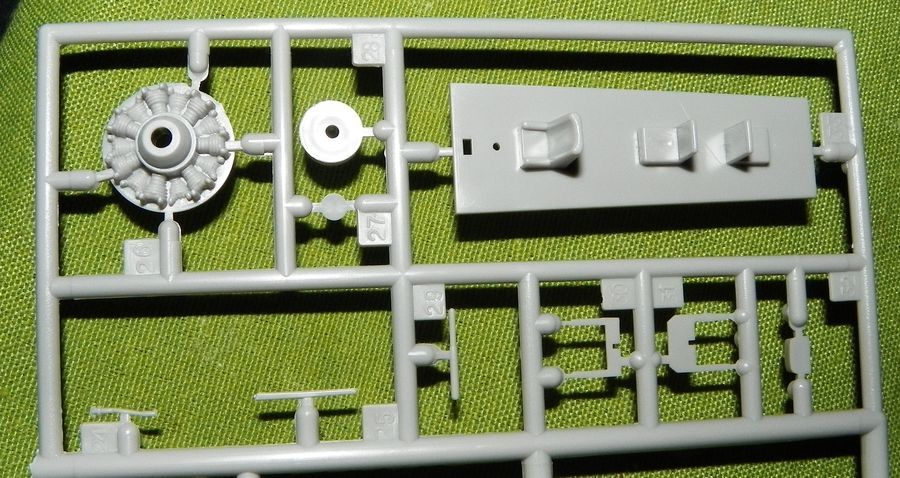
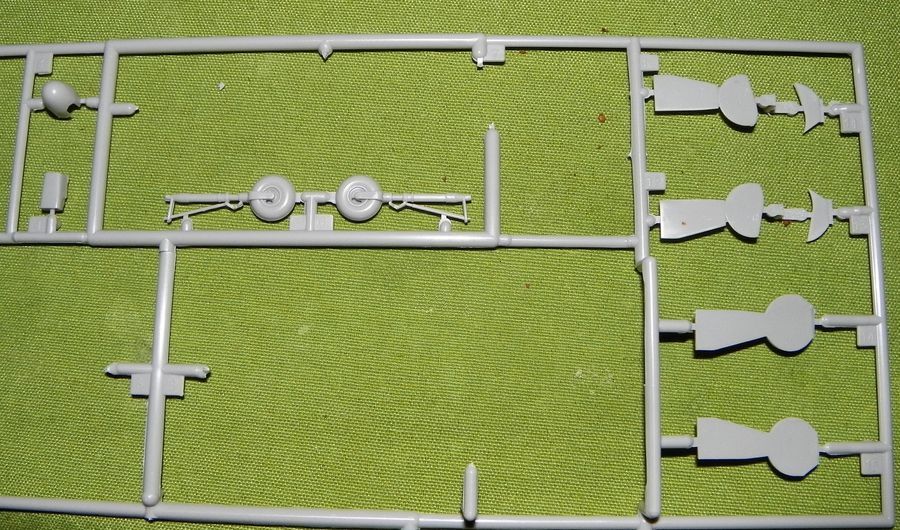
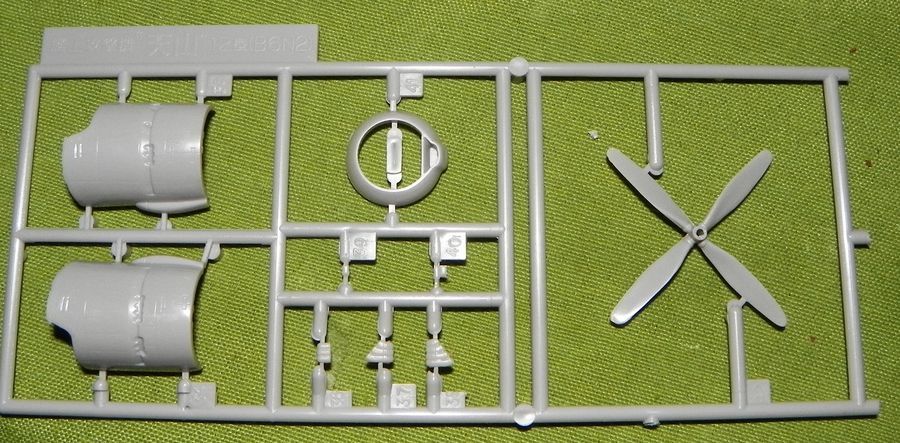
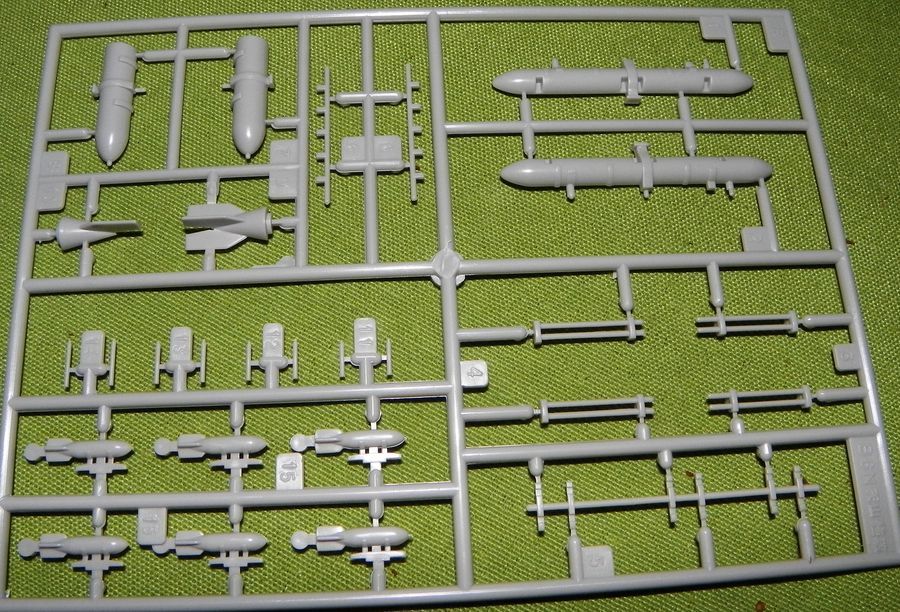
I hope soon come back with the tenzan, for now just the resume of done work from previous GB

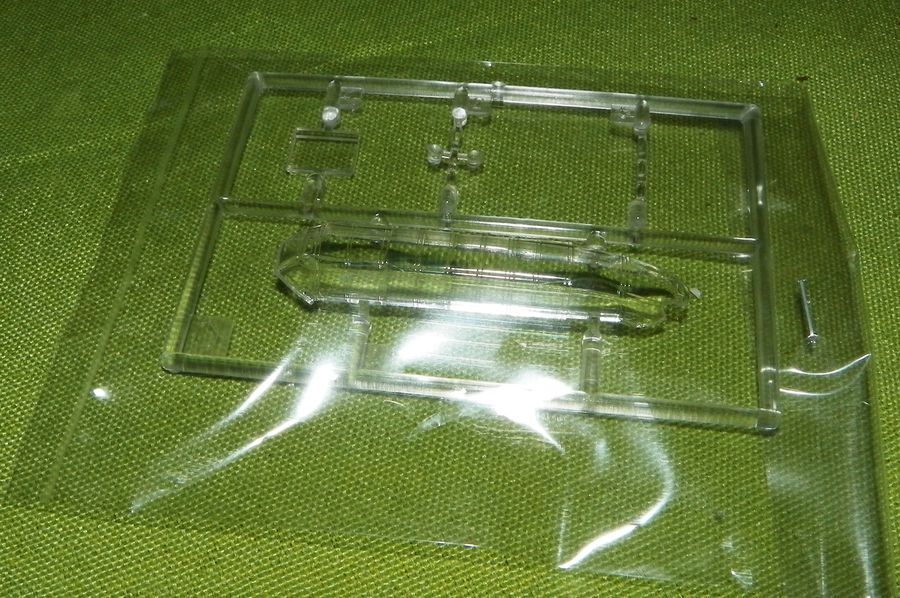
the box

the sprues withouth main parts
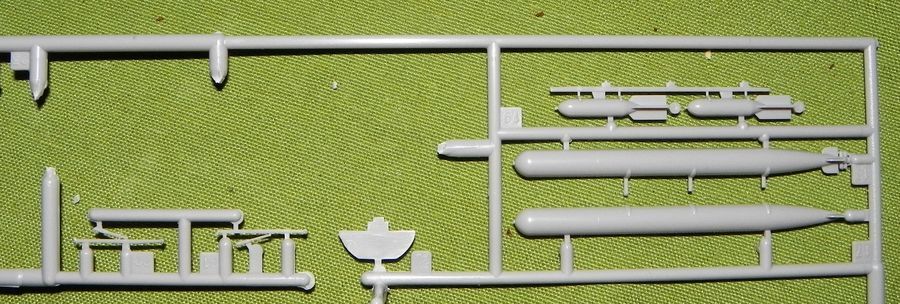
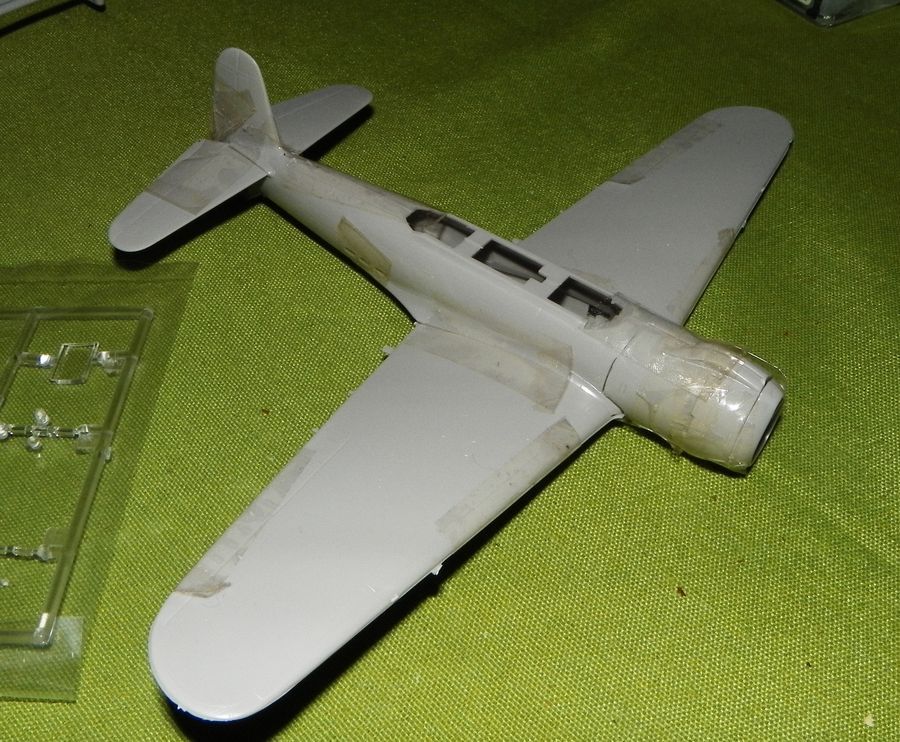
test fitting 
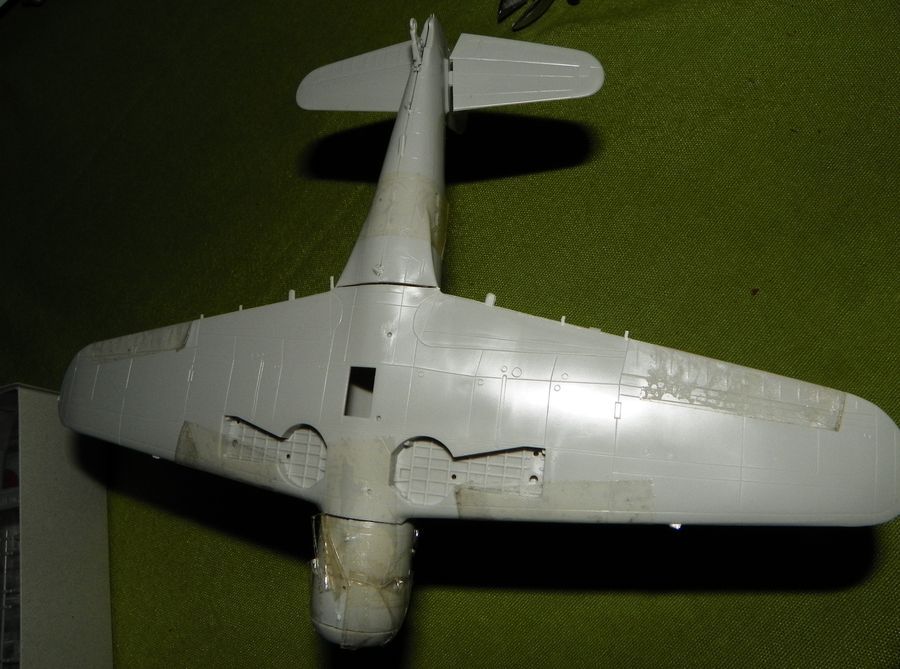
that shows "some" hole is needed in the wells!"
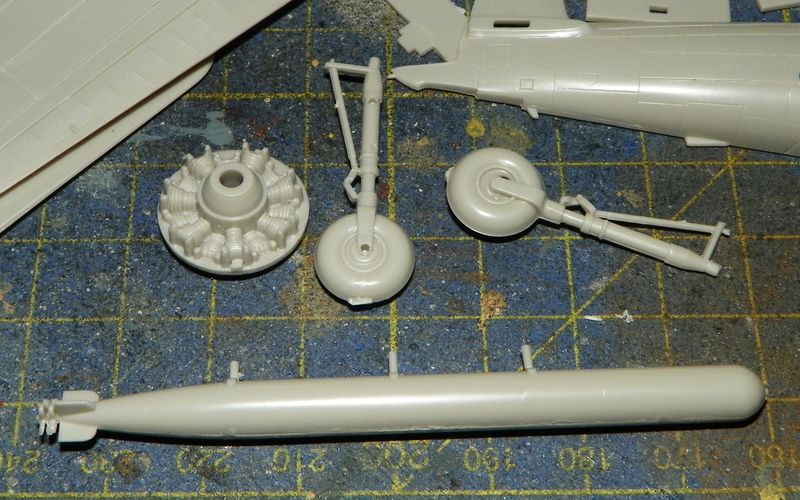
torpedo , endine and gears.. unfortunately an one piece gears with wheels :(
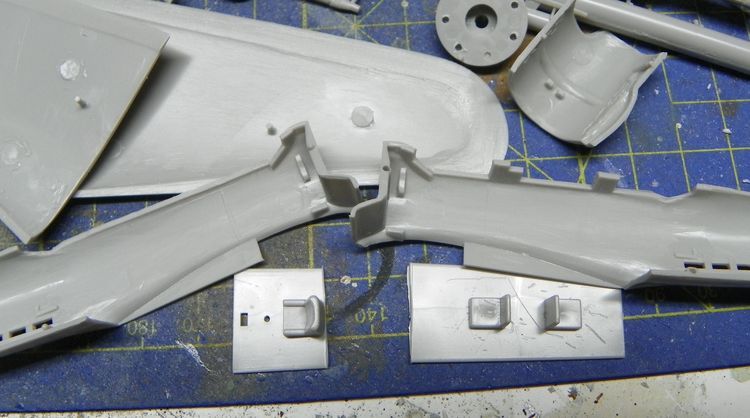
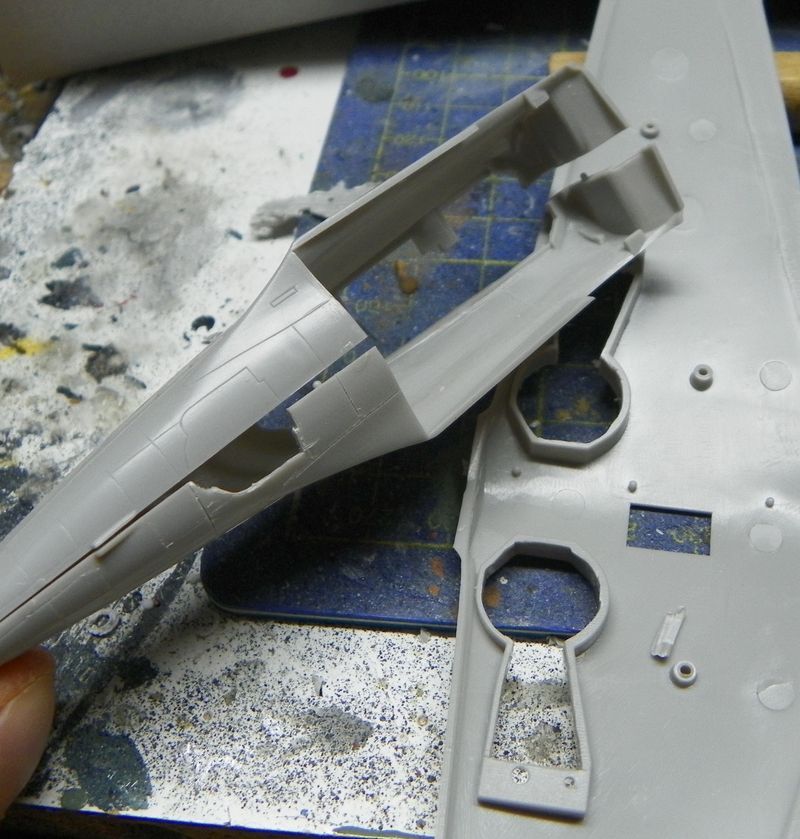
Cockpit roof cut in two as the real one, i will just use it as a dime for a full scratched cockpit
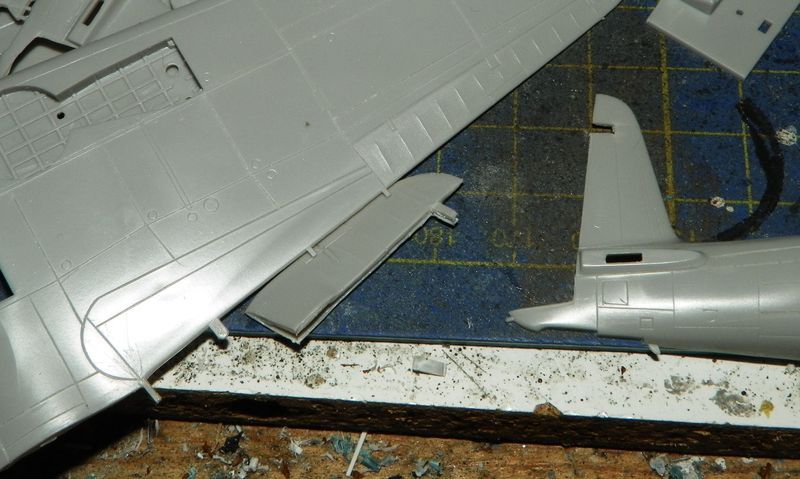
detatch and glued the vertical rudder
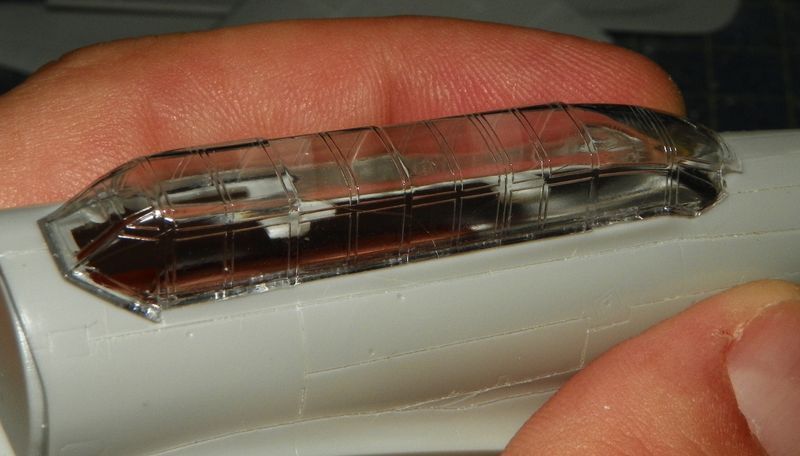
not too bad the canopy but i whish an opened one , then will heatform a new one in future.

Notice the panel lines, i redraw all of them to not lost details during the painting session
holes in the main wells to help the cutting operation
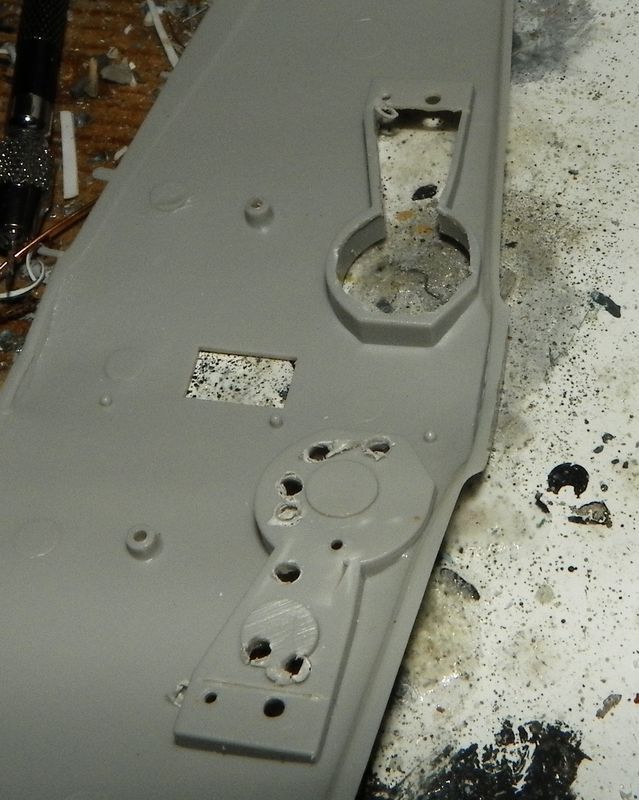
opened
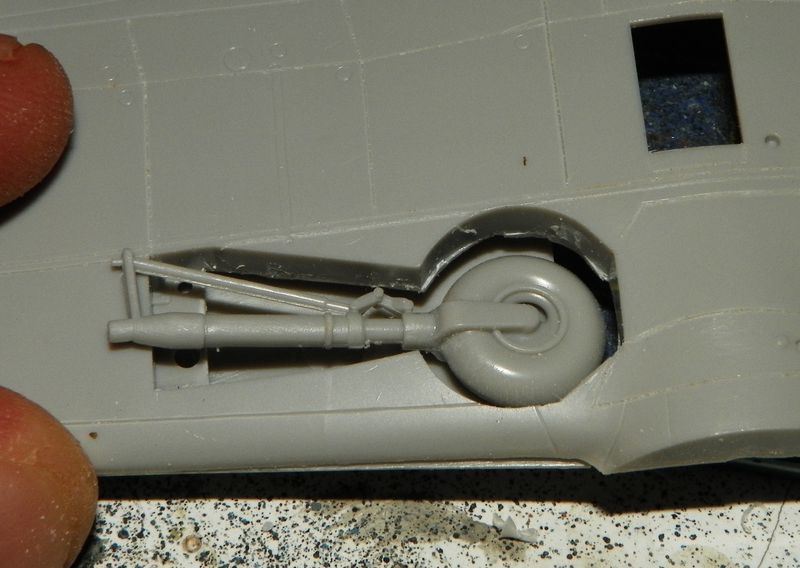
also opened the lower gun turret door
used aluminium sheet to scatch the opened door
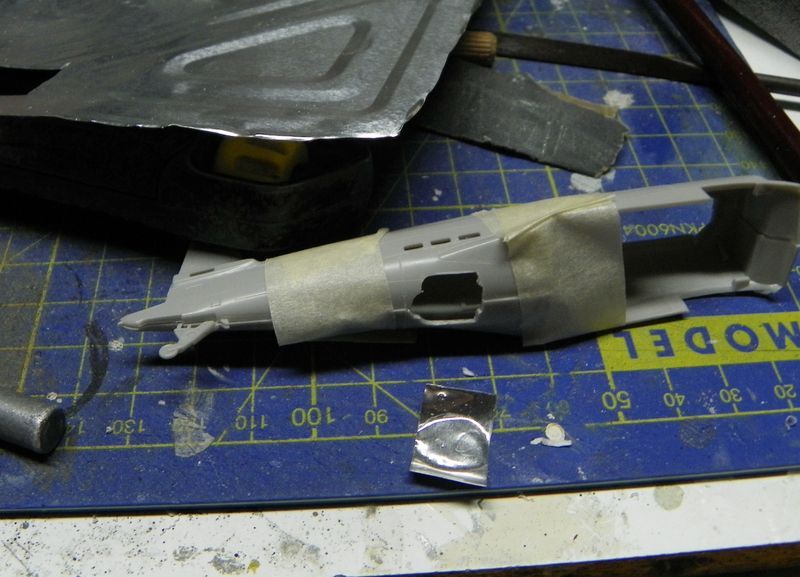
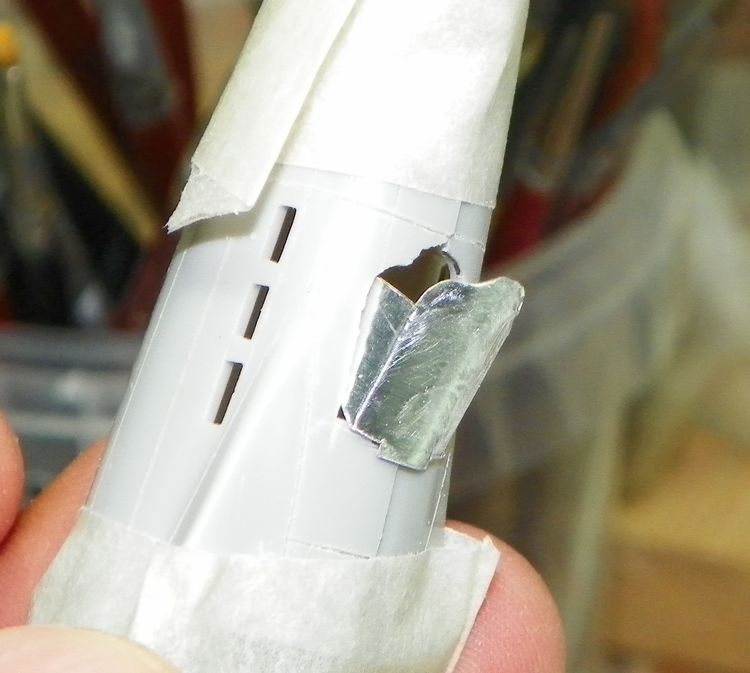
opened the cowling low air intake
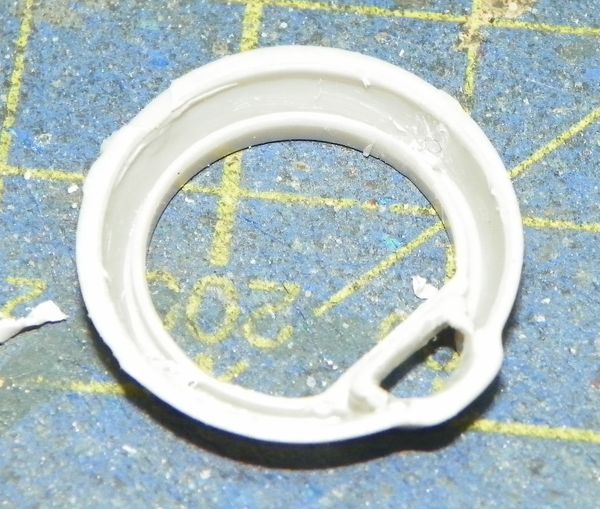
exhausts are not so good :( will try to replace with something
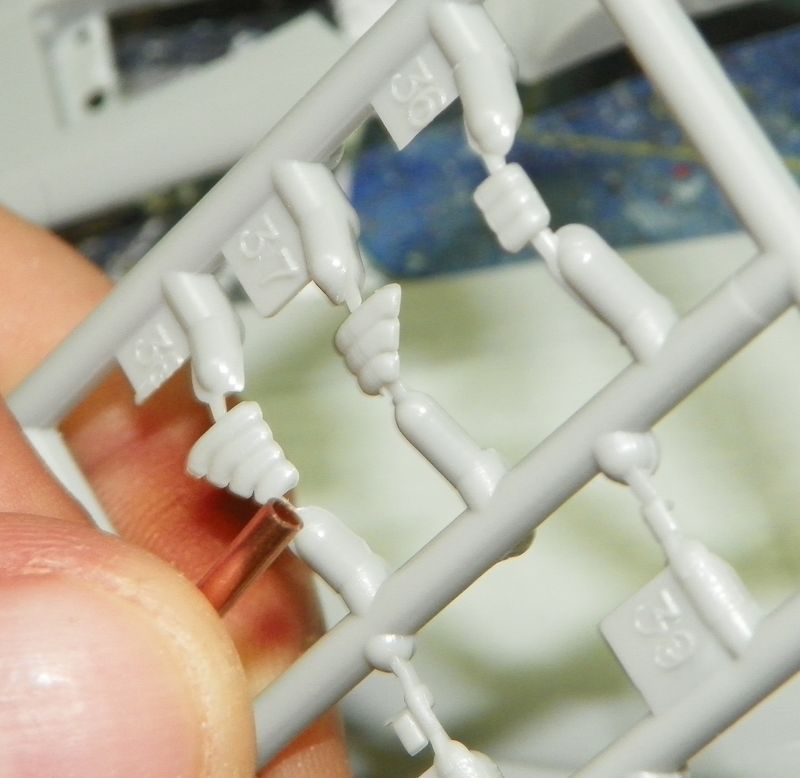
That's all for now

  • Member since
    November 2009
  • From: SW Virginia
Posted by Gamera on Monday, January 20, 2014 7:34 AM

Doug: That looks spectacular! I've tried to do the same but it always ends up, spray, spray, spray, WHAM huge gob of paint!!! Guess I need to practice more with the airbrush.

"I dream in fire but work in clay." -Arthur Machen


  • Member since
    January 2010
Posted by johnsan on Sunday, January 19, 2014 11:41 PM

Thanks for the comments, guys and for looking in.

Jgeratic - the mesh is from a nylon tea pyramidal infuser. The tea is from a US source and isn't terribly expensive should anyone be looking for really fine mesh suitable for detailing.

Plasticjunkie - yes, 72nd. 99% of my work is in this scale. I find it more challenging than other scales and because of the challenge more rewarding. It also has a much smaller footprint on the shelf.

Doug - Nice! I wouldn't worry too much about consistency, though. In one of my Tony books there is a series of photos of the same aircraft from all aspects. The blotching isn't consistent even on one side, let alone from side to side.

  • Member since
    October 2008
  • From: Georgia
Posted by Rigidrider on Sunday, January 19, 2014 7:19 PM

Thank you... you are all too kind! Tony, you are right about a pattern like that, you tend to get in a rush after awhile and it shows. That is why I take breaks inbetween, When I feel the patience fading, I stop for a bit!(LOL) All in all it took between 2-1/2 and 3 hrs to apply, and like I said, I just didnt like the way the tail was coming out, and re did it 3 times. First the tail is denser and darker in the picture I have, and secondly I didnt like the way it looked around the yellow Chutai "Crane" emblem until the last redo.

Thanks again all...

Doug

When Life Hands You A Bucket Of Lemons...

Make Lemonade!

Then Sell It Back At $2 Bucks A Glass...

  • Member since
    November 2008
  • From: Central Florida
Posted by plasticjunkie on Sunday, January 19, 2014 5:03 PM

Can u say fantabulous or fanbloodytastic! Beer

 GIFMaker.org_jy_Ayj_O


Too many models to build, not enough time in a lifetime!!

  • Member since
    April 2005
  • From: Australia
Posted by taxtp on Sunday, January 19, 2014 4:44 PM

Very well done camo Doug. That stuff is tricky to apply consistently.

Cheers

Tony

I'm just taking it one GB at a time.

  • Member since
    April 2006
  • From: Denver, Colorado
Posted by waynec on Sunday, January 19, 2014 2:48 PM

WOW. i will have to revisit this to study how you did the camo.

Никто не Забыт    (No one is Forgotten)
Ничто не Забыто  (Nothing is Forgotten)


  • Member since
    October 2008
  • From: Georgia
Posted by Rigidrider on Sunday, January 19, 2014 1:24 PM

Thanks Clemens, This one took some doing, and I still have the cowling and the weathering, but so far , Im pleased with the way its going. Take care!

Doug

When Life Hands You A Bucket Of Lemons...

Make Lemonade!

Then Sell It Back At $2 Bucks A Glass...

  • Member since
    April 2013
Posted by SchattenSpartan on Sunday, January 19, 2014 12:59 PM

You did an awesome job on that camo, bro! Not to mention all of it is freehanded! Bow Down

  • Member since
    October 2008
  • From: Georgia
Posted by Rigidrider on Sunday, January 19, 2014 12:53 PM


OK, I finally got the whole upper camo pattern done.

Just dont like the way the tail looks...

I took a Qtip and put a drop of thinner and dried with a towl to remove the excess, then rubbed around the wing Honamarus to make it look like what it was, a field applied camo.

A little scratching around the pilots cockpit entry area.

And I finally got the tail the way I wanted it. I had to retape the "Crane" pattern and run the paint over the tape to make it look as if it were applied after camo, not the other way around, Im happy with it now.

Thanks... 

Doug 


When Life Hands You A Bucket Of Lemons...

Make Lemonade!

Then Sell It Back At $2 Bucks A Glass...

  • Member since
    October 2008
  • From: Georgia
Posted by Rigidrider on Sunday, January 19, 2014 12:39 PM

Thanks PJ... I saw and am going to get one of the 32nd 219s! I have a 32nd He111 (what a beast that is!) Well just take your time, and do a section at a time. Just remember how the pattern you choose is applied and have at it! It took me almost 3 days to finish this one and I still need to do the engine cowling. The "Crane" pattern on the tail just didnt look right to me and I redid it three times before I got it like I wanted, You will be able to see the differance in the final pictures when they are posted.

Thanks

Doug

When Life Hands You A Bucket Of Lemons...

Make Lemonade!

Then Sell It Back At $2 Bucks A Glass...

  • Member since
    November 2008
  • From: Central Florida
Posted by plasticjunkie on Sunday, January 19, 2014 8:58 AM

johnsan

Is that 1/72? Great work so far !

Doug

Great job as usual dude! That paint job is looking meaner by the day. Speaking of squiggly lines, I want to do that type of camo on the big Revell 1/32 He 219 that I have and with a huge area to cover it should be a hair pulling session for me if I go freehand.

 GIFMaker.org_jy_Ayj_O


Too many models to build, not enough time in a lifetime!!

  • Member since
    October 2008
  • From: Georgia
Posted by Rigidrider on Sunday, January 19, 2014 7:09 AM

Thanks again Guys... Cliff, I started with the masking on the tail, then found that I wasnt getting the "look" I was wanting so I switched to doing it free hand. Yes at times its funny, your going along just fine with the airbrush, I will add a few more drops of paint and the pattern goes totally different then it was. I use a gravity fed gun, and have found that if you remove the nozzle (the very last piece that protects the needle) and slightly increase the air pressure (5 psi for my needs) and get up close and personal with the tip,(about 1/4 in. from the surface) You can get damn near a pencil line spray, depending on the size of needle

Mine go .02, .03. and .05 in size. This takes alot of practice and patience, and a VERY light touch on the trigger. If you open too much you get a splotch, if not enough your too light and will not appear as you want. For goodnes sake , Be careful not to bump the needle tip and bend it! It is near impossible to straighten after its been damaged. Sounds like Im speaking from experiance(lol) Also remember to back flush your gun every now and then to clear paint passages and it also helps to keep paint mixed in reservoir, and clean tip at times to clear "dry tip" and buildup on needle.

Sorry, didnt mean ti get long winded, but I do have a passion for the airbrush and its abilities, with some experamenting and practice, we can achive some amazing results, and I am still learning every day!

Doug

When Life Hands You A Bucket Of Lemons...

Make Lemonade!

Then Sell It Back At $2 Bucks A Glass...

  • Member since
    April 2013
Posted by SchattenSpartan on Sunday, January 19, 2014 6:41 AM

Oh boy, that's some great painting work, buddy!

  • Member since
    February 2011
Posted by GreySnake on Sunday, January 19, 2014 6:35 AM

Nice work johnsan!

Doug that Oscar is looking awesome! Can't wait to see it completed.

Planning to start on my Zero today. About to finish my 1/48 HE-111 so that will open up some bench space. Hopefully pictures are to follow later on today.

David

  • Member since
    November 2009
  • From: SW Virginia
Posted by Gamera on Saturday, January 18, 2014 11:44 PM

Johnsan: Looks really cool, I'm impressed with the detail there on the machine gun. And that's interesting- I just figured the kits came from the factory with cellophane already on them with just the boxes and instructions maybe different depending on where they were being sent.

Doug: I love the tail arrow there, super cool way to pull it off and very nice results. I was about to ask if you were free-handing the camo pattern or using a mask until I saw the mask in a couple of your photos there! I've got to try another camoed aircraft like that if my airbrush was acting all stupid on me lately.

Jack: You've only got 11 and a half months to go in the GB! Big Smile Very cool, nice to see something a little different, that's going to be tiny in 1/72nd. 

"I dream in fire but work in clay." -Arthur Machen


  • Member since
    October 2008
  • From: Georgia
Posted by Rigidrider on Saturday, January 18, 2014 8:06 PM

Thank you Jack... Yeah, the curve of the fuselage is a little more difficult, in the 1st and 3rd picture you can see my masks, You have to try and roll the mask slowly over the curve at the same time your spraying. I also spray from the edge of the mask inward towards the center to avoid the underspray. Also I dont apply too heavy a coat at one time. I should have the pattern done by tomorrow.

Take care...

Doug

When Life Hands You A Bucket Of Lemons...

Make Lemonade!

Then Sell It Back At $2 Bucks A Glass...

  • Member since
    April 2006
  • From: ON, Canada
Posted by jgeratic on Saturday, January 18, 2014 4:10 PM

johnsan - cool little build you got going there.  What did you use for the mesh at the back of the turret?

Doug - very nice progress.  You know, when I think about the way you applied the homemade masks, I'm very impressed witht the result.   There is no noticeable under spray, particularly on the curve of the fuselage.

------------------------------------------------

I'm still waiting on the shipment of an order from eastern Europe.  They have in stock the Claude, but still trying to find me the Nakajima A4N1.

regards,

Jack

  • Member since
    October 2008
  • From: Georgia
Posted by Rigidrider on Saturday, January 18, 2014 3:03 PM

Super looking armor Johnsan! I've tried in the past but have never had much luck with armor. I do love watching them being built, maybe I will learn something someday!

Any way... A little more done on the Oscar...

This is the markings of the 54th Sentai 3rd Chutai, The Pilot is WO Akira Sugimoto.

This camo was a crudely applied field version adapted by the Sentai.

This was WO Sugimoto's personal aircraft marking.


When Life Hands You A Bucket Of Lemons...

Make Lemonade!

Then Sell It Back At $2 Bucks A Glass...

  • Member since
    January 2010
Posted by johnsan on Friday, January 17, 2014 9:16 PM

Painted Hinomaru do look good and painting is the best way to match reds if you're painting other red markings. I use an Olfa compass cutter much like the one shown upthread. It works well if the blades are sharp.

Just as an aside regarding the Bandai factory sealed kit. Bandai and other Japanese kit manufacturers don't seal their kits. When I go to a hobby shop (I live in Japan), kits are unsealed. Generally you can look inside at the contents. The shops that do have sealed kits seal them themselves. Bigger commercial outlets like Yodobashi Camera tape the boxes with cellophane tape.

Enough of that, back to the bench. The Type 10 is glued together enough to throw a coat of primer at it. I had a holdup in the build losing a part to the carpet monster (plamo Gojira?). It's a small part for a loudspeaker fairing present on the prototype, but modified for the production. Not being able to the part, I scratched one. It looks decent under the primer.

The speaker is the small white thingey at the top of the hull. My intent was to this model quick and dirty OOB. So much for that. Which means I needed to add the mesh on the bustle basket that the kit lacks.

So. The kit has been pieced together and sprayed with Mr Surfacer 1500 black. Tomorrow it will get a coat of Tamiya XF-72 Brown (JGSDF).

  • Member since
    October 2008
  • From: Georgia
Posted by Rigidrider on Friday, January 17, 2014 4:42 AM

Hey jack, nice looking tool! actually I use the film with the hole cut in it. Now ... you can use the disc you cut out but the way I have made them, the disc is pretty much cut up when finished. You could however just cut the disc from another piece, if desired. Not sure if the cutter on that tool would easily cut the clear that I use, I would have to measure but I believe it would be too much for that cutter. The thickness I use is about the thickness of a card stock or possibly an index card thickness. I get it at hobby lobby in a sheet about 24" by 36" ? again I will measure later and let you know. I usually cut and leave enough around the outside th make a handle to hold while painting. the fuselage being curved can be a bit tricky and I just hold against it best as I can and spray carefully around edges. Later today, I'll take some pictures and show you what I have done. Take care...

Doug

When Life Hands You A Bucket Of Lemons...

Make Lemonade!

Then Sell It Back At $2 Bucks A Glass...

  • Member since
    November 2009
  • From: SW Virginia
Posted by Gamera on Thursday, January 16, 2014 7:50 PM

Thanks Doug, just going to have to try that.

Interesting tool there Jack, looks like it would make it really easy.  

"I dream in fire but work in clay." -Arthur Machen


  • Member since
    April 2006
  • From: ON, Canada
Posted by jgeratic on Thursday, January 16, 2014 6:56 PM

Doug, looking really good, and thanks for the tip on the home made masks.  

Still not sure, but is it the cut out disc, or the outer portion of the acetate that is used as a mask, and do you use tape to hold in place when ready to spray?

I've seen before a compass tool that holds a cutting blade instead of  drawing instrument - that would really come in handy here.

example;

regards,

Jack

  • Member since
    October 2008
  • From: Georgia
Posted by Rigidrider on Thursday, January 16, 2014 6:26 PM

Thanks Tony... What I did was to take a compass and scribe the right sized circle on the acetate then carefully cut it out, being clear and able to be seen through, it makes it easy to line up where you need evenly on both sides of the wings. The smaller fuselage markings are done the same way, just cut the white mask slightly larger then the red one, spray the white, allow to dry, then again being the mask is clear you can line it up evenly on thr white and spray your red.

You only need one of each and a little lacquer thinner will clean the paint off the mask and be ready to use again. I have done german national markings the same way, but they are a bit more complex and involve several more masks and steps.

If you dont have a compass handy just lay your clear sheet over a decal and trace the circle that way.Hope that helps, and I can take pictures and post the pieces I made if you would like.

Take care

Doug

When Life Hands You A Bucket Of Lemons...

Make Lemonade!

Then Sell It Back At $2 Bucks A Glass...

  • Member since
    April 2005
  • From: Australia
Posted by taxtp on Thursday, January 16, 2014 5:22 PM

I agree, it does look a lot better than decals Doug. I'm interested in how you use the clear acetate for it.

Cheers

Tony

I'm just taking it one GB at a time.

  • Member since
    October 2008
  • From: Georgia
Posted by Rigidrider on Thursday, January 16, 2014 2:52 PM

Thanks guys... They are actually real easy to do with a compass and some clear acetate sheeting, and its the only way I can get the thinning faded paint look without doing alot to the decals. I found some very interesting things out about my aircraft and pilot I'll share later. I now now that neither survived the war, But the story of their demise I thought was very interesting. I wasnt even looking for the pilot at the time but was reading about the Sentai when I ran across the story.

Doug

When Life Hands You A Bucket Of Lemons...

Make Lemonade!

Then Sell It Back At $2 Bucks A Glass...

JOIN OUR COMMUNITY!

Our community is FREE to join. To participate you must either login or register for an account.

SEARCH FORUMS
FREE NEWSLETTER
By signing up you may also receive reader surveys and occasional special offers. We do not sell, rent or trade our email lists. View our Privacy Policy.