SEARCH FINESCALE.COM

Enter keywords or a search phrase below:

P-40 GB 2014

55642 views
508 replies
1 rating 2 rating 3 rating 4 rating 5 rating
  • Member since
    June 2013
Posted by bvallot on Thursday, July 10, 2014 12:11 AM

Here's a quick update.  Reposted from my WIP.  

I think I've got this Allison back on course. I have had to be very patient for things to set up before moving on.  Everything is so tiny at this scale. But.. I'm back on DEFCON 5...so crisis averted.  =P

I had hoped to be a little further than this so I can move this along and get her off my bench before the deadline of the P-40 GB. Here's where I'm at now:

I've put all this back together and finally made a few more additions.  Also, I was able to marry the Allison to the mounting brackets.
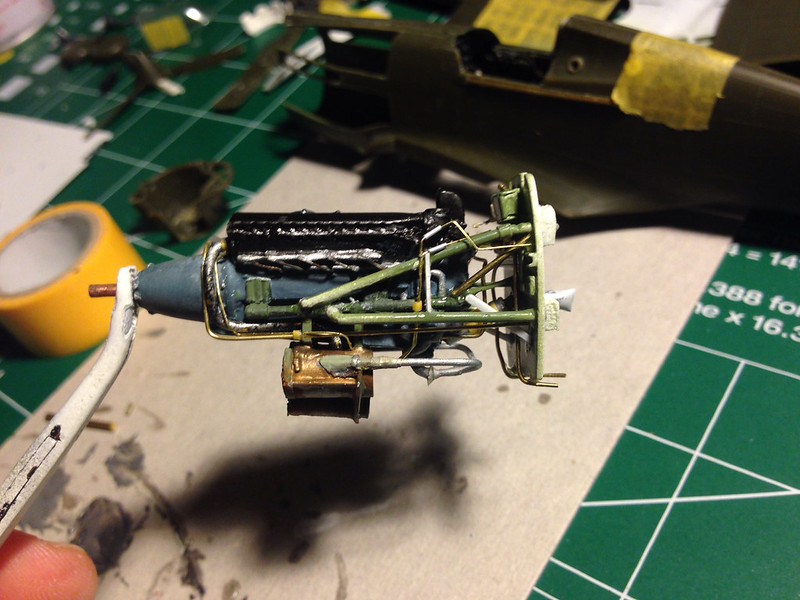
 image by brittvallot, on Flickr

 image by brittvallot, on Flickr
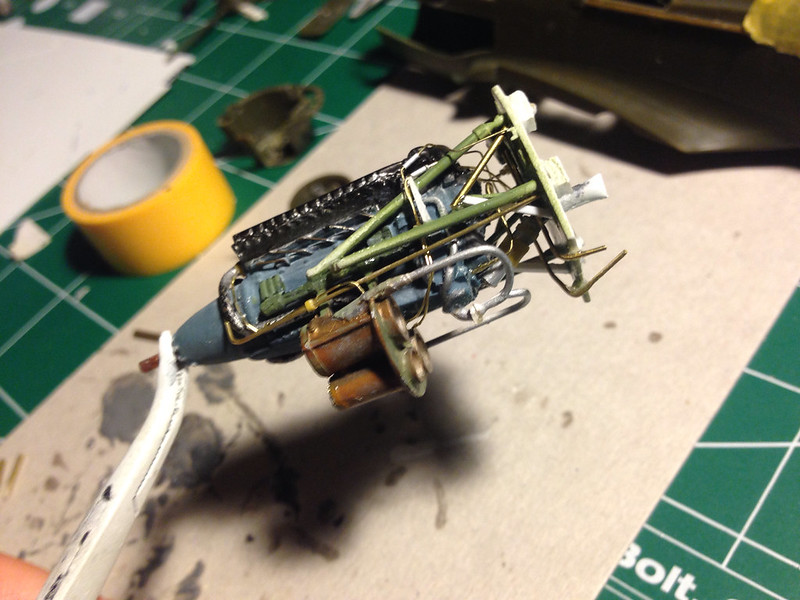
 image by brittvallot, on Flickr
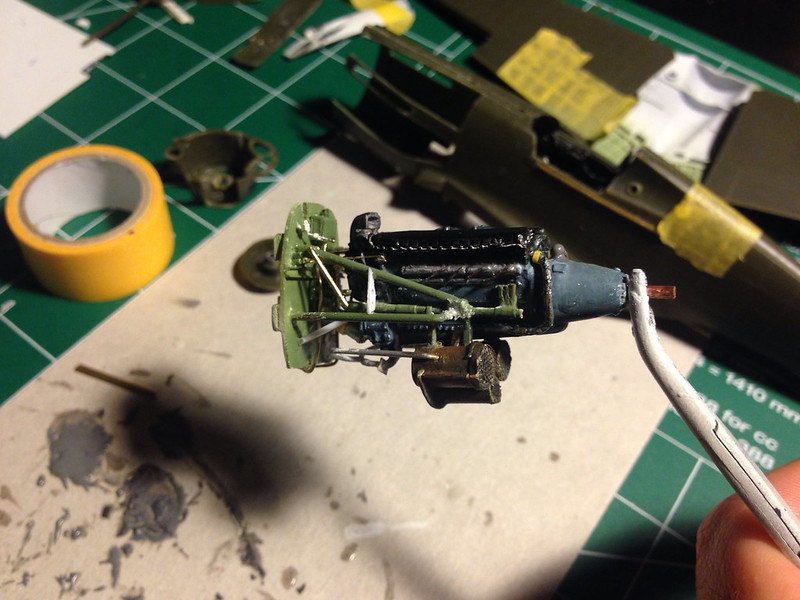
Just a few more odds and ends and I'll have the .50 cals back reinstalled, then I can finally put this part to rest and move on to the fun part...painting!  =D
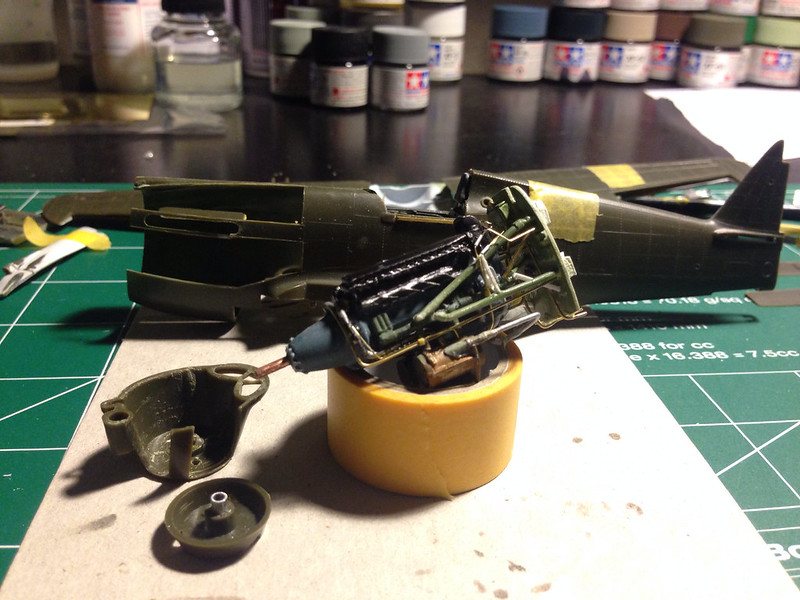
 image by brittvallot, on Flickr

On the bench:  

Tamiya F4U-1  Kenneth Walsh


  • Member since
    April 2010
Posted by Theuns on Wednesday, July 9, 2014 12:19 PM

I have heard they were interior as the glazing was put in before final "theatre colors" were applied, I stand to be corrected.

Theuns

  • Member since
    June 2013
Posted by bvallot on Wednesday, July 9, 2014 11:11 AM

Typically, that was the same color as the exterior colors nearby.

On the bench:  

Tamiya F4U-1  Kenneth Walsh


  • Member since
    October 2013
Posted by ajd3530 on Wednesday, July 9, 2014 11:04 AM

Thanks missvol.

Question guys. The area of the fuselage underneath the glass behind the cockpit; what color is it supposed to be? Interior color, or exterior color?

  • Member since
    November 2003
  • From: State of Mississippi. State motto: Virtute et armis (By valor and arms)
Posted by mississippivol on Tuesday, July 8, 2014 7:47 PM

Nice lookin' cockpit, AJ!

  • Member since
    October 2013
Posted by ajd3530 on Tuesday, July 8, 2014 7:09 PM
Well finally got started on my L model. Cockpit had decent detail, tried to make it pop with a dry brushing of aluminium and sone chalk pastels.


  • Member since
    November 2003
  • From: State of Mississippi. State motto: Virtute et armis (By valor and arms)
Posted by mississippivol on Friday, July 4, 2014 10:56 PM

Dittos on the engine work!

  • Member since
    October 2008
  • From: Georgia
Posted by Rigidrider on Friday, July 4, 2014 9:26 PM

BV... Good lookin engine!

When Life Hands You A Bucket Of Lemons...

Make Lemonade!

Then Sell It Back At $2 Bucks A Glass...

  • Member since
    April 2010
Posted by Theuns on Friday, July 4, 2014 1:53 PM

Very nice looking engine there!

Theuns

  • Member since
    October 2004
  • From: Northern Virginia
Posted by ygmodeler4 on Friday, July 4, 2014 12:17 AM

Looking good to me...as far as the magnets, I have never used them on a model. But in all other things I've tried using them for...they work terribly when I need them too, and magnificently when they shouldn't.

All kidding aside, not sure how I would try to pull it off but I'm sure someone will chime in with a good idea.

-Josiah

  • Member since
    June 2013
Posted by bvallot on Thursday, July 3, 2014 10:33 PM

So, I got a little progress going on this Allison build up.  Started adding more rods, probes, and hoses to this engine.  Hope to get up finished by Tuesday so that I can finally get it all installed.  I am very wary of where I will locate the magnets in order to pop the panel on and off for viewing.  If anybody out there has had experience with this sort of thing...I'm all ears. =]

 image by brittvallot, on Flickr

 image by brittvallot, on Flickr

 image by brittvallot, on Flickr

On the bench:  

Tamiya F4U-1  Kenneth Walsh


  • Member since
    June 2013
Posted by bvallot on Thursday, July 3, 2014 10:26 PM

Ah,  that's right. Looking forward to seeing more.  

We've got to hustle!  Time's running a little short now. =P

On the bench:  

Tamiya F4U-1  Kenneth Walsh


  • Member since
    October 2008
  • From: Georgia
Posted by Rigidrider on Wednesday, July 2, 2014 11:24 AM

There is a good picture of Joanne in the Signal/Squadron P40 book with the tank turned backwards. Not sure why though, aerodynamics (?) maybe?

When Life Hands You A Bucket Of Lemons...

Make Lemonade!

Then Sell It Back At $2 Bucks A Glass...

  • Member since
    December 2003
  • From: Charleston, SC
Posted by sanderson_91 on Tuesday, July 1, 2014 7:53 PM

Hey BV,

I am doing the plane with the backwards mounted drop tank which is actually a napalm tank, if what I've read is correct.  The plane is #49 Joanne of the 89th Fighter Squadron.  

Steve


  • Member since
    June 2013
Posted by bvallot on Sunday, June 29, 2014 8:11 PM

Steve, from what I can see it looks like you are on top of that P-40! =]  The cowl flaps are a nice upgrade, and the cockpit is looking sharp too.  The wing root is the one thing I'm most concerned with nailing on That Revellogram P-40B.  Hopefully, I'll have the same luck if I happen to find a need fix anything.

Refresh my memory...which paint scheme are you doing again?  Didn't your kit have the backward drop tank in the photo?

On the bench:  

Tamiya F4U-1  Kenneth Walsh


  • Member since
    November 2003
  • From: State of Mississippi. State motto: Virtute et armis (By valor and arms)
Posted by mississippivol on Sunday, June 29, 2014 2:41 PM

That's lookin' good, Steve!

  • Member since
    December 2003
  • From: Charleston, SC
Posted by sanderson_91 on Sunday, June 29, 2014 10:22 AM

Here are some progress shots of my P-40N.  I don't get a lot of bench time this time of year, but I'm slowly making progress.  I had some nasty wing-root gaps to putty and fabricated new bomb/napalm tank braces as the kit parts didn't hold the napalm tank in the correct position.  Added some cowl flaps from the AMT P-40. 

Steve


  • Member since
    October 2008
  • From: Georgia
Posted by Rigidrider on Sunday, June 29, 2014 10:13 AM

MV... I think you did a good job... All in all its a sharp , clean, good representation of a fine old warbird! Silvering of the decals is one of my major fears. You build and paint a great subject and silvered decals screw it up. The only way I've found to eliminate most of the problem is after the gloss coat is applied (if you do) is to spot treat the decal area with future floor polish and apply decal before the future is fully dried. That has worked for me most of the time, and a good treatment with Micro set dosent hurt either. Keep up the great work! Take care...

Doug

When Life Hands You A Bucket Of Lemons...

Make Lemonade!

Then Sell It Back At $2 Bucks A Glass...

  • Member since
    September 2011
Posted by fightnjoe on Sunday, June 29, 2014 7:08 AM

mississippi it looks good to me.  you did a great job with her.

joe

Veterans,

Thank You For Your Sacrifices,

Never To Be Forgotten

Where you can find me:

Workbench on FaceBook  Google Plus  YouTube

  • Member since
    November 2003
  • From: State of Mississippi. State motto: Virtute et armis (By valor and arms)
Posted by mississippivol on Saturday, June 28, 2014 12:54 PM

Thanks, y'all! The bad and ugly are not regrets necessarily, just an honest critique of my own work (which helps me to improve), and how I went about the build. The landing light for me was a happy shortcut; I really wanted to replicate what bvallot did with his, and I might pull that one off on a different build. I'm pretty happy it's complete, I haven't built a P-40 in 35+ years of modeling, and it helps complete my trifecta of a Guadalcanal Wildcat, early model Zero, and an Army P-40 at the start of WWII; it gives some perspective on the major combatants in that time frame.

BV, yes, I did rescribe...whew!!!!

  • Member since
    June 2013
Posted by bvallot on Saturday, June 28, 2014 8:38 AM

Now that I look closer at it...did you rescribe all these panel lines too!?!  I recall somebody in here doing that.  That's a lot of love going into this dinosaur.  Just saying.  Love is what keeps her together.  =]

On the bench:  

Tamiya F4U-1  Kenneth Walsh


  • Member since
    June 2013
Posted by bvallot on Saturday, June 28, 2014 8:35 AM

mississippivol: I have to agree with everyone else here.  That ain't bad at all.  The cockpit is pretty sharp.   Shortcuts aside, I can totally understand a build fall short of what you wanted to see it become...but when you still look at what you've got, it's not too hard to see you've still got a winner. =]   I mean really...how old is this kit??  It's amazing it even still fits together at all.  =D

Yes Yes

On the bench:  

Tamiya F4U-1  Kenneth Walsh


  • Member since
    April 2010
Posted by Theuns on Saturday, June 28, 2014 1:51 AM

Looking good! I will update the front page.

I too have had some bad luck with decals lately, even after a good pollish with 12000 micro mech and a glass smooth gloss they still show some silvering!

As long as you are happy with the model you have achieved the goal :-)

Theuns

  • Member since
    October 2013
Posted by ajd3530 on Saturday, June 28, 2014 1:29 AM

All the work going in is great guys. But i am especially impressed with ygmodelers weathered, beaten, sun bleached AVG ship. I have a soft spot for chipped, worn out schemes, and I believe you hit it out of the park on this one. Those P-40s were rode hard and put in the barn wet over and over, and you dipiction shows that well I think.

  • Member since
    October 2004
  • From: Northern Virginia
Posted by ygmodeler4 on Saturday, June 28, 2014 1:11 AM

Well...I looked at the pictures...loved it. Went back and read the good the bad and the ugly and I can honestly tell ya that all I really see is good...don't sell yourself short on maybe cutting some things out of it because I really do think it is a great finished piece of work. What you put into it really shows and knowing what this kit was when it was on the sprues....you've done a heck of a great job!

-Josiah

  • Member since
    November 2003
  • From: State of Mississippi. State motto: Virtute et armis (By valor and arms)
Posted by mississippivol on Friday, June 27, 2014 11:17 PM

All right, here she is! The good: I feel the cockpit kitbash went well, and the landing gear bays are an improvement. The wing join seams filled out well, also. I think the exhaust pipes held up to the hogging out pretty well. The bad: the seam scribing technique I've been using didn't work well on this plastic. I usually run some Testors cement to help clean up the lines, but it kept closing them up. The flaps have too much of a gap between them and the fuselage that I should've taken care of. The "U.S." decals silvered badly which I didn't see until I hit it with the final dullcote. The main canopy was masked too hastily and the framing has some inconsistency in the frame width; the rear parts of the canopy don't look right after gluing them in. The ugly: I got bored with it as it kept sitting there, so I took a lot of shortcuts and cut some ideas out in order to get it done. That precluded dropping and detailing the flaps, and the lack of planning in my haste left the gear bays underdetailed.

This last shot shows the landing light that the Monogram kit depicts as a bump. This was one of my shortcuts. I sanded down the bump to level it, then punched out a decal from a NASCAR Taurus light, and applied it, then overcoated in Future. Not exactly 3D, but ok from 3' away.

  • Member since
    October 2004
  • From: Northern Virginia
Posted by ygmodeler4 on Monday, June 23, 2014 9:37 PM

Thanks...it was alright....nothing a little (ok a lot) of TLC can't take care of. Next time I put it together I might try my hand at some AM

-Josiah

  • Member since
    June 2013
Posted by bvallot on Monday, June 23, 2014 8:43 PM

Blackdog: That's terrible news.  I'm sorry I'm just getting back to this thread.  I hope you bounce back quickly.

Ygmodler: That's a nice Warhawk there.  What did you think of the Revel kit?

On the bench:  

Tamiya F4U-1  Kenneth Walsh


  • Member since
    November 2003
  • From: State of Mississippi. State motto: Virtute et armis (By valor and arms)
Posted by mississippivol on Monday, June 23, 2014 8:30 PM

Thank you! I still can't believe it's pushing seven months since I snipped sprue, though it's sat there lonely a lot longer than it's been worked on.

  • Member since
    October 2004
  • From: Northern Virginia
Posted by ygmodeler4 on Monday, June 23, 2014 8:25 PM

Looking great so far!

-Josiah

JOIN OUR COMMUNITY!

Our community is FREE to join. To participate you must either login or register for an account.

SEARCH FORUMS
FREE NEWSLETTER
By signing up you may also receive reader surveys and occasional special offers. We do not sell, rent or trade our email lists. View our Privacy Policy.