SEARCH FINESCALE.COM

Enter keywords or a search phrase below:

Weekend GB: See You Next Year!

10078 views
155 replies
1 rating 2 rating 3 rating 4 rating 5 rating
  • Member since
    July 2004
  • From: Sonora Desert
Posted by stikpusher on Sunday, November 6, 2016 6:20 PM

Great work on the Mustang! In 48 hrs that makes it even more impressive!


F is for FIRE, That burns down the whole town!

U is for URANIUM... BOMBS!

N is for NO SURVIVORS...

       - Plankton

LSM


  • Member since
    January 2015
Posted by BrandonD on Monday, November 7, 2016 12:09 PM

Thanks, guys!

Lewbud, the fourth pic in the finish post would be best. The one that shows the left side from the rear quarter.

Thanks again - this was a ton of fun.

-BD-

  • Member since
    April 2005
  • From: Australia
Posted by taxtp on Tuesday, November 8, 2016 12:33 AM

That looks to be an excellent model Brandon.  Fantastic effort to get in done within 48 hours. Amazing !

Cheers

Tony

I'm just taking it one GB at a time.

  • Member since
    April 2014
  • From: Australia
Posted by lostagain on Wednesday, November 9, 2016 7:52 AM

Brandon,

Great result with the Mustang. You have a acheived a great finish. And getting a three colour camo (plus stripes) done in 48 hours is super work.

Lewbud,

Here is an offering for the GB badge, apologies to the artist:

  • Member since
    January 2015
Posted by BrandonD on Thursday, November 10, 2016 11:33 AM

Thanks!

Lewbud - I like the badge. Fortunately this one passed the "I wanna hit it with a hammer" stage, but I have a few out there...

-BD-

  • Member since
    June 2008
Posted by lewbud on Friday, November 11, 2016 10:49 PM

Sorry for not answering sooner.  Lostagain, that is a most excellent badge.  I will add it and Brandon's build to the front page tomorrow.  Two weeks to go.

Buddy- Those who say there are no stupid questions have never worked in customer service.

  • Member since
    July 2014
Posted by modelcrazy on Saturday, November 12, 2016 12:37 AM

Lebud, I'll start mine on Nov 26th.

Steve

Building a kit from your stash is like cutting a head off a Hydra, two more take it's place.


http://www.spamodeler.com/forum/

  • Member since
    June 2008
Posted by lewbud on Saturday, November 12, 2016 4:24 PM

Frontpage updated gents.  Brandon, what do you use for primer?  Do you have any problems with light colors going over it?  Modelcrazy, I will most likely join you providing family doesn't come to town.

Buddy- Those who say there are no stupid questions have never worked in customer service.

  • Member since
    November 2010
  • From: Florida-West Central
Posted by Eagle90 on Monday, November 14, 2016 8:34 AM

Hey Lewbud,

As some know, I'm making my comeback from my wifes passing and I think this will be a fun GB to get back into the swing of things.  I've moved, settled in, and have my building room set up and running!  Even bought a spray booth!!!  So I would respectfully like to request entry into the GB!

I have a bunch of those PM 1/72 Luft '46 kits that are perfect for this GB.  I know, it only takes about 20 minutes to put one together, but I spend 5 hours or more doing the painting and camo schemes!  LOL!  If I get done too early, I'll do 2 of them.  I'll send you the actually kit details and pics tonight.

Eagle90


  • Member since
    June 2008
Posted by lewbud on Monday, November 14, 2016 9:28 AM

Eagle, sorry to hear about your wife.  You are most welcome to join, so welcome aboard!Toast Will update the front page.

Buddy- Those who say there are no stupid questions have never worked in customer service.

  • Member since
    January 2015
Posted by BrandonD on Monday, November 14, 2016 3:36 PM

Eagle, my condolences on the passing of your wife. I hope the build time can be a cathartic experience for you, and I look forward to seeing what you've got planned.

-BD-

  • Member since
    January 2015
Posted by BrandonD on Monday, November 14, 2016 3:39 PM

Lewbud - I prime in Gunze Mr. Surfacer 1500 Black. I build up the paint slowly, and usually am able to get a subtle shading effect going on (I kind of rushed it on this one, but it sort of still worked out).

As for the light colors - I don't have any problems with them. For the white stripes here, I put seven drops of white in 14 drops of thinner and stirred with a toothpick that I had just slightly dipped in Neutral Grey. It helped the coverage a bit as well as toning down the starkness of the white.

The only color I have trouble with painting over black is red, so I usually undercoat it with yellow or gray. Everythng else seems to work as long as I build the paint up slowly. If I hose it on, that's where I get ridges in the paint. But that didn't happen with this build, and I think doing the white stripes first was helpful with that.

-BD-

  • Member since
    January 2015
Posted by BrandonD on Monday, November 14, 2016 3:42 PM

Here are two 15-second videos of me working the undercoat on my 1/72 Airfix Fw-190A8.

https://www.instagram.com/p/_qoWiXB5dZ/?taken-by=modelsbybd

https://www.instagram.com/p/_qpVDSB5eb/?taken-by=modelsbybd

-BD-

  • Member since
    November 2010
  • From: Florida-West Central
Posted by Eagle90 on Monday, November 14, 2016 10:05 PM

Thank you sir.  It has been a challenge to say the least.

Here are my entries for the GB.  Not sure if I'll do the same camo schemes as the box, but there they are.  Thanks for hosting the GB!

Eagle90


  • Member since
    November 2010
  • From: Florida-West Central
Posted by Eagle90 on Monday, November 14, 2016 10:07 PM

BrandonD

Eagle, my condolences on the passing of your wife. I hope the build time can be a cathartic experience for you, and I look forward to seeing what you've got planned.

-BD-


Thank you sir.  Building was a passion before her passing, now it is good theropy for me.  And with a new paint booth, I'm trying all kinds of camo schemes.  LOL!

Eagle90


  • Member since
    April 2014
  • From: Australia
Posted by lostagain on Wednesday, November 16, 2016 7:03 AM

Eagle, very sorry to hear about your wife. I can't imagine what it's like. Good to hear you are using the hobby for a bit of therapy.

I have started due to a change in work schedules, I have a few days open RIGHT NOW.

So I started this afternoon just after 1:

By early afternoon, the main body was together and I thought it would be all over really quickly. But the road wheels took for ages to clean up and put together. My dream of having base paint completed tonight was out the window.

Then there was shopping, cooking and helping with exam revision and some glasses of wine, so by the end of the day, I had only just finished the turret. And now I am wrestling with photobucket... Oh well start painting in the morning.

  • Member since
    June 2008
Posted by lewbud on Wednesday, November 16, 2016 7:32 AM

Looking good Lostagain!  Keep it up!

Buddy- Those who say there are no stupid questions have never worked in customer service.

  • Member since
    November 2010
  • From: Florida-West Central
Posted by Eagle90 on Wednesday, November 16, 2016 11:30 AM

Thank you Lostagain...great start on the tank! 

Eagle90


  • Member since
    April 2014
  • From: Australia
Posted by lostagain on Wednesday, November 16, 2016 6:28 PM

Into the paint shop this morning, and it is now green. Tried to get a bit of colour variation going by mixing the base with black for the wheels etc down low, and mixing a bit of yellow-green in for the highlights. Quite subtle, need more practice - later.

Next decaled the model (grand total of two) and hand painted the berlin recognition markings.

Decals are silvering over the cast texture on the turret, so I have slashed them up a bit and applied more setting solution. Next will be the gloss coat before some light weathering.

  • Member since
    April 2014
  • From: Australia
Posted by lostagain on Thursday, November 17, 2016 9:19 AM

Okay, it is 2:13 am and time for bed! 

Son's birthday today so plenty of family duties. But did get the gloss coat on, and after seven hours drying time, have done dot filters and pin washes.

I have taken photos as I have been working on it, will post them tomorrow.

Tracks were painted with metaliser then sealed before getting some rusty coloring.

  • Member since
    January 2015
Posted by BrandonD on Thursday, November 17, 2016 12:16 PM

Nice looking tank, Lostagain. Sorry to hear about the silvering, but I can't see it from here, so hopefully it's really slight and the solvent took care of it. Can't wait to see it finished!

I'm assuming the tracks aren't indy links if it's a weekend build?

-BD-

  • Member since
    April 2014
  • From: Australia
Posted by lostagain on Thursday, November 17, 2016 5:08 PM

Thanks Brandon,

slashing it a bit and drowning in decals olvent seemed to do the trick.

Photos from last night:

All glossed up

Tracks weathered. They are the usual Tamiya arrangemet for 1/48 sections shaped to go around the wheels. You're right Brandon, NO indy links for a weekend build!

Started with a dot filter on the turret:

Then onto the body:

And then time for bed with a pinwash added:

And now it's back to morning local time I have just under 3 hours to go so see you soon...

  • Member since
    April 2014
  • From: Australia
Posted by lostagain on Thursday, November 17, 2016 6:06 PM

2 hours to go, tracks are on.

  • Member since
    April 2014
  • From: Australia
Posted by lostagain on Thursday, November 17, 2016 8:04 PM

With 2 hours to go I was on track! These were a bit hard to get together - the instructions call for them to be built before the hull top goes on, so there is not much space, especially round the drive sprocket.

Then it moved pretty quickly, in just over an hour I had applied the flat coat, misted on some buff to give a touch of dust over the tank. An aerial was added, black pastel for exhaust and muzzle and installed the tow cables on the back. Calling it done:

Took it outside to get some good shots:

This one does show a bit of the colour variation on the top deck:

Thanks very much for running this lewbud.  It is great to do a kit in 48 hours. My build for the 1946 GB has been going for 10 months and I am yet to join 2 of the kit pieces together!

Thanks very much and look forward to seeing all the other builds on their way.

  • Member since
    January 2015
Posted by BrandonD on Friday, November 18, 2016 11:55 AM

That came out great! Looks like it just rolled off the streets of Berlin.

Nice job, and I like the subtle tonal variation to give the paintwork some depth.

-BD-

  • Member since
    April 2005
  • From: Australia
Posted by taxtp on Friday, November 18, 2016 7:04 PM

Hi Lewbud,

I'd like to have a crack this weekend please, as I have to spend a significant amount of time at home. I may have another go next weekend, as I enjoy this GB and might do more than one, but there's a good chance I will be too busy.

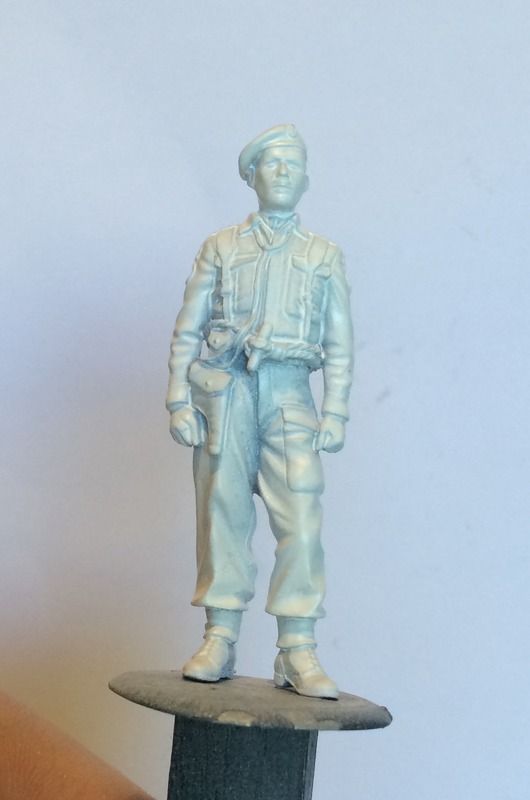
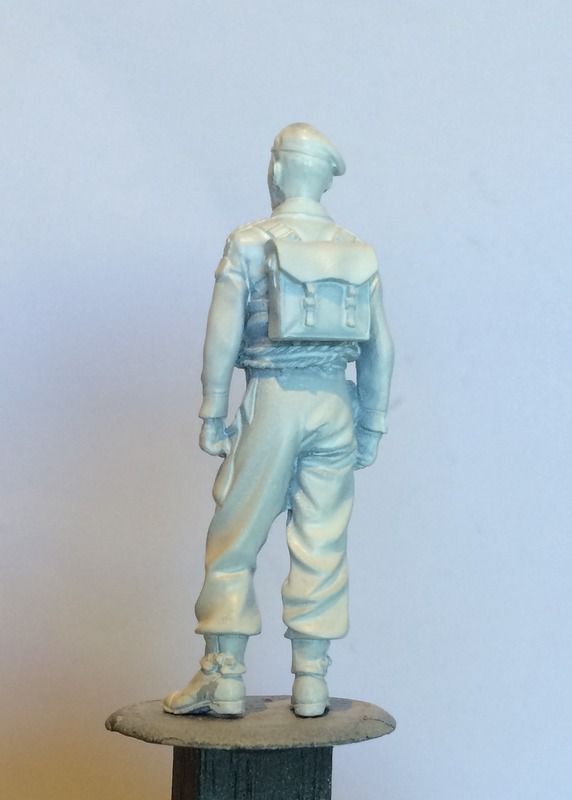
Since I've been in a figure painting mood, I'd like to introduce you to the Andrea Miniatures 54mm British Royal Marines Commando Officer from 1943.

It's a white metal kit with exquisite detail, and  Ienjoy 54mm (1/32) as it's a little larger than 1/35.

Here's the starting photos, as I started it earlier this morning. It's next to my wifes phone to record the starting time. I'm in Melbourne so it was 8.26am this morning.
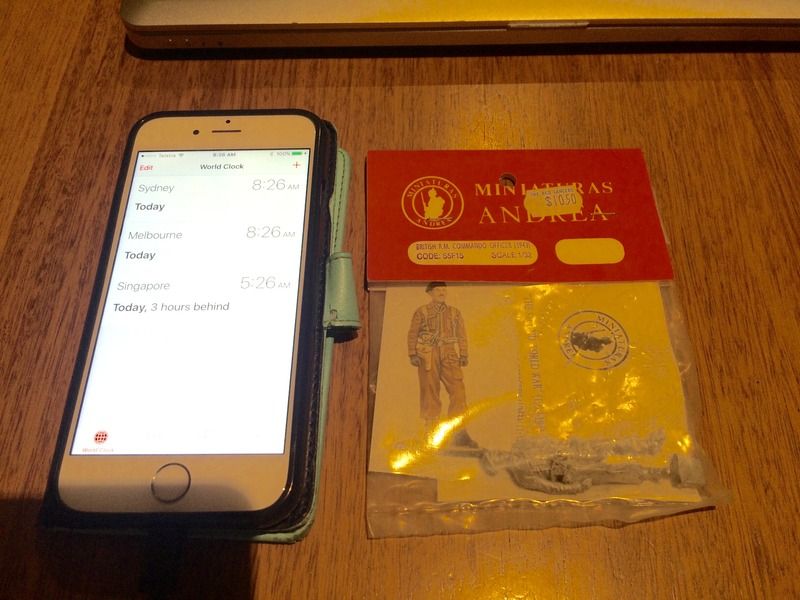
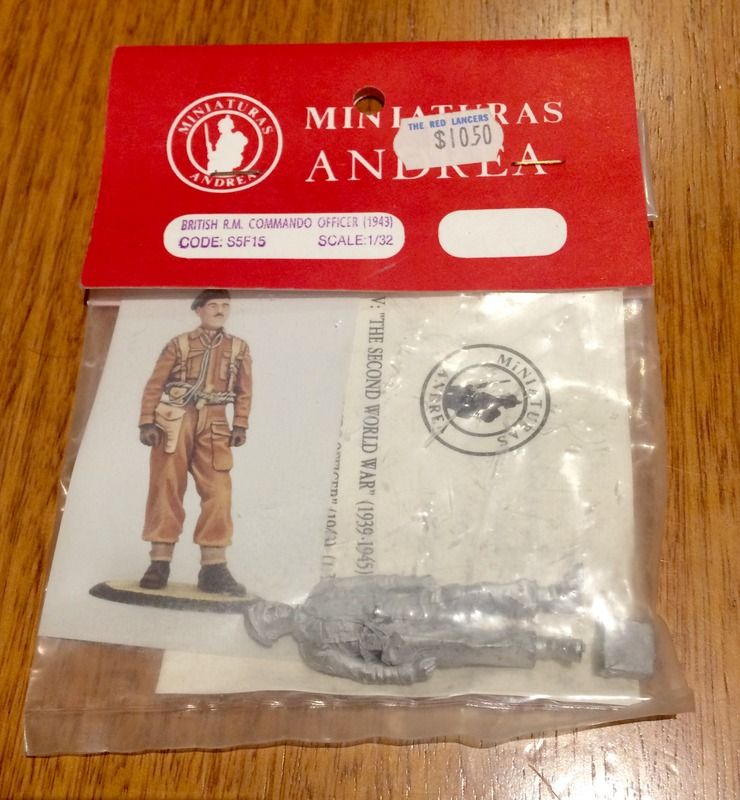
First look out of the bag. It's been in a box in the garage for over 15 years.
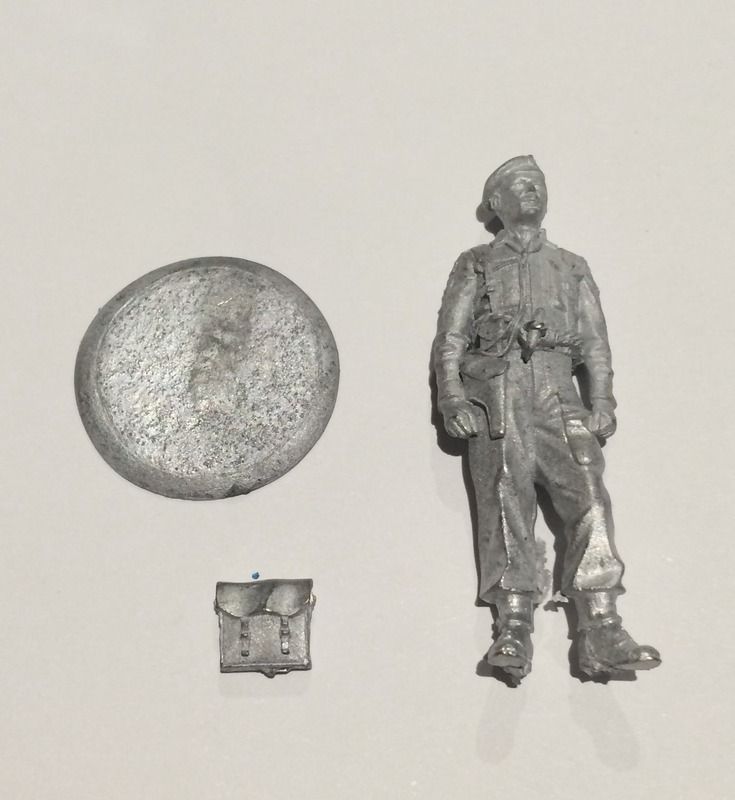
Very minor seam clean up is required. I've also given it a good scrub with a wire brush to remove surface oxidisation, then a wash in soapy water.
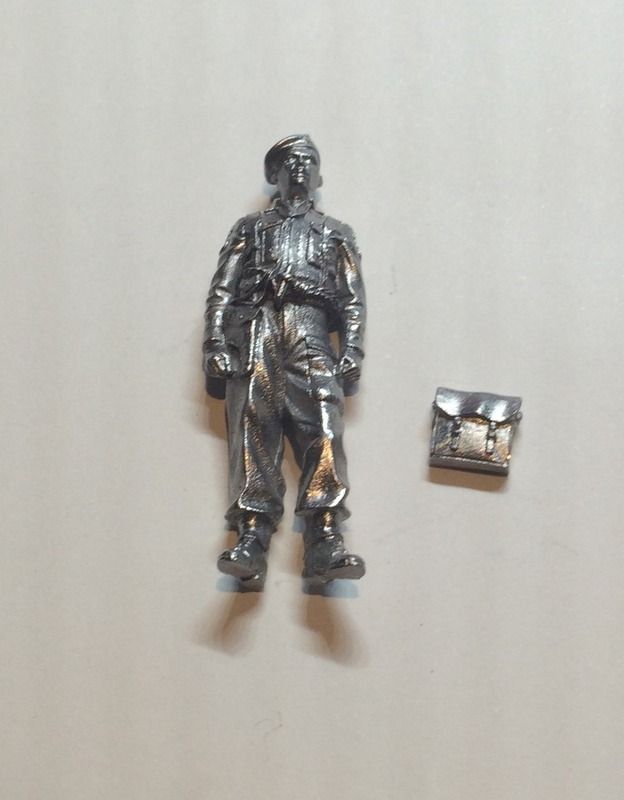
Now it's primed with Tamiya aerosol fine white primer. I'll let this harden for a little while.
Cheers

Tony


I'm just taking it one GB at a time.

  • Member since
    June 2008
Posted by lewbud on Friday, November 18, 2016 8:54 PM

Well done Lostagain!Toast  Which pic would you like for the front page?  Tony, better to ask forgiveness, than permission?  If you can pull it off, I think it will be the first figure ever for the Weekend GB.  Is it just me, or does your figure look a little like Montgomery? Go for it my friend.

Buddy- Those who say there are no stupid questions have never worked in customer service.

  • Member since
    June 2008
Posted by lewbud on Saturday, November 19, 2016 11:51 AM

How's it going Tony? I apologize if my asking permission comment was snarky, was aiming for tongue in cheek.  If you're still working would like to see pics.

Buddy- Those who say there are no stupid questions have never worked in customer service.

  • Member since
    April 2005
  • From: Australia
Posted by taxtp on Saturday, November 19, 2016 12:13 PM

All good Lewbud, I've only just seen your comment. I ended up with a much busier day than planned, of course. This is the next progress photo, although he has progressed further.

Since then I've tidied up the shadow areas, as this photo shows the original heavy and imprecise application of shadows,  and added emphasis where required. It still needs highlights, facial detail, detail painting etc. The webbing is painted.

I've left my phone upstairs, but dont want to wake my wife by getting it, so more later. I'll be busy until about 3pm today, but I'm comfortable enough at this stage.

It's the first figure that I can remember too. Previously I've done aircraft and a car that I can remember, but I may have forgotten some older ones.

It's 5am so more zzzzzz before I get back to this.

Cheers

Tony


I'm just taking it one GB at a time.

  • Member since
    April 2005
  • From: Australia
Posted by taxtp on Saturday, November 19, 2016 2:35 PM

THis is the photo that I couldn't post earlier. It is enlarged by the camera and photo display and hence shows brush strokes and imperfections that are not visible to the naked eye. I'll try to get a more realistic one for the next photo.

I'm just taking it one GB at a time.

JOIN OUR COMMUNITY!

Our community is FREE to join. To participate you must either login or register for an account.

SEARCH FORUMS
FREE NEWSLETTER
By signing up you may also receive reader surveys and occasional special offers. We do not sell, rent or trade our email lists. View our Privacy Policy.