SEARCH FINESCALE.COM

Enter keywords or a search phrase below:

75th Anniversary of 1945 Group Build (World at War)

23371 views
354 replies
1 rating 2 rating 3 rating 4 rating 5 rating
  • Member since
    March 2017
Posted by Armor_Aficionado on Friday, November 6, 2020 2:31 PM

Latest WIP on the M-36, working on the hull interior:


  • Member since
    September 2003
  • From: AandF in the Badger State
Posted by checkmateking02 on Friday, November 6, 2020 4:42 PM

Shaping up very nicely, AA!


  • Member since
    April 2019
  • From: South west, PA
Posted by Tomcat on Monday, November 9, 2020 7:32 PM

After painting a few more details, I have layed down the decals on my 262. The decals went on surprisingly well considering their age. The only glitch was the white glue on the underside, which when applied gave the impression of silvering. So I put the decal in the water bath and gently scrubbed off the glue with a paintbrush and re-applied them...

So after a dull coat, I'll have to unmask the cockpit, add a few more details that I always manage to break off and apply some subtle weathering and she'll be done.

Mark aka Tomcat

On the workbench: Monogram 1/24 '69 Pontiac GTO and a Monogram 1/67 (box scale) B-26 Invader

  • Member since
    April 2019
  • From: South west, PA
Posted by Tomcat on Wednesday, November 11, 2020 3:17 PM

With all the little details added, here is my Me 262...

Mark aka Tomcat

On the workbench: Monogram 1/24 '69 Pontiac GTO and a Monogram 1/67 (box scale) B-26 Invader

  • Member since
    September 2003
  • From: AandF in the Badger State
Posted by checkmateking02 on Wednesday, November 11, 2020 7:42 PM

Excellent, Mark.  I do like that brown and green camouflage, with the greenish undersides.  Not the usual!

Do you have a preference for the finished photo?


  • Member since
    April 2019
  • From: South west, PA
Posted by Tomcat on Thursday, November 12, 2020 12:50 AM

How about #8?

Thanks for letting me participate.

.

Mark aka Tomcat

On the workbench: Monogram 1/24 '69 Pontiac GTO and a Monogram 1/67 (box scale) B-26 Invader

  • Member since
    September 2003
  • From: AandF in the Badger State
Posted by checkmateking02 on Thursday, November 12, 2020 6:54 PM

Photo is up!  Thanks for participating, Mark.  It's a beautifully-achieved plane!


  • Member since
    January 2013
  • From: Athens, Greece
Posted by Zvezda1980 on Saturday, November 14, 2020 12:51 AM

Mark, very nice result. I always liked bomb laden 262's.

  • Member since
    January 2013
  • From: Athens, Greece
Posted by Zvezda1980 on Saturday, November 14, 2020 12:56 AM

Again I apologize for another long absence.

The HB kit was gradually sanded and some putty was used on the engine - wing seams.

Masking of canopy and wheel well was done with tamiya tape and wet tissue.

At last ready for painting.


  • Member since
    September 2003
  • From: AandF in the Badger State
Posted by checkmateking02 on Saturday, November 14, 2020 9:32 AM

Lots of progress, Z.  Should look good with the paint going on.


  • Member since
    January 2014
Posted by Silver on Saturday, November 14, 2020 11:31 AM

Great builds.

  • Member since
    January 2013
  • From: Athens, Greece
Posted by Zvezda1980 on Monday, November 16, 2020 5:12 PM

With the RLM 76 (Bottom) and RLM 82 applied (Gunze acrylics).

I am out of RLM 83 so I will have to improvise. First I thought of painting straight Nakajima green (dug out for the Jap GB) and renew the tripartite pact, but then decided to wait and think over a more refined solution:)

  • Member since
    September 2003
  • From: AandF in the Badger State
Posted by checkmateking02 on Monday, November 16, 2020 10:54 PM

Paint looks good, Z.  Nice, smooth coat.  


  • Member since
    October 2016
  • From: Louisiana Gulf South
Posted by Mrchntmarine on Tuesday, November 17, 2020 8:04 PM

Wow - super smooth. What did you cut it with?  Looks nice!

Keep on modeling!

All the best,

William

  • Member since
    July 2020
Posted by EricB on Saturday, November 21, 2020 2:43 AM

Very nice Jets. The 262 has lovely lines - certainly the most innovative plane of WWII. Strange but true - Hitler had defenders in his desire to make the jet a bomber. The Luftwaffe had vanished over the Western Front and Wehrmacht morale was not helped at all. Actually there were thousands of German sorties of all types flown against the allies in the West - but tens of thousands flown against the Germans.


Meng P-51D 1/48


 p-51wings by Eric Bergerud, on Flickr


 primed by Eric Bergerud, on Flickr


This year has been beyond weird and between plague, revolution and two new classes to teach, I have been distracted.


I can report in on some progress. As noted earlier this is an odd kit. Meng, for reasons that must remain known only to the styrene gods, decided to build a P-51 Bandai kit. Supposedly you don't need glue - but at well over 100 parts this kit is hardly beginner. This is my first Meng kit and I'm not impressed. I have their 1/35 Renault FT-17 tank which looks very nice (tiny of course). I have heard that they picked a very odd way to do a King Tiger. And I know that they botched the top wing of their 1/32 Fokker DrI Triplane. (Unconfirmed word was that Meng was doing the plastic for Wingnut Wings. We do know WNW had a DRI ready for release when they folded their tent. One thing that made WNW special were their splendid instructions - almost research booklets. The instructions here are very spare and the top wing has a definite "bow" which they picked up immediately at the definitive WorldWarIAirplane site. Andy the very nice YouTube Hobby Headquarters channel built it - he didn't mention it, but the bow was there and it looks bad. Been told you can soak it in very hot water and straighten it. Hope so.)


And now I've got this one. Because of the very odd construction techniques you have to get used to assembling the kit like you'd do a complex Lego build. Things don't really fit as much as they "snap" into place. It looks like "no way this is going to work" but you move things a bit, and in the part goes. But not always perfectly. I've had to sand several attachment points. The instructions are very poor and give one no idea about build sequence. The problem is that in several major steps there is a required sequence - but you're going to have to figure it out yourself. (Tamiya always gives you a heads up.) Worse, there was a lot of flash and the sprue gates were far too large. So there was prep on basically every part. But, once the prep was done and the fiddling finished, things do go together. Some of the joins - like the wing roots are perfect. Others are decent but a little off. Because the pieces all go down seam lines, it was easy to fix some of the imprecise fits with a very thin run of acrylic putty - worked great for this light duty.


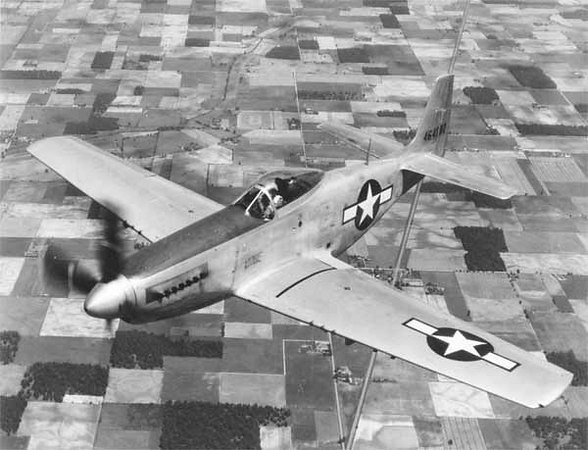
As also noted earlier Meng has given the modeler the job of eliminating panel lines on almost all of the wings to replicate the "laminar flow" technology used by North American. That did take some time. But almost all of the faults are now invisible thanks to my "go to" primer Duplicolor Hot Rod Black. Duplicolor makes a million paints and primers for auto work. This primer is a lacquer which means it melds into the surface perfectly. (This is a real live lacquer and I use a rattle can outside. It comes down very thin but dries fast. Paul Budzig recommends this stuff and he knows everything.) It is "sandable" and "fillable" which means that scratches will no longer exist and you can sand it with light grit and get the surface as gloss as you want. In my case, I don't want a super gloss black because service aircraft were never mirror shinny. In addition, North American didn't sand their wings for laminar flow - the plane was made of metal, not plastic, so the wings were puttied over and then spray painted silver. The fuselage was Natural Metal. Pretty soon I'll get out the Vallejo Metal Color Acrylics and paint it aluminum and silver. I've had good look with them in the past. In my house lacquer or lacquer/acrylic paints are out. But this will work. I think I'll give it a Blue Nose and use some Eagle Strike Decals for the famous 352 FG of 8th AF.


First though I'm going to try out a couple of new techniques for canopy masking. I've never made a perfect canopy and there's a lot of glass on a P51D. I'm going to experiment with very thin strips of masking tape and some Bob Divley Liquid Masking Film which comes highly recommended. If I can get that done right, I don't think finishing the plane will be an ordeal. I've got until late December.


Eric


  • Member since
    September 2003
  • From: AandF in the Badger State
Posted by checkmateking02 on Saturday, November 21, 2020 9:41 AM

Nice start, Eric.  Looking forward to seeing your plans come together.


  • Member since
    January 2013
  • From: Athens, Greece
Posted by Zvezda1980 on Sunday, November 22, 2020 4:21 AM

RLM 83 lines & 'rings' sprayed. This was a mix of Gunze's H65 'RLM70' (90%) + H422 'RLM82' (10%).

I use Gunze's acrylic thinner.


  • Member since
    September 2003
  • From: AandF in the Badger State
Posted by checkmateking02 on Sunday, November 22, 2020 11:48 AM

That is great work, Zvezda!  Absolutely beautiful job painting the camouflage.  Did you do it free-hand?  It looks exceptional!


  • Member since
    January 2013
  • From: Athens, Greece
Posted by Zvezda1980 on Sunday, November 22, 2020 4:19 PM

Thanks mate. Some spots need a bit of touch-up, though.

Yeah, this was free hand, with breaks every 15 minutes for a quick airbrush tip cleaning and fresh paint.

  • Member since
    September 2003
  • From: AandF in the Badger State
Posted by checkmateking02 on Monday, November 23, 2020 8:16 PM

Zvezda1980

Thanks mate. Some spots need a bit of touch-up, though.

Yeah, this was free hand, with breaks every 15 minutes for a quick airbrush tip cleaning and fresh paint.


It turned out exceptionally well!


  • Member since
    July 2020
Posted by EricB on Sunday, November 29, 2020 1:59 AM


 NMF by Eric Bergerud, on Flickr


A little more progress on the Meng P-51. I've applied the Vallejo Metal Color metallic paints. For a water based metallic paint I think Vallejo makes an excellent product. There's a blizzard of new lacquer metallic paints out there now and I'm not going to say that Vallejo equals them - at least if they're well applied. But I do think the difference is not major. And, at my house, lacquers are out - so it's Vallejo or nothing. The fuselage is painted Aluminum - that's the NMF called for. The wings and part of the tail, as noted earlier, was painted silver over a primer. The Vallejo Silver is probably pretty close, but I added just a bit of Magnesium to amplify the difference between the NMF and painted surfaces. The color difference is not dramatic, but certainly there. You can see the near absence of panel lines on the wings (the guns have some) - that's the result of yours truly sanding them down to emulate the "laminar flow" effect applied to almost all Mustangs. I've done the canopy separately and it looks OK - hope things fit right.


Next up is yet more masking to apply the "blue nose" found on the P-51s of the high scoring 352d FG of 8th AF. I'll be doing some salt chipping there, at least up front. Then comes the decals. And then, I don't know now.


Eric


  • Member since
    September 2003
  • From: AandF in the Badger State
Posted by checkmateking02 on Sunday, November 29, 2020 11:15 AM

That's a very nice NMF you achieved, Eric.


  • Member since
    March 2017
Posted by Armor_Aficionado on Wednesday, December 2, 2020 1:20 AM

Latest progress on the M-36 Jackson: hull is just about done, need to attach the bogies then start working on the turret.

  • Member since
    September 2003
  • From: AandF in the Badger State
Posted by checkmateking02 on Thursday, December 3, 2020 5:24 PM

Well done, aa!


  • Member since
    February 2005
  • From: Nashotah, WI
Posted by Glamdring on Tuesday, December 8, 2020 9:48 PM

These are great builds on this page, I feel like my little Jagdpanzer is like Charlie Brown's Christmas tree being posted here.  Smile

After a long time sitting in the box, working up the nerve to try and make static grass bushes without a static grass applicator, I took the easy path and bought some premade sets from an outfit called The Army Painter.  Just peel them off the wax paper, dab in white glue, and stick in place.  Great stuff!

Last step was the command antenna, Dragon just wanted it glued in place in a tiny  divot that was maybe half a MM deep.  I didn't trust this holding, so I drilled it out with a pin vice and super glued it in a proper hole.

This is just my 2nd completed kit of 2020, hopefully 2021 will be more productive!

Robert 

"I can't get ahead no matter how hard I try, I'm gettin' really good at barely gettin' by"

  • Member since
    July 2020
Posted by EricB on Wednesday, December 9, 2020 4:17 AM

 Decaled by Eric Bergerud, on Flickr

The blue nose of the 352d FG of 8th AF (very elite - George Preddy flew with them) is on, as are the decals. The decals are 18 year old set from Eagle Strike - but done by Cartograph and flawless. Next up will be oil washes and renderings and some more weathering to dirty the bird up a little.

Eric

  • Member since
    September 2003
  • From: AandF in the Badger State
Posted by checkmateking02 on Thursday, December 10, 2020 4:20 PM

Nice one, Robert.  Very effective camouflage and diorama!

Which photo would you like for the finish-photo?

Thanks for being part of the GB.  


  • Member since
    September 2003
  • From: AandF in the Badger State
Posted by checkmateking02 on Thursday, December 10, 2020 4:22 PM

Looks good, Eric.

Eighteen year old decals!  Well-preserved.  Did you have to treat them with one of the preservatives to prevent shattering?


  • Member since
    February 2010
  • From: New Jersey
Posted by 68GT on Thursday, December 10, 2020 5:13 PM

Great job on the 262 Mark!

On Ed's bench, ???


  • Member since
    July 2020
Posted by EricB on Thursday, December 10, 2020 5:28 PM
The decals were just fine out of the package - there appeared to be no fatigue at all. They're cartograph. The thing I like about Cartograph is that they have just the right amount of flexibility - you can move them around, but you have to want to - it takes a little effort. That's better than having a newly laid decal going totally wacko if you barely touch it or even move the model. That's good - there are more decals on this kit than I'd like and they all went on fine. Eric
JOIN OUR COMMUNITY!

Our community is FREE to join. To participate you must either login or register for an account.

SEARCH FORUMS
FREE NEWSLETTER
By signing up you may also receive reader surveys and occasional special offers. We do not sell, rent or trade our email lists. View our Privacy Policy.