SEARCH FINESCALE.COM

Enter keywords or a search phrase below:

Geschutzwagen Tiger by Trumpeter WIP /June 23

20864 views
56 replies
1 rating 2 rating 3 rating 4 rating 5 rating
  • Member since
    August 2008
  • From: S.W. Missouri
Posted by Pvt Mutt on Wednesday, May 20, 2009 6:30 PM

Big Smile [:D]There ain't no grass grown under my feet.

                             Feels like those tracks weight 20lbs.

I found a couple errors with the transporter so far:                                                            #1--If you look up front there you can see the exhaust pipes and you'll notice they go up the wall,through a bracket and then turn outward. The problem is those oval slots are where the exhaust exit to the outside.Sign - Oops [#oops]

#2--There are two panels with the "X" reinforcment bars on them that are not mentioned or even shown in the instructions. I think they go in the engine bay under the radiators but it's no big deal you can't see under there anyway unless the engine is removed.Sign - Oops [#oops]

OK now you're as up-to-date as I am                                                                            Tony the Mutt                                                          

Shoot Low Boys They're Ridin Ponys

  • Member since
    August 2008
  • From: S.W. Missouri
Posted by Pvt Mutt on Tuesday, May 19, 2009 8:33 PM

Rob, I mounted her in the chassis today and there sure ain't much to see of it.Sad [:(] That's ok cause as they say "I know it's there"Big Smile [:D]

Thanks                                                                                                                        Tony

Shoot Low Boys They're Ridin Ponys

  • Member since
    February 2009
  • From: mass,USA
Posted by scratchmod on Tuesday, May 19, 2009 8:01 PM

That's a sweet little motor and nice painting too. A shame that the entire motor will not be visible.


Rob

  • Member since
    August 2008
  • From: S.W. Missouri
Posted by Pvt Mutt on Tuesday, May 19, 2009 1:56 PM

There are two engine bay hatch doors i'm going to try and drill for pins so I can open and close them but even at that you'll only be able to see from the exhaust shields up.

Since there were a lot and I mean a whole bunch of small parts it took me two days to clean up and glue togeather the three units. I had so much ffffffuuuuuuunnnnn.Laugh [(-D]

Thanks Bill                                                                                                                   Tony

Shoot Low Boys They're Ridin Ponys

  • Member since
    July 2004
  • From: Texas
Posted by wbill76 on Tuesday, May 19, 2009 1:43 PM
Nice work on the details Tony! Are you going to be able to display it on the finished kit?
  • Member since
    August 2008
  • From: S.W. Missouri
Posted by Pvt Mutt on Tuesday, May 19, 2009 12:30 PM

This is the Maybach engine from the kit and it's very detailed in my opinion.Thumbs Up [tup] The gear box,final drive and engine take up three full pages of the instructions.

SeeYa Later                                                                                                                Tony the Mutt

Shoot Low Boys They're Ridin Ponys

  • Member since
    April 2005
  • From: Martinez Ga
Posted by commando on Saturday, May 16, 2009 7:51 PM
That thing is huge!!!Dinner [dinner]

'A government big enough to give you everything you want, is strong enough to take everything you have.' -Thomas Jefferson -

  • Member since
    August 2008
  • From: S.W. Missouri
Posted by Pvt Mutt on Saturday, May 16, 2009 7:34 PM

Will Do Terry.Thumbs Up [tup] I think that will be enough rope to do the job.Big Smile [:D]

Tony the Mutt

Shoot Low Boys They're Ridin Ponys

  • Member since
    May 2005
  • From: Dublin Rep Of Ireland
Posted by terry35 on Saturday, May 16, 2009 5:58 PM

Hi, Tony, I have one of these in the stash so I will be watching your progress with interest.

As for the engine colour that was usually a medium to dark grey. Just google Tiger II or Maybach engines.

Terry.

  • Member since
    August 2008
  • From: S.W. Missouri
Posted by Pvt Mutt on Saturday, May 16, 2009 5:49 PM

This kit has a really detailed engine so it looks like I might have to leave the hatch open so it can be seen.

Thing is this is the first kit i've done that had one and I never worried about the color needed to paint one. Can somebody direct me to that info are just let me know what color they were?

I sure would appreciate the information that I need.Make a Toast [#toast]

Tony the Mutt

Shoot Low Boys They're Ridin Ponys

  • Member since
    April 2005
  • From: Piscataway, NJ!
Posted by wing_nut on Friday, May 15, 2009 7:01 AM
Hole smokes that thing is huge.  Progress is looking good.

Marc  

  • Member since
    February 2009
  • From: mass,USA
Posted by scratchmod on Friday, May 15, 2009 6:00 AM

I had been watching this build on another site for some time now and think it is awesome. Maybe it will be of some help to you.

http://www.planetarmor.com/forums/showthread.php?t=5967

Rob

  • Member since
    February 2009
  • From: mass,USA
Posted by scratchmod on Thursday, May 14, 2009 5:02 PM

Looking good so far and I like how you made some room for that beast.

I would love to get my hands on that kit but the price is a bit too much right now. I have the perfect paintscheme for it too.Sad [:(]


Rob

  • Member since
    August 2008
  • From: S.W. Missouri
Posted by Pvt Mutt on Thursday, May 14, 2009 4:19 PM

Had a pretty good day. So far everything fits perfect:

I found a way to make room for this brute:Approve [^]

With room to spare:

Thanks for coming by                                                                                                     Tony the Mutt

Shoot Low Boys They're Ridin Ponys

  • Member since
    June 2006
  • From: Netherlands
Posted by Grem56 on Thursday, May 14, 2009 12:07 PM

Had my beady eye on this one but 75 Euro price tag held me off. This should be a very interesting build to follow.

Julian


illegal immigrants have always been a problem in the United States. Ask any Indian.....................

Italeri S-100: http://cs.finescale.com/FSMCS/forums/t/112607.aspx?PageIndex=1

Isu-152: http://cs.finescale.com/FSMCS/forums/t/116521.aspx?PageIndex=1


  • Member since
    August 2008
  • From: S.W. Missouri
Posted by Pvt Mutt on Thursday, May 14, 2009 11:04 AM

Big Smile [:D]The triplets have already ask to go for the first ride Bill.

I really don't have room myself but i'll make room. WarHammer:I got it from RB Models,they make them and it only took about a week to get here.

As for the paint scheme I guess the ambush shown on the box is as good as any besides that's one I haven't tried to do yet.

Tony the Mutt

Shoot Low Boys They're Ridin Ponys

  • Member since
    June 2005
  • From: Indiana U.S.A.
Posted by Panther F on Thursday, May 14, 2009 7:04 AM

 the doog wrote:
I wanna build this it SO BAD, but I have NOWHERE to put it! It's just so huge that I don't know where I'd put it?

I know, ditch some of those non-armor builds of yours.  Angel [angel]

I'll be watching this build as well, and then probably go on the hunt for a good price on one! Big Smile [:D]  Any decisions made on paint?

  • Member since
    September 2008
  • From: North Carolina
Posted by WarHammer25 on Thursday, May 14, 2009 6:41 AM
Awesome! I have wanted to build one of these since Trumpeter first released it but price and sheer size have kept me from getting one. For those interested though, GreatModels does have them on sale right now for a decent price. Might have to pick one up. I will be watching this build with interest. Where did you find the aftermarket barrel?
The only easy day was yesterday - U.S. Navy Seals
  • Member since
    July 2004
  • From: Texas
Posted by wbill76 on Wednesday, May 13, 2009 11:09 PM
Going to be very impressive when you get it all done Tony! Like Karl, I was really tempted to get one and build it but the size of the finished item has held me back. I literally would have no place to put it once finished...but yours will look right at home along with the triplets! Wink [;)]
  • Member since
    January 2008
  • From: Hickory, NC
Posted by Bushi on Wednesday, May 13, 2009 10:03 PM

Looks very interesting!!! Plus so HUGH. I will keep a close eye on this build.

Bushi

  • Member since
    April 2009
  • From: Carmel, IN
Posted by deafpanzer on Wednesday, May 13, 2009 9:51 PM

Oh man, I'd love to own this than a RV when I retire... 30 years from now.  Looks very spacious!  Will be watching this closely...

Andy

  • Member since
    January 2007
Posted by the doog on Wednesday, May 13, 2009 8:31 PM

Oh MAN!

I'm jealous!!

I wanna build this it SO BAD, but I have NOWHERE to put it! It's just so huge that I don't know where I'd put it?

I can't wait to see how this one builds up, Tony!

  • Member since
    August 2008
  • From: S.W. Missouri
Posted by Pvt Mutt on Wednesday, May 13, 2009 8:17 PM

Bill I thought it was kinda high priced(what ain't these days?) but when you figure that there's really two models in that box, one for the SP and the other for that big gun it averages out about the same.

This is only my 6th model to build. I wouldn't know about how it compares to those others but somebody should know. This one weights about 60tons if that's of any help.


Tony the Mutt

Shoot Low Boys They're Ridin Ponys

  • Member since
    December 2007
  • From: Bridgeview, Illinois
Posted by mg.mikael on Wednesday, May 13, 2009 8:07 PM
I never knew Trumpeter even made this kit untill now. Well, it sure is a beast and I can't wait to see you progress on this kit, Pvt Mutt!Thumbs Up [tup]

"A good plan executed now is better than a perfect plan next week." - George S. Patton

  Photobucket 

  • Member since
    January 2012
Posted by I make stuff on Wednesday, May 13, 2009 7:47 PM

I'll be following this one closely.  I have eyed this kit for some time.

Bill

  • Member since
    July 2007
  • From: Ohio
Posted by Geist on Wednesday, May 13, 2009 6:03 PM

Wow, that thing is a monster. How does it stack up size wise to a Maus or E100?


I'm looking forwaard to seeing this thing completed. Have fun. Any ideas on camo?


Erik

On the bench: Italeri Leopard 1A2 correction build with Perfect Scale turret and Eduard PE

  • Member since
    April 2009
  • From: Sunny Napier, New Zealand
Posted by DaGreatQueeg on Wednesday, May 13, 2009 4:19 PM

That certainly is a huge kit - gonna be good to watch it come together!

cheers

Brent 

  • Member since
    August 2008
  • From: S.W. Missouri
Geschutzwagen Tiger by Trumpeter WIP /June 23
Posted by Pvt Mutt on Wednesday, May 13, 2009 3:41 PM

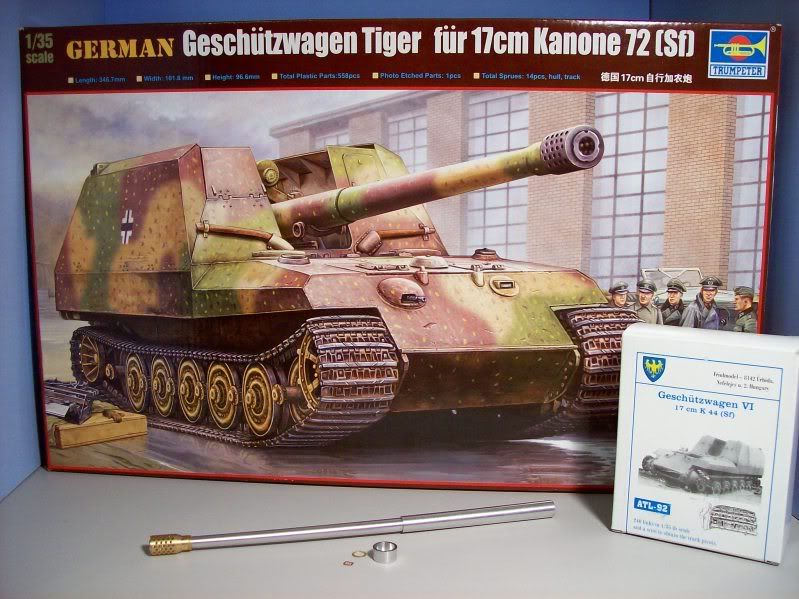
OK here we go:

                             That's a RB Model barrel and a set of Friulmodel tracks.
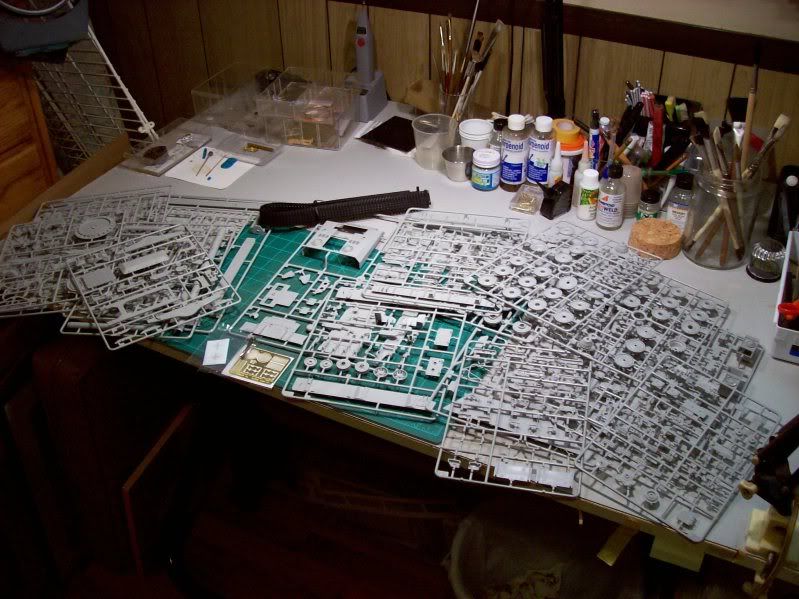
                              14 sprues,hull,tracks.small PE sheet,2 coil springs and a set of two crosses. A total of 558 pcs.
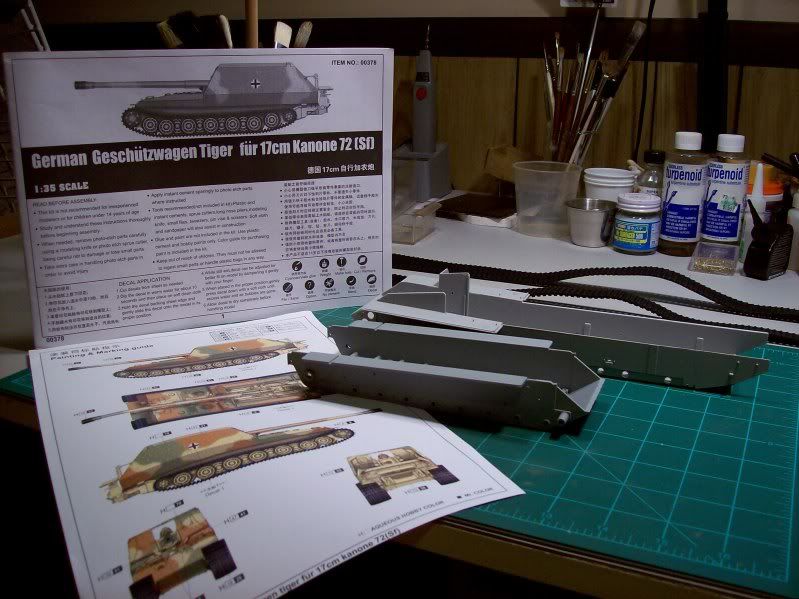
                              This will be my first non Dragon kit and I like the idea of the 28 page instruction booklet,takes up less room on the work bench. I placed a 1/35 Jagdpanther hull in the fore-ground there to give you an idea of size.

There are lots of knock-out dents to fill but the flash and seams seem to be minimal,at least for the kit I have. Clean up is just part of the game so I won't complain. Steps 1,2 and 3 are the usual wheel and hull work so i'll be back with more pictures when i've got something to see.

Thanks for stopping by                                                                                                Tony the Mutt

Shoot Low Boys They're Ridin Ponys

JOIN OUR COMMUNITY!

Our community is FREE to join. To participate you must either login or register for an account.

SEARCH FORUMS
FREE NEWSLETTER
By signing up you may also receive reader surveys and occasional special offers. We do not sell, rent or trade our email lists. View our Privacy Policy.