SEARCH FINESCALE.COM

Enter keywords or a search phrase below:

1/6th scale Early Production M4 Sherman

21251 views
43 replies
1 rating 2 rating 3 rating 4 rating 5 rating
  • Member since
    April 2005
Posted by armourguy on Wednesday, August 12, 2009 10:15 PM

I have completed more new components for the M4 and the M4 family. All of these new items have been added to the product line.
http://www.eastcoastarmory.com/ustankparts.htm

1. Resin M4 Sherman Family Lower Hull Lift Hook set.

2. Viper M4 Sherman Idler Mount Quick Fix set. Set comes with two resin Hex heads, and two plastic discs. This set is a simple quick dress up kit for the Viper Idler Mounts.

Stock Viper Idler Mount:

Modified with the dress up kit:

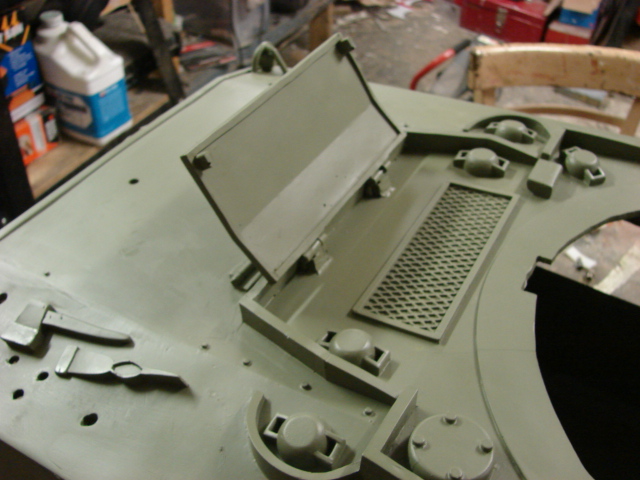
3. Rear deck Armored air intake. This part will work on all 1/6th scale M4 Sherman on the market.

4. Resin M4 Sherman Rear Engine Air Filter canister set. This set will work on The Viper M4, M4A1, M3 Lee, M7 Priest, and M12 SPG. These sets will not work on the Panzerwerk, Armortek, Plastic Panzer, and JD M4A3 Sherman. The Air filters are hollow and come with a removable top, and air filter. These sets would be perfect for a maintenance diorama. This set also comes in two options, One as a kit form, the other as a pre built set.

On the tank I completed the tank's rear firewall details.

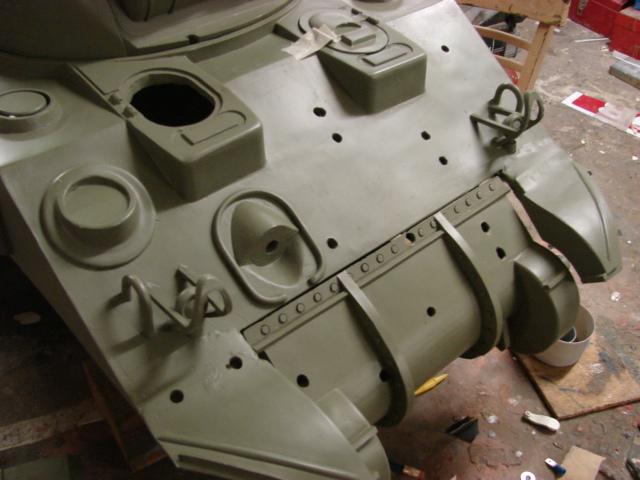
I have also been working on the tank's front armored plate details including a travel lock, side view mirror mounts, and front antanna mount cover plate.  

On the tanks top deck, new tow cable cleats and a new fire extinguisher control box were added.

  • Member since
    February 2006
  • From: Cincinnati Ohio
Posted by DantheMan85 on Saturday, August 8, 2009 12:39 PM
All I can say is WOW!!Bow [bow]

On my Work Bench: Tamiya Ford GT 1/24

Up Coming: ?


  • Member since
    July 2003
  • From: On my kitchen counter top somewhere in central North Carolina.
Posted by disastermaster on Saturday, August 8, 2009 12:24 PM

I always look forward to these wonderful updates as they are repeatedly full of valuable information.

http://www.innovationbyinstinct.com/services/hosting/clients/accountyp/status/DisasterMaster/%23t1-4.jpg

 https://i.imgur.com/LjRRaV1.png


  • Member since
    April 2005
Posted by armourguy on Saturday, August 8, 2009 10:58 AM

I have made more progress on the model, and I have added some new parts to the product line.
http://www.eastcoastarmory.com/ustankparts.htm

M4 Sherman Exhaust manifold set. This style of exhaust will work on the Viper M4, M4A1, M3 Lee, and the M7 Priest.

Early 60 degree M4 frontal additional armor set. Set includes port, starboard armor plates, and one 30. cal canvas ring. This set will work on Viper and Armortek sherman tank Kits.

M4 rear Sponson access cap set.

On the tank's rear deck I completed reworking the large air intake. I also made the recessed wells for the fuel caps, which will be added soon. The two angle pieces are mounts for the retaining bolts, which keep the large hatch locked to the rear deck. 

For the tanks sprockets I modified a set of Panzerwerk VVSS sprockets to fit over the Viper sprocket mounts.

The origonal kit came with two cast resin early spoke sprockets. These sprockets would be bolted onto metal studs that protrude out of the tank's transmission hub.

To make the Panzerwerk sprocket mount to the Viper stud I had to first widen the original bolt hole to 1/4 of an inch. I also extended the hole to run through the entire stud. This will be for mounting a 1/4 inch shaft that will be connected to the sprocket.

The panzerwerk sprockets were modified be first having a 1/4 inch hole drilled all the way through the sprocket. This will be for the 1/4 inch steel shaft.

Half way through the sprocket the 1/4 inch hole was bored out larger to the diameter of the viper stud. The 1/4 inch shaft was then glued in it's place. This allows the sprocket to spin freely, and with plenty of support from the stud.

More progress to follow.

  • Member since
    September 2006
  • From: Dripping Springs, TX, USA
Posted by RBaer on Tuesday, August 4, 2009 3:07 PM

Whoa.....

That's all I have.

Apprentice rivet counter.

  • Member since
    April 2005
Posted by armourguy on Tuesday, August 4, 2009 2:49 PM

I have added a new component to the US AFV poduct Line. More parts are to follow.  http://www.eastcoastarmory.com/ustankparts.htm
Resin M4 Sherman Bow 30.cal canvas mount ring

I have also assembled and installed the tank's functional VVSS Suspension. On this model I went with the Mid production VVSS skid rail. I also used different styles of swing arms, and road wheels for the "in field" mix and match look.

One weak point that these kits had were their suspension. The stock VVSS suspension was made out of the same brittle resin that the tank was constructed out of. The stock suspension was also ridged and non functional. This made the tank very unrealistic when placed on an uneven surface. Another problem because of the ridged and fragile combination was that when the tank was placed on an uneven terrain all of the tank's weight would be focused on one or two pressure points, giving the potential for the swing arms to snap.

With the new functional VVSS the tank now has a natural look on an uneven surface, and the tank's weight is distributed thought the entire suspension safely.

Now that the suspension is out of the way the tank's progress will be more rapid.

  • Member since
    April 2005
Posted by armourguy on Friday, July 31, 2009 6:35 PM

Thanks Guys, Compared to the Jag this build will be a vacation for me :D. I have some progress on the tank. I also have some parts in the molding phase and will be ready and on the product line shortly. WWI tanks are interesting, but I don't see myself building one in the future.

On the tank's engine deck I engraved the tank's engine hatch and engine access lid panel lines. I also severed the engine hatch armored ring from the tank's armored ring.


The tank's molded in air intake grill was removed. a new netal mesh one will be added soon.

I decided to reinforce the tank's upper hull roof. The hull is pretty sturdy, but I wanted to put extra reinforcement to eliminate the chance that the heavy turret could warp the hull over time. To reinforce the tank's upper hull roof I used three lengths of a hollow PVC pipe. The hollow pipe was then epoxied into the tanks hull. The hollow column gives me the maximum amount of strength with the minimum amount of added weight.  

For the tank's rear wall the kit was designed that the rear wall and the tank's upper hull would be connected via two fasteners. Instead of using fasteners I used two segments of Aluminum rods that were sanded flush with the rear wall.  

Resin and epoxy weld seams were added. There are still more welds that are needed; these will be added down the road.
 

On these vipers the early three piece transmission cover has molded in bolt details. The molded in bolts are simple round nubs with no fastener detail. These molded in bolts were removed and new metal fasteners were added. I added two seam lines to the transmission flange, giving the illusion that the transmission is in three pieces. Cast texture and the grease fittings were also added to the transmission cover.

Replacement bolts were also added to the final drives, idler mounts, and side wall. In addition to the bolts a circular disc was also added to the final drives.

On these Vipers where the Upper hull and the lower hull meet at the bolt strip there is a severe warp that leaves a large hole. To fix this I used a scrap piece of 20 gauge sheet metal left over from the jag. This plate was bolted to the upper hull with counter sunk fasteners. These fasteners were sanded flush with the tank's hull and are no longer visible. The other part of the steel plate is connected to the rivet strip with the rivet strip bolts. This plate forced the gap closed.
 

I'm now complete with the hull fragility improvements. The tank's hull is now not only more "stabile" and rugged, but is also easier to pick up then before.

The tank's fragility was easy to fix, but for the weight the only equipment that I know of that will fix the problem would be a set of these tools Big Smile [:D]

  • Member since
    February 2006
  • From: Cincinnati Ohio
Posted by DantheMan85 on Friday, July 31, 2009 11:44 AM
Look at the size of that Sherman!!!! HUGE  Nice job, keep us posted!!   Thumbs Up [tup] Thumbs Up [tup]

On my Work Bench: Tamiya Ford GT 1/24

Up Coming: ?


  • Member since
    April 2008
  • From: Philadelphia PA
Posted by smeagol the vile on Thursday, July 30, 2009 2:08 AM
I wish I had the time, money, and space to build tanks this size.  Any chance you'd ever do anything WWI in that scale?


  • Member since
    July 2006
  • From: New Jersey
Posted by redleg12 on Tuesday, July 28, 2009 5:18 AM

Very interesting to see building on this size and scale.....How do you display these????

Rounds Complete!!

"The Moral High Ground....A Great Place to Emplace Artillery."

  • Member since
    December 2003
  • From: Montreal
Posted by buff on Monday, July 27, 2009 8:13 PM
This is really interesting stuff.  Please keep the wip shots coming.

On the bench: 1/32 Spit IXc

  • Member since
    January 2006
  • From: Pineapple Country, Queensland, Australia
Posted by Wirraway on Monday, July 27, 2009 7:56 PM
Always blown away with your level of work and scratchbuilding.  Cant wait to see more. Bow [bow]

"Growing old is inevitable; growing up is optional"

" A hobby should pass the time - not fill it"  -Norman Bates


GIF animations generator gifup.com

  • Member since
    September 2006
  • From: Dripping Springs, TX, USA
Posted by RBaer on Monday, July 27, 2009 3:37 PM
Shermans rock! Big Shermans even more!

Apprentice rivet counter.

  • Member since
    March 2007
  • From: Northeast WA State
Posted by armornut on Sunday, July 26, 2009 6:41 PM
 HUGE please post more wips looks like fun but i don't have room for my 35th stuff much less a small volkswagon.hats off to ya.

we're modelers it's what we do

  • Member since
    April 2005
1/6th scale Early Production M4 Sherman
Posted by armourguy on Sunday, July 26, 2009 5:47 PM

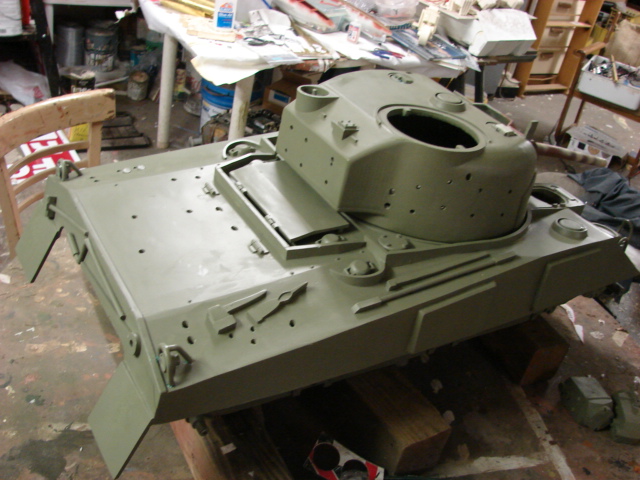
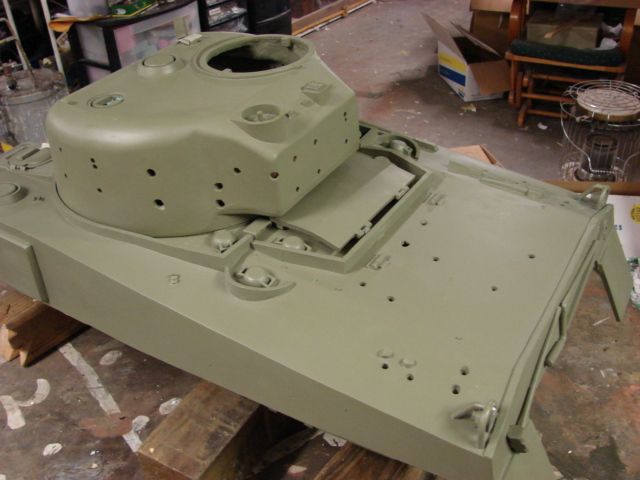
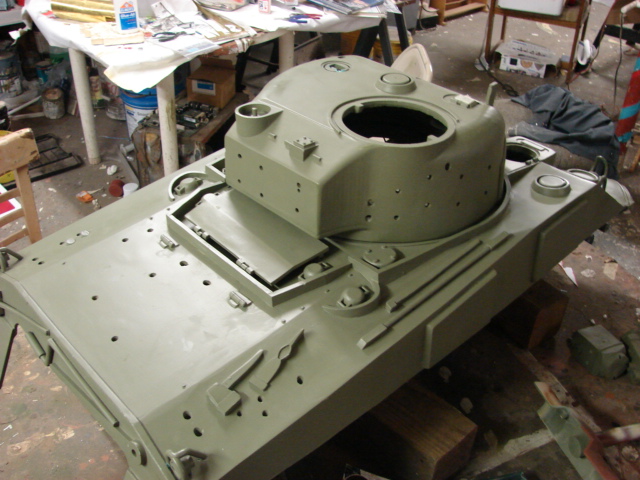
Hi Guys, Now that I finished off a batch of German tanks I decided to build some more American tanks. First will be this old Viper Sherman Hull and turret that I recently acquired in a trade.
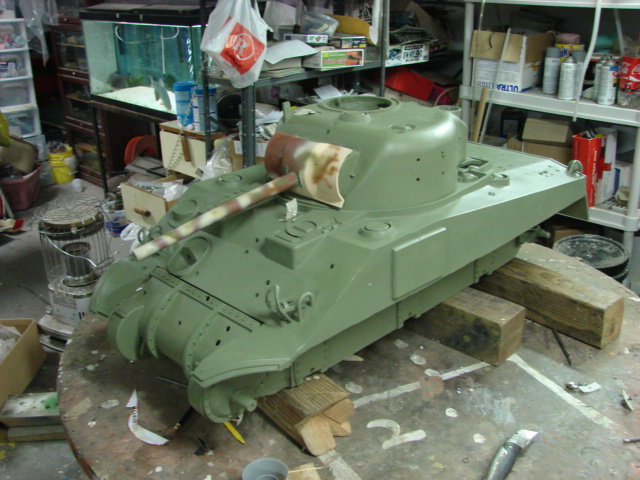
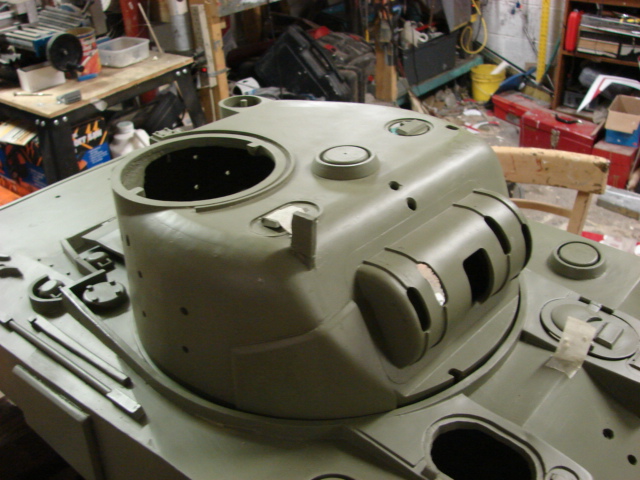
For those of you who are un familiar with the Viper Sherman it was an all resin and fiberglass early production M4 Sherman that was released in limited numbers back in 2003. The Model itself is a scaled up copy of the Tamiya 1/35th scale early production Sherman. The model came with a two piece upper and lower hull, non functional VVSS suspension, and lots of crew equipment that would be inserted into all of the holes that are drilled into the tank's surface. The problem with these models is that their resin construction made them very fragile and prone to damage. They also became unpopular because of their weight. Viper soon folded after the release of their Late Tiger I kit that was very un popular because of the same reasons.  
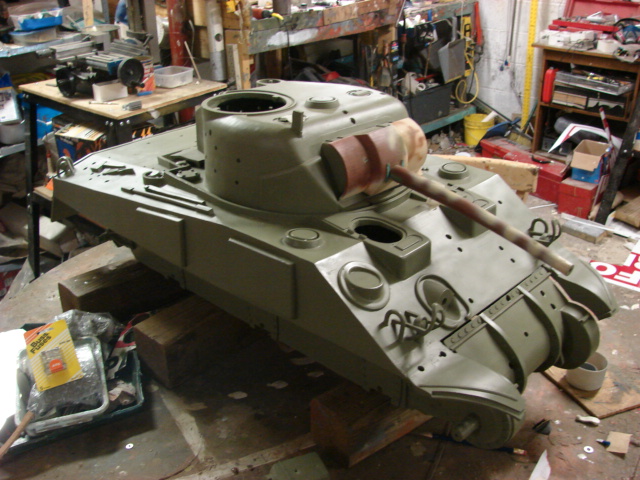
I always liked their M4 and I have built two of them when they were released. After building my two Shermans I saw room for improvement, and in making the tanks more rugged and robust.
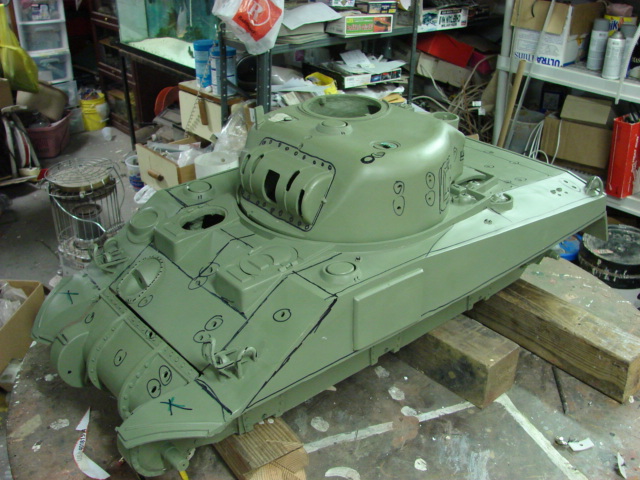
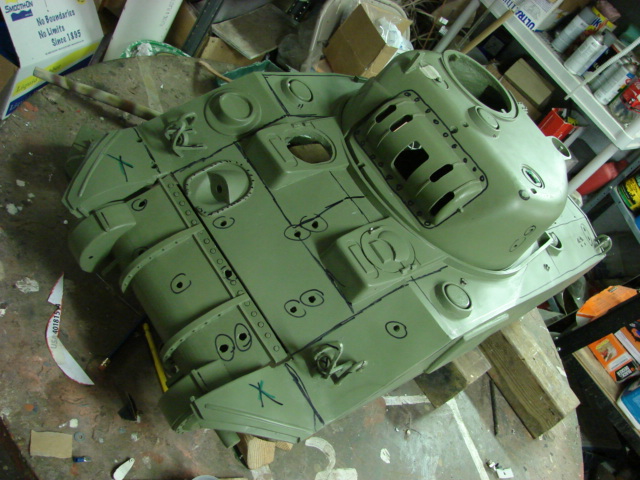
One problem that the kit has is that the lower hull doesn't have the hull sponsons. The hull is also molded that the hull wall is lower than the sponson by 1/2 an inch. Because of this there is a huge gap that can be shows through to the other side of the tank.
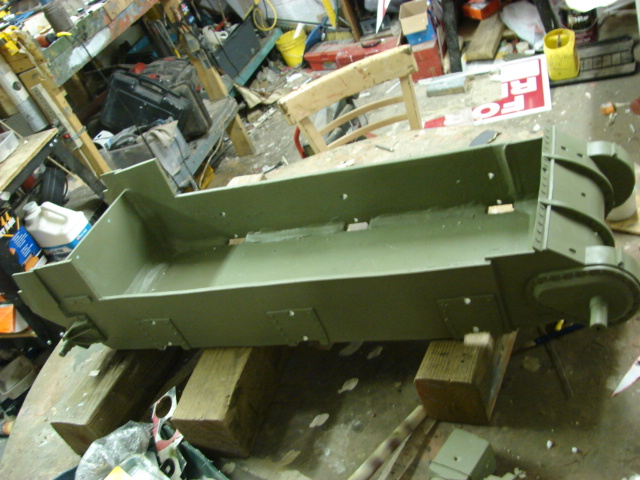
To correct this I cut several pieces of 1/2 inch plywood to construct the sponson and hull wall extender. I used this thickness of material because I wanted to use a material that was the same thickness of the tank's hull, also because it gives me a stronger point to attach fasteners. The sponsons had to be very strong because they will also be used to attach the top hull and the bottom hulls turning them into one solid piece. This alone reduces the fragility of the tank immensely. The sponsons were attached to the tank via fasteners, then they were treated and reinforced with fiberglass cloth and resin.
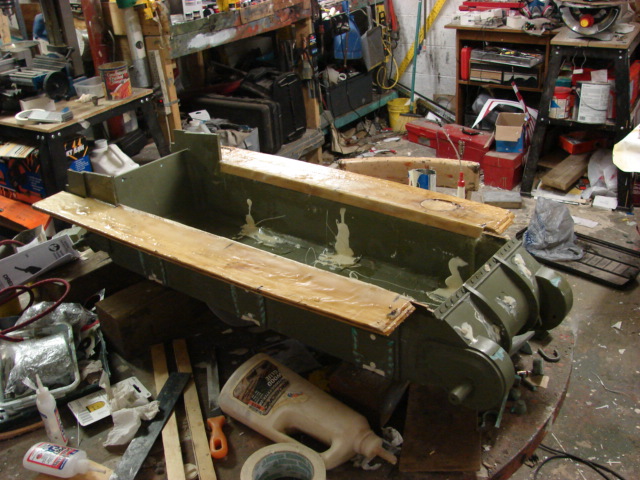
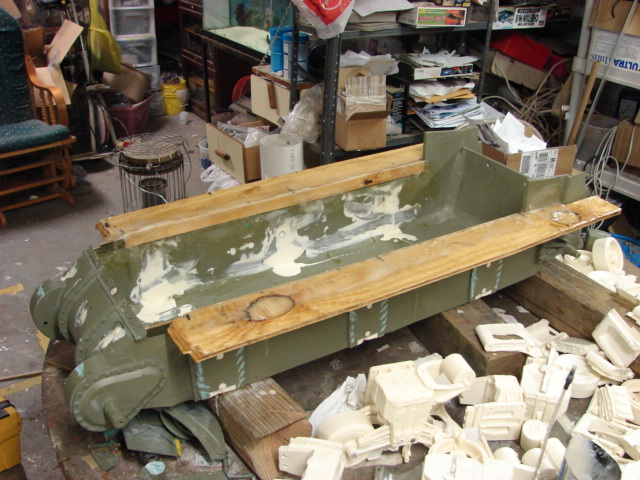
Prior to in the upper hull installation I reinforced the entire upper hull with more fiberglass cloth and resin. The tank does have cloth imbedded in its casting, but I felt that the thickness was too thin and the extra cloth and resin was a good measure. The Hull now sounds more "Solid".
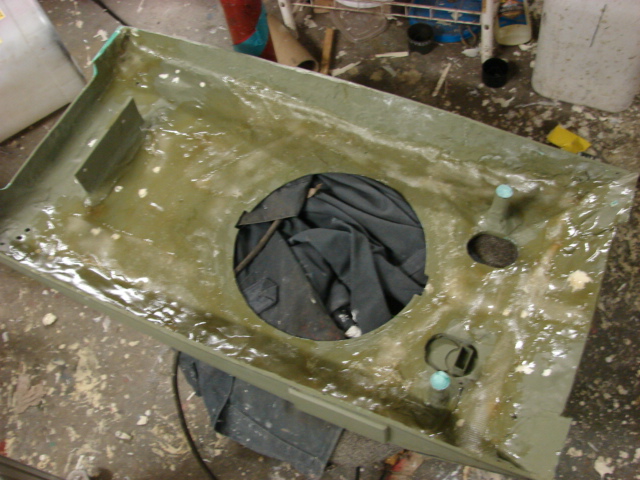
The upper Hull was attached permanently to the lower hull with fasteners, fiberglass cloth, resin, and epoxies.
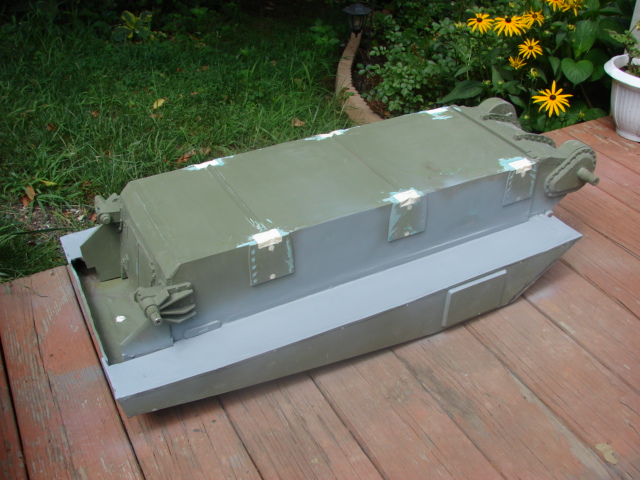
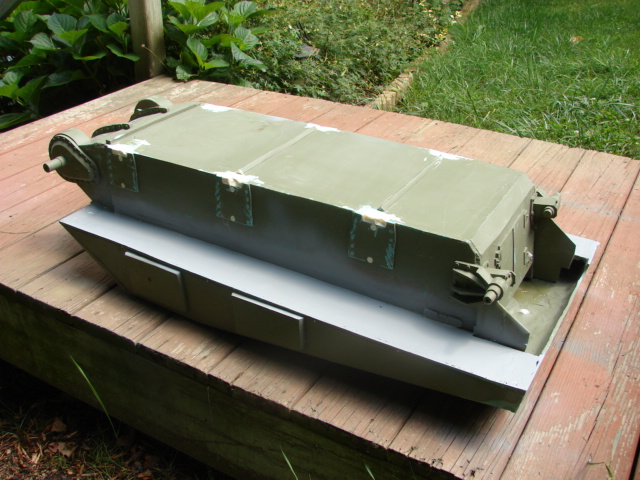
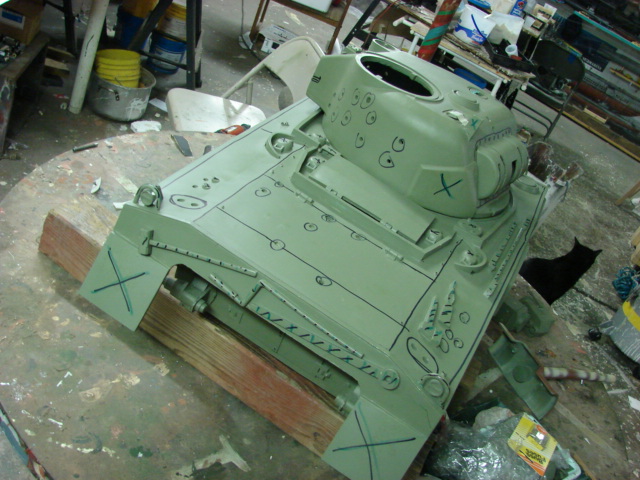
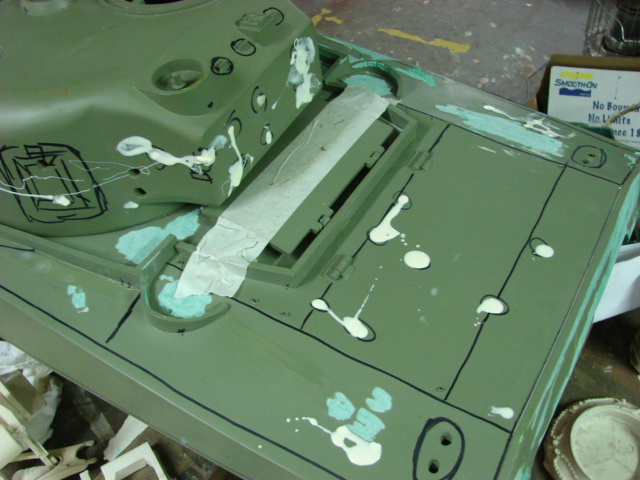
I will not be using the stock Viper VVSS suspension. In it's place I will be using my own functional VVSS suspension. Because of this I plugged up the holes for the kit supplied suspension with casting resin. I also used the casting resin to plug up all of the equipment holes.
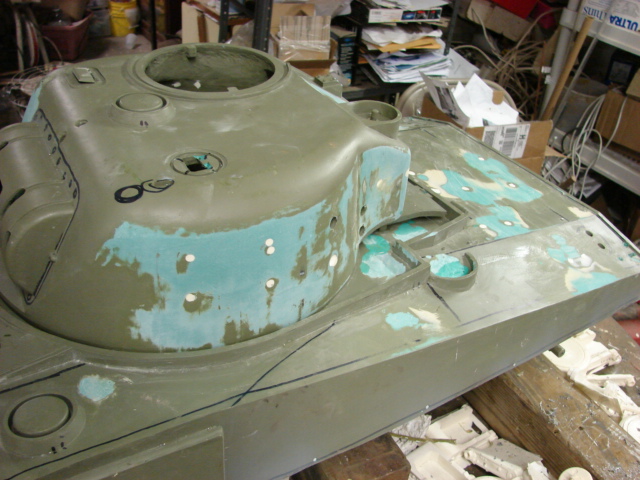
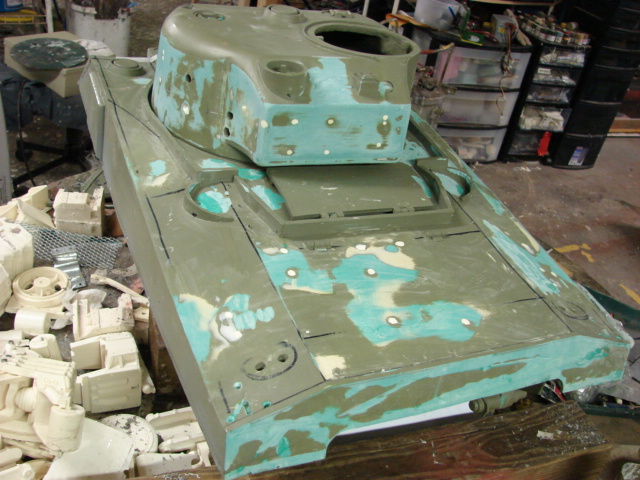
The tank came with a few tools and other accessories molded in shovels, fenders, head/ tail lights...ect. These were all removed and new ones will be added in their place

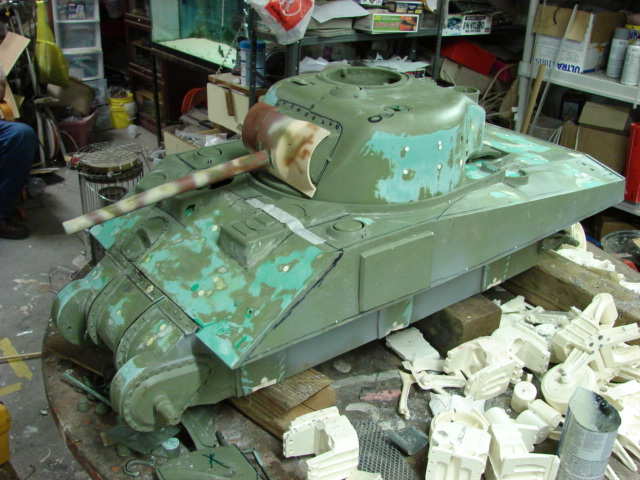
The tank's turret also had it's extra armor molded in. The problem was that the kit has the armor placed too low and had to be removed
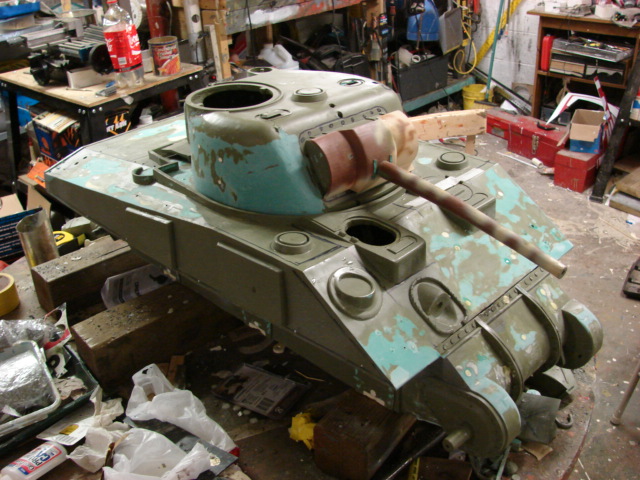
I will also be tooling up some new Resin components, as well as updating some of the older ones with newer tooling.

JOIN OUR COMMUNITY!

Our community is FREE to join. To participate you must either login or register for an account.

SEARCH FORUMS
FREE NEWSLETTER
By signing up you may also receive reader surveys and occasional special offers. We do not sell, rent or trade our email lists. View our Privacy Policy.