SEARCH FINESCALE.COM

Enter keywords or a search phrase below:

Tiger Coelian -- FINISHED PICS!

10549 views
66 replies
1 rating 2 rating 3 rating 4 rating 5 rating
  • Member since
    January 2007
Tiger Coelian -- FINISHED PICS!
Posted by the doog on Sunday, September 25, 2011 9:31 PM

Hello again, strangers!

Well, I'm still "out in the garage", but my boots are aching for some MUD--so I'm dying to do some Armor again, and I figure that I'll start return to the field here again with something off the beaten path--my own concept of the "Tiger (P) Coelian"

As you know, the Coelian was a conceptual Flakpanzer prototype only produced in one wooden mockup in February, 1945. The Tiger (P) chassis was built and used for test trials and then most converted into Ferdinands and Elefants, with a very few made into "one-off" vehicles and rarities like repair tanks, a command version, and a Rammpanzer. Well, here's my take on one more that might've sprung up?

I used two kits; the Dragon Panzerkampwagen Tiger (P) Command tank, and the Flakpanzer Coelian.

As the Tiger kit had once been an "extra", and used for some experimentation with a pyrogravure to make zimmerit, I had ruined the side panel. I had to therefore cut it out and replace it with a new side.

Next, it was quite a bit of trial-and-error guesswork engineering to get the turret race to sit properly on the hull. I finally got it to work though. I also added some engine vents shields, and added spare tracks to the rear, as well as splash shields on the front hull.
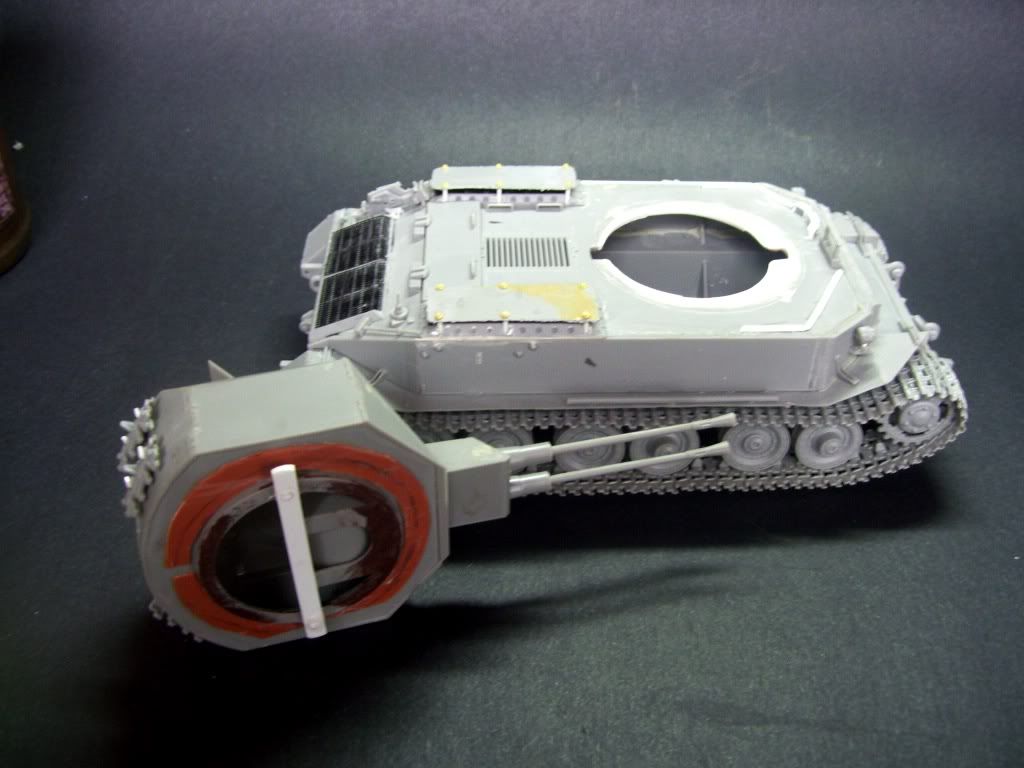
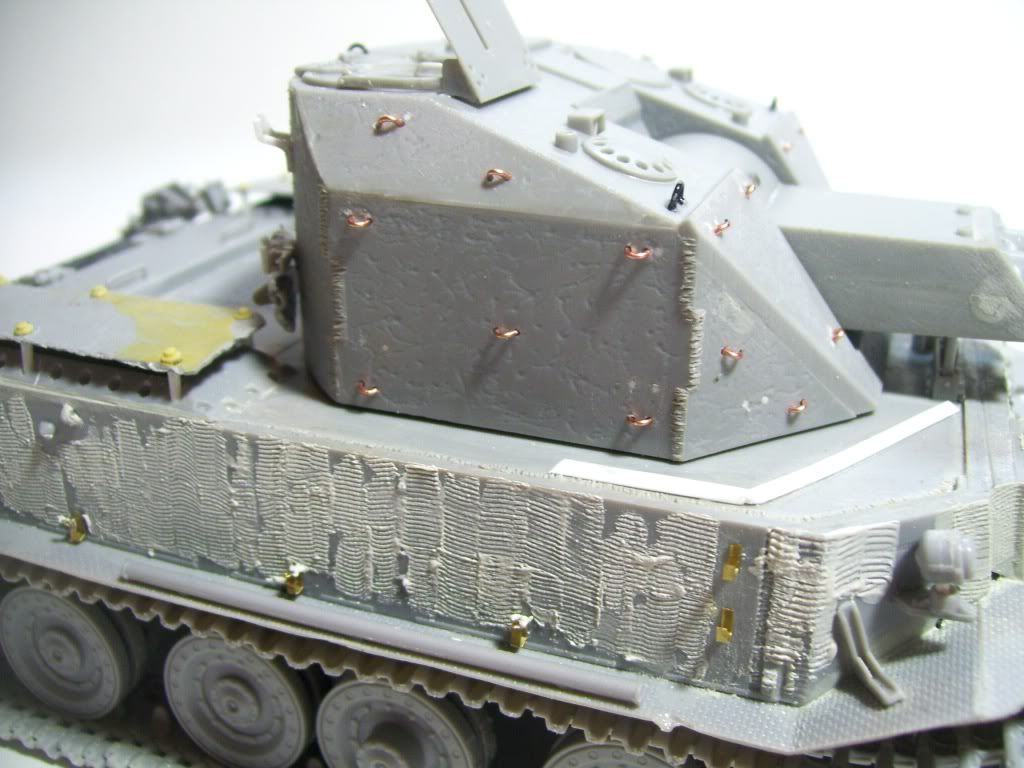
Next, I figured that the hull would have some "field-applied zimmerit"--kinda rough and not-too-neat. I used Squadron's white putty and some Testor's glue to thin it, and applied it with Tamiya's applicators.

Two other mods that I did were to rough up the turret sides with my Dremel using a small metal grinding head bounced along the surface. Also, I added a bunch of foliage loops using small gauge copper wire. I also improved the welds along the turret.
Here's what I had at that point before painting..
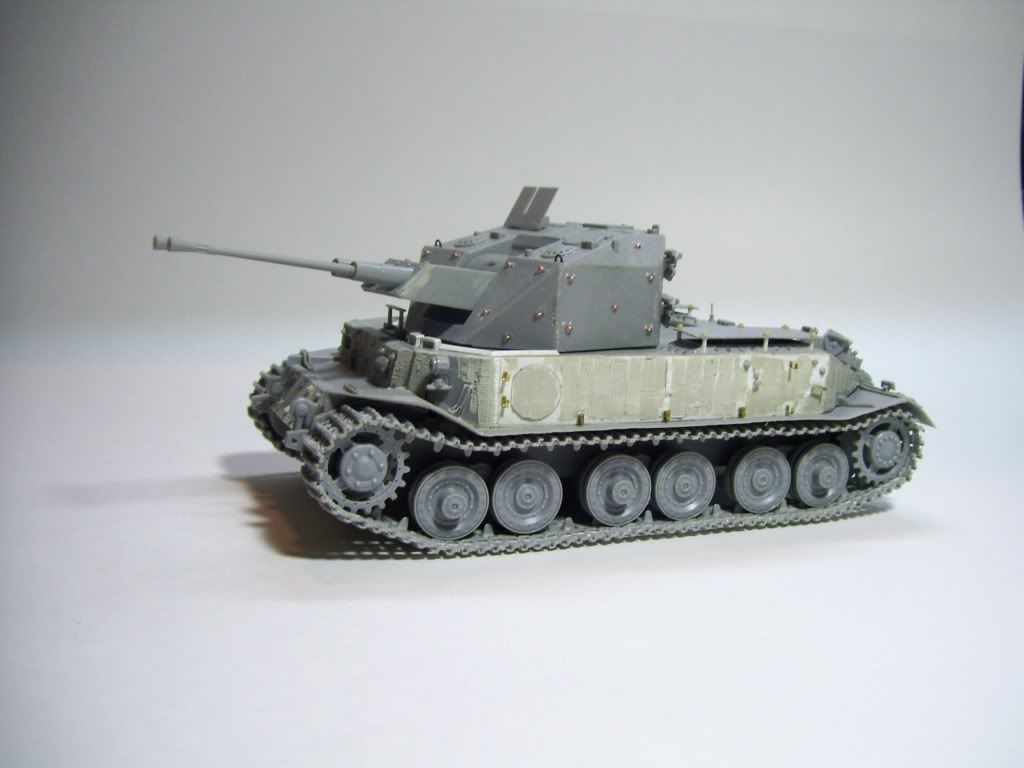
After stripping the wheels and tracks, I primered it with some Tamiya Gray.
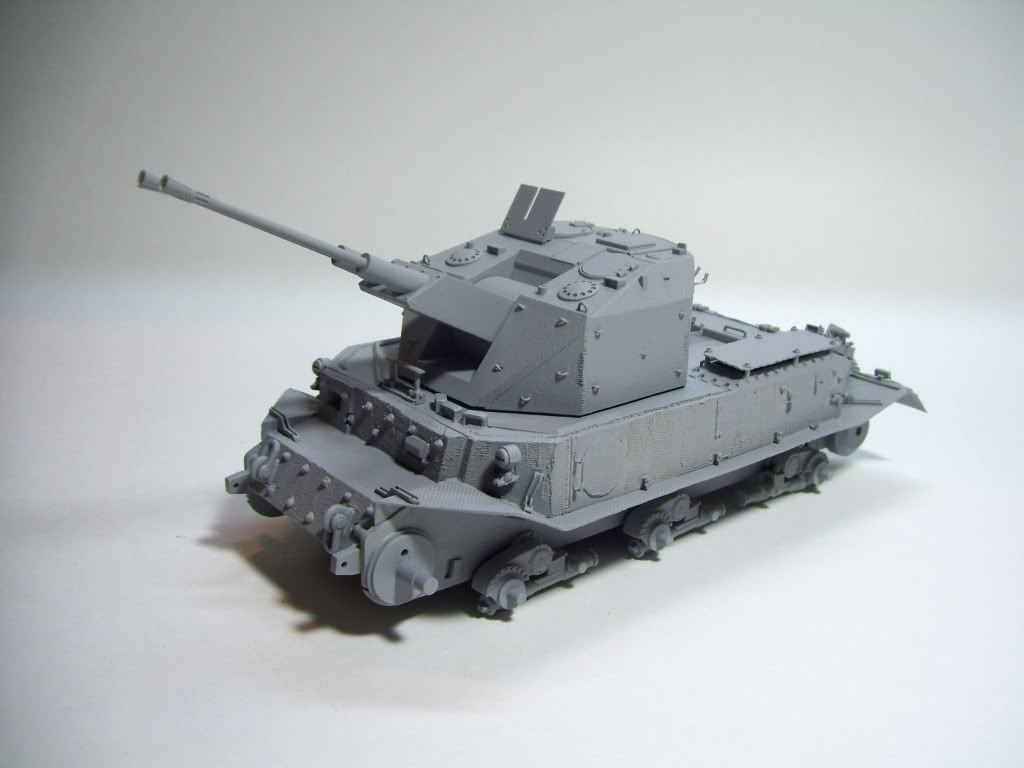
SOOOO--here's my concept for this vehicle!!

I am going to portray this as a brand new turret taken off the line and stuck onto an older hull. The hull will have been an old "command tank" variant, and one that had been sent to the front in Panzer Gray (as had been the original Porsche "VK" Tigers), and overpainted with yellow and green bands. It will be a degraded, faded hull--but the "new" turret will be finished in the newly ordered Dark Green, and will reflect a cleaner appearance. I'm going to try to capture the mood of "just get this to the front any way you can".

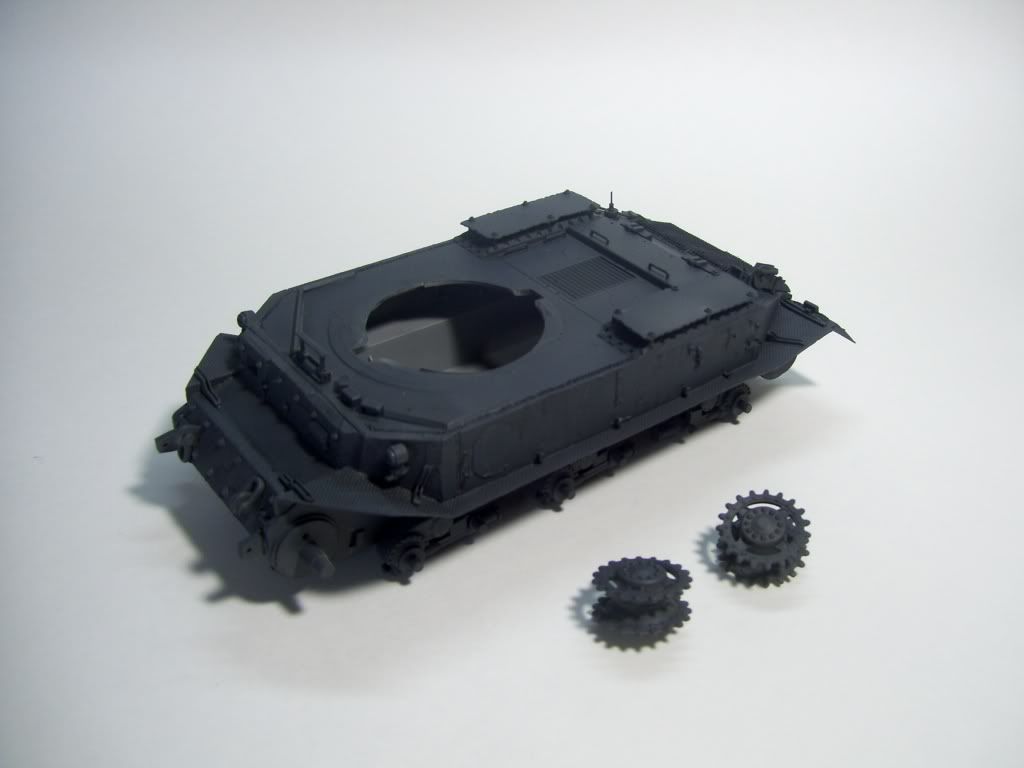
SO here's what I did so far....the hull painted in Tamiya German Grey, first in straight GG, then lightened with Tamiya Buff in the interior panels as is "normal" for my style...
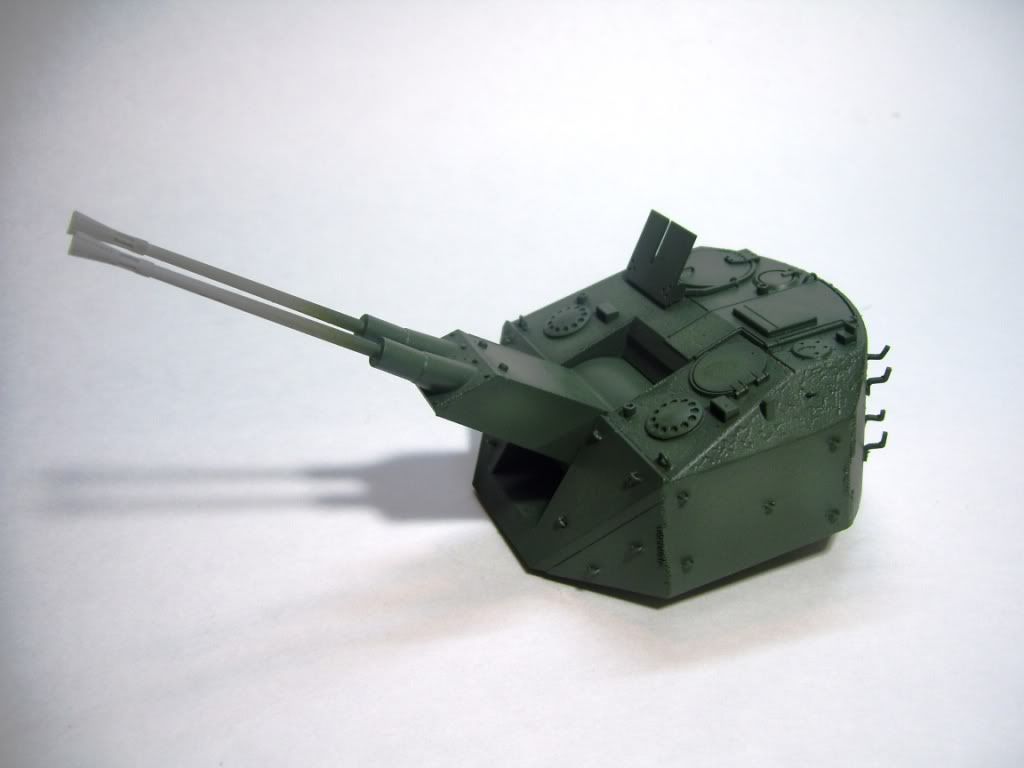
The turret was painted in Tamiya "JA Green", with a very slight over-fading of JA Green + Tamiya "Sky".
Here's the two elements so far....


And together.....keep in mind, the hull is nowhere near "finished". I'm going to be trying some new technique for me on this one, including the "Salt Method" to get a beat-up hull.

So it's off on another Armor adventure! Stick out tongue

Questions and comments always welcomed!

EDIT AND UPDATE!

After careful thought, I decided to try something even more challenging--a full-on "Color Modulation" ala' Adam Wilder. I think I want to try something a little different fro what I normally do--the "inside panel" lightening technique---and go for a "single light source" modulation the way that is becoming popular on some other forums.

I went out to buy some "Simple Green", which I've learned about in Auto Modeling--it works wonders in stripping paint. An hour or two in the "Green Bath" and the paint comes right off. It works for both Tamiya acrylics and spray paints. The only downside is that the stuff ain't cheap--like, $8.00 for 20 oz! And you need about 30 ounces to really make a good sized "bath". I found some in a hardware store for $7.49/bottle, but since I was on my way to Walmart, I decided to see what they had.

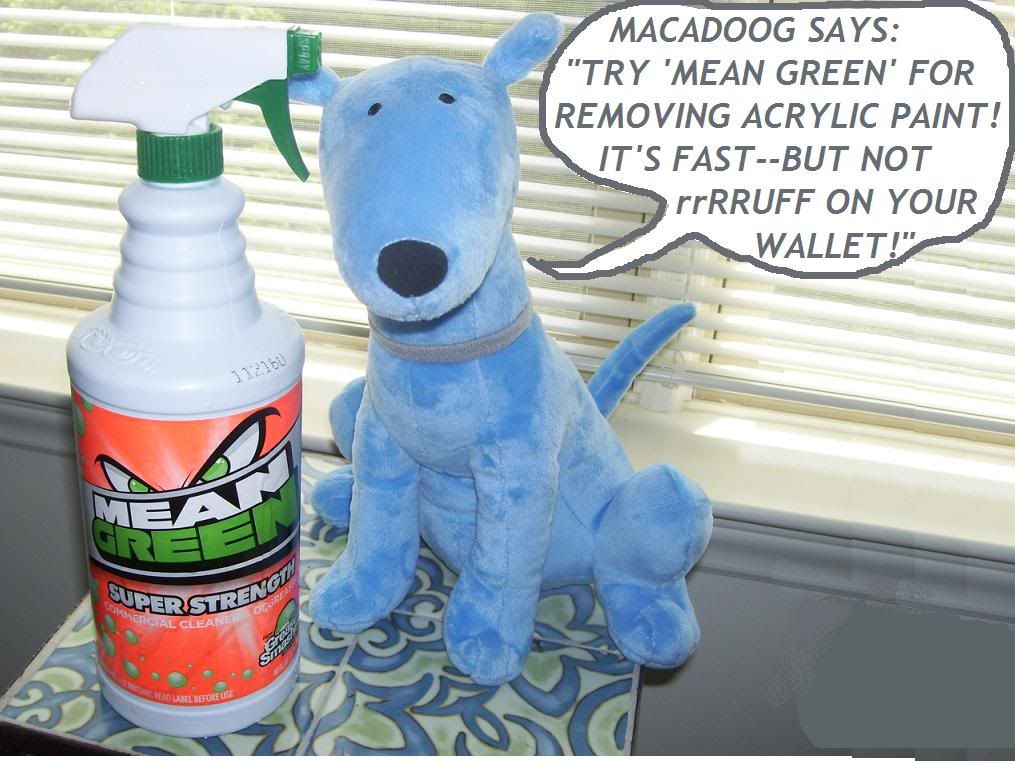
They didn't have any "Simple Green", but they did have "Mean Green". It looked like a similar product to me. On the back it had that warning "Do not use on painted surfaces". HMMM? Could it work the same? Geez. for $1.79 a bottle for 40 ounces, how could I go wrong?!

I got home and put the model in the bin, and started pouring--holy cow!--as soon as I started to pour the stuff on the model (which had been airbrushed with Tamiya acrylics) the paint literally started to wash right off! In the photo, I had Jenn grab the camera and shoot as I was still pouring out the liquid--the hull there has already been taken down to the gray Duplicote primer, and the Coelian turret has already lost most of its green topcoat, exposing the Dark Yellow underneath! The Dark Yellow came off a few minutes later--I easily just brushed it off with a soft brush, no problem! This stuff is AMAZING!--and CHEAP!

Spokesdoog Macadoog tells you what you need to know:
More to come after I get a new coat of paint on--it's going to take some time, so be patient, y'all!

Wink


  • Member since
    April 2009
  • From: Carmel, IN
Posted by deafpanzer on Sunday, September 25, 2011 9:51 PM

Looking great already!  You have been bookmarked... front row seat has been taken. 

Andy

  • Member since
    March 2006
Posted by TD4438 on Monday, September 26, 2011 12:38 AM

I'm definately diggin' the concept,but not sure about choice of color.We'll see when it's done.

  • Member since
    May 2006
  • From: Queensbury,NY
Posted by panzer88 on Monday, September 26, 2011 8:50 AM

Very cool. I'll definitely be watching this one.


  • Member since
    March 2003
  • From: Western North Carolina
Posted by Tojo72 on Monday, September 26, 2011 9:32 AM

very interesting,looking forward to your treatment

  • Member since
    December 2004
  • From: ohio
Posted by vonryan on Monday, September 26, 2011 10:15 AM

WOW i'm glad to see your still at it and nothings defferent still building awesome stuff really like it!


Clay 

  • Member since
    December 2008
  • From: Northern Va
Posted by psstoff995's lbro on Monday, September 26, 2011 10:24 AM

Great work so far Karl! i can't wait to see your take on the '"salt thingy'" Big Smile

-Will young modeler Test fit master
  • Member since
    January 2007
Posted by the doog on Monday, September 26, 2011 10:43 AM

Thanks, guys!

Ed, I may be concurring with you on this one....I"m considering stripping this and trying a "Color Modulation" technique with the airbrush?

I had a look at it this morning, and the "nothing changed" comment made me sit back and say. "Hmmm?" Maybe I SHOULD try stretching my legs a little more on this and try something more adventurous in the base coat? I realize that I"m kinda doing the same thing that I do on most of my models, and I may want to do something different to push my boundaries?

I'll post an update when I decide for sure!

In the meantime, thanks to everyone commenting, and for the welcome back to the Armor forum! Big Smile

  • Member since
    March 2006
Posted by TD4438 on Monday, September 26, 2011 8:10 PM

Oh no no no!

It's all my fault!

As cool as that kitbash looks,I think you made the right choice.You have the artistic talent to pull off something seriously awesome!

BTW,he doesn't lift a brush,but Marv likes hanging out at the bench with me.He talks a lot of smack with his no-building a$$!

  • Member since
    May 2003
  • From: fort mill SC
Posted by Robert92562 on Monday, September 26, 2011 8:34 PM

" y'all " You have already taken to the southern lingo...

  • Member since
    December 2006
  • From: N. Georgia
Posted by Jester75 on Monday, September 26, 2011 9:05 PM

Awesome doog, good to see you back in the armor section!!

Eric


  • Member since
    March 2006
  • From: Right Side of a Left State
Posted by Shellback on Tuesday, September 27, 2011 1:23 AM

Karl thats a bad a$$ looking vehicle . I like the idea . It looks like you have backed up your fictional vehicle with plenty of factual events to be able to make this build look valid . These type of builds dont happen enough . Its a break from the same-o same-o . Yes

You drink beer ? Beer LOL .

Carl

  • Member since
    January 2007
Posted by the doog on Tuesday, September 27, 2011 8:10 AM

TD4438

Oh no no no!

It's all my fault!

As cool as that kitbash looks,I think you made the right choice.You have the artistic talent to pull off something seriously awesome!

BTW,he doesn't lift a brush,but Marv likes hanging out at the bench with me.He talks a lot of smack with his no-building a$$!

http://i386.photobucket.com/albums/oo309/TI4438/Aircraft/018.jpg

Ed, that's a hilarious photo! lol! It actually looks real! Big Smile 

And BTW< it's not really "your fault"! I woke up and looked at it and thought that I could do something--SHOULD do something----different with the painting  technique. Now, even I admit that the combination of the green + gray looks pretty "odd", but I"m hoping that when I tie it all together it will find a plausible harmony and appearance.

Hey, it might look like hell and not come together, but in a way, that's what modeling means to me--yake a chance, and risk what could be either a disaster or a masterpiece! I'm going to be going for a far more involved series of airbrushing steps that I have before. I've been reading up on "Color Modulation" and  want to try it.

If it all goes wrong, THEN I'll blame you! Wink ha ha!

Robert--ha ha, it's hard to get away from "all the y;all" down here! (Actually it's not so bad--there are a lot more Northerners here than I thought!!)

Eric--thanks, man! It's sincerely good to be back!

Carl--ha ha, thanks, buddy! I'll take a tall Weissbier after this one if it comes out the way I'm envisioning it.Thanks for riding along with me on this one!

Back to the bench and the airbrush! Thanks again for commenting, guys! Smile


  • Member since
    November 2005
Posted by Anonymous on Tuesday, September 27, 2011 8:33 AM

You had me with the "Mean Green" bath...

  • Member since
    April 2003
  • From: 41 Degrees 52.4 minutes North; 72 Degrees 7.3 minutes West
Posted by bbrowniii on Tuesday, September 27, 2011 8:33 AM

Doog

Really nice project you've got going on here. It is nice to see you doing armor again. Cars are nice and all, but you belong down in the dirt with the rest of us! Stick out tongue

Can't wait to see more.

'All that is necessary for the triumph of evil is for good men to do nothing' - Edmund Burke (1770 ??)


  • Member since
    April 2005
  • From: Piscataway, NJ!
Posted by wing_nut on Tuesday, September 27, 2011 10:23 AM

It's getting hard enough to use the old bean to concentrate on stuff that comes in one box with a set of papers that tell you what to do.  And you go seriously off mission.  And so nicely too.

Marc  

  • Member since
    March 2003
  • From: Rain USA, Vancouver WA
Posted by tigerman on Tuesday, September 27, 2011 12:59 PM

Intriguing what-if. I've always wanted to do something like this with some older kits. Maybe next time I go to a show, I'll grab a couple of cheap kits and then throw them together.

   http://i7.photobucket.com/albums/y269/wing_nut_5o/PANZERJAGERGB.jpg

 Eric 

  • Member since
    August 2008
  • From: S.W. Missouri
Posted by Pvt Mutt on Tuesday, September 27, 2011 2:42 PM

Doog,you did say your name was doog right? Well Welcome to the armor forum Doog and if you need help just sing out the folks here are willing and able to help.

You'll like it here my boyWink

Tony lee

Shoot Low Boys They're Ridin Ponys

  • Member since
    July 2004
  • From: Texas
Posted by wbill76 on Tuesday, September 27, 2011 5:20 PM

Nice to see you back over here in the Armor forum Karl! Look forward to seeing what your leg-stretching will do for you! Yes

  • Member since
    January 2007
Posted by the doog on Tuesday, September 27, 2011 8:15 PM

Hey guys, thanks to all for looking in!

Manny--you should try tat stiff if you ever need to do s strip-and-repaint. It's really amazing stuff!

Boyd--yeah, I"m still working on my green Mach 1, but I just have the itch to get this one going and do something HEAVY! I'll be working between the two for the next couple weeks!

Marc---I only hope I can keep up with your award-winning performance at AMPS! You've really got some incredible stuff recently, and you guys have all collectively raised the bar! I'll be working hard to "be worthy"! Wink

Hal--glad that you got to witness the power of MEAN GREEN! Thanks for looking in, and welcome to the forum

Tigerman---it's always goof to break out of a rut; I wanted to do something radical in both build and finish. I only hope I can pull this one off and rock it! ! It would be cool to see some other "conceptual" builds fro some of our veteran members here!

Tony--ha ha. that made me laugh! Thanks for dropping in--you've got so much on your hands with that Diana, I appreciate you taking the time to stop by!

Bill--thanks, buddy! Glad to be back! I just hope I don't stretch mu leg too far and pull a muscle, ha ha!

Working away as we speak--will have an update in a day or two! Thanks again, guys!!!! Smile

  • Member since
    August 2008
  • From: S.W. Missouri
Posted by Pvt Mutt on Tuesday, September 27, 2011 8:47 PM

OH MY Karl is that you? Didn't recognize you,must be being a married man did it or it could have been all that black windshield glue under your fingernails.

Just kiddin you know. I see you found your way back home and so good to see you back buddy of mine.

Tony lee

Shoot Low Boys They're Ridin Ponys

  • Member since
    June 2010
  • From: Spokane, WA
Posted by Hun Hunter on Thursday, September 29, 2011 6:49 PM

If that stuff is as strong or stronger than Simple Green be sure to wear gloves, the reason it's so strong is because you're supposed to dilute it with water when you use it as a cleaner. Not sure if it can cause burning but it might cause irritation, better safe than sorry.

There are some that call me... Nash

  • Member since
    March 2003
  • From: El Dorado Hills, CA
Posted by IBuild148 on Thursday, September 29, 2011 11:09 PM

Macadoog............You crack me up with the stuff you come up with!

Just don't tell us you sleep with that dog in lieu of a blanky!

IBuildOne48

Teach modeling to youth!

Scalefinishes.com

http://i712.photobucket.com/albums/ww122/randysmodels/NMF%20Group%20build%20II/Group%20Badge/NMFIIGBbadgesmall.jpg


  • Member since
    January 2007
Posted by the doog on Wednesday, October 5, 2011 8:01 PM

Hi guys,

Thanks again for all the comments. It's great to be back working on some armor! Sorry that the update has taken so long, but I had some work to do in New York, and was traveling...but I've still been working away.

I started the re-paint by putting down a base coat of flat black. This is to ensure shadows to the final paint finish.

Next, the Panzer Grey from Tamiya was put down in first an un-tinted coat straight from the bottle, and then lightened with both White and a little bit of Flat Blue, and the panels highlighted using masks ad blocks to allow shadows in the lower panels and recesses. All painting was done spraying from "above" so as to leave "shadows".

Now, all of that will next be covered in Dark Yellow, then hair-sprayed to make for a well-abused "top coat" over an old Panzer Grey base. The turret, however, was repainted in Dark Green--Tamiya "JA Green" for a different hue which I imagine would be close to the newly-proposed DG in late 1945. This was also painted in the "Modulation" style, meaning adding lighter tones and airbrushing them onto the higher parts from above to leave shadows. Masking and careful angles also help in this technique.

And speaking of DY--Tamiya's DY, straight from the can...the lower hull was left unpainted, as I wanted to show a field-painted vehicle, on top of the field-applied zimm.

The lightening treatment was given here too, lightened with White and a smidge of Yellow. The sides were not painted, but left in "dark" DY. Again, everything was painted "from above" so as to leave shadows and highlights.

Next, Tamiya's "Field Grey" was used to put down a "Panzer Green" camo pattern. The engine shields were then masked and painted in Steel to set them up for a good rusting. Stick out tongue

Where I was at this point...

OK--skip ahead a bit. Sorry, but I didn't get this on film--trying to make up for time lost..Embarrassed. But I coated the whole vehicle with hair spray, and then wet the model with water and started to scratch and remove the paint to show a heavily-weathered old vehicle hull brought in from the front to be used as an ersatz carrier for the Coelian turret. I mostly weathered only the tops of the hull panels, as I didn't want to yet "wear through" the sides where the zimm was, because it would be "Grey" and that would look really weird. I'll add "zimm weathering" later.

The turret has not been addressed yet...


The wheels got the same Hairspray treatment.

And here's where I am at this point...I"m starting to see the narrative emerge in the paint now.

Next up--a LOT of subtle and careful oil weathering/tinting ala' Mike Rinaldi, as well as detail painting. I should have that in the next update, and then I'll really start in with the overall weathering--filters and such,...

All comments and queries welcomed!Smile Thanks for looking in, guys!


  • Member since
    December 2003
  • From: Los Angeles
Posted by dostacos on Wednesday, October 5, 2011 8:41 PM

Robert92562

" y'all " You have already taken to the southern lingo...

well sort of, Y'all is SINGULAR and all Y'all is plural Big Smile


Toast Dan

Dan support your 2nd amendment rights to keep and arm bears!
  • Member since
    March 2006
Posted by TD4438 on Wednesday, October 5, 2011 11:38 PM

Like I said earlier,you have the artistic talent to pull off something really awesome.I do believe you are well on your way to doing it!

  • Member since
    January 2007
Posted by the doog on Thursday, October 6, 2011 2:34 PM

Hey, thanks, TD! Thanks for the "push" to do a "redo" on this.

I think we're on track with it now?

Thanks for commenting! Smile

  • Member since
    July 2006
  • From: New Jersey
Posted by redleg12 on Thursday, October 6, 2011 6:41 PM

Karl.....Holy Crap I missed this one.....glad to see you back and up and running in NC.

Interesting concept model. Love the rebound in removing the paint. As usual, you are quite the artist. Nice job on the modulation. I will be interested to see where this ends up.

Rounds Complete!!

"The Moral High Ground....A Great Place to Emplace Artillery."

  • Member since
    April 2003
  • From: 41 Degrees 52.4 minutes North; 72 Degrees 7.3 minutes West
Posted by bbrowniii on Thursday, October 6, 2011 6:51 PM

Karl

That is pretty darn cool, right there. That's what it is...Stick out tongue

'All that is necessary for the triumph of evil is for good men to do nothing' - Edmund Burke (1770 ??)


  • Member since
    August 2006
  • From: Cygnus X-1
Posted by ogrejohn on Friday, October 7, 2011 2:47 AM

Whole lotta paint slinging going on here! Nice work Karl!

JOIN OUR COMMUNITY!

Our community is FREE to join. To participate you must either login or register for an account.

SEARCH FORUMS
FREE NEWSLETTER
By signing up you may also receive reader surveys and occasional special offers. We do not sell, rent or trade our email lists. View our Privacy Policy.