dupes: Thanks man!
wing nut: Yep, Paint and weathering...I feel like I'm in the ZONE!
Salt Techinique explained:
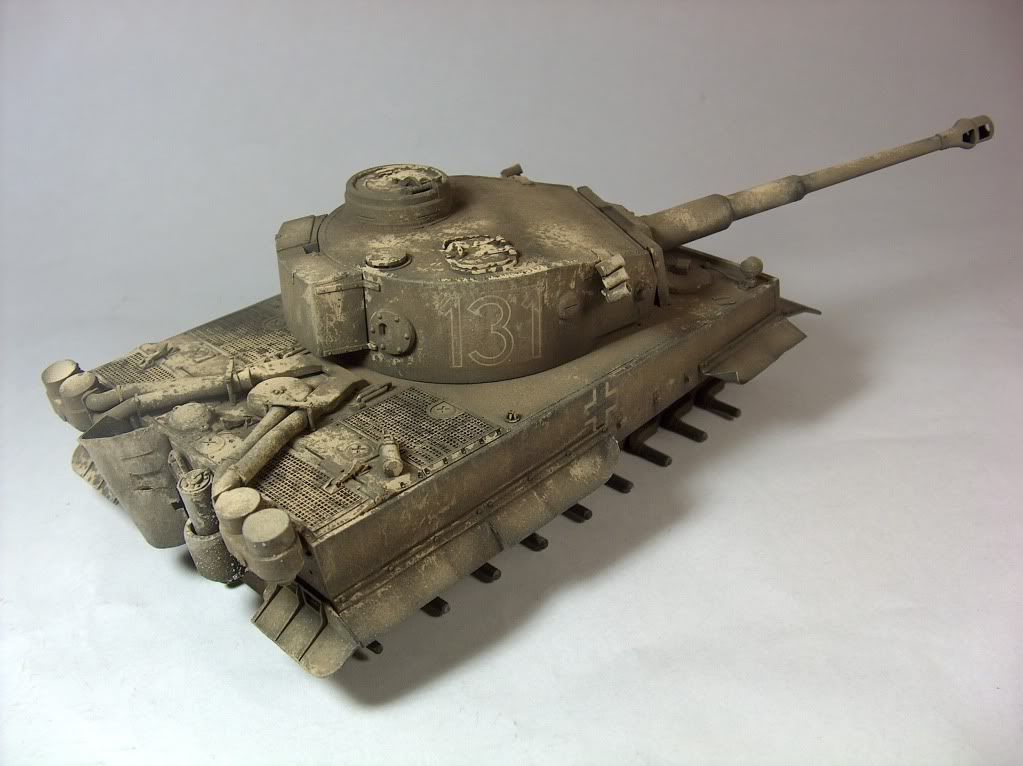
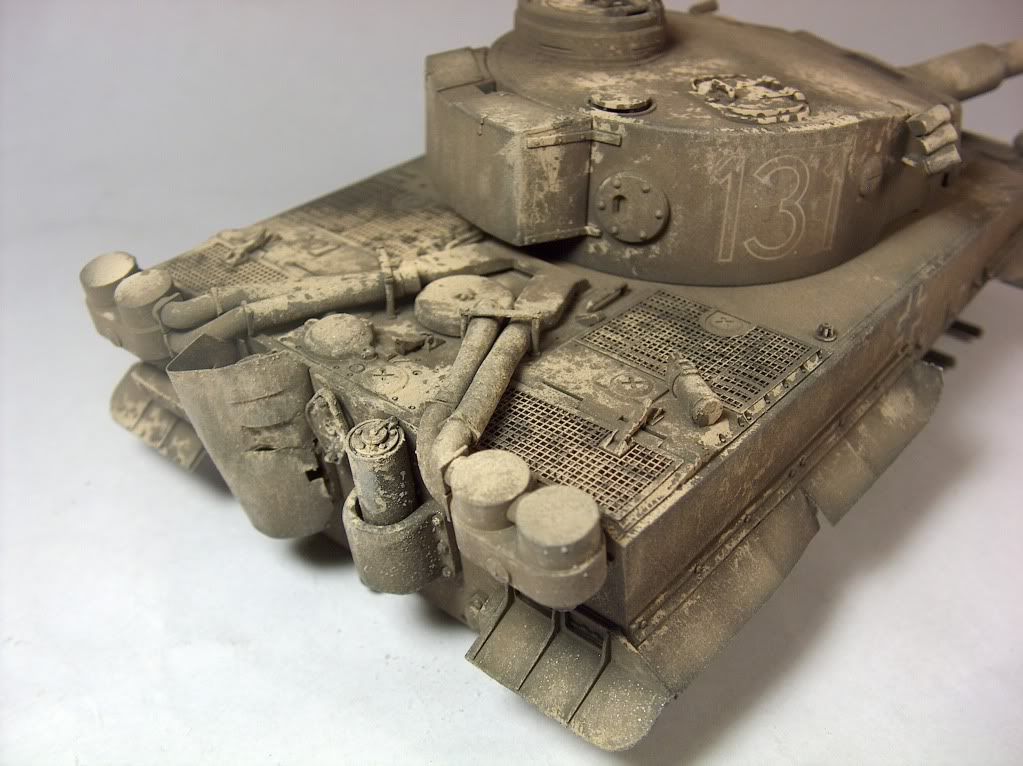
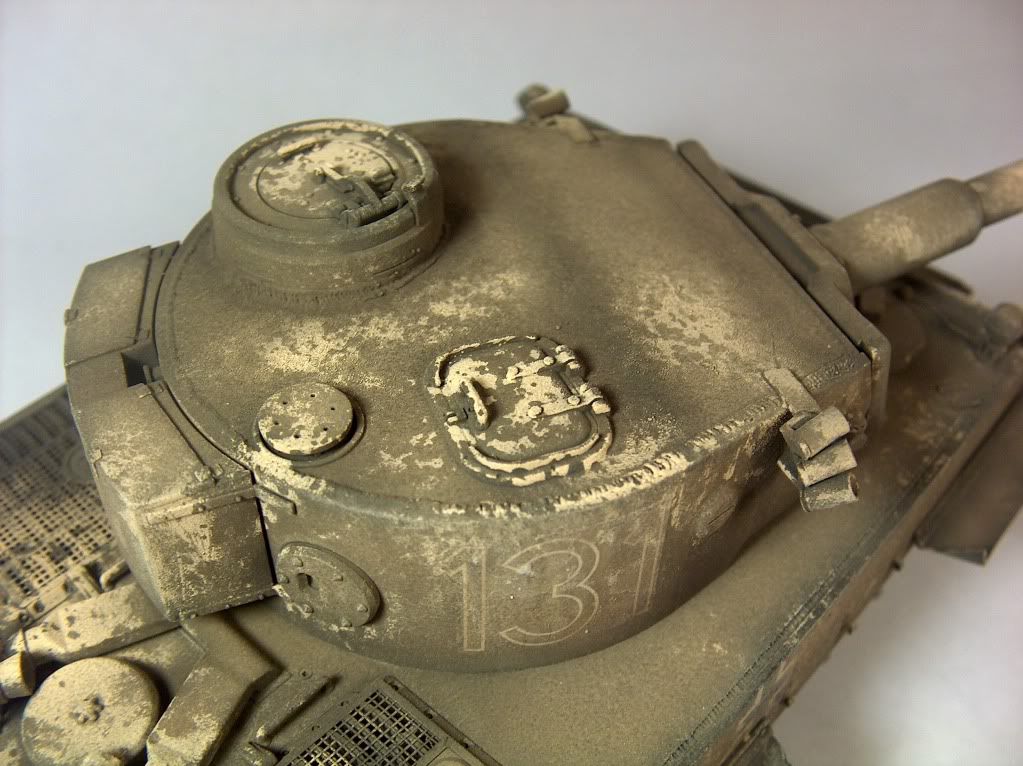
Guys: I used coarse salt (blue container at grocery store, about $2.50) to achieve the effect seen in the photos below. I first sprayed the model HEAVILY with water then I hap-hazardly sprinkleda generous helping of salt everywhere, bunching it up in the "shadowed" areas with the opposite end of a paintbrush. Then I sprayed water again. With a 60%+ to40%- (rubbing alcohol to paint) dilution of Tamiya XF-57/Buff and cranked up airpressure I then sprayed the model. I focused the spray on sun exposure areas and I let the pressure blow the salt off the model. It makes a mess! Note: If you alter the spraying distance of the airbrush (closer removes more salt and adds more pigment) from the model, you also will very the intensity of paint...which is a benefit.
I was VERY careful to NOT add too much paint! I really liked my post-shading work and I wanted it to still stand out.... I originally intended to achieve a heavy wind-driven sand finish too.( Note: If I were to do this as a winter whitewash I would have added much more paint for newly applied wash, and a bit more for a well-worn finish)
While the paint and salt was still wet I used canned air spray (computer keyboard cleaning stuff) and blew off as much salt as I could. (Note: Do this outdoors!, and be careful around attached details). Oh yeah, as you spray, direct it downward as much as possible...it adds to the streaking effect. To remove the rest of the salt, I ran the model under lukewarm water at the kitchen faucet, again downward for steaking.
It takes quite a while for the model to dry so I put it in front a small fan overnight. You can dry it in less time if you continually rotate the model.
When all is said and done there will probably be small bits of salt and a slight residue/light texture on the model. Use a toothpick and air can to knock of what bits you can. Leave the residue...trust me, the slightly rough texture in many places is a BENEFIT so don't sweat it... it picks up the paint during drybrushing fantastically and makes that ehaustive effort worthwhile.
Below you'll see the final product of this technique. At first I was disappointed that it was WAY to light (not color, but amount) AND I was afraid it looked more like thick powder and dust than a paint-tone variation BUT I decided to leave it well-enough alone. I'm GLAD I DID!!!..you'll see in future pictures (I'm much farther along on the model as of this writing) how subtle but effective this came out.
Finally, As you can tell this puts the model through its paces so keep off as many fragile details as possible...and if you know you're going to try this technique going-in, make sure to be attentive to strong gluing.
Thanks for looking:


