SEARCH FINESCALE.COM

Enter keywords or a search phrase below:

Italeri/Zvezda IS-2 Stalin WIP

5592 views
11 replies
1 rating 2 rating 3 rating 4 rating 5 rating
  • Member since
    December 2002
  • From: Fort Knox
Italeri/Zvezda IS-2 Stalin WIP
Posted by Rob Gronovius on Monday, February 11, 2013 12:19 PM

I've had this kit in my possession for a very long time; it's older than my son who turns 16 on March 1st. I bought it when I was stationed at Redstone Arsenal PX right after Christmas of 1996. It was on clearance for 75% off (original price of $21.99). It was a smaller PX and the toy aisles became the lawn & garden area during spring and summer. I wasn't familiar with Zvezda back then, but had built a lot of Testors/Italeri kits during the 80s and at $5.50; the price was too good to not buy it.

The kit was very crude compared to real Italeri kits I had built before. I wasn't familiar with the IS series of tanks and after opening the kit, I stuck it into my stash for another day.

Almost five years ago, a modeler was selling the Tamiya JS-2 link & length tracks for $5 on Missing Lynx. I bought them and stuck the padded envelope inside the kit box. It was postmarked May 14, 2008.

A year ago, a modeler from Australia offered the Tamiya JS-2 suspension parts for free to the first taker. He sent me two of the untouched "A" sprues. They included the entire road wheel, idler wheel and drive sprockets, the gun tube, fuel tanks, lifting hooks, road wheel arms, support rollers and various other detail parts.

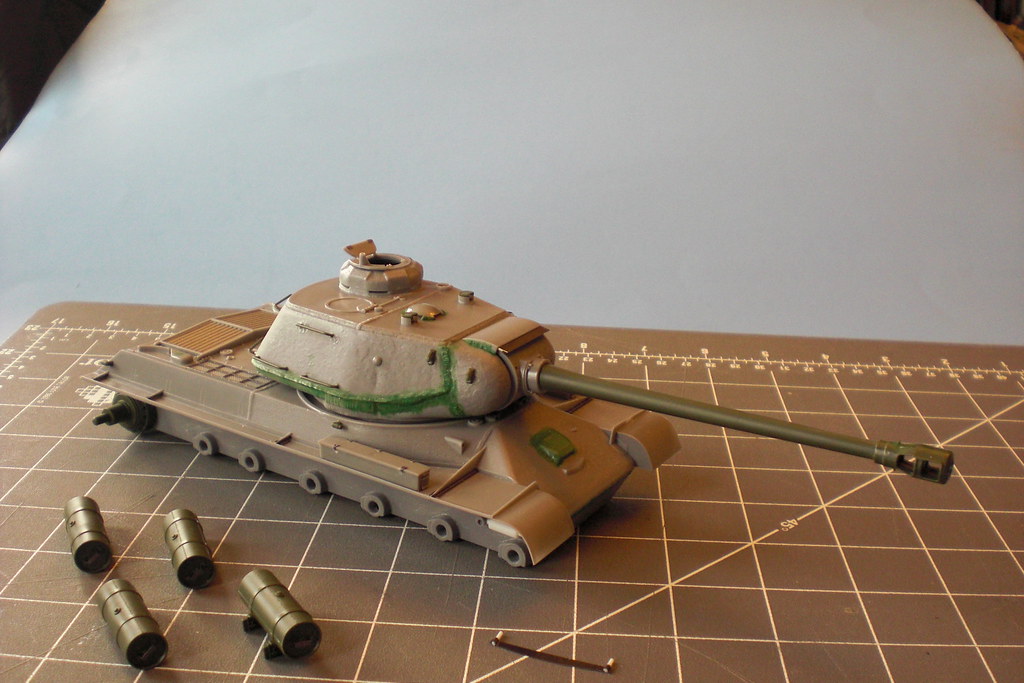
Sometime along the way, I ended up with the CMK aluminum gun tube and resin mantlet as well as the Eduard PE set for the IS-2. The gun tube and mantlet are miniscule compared to the original Zvezda one and the Tamiya one, both of which appear to be identical in dimensions. I chose to use the Tamiya gun tube because it looks better than the Zvezda one.

I began by removing the molded on drive sprocket and support roller mounts. I've drilled out the road wheel and idler mounts to accept the Tamiya parts. There were other molded on locating squares I removed. They were similar to the molded on lines for the driver's sight that is visible on the front slope of the hull below the main gun and on the lower front hull for the tow hooks in the above photo. I removed those lines after I took the photograph.


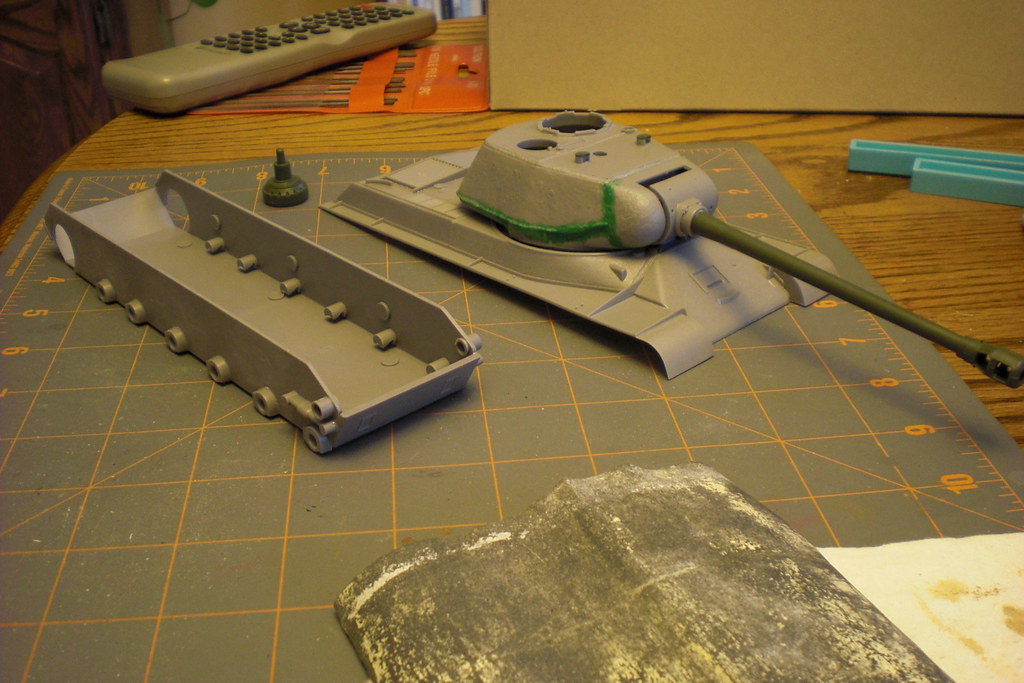
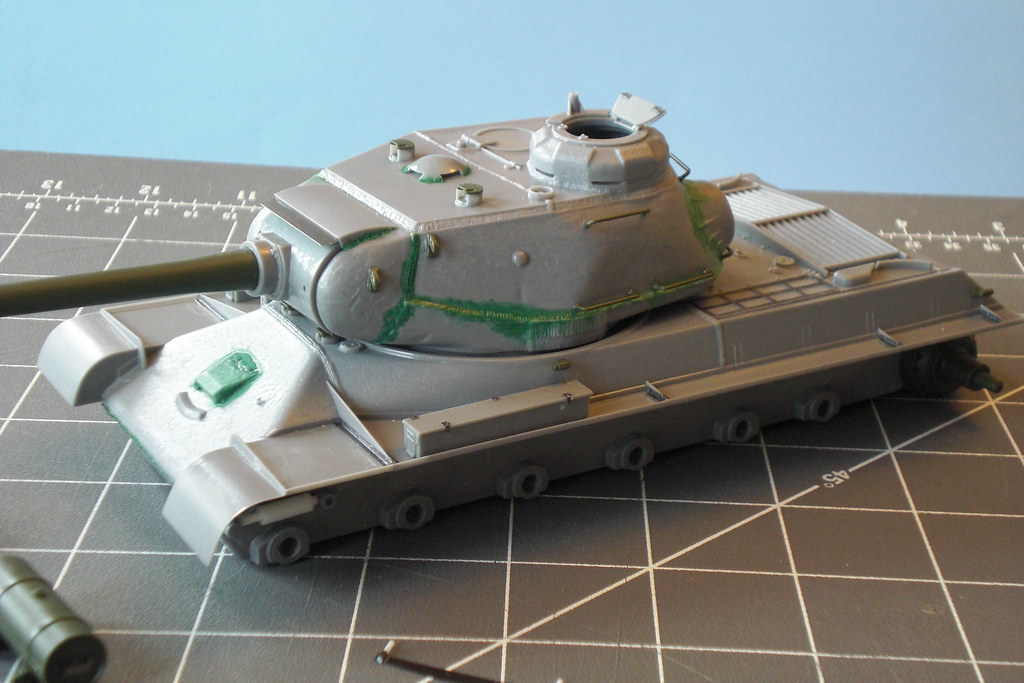
More in progress photos with the majority of the turret completed with Tamiya detail parts and Eduard photo etch. Squadron Green Stuff putty was used to fill seams and add weld marks around turret fixtures.

Liquid cement was stippled on the gun mantlet to add texture and Grandt Line conical head rivets were added to replace misshapen molded on ones.

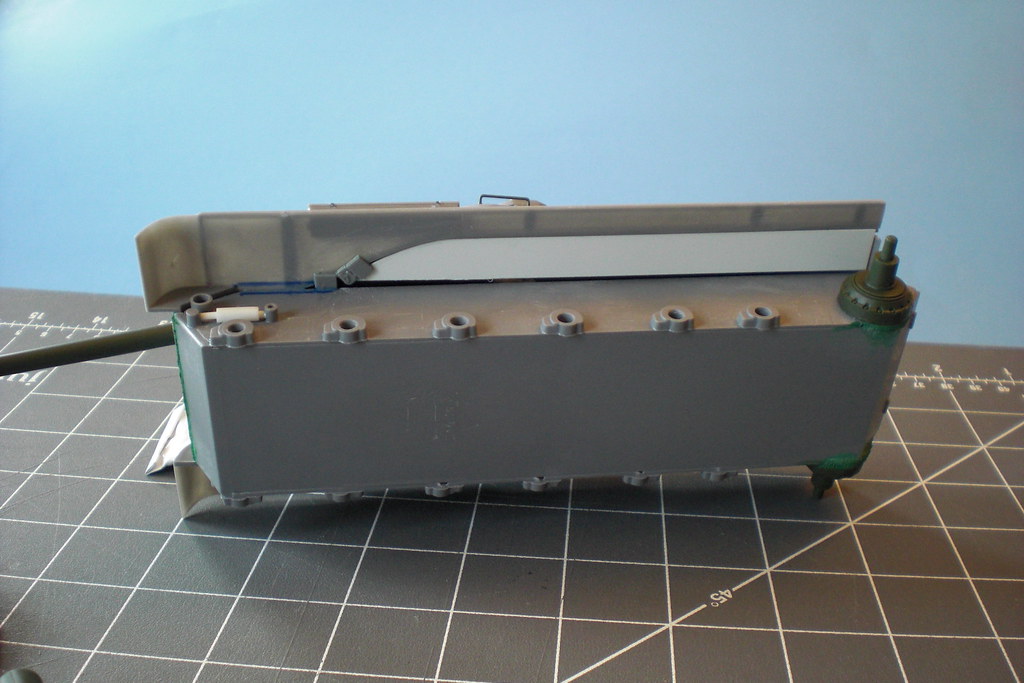
The open sponsons were blanked off with scraps of Evergreen styrene. New track adjusting idler links were scratch built using the molded on detail as a guide. Nothing fancy, just enough to get by.

The Tamiya fuel tanks were detailed with the Eduard PE set.


  • Member since
    March 2004
  • From: Spartanburg, SC
Posted by subfixer on Monday, February 11, 2013 12:41 PM

It sounds like this project was preordained for you, Rob.

I'm from the government and I'm here to help.

  • Member since
    July 2003
  • From: On my kitchen counter top somewhere in North Carolina.
Posted by disastermaster on Monday, February 11, 2013 2:50 PM

 Whoooaaa Rob, thought I'd share this morsel with you. http://i165.photobucket.com/albums/u55/BJ_BOBBI_JO9/Bathing%20and%20Hygiene/36_1_57.gif

Before you get any further down the road, that weld you've applied around all sides of the mantlet is incorrect. The mantlet was bolted to the turret on both the IS-I and IS-II , not welded. These pics will help you.

 Here'ya go.......... 

http://tigerscorner.ru/gallery/images/stories/walk_is/IMG_0323.jpg

http://tigerscorner.ru/gallery/images/stories/walk_is/IMG_0321.jpg

http://www.williammaloney.com/Aviation/MilitaryMuseumOfSouthernNewEngland/JSJosephStalinTankMainGun/images/04StalinTankRecoilNMantlet.jpg

http://ravenrepublic.net/blog/wp-content/uploads/2010/06/is2_01_164.jpg

Copy and go to

https://www.google.com/search?q=JS+II+russian+tank+seminar&hl=en&gbv=2&um=1&tab=iw&gs_l=heirloom-serp.12...14728.19865.0.23824.6.5.1.0.0.0.140.480.2j3.5.0...0.0...1c.1.2LrnMeiS2Hs&oq=JS+II+russian+tank+seminar

for additional help and download the PDF file named "The Soviet IS Series Heavy Tanks & How to Model Them - 4BO Green". 

It's a clean download, I have the same one.

http://files.myopera.com/crystalacey/Smilies_Emoticons/Passed_Out_Smilie.gif

Sherman-Jumbo-1945

"I was so much older then, I'm younger than that now"


  • Member since
    May 2005
  • From: Dublin Rep Of Ireland
Posted by terry35 on Monday, February 11, 2013 3:25 PM
Very interesting thread, nice build so far Rob, I would assume it will be easy enough to sort out the eror.

Terry.

  • Member since
    December 2006
  • From: N. Georgia
Posted by Jester75 on Monday, February 11, 2013 3:33 PM

Nice work so far Rob, this should be interesting to watch! What a beastly turret on that thing.

Eric


  • Member since
    September 2006
  • From: Dripping Springs, TX, USA
Posted by RBaer on Monday, February 11, 2013 6:47 PM

Cool. This is old-school modeling.

I also like the way you've put together a collection of bits and pieces over the years.

Apprentice rivet counter.

  • Member since
    January 2007
Posted by the doog on Monday, February 11, 2013 9:06 PM

WOW, awesome, Rob! I can't remember ever seeing a WIP or a model posted from you! I hope this is not your last!

I"m looking forward to seeing what you do with it!!!

  • Member since
    July 2006
  • From: San Francisco Bay Area
Posted by bufflehead on Monday, February 11, 2013 10:09 PM

Rob, you've always been so helpful providing information on a plethora of subjects, its nice to see your work again!  I love how you provided the history of parts gathering for this build!  Verrrry interesting!  Plus, Steve provided some really cool reference photos!!

Ernest

Last Armor Build - 1/35 Dragon M-26A1, 1/35 Emhar Mk.IV Female


Last Aircraft Builds - Hobby Boss 1/72 F4F Wildcat & FW-190A8


  • Member since
    March 2003
  • From: Western North Carolina
Posted by Tojo72 on Monday, February 11, 2013 10:56 PM

you have a nice project going on,looks good so far.

  • Member since
    December 2002
  • From: Fort Knox
Posted by Rob Gronovius on Tuesday, February 12, 2013 12:46 AM

Darn it, now I'll have to trash the entire build. seriously though, thanks for the heads up. Very few online builds of the old Zvezda kit; most are of the later Dragon or Tamiya kits. I was wondering why the mantlet had a tremendous gap along the entire edge. Fortunately, the kit has a very rough cast to replicate the actual vehicle and I should be able to reduce the green stuff with some liquid cement.

I decided to build the kit because, frankly, it isn't worth selling on eBay and it's not worth pouring any real money into aftermarket to make it better (the price of AM for this kit would be equal to a better Dragon kit).

I'm not too concerned with accuracy; I'm just trying to up the detailing a notch. All I did was a rough approximation of the idler adjuster with some styrene rod & tube. I didn't even bother to carve off the molded on fender braces. I just added the PE bolt detail strips to the plastic. Same with the engine grills; I didn't bother to cut out the molded mesh to replace it with the Eduard mesh. I did add the bolt detail grid though. I've never been one to replace the plastic with PE just because they provide you with it.

I did notice the commander's hatch is inaccurate if you open it (which I decided to do). The kit pieces are complete semi-circles, but the edges of the hatch where the hinges are are straight across. I fixed the rear hatch portion but haven't gotten to the forward hatch half. It has the periscope detail and I have to be more careful since the periscope interferes with just cutting it. I have a set of Soviet tank crewmen and I thought I may stick a commander figure in the hole.

Another issue that I've come across is getting the road wheel arms at the proper angle to give the tank the proper height. The Tamiya kit arms are keyed to that hull and the original Zvezda arms are keyed to this hull. Since I drilled out the mounting holes to accept the Tamiya arms, there isn't a key to lock the arms into the correct angle.

I think I may assemble the link & length track in its entirety and use it as a guide to set the proper height. Or I may just guestimate it. Depends on how lazy I get when that task arises.

  • Member since
    July 2003
  • From: On my kitchen counter top somewhere in North Carolina.
Posted by disastermaster on Tuesday, February 12, 2013 12:58 AM

  You're welcome, the PDF file addresses the height issues for several kits of this build and illustrates the various muzzle brakes associated with it.

Sherman-Jumbo-1945

"I was so much older then, I'm younger than that now"


  • Member since
    November 2009
  • From: SW Virginia
Posted by Gamera on Tuesday, February 12, 2013 12:40 PM

Very cool, will be following along. Love the look of the IS/JS series - what a brute.

"I dream in fire but work in clay." -Arthur Machen


JOIN OUR COMMUNITY!

Our community is FREE to join. To participate you must either login or register for an account.

SEARCH FORUMS
FREE NEWSLETTER
By signing up you may also receive reader surveys and occasional special offers. We do not sell, rent or trade our email lists. View our Privacy Policy.