SEARCH FINESCALE.COM

Enter keywords or a search phrase below:

"The Hunters GB" (2/1/08 to 6/1/08)

98572 views
1237 replies
1 rating 2 rating 3 rating 4 rating 5 rating
  • Member since
    February 2007
Posted by Slightly Altered on Friday, February 22, 2008 9:14 PM

I can't wait to see that bugger weathered dupes. Sounds like it's been a bit of a pain, which I'm sorry to hear. I think you've nailed it though!

Dale 

  • Member since
    November 2006
  • From: Coastal Maine
Posted by dupes on Friday, February 22, 2008 8:57 PM

Wow, this is the "better" available kit? Huh. I mean, it isn't horrible, but it's not exactly top shelf either. Need to seal up the decals, then it's time to weather this little b*****d. Evil [}:)]

My attempt at figures (bad Italeri figures, I might add) has not gone swimmingly (can you say bad department store mannequins?). Whistling [:-^] This may result in a CLOSED hull rather than throwing those big hatches open. Heh.

  • Member since
    July 2006
  • From: San Francisco Bay Area
Posted by bufflehead on Friday, February 22, 2008 8:54 PM
Yeah, I think I read somewhere that the Italeri kit was better than the Tamiya one.  Now that I'm thinking about it, I also think the builder "improved" the kit with a Model Victoria resin & PE upgrade set.....

Ernest

Last Armor Build - 1/35 Dragon M-26A1, 1/35 Emhar Mk.IV Female


Last Aircraft Builds - Hobby Boss 1/72 F4F Wildcat & FW-190A8


  • Member since
    March 2003
  • From: Rain USA, Vancouver WA
Posted by tigerman on Friday, February 22, 2008 8:09 PM
Years ago, my friend built both the Tamiya and Italeri kits. He seemed to think the Italeri kit was better detailed. I'm sure the Tamiya was easier to put together. That was a long, long time ago.

   http://i7.photobucket.com/albums/y269/wing_nut_5o/PANZERJAGERGB.jpg

 Eric 

  • Member since
    May 2006
  • From: Nanaimo, BC, Canada
Posted by Brews on Friday, February 22, 2008 4:12 PM
 dupes wrote:

you should probably just leave it in your stash. It's by far the weakest Italeri kit I've ever done...real soft on detail, bad engineering with respect to the contact points of the sprues, fit is...uhhh..."iffy".

I have a Tamiya Semovente. Is that any better? 

  • Member since
    October 2004
  • From: Northern Virginia
Posted by ygmodeler4 on Friday, February 22, 2008 11:35 AM
Sorry I haven't been around guys, Senior year and everything that comes with it, lol.  I haven't purchased the kit yet, but probably will do that hopefully soon.  I won't be around much either because lacrosse is starting up and that pretty much takes precident over everything except God and family, so I'll pop in and out, but I WILL be building, lol, once I get my kit.

Oh yeah, SWEET looking builds guys!

-Josiah

  • Member since
    November 2006
  • From: Coastal Maine
Posted by dupes on Friday, February 22, 2008 9:00 AM
 bufflehead wrote:

Looking good dupes!!  I've got this one in the stash, but it will be some time before I can get to it.  I'm curious...will it have a monotone or camo paint scheme?

Heh...hate to tell you Buffle, but you should probably just leave it in your stash. It's by far the weakest Italeri kit I've ever done...real soft on detail, bad engineering with respect to the contact points of the sprues, fit is...uhhh..."iffy". I have the Zvezda version of this same TD in my stash, I probably should have stuck with that one and continued the theme!

I'll be doing the monotone desert scheme, have a couple of chipping techniques I wanted to test on this guy.

Wait until you see a pic of this next to the ISU-152 - hard to believe they were manufactured for the same purpose! 

  • Member since
    December 2007
  • From: Eagle River, WI
Posted by PANZERJAGER on Thursday, February 21, 2008 2:56 PM

Thanks bufflehead,

I started using P.E. Zimm. about a year ago on a Jadgtiger.  I had all kinds of problems with it "poping" at first.  

Now I wash the plastic rough it up with scotchbright and re-wash, then I use 15 minute epoxy to glue it down.

So far, (knock on wood) no more problems...

Try it!, you might like it.

PANZERJEAGER 

 PANZERJAGER


  • Member since
    July 2006
  • From: San Francisco Bay Area
Posted by bufflehead on Thursday, February 21, 2008 2:21 PM
 PANZERJEAGER wrote:

Zim complete, now onto the tools and joining the hull.

PANZERJEAGER 

Wow, its looking really good PJ!!  I'm not usually a fan of PE zim, but it looks excellent so far!  Any problems attaching the PE zim panels?

Ernest

Last Armor Build - 1/35 Dragon M-26A1, 1/35 Emhar Mk.IV Female


Last Aircraft Builds - Hobby Boss 1/72 F4F Wildcat & FW-190A8


  • Member since
    July 2006
  • From: San Francisco Bay Area
Posted by bufflehead on Thursday, February 21, 2008 2:18 PM
 dupes wrote:

Panzerjeager, did you actually paint and weather the ENTIRE bottom half of your build before attaching the top? Doesn't that make it difficult to "blend" the whole unit? Not that I'm saying that what you have so far doesn't look good - far from it! Really digging the mud you've got crammed into the tracks on the starboard side. Very convincing. How'd you make it?

Anyhoo, got a mini-update for youse guys, had hoped to get the basecoat on last night, but only made it to the preshading before I had to pack it in. This monster has a lot of interleaved road wheels, so I need to paint the hull and suspension first before assembling it all. Thank god for the template method...soooooo many road wheels! On a tank the size of a small armored car! Banged Head [banghead]


Looking good dupes!!  I've got this one in the stash, but it will be some time before I can get to it.  I'm curious...will it have a monotone or camo paint scheme?

Ernest

Last Armor Build - 1/35 Dragon M-26A1, 1/35 Emhar Mk.IV Female


Last Aircraft Builds - Hobby Boss 1/72 F4F Wildcat & FW-190A8


  • Member since
    July 2006
  • From: San Francisco Bay Area
Posted by bufflehead on Thursday, February 21, 2008 2:17 PM
 DerOberst wrote:

Hey, guys, thanks for all the comments and praise.

One thing no one noticed: no antenna.

What is the accepted method for antennas now?  Stretched sprue?  Wire? 

What the.....???  I thought this was Tamiya's 1/35 scale Jagdpanzer....did I miss something?  That's TINY!!

Ernest

Last Armor Build - 1/35 Dragon M-26A1, 1/35 Emhar Mk.IV Female


Last Aircraft Builds - Hobby Boss 1/72 F4F Wildcat & FW-190A8


  • Member since
    May 2006
  • From: Nanaimo, BC, Canada
Posted by Brews on Thursday, February 21, 2008 10:06 AM

I thumbed my way through my Panzer Vor!s and other Concord picture books last night. Most of the PzJg IVs had tracks that were as tight as a fish's tight bits.  The ones that were saggy were blown up. Inconclusive evidence to support saggy track runs. However, Pzkw IIIs consistently appeared with saggy track runs.

On the plus side (personally) I found several pictures of Pzjg Is, some colour drawings and some clear b/w photos. The text suggests that 27 were landed in Tripoli in 1941, and some made it through to Tunisia in 1943. 3 were captured at El Alamein, one with 5 kill rings (Cruiser tanks, maybe?).

I found one colour scheme I really liked, but it would mean that I'd have to respray it Panzer Grey, and then mottle on some dark yellow ... so it's not going to happen.

  • Member since
    July 2003
  • From: Ozarks of Arkansas
Posted by diggeraone on Thursday, February 21, 2008 9:48 AM
Well for all of you out there I have been working on my marderII.The last two days just on the clamps for the tools but as it would have itit is not working well. So for tose who feel my fustration......I cut the p.e. for its spur.All three parts are cut and ready to go.So with tweesers in hand and p.e. ready then.I have one piece then other to only have it shoot out of the tweesers.So that is one but wait oh no there is one that broke.Well one down and 11 to go.As I steady my hands and was setting it in,oh no what was that.Another handle shot into the air and where it landed I do not know were.Two down and one to go before I scrap said p.e. and go.Well thrid times the charm and sucess but was short lived.As I was clamping it down it came apart and it handle was gone.So with nerves of steel I went and looked for it.Sucess again not only did I find it but also the other one that was lost.So here I go again oh but wait the handle broke,oh no.Then the other handle that I found went shooting throught the air.......................Now I am using the molded in handled tools that they supplied so that people like me can use if the p.e. gones home somewhere over that rainbow.............A model should not be STRESSFULL.....Just the wife....Digger
Put all your trust in the Lord,do not put confidence in man.PSALM 118:8 We are in the buisness to do the impossible..G.S.Patton
  • Member since
    December 2007
  • From: Eagle River, WI
Posted by PANZERJAGER on Thursday, February 21, 2008 8:38 AM

Hey dupes,

Looks like your build is progressing well!

Are you going to use the rubber band tracks?

"Tanks" for the ataboy.  

 As for the upper hull, it will be painted and weathered seperate from the lower hull.

After I join the two, I will finalize with some final weathering.

 Onto the tracks,

The tracks were painted with Floquil Rail Brown and sprayed with a wash of Mars Brown artist oils and Mineral Spirits.  Next I sprinkled on a mixture of Iron Oxide and Raw Umber Dry Pigment and Diamatatius Earth.  Then I sealed the tracks with a couple of coats of Dull Coat.   After this was dry I scrubed the tracks with a wire brush to expose the grousers and dry brushed them with silver artist oil.

Thanks again for the intrest!!!

PANZERJEAGER 

 PANZERJAGER


  • Member since
    November 2006
  • From: Coastal Maine
Posted by dupes on Thursday, February 21, 2008 8:08 AM

Panzerjeager, did you actually paint and weather the ENTIRE bottom half of your build before attaching the top? Doesn't that make it difficult to "blend" the whole unit? Not that I'm saying that what you have so far doesn't look good - far from it! Really digging the mud you've got crammed into the tracks on the starboard side. Very convincing. How'd you make it?

Anyhoo, got a mini-update for youse guys, had hoped to get the basecoat on last night, but only made it to the preshading before I had to pack it in. This monster has a lot of interleaved road wheels, so I need to paint the hull and suspension first before assembling it all. Thank god for the template method...soooooo many road wheels! On a tank the size of a small armored car! Banged Head [banghead]


  • Member since
    February 2004
  • From: Weymouth, Dorset, UK
Posted by chris hall on Thursday, February 21, 2008 2:10 AM
 DerOberst wrote:


One thing no one noticed: no antenna.

What is the accepted method for antennas now?  Stretched sprue?  Wire? 


Both work, mon Colonel.  I prefer 0.025mm gauge stainless steel surgical wire, because it's stronger and more resistant to damage:

You couldn't mount even a decal Stars and Stripes on a piece of scale-accurate HSS.

Cheers,

Chris.


Cute and cuddly, boys, cute and cuddly!
  • Member since
    March 2003
  • From: Rain USA, Vancouver WA
Posted by tigerman on Wednesday, February 20, 2008 11:11 PM

I notice that the early version has two cone covers as opposed to the single on my later version.

Making some progress, but no reason to get out the camera. File, file, putty, putty. Repeat over and over. Zzz [zzz]

One reviewer acted like this kit lacked pieces. LOL I beg to differ, especially if I add the 64 PE bolts to the PE schurzen if I choose to do them.

   http://i7.photobucket.com/albums/y269/wing_nut_5o/PANZERJAGERGB.jpg

 Eric 

  • Member since
    December 2007
  • From: Eagle River, WI
Posted by PANZERJAGER on Wednesday, February 20, 2008 9:48 PM

Zim complete, now onto the tools and joining the hull.

[/img]

[/img]

[/img]

PANZERJEAGER 

 PANZERJAGER


  • Member since
    December 2003
  • From: Los Angeles
Posted by dostacos on Wednesday, February 20, 2008 7:57 PM
 DerOberst wrote:

Hey, guys, thanks for all the comments and praise.

One thing no one noticed: no antenna.

What is the accepted method for antennas now?  Stretched sprue?  Wire? 

at that size stretched sprue might be a little large, how about using a HAIR....ok, really small wire
Dan support your 2nd amendment rights to keep and arm bears!
  • Member since
    January 2008
  • From: Chicago
Posted by DerOberst on Wednesday, February 20, 2008 5:38 PM

Hey, guys, thanks for all the comments and praise.

One thing no one noticed: no antenna.

What is the accepted method for antennas now?  Stretched sprue?  Wire? 

  • Member since
    December 2003
  • From: Los Angeles
Posted by dostacos on Wednesday, February 20, 2008 4:56 PM
 tigerman wrote:
Dostacos, I forgot to mention that the camo came out well. Weathering will really make that kit fly.
thanks, I will be following a certain modeler's tutorial Whistling [:-^] {doog}having used his silly putty trick I will be trying the next step Smile,Wink, & Grin [swg]
Dan support your 2nd amendment rights to keep and arm bears!
  • Member since
    May 2007
Posted by Specter on Wednesday, February 20, 2008 4:31 PM

DerOberst and Dostacos: Great jobs on the kits and camoCool [8D]

I'm enjoying looking at everyones in progress pics, and I will be starting my Jagdtiger very soon

Seth
  • Member since
    March 2003
  • From: Rain USA, Vancouver WA
Posted by tigerman on Wednesday, February 20, 2008 4:26 PM
Dostacos, I forgot to mention that the camo came out well. Weathering will really make that kit fly.

   http://i7.photobucket.com/albums/y269/wing_nut_5o/PANZERJAGERGB.jpg

 Eric 

  • Member since
    July 2006
  • From: San Francisco Bay Area
Posted by bufflehead on Wednesday, February 20, 2008 3:15 PM

WOW!

I haven't been able to participate for a while due to that killer cold/flu bug that knocked me out for 3 weeks and then going to Denver for training.  I finally am able to check things out in this GB and.....WOW!!  As usual for one of Eric's GB's there's some great stuff going on here!!

Chris:  Your Nashorn is looking fantastic, especially the interior!  I can't wait to see the completed build!!

digger:  Thanks for the Marder photos!  I'll be honest...I hate painting roadwheels!!  I'm glad to see you got through them and on to more fun parts of the build!

PANZERJAEGER:  Now that is some mighty fine work PJ!  The paint and weathering is superb! Wow!! [wow] I can imagine what the top hull will look like!!  Maybe I should just quit on mine now!!  Tongue [:P]  How did you apply the zim?

panzerguy: Man that Marder III is looking pretty sweet!!  What a fantastic kit!  Hard to believe its Tamiya...I almost thought it was Tristar!  Gotta see it with a paint job!!

DerOberst: Oooh, thats a real nice looking Jagdpanzer!!  Great job!  I hope mine looks as good!  I really like the scrapes on the the schurzen!  You made that old Tamiya kit look dang good!  The only thing I might do is give the tow cable a light wash of raw umber to tone down the bright silver, but otherwise I wouldn't change anything!

dostacos: Now that is a great camo job on that little Hetzer!  Weather her up and send her into the field!  

panzer88: That Jagdtiger is such a beast!  Can't believe it has soo many track hangers on the sides!  That would drive me crazy trying to line them all up!  Good work!

Before I got knocked out by that nasty bug I was progressing pretty well with my Italeri Jagdpanzer IV.  I'll post some photos as soon as I get time.  Unfortunately I took a look at the other GBs I'm in and decided that I'll have to put this one aside for now...gotta finish a couple other builds first!  I'll get back to it as soon as I can!


Ernest

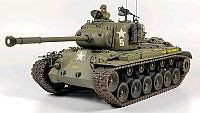
Last Armor Build - 1/35 Dragon M-26A1, 1/35 Emhar Mk.IV Female
     

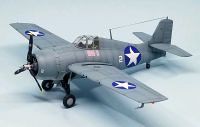
Last Aircraft Builds - Hobby Boss 1/72 F4F Wildcat & FW-190A8
     

  • Member since
    November 2006
  • From: Coastal Maine
Posted by dupes on Wednesday, February 20, 2008 9:34 AM

Glad to see I'm not the only one who likes the older DML kits...got a pretty decent collection going right now. Wink [;)]

Will have some progress pics on my little Italian monster shortly, I've been forcing myself to do some figure work (they ain't pretty) and it's slowed the build waaaaaaaaay down. Should have the construction done tonight, hopefully hit her with the pre-shade and base coat of paint.

  • Member since
    May 2006
  • From: Queensbury,NY
Posted by panzer88 on Wednesday, February 20, 2008 7:34 AM

Hers's what I'll be building for this build. Have most of the main construction done , still have to finish the interior with the gun  breach that is supplied with the kit, then the hull halves can be glued and then the paint will fly. Everyone's builds are looking great!!!!!Bow [bow]


  • Member since
    March 2003
  • From: Rain USA, Vancouver WA
Posted by tigerman on Wednesday, February 20, 2008 6:56 AM
Hope you get well soon Andy and it's nothing serious. Always look forward to your work.

   http://i7.photobucket.com/albums/y269/wing_nut_5o/PANZERJAGERGB.jpg

 Eric 

  • Member since
    January 2005
  • From: Meeeechigan!!!
Posted by STUG61 on Tuesday, February 19, 2008 11:17 PM

Good to see some stuff getting done.

I haven't started yet.I'm still slowly finishing up a M60A1 for a buddy of mine.


My health has kept me busy with appointments and not feeling like building, but I'll get going on my entry pretty soon.

Smile! It makes people nervous!! Andy
  • Member since
    February 2004
  • From: Weymouth, Dorset, UK
Posted by chris hall on Tuesday, February 19, 2008 1:22 PM
 PANZERJEAGER wrote:

Thanks for the constructive criticism,

as for the track tension on the right side, I accidentally set the tensioner too loose.Oops [oops]  

My Jagdpanzer IV AO is going to have skirts, so maybe it's no big deal......

Or should I leave a skirt or two off?

What do you guys think???????Whistling [:-^]

PANZERJEAGER 

I'd leave one or two Schurtzen plates off, where the tracks aren't too sagged, just to show it's there.

Cheers,

Chris.

Cute and cuddly, boys, cute and cuddly!
  • Member since
    September 2006
  • From: Central Texas
Posted by NucMedTech on Tuesday, February 19, 2008 12:24 PM
WOW!! Everyone's doing a great job. I've got some work on the Hellcat done and I'll try to get some pics up, if nothing else just to break up all the german tank hunters here.Cowboy [C):-)]

Most barriers to your successes are man made. And most often you are the man who made them. -Frank Tyger

JOIN OUR COMMUNITY!

Our community is FREE to join. To participate you must either login or register for an account.

SEARCH FORUMS
FREE NEWSLETTER
By signing up you may also receive reader surveys and occasional special offers. We do not sell, rent or trade our email lists. View our Privacy Policy.