SEARCH FINESCALE.COM

Enter keywords or a search phrase below:

"Munitionsschlepper I & Stuka zu Fuss projects"

6282 views
22 replies
1 rating 2 rating 3 rating 4 rating 5 rating
  • Member since
    October 2007
"Munitionsschlepper I & Stuka zu Fuss projects"
Posted by White_R34 on Monday, July 14, 2008 3:32 PM

These project are in the works for two different GBs and this is a post where I can post the point by point parts of my work from day to day. Now I will let you all in on any thing if asked and I'll tell what I'm work with such as materials and so forth.

First my Sd.Kfz 251/2 Ausf. D (These images are from when I started on it):

Yes Hobby Boss Tracks. I wish I had DML tracks easyer to see unlike these black ones.

I went and add some detail to my halftrack that I had seen on othere HTs. You know it's bad when you have no idea of what a part is but you can build it. Laugh [(-D]

I was looking in my ARMOR Mag at one that is of the same type a Ausf.D and I saw that it had some item added to the upper hull so I added them to my build as well. You can see the radio wire running from the place were the radio will go.

I got my PE set in at that time from Squadron.

What you don't see yet is I took the time and pulled out all my PE sets and sanded or rubbed off that dark green tarnish so all I need to do now is shape or bind all the parts and put them on. So I can get back to work on this project.

That was Part 1 of my Sd.Kfz 251/2 Ausf. D Stuka zu Fuss for the HalfTracks GB.

Building the Impossible Is my main goal!!
  • Member since
    July 2004
  • From: Texas
Posted by wbill76 on Monday, July 14, 2008 3:38 PM
Nice work on the added scratched details, really adds to the old girl.
  • Member since
    October 2007
Posted by White_R34 on Monday, July 14, 2008 3:55 PM

Ok 2nd my Sd.Kfz 11 Munitionsschlepper I Ausf. B

Here's the  kit and some item I may use in or on it.

I thought that the model in the kit came from Maquette but the chassis has the logo for Zvezda on it. ((huh))??Dunce [D)] and I removed it any way.

Once I started on this build I realy wanted to use some PE parts but I did not see any PE sets for my "Munitionsschlepper" at the place were I shop but I did notice that there is a light tank that looks close in stye to my project tank so I took a chance and got the a set and for me there was a sale on at Sq. so I got a Pz. I set and a Pz. II set at a cheap price and the Pz.I set had every thing I needed. On the back I started  hull screen I wanted it to sit flush with the hull so I added 4 peases of .020 styrene so that the PE screen would fit smooth. I did later push the screen in a bit to look bint in.

Now some time has gone by and I did not post every thing I have done sorry for that. When I started putting the wheel assembly together I kep it where I can still move and I made some small dints in mini of the parts of  PE to make them realy look used as well as making some small nicks and cuts to the rubber part on the track roller wheel. I think It's coming a long well.

Because the tracks are flexible and the rollers can move I can pose it any way I want.

That was Part 2 of my Sd.Kfz 11 Munitionsschlepper I Ausf. B for the Service & Support GB

Till next time you all, ask any thing or tell me any thing. Good day.


Building the Impossible Is my main goal!!
  • Member since
    January 2008
  • From: Bournemouth UK
Posted by Bodge on Monday, July 14, 2008 4:36 PM
Wow some good work going in to those builds , spot on.
  • Member since
    October 2007
Posted by White_R34 on Monday, July 14, 2008 4:41 PM

thanks wbill76, I know a lot my ask why do them in the same post I'm doing them both is the colors of the Africa Corps. The one thing that is holding me up on the Munitionsschlepper is the Munition box on top of the tank I wanted to use the sturmtiger shells I got for "1.99 US" I know there are big but I got them so cheap I want to put them to use., but I don't thing this type of Munitions carrer carred the shells. I would like to do it any way even if it's rong ((BUT)) I'mm still thinking on it.

Images of Sturmtiger

The Sturmtiger Mortar shells from Tamiya. I think they realy cost "10 somthing US" and I got them for "1.99 US" what a dill.

Hay I just got it I can do it the right way and my concept way at the same time I'll just build two boxies one for the Tiger Ammo and one for my Sturmtiger Shells. See I want my Service & Support badge so I will go back and reed up on the do's and don'ts to see if I can get away with my concept.

The two badges I'm trying to get.

Thanks for the coment Bodge. Make a Toast [#toast]

Building the Impossible Is my main goal!!
  • Member since
    October 2007
Posted by White_R34 on Tuesday, July 22, 2008 3:49 PM

Hello all well I'm back to work on my "headBanged Head [banghead]ache" of a project. For one thing I started on a part an I had to stop an look up what the part look's like in real life some times I need to rebuild them and that takes time. Well any way on to the work of my radio. In my Squadron Sig book I found an image of that type of radio that I'm working on so I used the photo to help me see were to run all the wires from and to the right parts of the radio.

I put black marks on the kit radio to show where wires run from.

After some time looking over that photo I came up with this.(In the image you see the radioface and the start on the throat mic and last the electrical box.

I started on the dash and I know that this version should not have the map holders but I thought if the radio is right there the maps should be there as well.

Here's some shots of the radio mounted up to the roof, you can see the antenna line running from the rear and along the side to it's protector.

Now from there to just out side on the upper hull you can see a wire looking like it comes from the protector through the base and up to the antenna base. I first cut the a pace of copper wire and pushed it up the protector to look like it's  coming out., and thin I cut a 2nd peace of wire bint it in to a half round shape an glued it under the PE antenna base so It looks like the first wire is going through the PE base and going under to the antenna base. I think it came out well.

As for the electrical box I'm thinking of putting it just under the radio. ((BUT))(see the black box drawn on the wall in front of the seat.

But I think that it my take up too much room.

I'm thinking of moving it to the  back of the seat an out of the way.

Now I want the rear doors open so I'm going to have to scratch build two new ones. An I'm going to keep the parts with the boxes around them, an scratch build new springs and leavers for the doos.

I think my "Stuka on Call" US for German "Stuka zu fuss" is comming a long grate.


Building the Impossible Is my main goal!!
  • Member since
    October 2007
Posted by White_R34 on Friday, August 8, 2008 4:45 PM

Ok I'm back to work on both project I will have new pis up to day but I'm building a-part for my Munitionsschlepper once I get what I need built I will post the new work Remember I must upload to Photobucket then come back here and post so give me some time. The part I'm adding is the same part Rafhart scratch built for his project but I'm going to make my holder from Brass sheet.


Building the Impossible Is my main goal!!
  • Member since
    November 2007
  • From: Wisconsin Rapids, WI
Posted by moose421 on Friday, August 8, 2008 7:02 PM

Your builds are looking great.  Love what you are doing with the radio.  That is beautiful scratch building.

Keep up the great work!

  • Member since
    March 2003
  • From: Rain USA, Vancouver WA
Posted by tigerman on Friday, August 8, 2008 8:27 PM
I had no idea the Stuka was used in Africa. It just seemed like a natural for the Eastern Front. I do like the idea of adding the AM tracks to it. Wise move.

   http://i7.photobucket.com/albums/y269/wing_nut_5o/PANZERJAGERGB.jpg

 Eric 

  • Member since
    October 2007
Posted by White_R34 on Saturday, August 9, 2008 6:01 PM

Thanks you two moose421 and tigerman. The radio is my first build of one and yes the land stuka was in AF. My build will be of it with a white wash over the desert yellow. I',m sorry I did not get the pics up lastnight as the Olympic game openings had to be taped. Well any way here the build of the fuel can carrer for my schlepper.

First I looked over the kit box and realy didn't like it. so I wanted to try to build a new box from brass., I thought if it didn't work I can go back to the kit box.

I then wanted bullit holes in the box as well.

Once it was fully cut out folded and glued I think it looks good.

I don't know if any of you had seen the you tube video as I did, but in the video the guy shows how the make weld lines from styrene rods so I thought I would use that as a way to cover the fold lines on my brass box. Once I superglued on the rods, I thin used Tenax 7R brushed on over each rod at a time and used a an X-acto No. 11 blade to form the weld folds. Thin I put on some more Tenax to make the folds lay down an look rounded.

Now it's time to to make the jerry can carrer. I worked on my a peace at a time. once I got all the parts cut out and the 4 corners had bean cut out and folded I simply built the carrer. But I did not build my carrer just like the guy that came up with it as I put my brass strip lines on the inside and my supports and in the middle. I only plan to put 5 jerry cans in it but I'm still thinking on that. Oh I also added a brass rod to replace the kits antenna. I'm realy close to the end.

As for the kits munition rounds I did not like the kit versions (Panther 75mm Projectiles)so I got some brass ones that look a lot better, what do you think? (Both not yet painted).

Ok here are some photos of it with the can carrer glued in place what to you think so far.


Building the Impossible Is my main goal!!
  • Member since
    August 2007
  • From: The Plains of Kansas
Posted by doc-hm3 on Monday, August 11, 2008 12:14 PM
 Another superb build going on here @ the DARK SIDE! FSM has so much talent here in this forum, I almost feel like I'm at the Nationals. Great attention of detail to all of your PE! She's looking sweet!

All gave some and some gave all.

  • Member since
    January 2007
Posted by the doog on Monday, August 11, 2008 12:42 PM

Really superb effort and results, White!

I'm amazed that you can actually have the patience to tacke two different PE-laden kits here and still retain your sanity! 

These look expertly handled! 

  • Member since
    January 2005
  • From: in the tank factory in my basement
Posted by biffa on Monday, August 11, 2008 8:17 PM
Some really really super scratch building going on here white and i love it, very interesting subjects keep it coming. 
Ron g.
  • Member since
    October 2007
  • From: N.H.
Posted by panzerguy on Monday, August 11, 2008 8:28 PM


  Hey White been watching both these builds over in the GB's some great work you got going onBow [bow]

   That radio is super sweet!

"Happiness is a belt fed weapon"

  • Member since
    October 2007
Posted by White_R34 on Tuesday, August 12, 2008 6:32 AM

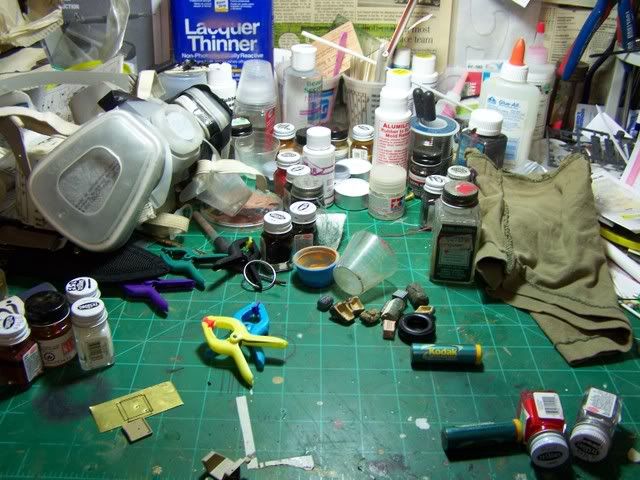
Thank's doc-hm3,the doog,biffa and panzerguy for your raving comments. Hay Doog it's not all that hard to work on two types of projects, just think of your self as a mechanic and you have two vehicles to get done. Some times in the passed I use to work on 2-3 at a time if I wer going to go to a local show that was coming up., but in this case it's because they both are German vehicles and I thought why not work on them both. Well here's the work on my "Stuka on Call" project. First before I get back to work on the schlepper and this project I needed to clean up my desk.
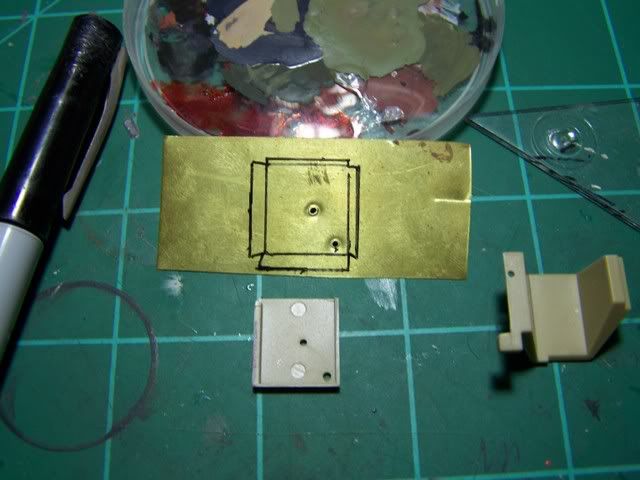
Realy the work started on my halftrack first but I put the schlepper in the titel first so I thought just keep them in line the way I titled it, an like the small tank I scratchbuilt a finder for my HT-HalfTrack so I could show damage.
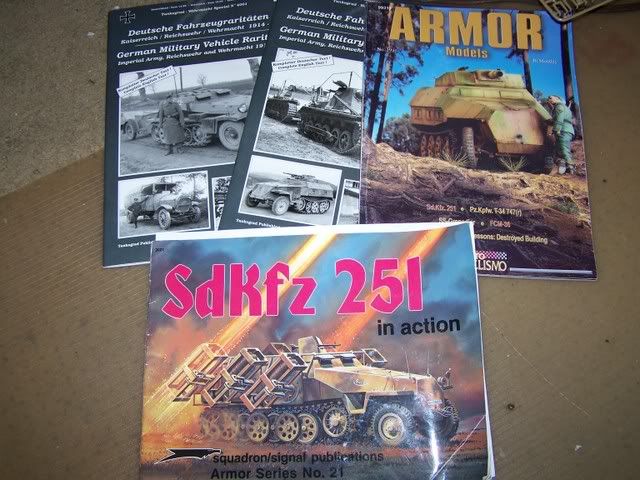
Here's some good reading at ya. (I use them for both projects)-(New book's on the way)
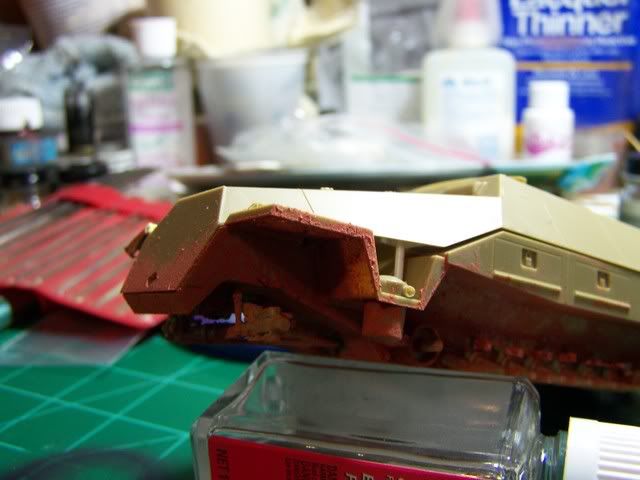
Well once I added the brass finder I put a small bind in it(Look r3eal to me) I then though if this unit will be going in to russia (Eastern Front)I need some mud under it so I used Testors Red putty to give it some texture on it's belly or chassis. First image it's wet.
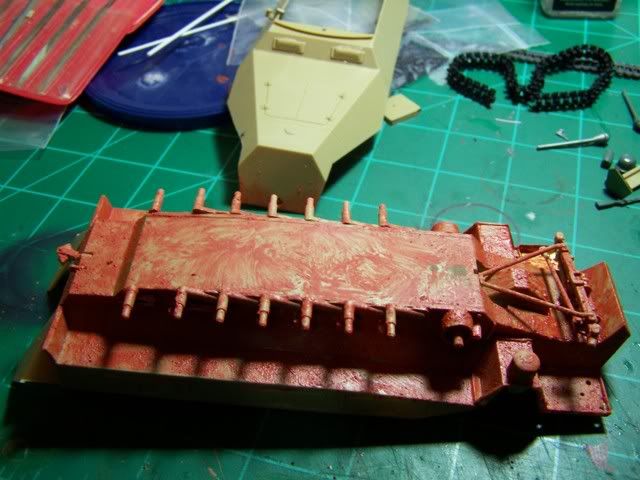
You can see the Hobby Boss tracks in that shot.
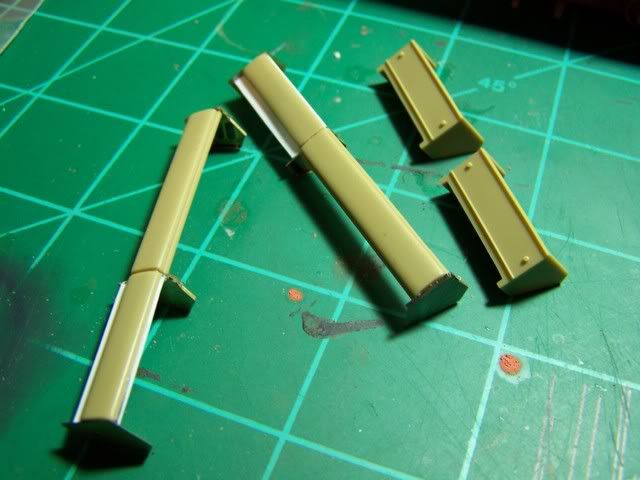
Now I could keep the kit stock storage racks but adding the PE parts made them look a lot better.
Oh one thing I need to go back and point out the adding of the PE map holders that was not right for the Ausf.D version. So I thought on it for some days now and to keep my project close to being right they had to go.
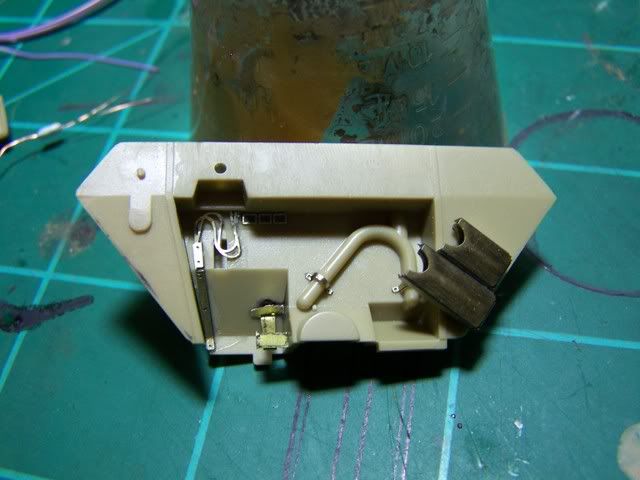
Once I get the full dash built and painted I will show it. OK NOW for those rrrrrrrrrrrrrBanged Head [banghead] Hobby Boss Tracks that build up fast and snap together like AFV track just one thin the done fit Tamiya halftracks and it tell you on the box that they do ((NOT))!!!Yuck [yuck] The look realy good but a bad fit. I can make them work only on this project and on the basic hanomag the gear will is to thin and there's no space for the track teeth to fit in to. First image is the gear wheel from this project - (Stuka Zu Fuss)German (Stuke On Call)English. Next whell if is also a tamiya Hanomag.
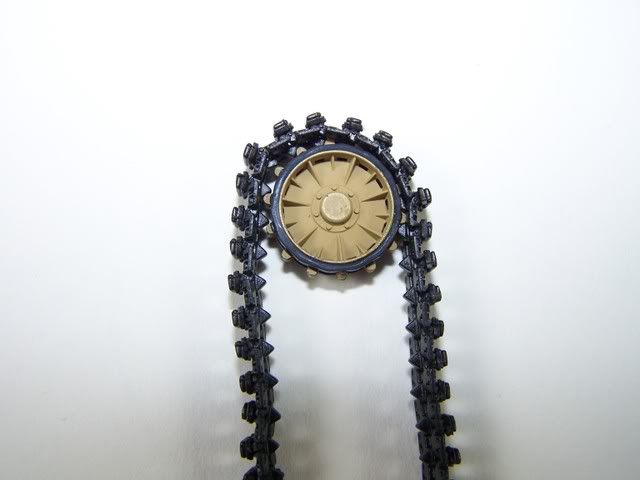
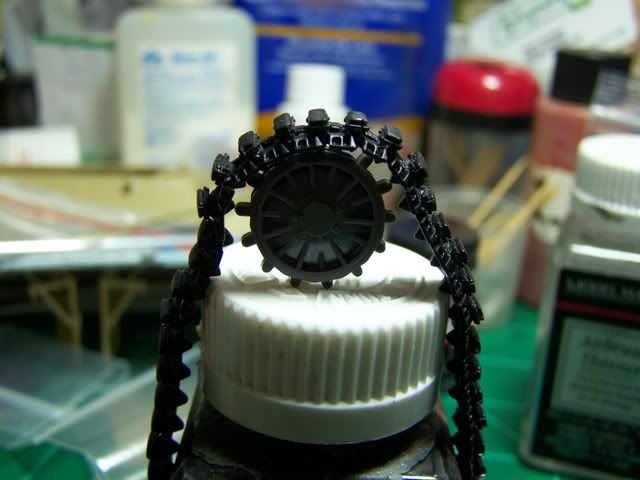
I know what some of you are going to say "You should have gone with AFV" "You buy cheap you get cheap"Laugh [(-D] Well what's done is done I will make them fit. I just will not be getting any more.

But all in all she's coming along nicely. I do have two hang up's the painting of the rifles and the oh man there called something poles ,oh man the two directional poles I hope that's right. I was thinging to ordering some but last night I thought my buy them when I can make them so I'll be working on that two day as well. As for the rifles I think I can paint them then paint some of the PE holders glue them in the holder than glue a hole rack in place, I'll try that as well two day.

Next I will have all the last of the PE for the Munitionsschlepper's tools and the tools themselves painted and ready to do a full paint job.


Building the Impossible Is my main goal!!
  • Member since
    October 2007
Posted by White_R34 on Sunday, August 17, 2008 3:35 AM

Here what I just got done to day. First I jumped on to my two front finders and put on the tool clamps and indecator poles but I was looking in one of my books and I realy don't like the way the kit poles look so I was thinking of buying some but why pay for what you can make your self.

First I got some Radio-Shack Speaker wire as it has the right thickness [0.3mm] An some reference material.{Images above}

Here some of the tools I use to pull this off.
TooL List: Sharpie, A round and Flat nose pliers Hobby knife #11 blade, and what you don't see is a caliper,tooth picks and super-glue.

To save my self some time and bypass all the measuring I put the two pole flat on a peace of white sheet styrene, an marked some points of where the bind in the pole should be and how long they should be.

Then I cut the kit poles up in to sections.

Ok in this image you see the flat nose pliers holding the one stran of wire over the markings on white sheet. You use the round tip of the othere pliers to do a short bind.

Once you have bint the wire to where you think It should be mark in and then cut the top and bottom parts off.

Here you all all the section of the kit peases and the two new wire poles.

Now the Hard part put a small drop of Epoxy or Super Glue on the top of the the base parts of the Indicator pole. First let the epoxy of superglue dry or get a little sticky and then place you thin wire atop the kit part an let dry.

Use a tooth pick to add each drop to the top of the wire. But let it set for some seconds and dry a little and then repeate the adding of dropes. The easiest way is to just glue on the kit Indicator balls.

Ever time you let it set make a build up of layers and that make's you some nice round balls. Remember add each pease one at a time.

I think they came out well for my first time trying that. On the interior I put the radio in it's place so I can test fit the throat mic flops or lays over the seat. Thats all you realy see in this image, I'm going to do a lot of work to day on the interior so I'll have new images up soon.

Building the Impossible Is my main goal!!
  • Member since
    January 2007
Posted by the doog on Sunday, August 17, 2008 9:53 AM

Hey,Whte; this is just sick detail, man! Tongue [:P] You're really going to the "nth degree" with these! Very impressive!! The work on those side markers alone is just head-shaking!

Shame about those tracks--I hate when you get that kind of bad fit! Just a comment here--are you sure that after putting in all this awesome detail and time, that you're going to be happy when this is finished with a substandard pair of tracks? Seems like a shame to build a tremendously detailed kits like this, and then have the tracks not quite measure up to even plastic indy-link standard?

One more comment--the next time you do a double-WIP like this, I would strongly suggest to do two different threads. The reason being, you have so many pictures here, that I'm sure the dial-up users are having a really hard time viewing your post here because of the time it takes to load it. A WIP build this fine should have comments posted all over it, and maybe that's one of the reasons it is kinda sparse? Also, there's just so much information and detail on both kits that it's hard to know what to comment on.

Really an exceptional pair of builds though! Bow [bow]

  • Member since
    October 2004
  • From: League City, Texas
Posted by sfcmac on Sunday, August 17, 2008 12:04 PM
 I am so behind. Excellent stuff! White. A lot of work but it really shows! Trying to brush up on my PE skills as well. Nothing beats a good innovative imagination like yours .Thumbs Up [tup]
  • Member since
    October 2007
Posted by White_R34 on Sunday, August 17, 2008 8:03 PM

Your right Doog I should slit them up so from now till I get them done I will have two new posts on these builds. I'll go back if any one need's me to and your Comments wer just what I need to hear or read so don't you ever stop giving them man! Comments like yours and some times the ones of that tuff as neils Heavy Artly are just what get's me going and try to do better.

Ok first I'm going to start both new post and go over all the info I have posted so It my take some time so if it's ok with you {DooG} to let every one that may say there is a post up on this that I'm doing it in a slit post so evey one will be abel to see the work.

Now I'm going to pick some of the words from this post to build up the new posts then I should be back on track, So I will hold off on any new images and info I have to upload to my album till the new posts are up.

Cool An to you two sfcmac if any of what I'm doing helps you man just go on and use any thing you see oh and if you can think of any thing you may want me to try just let me know.

Oh and one last thing I have found a way to make the tracks fit but I think your trying to let me know that I should think about getting the AFV tracks and I'm realy thinking on that man but first I realy want to show you my idea and see what you think first before I pay that high cost. And let me point out to any of you that may want those Hobby Boss Sd.Kfz. 251 tracks DON"T GET THEM!!!!!!!

Once I get the two new post up doog I will find you and pull you there to see my track idea.

Vince

Building the Impossible Is my main goal!!
  • Member since
    January 2007
Posted by the doog on Sunday, August 17, 2008 10:09 PM
Good goin', Vince! I'm sure the two separate posts will be appreciated by the dial-up guys! Thumbs Up [tup]
  • Member since
    October 2007
Posted by White_R34 on Sunday, August 17, 2008 10:46 PM
Hay Doog thanks for the good idea and could you go over to my Munitionsschlepper I build and read that last part as I will be needing you help and any one here that paints like doog and I know thear are alot of you that have that over the top skill level and may be-able to help me.
Building the Impossible Is my main goal!!
  • Member since
    October 2007
Posted by White_R34 on Saturday, September 6, 2008 10:42 PM
I'm painting right now and will have new pix up soon.
Building the Impossible Is my main goal!!
  • Member since
    October 2007
Posted by White_R34 on Sunday, September 7, 2008 4:13 AM

Ok this is what I have done so far. I added a little mud look the the belly of the tank with Testors red putty and a stiff brush.

I let it dry then painted the tank a mix of XF-1, XF-12- Flat Black,J.N. Grey the tracks are a mix of FL-Black,FL Brown, The road wheel rubber is a mix I call used tire rubber gray.

Once I get some items that I will need to do the next part of this paint job I will then post more pix. I'm now working on the solder and shells.

Building the Impossible Is my main goal!!
JOIN OUR COMMUNITY!

Our community is FREE to join. To participate you must either login or register for an account.

SEARCH FORUMS
FREE NEWSLETTER
By signing up you may also receive reader surveys and occasional special offers. We do not sell, rent or trade our email lists. View our Privacy Policy.