SEARCH FINESCALE.COM

Enter keywords or a search phrase below:

IDF M151A2 (Ford MUTT) w/TOW Launcher Done w/Lots of pix

22196 views
25 replies
1 rating 2 rating 3 rating 4 rating 5 rating
  • Member since
    October 2007
IDF M151A2 (Ford MUTT) w/TOW Launcher Done w/Lots of pix
Posted by White_R34 on Thursday, July 24, 2008 5:49 AM

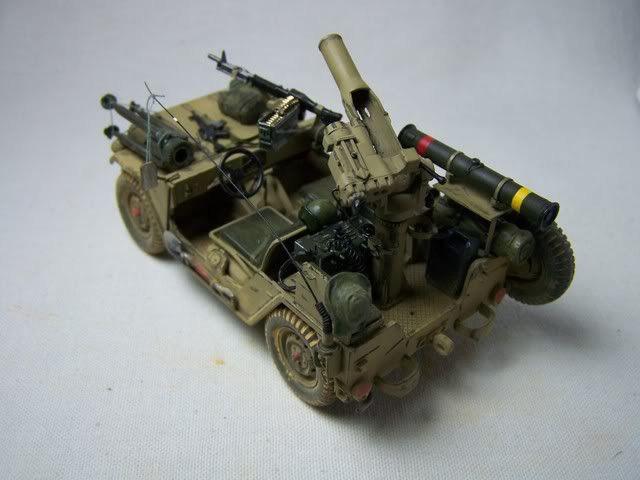
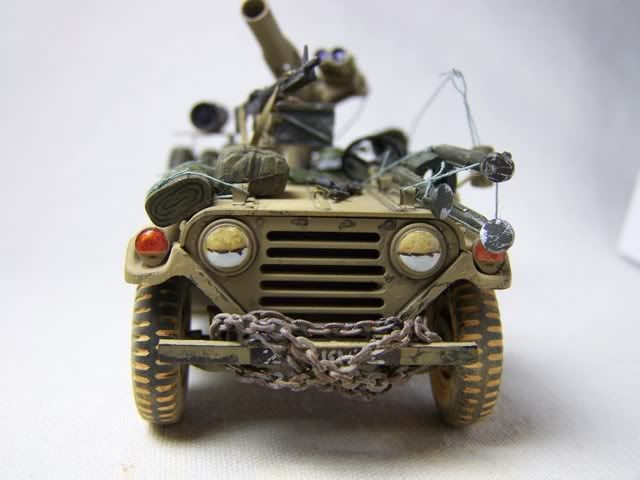
I think I can add more to itbut for now I'm done. I hope you all like.Smile [:)]

I'm thinking of going over the lights once again.

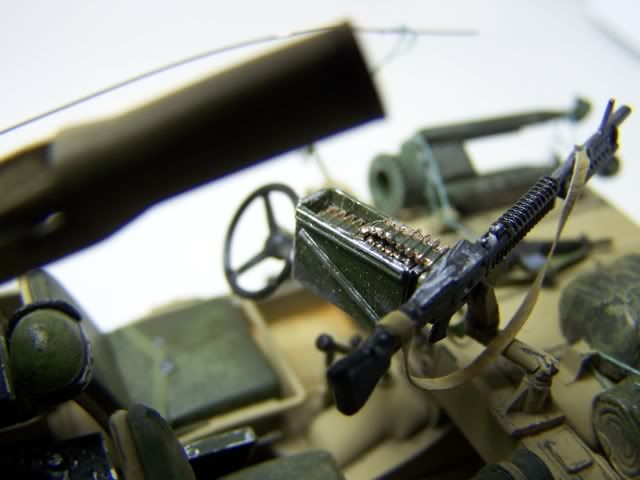
Just some close ups.

Holes in the TOW launcher tube.

Thanks for looking................Vince

Building the Impossible Is my main goal!!
  • Member since
    August 2007
  • From: The Plains of Kansas
Posted by doc-hm3 on Thursday, July 24, 2008 7:13 AM
  Vince. One hot looking Mutt! Great detailing! Fantastic scale effect on the paint! The tires look very real! Radio & antenae spring/mount w/wiring, Tow launcher looks ready to load... Fantastic! One thing, should the tarp & boonie hat have that sheen on them? Over all one great build!!!Thumbs Up [tup]

All gave some and some gave all.

  • Member since
    December 2002
  • From: Massachusetts
Posted by ajlafleche on Thursday, July 24, 2008 7:30 AM
Looks quite nice. One thing you might want to consider is trading out that tamiya M-60 for a newer, more accurate Dragon versio. The old Tamiyas have a none tapered flash suppressor that just doesn't look right. Another option would be an M1919 Browning .30 which is commonly seen on Israeli vehicles.

Remember, if the women don't find you handsome, they should at least find you handy.

  • Member since
    April 2005
  • From: Piscataway, NJ!
Posted by wing_nut on Thursday, July 24, 2008 7:34 AM
Beuatiful work Vince.  Great looking model and beautifully phototgraphed too.Thumbs Up [tup]

Marc  

  • Member since
    December 2007
  • From: Southern NJ
Posted by Jeordicat on Thursday, July 24, 2008 11:21 AM
 wing_nut wrote:
Beuatiful work Vince.  Great looking model and beautifully phototgraphed too.Thumbs Up [tup]


Yes!  I agree! 

  • Member since
    September 2006
  • From: Dripping Springs, TX, USA
Posted by RBaer on Thursday, July 24, 2008 12:19 PM
Vince, beautiful. You are FAST! One thing I have noticed, and not sure of your intention here, but Israeli water and gas cans are plastic, so unless you're showing dirt on the one stowed on the mutt instead of chipped/worn paint, it should be solid black. Other than that miniscule point, fabulous work.

Apprentice rivet counter.

  • Member since
    February 2008
  • From: ladner BC Canada
Posted by stick man on Thursday, July 24, 2008 12:31 PM

WOW Great work! did you scrach build the raido?

Looks GREAT!

 Smile [:)]

I'm 15 and I model I sk8board and I drum what could be better.
  • Member since
    July 2003
  • From: On my kitchen counter top somewhere in central North Carolina.
Posted by disastermaster on Thursday, July 24, 2008 12:57 PM

Take the shine  http://th88.photobucket.com/albums/k197/RedKnight_04/Smileys/th_hatsoff.gifoff the hat, fix the headlights and you'll have an instant winner.

Looks really good! 

                                                        DISASTERMASTER 

 https://i.imgur.com/LjRRaV1.png


  • Member since
    July 2004
  • From: Sonora Desert
Posted by stikpusher on Thursday, July 24, 2008 1:32 PM
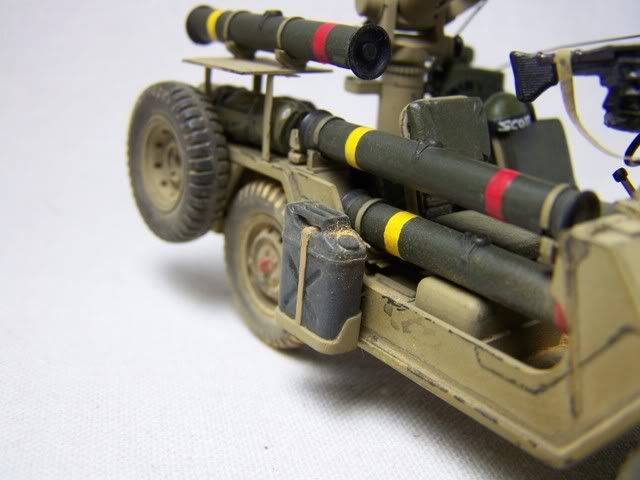
beautifully done! Two subjects near and dear to my heart- the M151 (I learned to drive a stick on those!Shock [:O]) and the TOW (my primary MOS at the same time). I onlyhave one nitpick- there are no red stripes on TOW rounds. A brown stripe on the rear of the round for a live rocket motor, and a yellow stripe on the front half for a live warhead. A blue stripe on the front if an inert  training warhead. But overall, a superb build!


F is for FIRE, That burns down the whole town!

U is for URANIUM... BOMBS!

N is for NO SURVIVORS...

       - Plankton

LSM


  • Member since
    November 2003
  • From: savannah ga.
Posted by GA.modelmaker on Thursday, July 24, 2008 2:43 PM
nicley done thier vince. how was the fiting of this kit. i have it in the stash to do some day. so are thier any surpises to look out for?
  • Member since
    October 2007
Posted by White_R34 on Thursday, July 24, 2008 4:18 PM

Stickman no I did not scratch build the radio I just added to them. An as for the shine on the hat I don't know how that happened, but I will fix and I to was thinking of going over the headlights I think just silver. My panited on image did not work. As for the gass can on the exterior, I did not know it should have bean Black. In most IDF MUTTS you done even see the gass or water cans. So I looked at some US version that had the gass can on them as a point of reference. I did get the one on the interior right. But there are not a lot of good photos of IDF MUTT's out there with good detail in them, most are fuzzy and small. But I will fix and post new images to day. As for the M60, at the time I didn't have the money to get the right gun. So I used the M60 to fill in for the right gun. (I like the way it looks any way. It must stay for now but to pull it off know would be a bad thing to do (Still I don't have the resion gun set yet once I get it I may pull it off). I am going to do the Support version or as some times called the MUTT/TOW Support Unit or (OREV Missile carrier) and I will use a legend IDF AFV FN Mag resin heavy gun set. on my next MUTT.

http://www.squadron.com/ItemDetails.asp?item=LF1160&Submit3=Go

some of the images I used.

http://idfmodelling.free.fr/mutt.html

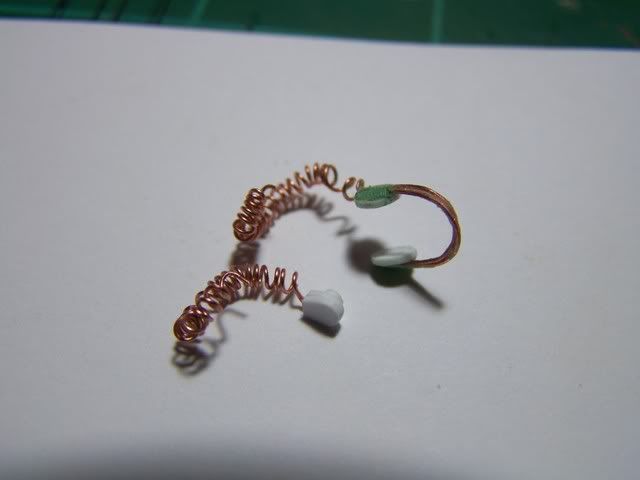
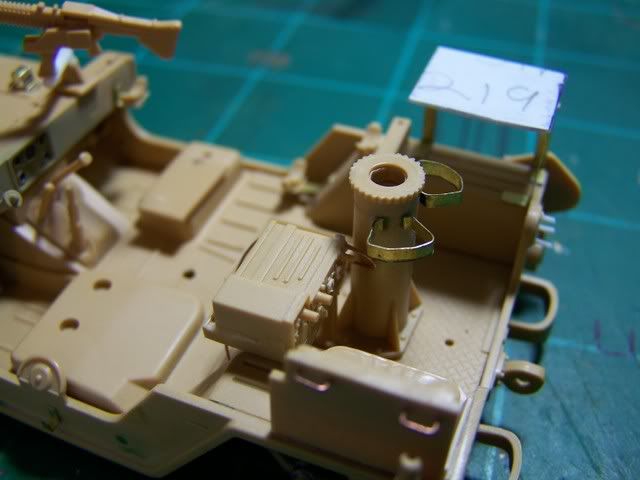
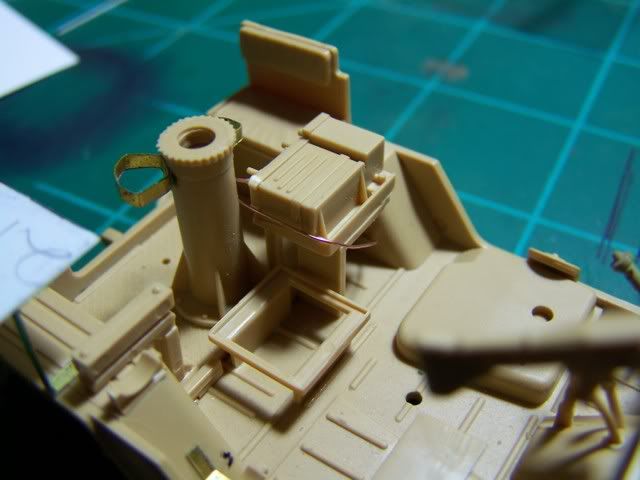
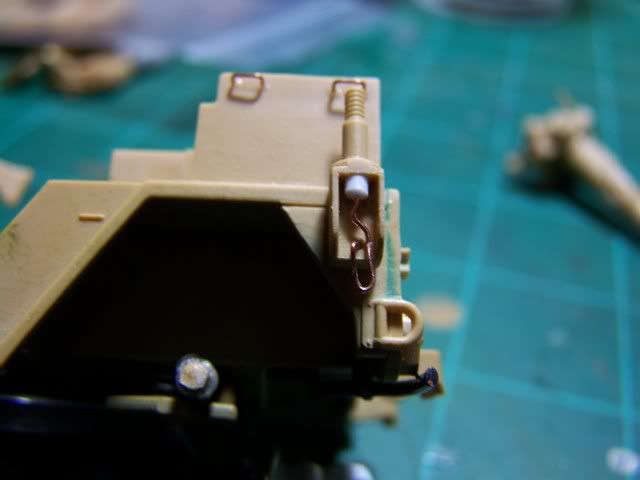
The work on the radios.
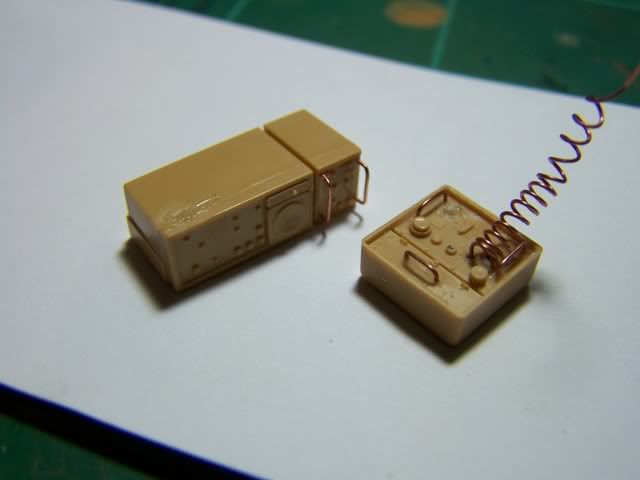
Here you can see the anntena line running across the floor.
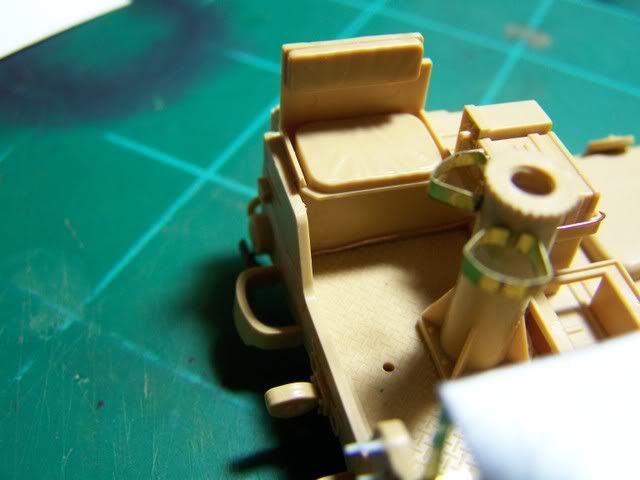
I'll have those photos up soon I'm working on it now. Ok I'm done here are the new images and what was changed.

The shine on the hat was cover over by black wash and sand colored dust.
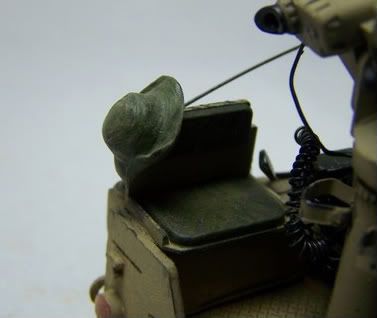
New Black plastic gass can has XF-1 and XF-2 mixed on it to show it's aged, then some sand colored dust on it.
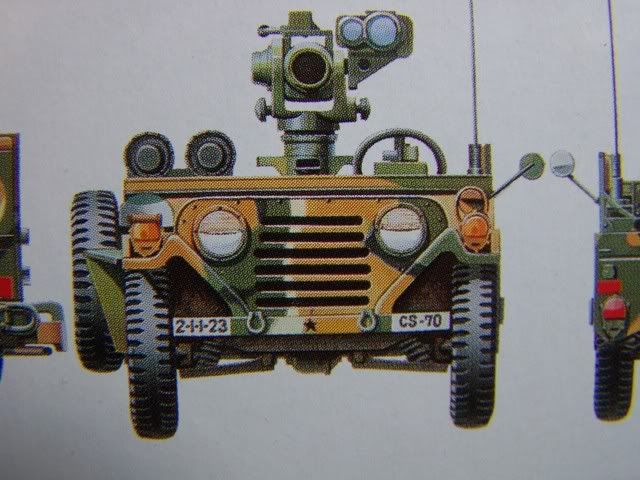
I still don't like putting just silver on so I used the side box art as a point of reference then mixed some XF-56 with XF-2 for the sand color and the dark line of stuff is from XF-60 and XF-1, once that was dry (and it was fast drying) I mixed Testors Fl-Blue 1162 and Fl-White 1168 to make the super light blue streaks in the sky, then covered it in Boyds high gloss clear-52720 . As you all know in a concave mirror lines for the back of a  light with a some what clear face cover you see the world up side down. Concave: means curving in or hollowed inward. So lest say the MUTT or Jeep is in a desert landscape than that is what you would see reflected in the light lines. A Israel desert landscape:

http://upload.wikimedia.org/wikipedia/commons/thumb/4/4b/Qyzyl-Qum-Desert-landscape.JPG/800px-Qyzyl-Qum-Desert-landscape.JPG

Tamiya paint list:

XF-1 FL Black

XF-2 Fl White

XF-56 Desert Yellow

XF-60 Dark Yellow
I hope on the new resin gun I can make the ammo belt fold over like I did on this M60.
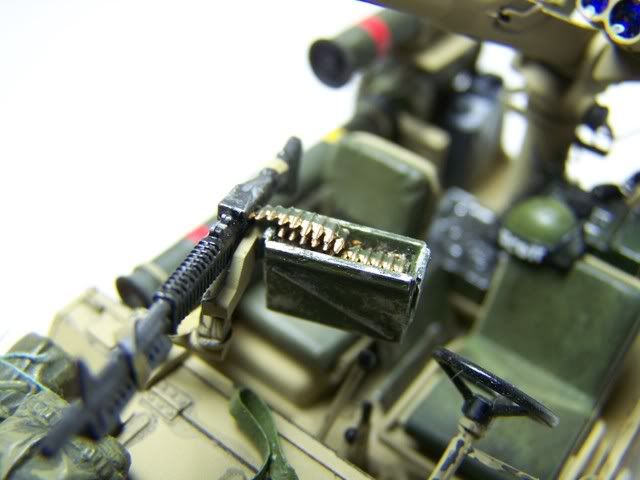
I'm going to keep the M60 and its ammo box once I get the new gun set and use the 60 on a new project once I come up with one that will need that type of heavy gun.
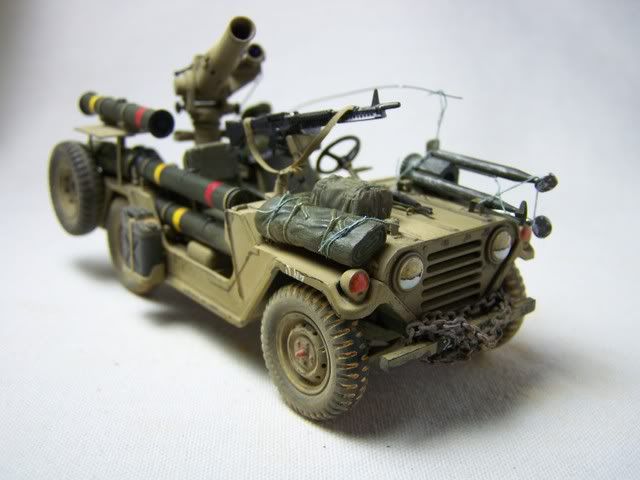
Thanks for all the help you all. I think I'm going to have to shoot all new photos so I can get them posted on the IDF modeling site.

Vince


Building the Impossible Is my main goal!!
  • Member since
    October 2007
Posted by White_R34 on Thursday, July 24, 2008 4:53 PM

 GA.modelmaker wrote:
nicley done thier vince. how was the fiting of this kit. i have it in the stash to do some day. so are thier any surpises to look out for?

YES yes some fit gaps need to be filled once you put the two parts A2 and A4 to the mane body or chassis(A34) your going to have to fill in the gaps on both sides of the finders over the front wheels. Your sheet tells you what you need to fill in when it comes to those small holes. Now look a long the sides from a top view you can see a thin gap just over the wheel whells. here are some of my filling images for when I was working on this project I hope they help.

once uyou go tp put on the hood there will be two gaps on both sides nearthe top of parts A2-A4. See here lower right corner.......

Your going to have to do some small filling in or smoothing out in and out side you TOW Launcher. I put the long holes in to look more like the real ones. It's up to you to try that.

An then the new up dated image.(Sorry for the fuzz)

.

Now as for going back and pulling my hole model a-part to fix the stripes on the TOW tubes "For get it". If some of you would take the time and read what I said I don't have the best Reference photos to see or know what the right colors should be. An no I did not think to ask any of you at the time (As I dont know the back ground of all of you here) to ask for info on stuff like this, at the time I was working on this. Why is it that at the end of a build you guys have all this (GRATE) info, why don't you say any thing when the build is going on? I have been working on this project for 2 months in the IDF GB. Any way I fixed what I could and I'm happy with the out come and I still have a Merkava tank to do and one more MUTT to do also. So I just can't wate to see what you all will say and pick out on that one. I will try to get it posted on the IDF modeling site soon.

Oh one last thing I left out your going to have to fill in parts B3 and B6 of the tire assembly.


Building the Impossible Is my main goal!!
  • Member since
    August 2007
  • From: Peterborough, Ontario
Posted by Townsy11 on Thursday, July 24, 2008 6:08 PM

Wow, Excellent Work Vince!

Looks amazing, Your scrathbuilding talents really show on this one, I especially like the headsets with the coiled up wires, a very nice touch.

This has really got me looking forward to your Bradley for the GWGB!

Keep up the great work,                                                                                

Chris,

"The object of war is not to die for your country, but to make the other bastard die for his."-- General George S. Patton
  • Member since
    October 2007
Posted by White_R34 on Thursday, July 24, 2008 6:54 PM
Man thanks dude as for my build in your next GB I was looking up all the items I will need to do my next pro ject and "MAN" has the cost gone up on stuff. But don't think I'm out I will get the items I need befor the cost go's up and more. As for that ERA Kit I'm haveing a hard time getting a kit. So I just may have to scratch build the ERA my self once again, but I will do a even better job this time. An I will not leave out all the detail this time.
Building the Impossible Is my main goal!!
  • Member since
    October 2007
Posted by White_R34 on Friday, July 25, 2008 8:09 PM

 stikpusher wrote:
beautifully done! Two subjects near and dear to my heart- the M151 (I learned to drive a stick on those!Shock [:O]) and the TOW (my primary MOS at the same time). I onlyhave one nitpick- there are no red stripes on TOW rounds. A brown stripe on the rear of the round for a live rocket motor, and a yellow stripe on the front half for a live warhead. A blue stripe on the front if an inert  training warhead. But overall, a superb build!

Os what your saying is I need to try to change the red stripe to brown othere thatn that It's right on. Well in a lot of the images I have seen I coild not tell if the stripe was only dart becouse a thin red decal was used. But I will try.

See here are some images of the real 1:1 scale MUTT and some of the model version. The realy images are so unclear.

http://idfmodelling.free.fr/refview.php?name=ref_veh_pictures/mutt/mutt_03

You just cant tell any thing on a Black an White Photo!Thumbs Down [tdn]

http://idfmodelling.free.fr/refview.php?name=ref_veh_pictures/mutt/mutt_12

No thing on this guys model:

http://idfmodelling.free.fr/kit_m151_02.html

A White stripe??Confused [%-)]??

http://idfmodelling.free.fr/view.php?name=kit_veh_pictures/m151_10d

By far I think I'm the closest but I'll try to turn the red to a dark brown. Hay how did you know that the front strip is brown? In the US M2A2 bradley the TOW tub stripes are the same way I striped on my tubs that is were I got the idea to do my color stripes from and you? HeavyArty pointed the color code out to me when I was working on my Bradley., as he served in ODS in a bradley and knows that color code.


Building the Impossible Is my main goal!!
  • Member since
    July 2004
  • From: Sonora Desert
Posted by stikpusher on Friday, July 25, 2008 10:55 PM

I was a TOW gunner for four years, 1983-1987. I had the good luck during that time to fire 3 live missiles (pretty rare to fire more than one in that time span in those days). I was an avid modle buider than, as now. I particularly paid attnetion to colors on things. A live TOW round (I fired TOW I and ITOW) was in an OD fiberglass case. At the ends it had metallic covers- usually a greenish alloy similar to an olive green. The front cover was removed prior to loading in the launcher revealing a white plastic diaphragm. Stenciling on the encased round was flat black. A yellow stripe on the forward end of the round indicated a live HE warhead, a blue stripe for an inert warhead. A brown stripe to the rear of the casing indicated a live rocket motor. In addition to the 3 live rounds I was able to fire, I also handled probably two dozen or more live TOW rounds fired by other gunners. Red as a color on ordinance is used to indicate an incendiary- something that TOW rounds do not fall under. Brown is the standard color for live rocket motors, while Yellow is the standard color to incate live HE. I cant personally vouch for anything Heavy Arty has seen or not seen in his service- I just can go off my own time in as a TOW gunner.

I Know reference photos are difficult to track down and rarely show anything so trivial on Army AT missiles.  

Here are a couple of shots I was able to dig up


A live round being loaded into a ground mount launcher. The front cap has been removed.

A live round being carried, the front end cap is still in place.


F is for FIRE, That burns down the whole town!

U is for URANIUM... BOMBS!

N is for NO SURVIVORS...

       - Plankton

LSM


  • Member since
    January 2005
  • From: Portland, Oregon
Posted by fantacmet on Saturday, July 26, 2008 2:05 AM

Looks SUPERB!  The Badge for the GB is I think on the second page, but I am going to try and remember to put it up in the original post.


First one done, and one of the best that I've seen so far. 


  • Member since
    October 2007
Posted by White_R34 on Saturday, July 26, 2008 6:42 AM

Thank's "fantacmet" for the coment and I will change the badge, I wanted to realy earn my badge. "stikpusher" you see I have tryed to change some of the parts on my build so as to try to keep it right or as close to the right thing as I can. I'm working on fixing the red color but I do see that in a lot of the IDF MUTTs w/TOW the IDF solders place the tow tub on the vehicels in diferent positions on some it look like the stripe is in the rear but I know that the stripe has not moved only the direction the tub is facing. So with that I looked at the top images you posted and I see the colors, an now this is just what my eyes see the stripe looks some what a red brown. Any way I like the first Image and that big camera on the M220A2 TOW launcher with thermal nightsight looks cool. I plan on building the ground based version as I will not need it on the TOW support version that I'm going to build to go with this one. An thanks for all the help man and the cool images I'm saving them to help me on othere projects.

TOW Case Diagram:

Color Configuration Chart:

Blue stripe!!

http://www.combatreform2.com/towparts.jpg

Man you got to see this one:

http://www.patchesofpride.com/poppages/pop43.html

I now see that I have my TOW Cases mounted in the reverse direction on my MUTT and that's ok, long as I fix the red stripe. ((Some minutes later))

Ok now after looking over the case diagram and color configuration chart, I see that there is a lot rong with my placement of the colored stripes. First look at my images.

Ok after looking at the first image or diagram on the TOW firing end there are two small rectangle shape blocks that you can see here:

I have the stripes on the rong ends. "I feel Sick at this point"Yuck [yuck] I did not do a good job on the reacher end for this project. I'm gong to have to leave it the way it is but I can add some brown over the red but the flip the colors can't be done you see the 2nd image of the last tub or case is to low to fix just right. I super-glued the cases inplace. An there is just not a lot of room to maneuver a paint brush on the last case. I'll only going try the fixing the red color stripe.

But still thanks for all the help some time the reacher side can take longer to do that the model. Military modeling is truly hard some times. And at this point I'm not having any fun. It's almost like a job that you don't get payed for. Banged Head [banghead] Still all it realy looks go any way and I will keep that inmind and move on to my next project. Lets hope I dont lose the joy in doing that project and drop the military building altogether and go back to 1/25 car modeling. I think some time you have to over look the bad parts and just try to have fun at this.

Building the Impossible Is my main goal!!
  • Member since
    October 2007
Posted by White_R34 on Saturday, July 26, 2008 3:21 PM

Ok you all I have all the things fixed I thing shes just right now. Like I said in othere posts I'm going to make a new line of images or photos to sind over to the IDF site but now I rely think I have it looking even better becouse of you all. Thanks so much and here are the last two shots.

So what do you all think know (Perfection) or what. Looking over the tow cases being in the rong direction. Now  if we can skip all the jockularity and back to the Business of the "Tank Project"!

As for the badge I made it smaller so I can fit otheres next to it when the time comes.

Building the Impossible Is my main goal!!
  • Member since
    January 2005
  • From: Portland, Oregon
Posted by fantacmet on Saturday, July 26, 2008 3:53 PM
Badge size is all good.  I'm used to working with gigantic images at high resolution so, that is why it is kinda big.  Resizing it for personal tastes is all good.  The original size of the badge I started with was over 1200 pixels square at 300DPI Resolution in Photoshop.


  • Member since
    August 2006
  • From: Amherst, MA
Posted by M1 A1 A2 Tanker on Saturday, July 26, 2008 3:58 PM

AWESOME!!!!!!!!! Bow [bow]


“Computers are like Old Testament gods; lots of rules and no mercy.”  ~ Joseph Campbell


  • Member since
    July 2004
  • From: Sonora Desert
Posted by stikpusher on Saturday, July 26, 2008 3:59 PM

R34,

Your attention to detail is most impressive! Your gun jeep looks outstanding!Thumbs Up [tup]Thumbs Up [tup]Bow [bow]


F is for FIRE, That burns down the whole town!

U is for URANIUM... BOMBS!

N is for NO SURVIVORS...

       - Plankton

LSM


  • Member since
    October 2007
Posted by White_R34 on Saturday, July 26, 2008 5:16 PM
thanks for all the help and the most wonderful comments you all.Thumbs Up [tup] I'll do my best on my tank to.
Building the Impossible Is my main goal!!
  • Member since
    October 2007
  • From: N.H.
Posted by panzerguy on Saturday, July 26, 2008 5:24 PM


   White I'm not a modern armor guy so from my point of view I think this looks DA BOMB! Great job man.

"Happiness is a belt fed weapon"

  • Member since
    October 2007
Posted by White_R34 on Sunday, July 27, 2008 2:45 PM
(Hay thanks panzer) as you see I'm working on some halftracks if you see any thing rong with them feel free to let me know so if aI can I'll try to fix them. (On going Projects)
Building the Impossible Is my main goal!!
  • Member since
    September 2006
  • From: Dripping Springs, TX, USA
Posted by RBaer on Monday, July 28, 2008 4:35 PM
R_34, keep in mind that the picks you've received are all prefaced with something like "great build", or "fantastic". ALL the models I've completed have some kind of error, either due to my ignorance of the real item, incorrect info, or a simple omission. But in the end, if I feel good about what I did to reach the point of completion, I enjoy the completed build, as well as the process. As I've posted in the IDF GB, my Magach has what is very likely a glaring error with the headlight guards, but I'm plugging on regardless. In the long run, I'll do another one (to accompany the two that are 98% finished now, and the one I'm doing for the GB) and it'll be better, with better research. Such is modelling.Make a Toast [#toast]

Apprentice rivet counter.

JOIN OUR COMMUNITY!

Our community is FREE to join. To participate you must either login or register for an account.

SEARCH FORUMS
FREE NEWSLETTER
By signing up you may also receive reader surveys and occasional special offers. We do not sell, rent or trade our email lists. View our Privacy Policy.