Hi guys--
Well, it's been quite a while since I've built a model in "Auto's", but I"ve had the itch lately to do a project that I think we all want to do at some point--to model your own personal vehicle.
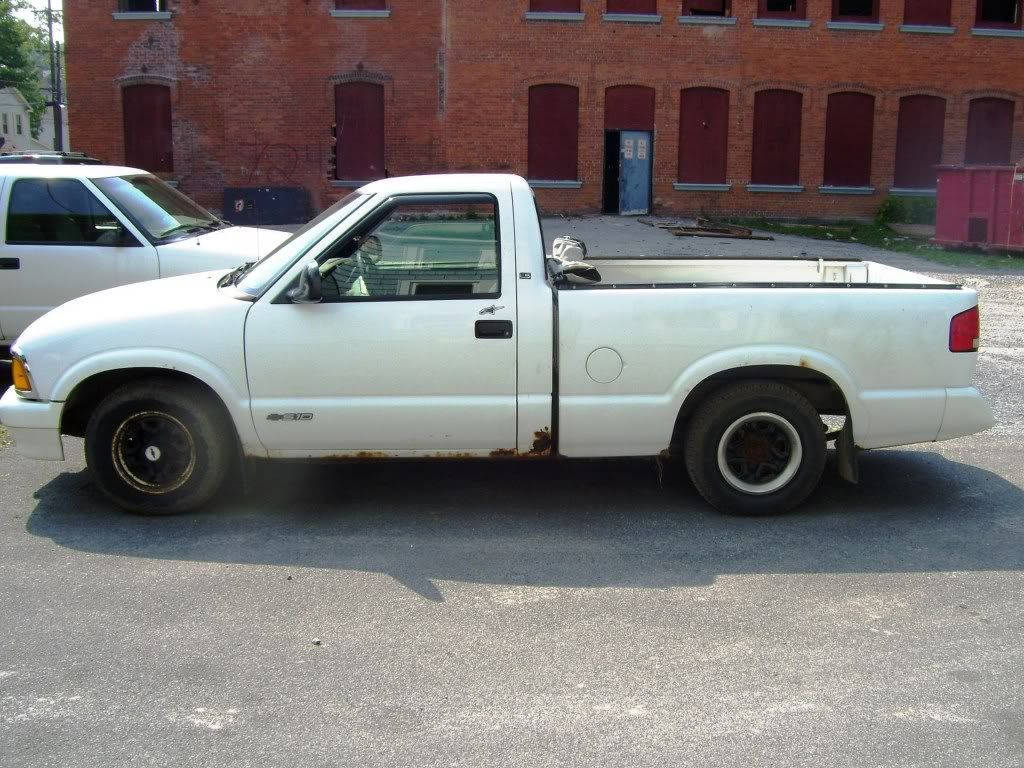
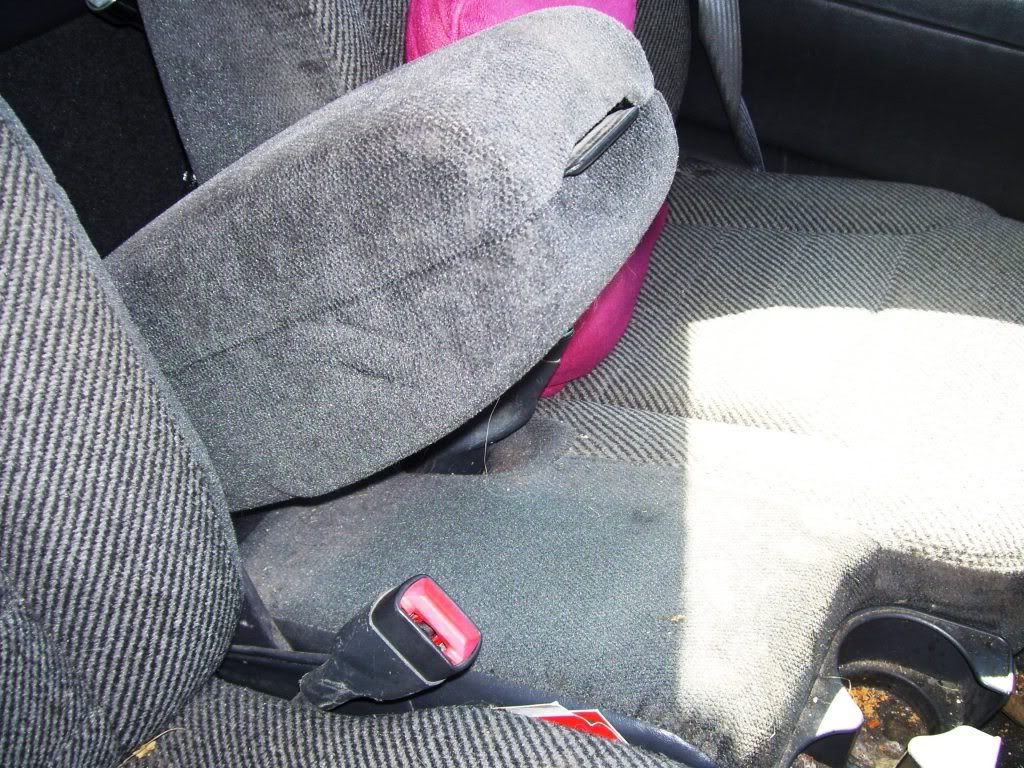
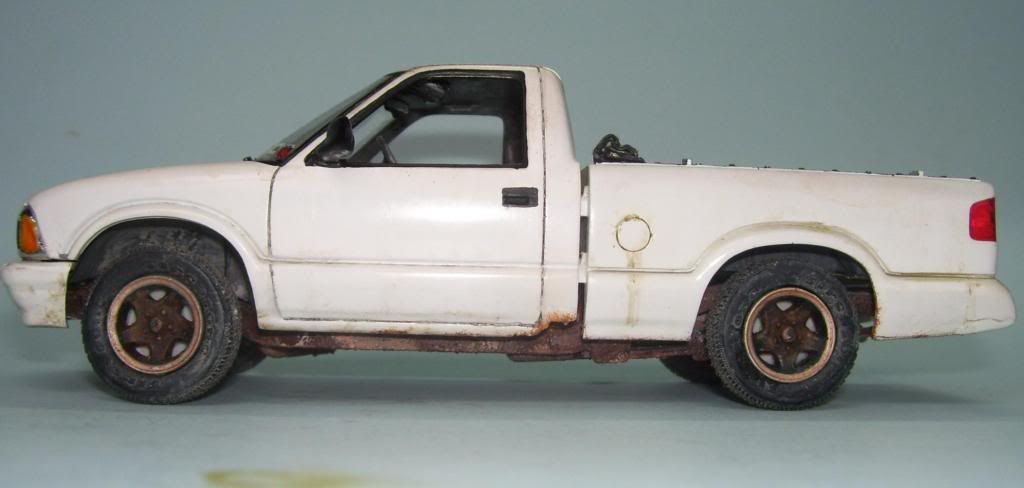
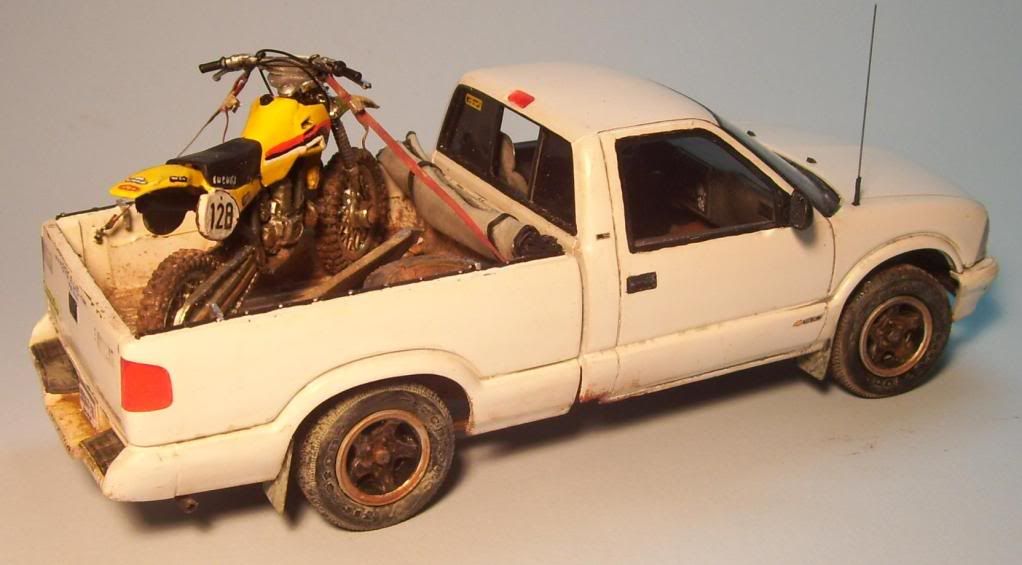
Here's my New York rustbucket--a '97 Chevy S10 LS.
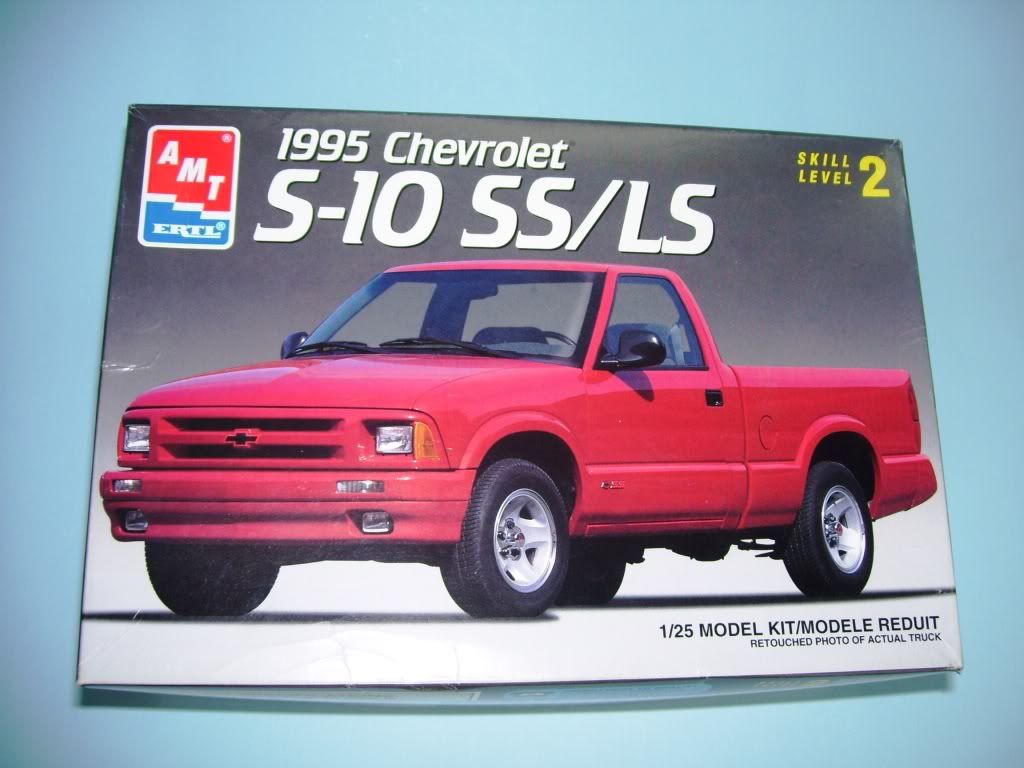
And here's the kit--it's slightly different; mostly in the engine department, but I was not so concerned with that as much as making it look like my vehicle from the outside.
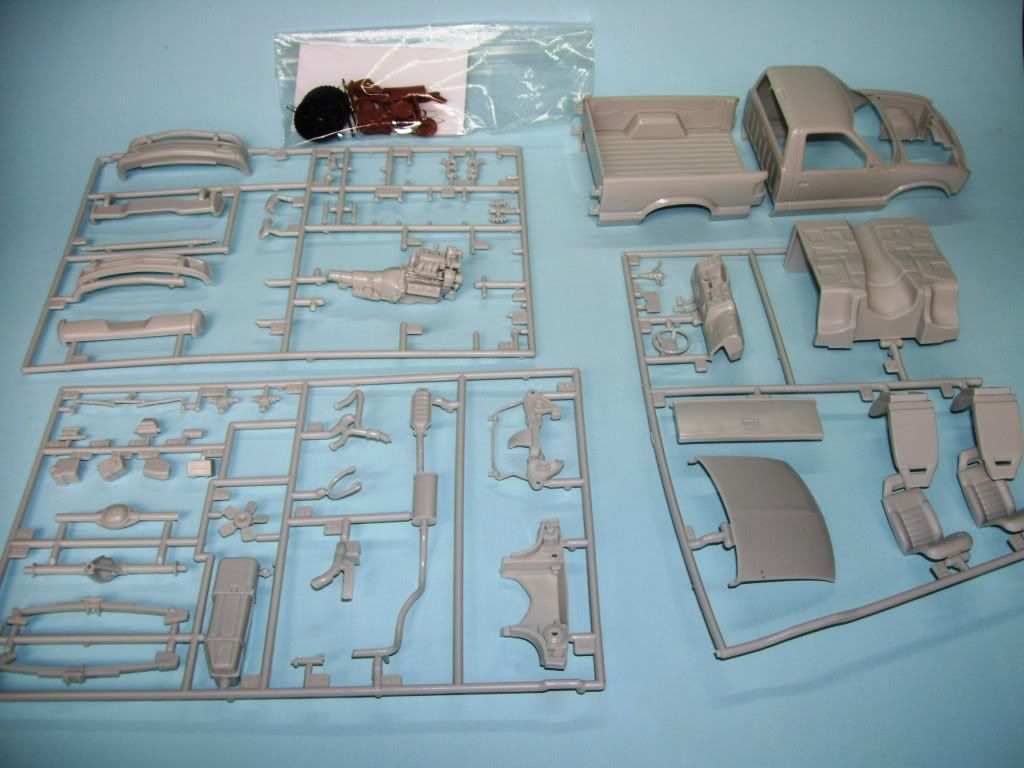
So here's what you get in the box.
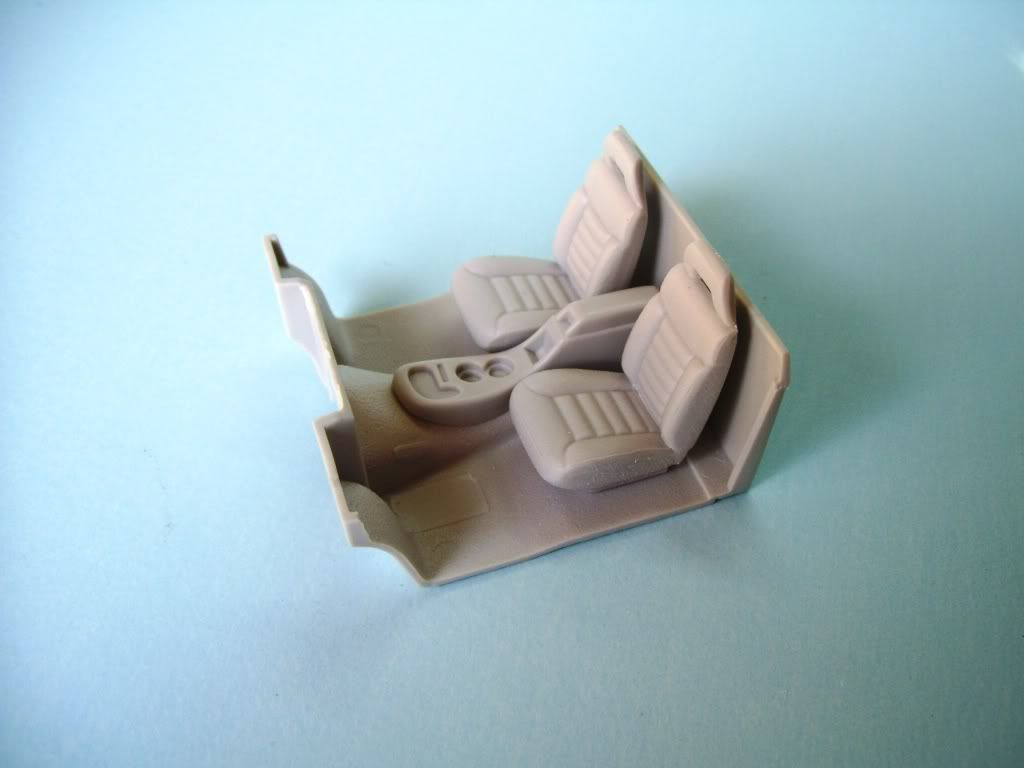
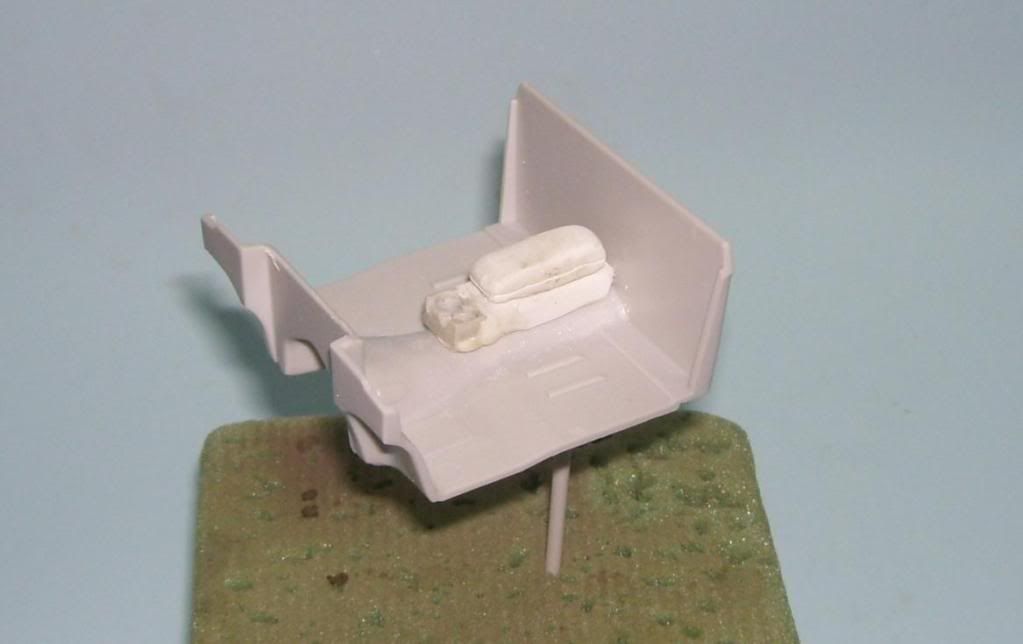
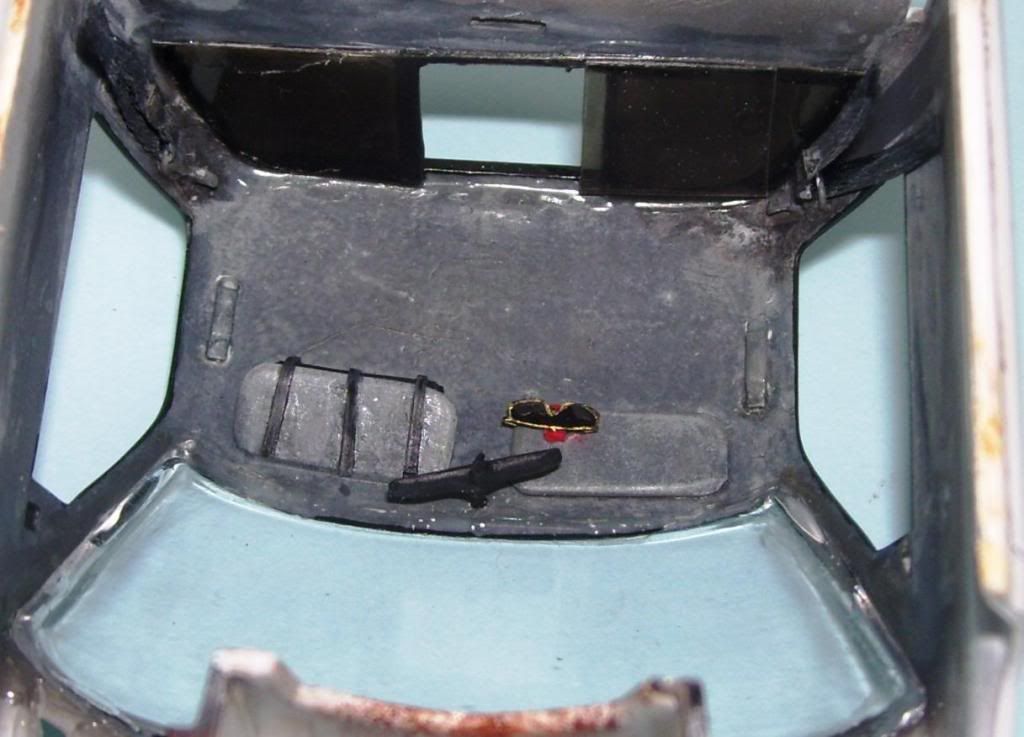
The interior is really close, but for the console. The model has a smaller console--mine is a bog cassette box/armrest thing, and I wanted to really do the interior right, Here's the kit offering.
But here's my truck console...
So I fashioned one out of Milliput fine putty.
And then weathered them up. The interior was painted with Model Master and Polly S paints. A combination of MM Panzer Grey, White, tan craft paint, and Polly S Medium Gray. I had to figure a way to make the seats look like fabric to a degree, do I used wite and black oil to make a gray color and crosshatched the pattern onto them. The interior was flocked with black, and then matts cut out of 600 black sandpaper, and the floors weathered with MIG powders and pastels.
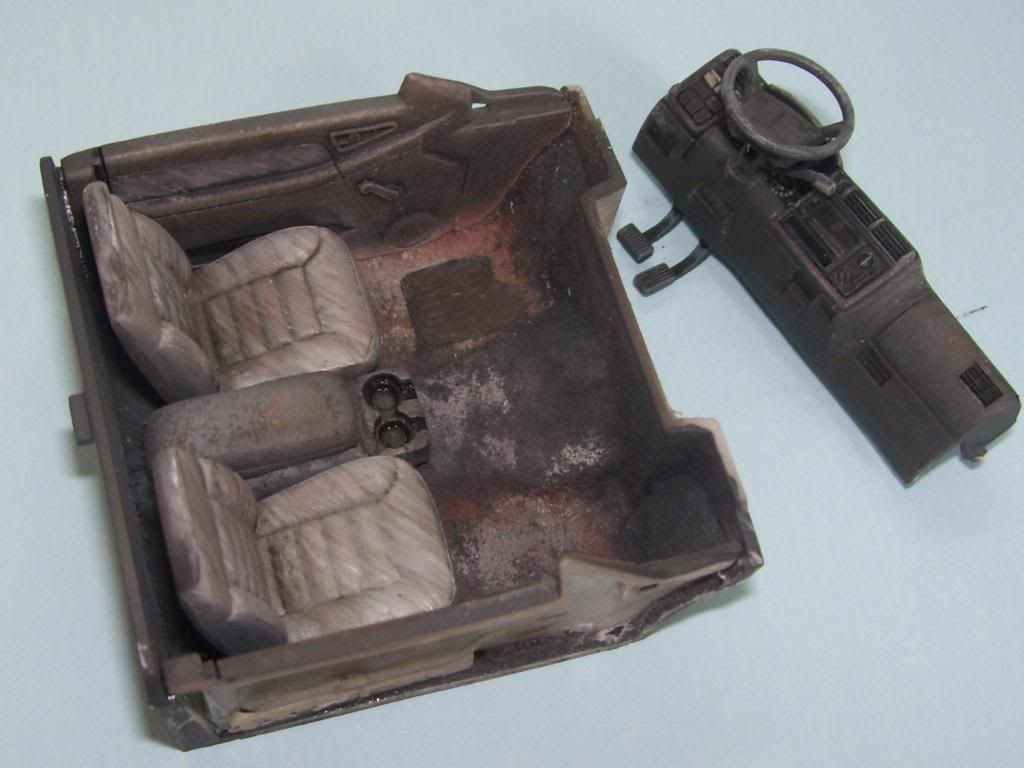
Detailing was finished with a Milliputt cassette box that Jenn just bought for me at a garage sale, lol, and some maps and whatnot in the side panels. I made seatbelt holders out of styrene too. And the blue bags behind the seats are old newspaper delivery bags that I keep in there for litter.

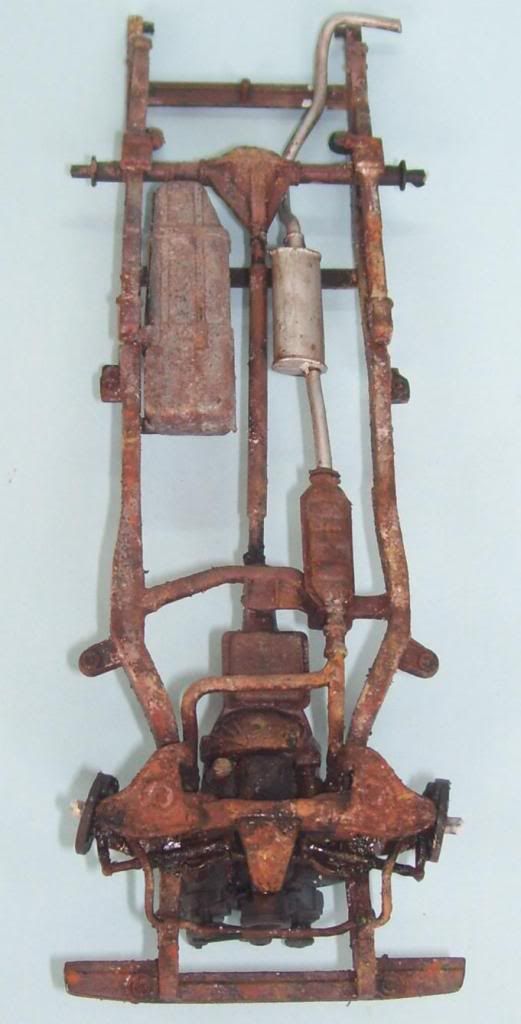
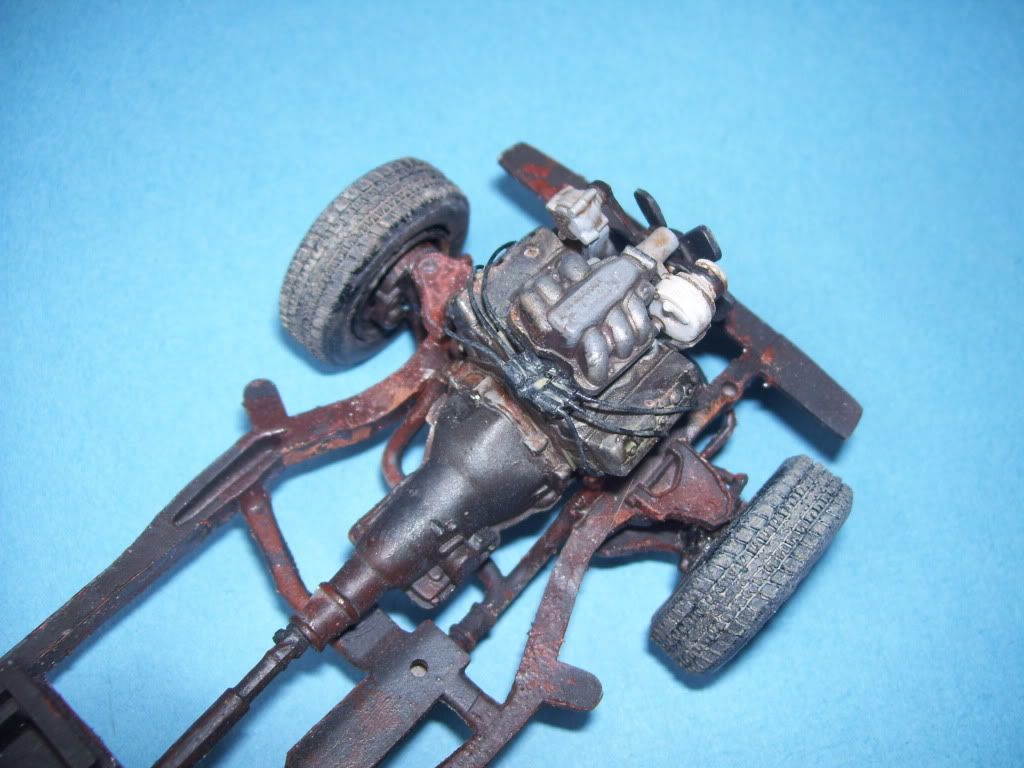
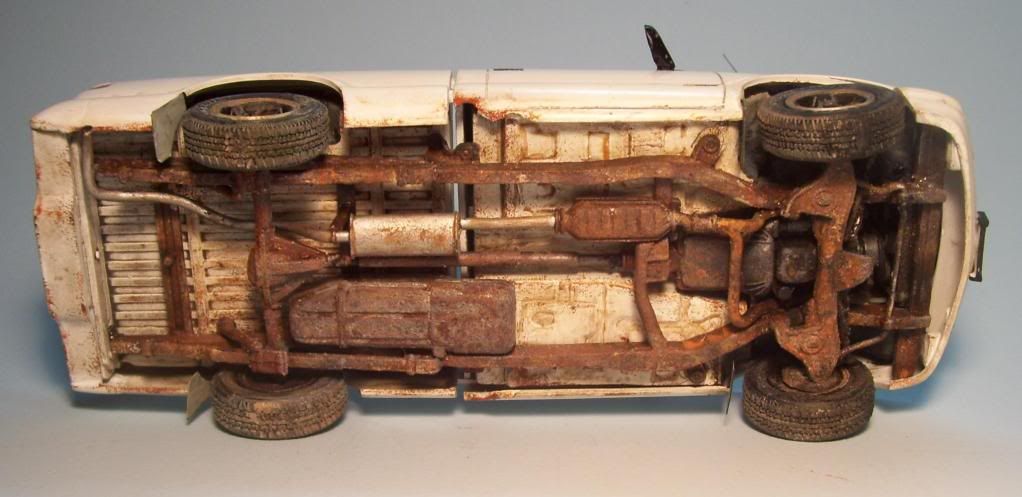
OK now the chassis. Here it is assembled...
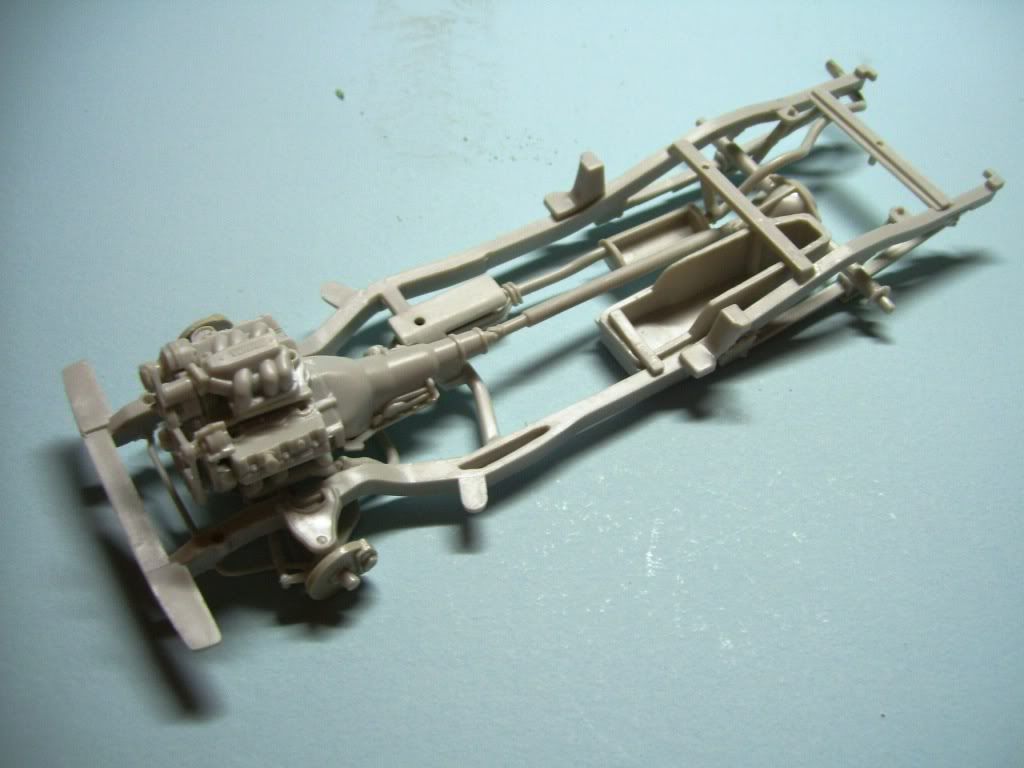
Of course, the New York salt just eats up your undercarriage...
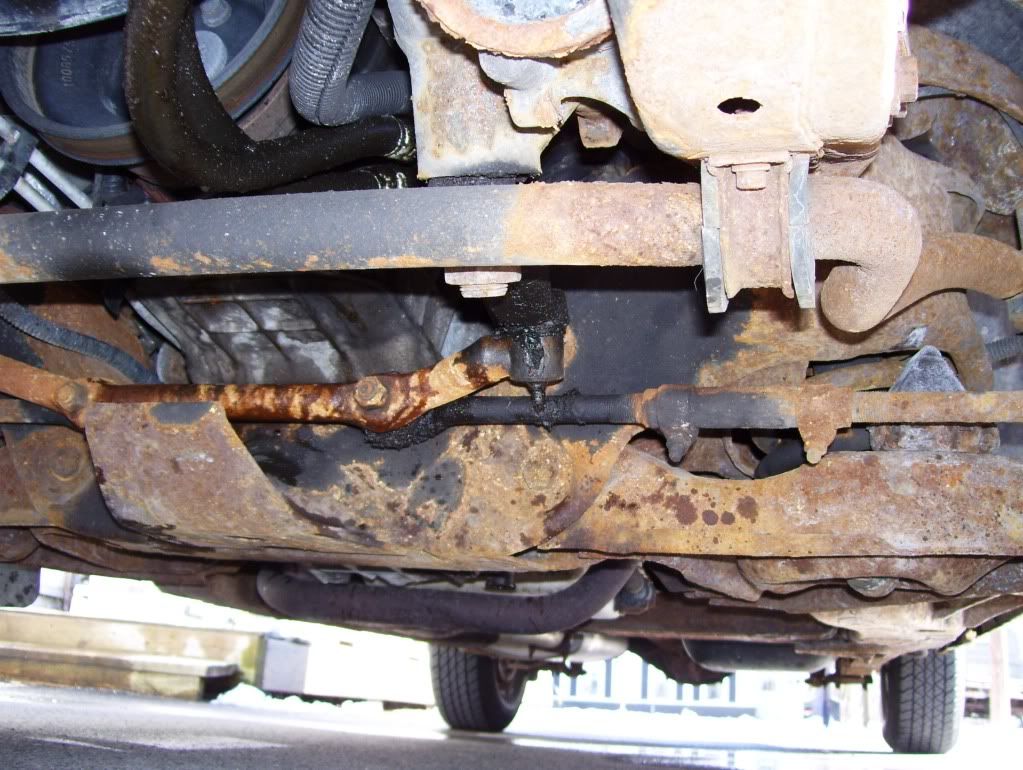
...so I had to rust it up good. This was accomplished with MIG weathering pigments mixed in MIG acrylic resin, and various oil washes.
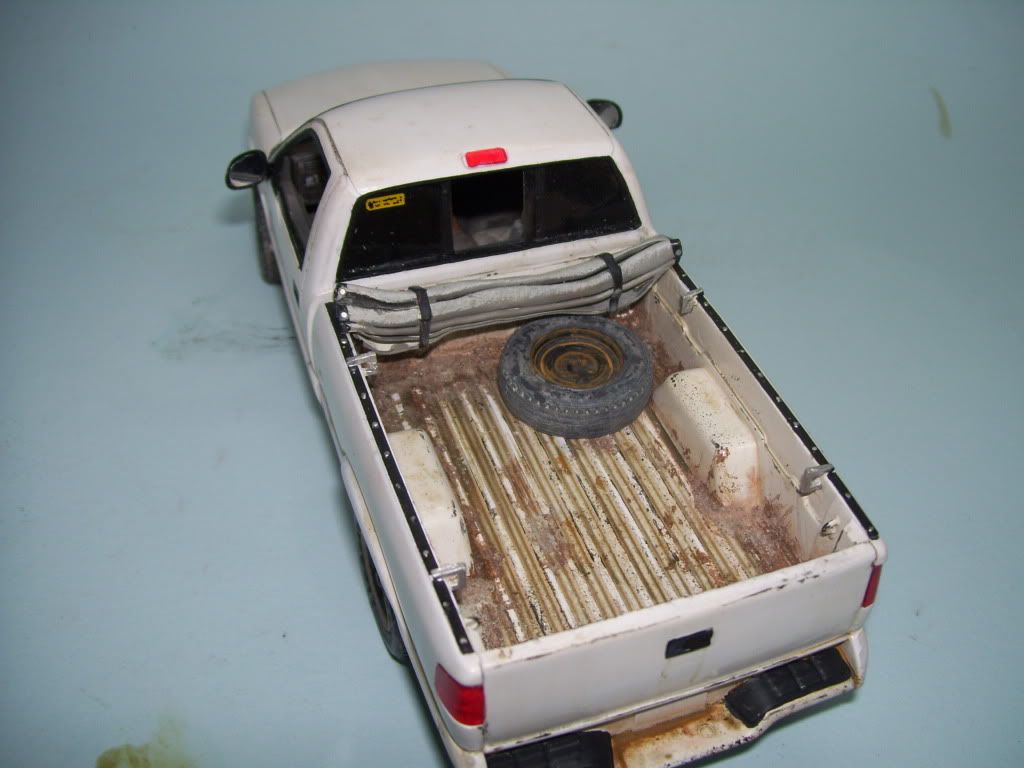
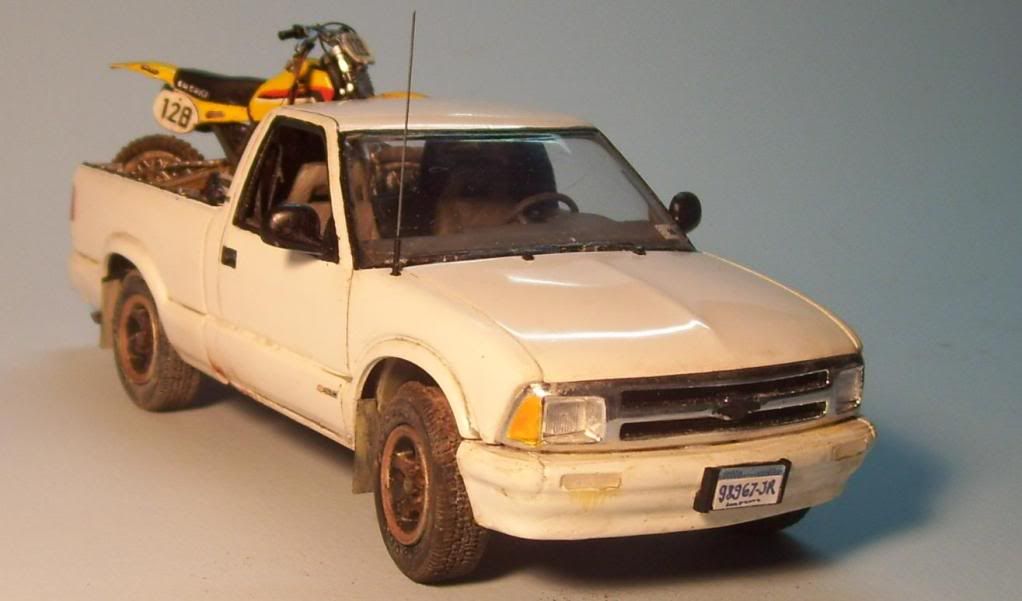
My truck has a tonneau cover and a split, openable, tinted rear window, so...
... I decided to make one out of clear styrene and paint it with Tamiya Smoke, and then dip it in Future to get this result.
I got a organizer on the shade, and a sunglass holder inside..
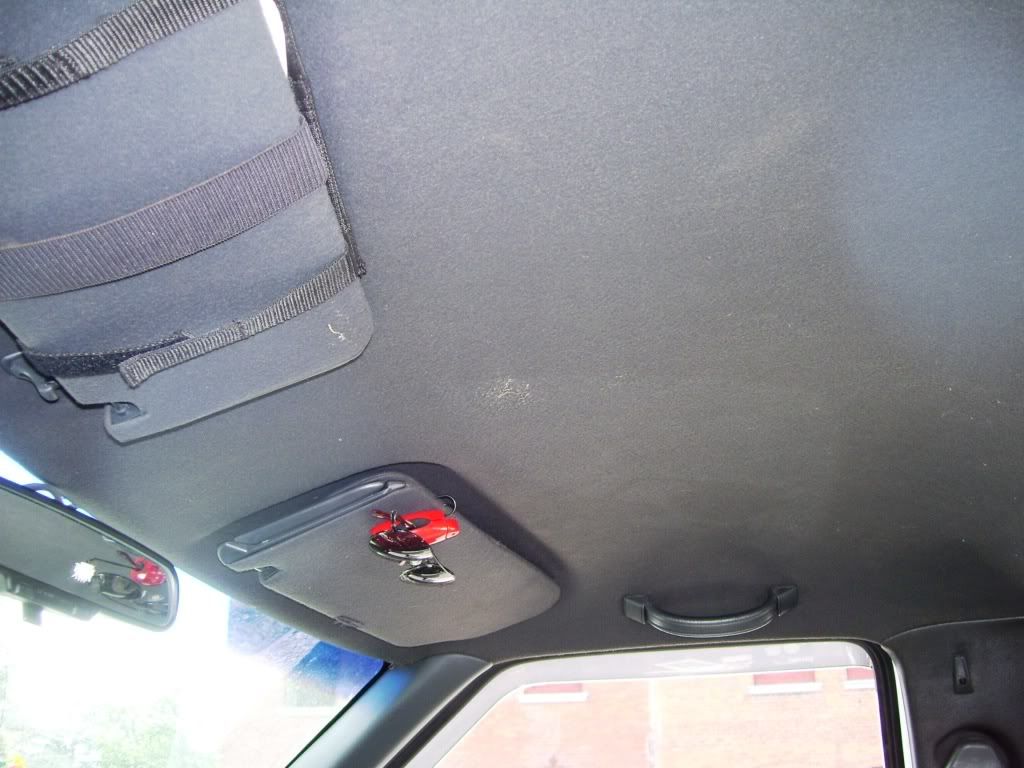
....so I modeled these too with plastic and lead foil. The sunglasses is a PE accessory from Detail Master.
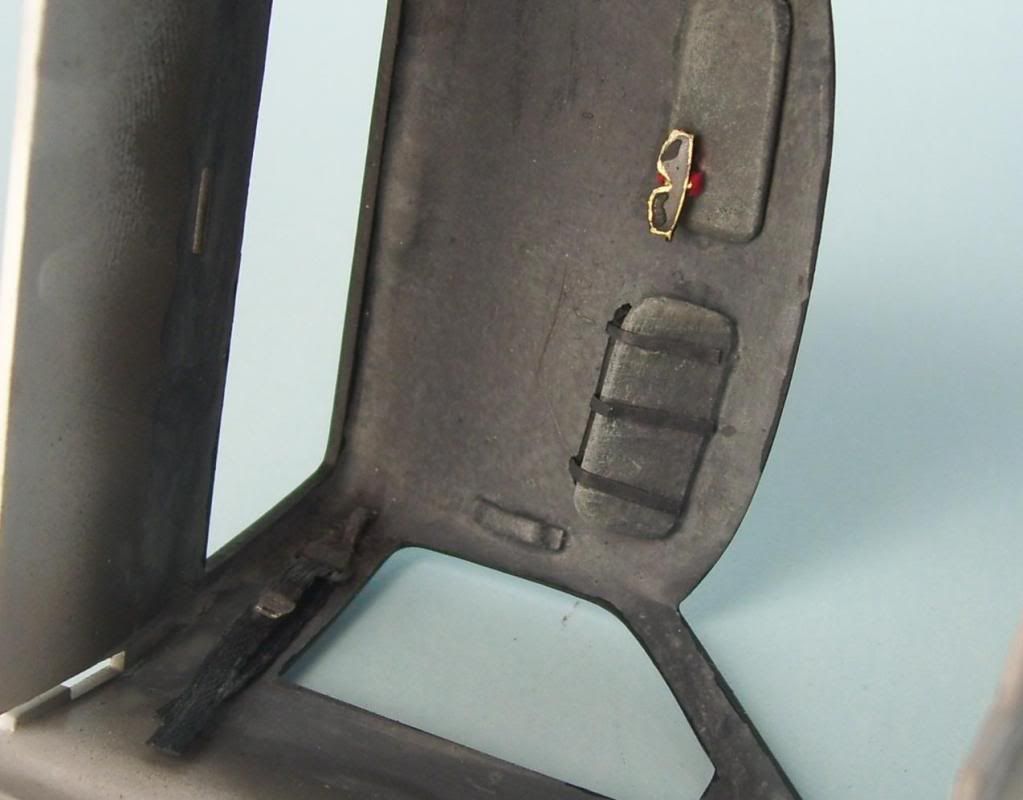
I put the window in, made a rear view mirror, some roof handles, and made some seatbelts hanging off the side...
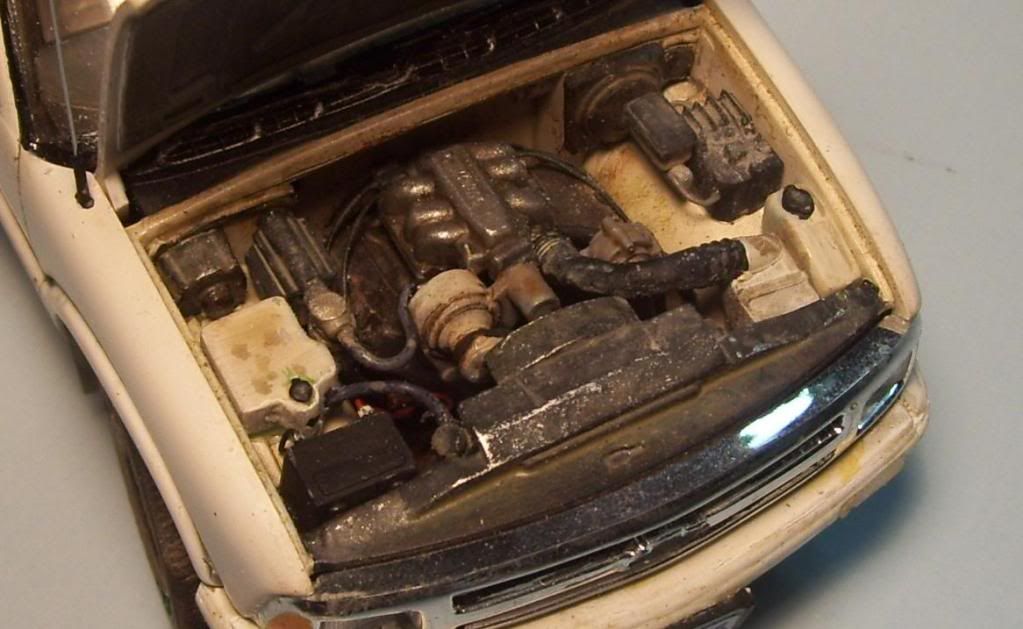
My truck has this weird looking distributor that looks like a crab, so I had to model this out of styrene. The engine was weathered with MIG oils.
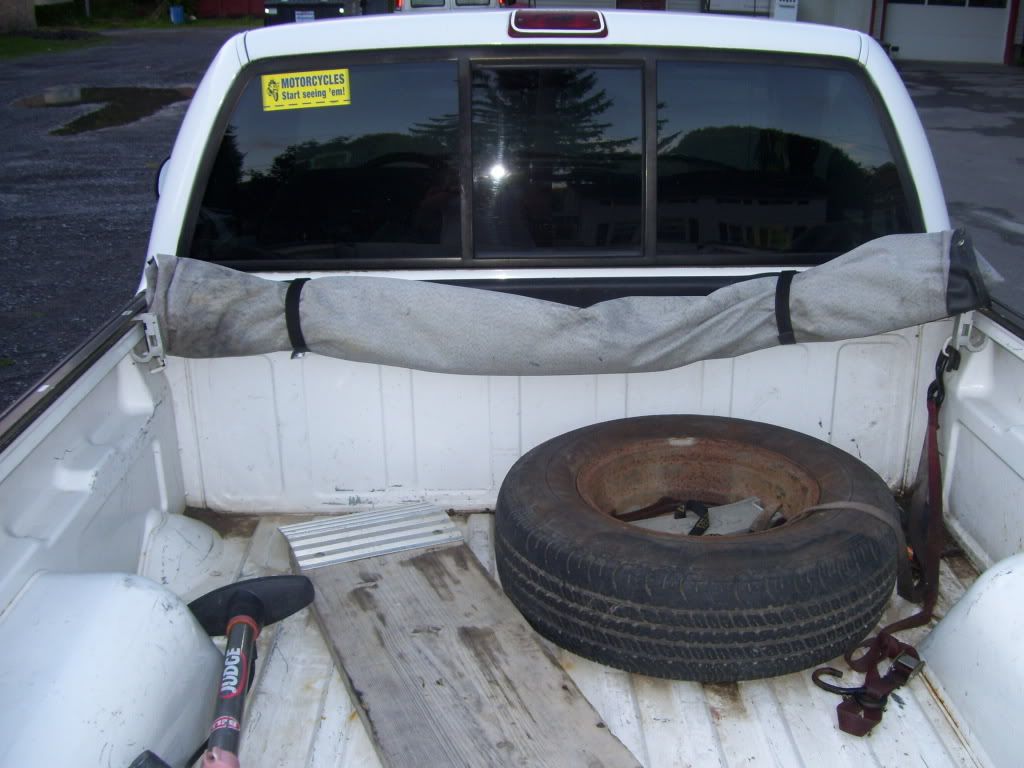
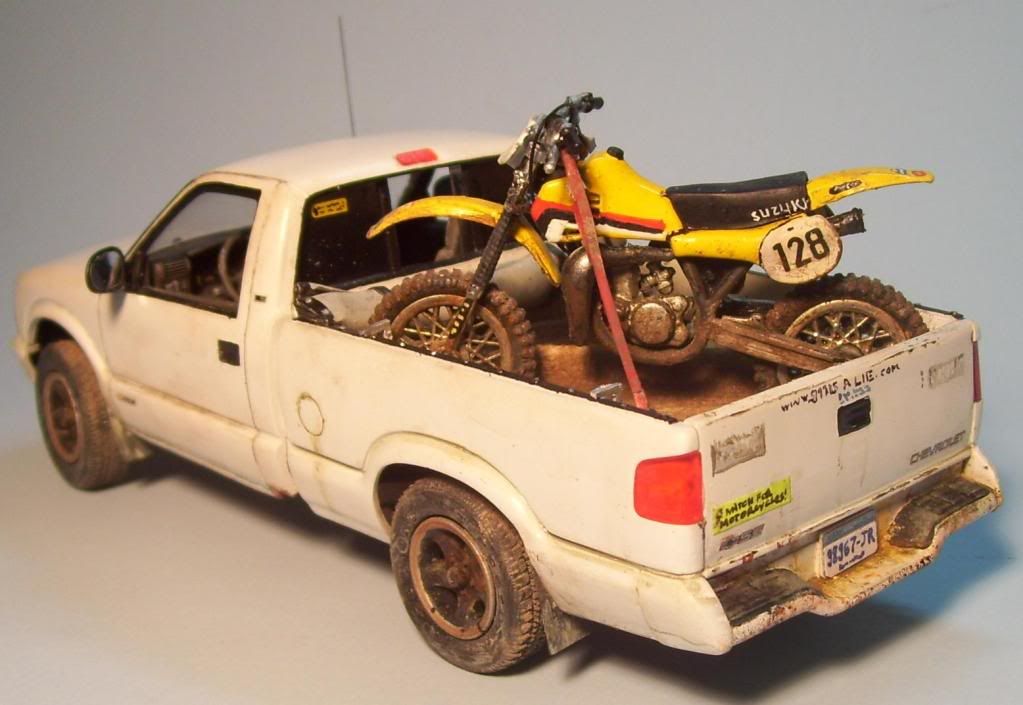
I had to fashion rails on the rear box which the tonneau cover snaps on to; this was done with 10 x 40 styrene rod, and then the snaps were made by using a single edge razor blade on a syrene .020 rod. I also then had to fashion 4 U-clips which keep the tonneau mounts on. I also had to make a folded tonneau cover out of Milliputt and lead foil. The truck was painted with Tamiya Pure White over Tamiya WHite Primer.It all laid down very nicely. The rear bed was then weathered with the trusty ol' MIG pigments, and some JoeFIx leaves left over from my "Rust Bunnies" dio. I weathered the rear fender with rust washes, and even added my "Watch for Motorcycles!" sticker on the back window with an old decal. That's where I keep my full-sized spare too. (Can't carry a bike on a donut tire!)
I had to "rust out" the bottom of the cab pillars there, by using a Dremel rotary tool to thin the plastic and effect that result, Another thing you might notice is that after I had painted it, I realized that the body had molding on it for the "SS" version that had to be removed! So I had to dig into that too, and repaint! Anyway, it's finally starting to look like my Brapwagen! The tires too, were weathered with pigments and washes.
I wired up the engine. It's not the same Vortech as in my truck, but it makes a decent representation...
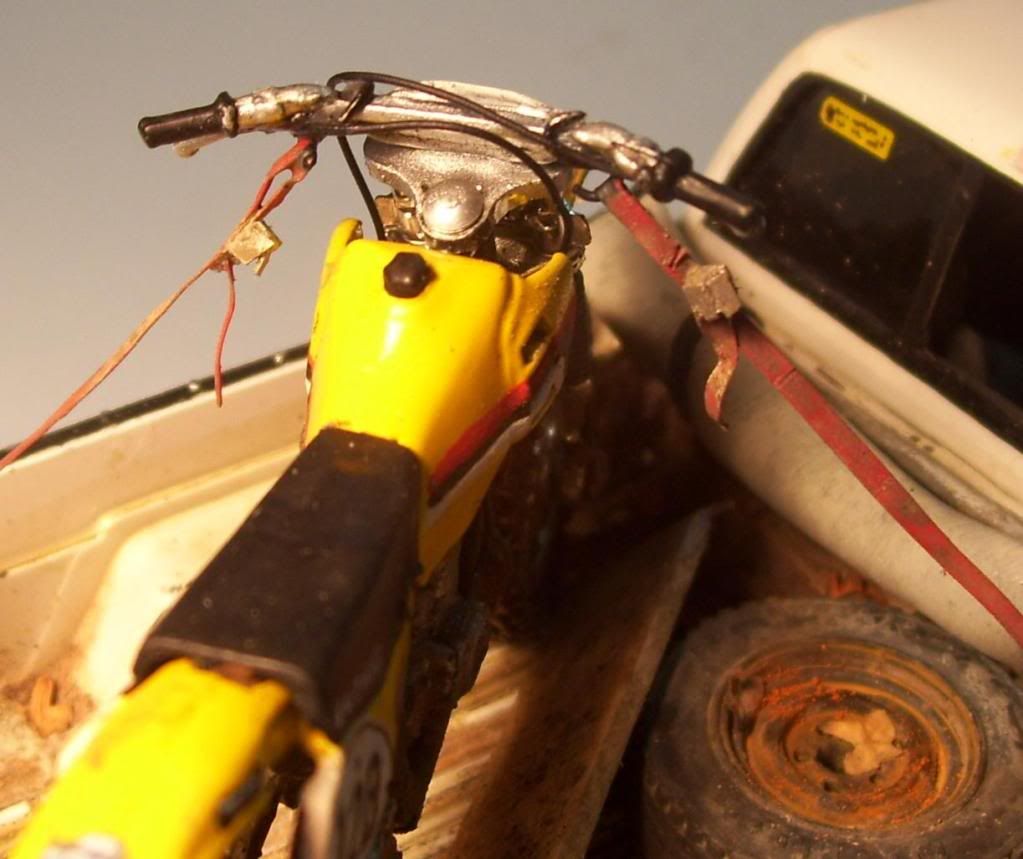
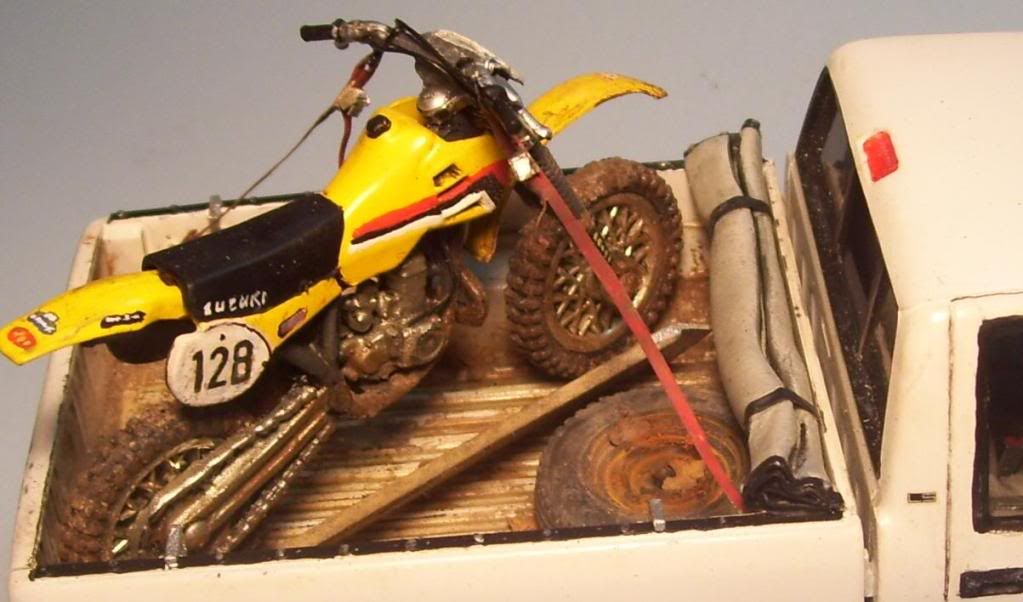
And the piece-de-resistance! It's not easy to find current 1/25 scale dirt bikes today, but I managed to find one on eBay! I put cables on it, and painted up some Suzuki graphics and sponsor decals, and then weathered it to look like I just had a wonderful day brapping!
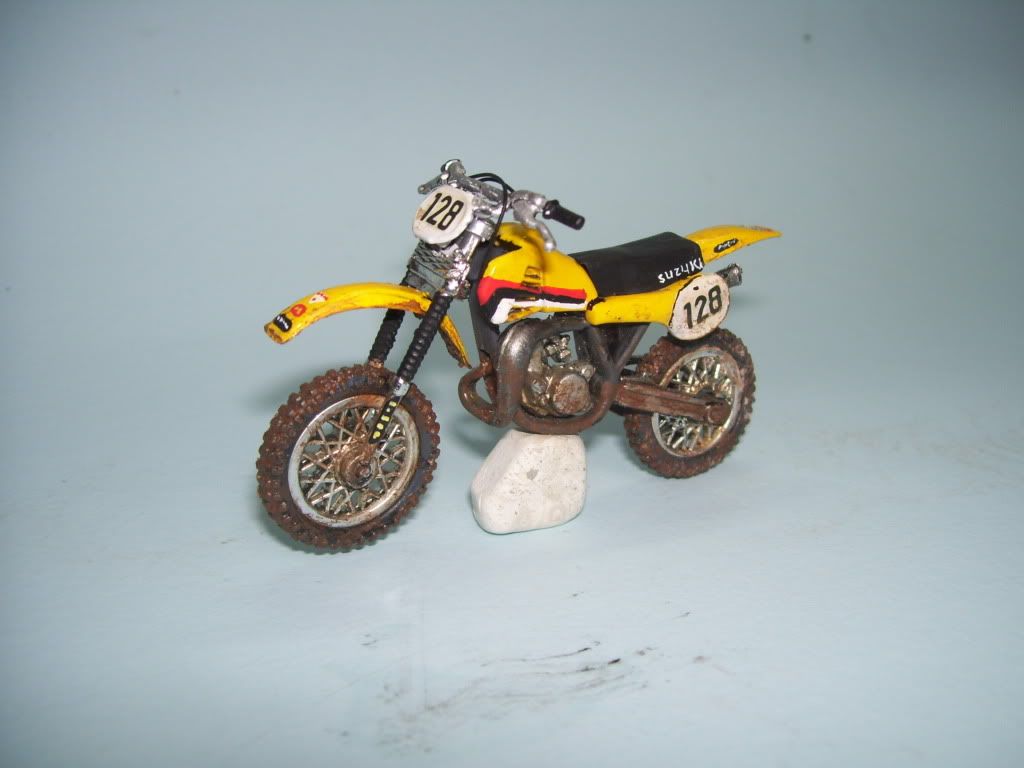
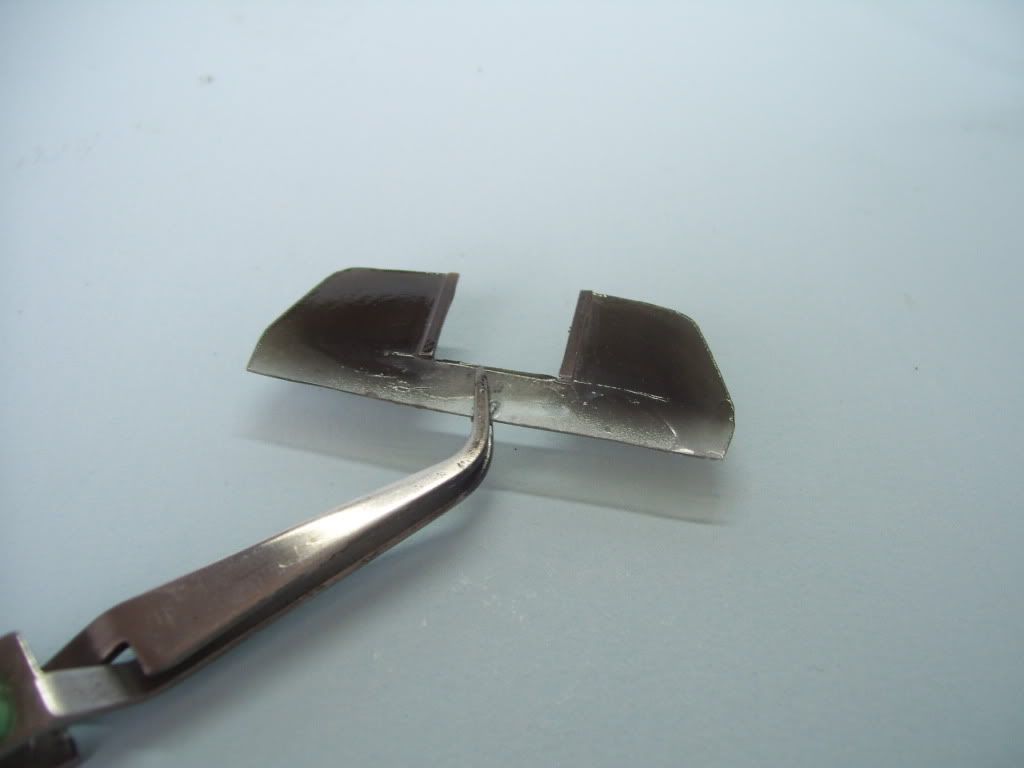
I put it in the back with a scratchbuilt pair of tie-down straps made from lead foil and styrene, and a scratched loading ramp made from balsa and styrene.
And here's the finished model! My Brapwagen--ready to go race or ride, as I will be this Sunday before the dam'ned snow sets in! WAHOO! bbbRRRAAPP!!! ![Big Smile [:D]](/emoticons/icon_smile_big.gif)
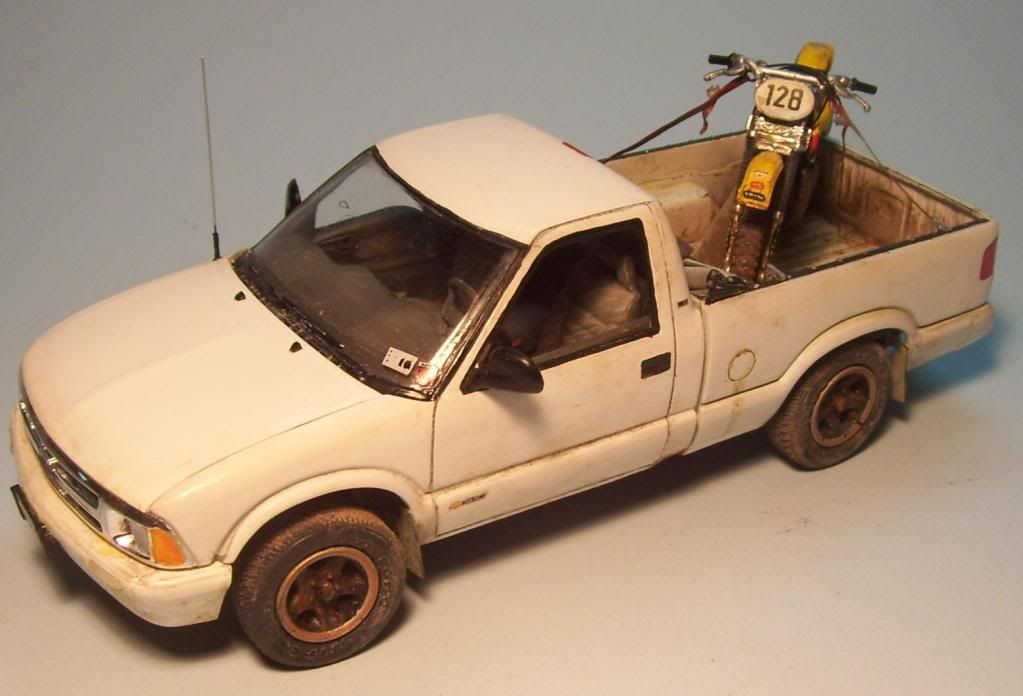
I even painted in my old bumper stickers on the rear...the lisence plate I made from an old decal and some paper with hand-lettered numbers. I plan to replace this with a photo of my plate scaled to size.
The underside--I hate to say it, but the weathering is pretty accurate for a NY vehicle!
Well, that's it! I hoep you enjoyed my post and my model! It's cool to have my real vehicle reduced in miniature. All comments, questions, and critiques always welcomed.