SEARCH FINESCALE.COM

Enter keywords or a search phrase below:

AMT Der Beetle Bus-OOB Version Completed

13364 views
153 replies
1 rating 2 rating 3 rating 4 rating 5 rating
  • Member since
    January 2010
Posted by CrashTestDummy on Wednesday, November 9, 2016 2:26 PM

mustang1989

Thanks Gene and Steve. I'll see if I can throw together a small tutorial of how I do things in regards to seams there Gene.

Ok folks. I've got my next automotive build lined up after I get through with "The VW Bus Project". I've been wanting to do a 460 Big Block Ford powered Fox Body Mustang for a while now. Initially I wanted to do the 1990 Model LX but now that I've acquired an older Fox Bodied car that just looked too cool to pass up I think I'll go with this one. I've already got the wheels and tires to make all this happen so here's where we're at:

Image
<SNIP>

Thanks for the tutorial, Joe.  It does help.  I do similar work when cutting things out, but guess I'm just not as steady as you are. 

Please get me the kit number for this kit.  It's very close to a 1:1 car a good friend has, and I'd like to replicate it for him.

Gene Beaird,
Pearland, Texas


G. Beaird,

Pearland, Texas

  • Member since
    March 2012
  • From: Corpus Christi, Tx
Posted by mustang1989 on Wednesday, November 9, 2016 3:14 PM

No problem Gene and I'll get that number to you.


 Forum | Modelers Social Club Forum (proboards.com) 

  • Member since
    March 2012
  • From: Corpus Christi, Tx
Posted by mustang1989 on Friday, November 11, 2016 7:34 AM

Gene: That Revell Mustang Street Machine kit number is 7115.

I'm so immersed in theory and planning right now I don't know when this thing'll ever start to progress. I'm hanging in there and taking it one day at a time and sooner or later I'll end up making a bus out of it one way or another.


Here we are right now with the engine/ transmission with the cylinder heads installed, seating and center cluster pod test fit into place so I've got an idea of how this is all going to turn out and what I still need to do to get things to "behave". As you can see, there's a lot of work and "repositioning" left to do concerning the seating arrangement :


This is about where the transmission tail housing is going to wind up. Hopefully I can scoot it all to the rear another 1-2mm but this is a good spot for now.

and I'm currently working on relocating the steering column over towards the drivers door to line it up with the drivers seat.


 Forum | Modelers Social Club Forum (proboards.com) 

  • Member since
    May 2009
  • From: Poland
Posted by Pawel on Friday, November 11, 2016 1:32 PM

Hello!

I've got an idea for you - maybe it would make sense to mount the seats (why are there actually two of them?) to a tubular inner frame? That could be made from sprue or stuff like that, and that's how it probably would be done in real life. Also it would make sense to move the seats back some. It is said the driver has a better feel for the car if he seats near the center of gravity. Also, I don't know if you ever drove a van like this, or a cabover, or a big bus, but it's a funny feeleing, sitting in front of the front axle, so moving the seat back would make theoretical driving of this baby a lot more natural and probably easier.

Good luck with your build and have a nice day

Paweł

All comments and critique welcomed. Thanks for your honest opinions!

www.vietnam.net.pl

  • Member since
    March 2012
  • From: Corpus Christi, Tx
Posted by mustang1989 on Friday, November 11, 2016 1:53 PM

Thanks Pawel. I did actually think of that but the dang wheel well would get right in the way. The thought process aint over yet and all but my options for seat positioning are very limited with this vehicle.


 Forum | Modelers Social Club Forum (proboards.com) 

  • Member since
    March 2012
  • From: Corpus Christi, Tx
Posted by mustang1989 on Friday, November 11, 2016 2:16 PM

I went out today to pick one of these up from Hobby Lobby because I wanted to one to build OOB (yes.....it's going to happen) just to display my modified one next to an OOB version when finished and got that 1 in 12 that's supposed to be green. Cool color is all I've gotta say. I'm happier than a pig in slop!


 Forum | Modelers Social Club Forum (proboards.com) 

  • Member since
    March 2012
  • From: Corpus Christi, Tx
Posted by mustang1989 on Saturday, November 12, 2016 4:34 AM

I did check some seating options out for this thing and it's going to require more than I have planned for so I'll be sticking with the the current seat location. To pull this off would mean scrapping the whole chassis build idea and starting from scratch. I've gotta say "when" at some point with all of this and this is one of those times.

This video shows what could be done  in regards to seating:

https://search.yahoo.com/search;_ylc=X3oDMTFiN25laTRvBF9TAzIwMjM1MzgwNzUEaXRjAzEEc2VjA3NyY2hfcWEEc2xrA3NyY2h3ZWI-?p=volkswagen+bus+drag+racing&fr=yfp-t&fp=1&toggle=1&cop=mss&ei=UTF-8


 Forum | Modelers Social Club Forum (proboards.com) 

  • Member since
    August 2015
  • From: the redlands Fl
Posted by crown r n7 on Saturday, November 12, 2016 5:11 PM

 Translucent Nice !!!


 Nick.

  • Member since
    August 2007
  • From: back country of SO-CAL, at the birth place of Naval Aviation
Posted by DUSTER on Saturday, November 12, 2016 10:49 PM

Oh Good. Now we can see through the transulant green to see that  seat placement lots better.........


Ok, I'll  just sit over here and be quiet now............for a while

Steve

Building the perfect model---just not quite yet  Confused

  • Member since
    March 2012
  • From: Corpus Christi, Tx
Posted by mustang1989 on Saturday, November 19, 2016 9:55 AM

Thanks for the comments Nick and Steve.

  I received my fuel cell yesterday for the XL version that I'm building. This is gonna work out nicely is all I've gotta say....


aaaaand I got the inside of the OOB body shot with gold this morning and that's gonna work out well also!


I've got some work to do on the top though. There's those to optional cut out impressions for adding....................antennas????????????    I've got some sanding to do to get not only those to look right but the ejector pin marks all over the inside of the roof as well. No problem.....................we'll get there.    


 Forum | Modelers Social Club Forum (proboards.com) 

  • Member since
    April 2016
  • From: Parsons Kansas
Posted by Hodakamax on Saturday, November 19, 2016 10:24 AM

Ok, I'm an aircraft guy, but this is a fun one to watch. Early life exposure to hot cars and VWs keeps bringing back me to your posts! LOL! Still watching!

Max

A big supercharger would look good under dual quads! Just thinking.

  • Member since
    March 2012
  • From: Corpus Christi, Tx
Posted by mustang1989 on Saturday, November 19, 2016 10:37 AM

Thanks Max.

Just one supercharger? This one's got two...............and two turbo's............and Nitrous. I think that'll blow the competition away.....


 Forum | Modelers Social Club Forum (proboards.com) 

  • Member since
    April 2016
  • From: Parsons Kansas
Posted by Hodakamax on Saturday, November 19, 2016 11:25 AM

Excellent my friend! Carry on!

Max

  • Member since
    May 2009
  • From: Poland
Posted by Pawel on Sunday, November 20, 2016 7:20 AM

Of course they added the antennae - after all this is a beetle, a bug! In Poland they call those old VW busses/vans a "cucumber" because of it's rounded shape. Good luck with that OOB baby and have a nice day

Paweł

All comments and critique welcomed. Thanks for your honest opinions!

www.vietnam.net.pl

  • Member since
    August 2009
  • From: MOAB, UTAH
Posted by JOE RIX on Sunday, November 20, 2016 8:50 AM

Definitely some outstanding progress Joe. The gold on your transluscent body sure came out nice. Well done. I am so looking forward to you building up that motor. That is just going to be epic.

"Not only do I not know what's going on, I wouldn't know what to do about it if I did". George Carlin

  • Member since
    March 2012
  • From: Corpus Christi, Tx
Posted by mustang1989 on Monday, November 21, 2016 5:09 AM

Pawel: LOL. Thanks bud. A cucumber. LOL!

Joe: Thank you as well. I may strip the paint on the bottom of the oil pan and start over. Got a little unfinished seam work business to tend to.

I'll be changing the front wheels and tires up on the "OOB" build just because the more I look at the front wheels and tires the more I don't like 'em.


 Forum | Modelers Social Club Forum (proboards.com) 

  • Member since
    March 2012
  • From: Corpus Christi, Tx
Posted by mustang1989 on Friday, November 25, 2016 1:10 PM

I managed to work on my "OOB" build this morning. I didn't like the front tires from this kit so I used the one's from the AMT '67 Chevelle kit. I chucked a 12mm socket up in my cordless drill and mounted each of the four tires up, one at a time on to the socket and spun the tires up on some sandpaper to rough up the tread araas some. I also treated each of the wheels to a coat of X-22 Smoke for that true metal/ chrome look. After that I installed all four wheel and tires.

Here's the progress so far:

Image


 Forum | Modelers Social Club Forum (proboards.com) 

  • Member since
    August 2009
  • From: MOAB, UTAH
Posted by JOE RIX on Saturday, November 26, 2016 8:28 AM

Hey, now that's looking pretty cool. You move along right smartly when your not rebuilding the entire kit with using only 2 of original parts.Wink

"Not only do I not know what's going on, I wouldn't know what to do about it if I did". George Carlin

  • Member since
    March 2012
  • From: Corpus Christi, Tx
Posted by mustang1989 on Saturday, November 26, 2016 1:09 PM

Thanks Joe! .........smarty!!Wink

Ok I'm back with today's update. Folks I had to ditch the front wheels as well. First off , I just didn't like the way they looked. Secondly , these things, no matter how much I cut them down on the back of the wheel where they mounted up to the axle just stuck out way to far outside of the body.

Here's where I started at this morning when test fitting the body onto the chassis to see if everything was going to work out ok. I'm glad I did because I wouldn't have been very happy with this..........

Image

After cutting the backs of the OOB wheels down it wasn't too much better...........

Image

So I scrapped the OOB front wheels and went with some Cragar SS's I had in the spares bin. Now THAT'S more like it!!!!!!!!!

Image

The engine? Well it's probably the most primitive Hemi engine I've seen but there aint no way in HELL I'm going to use my Ross/Gibson Hemi on THIS build! lol

I painted the engine metal flake blue , drilled some holes in the rocker covers for ignition wires and while I was on the rocker covers , applied a little Tamiya Smoke to them.

Engine progress for this morning.......

Image

After looking at it for a while I don't know if I'll use this 426 Hemi or another OOB Hemi from 30 years ago. Will be thinking on this part.... :hmm:


 Forum | Modelers Social Club Forum (proboards.com) 

  • Member since
    March 2012
  • From: Corpus Christi, Tx
Posted by mustang1989 on Saturday, November 26, 2016 1:11 PM

OK! Done thinking!!!

After some re-thinking and internal debate... I'll be going with a 30+ year old Hemi that I've got in the stash. I'll be taking all of the peripherals off like the blower, belts and I'll be replacing the rocker covers but the base engine just has so much more detail than the OOB one in this kit. (Yeah I know, the pink is a little hard to take but you've gotta remember I was going to put this in a Panther Pink Cuda that I built back then as a teenager). That thread for ignition wires'll go too. Hey....It's all I could think of 30 years ago that would work ya know.

I'll be painting this engine the same blue that I did in the pics above....

Image


 Forum | Modelers Social Club Forum (proboards.com) 

  • Member since
    August 2009
  • From: MOAB, UTAH
Posted by JOE RIX on Saturday, November 26, 2016 1:25 PM

And the whole OOB concept? Out the door like a bad habit. That's the Joe I know and love. HaHa..HAHAHAHA!!!!! I knew you couldn't do it.

You do know that I am just having fun at your expense right?Wink

"Not only do I not know what's going on, I wouldn't know what to do about it if I did". George Carlin

  • Member since
    March 2012
  • From: Corpus Christi, Tx
Posted by mustang1989 on Saturday, November 26, 2016 1:35 PM

JOE RIX

And the whole OOB concept? Out the door like a bad habit. That's the Joe I know and love. HaHa..HAHAHAHA!!!!! I knew you couldn't do it.

You do know that I am just having fun at your expense right?Wink


No worries Joe. It shouldn't be too far out of line.Big Smile


 Forum | Modelers Social Club Forum (proboards.com) 

  • Member since
    May 2009
  • From: Poland
Posted by Pawel on Saturday, November 26, 2016 3:04 PM

Hello!

Let's just face it - the kit OOB is just plain ugly! Anybody with a little skill and good taste is bound to modify it! Our Mustang Joe could build it OOB, but what's the point building an ugly model?

Good luck with your Hemi Joe, and have a nice day

Paweł

All comments and critique welcomed. Thanks for your honest opinions!

www.vietnam.net.pl

  • Member since
    August 2007
  • From: back country of SO-CAL, at the birth place of Naval Aviation
Posted by DUSTER on Saturday, November 26, 2016 11:31 PM

Have to say, you have worked your magic on this one.

Steve

Building the perfect model---just not quite yet  Confused

  • Member since
    March 2012
  • From: Corpus Christi, Tx
Posted by mustang1989 on Sunday, November 27, 2016 6:18 AM

Thanks for the kudos Pawel and Steve!

Ok fellas. I started tearing the pink Hemi down to prepare it for the install and it literally flew apart. I was able to remove the timing cover from the front of the pink engine, sand the backside of it and cut and carve until I had the dimensions of the base timing cover and it's now in a bath of brake fluid where the paint will be stripped and then painted with a coat of the metal flake blue so it looks like I'll be able to use the OOB engine on this thing after all. That means less modification and re-work later.

I pulled the completed chassis down now that the front wheels are set from the glue drying and mocked up my custom VW along with the OOB build. The differences are dramatically different (even more so than I thought they would be with what I thought wasn't much of an extension in the body):


 Forum | Modelers Social Club Forum (proboards.com) 

  • Member since
    May 2009
  • From: Poland
Posted by Pawel on Sunday, November 27, 2016 2:14 PM

Hello!

Like I thought, your modified looks a lot nicer. But it's a lot of work. Like always - quality has to be paid for, it's never free! Good luck with your "Transporters" and have a nice day

Paweł

All comments and critique welcomed. Thanks for your honest opinions!

www.vietnam.net.pl

  • Member since
    August 2009
  • From: MOAB, UTAH
Posted by JOE RIX on Sunday, November 27, 2016 5:20 PM

Both of your buses are looking awesome. You're sure enough right about the difference you've made in the modified one. The cool thing about it is that you have done such a remarkable job on the modifications that you cannot even tell that it was once the original that you are working up. Really tremendous work Joe. Also, good to here that you will be able to salvage the engine.

"Not only do I not know what's going on, I wouldn't know what to do about it if I did". George Carlin

  • Member since
    March 2012
  • From: Corpus Christi, Tx
Posted by mustang1989 on Sunday, December 4, 2016 7:12 AM

Thanks guys.

Okeedokee folks. Progress onthe OOB build. I left off with the engine that had no timing cover, water pump....nothin'. Man did that look blank! I was initially going with a Hemi that I built as a kid and then backed out of that one just because of all the mods I would have to do to get it looking right and fitting. So I took the timing cover and water pump from that engine and put over onto this engine first of all. Secondly, I couldn't leave the engine with now ignition system given all this effort I'm going through to "enhance" things a bit so I added some wire's from Lex's after drilling out the distributor cap and going through the usual process of installing wires into the cap and routing and all. 


A before recap shot:
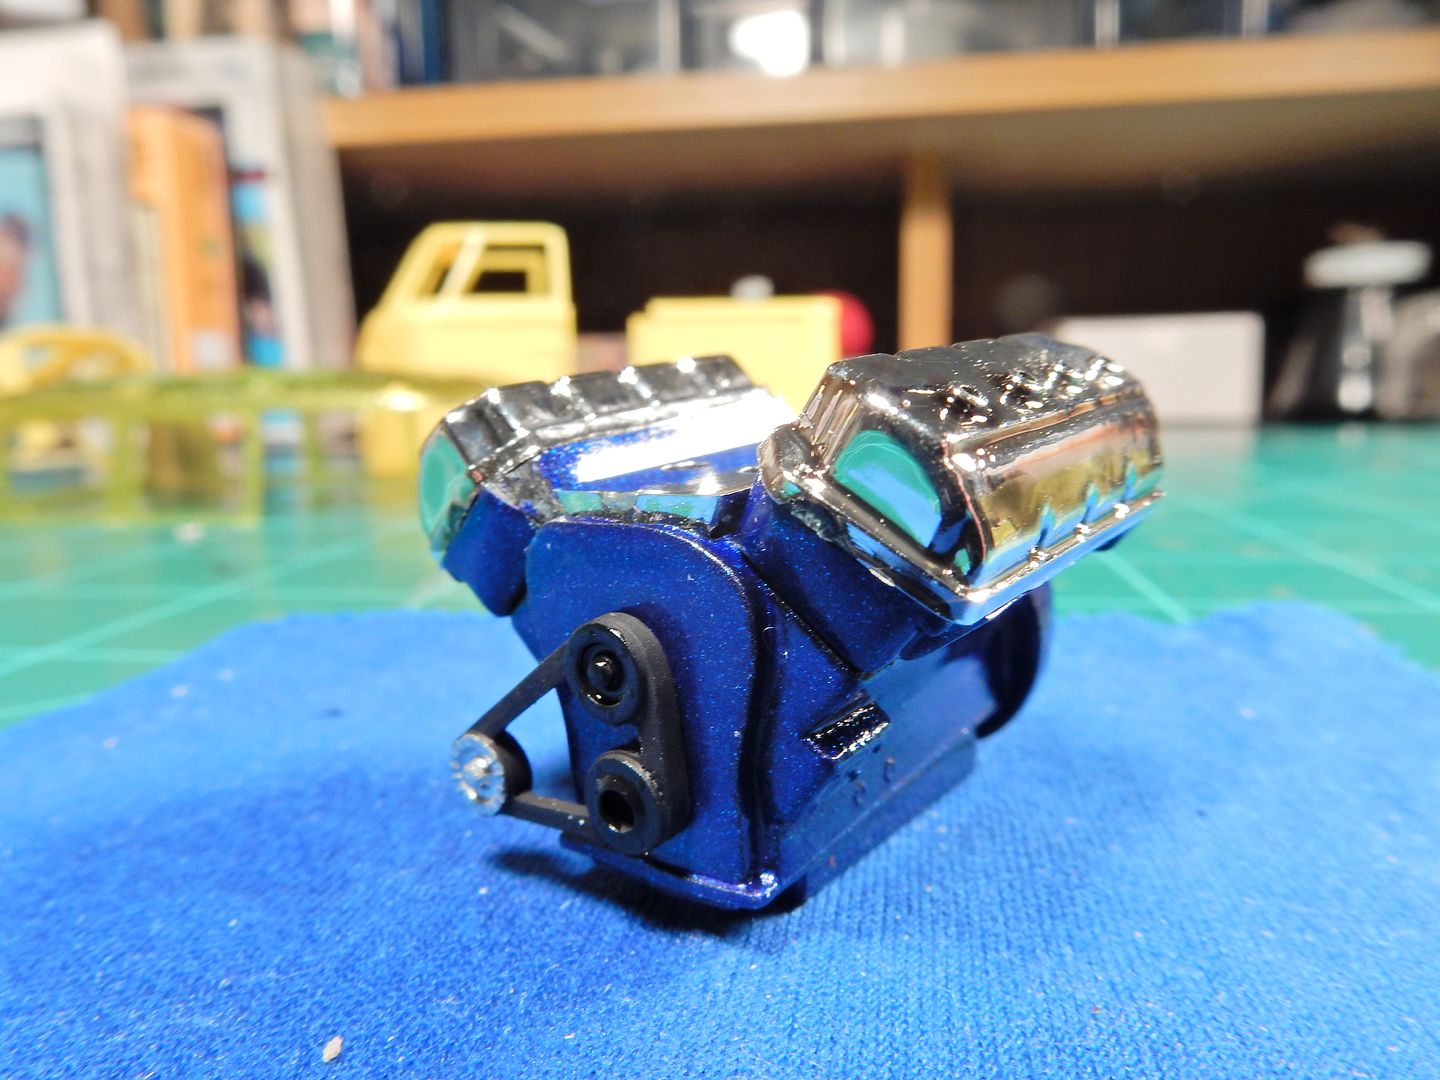


and the current progress with the L/H OOB injector stack test fitted
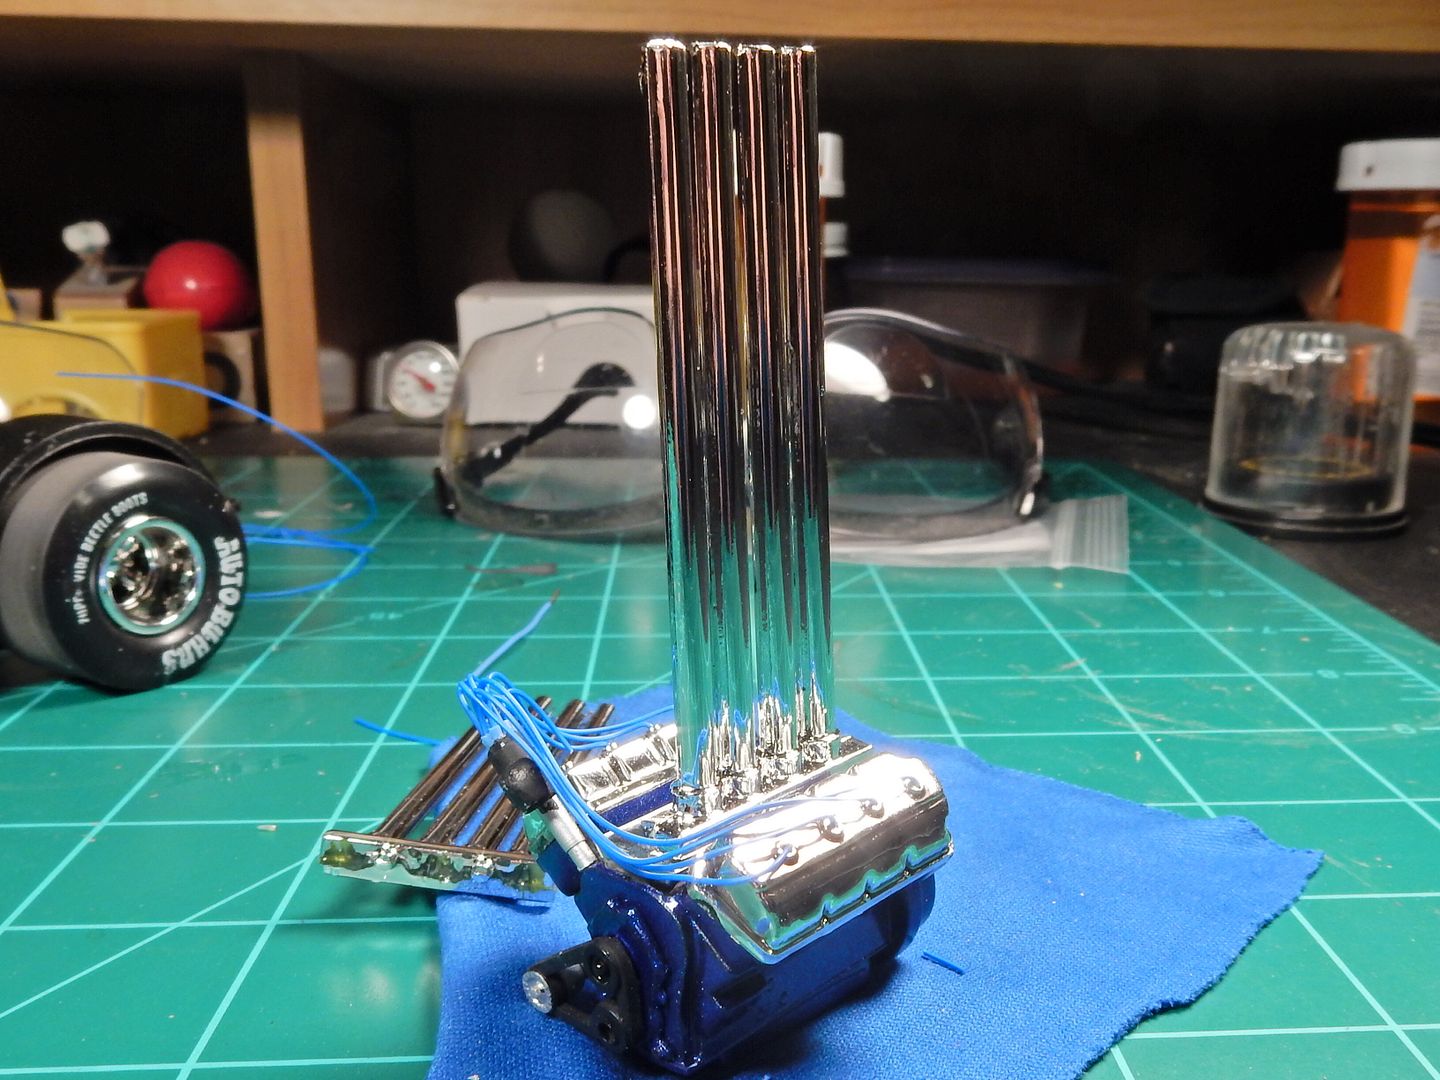


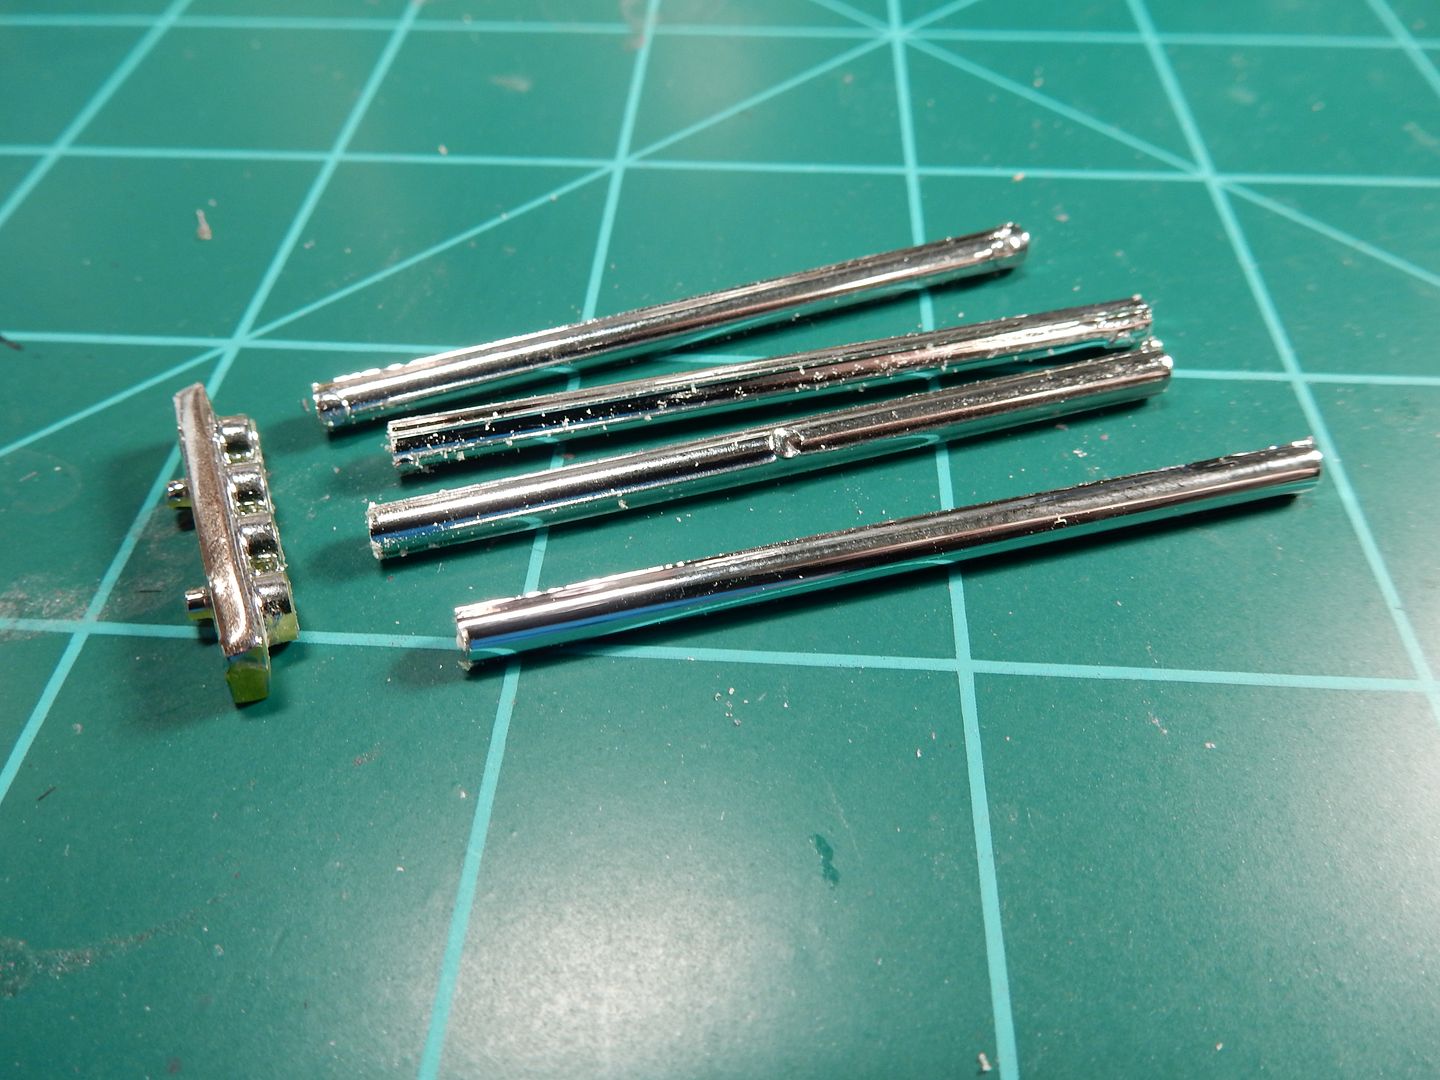
 Lastly, speaking of injector stacks,  while I like the idea of those on this kit I strongly dislike all the seam lines and flash associated with the parts that AMT used. From a distance they look great and the stacks are at least not molded together but close up they are a complete disaster that would require total reworking to straighten out!


Let's zoom in a little closer....
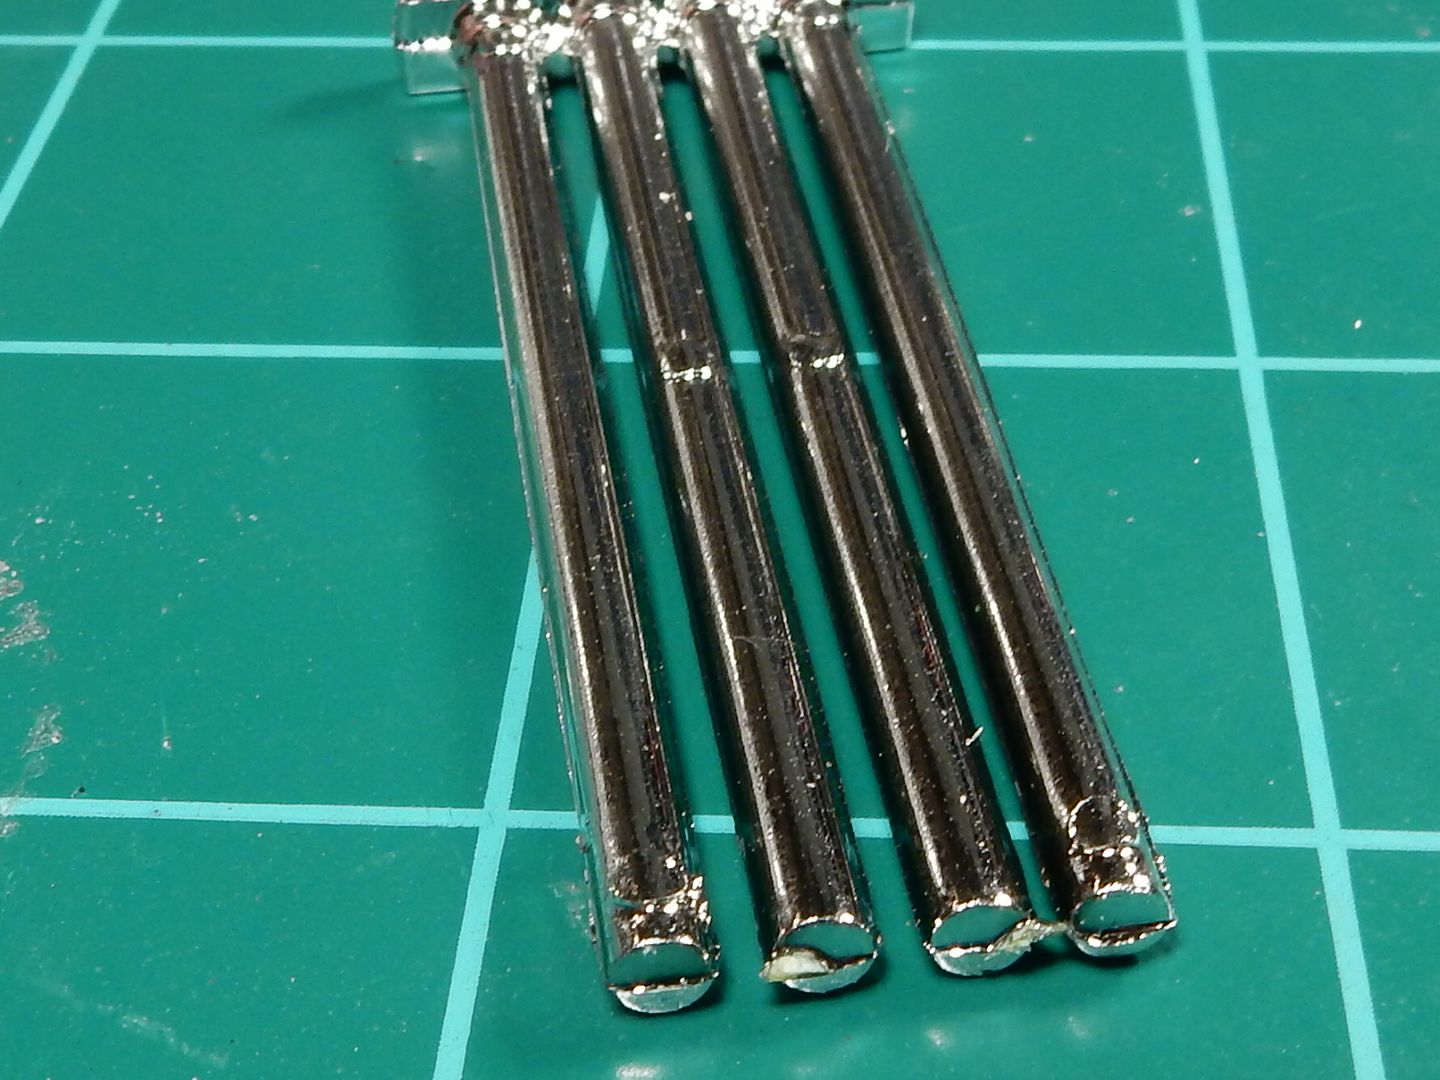


So I'll start fixing that by cutting off the stacks from the bases....


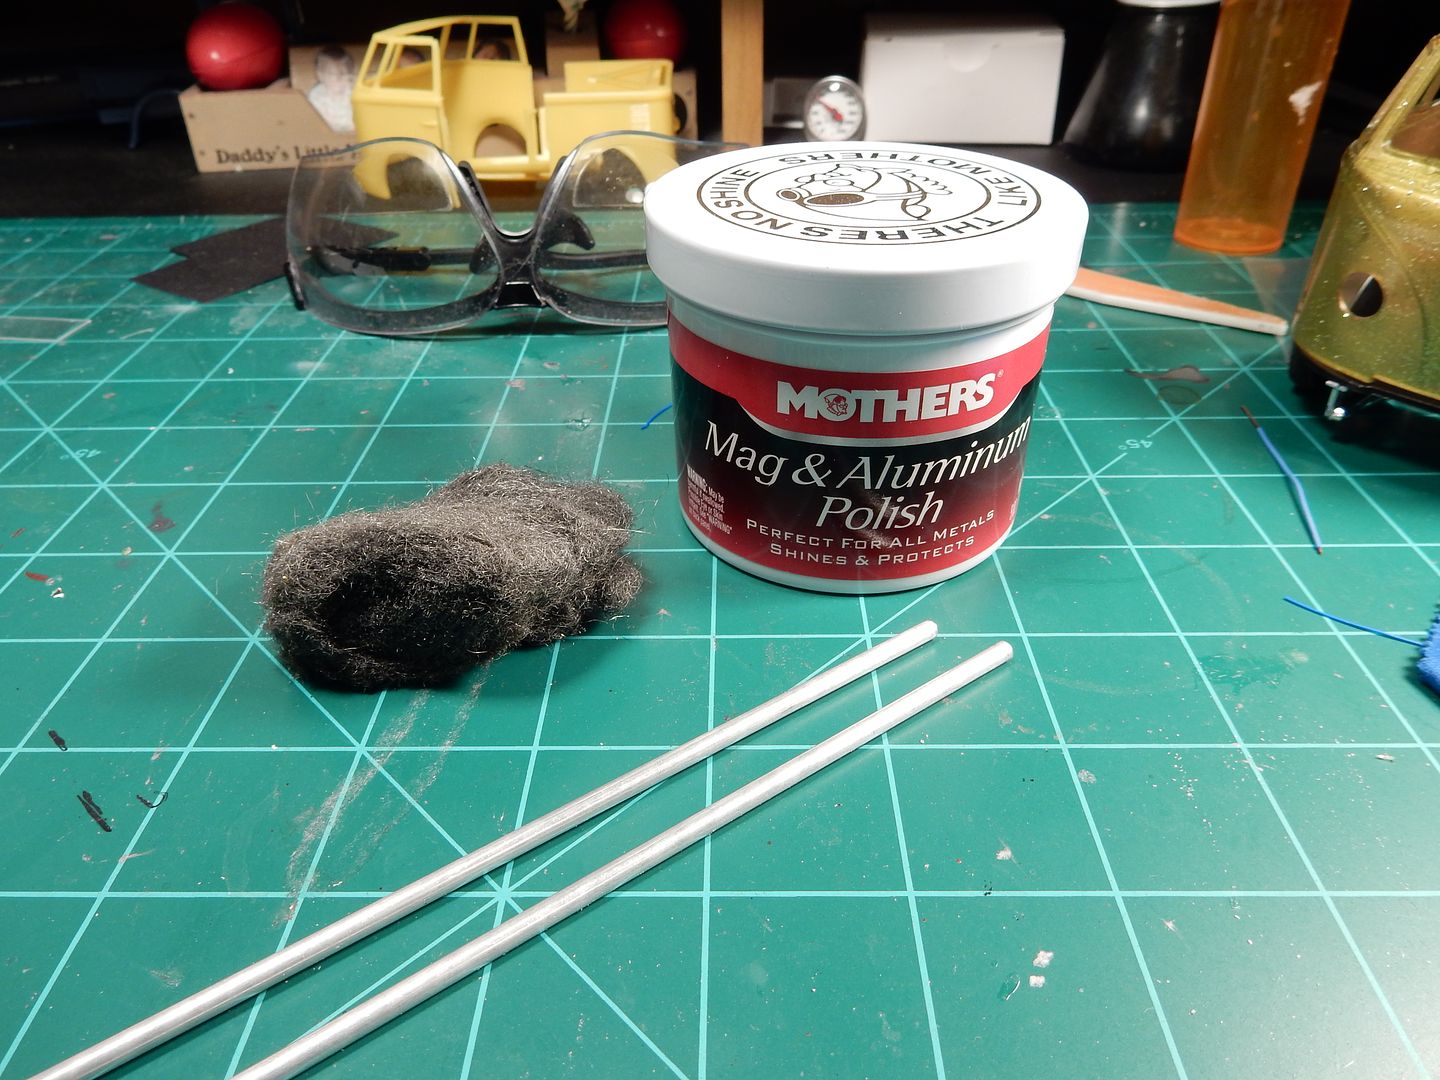
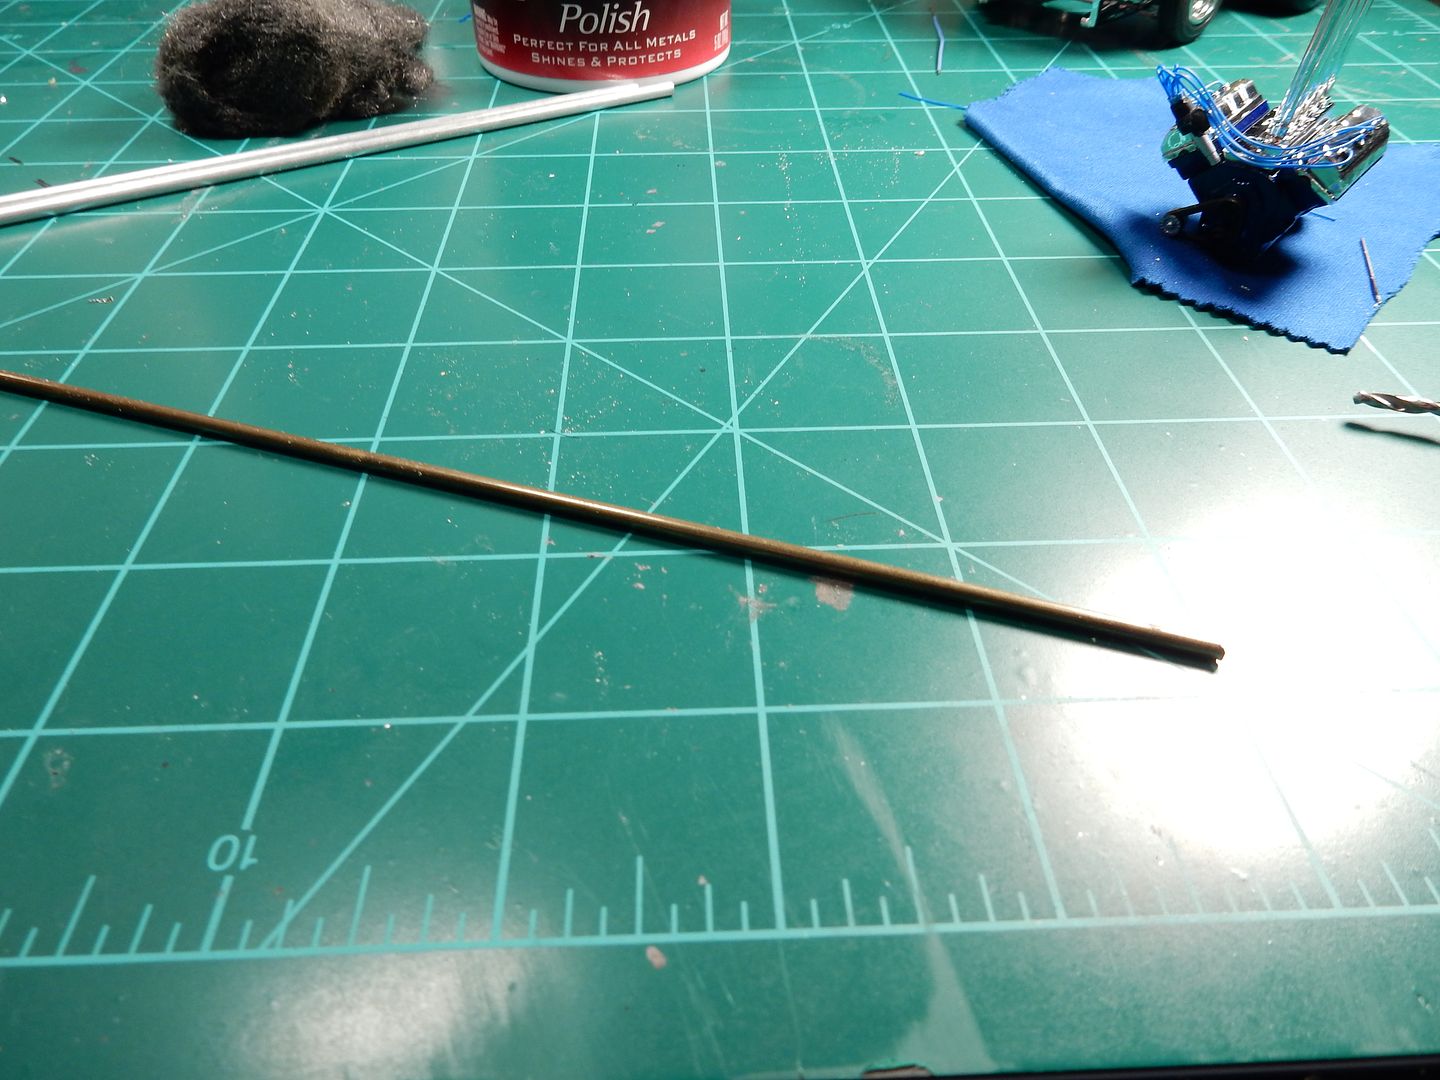
Here's what I'm going to use instead. I picked up some aluminum tube from HL and will cut each stalk in half, chuck it up in a drill and spin it up in the steel wool there beside the stalk here to start a base for the shining process and then switch over to spinning it up in a polishing cloth with some Mothers Aluminum polish to "polish" things off. Sorry...............couldn't help the pun. sorry%20bout%20dat_zps1nny96hw


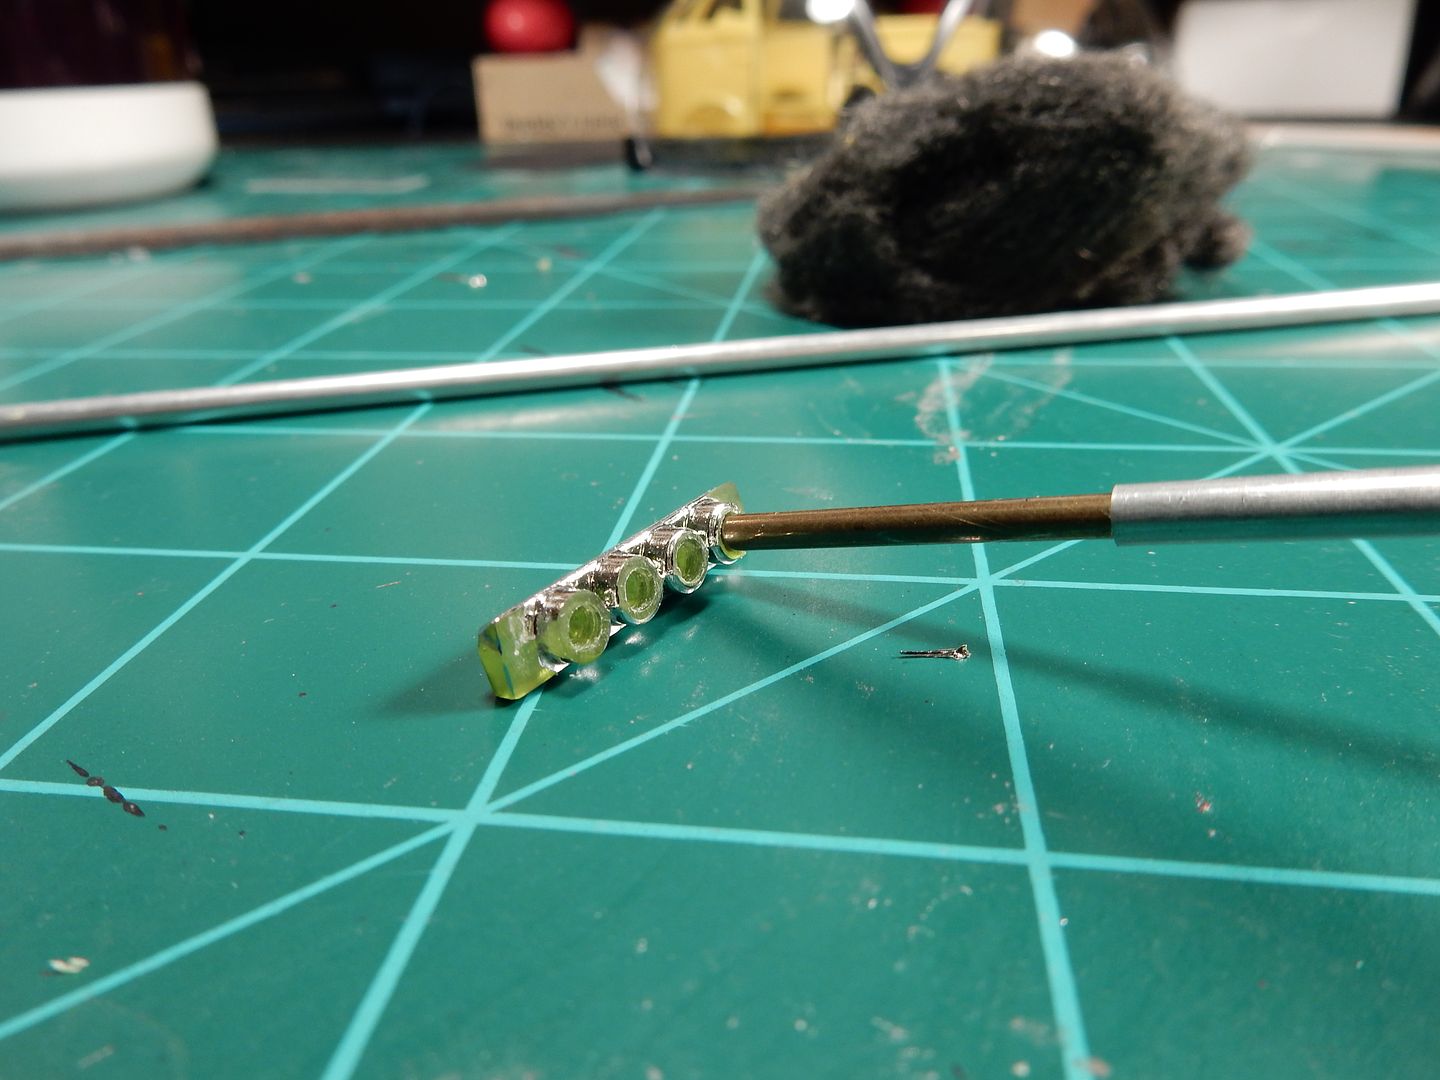
I needed locators in which to create a strong adhesion and to help line everything up so I chose some smaller diameter brass rod that slips right into the aluminum rod perfectly.


and in one photo I'll illustrate the process. I drilled into the injector stack base at each outlet to create a pilot hole for the brass rod which fits snugly inside each hole, then will slip the aluminum rod over the short lengths of brass rod like so.............


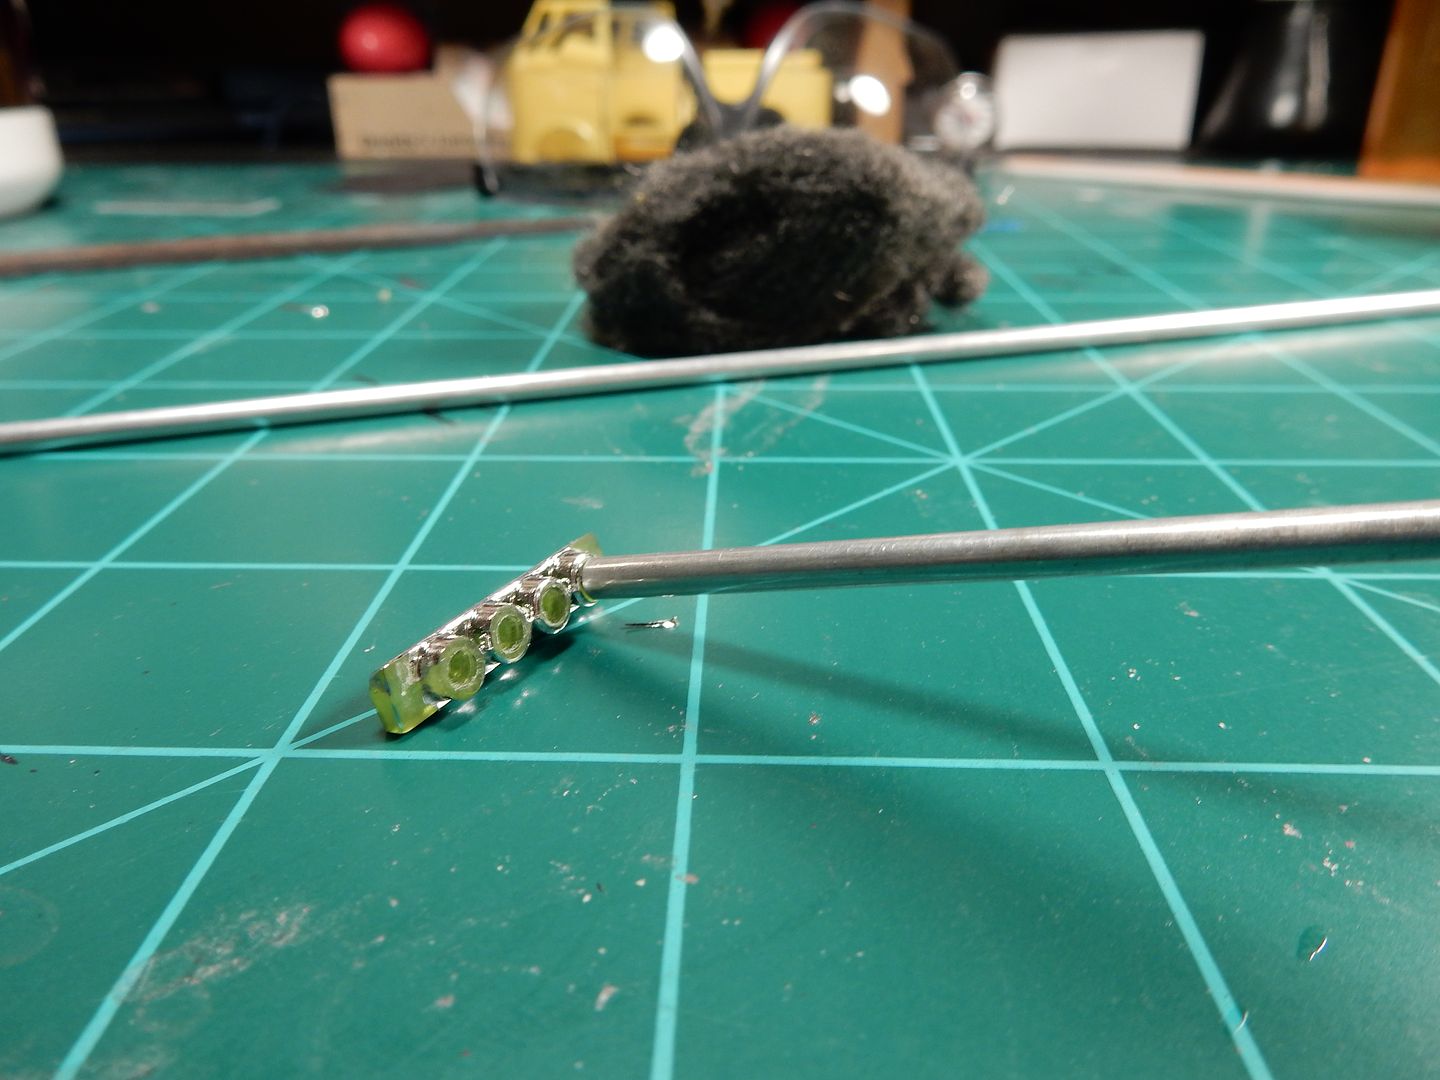
and then slid it on down to it's "home" position like so..............and do 7 more like that and I'll be home free with a lot better looking stacks than  I started out with.


 Forum | Modelers Social Club Forum (proboards.com) 

  • Member since
    March 2015
  • From: Streetsboro, Ohio
Posted by Toshi on Sunday, December 4, 2016 7:57 AM

I'm fashionably late to this party lol, but this beetle build is amazing!  I'd love to see more, much more!

Toshi

On The Bench: Revell 1/48 B-25 Mitchell


Married to the most caring, loving, understanding, and beautiful wife in the world.  Mrs. Toshi


  • Member since
    May 2009
  • From: Poland
Posted by Pawel on Sunday, December 4, 2016 10:02 AM

Hello!

Somehow everybody likes Polish things here on the forums - I like that :-)))

Joe - you're oficially unable to build OOB anymore - get that in writing from a doctor or something, man...

I'd do the same thing, personally - on those old kits it's easier, in case of some parts, to build the thing from scratch than to clean up the OOB part. Even the Hasegawa Bus I'm building has that - it was easier to scratchbuild the mirrors that to clean up the seams on the OOB ones.

Good luck with your builds and have a nice day

Paweł

All comments and critique welcomed. Thanks for your honest opinions!

www.vietnam.net.pl

JOIN OUR COMMUNITY!

Our community is FREE to join. To participate you must either login or register for an account.

SEARCH FORUMS
FREE NEWSLETTER
By signing up you may also receive reader surveys and occasional special offers. We do not sell, rent or trade our email lists. View our Privacy Policy.