SEARCH FINESCALE.COM

Enter keywords or a search phrase below:

Kodak Olds NASCAR Racer Start-to-Finish Build

9430 views
40 replies
1 rating 2 rating 3 rating 4 rating 5 rating
  • Member since
    March 2012
  • From: Louisville, KY
Posted by Builder 2010 on Monday, July 17, 2023 6:19 PM

Put the first gloss coat on the body. And of course, before the Alclad AquaClear was fully cured, I dropped the darn thing on the floor (jelly side down) and it picked up some floor muck. Not much, just enough to make me grumpy.

I put the pieces under a cardboard box so it would fully cure without dust, but then I took the box off to check it, knocked the body holder which tipped over and dumped the model and hood onto the floor. DOH! Should have left it alone. My ADD rears its ugly head again.

Tomorrow I'm going to give it a light polishing and then apply one more coat. I then have to paint the front vents with a flat aluminum/steel color and the body should be finished.
While that was drying I "attempted" to put on the front spindles and mount the tires. The "" are intentional. While fitting the two sides (one with the kit's disc and the other with my custom one), the custom fell off. I spent the next 20 minutes sweeping, crawling, checking my clothing, etc. Nada, bubkis! I gave up and fabricated my own steering knuckle to fit nicely within my custom disc. I then used 0.032" phos-bronze wire as the king pin (even though modern cars use ball joints). This created a fully functional steering hub.
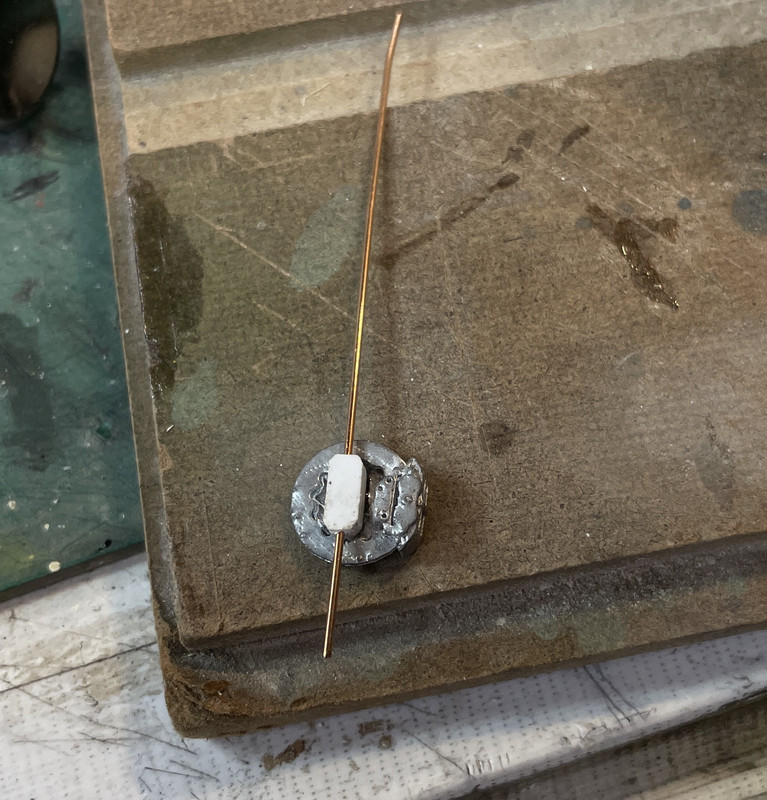
From the front I just CA'd the knuckle into place with medium CA and accelerator. After this image I painted the caliper bright red.
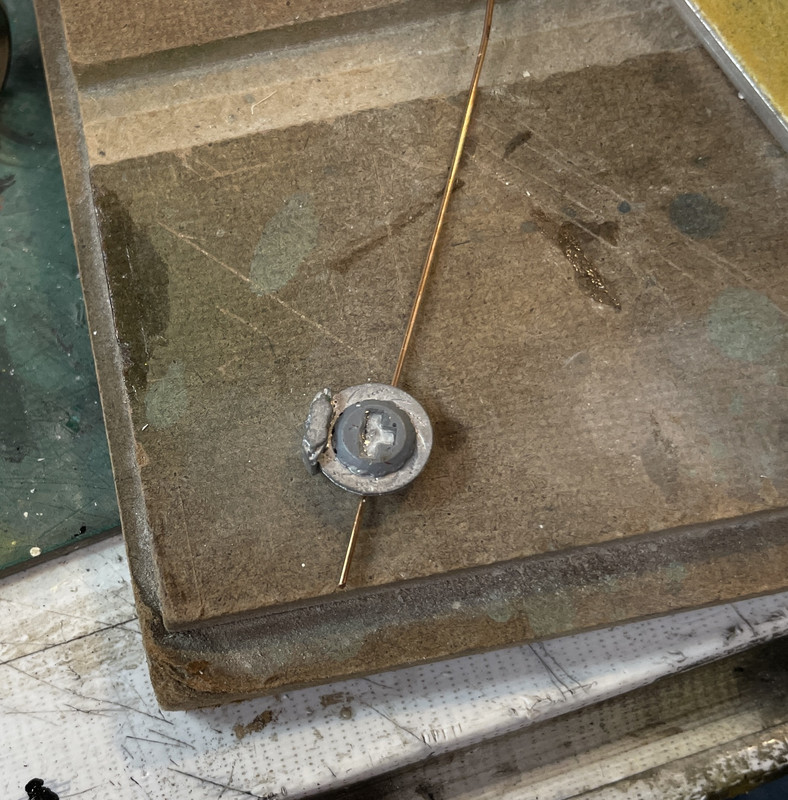
I drilled the upper and lower A-arms for the metal rod. I partially drilled the center to accept the steel pin I was using as an alxe (0.073"). I then installed it and clipped the excess metal sticking out. Wheels were glued with Gel CA and accelerator as the hole was a little larger than the pins.

The opposite side went on with the previously built kit parts. The new work is much sturdier.

During the handling I knocked off the radiator hose. I found it on the floor when searching for the steering part. It was a dubious joint to start with and was fixed with my usual method of pinning with some 0.022" wire. 
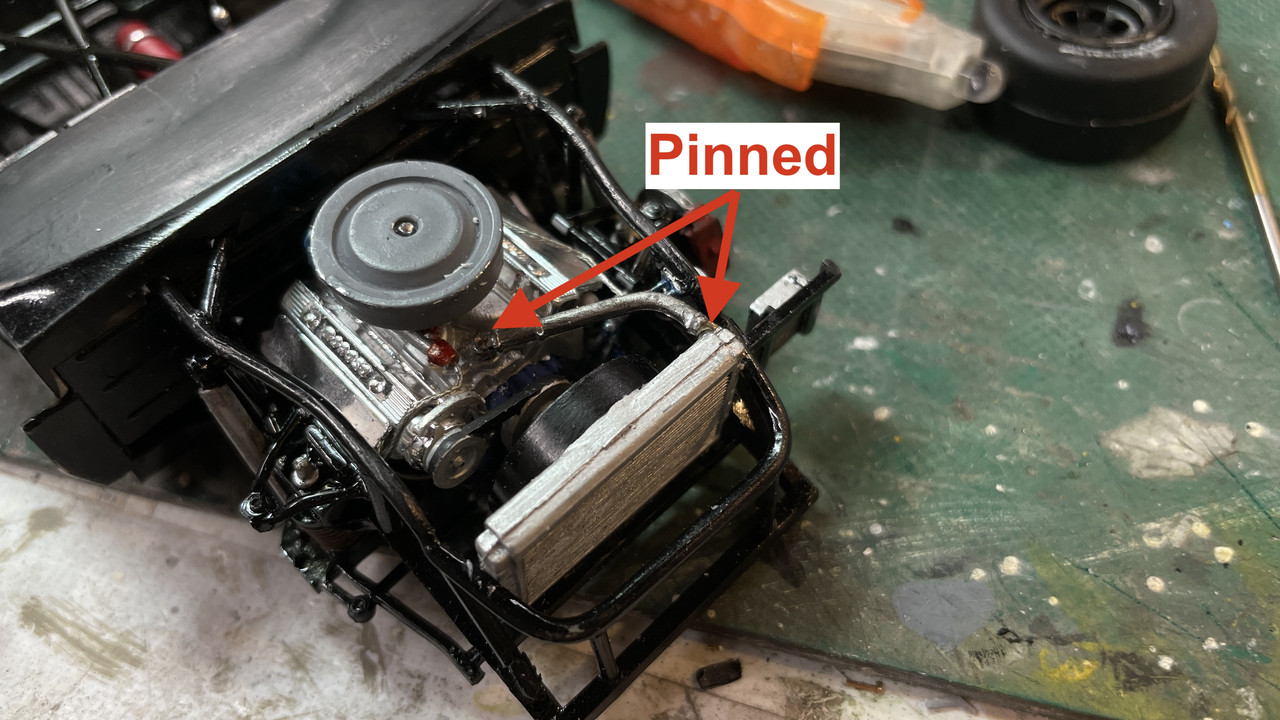
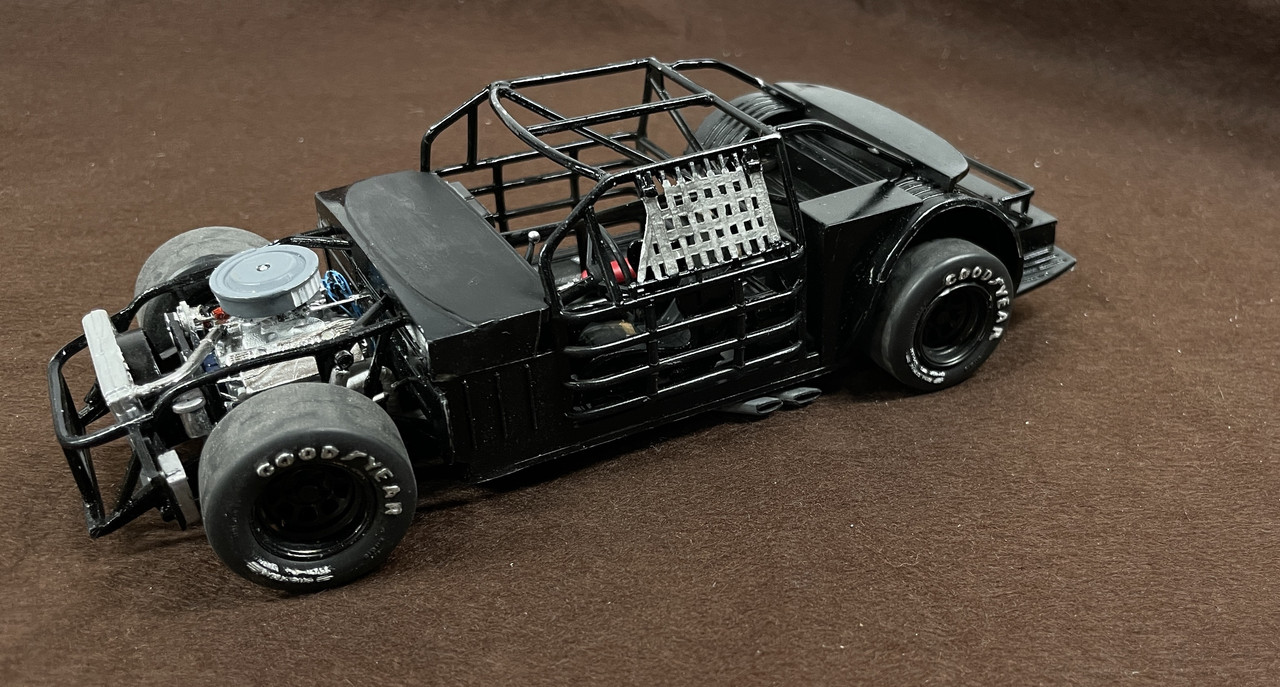
With the wheels installed it was time to take some complete chassis pictures. I also added the last part, the steering wheel.
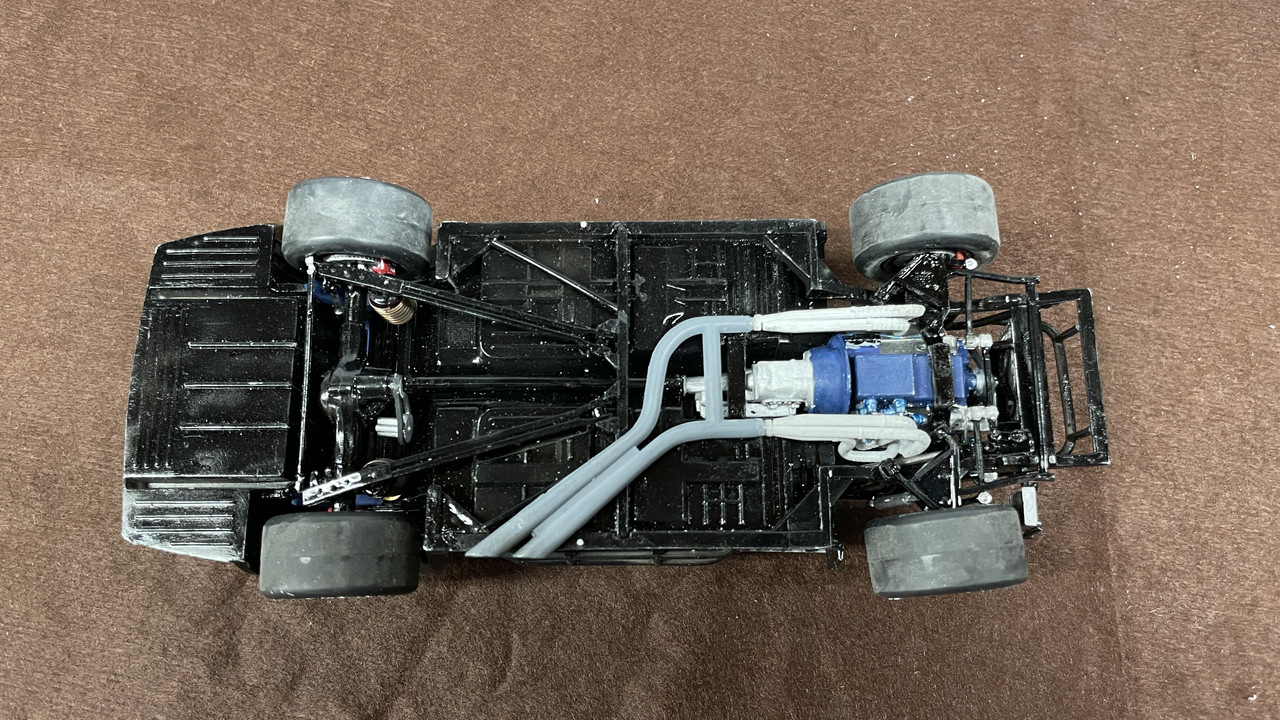
And the underside. It's really not as dusty as these pictures seem to show.
And then I ended the session and went upstairs to change out of my gross shop clothes, and looked what popped out on the closet floor.
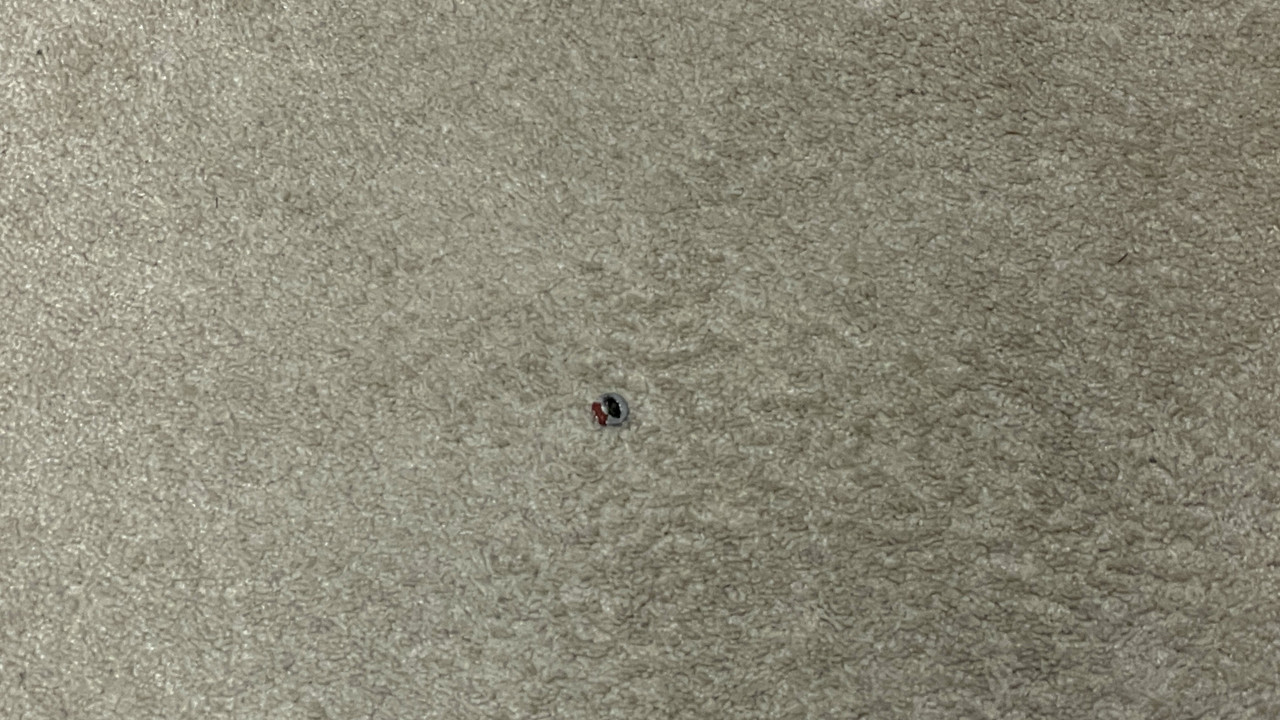
The *%)UY%@ part was hiding in my clothing anyway. I really did check my clothing and I don't have cuffs. Furthermore, my flannel shirt is out, not tucked in, so it theoretically blocks parts creeping into my belt line. Not this part! This thing really was hiding. Too late! That ship had left the dock, was replaced and no longer needed.

  • Member since
    November 2018
Posted by oldermodelguy on Tuesday, July 18, 2023 3:45 AM

If it's any consolation these things in 1/1 crash into one another, into the wall and slide on their roof . So it could be said that accidents come with the territory.

  • Member since
    March 2012
  • From: Louisville, KY
Posted by Builder 2010 on Tuesday, July 18, 2023 5:19 PM

Yes! That's certainly true, but not when they wheeled out of the shop before the first race. I tend to make my models in pristine or near pristine condition. While I do weather, I am very judicious in the amount.

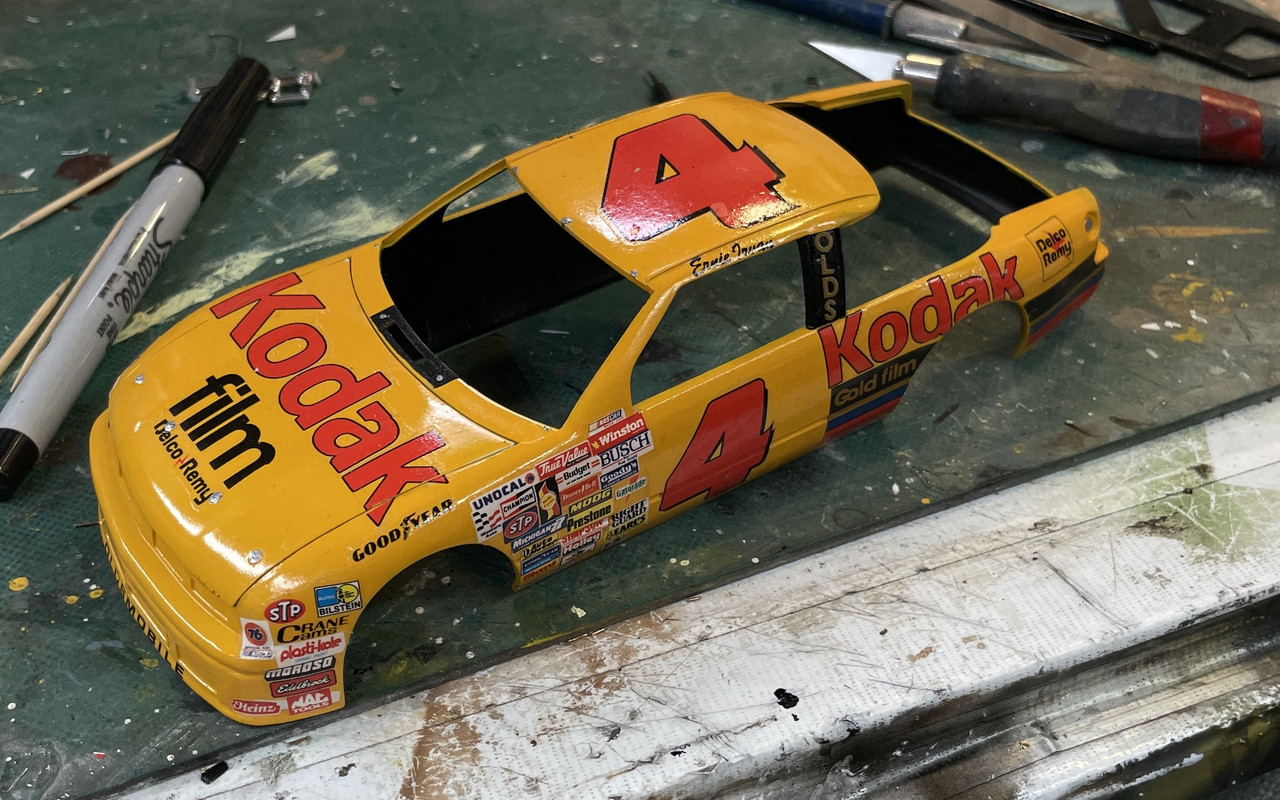
I decided to NOT attempt to wet sand or do any further polishing of the gloss coat. There was too much texture in the decals and I felt that any attempt to rub out the surface would actually cut into the decal film. Instead I went on to finish the last bit before body and frame mating. This was painting the metallic vents in the front.

I thought about hand-painting, but decided spraying would give a more uniform finish. And that required masking. I used Tamiya rattle can Silver Leaf and I'll go back and do some panel line accenting on the vents after they dried. Should have hand painted them!

I used Tamiya tape and Tamiya Flexible tape to mask the detailed portion. And then I made a near-fatal mistake in using 3M Blue Tape to cover the rest of the exposed areas. Here's the tape job:

Here's the paint:

And then the beautiful results:

Can't expect masking to better than that!

And then... I started removing the blue tape first. What a screw up!!! The blue tape had way too much tack, and removed large chunks of those onerous, annoying and miserable decals.

There could be a happy ending to this mess... As I was concerned about the decals age, I had made a color scan of the decals before using them. If you have access to any photoediting software and a decent scanner (found in almost every inkjet printer on the market today), save yourself a lot of heartache and scan the decals before the build. You never know if you'll need them.

In Corel PhotoPaint I masked and copied only those images that were wrecked and made my own decals. I used both clear and white background sheets since some of the decals had images with white in them. It makes for a very fancy cutting operation to remove the decal from the white backgrounds to preserve just the parts with the white. Where there is no white (the "4s" and the color band Kodak Decal) I used clear.

Before printing them I went into the software to remove any blemishes on the originals. These decals were rotten messes. All show and no go! Regardless of all this work, the new decals are going to have to go over the old ones. I believe the registration will be okay since the scanner is quite accurate.

I should have hand-painted those grills! And I proved that any further surface treatment to those decals would have ended up with the same mess. This car needs to be finished by Friday so any setbacks now are not welcome... actually, they're never welcome.

Oh... and one more thing. I made the above decal composite from memory. When I took them downstairs to coat the with MicroSol Decal Film Protectant, I looked at the body and realized that I missed one. I reprinted the sheet with the missing decal (another one of those massive product sticker decals.) I will coat that one tonight so it will be ready to go tomorrow.

  • Member since
    March 2012
  • From: Louisville, KY
Posted by Builder 2010 on Wednesday, July 19, 2023 5:59 PM

The repaired decals worked... but it was not easy.

The color denisity of the inkjet decals was not very deep. The result was having to double them up. Added to that was printed out the sheets on clear and white background film yesterday, only to find out that they were all clear. The film I had cut up to 5 X 7 was clear, not white, but I had put it in the white product packet.

The registration was remarkedly good... not perfect, but good enough.

The right side was the most challenging. The originally applied "Kodak" text was the one that had parted in two. When I applied the new decal over the old, it didn't register in length. I then realized that when I put the two halves of the broken decal back together, I slightly changed their overall length. I fixed this by cutting the new decal (after it was already applied, I might add) and slightly spread it apart so it re-registered. It's not perfect, but will work without close inspection.

The striped decal was so gone that I removed all of it. BTW: I did lightly sand with 4000 grit wet-or-dry sanding cloth to knock off the underlying decal's irregularities. I used Microscale's Micro-sol before applying the new decals. The clear-backed "Gold Film" stripe's color density was so bad that it needed another on top. I found one piece of white background decal film and was able to re-print those that needed white (all the sticker decals) and was able to overlay the white background over the previously laid down clear background. The "a" in "Kodak" shows the slight registration difference.

The big "4" on the roof came out fine when laid over the existing decal. You can see this on the below image.

On the left side it only needed the sticker decal. In order to make this look reasonable, I had to carefully trim the white background away from any areas that would have shown body color. This was particularly tricky around the "Gatorade" sticker.

While these were all settling down, I finished the last little bits: the clear fuel piping that's in the "trunk". These "cars" don't really have trunks.

I'm letting the decals fully cure overnight, and will give it another coat of Alclad Aquar Clear tomorow. That will again cure overnight and I'll join the body to frame on Friday. Friday night is the competition. I don't expect to win. This model is not my best work.

I started work on the Takom 1:35 AH-64D Apache by filling my homemade sprue holder. I will be working concurrently on the Apache and the 5-38 turret since I'm waiting for the kit to arrive. I generally don't like to build two models at the same time, but I'll make an exception in this case. BTW: I'll be doing a state-to-finish thread for both of the these projects.

  • Member since
    April 2003
  • From: USA
Posted by keavdog on Wednesday, July 19, 2023 10:29 PM

Great save!

Thanks,

John

  • Member since
    March 2012
  • From: Louisville, KY
Posted by Builder 2010 on Friday, July 21, 2023 4:32 PM

Finished in the nick of time! Got the hubs painted, joined the body to the chassis and glued in the windows. This baby is as done as it's going to get. If I had more time, I was going to try and craft some NASCAR hood hinges. Not happening.

The box top showed the wheel hubs to be shiny so I added that with decanted Molotow ink.

I glued in the windows using Testor's Canopy Glue. Good stuff and doesn't damage clear parts. Has a reasonable tack so the parts sort of stay put while it cures.

While I'm not happy with the finish due to all the decal woes, I'm going to live with it and let the chips fall where they may vis a vis the model constest at tonight's meeting.

Up next are two projects: I'm building Takom's 1/35 AH-64D Longbow and have started design on another massive cutaway gun turret project that's also going to the USS New Jersey Museum ship. I'm posting my usual comprehensive build threads for both here on FSM's Forum.

AH-64D

https://cs.finescale.com/fsm/modeling_subjects/f/16/t/192524.aspx

5"38 Twin Turret Cutaway

https://cs.finescale.com/fsm/modeling_subjects/f/7/p/addpost.aspx


  • Member since
    April 2003
  • From: USA
Posted by keavdog on Friday, July 21, 2023 5:22 PM

Turned out great.  Sure looks the part - and I like the stance.  BTW the link to your cutaway isn't what it's supposed to be

Thanks,

John

  • Member since
    March 2012
  • From: Louisville, KY
Posted by Builder 2010 on Saturday, July 22, 2023 9:55 AM

Try it now! For some reason, all the text I wrote on the first post didn't take and the post was never uploaded.

https://cs.finescale.com/fsm/modeling_subjects/f/7/t/192531.aspx

I was told last night at our modeling club meet that my kit arrives at Scale Reproductions, Inc. this week. Then the fiun will really begin.

  • Member since
    November 2018
Posted by oldermodelguy on Saturday, July 22, 2023 2:22 PM

Looking good from here !

  • Member since
    December 2008
  • From: UK
Posted by PatW on Monday, July 24, 2023 4:44 PM

Superb!

Remember , common sense is not common.

fox
  • Member since
    January 2007
  • From: Narvon, Pa.
Posted by fox on Monday, July 24, 2023 5:00 PM

Great work! Toast Toast Toast

Stay safe.

Jim Captain

 Main WIP: 

   On the Bench: Artesania Latina  (aka) Artists in the Latrine 1/75 Bluenose II

I keep hitting "escape", but I'm still here.

JOIN OUR COMMUNITY!

Our community is FREE to join. To participate you must either login or register for an account.

SEARCH FORUMS
FREE NEWSLETTER
By signing up you may also receive reader surveys and occasional special offers. We do not sell, rent or trade our email lists. View our Privacy Policy.