SEARCH FINESCALE.COM

Enter keywords or a search phrase below:

First Figure WIP-8/8Update, First figures DONE, TAKE A LOOK!

6381 views
57 replies
1 rating 2 rating 3 rating 4 rating 5 rating
  • Member since
    January 2012
Posted by I make stuff on Wednesday, July 22, 2009 1:50 AM

psstoff995's lbro

Thanks for the kind words, and yes, you need to try Vallejo, it goes on like silk, very smooth, it's easy to go from full strenght to a wash, thins with water, easy clean up, it just works.

Thanks again, psstoff995's lbro!

Bill

  • Member since
    January 2012
Posted by I make stuff on Wednesday, July 22, 2009 1:46 AM
 Schnobs wrote:

Hi Bill!

Awesome progress Bill! I was thinking when I was reading your post what I would of wanted to hear on my first figure post and what I did hear that meant a lot to me and here it is.

Great job facing your own fears and each one will get easier and turn out better than the last!  Your figures will eventually look as good as your tanks and add not detract from the presentation.

Amazing the difference between resin figures and plastic huh!

Keep it up Bill bring these figures home!

Thanks, Edmund, I certainly would not even be trying this without your help.  It's dues I have to pay, I will most definately finish these guys, and the head guy, then the rest ofthe DML tank crew and the 3 resin guys I got, by then< I should have almost 10 figures under my belt, they should be looking presentable by then.  Can you think of any reason the paint will not stay on the boxer?  I can't get a handle to stick to him, so I hold him a lot, but the paint just seems to wipe off.

My new plan is to put some late russian tank riders on that IS 3 when I turn ba  ck to the heavy metal.  The resin detail makes it SO much easier, both in holding the dark washes, and in giving you a detailed road map of where to highlight.  I love resin.

Bill

  • Member since
    August 2005
  • From: Sydney, Australia
Posted by Phil_H on Wednesday, July 22, 2009 1:20 AM
 psstoff995s lbro wrote:

I think I'll need to invest in some Vallejo paint for my builds, turns out great looks like!

They are definitely well worth the investment. Also, if you're not already using them, get a couple of artist grade brushes to go with the paints.

  • Member since
    December 2008
  • From: Northern Va
Posted by psstoff995's lbro on Wednesday, July 22, 2009 1:01 AM

These are great looking figs, shapping up very well.

I'd say you deserve a pat on the back. Smile [:)]

I think I'll need to invest in some Vallejo paint for my builds, turns out great looks like!

-Will young modeler Test fit master
  • Member since
    January 2009
  • From: Everett, WA
Posted by Schnobs on Wednesday, July 22, 2009 12:55 AM

Hi Bill!

Awesome progress Bill! I was thinking when I was reading your post what I would of wanted to hear on my first figure post and what I did hear that meant a lot to me and here it is.

Great job facing your own fears and each one will get easier and turn out better than the last!  Your figures will eventually look as good as your tanks and add not detract from the presentation.

Amazing the difference between resin figures and plastic huh!

Keep it up Bill bring these figures home!

"There is a principle which is a bar against all information, which is proof against all arguments and which cannot fail to keep a man in everlasting ignorance. That principle is contempt prior to investigation." Herbert Spencer
  • Member since
    January 2012
Posted by I make stuff on Wednesday, July 22, 2009 12:06 AM

OK, more progress tonight.  On Scnobs' learned counsel, I started alternating between oil umber washes on the uniform, and highlight with lighter colors, several iterations, 3 or so, I am a lot happier with the uniform now.  I also started painting the various details, the MP44s, the mag pouches, the spats, t shirts, etc.

Here's where we stand now:

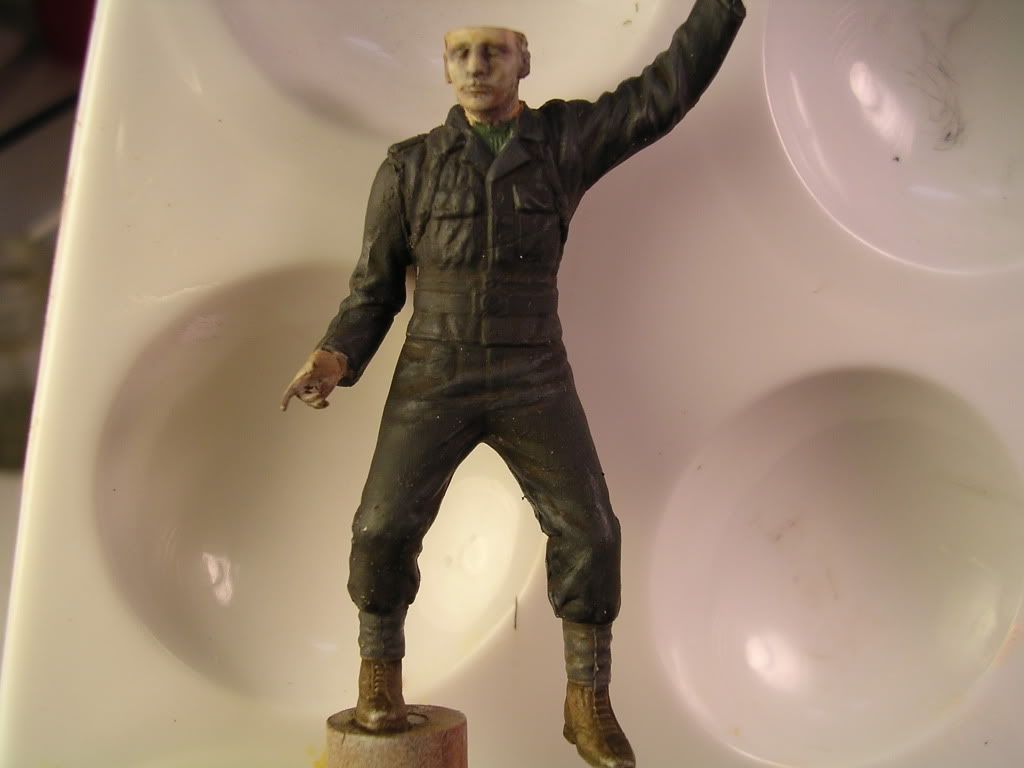
Disco Franz,
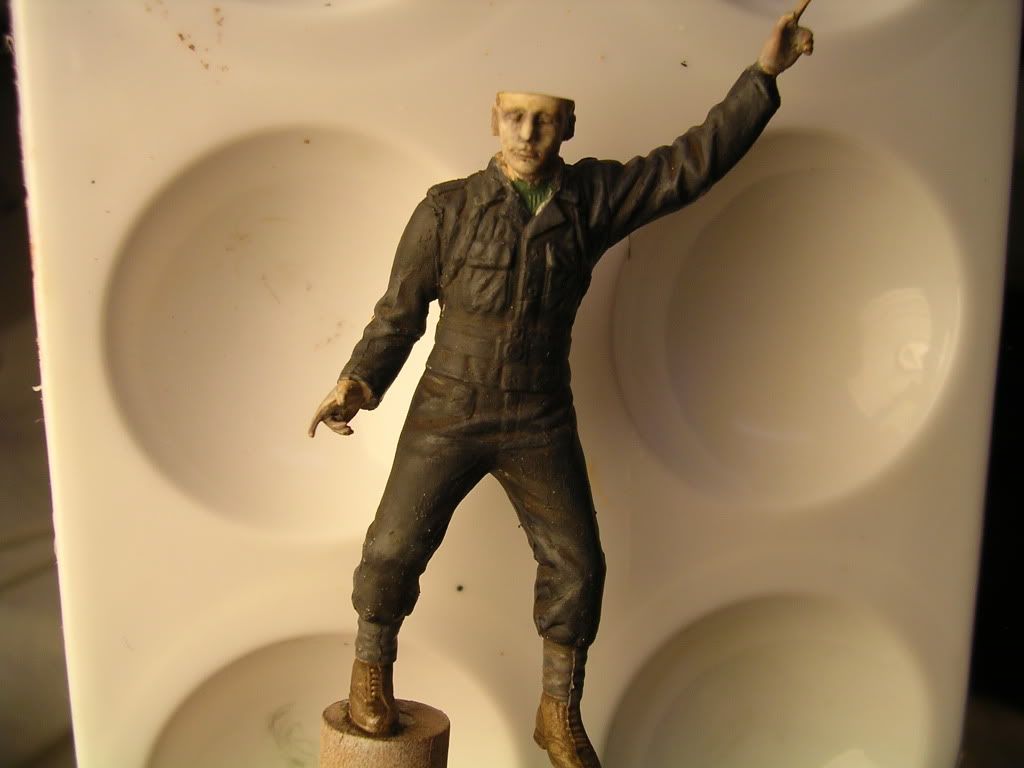
 

I like how his hair turned out 
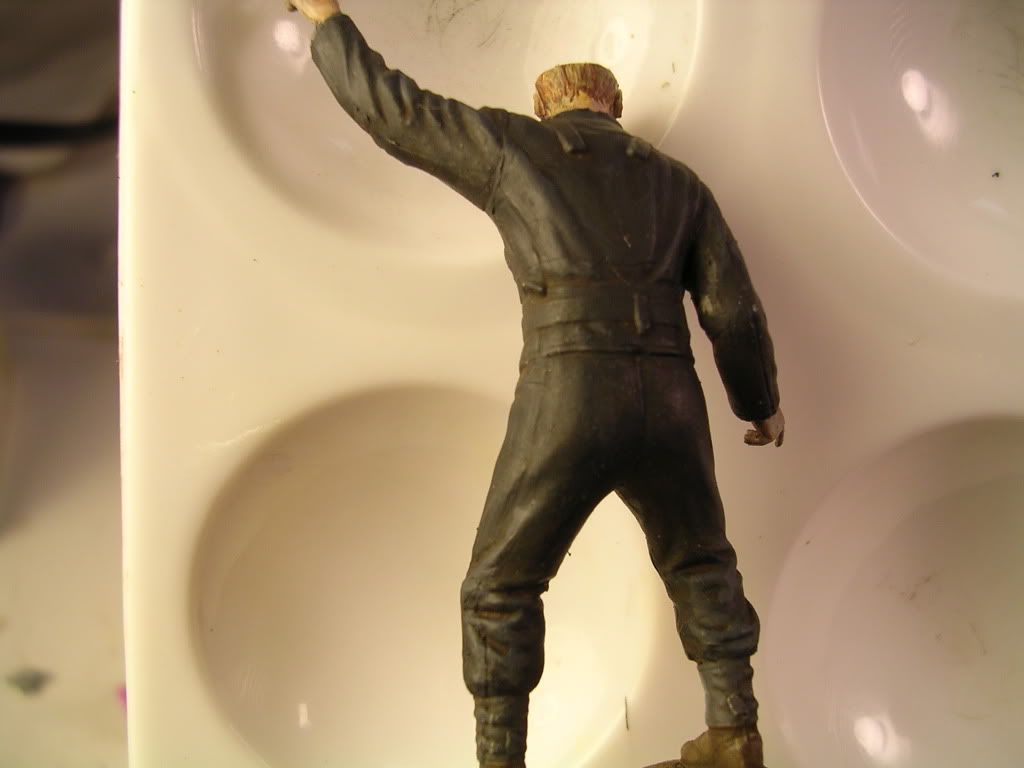
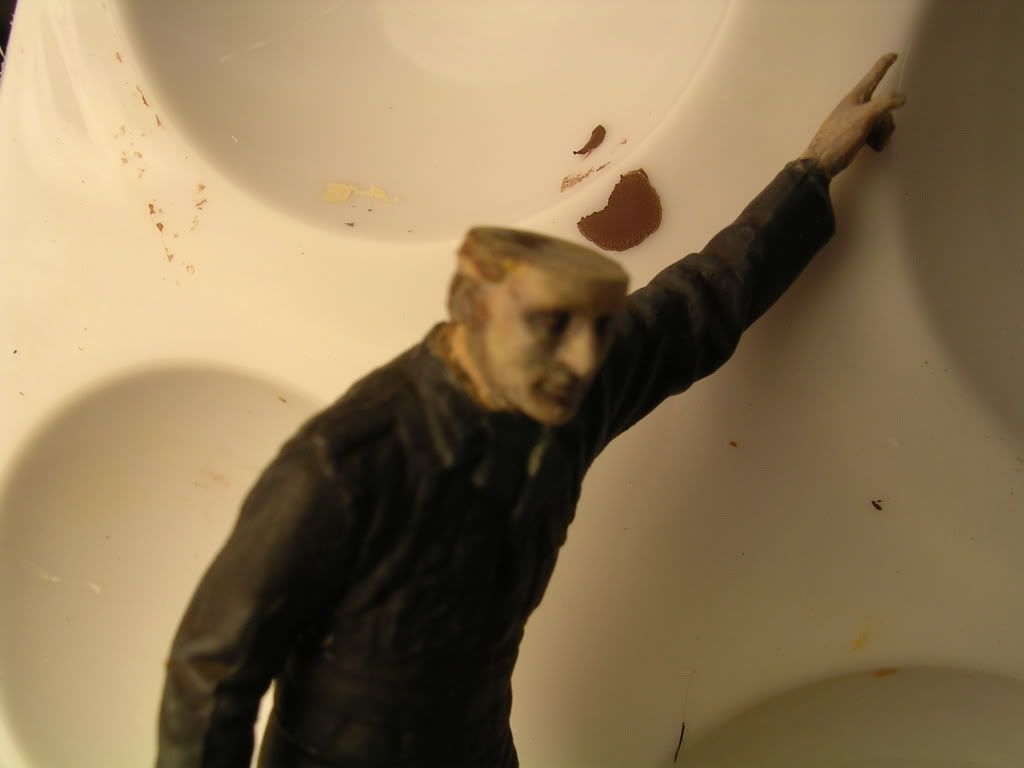
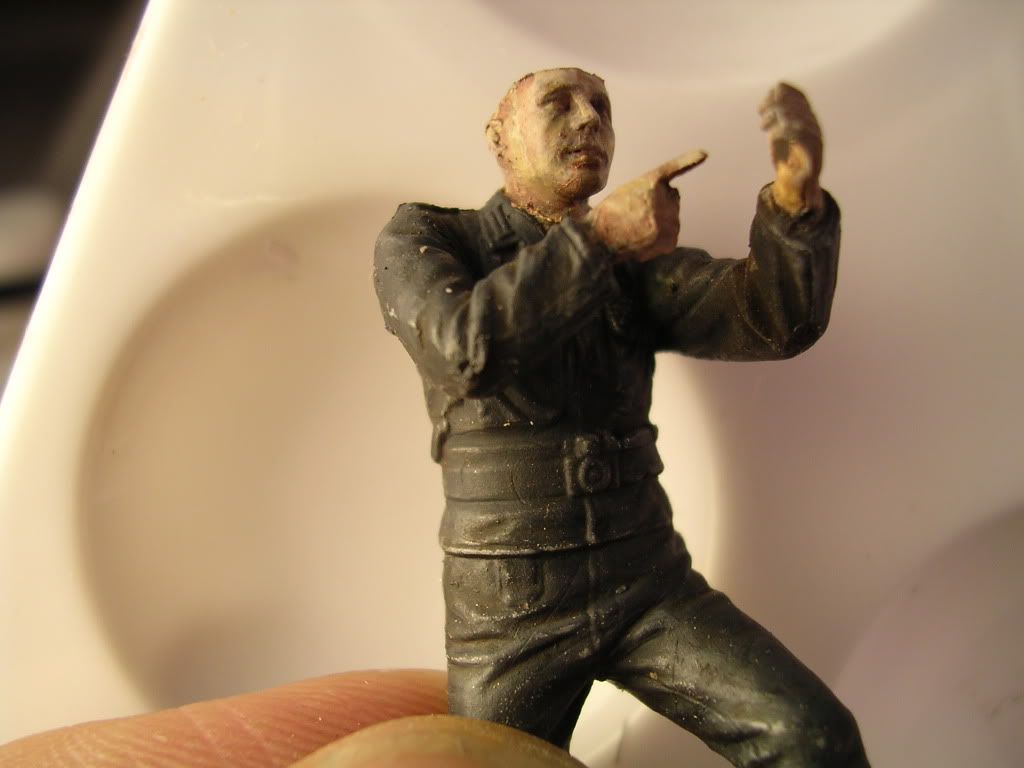
And boxer Hans
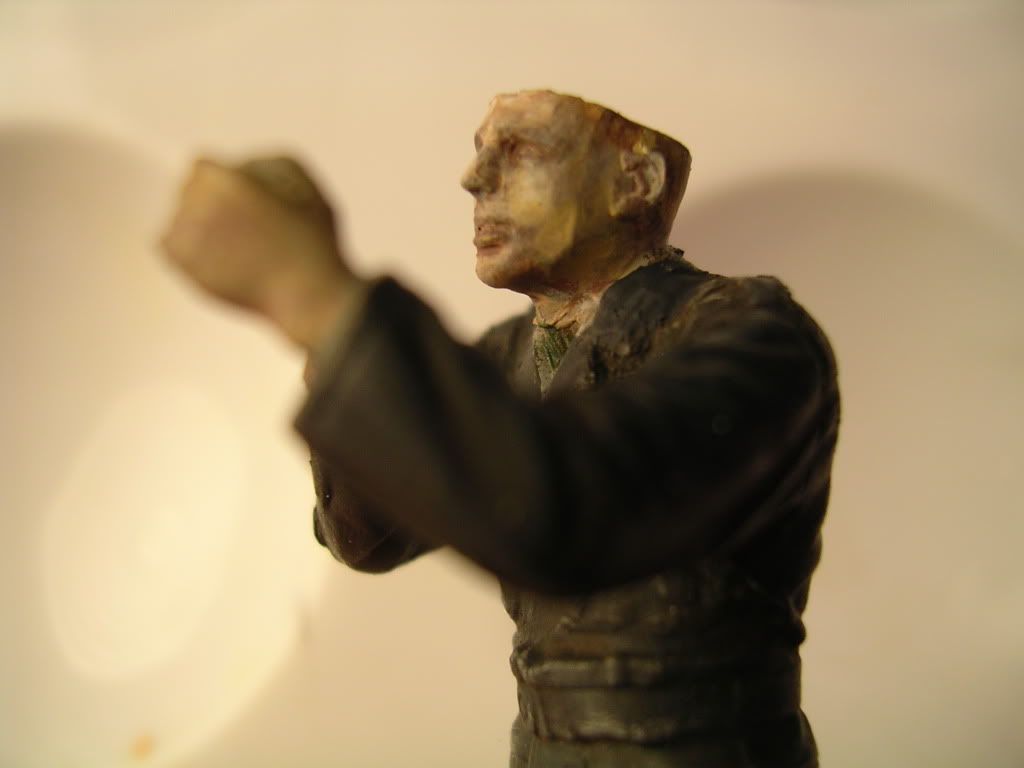
He's the stepson, I haven't done much shading on his uniform, and the paint doesnt want to stick to him.  You can only be disappointed so many times, I will finish him, but I am not giving him as much attention as Disco boy.

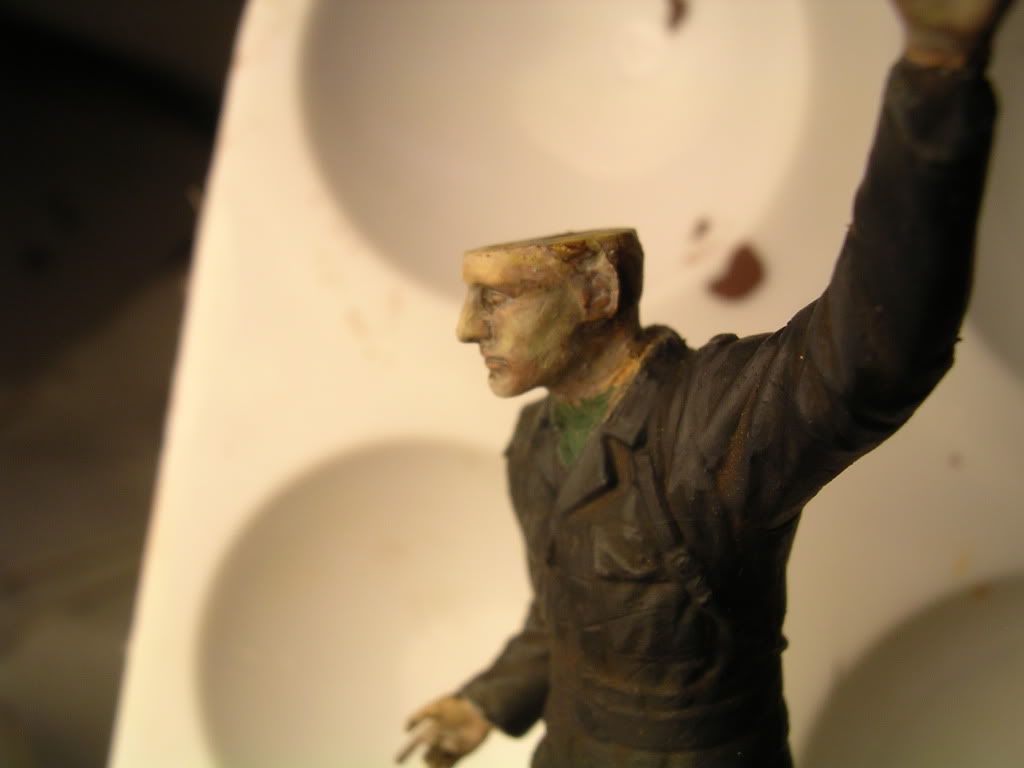
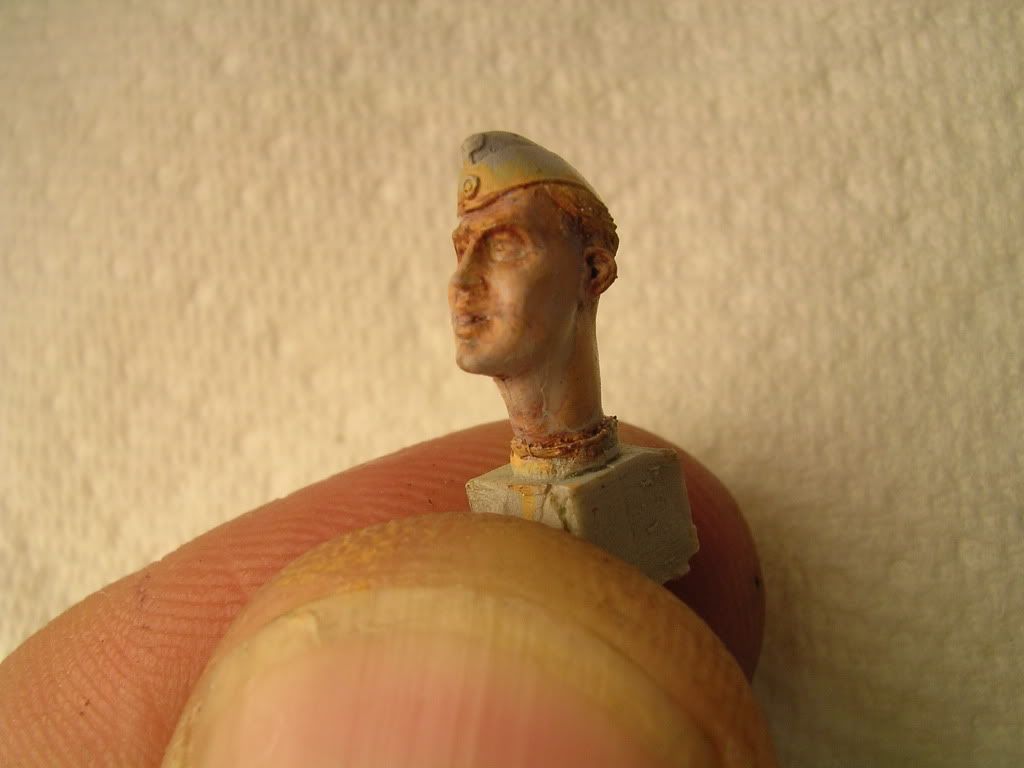
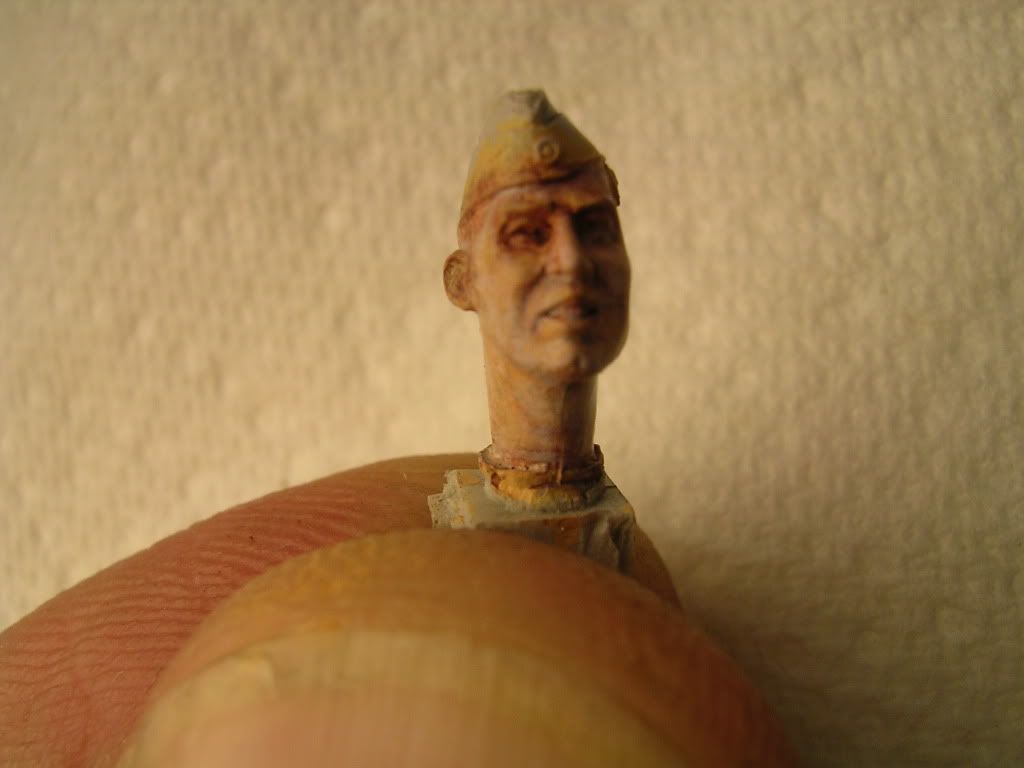
And just for grins, actually practice, I got some severed resin heads to practice on, I will probably graft them on the DML tank riders I already have.  I've only just started the first resin head, the first piece of resin I have ever touched, let alone worked on, I am totally converted, the detail makes painting a breeze.

Here are some shots after 2 coats of vallejo dark and flat flesh I mixed up, then a red/brown wash to emphasize the lines and creases, almost none of them could be found on the DML injection molded guys.
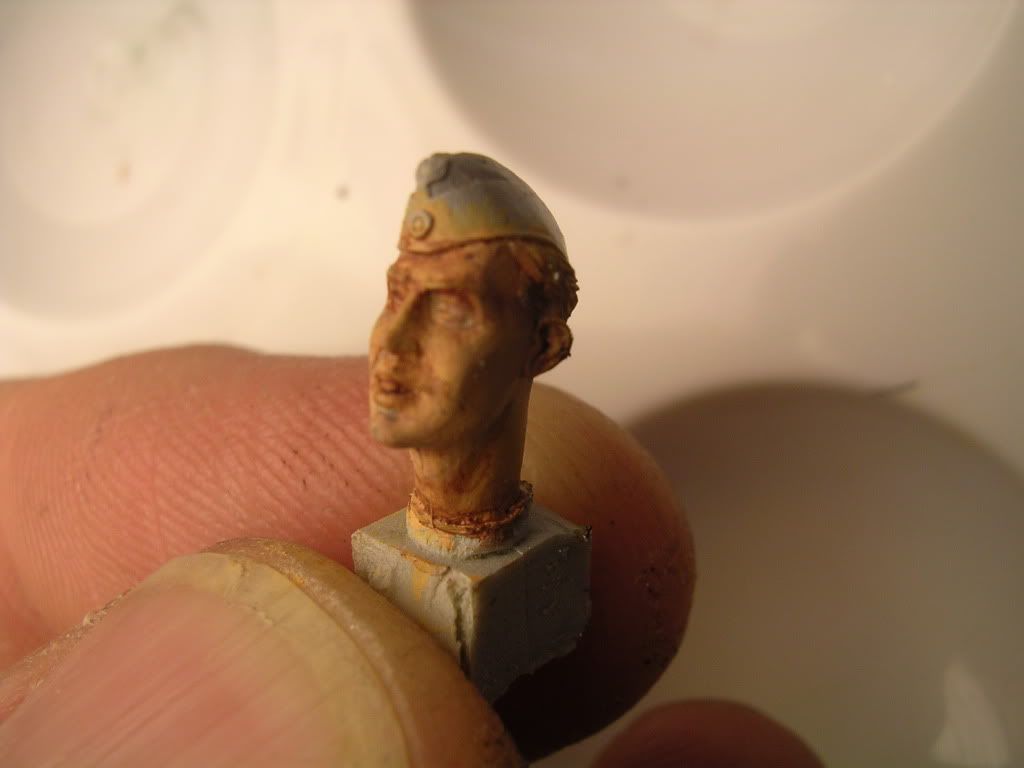
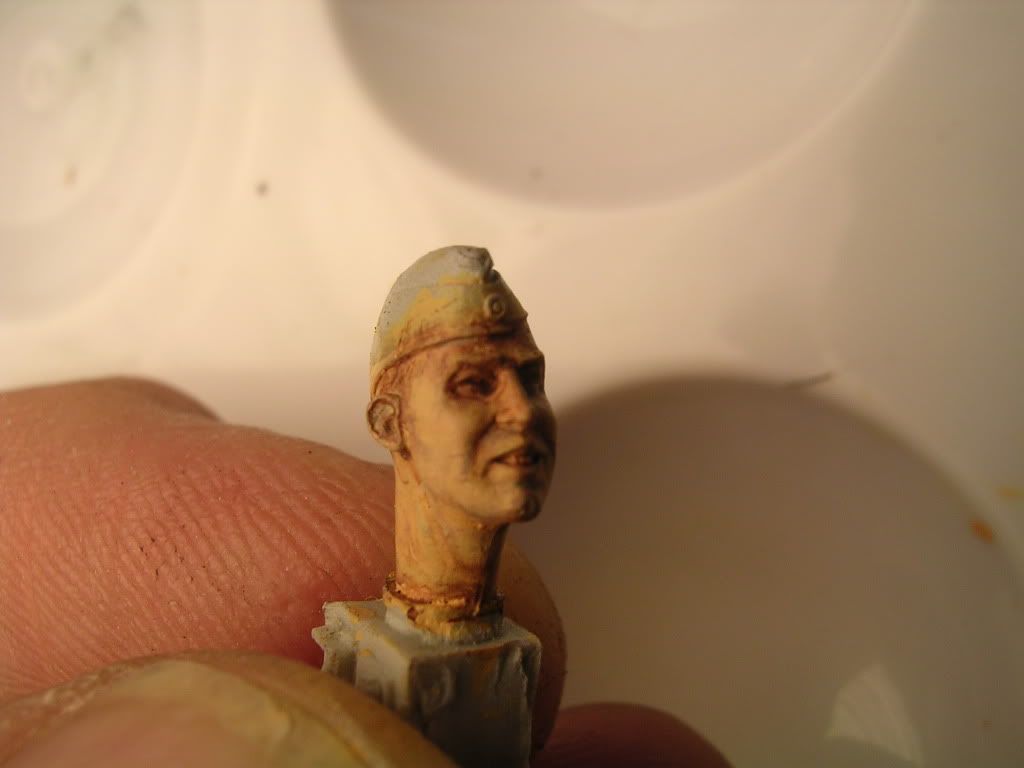
At this point, it's already the least pathetic figure I have ever cranked out.

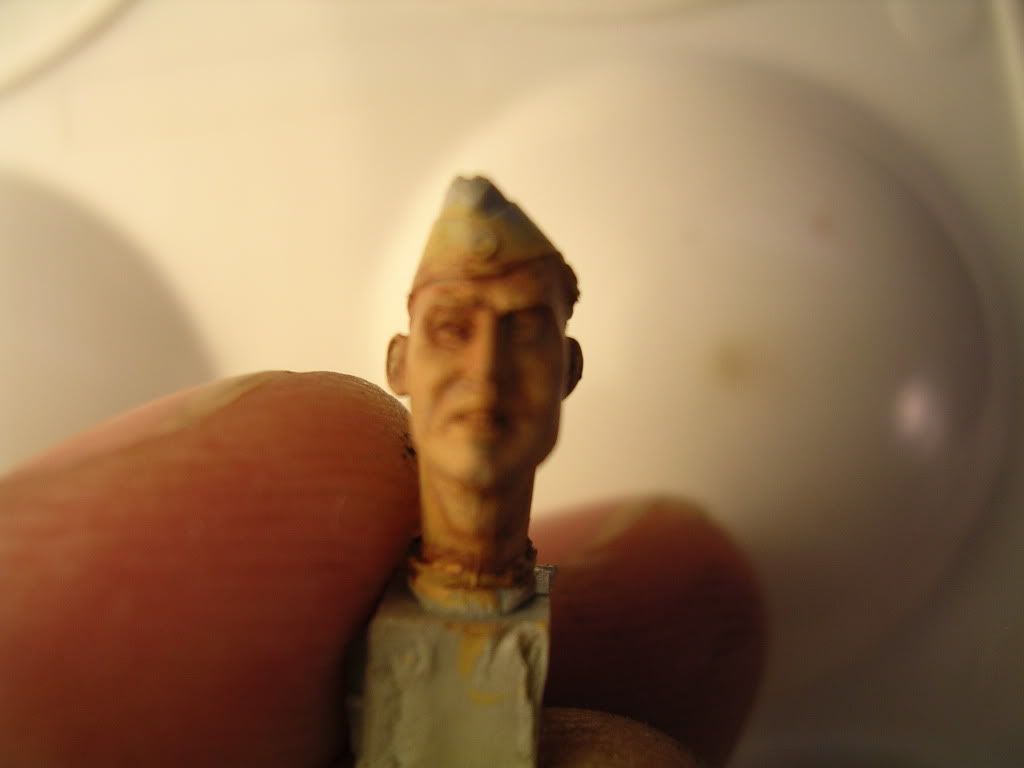
Then I took some straight flat flesh and added highlights with a thick wash
 

Edit to add--mini machine guns 
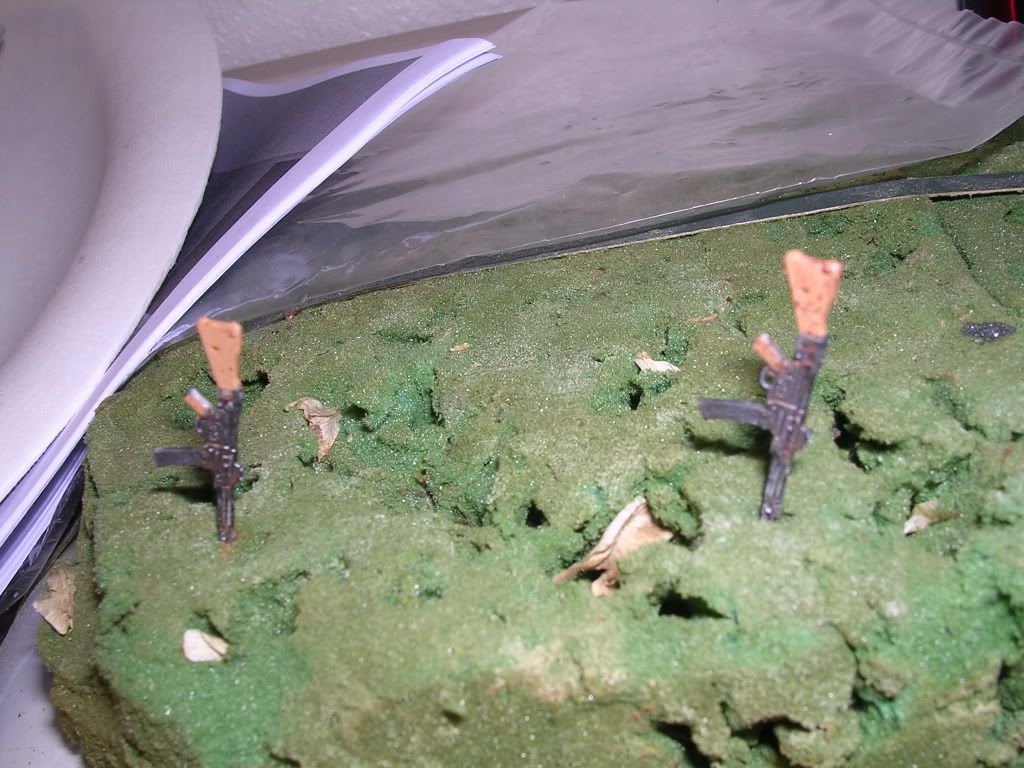
Then I put some lighter flesh, just the straight flat, into a thick wash and highlighted the high areas.  I think I will do alternating oil washes with smaller and smaller and lighter and lighter highlights.  This is my weak link right now.

Well, every single person reading this has probably got a lot more time in figures than I have, so let's hear it, please?

Thanks for following this one, I am on uncomfortable ground at this point. 

Bill         

  • Member since
    January 2012
Posted by I make stuff on Monday, July 20, 2009 1:29 AM

Hi I build.

I like the Vallejo, with the caveat that I just bought it last week and have nothing to compare it to.  On the downside, it was a totally new paint line, and I don't think I can use it for anything but figures and stowage.  So there's a minor investment, but I have had a chance to read a lot, and Schnobs' figures, as you know, are realy something.  I want to be able to put figs on my builds, and not fear the process.  The paints operate exactly as I read they would, make sure you thin with clear clean water, and shake shake shake before mixing, and stir stir stir while using them.  Also, wick the paint off the brush on a rag before using it or you will flood out your work.

The paint goes on very smoothly, I have yet to see a brush mark, but it seems delicate, I have rubbed it off with handling before it is set up i guess, but it looked dry to me.  Beyond, I am pretty certain that parctice is the key to where I want to be.

So get some Vallejo and post some pictures.  I went from thinking I would never to a figure because it looked "tricky," to posting a WIP of my first figure in a span of about 10 days.

  • Member since
    March 2003
  • From: El Dorado Hills, CA
Posted by IBuild148 on Sunday, July 19, 2009 6:20 PM

Bill,

This is good timing! I to am moving into "figs" by reading and watching other members techniques. I have already locked in on "Schnobs", "MR" and now you.

My question for you is what to you think of your "Vallejo" paints. I am looking at purchasing a set myself since I have tried oils and enamels with poor results.

What I do know so far is...PREP, PRIME, and work slowly.


IBuildOne48

Teach modeling to youth!

Scalefinishes.com

http://i712.photobucket.com/albums/ww122/randysmodels/NMF%20Group%20build%20II/Group%20Badge/NMFIIGBbadgesmall.jpg


  • Member since
    January 2009
  • From: clinton twp, michigan
Posted by camo junkie on Sunday, July 19, 2009 6:47 AM

edmund, the first guy...never mind i just saw how you think he looks like he's "discoing"!! Laugh [(-D] for first guys, they're better than most. i think now with some good practice you will progressively increase your abilities. Big Smile [:D]

"An idea is only as good as the person who thought of it...and only as brilliant as the person who makes it!!"
  • Member since
    January 2012
Posted by I make stuff on Saturday, July 18, 2009 6:14 PM

Hi Edmund, no need ot apologize, hobbies are the last thing on my list, too.  I figured you would surface at some point.

The smocks are straight German gray, the pants are the German Gray, with a touch of black, the boots are straight leather brown.

To darken for both the smocks and pants, I put some black in the next pallette dish, and dipped the brush in once for the first shadow, and again for the second.

To lighten, I used yellow first, then white into that mix.  I need to try to get some better color shots, the highlighting looks pretty good by eye, but, like postshading on olive green, it's hard to show it in a photo.  It's most prominent in the knees in the first photo, I was trying to fade the knees like happens in my jeans.   

My mistake was I did the disco guy first and forgot to use the interim shadow and highlight on the boxer guy, so his shadow and highlight is pretty stark.

I gave them dark blond hair, I need to get their headgear on, princess said they look "OK," but was concerned they have flat heads.  

  • Member since
    January 2009
  • From: Everett, WA
Posted by Schnobs on Saturday, July 18, 2009 5:57 PM

Hey Bill,

Sorry I got really busy with work and family priorities and got behind on this.  They look like my first ones buddy!  Awesome going to new places with your skillsets is fun huh?  I like the color you used for the boots.  Give us more info what is your base colors for the uniforn and what colors are you going to add to the basecoat color for highlights and shadows? 

"There is a principle which is a bar against all information, which is proof against all arguments and which cannot fail to keep a man in everlasting ignorance. That principle is contempt prior to investigation." Herbert Spencer
  • Member since
    January 2012
Posted by I make stuff on Saturday, July 18, 2009 5:19 PM

I got a lot done today, I used my wife's hair dryer to speed up the process, and I think I finished the heads, gave the dudes some hair, and did the base uniform colors and did the unifirm highlighting. 

The disco guy was first, and i got into the shadow/highlight groove that I forgot the other guy, so his shadows are much darker, I didn't use 2 shades of darker, only the darkes shade.

I think this is an in progress shot

I need to start on the straps, equipment, and get these guys some headgear.  I think I like this figure painting deal, but I need to see these pictures to see how they look.

First figures, so with that in mind, comments welcome.

Bill


  • Member since
    January 2009
  • From: clinton twp, michigan
Posted by camo junkie on Friday, July 17, 2009 9:13 AM
your getting it bill. ultimately what makes a figure painter is what system works out best for you. that includes paint. like schnobs said...keep it up. Smile [:)]
"An idea is only as good as the person who thought of it...and only as brilliant as the person who makes it!!"
  • Member since
    January 2009
  • From: Everett, WA
Posted by Schnobs on Friday, July 17, 2009 1:34 AM
Bill you are making great progress!  Keep it up!
"There is a principle which is a bar against all information, which is proof against all arguments and which cannot fail to keep a man in everlasting ignorance. That principle is contempt prior to investigation." Herbert Spencer
  • Member since
    January 2012
Posted by I make stuff on Friday, July 17, 2009 1:11 AM

Tonight, I repositioned the pesky arm, used a tiny bit of putty, then re primed, re base coated the face and hands, painted the jacket while the face was drying, then did the same thing to the other guy, and then I washed both faces and hands twice with a red/leather brown mix.

I am happier with his arm, and the washes came out pretty good.  I know there are still many steps to go, but I feel like I am making progress here.

And the other guy, he looks like he is a boxer

Bear with me, I am still working out the are of the close up, I am trying to balance good light, the proper backdrop, and the distance from the camera.  I had to dump a lot of fuzzy pictures.

well, as always, open for comments, and thanks for looking.

Bill


ETA--guess it's time to break out the opti visor, huh?

Mic
  • Member since
    June 2009
  • From: AusTx, Live Music Capitol of the World
Posted by Mic on Thursday, July 16, 2009 1:58 PM

Oh, in one post, I thought you were remarking on the mold / sink line in his left index finger (raised hand), and I was thinking the MP44 would be in his right hand.

Sorry 'bout that.


Steve M.

On the workbench: every tool, paint, brush, glue I own

  • Member since
    January 2012
Posted by I make stuff on Thursday, July 16, 2009 12:52 PM
 Mic wrote:

How about throwing a side arm in his left hand, to hide the sink line? Just a thought.

Hi Mic, yes, he will be holding an MP44, but the stock is so short, I don't think it will fit in his shoulder pocket.  I don't think the arm was right, i pulled it off this morning for another try.    

Mic
  • Member since
    June 2009
  • From: AusTx, Live Music Capitol of the World
Posted by Mic on Thursday, July 16, 2009 12:00 PM

How about throwing a side arm in his left hand, to hide the sink line? Just a thought.


Steve M.

On the workbench: every tool, paint, brush, glue I own

  • Member since
    January 2012
Posted by I make stuff on Thursday, July 16, 2009 11:26 AM

 camo junkie wrote:
Sign - Ditto [#ditto] and are you going to apply some of that red/brown wash on the face/eyes/mouth?


Camo junkie,

Yes, but see above, I actually put some wash on him last night, but in looking at the pictures I took, and seeing the coments, some re work is necessary before I move forward.

Bill  

  • Member since
    January 2012
Posted by I make stuff on Thursday, July 16, 2009 11:25 AM

Thanks, all, don't be shy about these comments.  I'm a big boy.

I pulled that arm off this morning, and also filed around the collar line and the index finger seam.  The arm mating surface and the shoulder mating surface sem to match, I will try a remount.  I am gong to have to re paint the undercoat, but no big deal there.

About the granularity/primer issue, should I soak him in Simple green and start over with some sprayed primer?  I used Tamiya rattle can fine surface primer the first time just because I didn't want  to turn on the compressor. 

I don't mind setbacks, especially on this scale (pun?), I've only got about 20 minutes of actual painting time on him.  

  • Member since
    January 2009
  • From: clinton twp, michigan
Posted by camo junkie on Thursday, July 16, 2009 10:15 AM
Sign - Ditto [#ditto] and are you going to apply some of that red/brown wash on the face/eyes/mouth?
"An idea is only as good as the person who thought of it...and only as brilliant as the person who makes it!!"
  • Member since
    August 2005
  • From: Sydney, Australia
Posted by Phil_H on Thursday, July 16, 2009 8:50 AM

Hi Bill,

It's looking good so far. Just a couple of observations.

Your primer coat looks a little granular, particularly on the upper half of the figure. This may have been caused by your paint being too thick or by spraying from too great a distance, allowing the paint droplets to dry before they reach the surface.

The grunginess of the neck/collar line may be partially a result of this, particularly if you painted this area using vertical strokes and pushed the "grains" down to the collar line with the tip of your brush. To prevent this, paint the edge with strokes parallel to the collar line.

Another thing that I've noticed with Vallejo paints is that when you dispense and thin the paint, if you are picking up paint from the edge of the "puddle", this edge can start to dry quickly and subsequent dips of the brush can start to pick up bits of dry paint. This can also contribute to "lumpiness".

  • Member since
    January 2012
Posted by I make stuff on Thursday, July 16, 2009 1:33 AM

Thanks, guys, and yes, something is wrong with that right arm.  He is supposed to be holding a rifle at about a 45 angle.  I'm not sure what's wrong, but it matches up perfectly at the rear and top, it looks funny from the front.  I knew there was a gap, but I figured the rifle butt would fill the crease, butI don't think it will, and that was before I spotted the blue background in the giant photos.  I will take a look tomorrow and either pry it off or add some putty.

I will also look at his chin area.

Thanks, guys.

 EDIT--Wow, check that mold line on his left index finger, man, I forgot how mcu shows up on the old photo blow ups.

Slight delay, i will fix and report back.

Bill

  • Member since
    December 2008
  • From: Las Vegas, Nevada
Posted by model maniac 96 on Thursday, July 16, 2009 1:30 AM
Very nice work so far! But I do agree with Schnobs, you might might want to put some squadron white putty on that arm pit and sand it, not trying to rain on your parade or anything, just trying to be of help!


Thanks, Jim.
"Veni, Vidi, Vici" Julius Caesar: I came, I saw, I conquered.
  • Member since
    January 2009
  • From: Everett, WA
Posted by Schnobs on Thursday, July 16, 2009 1:05 AM

Awesome Bill I know personally how daunting starting from scratch painting figures can be, but the end results are well worth it.  Guy looks great, but it might be the picture but it looks like you might want to put some milliput underneath his left arm pit.  It looks like you can see the backdrop right through his arm.

Also you might want to sand underneath his chin and neck and repaint those areas.  The paint will build up really quickly htere and will make blending and feathering very difficult.

Sorry don't want to sound negative or picky on your first figure.  I had to sand and primer my first figures a couple of times as ll.

Good start!!!

Let's Do This!

"There is a principle which is a bar against all information, which is proof against all arguments and which cannot fail to keep a man in everlasting ignorance. That principle is contempt prior to investigation." Herbert Spencer
  • Member since
    April 2008
  • From: Philadelphia PA
Posted by smeagol the vile on Thursday, July 16, 2009 12:58 AM

Ill give you the same site I give everyone for doing flesh, I find it works really well, its hard to do in 1/35 but its possible with a steady hand.

http://www.acesofiron.com/skin_tones.htm


Also, his right arm isnt on correctly, its to low.


  • Member since
    January 2012
First Figure WIP-8/8Update, First figures DONE, TAKE A LOOK!
Posted by I make stuff on Thursday, July 16, 2009 12:36 AM

With a little (or a lot) of encouragement from Schnobs, largely consisting of observing how darned good he has become, and how much a good figure enhances his builds, I have decided to cross the Rubicon.  My personal bugaboo WAS figures.  To review, I started back up in November 2008, I have built 3 historical tanks, one Princess Panzer for my daughter.  Figures were not in the program, although I appreciate that my abilities have progressed.  I began to make more of figure painting than is realistic, a mental block of sorts, so I decided the longer I put it off, the longer it would take to master the skill.  Edmund has really been a great help and influence.

I took a DML nachtjaeger from my E-100 build, put him together, cleaned him up, primed him, and stared at him for a long time.

I have decided to use Vallejo acrylics, solely based on recommendations and other's comments, this truly is my first effort in 20 years to paint a figure.

I mixed up some dark flesh and light flesh, thinned with water, and here's where we are:

Tonight, I applied a red/brown wash, I am still getting the hang of mixing, paint load, etc.  I will post a picture when I get another wash on him, maybe tomorrow am early.

I realize it's not much to look at yet, but I will post this guy to the end.

Comments, encouragement welcome, as always.

Bill

JOIN OUR COMMUNITY!

Our community is FREE to join. To participate you must either login or register for an account.

SEARCH FORUMS
FREE NEWSLETTER
By signing up you may also receive reader surveys and occasional special offers. We do not sell, rent or trade our email lists. View our Privacy Policy.