SEARCH FINESCALE.COM

Enter keywords or a search phrase below:

Zvesda 1/2700 Star Destroyer with custom lighting

10105 views
73 replies
1 rating 2 rating 3 rating 4 rating 5 rating
  • Member since
    February 2021
Zvesda 1/2700 Star Destroyer with custom lighting
Posted by JimC2020 on Sunday, November 7, 2021 12:36 PM

So I got this while I was away as something to do at my folks home while I was helping them out. 


Very excited to try this, my plan is to go whole hog and add custom lighting, the whole 9 yards!


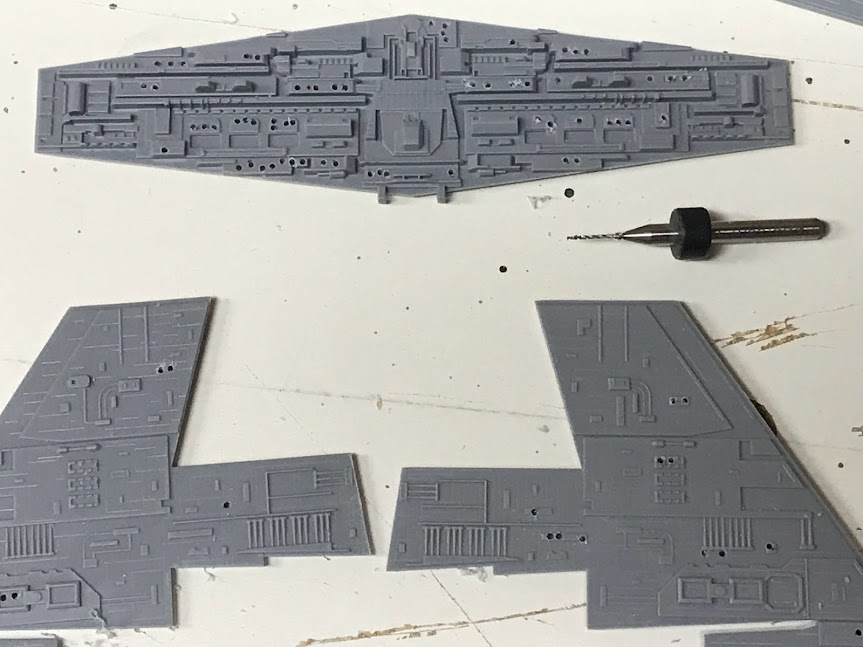
In preparation, lots of drill bits!!! 0.6mm with a cheap little rotary tool I got on Amazon for $17. Works fine for this, just have to watch the speed, so it's not too fast. About 33% of max speed seemed to work ok for me.


Building the main parts. This is NOT being done in order, so I can have room to drill, etc. The top cover, that holds the roof here and the command tower, that will be removeable so I can access the innards to change battery, replace the brains for hte electronics, etc.


Now on to a lighting test, I've removed the hangar bay, because I'm using a custom 3rd party resin kit from Mos Eisley Modelworks, very nice guy to deal with.


It works!


Removed hangar bay area cleaned up


Drilled holes...


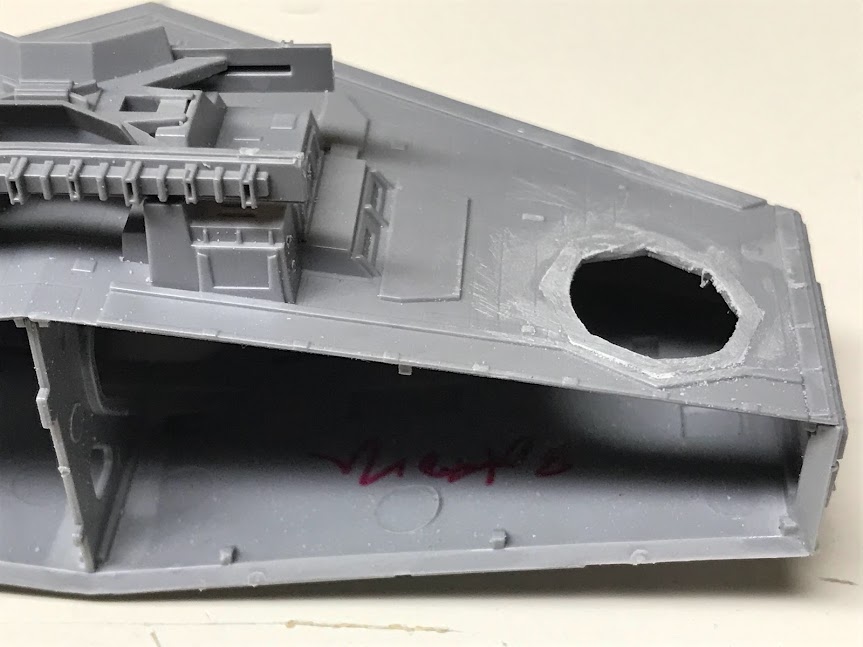
Removed the garbage chute area in preparation for the resin part


Removed the shield generator section, in preparation for the resin part from the upgrade kit
 

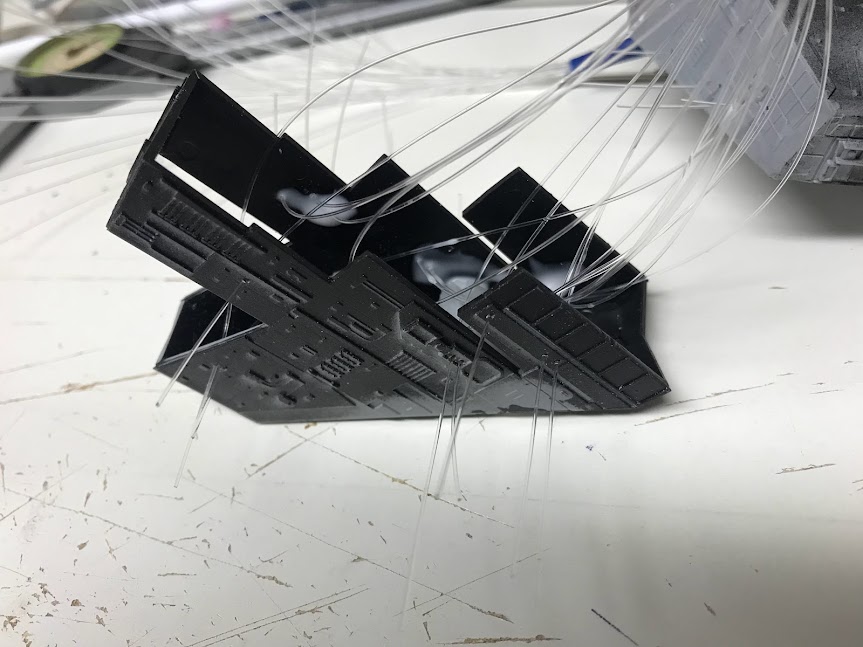
Starting to put in the fiber optic cables


Black primer to light block the insides


Note the 4 tubes, those will hold little magnets, that will lock the top in place


The top, with magnets in place. These little things are strong!!! No worries about this falling off.

Locked into place!


  • Member since
    February 2021
Posted by JimC2020 on Sunday, November 7, 2021 1:04 PM

The hangar bay has two exits, that in the current model just exit to empty space, but apparently in the SD, would lead to another section of the hanger. I'd seen a youtube video where the author design a really cool extension that was lit up and provided some extra detail. So i thought it would be cool if I could get something like this to work.

These two exits should show something more interesting...

At first I was going to scratch build the new section completely from scratch. But that turned out to be overly optimistic, ha ha! But once I got the new upgrade kit, I realized that I already had a starting point...

Why not just use this as a starting point? Cut this into a smaller form...

Voila! A new hangar bay extension...


The light would come from the top, with a little "roof" piece:


Painted up:


Now to test how it looks...


OK it works!


  • Member since
    February 2021
Posted by JimC2020 on Sunday, November 7, 2021 1:13 PM

Fiber optics...


I made bundles of the fiber, and then used a plastic tube and glued one end in place with CA glue, and then later on will glue the LED into the other end and then light seal it so it doesn't leak light.


  • Member since
    July 2014
  • From: Franklin Wi
Posted by Bakster on Sunday, November 7, 2021 3:07 PM

Looks awesome.and cool.project. I will.be following.


  • Member since
    November 2009
  • From: SW Virginia
Posted by Gamera on Tuesday, November 9, 2021 9:37 PM

Very cool!!! 

I love the expanded hanger- great idea!!! 

"I dream in fire but work in clay." -Arthur Machen


  • Member since
    December 2002
  • From: Fort Knox
Posted by Rob Gronovius on Wednesday, November 10, 2021 3:27 AM

Very impressive, I hear the music in my head when I see the kit.

  • Member since
    February 2015
Posted by InternationalRescue on Friday, November 12, 2021 6:20 PM

Beautiful job!  I love your fiber obtic cable management :-)  Great idea with the magnets as well; make updating and maintenance a breeze.  Looking forward to your next post!

Cheers

  • Member since
    February 2021
Posted by JimC2020 on Tuesday, November 16, 2021 3:02 PM

Thanks guys. Currently working on finishing up the painting of the hull. Got the fiber optics pretty much done.

Built a light box for the main hanger and the extension


Prepped for it


Test fit:


Added the LED strips


  • Member since
    February 2021
Posted by JimC2020 on Thursday, November 25, 2021 9:30 AM

Happy Thanksgiving!

  • Member since
    November 2009
  • From: SW Virginia
Posted by Gamera on Thursday, November 25, 2021 9:38 AM

Happy Thanksgiving to you too sir!


Love how she's going, I see her thundering over my head shooting at that pesky blockade runner when I look at your photos.

I know sound doesn't travel in the vaccum of space but it sounds so awesome!

"I dream in fire but work in clay." -Arthur Machen


  • Member since
    February 2021
Posted by JimC2020 on Thursday, November 25, 2021 9:49 AM

New light box working


  • Member since
    February 2021
Posted by JimC2020 on Thursday, November 25, 2021 10:09 AM

More painting, getting close to finishing this up


Lightened things up


Some detailing


  • Member since
    February 2021
Posted by JimC2020 on Thursday, November 25, 2021 10:17 AM

More weathering, using panel wash made from scrath


Oil wash 


Rubbed off, still working on finishing this


  • Member since
    November 2009
  • From: SW Virginia
Posted by Gamera on Saturday, November 27, 2021 6:20 PM

Oh wow that looks sooooooooo good!!! Heart


Would be cool to see you done by the end of the year! 

"I dream in fire but work in clay." -Arthur Machen


  • Member since
    January 2015
  • From: Katy, TX
Posted by Aggieman on Saturday, January 8, 2022 6:21 PM

Wow, your work on the Star Destroyer is fantastic.

  • Member since
    October 2019
  • From: New Braunfels, Texas
Posted by Tanker-Builder on Sunday, January 9, 2022 1:27 PM

Omigawd!

     That looks like my model of the Titanic before I closd her up! Good job there

  • Member since
    April 2016
  • From: N. Burbs of ChiKawgo
Posted by GlennH on Monday, January 10, 2022 9:16 AM

Amazing. That lighting alone is an art form.

A number Army Viet Nam scans from hundreds yet to be done:

https://www.flickr.com/photos/southwestdreams/albums/72157621855914355

Have had the great fortune to be on every side of the howitzers.

  • Member since
    February 2021
Posted by JimC2020 on Saturday, January 15, 2022 12:49 PM

Thanks, I'm stuck on the electronics, really kicking my butt, I'm still learning how to do this part of it.

  • Member since
    February 2021
Posted by JimC2020 on Sunday, January 16, 2022 4:24 PM

Ok some progress finally,

Breadboard test of the first circuit, had to scrap it because I couldn't get my code to supply the LED's with enough power, they were always too dim.


New design uses NeoPixels for the 30 LED fiber optic light sockets, easier to control and less hassle circuit wise.  So here's the new circuit board:


Not the most elegant soldering, LOL, still learning on that...


The input cable that will supply the power and data from the arduino Nano that will eventually run this.


LED plugged in


This is the board hooked up to the arduino to test that it actually works.


This shows the it plugged into two of the command tower LED sockets. Just 35 more of these cables to wire up!

  • Member since
    November 2009
  • From: SW Virginia
Posted by Gamera on Sunday, January 16, 2022 6:31 PM

Oh wow! That's a lot of wiring! Looking forward to seeing how she comes out. 

"I dream in fire but work in clay." -Arthur Machen


  • Member since
    February 2021
Posted by JimC2020 on Monday, January 17, 2022 7:12 PM

A little more work last night and today.


Lighting test after putting together a few more LEDs


 Put together the engine circuit board, that's separate from the main LEDs, but it shares a connection to the main LED circuit board


Connected together


Then made a test with the LEDS hooked up to the engine housing


 And a test run with the Arduino


It works!


  • Member since
    November 2009
  • From: SW Virginia
Posted by Gamera on Thursday, January 27, 2022 11:49 AM

Oh wow, she's really lookin' good!

"I dream in fire but work in clay." -Arthur Machen


  • Member since
    February 2021
Posted by JimC2020 on Sunday, January 30, 2022 12:42 PM

Engine lighting done! Only thing left would be to possibly tweak the timing on how the lights ramp or or the color pulsing.


Engine running

  • Member since
    November 2009
  • From: SW Virginia
Posted by Gamera on Sunday, January 30, 2022 10:54 PM

Looks good! I like the neat look here, so many the fiber optic cable and wiring look like an explosion in a spagetti factory. 

"I dream in fire but work in clay." -Arthur Machen


  • Member since
    February 2021
Posted by JimC2020 on Sunday, February 6, 2022 8:20 PM

Got some more work done! The last lighting circuit board:


With the IC mounted (TLC 5940NT for those who are curious):


This is going to drive a set of SMD lights, which I spent the weekend mounting and wiring up. These are a joy to work with since the wires for them are 0.2mm thick. Yeah....


This is where one of them get's mounted in the model


Close up after mounting


It works!


JST connectors where the tiny SMD wires will be soldered to, and then use reasonably sane wires that I can actually work with (without worrying about them evaporating into thin air at the slightest touch) for the rest.

Soldered...


Wired up and ready to go...


It's alive!!


  • Member since
    January 2015
  • From: Tumwater, WA.
Posted by M. Brindos on Tuesday, February 8, 2022 10:29 AM

That is mind blowing!

Ive wired up a couple of small kits, but this is by and LARGE the coolest build I've ever seen lit up.

Fanfreakintastic!

- Mike Brindos "Lost Boy"

  • Member since
    November 2009
  • From: SW Virginia
Posted by Gamera on Tuesday, February 8, 2022 7:01 PM

Yeah, she's looking amazing! 

"I dream in fire but work in clay." -Arthur Machen


  • Member since
    October 2021
Posted by PhoenixG on Wednesday, February 9, 2022 9:52 PM

Cool!

So you used the TI chip for doing shift registers and controlling blocks of LEDs?  I've read about that but not tried it.  How challenging was it to program on the Arduino?

On the Bench:

Bandai 1/72 Defender Destroid

  • Member since
    February 2021
Posted by JimC2020 on Friday, February 11, 2022 12:19 PM

PhoenixG
So you used the TI chip for doing shift registers and controlling blocks of LEDs?  I've read about that but not tried it.

Yes. I have a total of 28 leds for main body (upper and lower halves) & tower, 7 more SMD lights in the lower body, 1 light box for indirect lighting of docking bays, 7 for the engines, and 1 for the tower garbage chute. So thats 44 total. The main body and engine LEDs are driven together (they are neopixel LEDs). The 7 SMDs, garbage chute, and lightbox are driven by the TI chip. 

Both sets have code that instead of simply just turning them on or off, gradually ramps up to full color intensity over the space of about 300-500 millseconds (and in the case of the engines actually flickers the color over time as they are on).

PhoenixG
How challenging was it to program on the Arduino?

Pretty easy. The Arduino IDE works great in terms of seamlessly uploading your compiled code to the actual Arduino hardware. The IDE is simple, but then again the programming is crazy complex either, so it's OK. 

  • Member since
    February 2021
Posted by JimC2020 on Friday, February 11, 2022 12:21 PM

Got the lights for hte tower wired up, simple test...


JOIN OUR COMMUNITY!

Our community is FREE to join. To participate you must either login or register for an account.

SEARCH FORUMS
FREE NEWSLETTER
By signing up you may also receive reader surveys and occasional special offers. We do not sell, rent or trade our email lists. View our Privacy Policy.