SEARCH FINESCALE.COM

Enter keywords or a search phrase below:

Weathering modern aircraft

10522 views
27 replies
1 rating 2 rating 3 rating 4 rating 5 rating
  • Member since
    December 2016
Weathering modern aircraft
Posted by JohnMatt on Wednesday, January 11, 2017 7:58 PM

I'm getting close to finishing my Revell 1/48 F-15E  (like 7 months Tongue Tied) -- and I'm trying to figure out how to weather the kit.  Now, it's already been glosscoated (future) and decals applied and I pin washed the panel lines, so I'm not really concerned about the panels lines, just weathering the decals and the body itself.

Most of the YT videos I've seen go on and on about panel lines but not the overall weathering of modern aircraft.   I just can't quite find what I'm looking for.  Can anyone recommend a method?  I've been told to do a 'clay' wash, which appears to be a water based wash.

I have Vallejo washes (not sure if they are water based)... but I don't think that's what I'm looking for.  They are juuuuust this side of paint if you leave them on for more then a few minutes.

I know the UMP washes are water based but I don't own those.  And I mix my own washes with W&N oils and turpenoid, but I've only used them for pin washes before.

So, slather on and rub off?  Airbrush them on?  I really don't know what product or how to apply. Any advice?

  • Member since
    January 2009
  • From: hamburg michigan
Posted by fermis on Wednesday, January 11, 2017 9:58 PM

When I do modern aircraft, most of the weathering is done with paint...from the get-go.

I'll start with all black, then "marble on some white...like so...

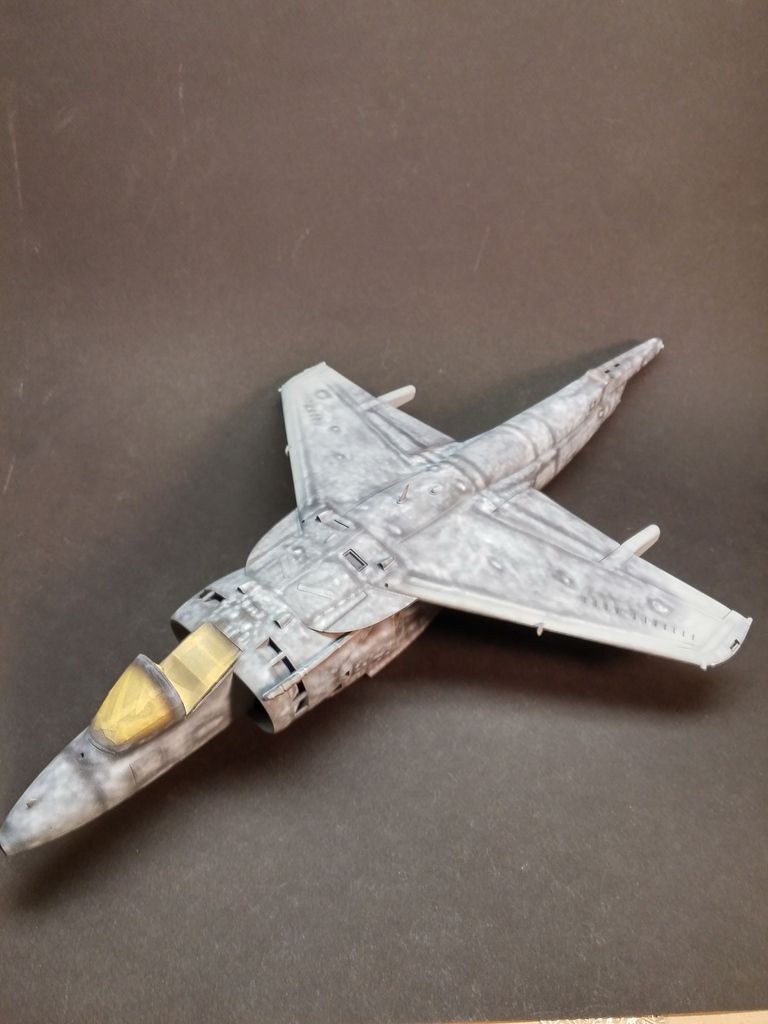
Then, airbrush your color coats...I thin them way down, maybe 65/35(thinner/paint) and build up the color slowly, leaving just a wee bit of the black/white showing. There's a decent sized "window" between nopt enough color and too much color. Having it thinned down allows so slow build up, so it's difficult to put down too much.

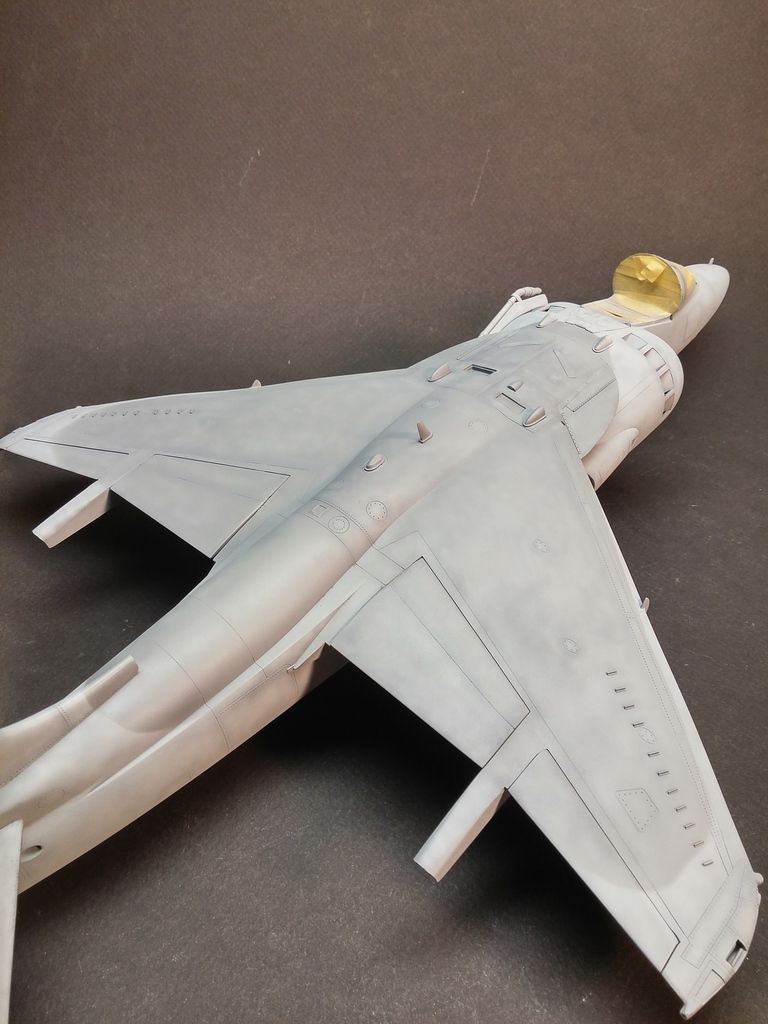
At this point, I gloss, decal, gloss again to seal in the decals, then do the wash.

Now, we're up to the point that you are at. There's a few things that can be done. If you want a bit of tonal variation to the paint(kinda like I have), you can add just a drop of grey (lighter than what the plane is now) to the paint cup that's half filled with dull coat. There will be very little color building up, and you can "marble" a bit with that. You can also go right over the decals to tone them down a bit. (test on some scrap!) In addition to that, pastel chalks are good for dirtying things up around access panels and traffic areas, as well as making streaks and grime.

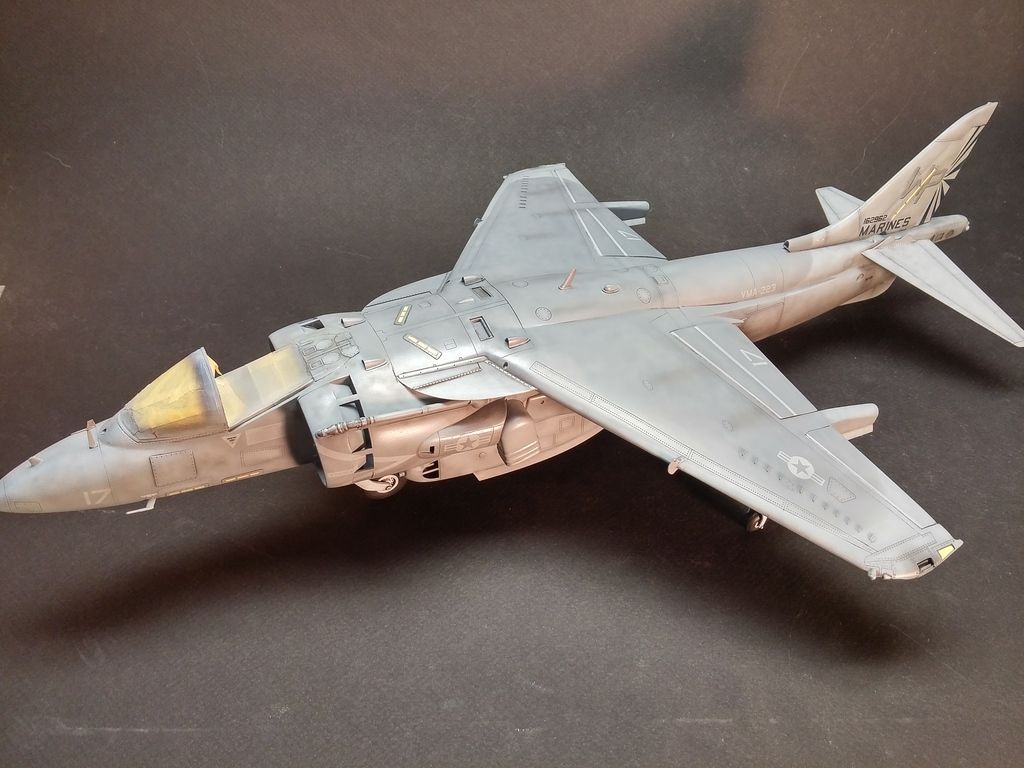
You can see some pastel chalk grime and streaks on top of the wings...

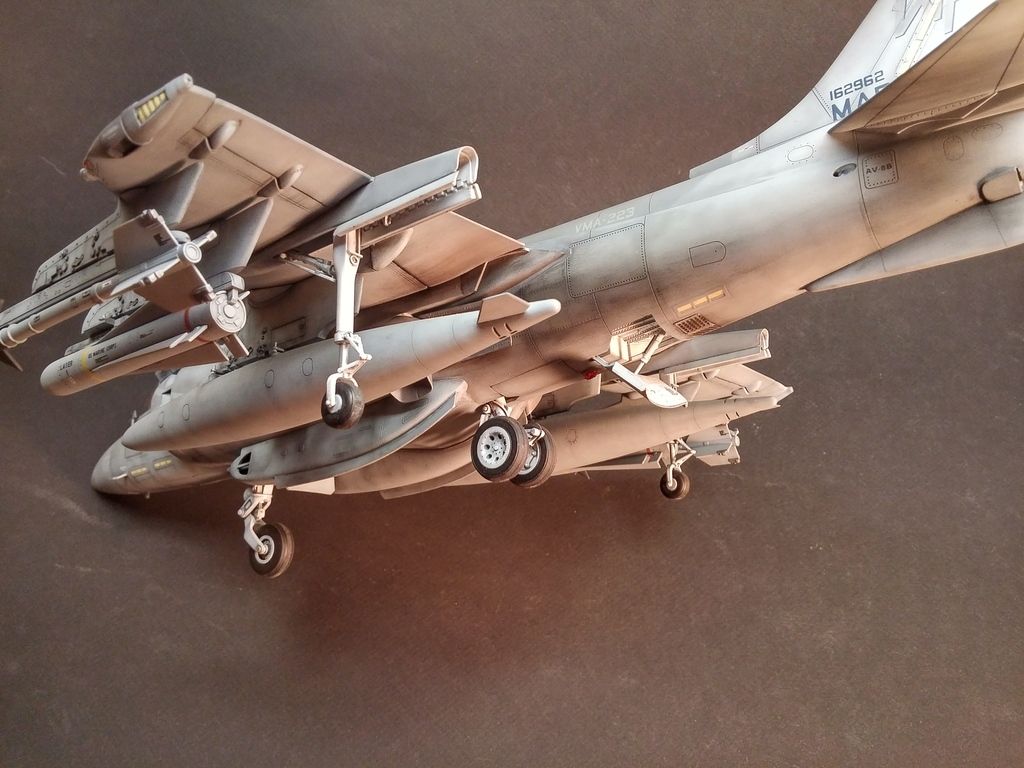
Pastel chalk again for streak on bottom of wings as well as exhaust. The exhaust staining was first done by adding a drop of dark brown to half a cup of dull coat(as mentioned earlier), sprayed a little, then added a drop of black, sprayed a little more...then pastel chalk to finish it up.

So...a basic recap...add a little color to the dull coat, spray it (practice a little on a "test bed" to see what it does...you may want to add a little more paint...little less...whatever). Then go with some pastel chalks.

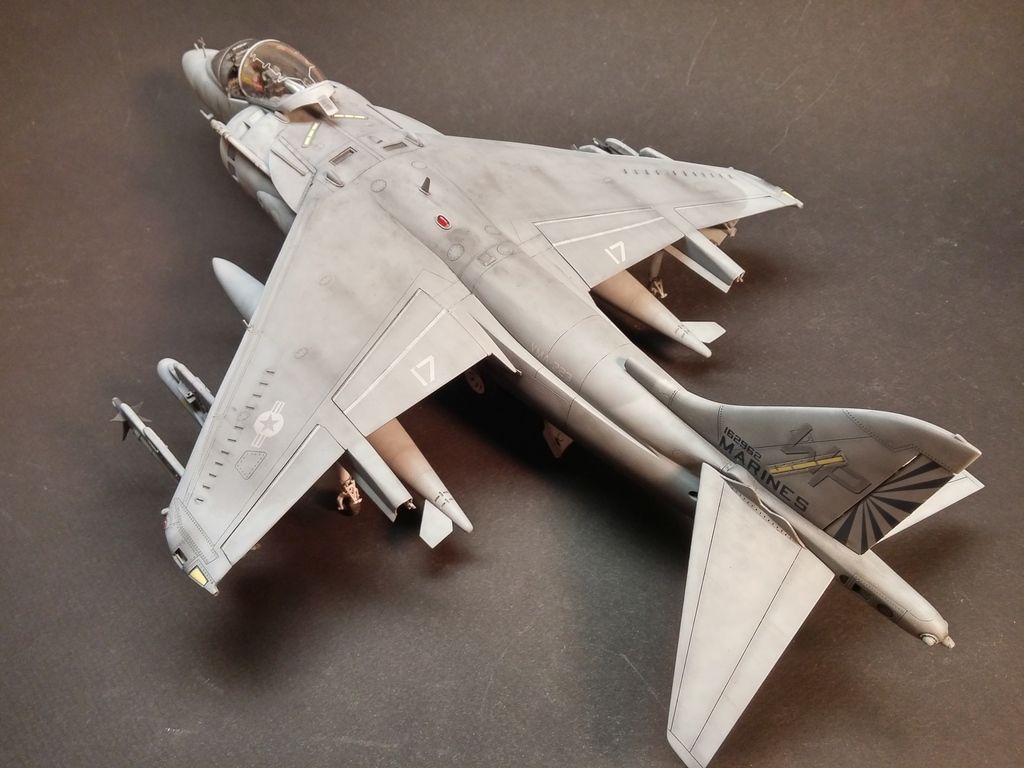
Most of the F-15's I've seen (speaking of the E's, in the darker "gunship grey") seem quite clean...no where near as fun! The belly though...that area can get pretty grimey and streaky, especially under where the engines are.


  • Member since
    July 2004
  • From: Sonora Desert
Posted by stikpusher on Wednesday, January 11, 2017 10:42 PM

First off figure out the look you want before you set out weathering. Strike Eagles were brand new when they went into Desert Storm, so weathering was light. Dusty, but little fading, etc. During the Balkan Wars of the mid to late 90s they were a bit older, but operating from a moderate climate in Italy in both 96 and 99. But during OEF/OIF they were older and spent a lot more time forward deployed. They are still well cared for but will tend to show more age.

i am not one who does the pre shading weathering, but I do use washes, enamel, oils and the pre mixed ProModeler/Florys stuff. That stuff is really the easiest to use and very forgiving to use. On top of washes I may airbrush on some panel fading and dry brush some wear areas. I also like using the Tamiya weathering compacts for streaking soot or whatever. 

But seriously there are probably as many techniques as there are good modeler son here. Each doing something a bit different.


F is for FIRE, That burns down the whole town!

U is for URANIUM... BOMBS!

N is for NO SURVIVORS...

       - Plankton

LSM


  • Member since
    November 2009
  • From: Twin Cities of Minnesota
Posted by Don Stauffer on Thursday, January 12, 2017 9:31 AM

One easy weathering technique for modern aircraft is to lighten the paint on top surfaces to simulate chalking and UV bleaching.  Paints on modern aircraft are fairly resistant to chalking and bleaching, so go easy on this. I use the regular model paints for this.

Two ways to do it.  Either add some white to the paints you used on the airframe, and airbrush this on upper fuselage and tops of wing and horizontal tail surfaces.  Or, if you have a good DA brush, you can just use white or light gray and put down a very, very light coating, fading from fuselage top around to upper side areas, and tops of the horizontal surfaces.

Even for washes, I make them with my model paints and thinner.


Don Stauffer in Minnesota

  • Member since
    July 2004
  • From: Sonora Desert
Posted by stikpusher on Thursday, January 12, 2017 12:47 PM

And to add a bit further to Don's suggestions, keep aircraft type in mind. A Marine Harrier forward deployed in Afghanistan or Iraq in an open revetments in a dusty sunny climate will weather differently than an Air Force Strike Eagle housed in hardened shelters in Europe, or a Navy Hornet at sea in the Med, Gulf, or Red Sea. Also carrier based aircraft in the TPS schemes can get very patchy looking from all the corrosion control paint touch ups. New fresh paint spots over weathered paint near acces panels and other such wear areas can be done to replicate this.


F is for FIRE, That burns down the whole town!

U is for URANIUM... BOMBS!

N is for NO SURVIVORS...

       - Plankton

LSM


  • Member since
    June 2016
  • From: Bristol CT
Posted by XF-15DCC on Thursday, January 12, 2017 6:01 PM

Stikpusher nailed it. What is the look your working for. I crewed C & D models for 22 years and the only time my jet was really clean was after a wash or paint. You can keep the visible areas clean but some places you gave up on. Granted the E is darker and hides the dirt better.

Behind both main gear doors by the struts back toward the exhaust was always oily, either hydo fluid, engine oil, fuel or a combo of the 3. You can keep the visible portion of the struts clean but that was it. Nose wheel and main wheels were all depending of the paint on the wheel. Sometimes they were clean and shiney, other times they looked like crap. 

Also if the decals happen to be for a wing king or squadron commanders jet, they are a cleaner than the rest of the fleet.


Kevin

We live in fame or go down in flame. 

  • Member since
    December 2016
Posted by JohnMatt on Thursday, January 12, 2017 7:29 PM

Wow, a lot of great advice here.  My goal is to make it look like it didn't just roll out of the paint shop.  And to give it some eye appeal and character.

I have the Tamiya weathering powder kits, how do they stack up against pastels?

Hmm, mix paint with dullcoat, I've never done that.  Ratio?

I use the Testors spray can and I have the Testors Dull Cote Lacquer.  I suppose I could decant the spray stuff.  Any recommendations?  This is going over Tamiya acrlylics that have a few layers of future over it.

Many thanks, all, and please keep it coming!

Here's a thread I came across some time ago.  I've asked Fly-n-hi if he'd share with me/us here in the thread more about his methods.

I'll be honest.  I'm a little terrified of screwing this up.

  • Member since
    July 2004
  • From: Sonora Desert
Posted by stikpusher on Thursday, January 12, 2017 7:58 PM

I am a huge fan of those Tamiya weathering products. I presume you have the ones that come on the little compacts like women's make up? If so, when I use that stuff, I add it absolutely last, after washes, flat coat, etc. Testors rattle can stuff on the other hand, I gave up on long ago, due to various reasons. I now use Future exclusively for my gloss coat ano prefer Humbrol for my Satin or Flat top coats. I have also experimented a bit with using Tamiya Flat Base added to Future for a top Flat Coat as well. But I do not have that method wired yet. 

As far as applying the dissimilar layers over one another, make sure you give the lower coat plenty of time to dry and cure before adding the next layer. With Testors over Future I would give it at least overnight.


F is for FIRE, That burns down the whole town!

U is for URANIUM... BOMBS!

N is for NO SURVIVORS...

       - Plankton

LSM


  • Member since
    December 2016
Posted by JohnMatt on Thursday, January 12, 2017 8:24 PM

stikpusher

I am a huge fan of those Tamiya weathering products. I presume you have the ones that come on the little compacts like women's make up? If so, when I use that stuff, I add it absolutely last, after washes, flat coat, etc.

Yes, and noted.  Last.

stikpusher
Testors rattle can stuff on the other hand, I gave up on long ago, due to various reasons. ...prefer Humbrol for my Satin or Flat top coats.


Have you used this method before, paint mixed with dull coat to weather?  It's the first I've heard of it and now I'm a little curious.

  • Member since
    January 2009
  • From: hamburg michigan
Posted by fermis on Thursday, January 12, 2017 8:34 PM

Like Stik said...I also do pastels (Tamiya weathering stuff....same differnce) last. Clear coats on top will pretty much make most of it disappear, except for black...that tends to get amplified.


JohnMatt

I have the Tamiya weathering powder kits, how do they stack up against pastels?

Hmm, mix paint with dullcoat, I've never done that.  Ratio?

I use the Testors spray can and I have the Testors Dull Cote Lacquer.  I suppose I could decant the spray stuff.  Any recommendations?  This is going over Tamiya acrlylics that have a few layers of future over it. 

I have sprayed lacquer dull coat (Testors) over top of Future, without any issue. I do spray a very light coat or two first, then get a bit heavier. Never had an issue. I do not use the rattlecans anymore. I buy the 1.75oz bottles and thin it down 50/50 for airbrushing. You get better control with the airbrush than you can get with a rattlecan. As far as adding color to it...I'll add a drop of color...test shoot...add more if needed. It's pretty much a trial-n-error sort of deal. I find it way easier than trying to airbrush super thinned paint...a lot more forgiving as well. 


  • Member since
    December 2016
Posted by JohnMatt on Thursday, January 12, 2017 10:30 PM

fermis
I buy the 1.75oz bottles and thin it down 50/50 for airbrushing.

Thin it with lacquer thinner?

I apologize if I am torturing the subject to death.  I just have little experience with this.

  • Member since
    January 2009
  • From: hamburg michigan
Posted by fermis on Thursday, January 12, 2017 11:49 PM

JohnMatt


fermis
I buy the 1.75oz bottles and thin it down 50/50 for airbrushing.


Thin it with lacquer thinner?

I apologize if I am torturing the subject to death.  I just have little experience with this.


No sweat...this is what we're here for!

Yes, lacquer thinner. I use a generic from the local hardware store. 

If you are decanting the dull coat from a rattlecan, you shouldn't need to thin it. If you're using the stuff in the bottle, thin it.

  • Member since
    January 2009
  • From: hamburg michigan
Posted by fermis on Thursday, January 12, 2017 11:53 PM

I'll also add...spray a light mist or two first...if you get too heavy, too quickly, you can run into trouble with the lacquer attacking what's already there. Personally, I have not had a bad experience with such things when it comes to the dull coat....I have though, with the gloss (I use Minwax gloss lacquer...also thinned 50/50...for my gloss coats). That is on top of enamels...I have zero experience with acrylics.

  • Member since
    December 2016
Posted by JohnMatt on Sunday, January 15, 2017 9:47 PM

Well, I decided to dive in and give this a whirl.  My goal, again, was to give the kit a little character.  The result was okay.

Before weathering for reference.

Dirtied it up with some burnt umber and ocre washes.  It doesn't look like much but that's about six wash applications.  Mixed up turpenoid and oil paints very thin, applied and let it dry for an hour.  Rubbed it down with a lintless cloth removing 65% of it, and did it again and again.

Added a little oil streak coming from a panel on the wing.  At first, I put down two parallel Post Its so the weathering powder would go straight back.  I've had problems in the past (see the underside of the wing, which was my first experiment) with the streak going off center.

But the edges were too perfect.  So I put a few tiny dots of black oil paint at the head and gently feathered them back with turpenoid.

Bottom. Sandy dirt streaks behind the tires.

Also mixed up a batch of dull cote, lacquer thinner and a few drops of light gray and sprayed all of the decals to make them less white and pristine.


  • Member since
    January 2009
  • From: hamburg michigan
Posted by fermis on Sunday, January 15, 2017 10:55 PM

Looks pretty good to me!Yes

  • Member since
    July 2004
  • From: Sonora Desert
Posted by stikpusher on Sunday, January 15, 2017 11:44 PM

fermis

Looks pretty good to me!Yes


Ditto


F is for FIRE, That burns down the whole town!

U is for URANIUM... BOMBS!

N is for NO SURVIVORS...

       - Plankton

LSM


  • Member since
    December 2016
Posted by JohnMatt on Tuesday, January 17, 2017 9:34 PM

Thanks guys. I may take the time to make a thread with some intermediate build pics at some point. Getting ready to attach the ordnance and I have a question.

What kind of glue do I use to attach fully painted parts? The hard points are primed and painted, as are the bombs etc.

  • Member since
    January 2009
  • From: hamburg michigan
Posted by fermis on Tuesday, January 17, 2017 9:57 PM

I usually just use a little bit of CA for attaching ordnance. A little spot on the "pins", as well as the sway braces should be enough...wherever contact is made.

  • Member since
    July 2004
  • From: Sonora Desert
Posted by stikpusher on Wednesday, January 18, 2017 12:01 AM

fermis

I usually just use a little bit of CA for attaching ordnance. A little spot on the "pins", as well as the sway braces should be enough...wherever contact is made.


Yup... preferably the thicker gel type. It stays in place better and is less likely to run and mar your work. 


F is for FIRE, That burns down the whole town!

U is for URANIUM... BOMBS!

N is for NO SURVIVORS...

       - Plankton

LSM


  • Member since
    December 2016
Posted by JohnMatt on Wednesday, January 18, 2017 10:15 PM

stikpusher
Yup... preferably the thicker gel type. It stays in place better and is less likely to run and mar your work. 

Huh.  Haven't heard of the gel type.  Brand?

Thanks.

  • Member since
    July 2004
  • From: Sonora Desert
Posted by stikpusher on Wednesday, January 18, 2017 10:56 PM

There are various brands- Loc-tite, Zap, Etc. just look for gel type superglues at the market, hardware, or hobby store.


F is for FIRE, That burns down the whole town!

U is for URANIUM... BOMBS!

N is for NO SURVIVORS...

       - Plankton

LSM


  • Member since
    November 2009
  • From: Twin Cities of Minnesota
Posted by Don Stauffer on Thursday, January 19, 2017 9:06 AM

stikpusher

There are various brands- Loc-tite, Zap, Etc. just look for gel type superglues at the market, hardware, or hobby store.


I have settled on the Loc-tite brand. The gel version has a different, handy container with a bladder that makes controlling the amount I squeeze out quite easy. I find it at many hardware and building supply stores (Usually Menards).  The thin version comes in a regular plastic squeeze bottle, again easy to find at these stores.


Don Stauffer in Minnesota

  • Member since
    December 2016
Posted by JohnMatt on Thursday, January 19, 2017 11:43 PM
Tried something else tonight: pigments. Brushed on some Vallejo dust, worked it in and then blew off the excess with compressed air. Laid a light dull coat on top to keep it in place. I seemed to add a bit more character.
  • Member since
    December 2015
  • From: providence ,r.i.
Posted by templar1099 on Friday, January 20, 2017 11:21 AM

fermis

I usually just use a little bit of CA for attaching ordnance. A little spot on the "pins", as well as the sway braces should be enough...wherever contact is made.


Is it my understanding that one can use CA on painted parts or did I read the inquiry wrong ? 

"le plaisir delicieux et toujours nouveau d'une occupation inutile"

  • Member since
    July 2004
  • From: Sonora Desert
Posted by stikpusher on Friday, January 20, 2017 12:48 PM

Yes, CA works on painted or unpainted surfaces.  On some surfaces or paint types that have adhesion challenges, vinyl/soft plastic or certain acrylic paints, there is the possibility that the paint will adhere to the glue but not the surface beneath in some cases.


F is for FIRE, That burns down the whole town!

U is for URANIUM... BOMBS!

N is for NO SURVIVORS...

       - Plankton

LSM


  • Member since
    December 2015
  • From: providence ,r.i.
Posted by templar1099 on Friday, January 20, 2017 2:01 PM

stikpusher
, there is the possibility that the paint will adhere to the glue but not the surface beneath in some cases.


Yea, that's been my experience. Thx Stik.

"le plaisir delicieux et toujours nouveau d'une occupation inutile"

  • Member since
    November 2008
  • From: Central Florida
Posted by plasticjunkie on Friday, January 20, 2017 9:19 PM

I attach my underwing weapons with Aleene's Tacky Glue. The glue is super strong and dries clear and if you want to remove the weapons just carefully pop them off. Aleene's won't damage the paint either.

As for weathering, I use the marbling technique which produces multiple tonal hues on the paint rendering a weathered look. For streaks and stains I use oil paints. Flory Washes are also fantastic for panel lines.

I used Aleene's to attach the missiles, bombs and GBUs on these two F-4s, Flory washes for the panel line grime and oils for streaks.  


 GIFMaker.org_jy_Ayj_O


Too many models to build, not enough time in a lifetime!!

  • Member since
    December 2016
Posted by JohnMatt on Friday, January 20, 2017 10:26 PM

Don Stauffer


stikpusher

There are various brands- Loc-tite, Zap, Etc. just look for gel type superglues at the market, hardware, or hobby store.


I have settled on the Loc-tite brand. The gel version has a different, handy container with a bladder that makes controlling the amount I squeeze out quite easy. I find it at many hardware and building supply stores (Usually Menards).  The thin version comes in a regular plastic squeeze bottle, again easy to find at these stores.


I went with the Loc-Tite gel and it seems to be working well.

Love the pics of the marbling technique you guys posted; I'm gonna try that someday.

JOIN OUR COMMUNITY!

Our community is FREE to join. To participate you must either login or register for an account.

SEARCH FORUMS
FREE NEWSLETTER
By signing up you may also receive reader surveys and occasional special offers. We do not sell, rent or trade our email lists. View our Privacy Policy.