SEARCH FINESCALE.COM

Enter keywords or a search phrase below:

Painting AFV tracks - assembled or unassembled?

7600 views
4 replies
1 rating 2 rating 3 rating 4 rating 5 rating
  • Member since
    June 2011
Painting AFV tracks - assembled or unassembled?
Posted by slinky malinky on Tuesday, June 12, 2012 12:46 AM

Hi,

I'm pretty inexperienced with AFV subjects so this might seem a dumb question...

But how are AFV tracks painted when on an already assembled model? I have no problem painting them separately to the vehicle and then assembling but I see lots of tutorial photos that show a model assembled with tracks installed and then painted in-situ.

The accompanying article usually just says something like 'I built it, then I painted and weathered it' (a gross oversimplification but you get what I mean). Painting track separately has some drawbacks so I'd like to try it in-situ but how do modelers manage to get the colours, rust effects, weathering and so-on without all the road wheels/suspension and other bits getting botched.... and how do items like rubber road wheels get painted when the track is in the way?


Cheers, Slinky

  • Member since
    May 2009
  • From: Poland
Posted by Pawel on Tuesday, June 12, 2012 2:24 AM

Howdy, Slinky!

That question pops up every now and then, and my answer is always: if the tanks is going to be built "clean" you could paint the tracks separately. Or if the track is of the "movable link type", so you can install it after painting without glueing. But if you need to glue the tracks on the model to get the correct shape, or the tank is to be built "dirty", I'd recommend glueing first, painting later.

Now I can't tell you things like "take a brush this fine and insert it at precisely this angle", can I? But I have some WIP photos to show you what I mean.

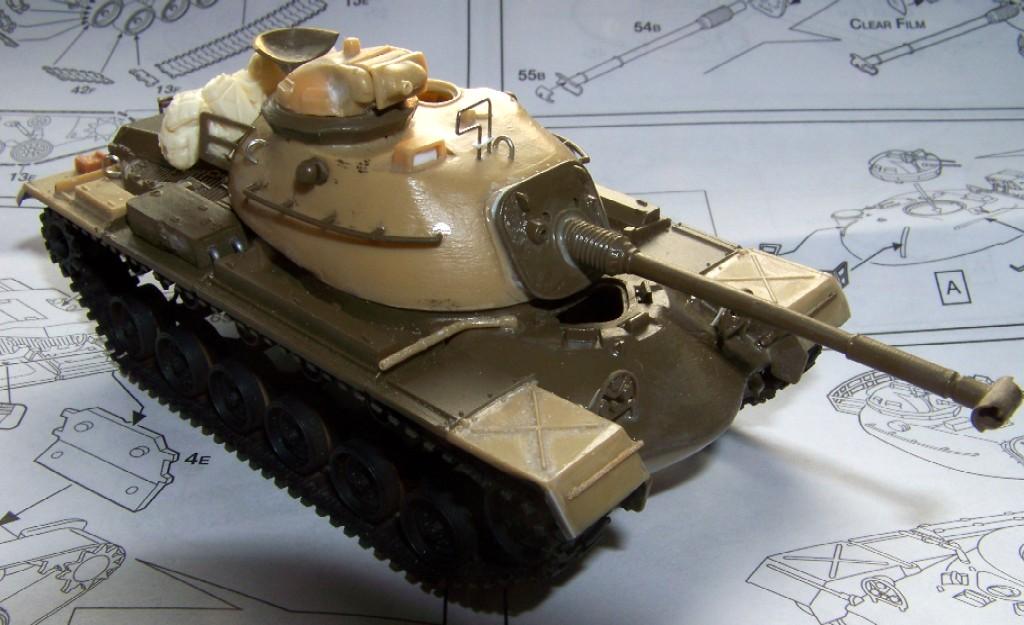
Let's take my 1:72 M48A3 as an example. First you assemble everything - I use lacquer thinner for glue, works best/at all on unpainted parts:
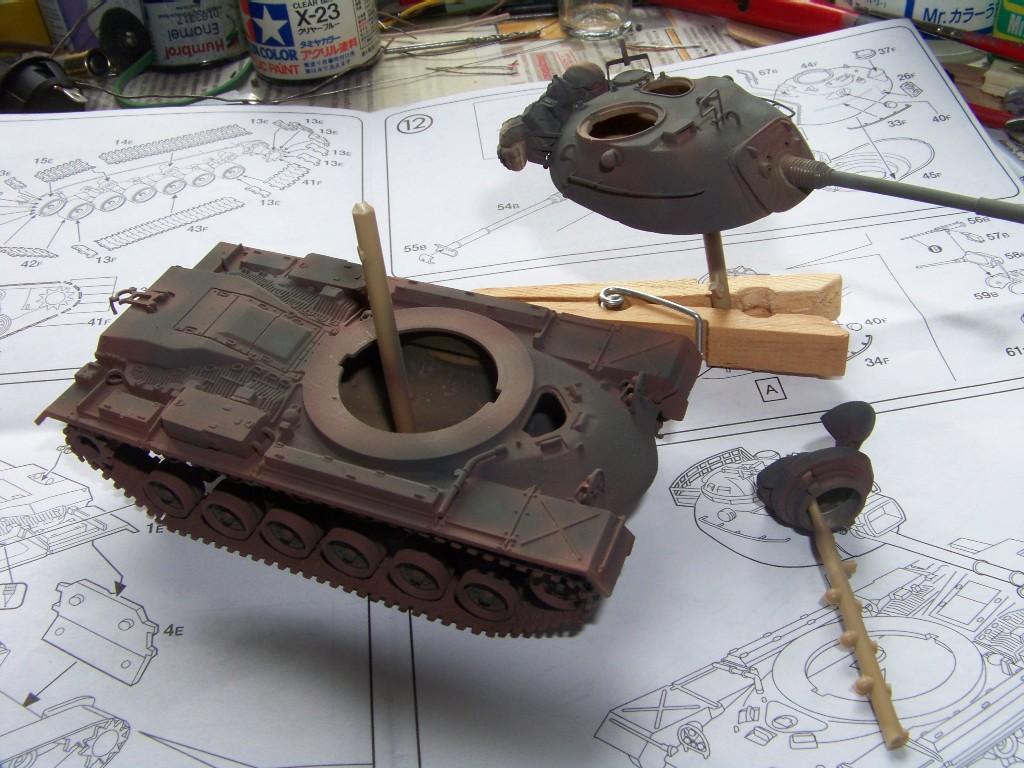
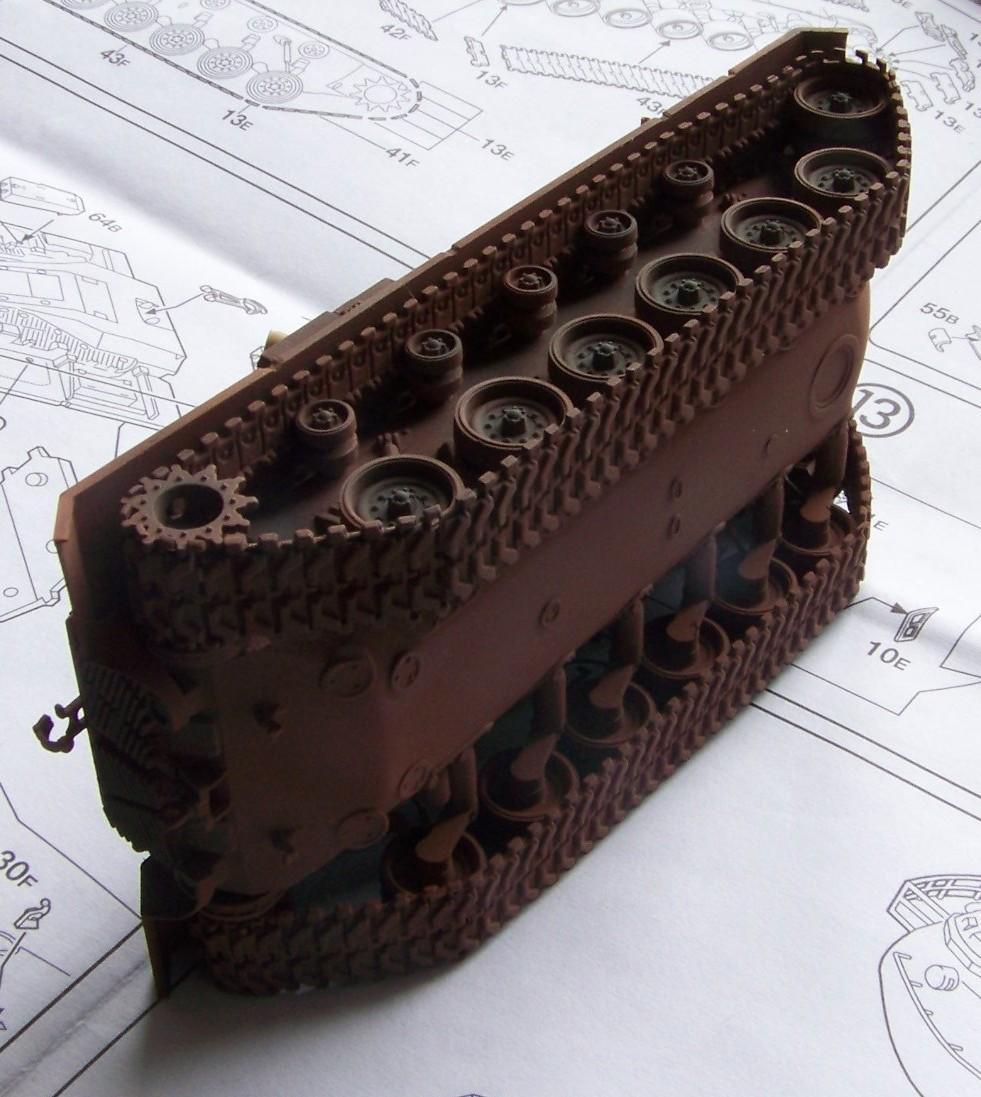
Then I went on with two color preshading (using an airbrush) - the base was Humbrol 113 red-brown, panels and road wheels were picked up with Humbrol 66 (my color for US OD):
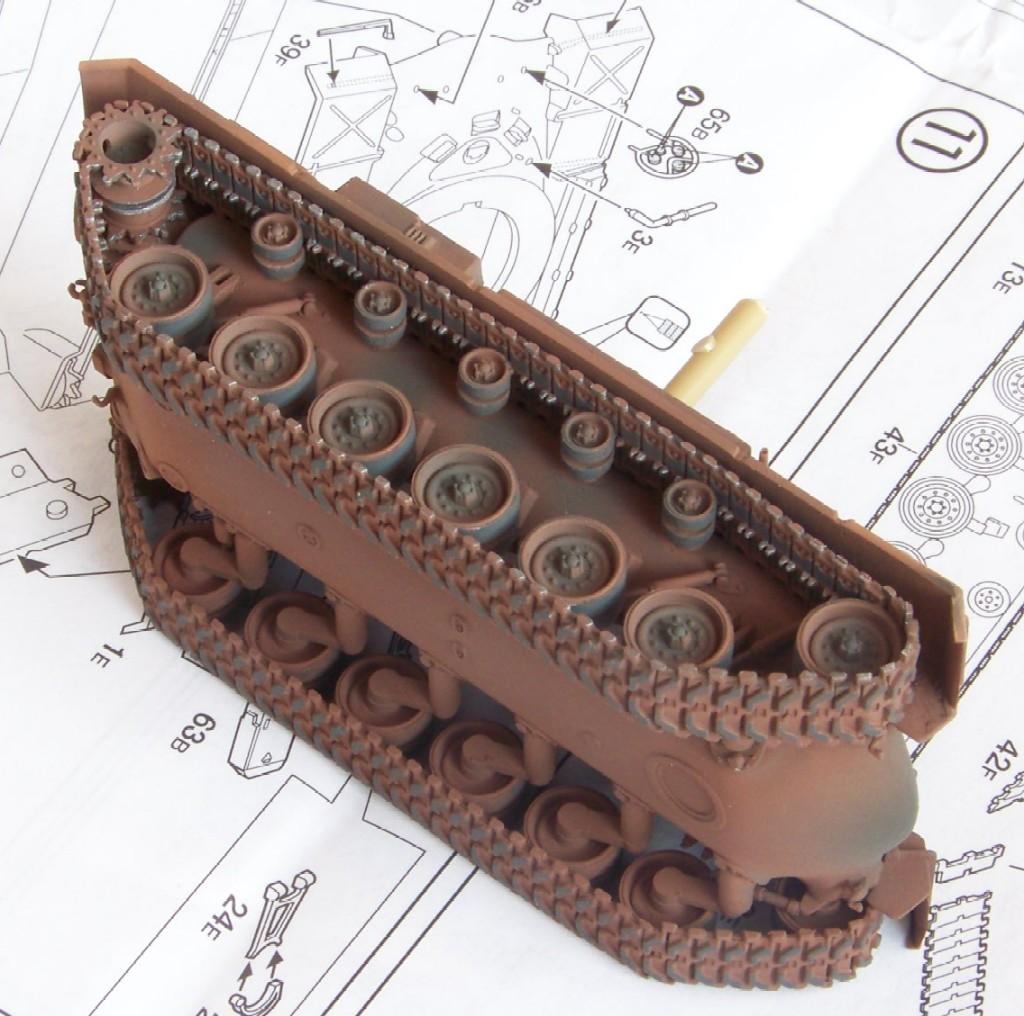
Once this dried well i went on to simulate some wear effects. From what I've seen on the photographs, uder certain conditions the surfaces of the running gear being rubbed constantly  maintain the colour of the material (in this case rubber or steel), the other surfaces remain dusty red-brown. That's what I want to get, so I took a fine brush and started applying Humbrol 32 (Dark Grey - my favourite for weathered black) and Humbrol 53 Gun-Metal. When I was done, this is what it looked like:
Add some dry-brushing and maybe a wash, and it will be OK. Maybe you feel like what you said before - OK, I still don't know how to do it - I say give it a try, you'll be surprised. In most cases, what you can't paint won't really be visible, anyhow, so what's the big deal? Just take a fine brush and try to relax and keep steady, and it should do. Hope it helps, good luck with your project and have a nice day

Paweł

All comments and critique welcomed. Thanks for your honest opinions!

www.vietnam.net.pl

  • Member since
    June 2011
Posted by slinky malinky on Tuesday, June 12, 2012 4:28 PM

Wow Pawel,


That's awesome... exactly what I needed. I see what you mean about 'building dirty'. I'm in the middle of a build for a 1/35 STUG III F/8 and I'm at the track stage. I'm going to cross my fingers, hold my breath and give it a go with a lot more confidence thanks to your great reply and fantastic build post.

I can only hope to one day develop the skill and confidence to tackle the sort of conversion and build work on your M48. Thanks heaps for the great help and for being patient with a less experienced modeller.


Cheers, Slinky

  • Member since
    April 2006
  • From: Denver, Colorado
Posted by waynec on Friday, June 15, 2012 1:23 PM
i have heard it's best to assemble indy tracks before painting because sometimes that little bit of paint will keep the links from fitting and "snapping" into place. i usually paint mine off the vehicle and than assemble but recently switched over to doing modern wheels.

Никто не Забыт    (No one is Forgotten)
Ничто не Забыто  (Nothing is Forgotten)


  • Member since
    August 2006
  • From: Arkansas
Posted by K-dawg on Wednesday, June 20, 2012 4:26 PM

My personal preference is workable tracks for ease of painting but when I do use kit indi links, this is my method.

I generally build plastic link to link or length and link tracks to where they can be removed for painting. The tracks are assembled and all but one joint is glued. This lose joint is on one end of the other just as the track starts to curve around the idler or drive sprocket. The tracks are taped into place and left to dry. One they're set I can remove them and paint separately. Sometimes it's necessary to have a completely separate top and bottom run. The joints are in the same place but there is one at either end. I know a lot of other guys that do this so seeing a "before paint" photo of a tank with it's tracks on doesn't necessarily mean that they're attached.

Good luck man.

Kenneth

Kenneth Childres, Central Arkansas Scale Modelers

JOIN OUR COMMUNITY!

Our community is FREE to join. To participate you must either login or register for an account.

SEARCH FORUMS
FREE NEWSLETTER
By signing up you may also receive reader surveys and occasional special offers. We do not sell, rent or trade our email lists. View our Privacy Policy.