SEARCH FINESCALE.COM

Enter keywords or a search phrase below:

Rick's Huey uh-1b work in progress ( FINISHED)

50541 views
320 replies
1 rating 2 rating 3 rating 4 rating 5 rating
  • Member since
    October 2013
Posted by infofrog on Wednesday, October 30, 2013 7:05 PM

I'm hoping when I apply the weather wash , it will all blend in .

  • Member since
    October 2013
Posted by infofrog on Wednesday, October 30, 2013 9:37 PM

Is this what  a lot of you use ?  Pledge  , I do have Tamiya x22 clear

www.walmart.com/.../15136693

I'm hoping to be ready for weather the cockpit soon .

Rick G

Thank you

  • Member since
    October 2013
Posted by infofrog on Friday, November 1, 2013 6:54 PM

 I finished a little more . I'm now ready to gloss coat and start the weather process .I  order 2 bottles of flory weathering wash. Now should i use pledge or clear it with Tamiya clear coat ?

I wish my hand brush was little better , but i dont think it's bad for a first timer .

thanks .

Rick G

  • Member since
    October 2013
Posted by infofrog on Friday, November 1, 2013 6:54 PM

  • Member since
    October 2013
Posted by infofrog on Friday, November 1, 2013 6:59 PM

Maybe tomorrow morning I will touch up  those holes I drilled .

I got a ? The floor need some black  . will my wash do that ?

1 bottle of Flory Models Light weathering wash

1 bottle Flory Models Dark weathering wash

Thanks

Rick G

  • Member since
    December 2002
  • From: Valrico, FL
Posted by HeavyArty on Friday, November 1, 2013 8:34 PM

The wash will dirty it up and blend it all in.  A couple things though, the foot pads, circles for the seat attachments, and the seat mounts should all be the same color grey as the floor.  The grips on the collectives (left of the seats) are natural cork.  The hand grips on the cyclic sticks are black plastic with white buttons and a red trigger.  Unfortunately, Hueys were pretty monochromatic on the inside and not very interesting color wise.  

Here is are a couple examples of the interior.


Gino P. Quintiliani - Field Artillery - The KING of BATTLE!!!

Check out my Gallery: https://app.photobucket.com/u/HeavyArty

"People sleep peaceably in their beds at night only because rough men stand ready to do violence on their behalf." -- George Orwell

  • Member since
    October 2013
Posted by infofrog on Friday, November 1, 2013 9:00 PM

thanks .

I will fix tomorrow . I was going off the kit  manual colors . should be a easy fix

Thanks again

Rick G

  • Member since
    January 2007
  • From: Auburn, Alabama
Posted by rotorwash on Friday, November 1, 2013 9:05 PM

Gino,

  I think since he's modeling an early B model, there is some leeway on the color of the footrests.  For instance on this early B model at Rucker:

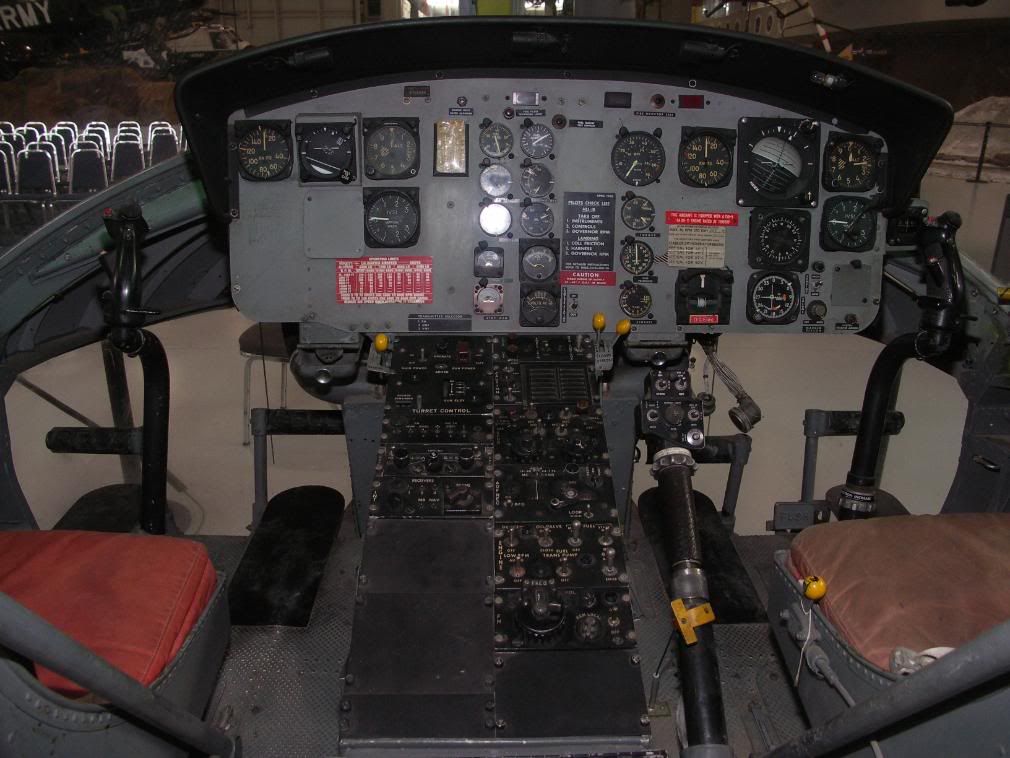
Collectives definitely shouldn't be all black on a early B model.  However, as the cork on the collective weathers, it definitely losses that nice new cork color:

You could also add the black area behind the cockpit seen here.  This scheme was pretty common on early B models.

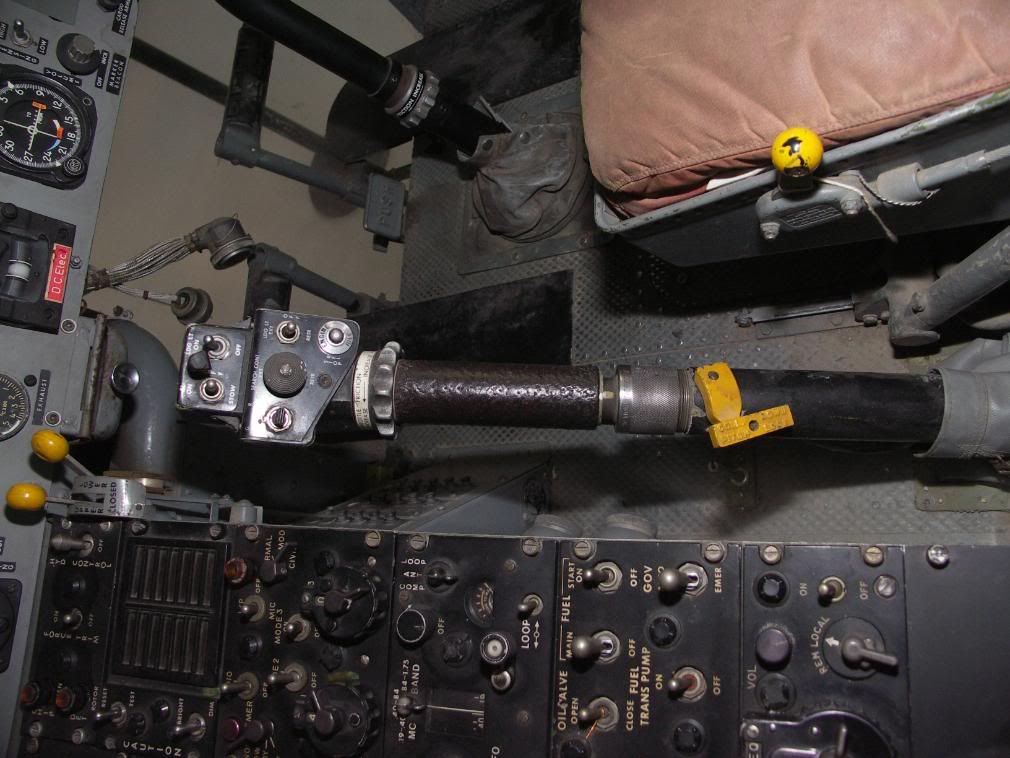
Gino is correct about the seat mounts.  Later armored seats were mostly OD green with OD mounts, but the early seats and mounts would have been all gray.  Looking good so far.  keep up the good work.

   Ray 

  • Member since
    December 2002
  • From: Valrico, FL
Posted by HeavyArty on Friday, November 1, 2013 9:11 PM

Interesting, I have seen the black stripe in the rear cabin.  I had not see the black foot pads before though.


I wouldn't blindly follow the color callouts in the instructions, they are often wrong.  Its better to go by reference pics.  Find a helo you like and model it based on what you see in pics.

Gino P. Quintiliani - Field Artillery - The KING of BATTLE!!!

Check out my Gallery: https://app.photobucket.com/u/HeavyArty

"People sleep peaceably in their beds at night only because rough men stand ready to do violence on their behalf." -- George Orwell

  • Member since
    October 2013
Posted by infofrog on Friday, November 1, 2013 9:20 PM

thanks .

I will paint the front seat supports gray .

What you all think about the pledge or Tamiya clear before the was process ?

Thank you

Rick G

  • Member since
    January 2007
  • From: Auburn, Alabama
Posted by rotorwash on Friday, November 1, 2013 9:23 PM

Rick,

 I usually seal my interior paint jobs with flat clear before I add any weathering.  Gino's built way more than me though, so he may have a different suggestion.

 Ray

  • Member since
    December 2002
  • From: Valrico, FL
Posted by HeavyArty on Saturday, November 2, 2013 7:50 AM

It depends on what paints and wash material you are using.  I always use enamel paints and usually weather with acrylic, and do not seal between them since they don't interact.  If you are painting and weathering in the same type paints, you may want to seal between them so they do not react with each other.

Gino P. Quintiliani - Field Artillery - The KING of BATTLE!!!

Check out my Gallery: https://app.photobucket.com/u/HeavyArty

"People sleep peaceably in their beds at night only because rough men stand ready to do violence on their behalf." -- George Orwell

  • Member since
    October 2013
Posted by infofrog on Saturday, November 2, 2013 5:35 PM

thanks  again . i spray one coat of clear on toady . Tomorrow I will start the weather wash process .

I will update pictures tomorrow .

Again thank you

Rick G

  • Member since
    October 2013
Posted by infofrog on Sunday, November 3, 2013 8:09 AM

 I just applied the wash . The front and back seats . I used flory weather light wash . The floor  I used flory weather dark dirt wash . Then i add little dark dirt on the seats .

I looks wet right now , but i really like it .

  • Member since
    October 2013
Posted by infofrog on Sunday, November 3, 2013 8:09 AM

  • Member since
    October 2013
Posted by infofrog on Sunday, November 3, 2013 8:10 AM

  • Member since
    October 2013
Posted by infofrog on Sunday, November 3, 2013 8:10 AM

  • Member since
    December 2002
  • From: Valrico, FL
Posted by HeavyArty on Sunday, November 3, 2013 10:34 AM

It looks like you got the hang of it.  It may be a bit overdone though.  If it is acylic, you may be able to wipe some off using a rag dampned with rubbing alcohol.  You could also go back with the original colors and drybrush them to tone it down a bit too.  The parts I would concentrate on are the fabric of the seats and the top of the center console.  These areas would have minimal weathering since they are touched or sat on often, mainly just dust and deep, old stains would be on the fabric.  I would try to pretty much remove the large water spots (circles) they look unrealistic since you don't get that much water on the inside of a Huey and the fabric would soak it in, not allow it to pool up and form a circle.  The floor looks good.


Keep up the good work.

Gino P. Quintiliani - Field Artillery - The KING of BATTLE!!!

Check out my Gallery: https://app.photobucket.com/u/HeavyArty

"People sleep peaceably in their beds at night only because rough men stand ready to do violence on their behalf." -- George Orwell

  • Member since
    October 2013
Posted by infofrog on Sunday, November 3, 2013 1:03 PM

I still need to wipe off the extra wash later today or tomorrow.

Yes im having good time on this build . Im learning so much .

thank you for the advice .

Rick G

  • Member since
    February 2003
  • From: East Bethel, MN
Posted by midnightprowler on Sunday, November 3, 2013 1:05 PM

Sweet!

Hi, I am Lee, I am a plastiholic.

Co. A, 682 Engineers, Ltchfield, MN, 1980-1986

1 Thessalonians 4:13-18 1 Corinthians 15:51-54

Ask me about Speedway Decals

  • Member since
    October 2013
Posted by infofrog on Sunday, November 3, 2013 1:45 PM

 How  we look now ? Need more taken off ?

  • Member since
    October 2013
Posted by infofrog on Sunday, November 3, 2013 1:45 PM

  • Member since
    October 2013
Posted by infofrog on Sunday, November 3, 2013 1:47 PM

midnightprowler

Thank you

  • Member since
    December 2002
  • From: Valrico, FL
Posted by HeavyArty on Sunday, November 3, 2013 2:05 PM

That look much better.  Great job on it.  I would blend the floor a bit more to break up the hard line you have, then drybrush the floow with some aluminum.  The floor tended to rub through pretty quickly with guys getting in and out with the dirt on their boots acting like sand paper.


Here is how I do the floor in 1/35.


This is how she ended up.

And in its final display for a customer who gave it to his father who had been a Flight Medic in Vietnam.


More here: http://www.armorama.com/modules.php?op=modload&name=Sections&file=index&req=viewarticle&artid=1885

Gino P. Quintiliani - Field Artillery - The KING of BATTLE!!!

Check out my Gallery: https://app.photobucket.com/u/HeavyArty

"People sleep peaceably in their beds at night only because rough men stand ready to do violence on their behalf." -- George Orwell

  • Member since
    October 2013
Posted by infofrog on Sunday, November 3, 2013 2:22 PM

That look much better.  Great job on it.  I would blend the floor a bit more to break up the hard line you have, then drybrush the floow with some aluminum.  The floor tended to rub through pretty quickly with guys getting in and out with the dirt on their boots acting like sand paper.

just dry brush inside the line with aluminum ? thanks

Is that where you dip the brush in the paint then wipe off ex. . Then brush the floor ? I Will you tube it

Thank you again

Rick G

  • Member since
    December 2002
  • From: Valrico, FL
Posted by HeavyArty on Sunday, November 3, 2013 2:25 PM

You got it, the brush should almost be dry.  It will just pick up the raised details and make the paint look rubbed off.

Gino P. Quintiliani - Field Artillery - The KING of BATTLE!!!

Check out my Gallery: https://app.photobucket.com/u/HeavyArty

"People sleep peaceably in their beds at night only because rough men stand ready to do violence on their behalf." -- George Orwell

  • Member since
    October 2013
Posted by infofrog on Sunday, November 3, 2013 4:21 PM

One way looking at this .U don't see much aluminum .Look at a  different  view u see it big time .

need to use a little wash on it later .

  • Member since
    October 2013
Posted by infofrog on Sunday, November 3, 2013 7:06 PM

 I tone the floor   down just little .

I'm  slowly getting  some where now  .LOL

  • Member since
    October 2013
Posted by infofrog on Sunday, November 3, 2013 7:07 PM

  • Member since
    October 2013
Posted by infofrog on Wednesday, November 6, 2013 1:22 PM

Can someone help me on the color for the engine and transmission . The manual calls for silver .

Would that be correct ?

Thank you

Rick G

JOIN OUR COMMUNITY!

Our community is FREE to join. To participate you must either login or register for an account.

SEARCH FORUMS
FREE NEWSLETTER
By signing up you may also receive reader surveys and occasional special offers. We do not sell, rent or trade our email lists. View our Privacy Policy.