SEARCH FINESCALE.COM

Enter keywords or a search phrase below:

UH-1B Gunship build

8886 views
14 replies
1 rating 2 rating 3 rating 4 rating 5 rating
  • Member since
    April 2008
  • From: SE Alabama
Posted by Retired Gunpilot on Thursday, April 24, 2008 9:43 PM

It sure does and thanks for the info, I'll see if I can get some.

Charlie

  • Member since
    January 2007
  • From: Auburn, Alabama
Posted by rotorwash on Thursday, April 24, 2008 9:39 PM

Charlie,

  PSP base is from Emodelsandmore.com.  The owner, Richard Kern was at our show a few weeks ago and I picked it up.  Really helps the model I think.

     Ray
 

  • Member since
    April 2008
  • From: SE Alabama
Posted by Retired Gunpilot on Thursday, April 24, 2008 9:25 PM

Sometimes one gets caught up in the excitement of building, not noticing the error. I bet you I built mine the same way and never noticed it.

But you're welcome and you only need that kind of info if you were going to compete in an accuracy category. It is still a beautiful model and when I get my C model built I will post images and hope mine comes out half as nice as yours did.

BTW: Where did you get the PSP base at? I have been looking for some for my model but have not found any.

Charlie

  • Member since
    January 2007
  • From: Auburn, Alabama
Posted by rotorwash on Thursday, April 24, 2008 9:12 PM

Charlie,

  Thanks for your service, sir!  You are of course correct.  Here is a B model panel:

Photobucket" border="0" /> 

here's the Eduard UH-1B Photoetch panel:

[img]http://Photobucket

Way to busy on the pete pilot side.  i knew that, but i figured no one would notice.  Good eye my friend!  Anyway, it looks better than the kit panel.

    ray
 

  • Member since
    April 2008
  • From: SE Alabama
Posted by Retired Gunpilot on Thursday, April 24, 2008 8:54 PM

 Those are beautiful pictures, and I have built this model before but until tonight I believe the instrument panel is actually a twin engine version instrument panel on your model. I notice it has four rows of vertical engine instruments, N1, Torgue, etc. I never caught this error on my model, and wish I still had it to see if this was something changed in the model over years or was always the wrong instrument panel. I flew the last active duty M model to the bone yard in the mid 80s and remember how empty the panel always looked compared to the Bell 212 and 412 I had been flying in the Gulf. I would post a picture of a B model instrument panel but I believe I need special permission to do so. Your panel looks alot like the N model panel, but I think the N had the caution panel up on the instrument panel also. I'm going to have to research this to be sure though. I have flown so many variants of the huey, I'm confusing my memory of civilian and military versions. That happens when you get old. Sigh [sigh] I hadn't flown a helicopter since 95.

I have the academy 135 C model which I just bought to build and I just checked its instrument panel. It has the correct dual row of engine instruments.

Anyway, it still a great looking model. Smile [:)]

Charlie

  • Member since
    January 2007
  • From: Auburn, Alabama
Posted by rotorwash on Thursday, April 24, 2008 6:49 PM

Thanks for the kind comments guys.  This build was very special to me.  Not only was it the first Huey I have completed, but it will be my dad's Father's day present.  I really tried to get the details correct.  It's my way of honoring all the Vietnam vets for their service in the "Helicopter War."  Here are the last batch of build pics, beginning with the fuselage.

 I added a first aid kit to the interior made from a couple of pieces of platic strip:

Photobucket

The photoetched metal piece didn't want to conform to the wall of the fuselage very well I'm afraid.

Here is the Esci ceiling installed with the overhead instrument panel represented by a decal.  I have weathered the ceiling a bit with earthtone pastels.  The interior gray, by the way, is just Mr Surfacer 1200 from a can.  It just looked right to me.

[img]http://Photobucket

I glued the fuselage together with CA glue instead of plastic model glue.  In fact, the whole modelw as put together with CA. I think I should have used something like Tenax to close the fuselage, though.  As you can see here, I has several spots to fill/sand that a more experienced builder probably would have avoided.  You will see that the left greenhouse window is missing.  I lost one and destroyed another with thinner, and finally cracked a third.  i decided the last one was "battle damaged" and installed it anyway.  The geen tint was finally achieved using the future/green food coloring technique suggested byCCOLINA.  Thanks for the tip, man!

[img]http://Photobucket" border="0" />

The only other real modifiction worth noting was the rotor. The rotor was kitbashed from a Esci uH-1D rotor and an Italeri rotor.  Here is the before and after pics.  the Italeri rotor is 4 scale feet too short for the Bravo.

Photobucket" border="0" />

 I wouldn't do it this way now.  I am working on a replacement rotor and I just cut a small piece of the leftover Italeri rotor to add to each end of a new one.  I will add the trim tabs using thin foil.  Because of the join I had to sand prime/resand several times to get a decent surface.  Then, while attempting to put the subtle droop in the rotors, i broke one side!  After that things really went south and i ended up breaking several pieves off the rotorhead, including the blade counterweights I had made from styrene rod.  After completing the rebuild I had to repaint and then blend the parts again.  that is why the rotor looks well worn.  I weathered the heck out of it to help hide the flaws!

Photobucket" border="0" />

 Wethering was all done with two sets of pastels. One was a set of black and greys that I shaved and mixed dry in a cup.  This was used to simulate exhaust stain.  The other was a set of earthtones that I mixed to simulate the red dust that seemed to be everywhere in vietnam.  after apllying the pastels they were sealed with MM clear flat.  Finally a wash using thinned MM gunmetal acrylic was applied.  All painting was done either with a spray can or a paintbrush (both using enamels).  the only airbrushed color was the yellow tips on the rotors.  Well, that's about everything that might be of interest I think.  The biggest problem with the model is the windshield which is not straight (GRRRRR!).  Oh well, I will try to do better next time.  This was a real learning experience and I am greatful for all the tips and advice I have recieved from FSM members.  Thanks alot guys!

    Ray

Here's one last shot for the road:

Photobucket" border="0" /> 

  • Member since
    January 2005
  • From: California
Posted by Heloguy on Wednesday, April 23, 2008 11:39 PM
Wow is all I can come up with. Such an impressive build, especially for 1/72! You really put in the work and it shows.
"You scratched my anchor!"
  • Member since
    September 2003
  • From: Australia
Posted by Helo H-34 on Tuesday, April 22, 2008 7:06 PM

ABSOLUTELY AWESOME Ray Bow [bow] The amount of detail and kit bashing for a 1/72 scale helicopter is incredible . I certainly admire the fact that you went to the effort of cutting out those tiny engine screens and replaced them with AM screens , I was thinking of doing the same with my 1/48 1P build to match the exhaust screen I did ; but I got lazy and thought I would do a black wash instead . I'm truly impressed with the amount of detail , I hope you don't mind but I just popped in a disc into the computer and copied this whole page . I'll be spending a lot of time looking at those great progress pic's and the completed Huey model as well. Kind regards John

PS. How do you add stars to post ; this Huey build deserves a dozen at least !!!!

OH , I figured out how to add stars , It's right at the top of the page . Again Ray well done Make a Toast [#toast]

  • Member since
    January 2007
  • From: Auburn, Alabama
Posted by rotorwash on Monday, April 21, 2008 11:28 PM

Well I finally finished my first Huey and only my third model.  man, do i have a lot to learn!  Anyway, I thought i would post some of the build pics and info on the mods I made as well as some finished pics.  I'm hoping for some constructive criticism on how to do some of this better.  First, here is the goal:

I wanted to build a model of my father's gunship Gladiator 36 from late 1969.  I had these photos to go on:

[img]http://Photobucket
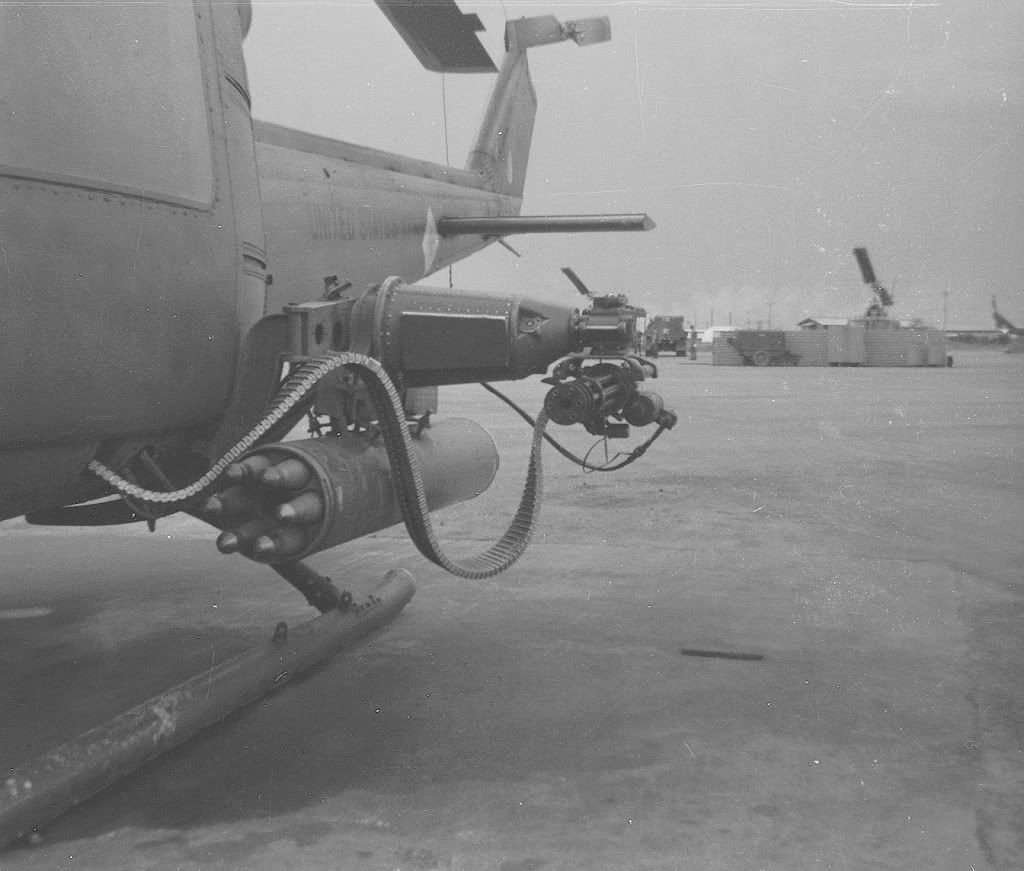
I'm not sure if this is Gladiator 36 or not and dad can't remember, but I decided to use this loadout with the XM157 pods and minis.  also, I liked the C model tailboom replcement seen here so I incorporated that as well.  The best photo I have by far is this one:

[img]http://Gladiator
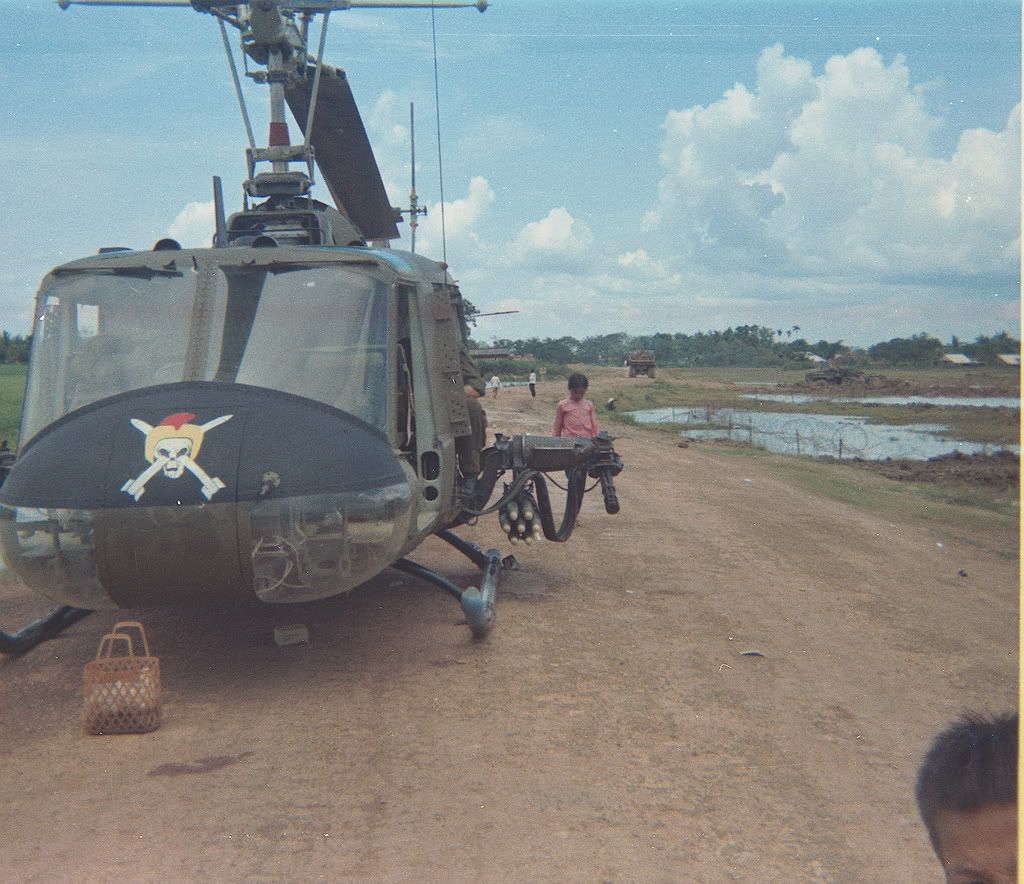
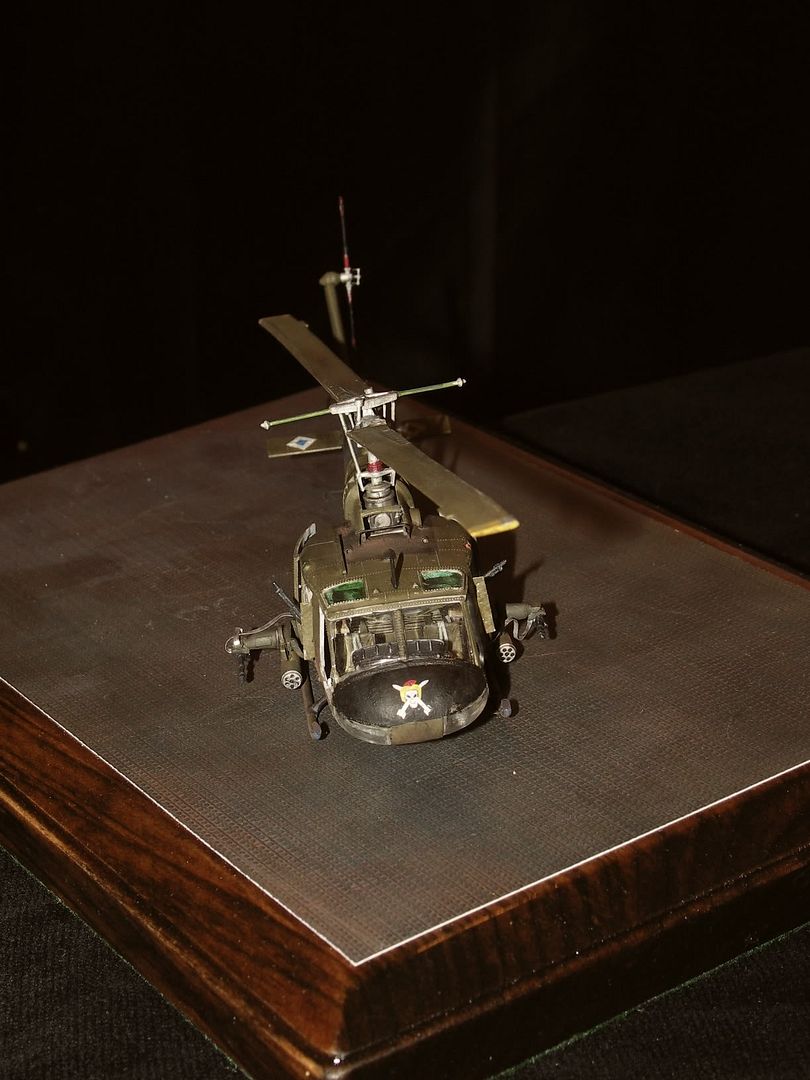
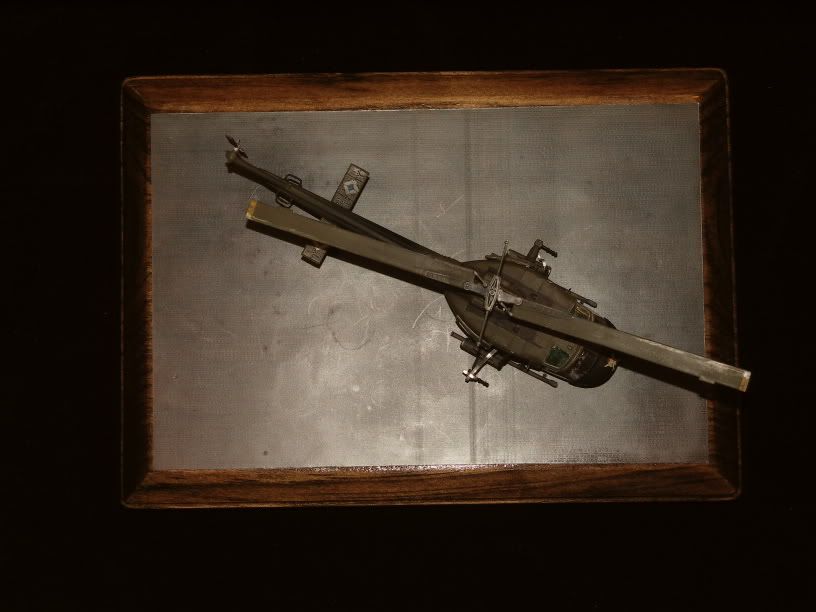
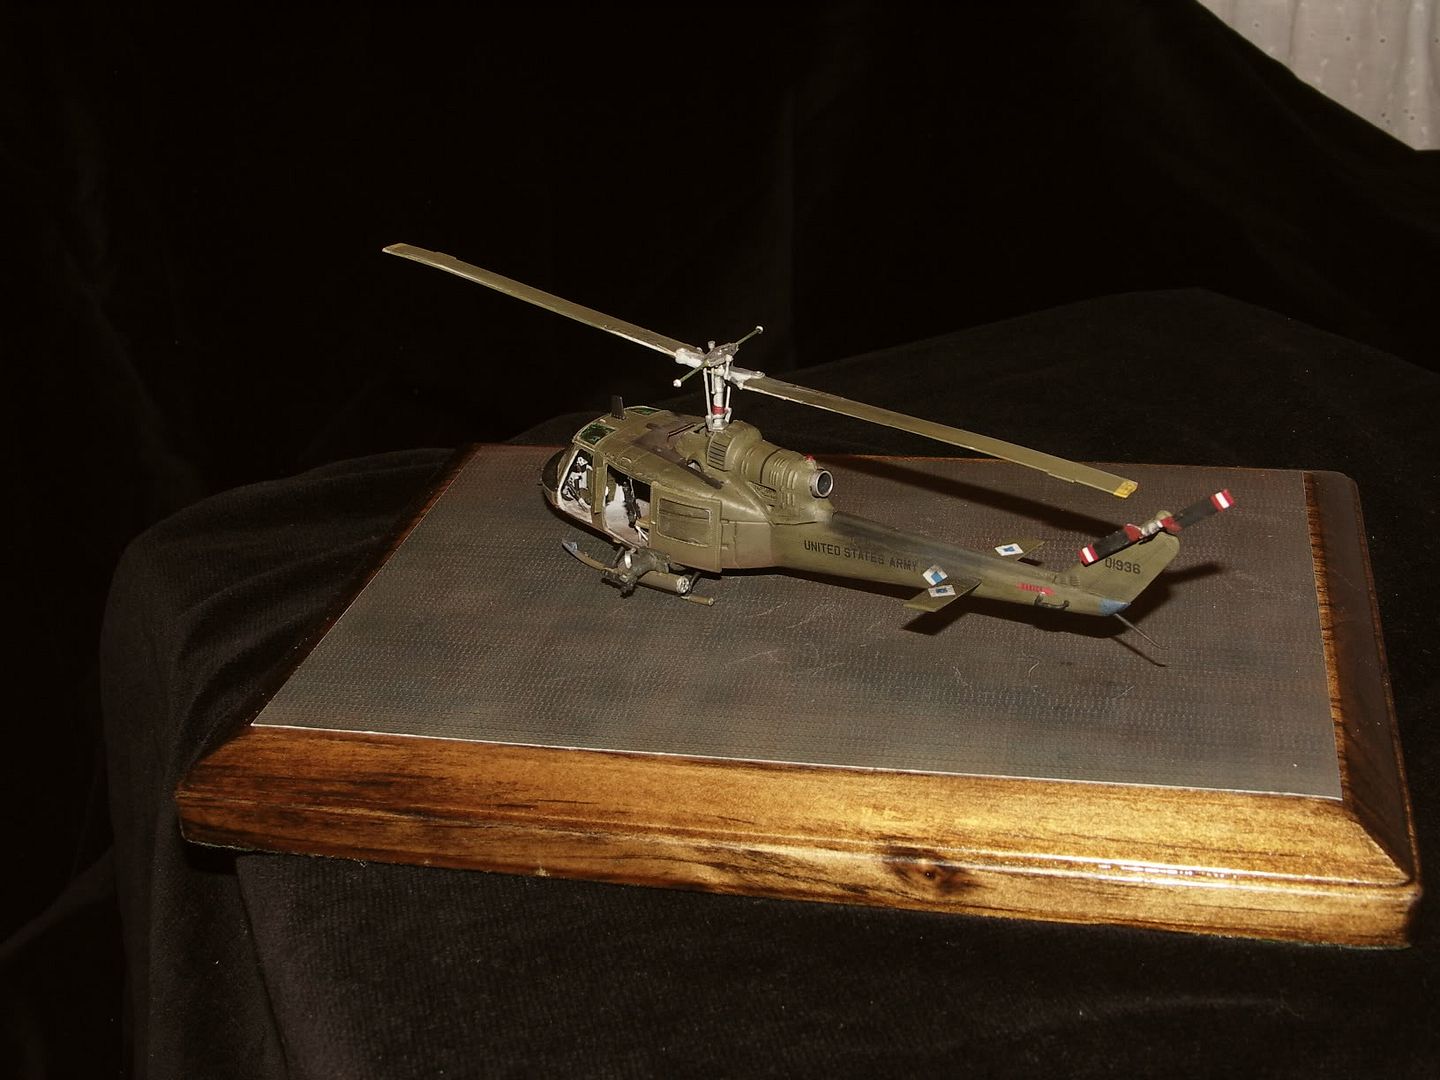
This was my main reference.  So no pilot/copilot doors, no FM antennas, late VN style particle separators, towelbar on the roof, windscreens for the gunners, green drab M156 mounts, blue skid tips, and of course the cool Gladiator nose art.  i would have loved to do the m158 pods, but I didn't want to spend the time scratchbuilding 'em.  I also had a couple of photos of other Gladiator ships showing the diamonds on the tailboom and stabs.  Anway here is the final results fro those who don't want all the details:

[img]http://Photobucket[img]http://Photobucket[img]http://Photobucket
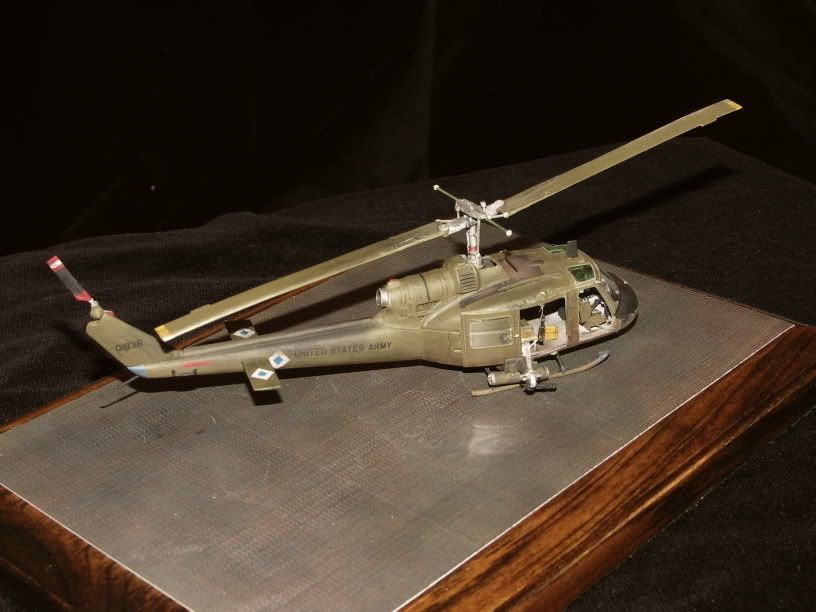
[img]http://Photobucket

The PSP Base was made by Richard B Kern of Emodelsandmore.com  The decals were made by Joseph Osborne of Fireball Modelworks.  The decals are Awesome and I think they would make a couple of pieces of painted styrene strip look nice!  Thanks again Joseph!  Now if you want to know what I did read on.

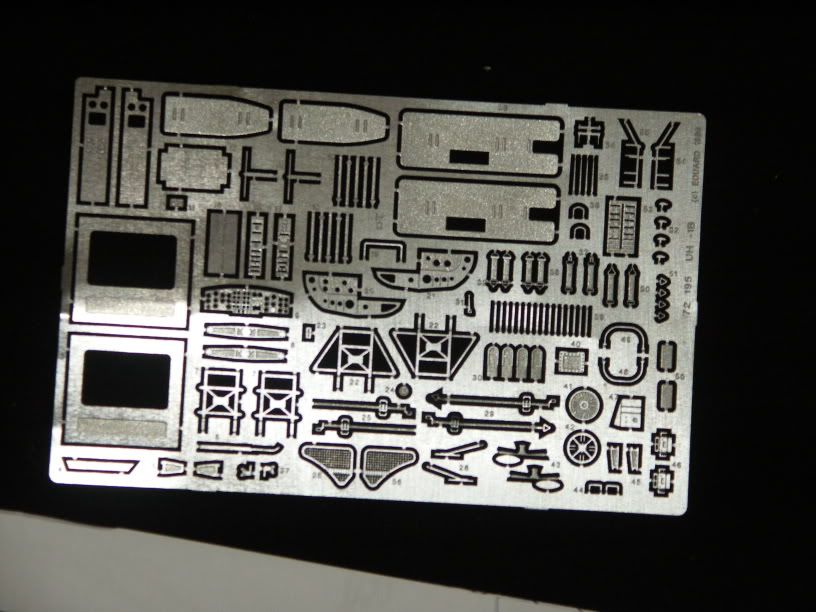
This build was a kitbash with lots of AM thrown in. The base kit was the Italeri UH-1C kit actually with only the horizontal stabs coming from the B model kit.  As a note, and accurate Charlie model CANNOT be built using the Italeri kit because the rotors are totally wrong!  You would need the Cobra Company 540 rotor to make a accurate C model.  Besides the two Italeri kits, I used the roof from the ESCI/Italeri UH-1D as well as the rockets, ammo box and miniguns from that kit.  I also bashed the ESCI rotors with the italeri rotors as the Italeri ones were too short and the D model rotors were too long for a Bravo.  The minigun mounts came from an old Hasagawa/Revell UH-1D/H "Gunship" kit.  The M60's were originally going to be Extratech photoetch only, but they looked too thin so I stole a couple of 60's from the Italeri OH-13 kit and sanded down the sides and added the photoetch to them. I think they turned out OK.  As far as the other AM goes, I used the Czech Masters UH-1B interior set and the Eduard UH-1B set.  I also scratchbuilt a map case, gunners ammo box, legs for the gunners seats, ammo chutes fro the minis, towelbar antenna, windscreens for the gunners, part of the mounts for the minis, a pitot tube (25 guage needle), and smoke grenades for the rear cabin wall. Here are some pics of the process:

The Czech Masters and Eduard detail sets:

[img]http://Photobucket[img]http://Photobucket
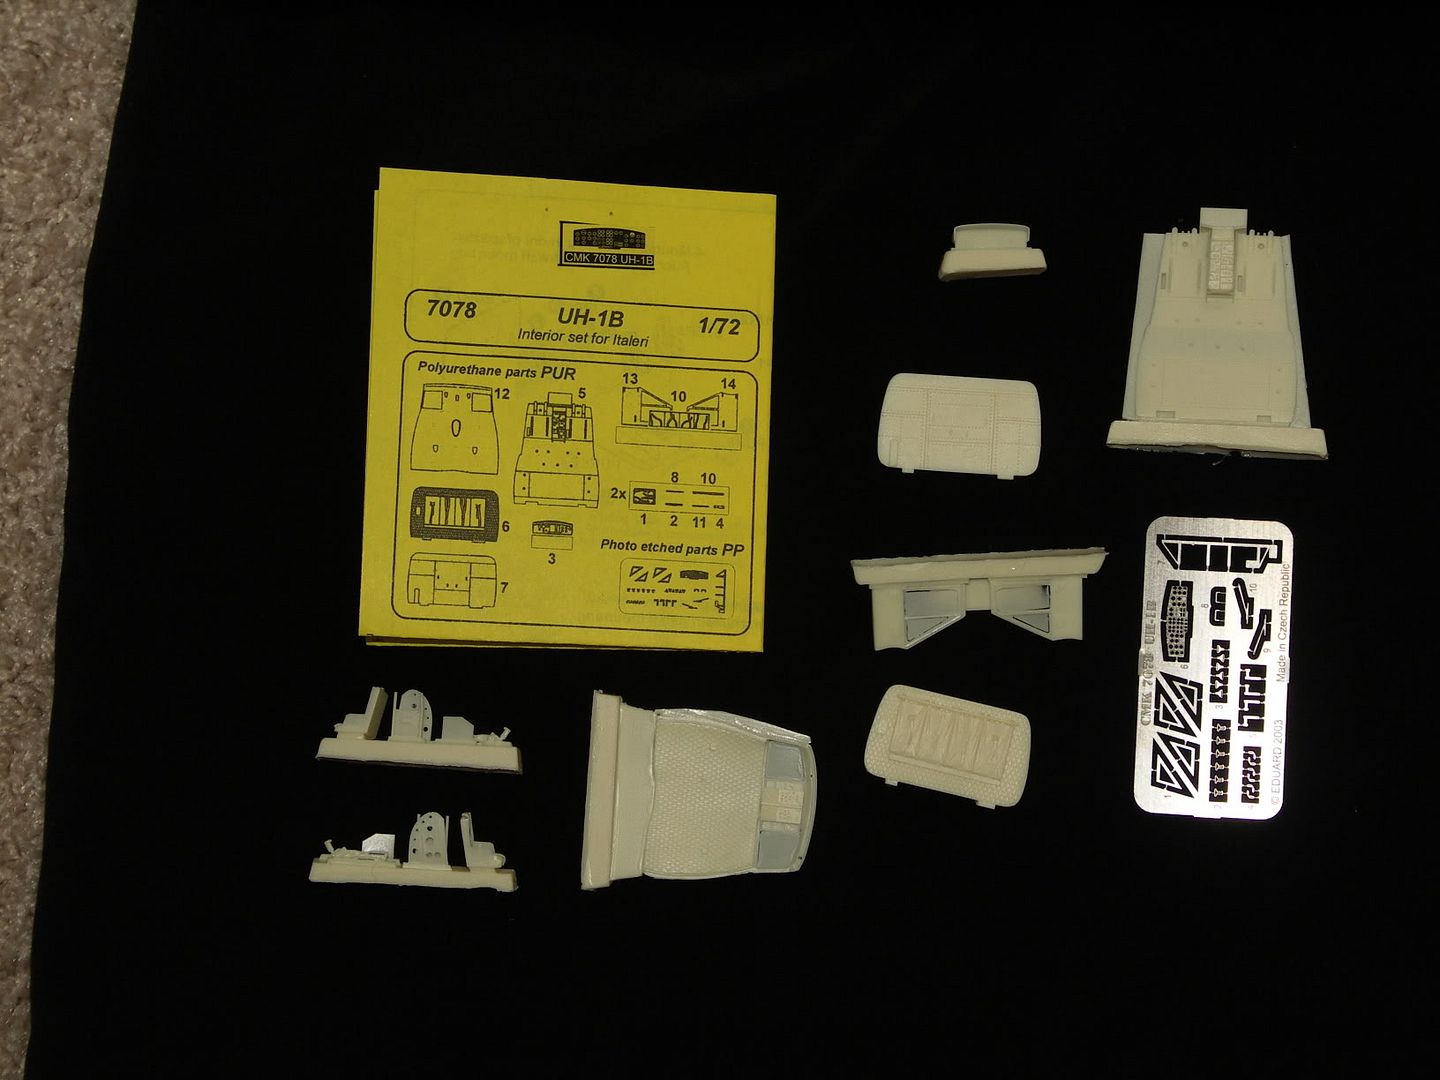
I only used part of both sets.  First step was to strip the Italeri floor of all but the center console:

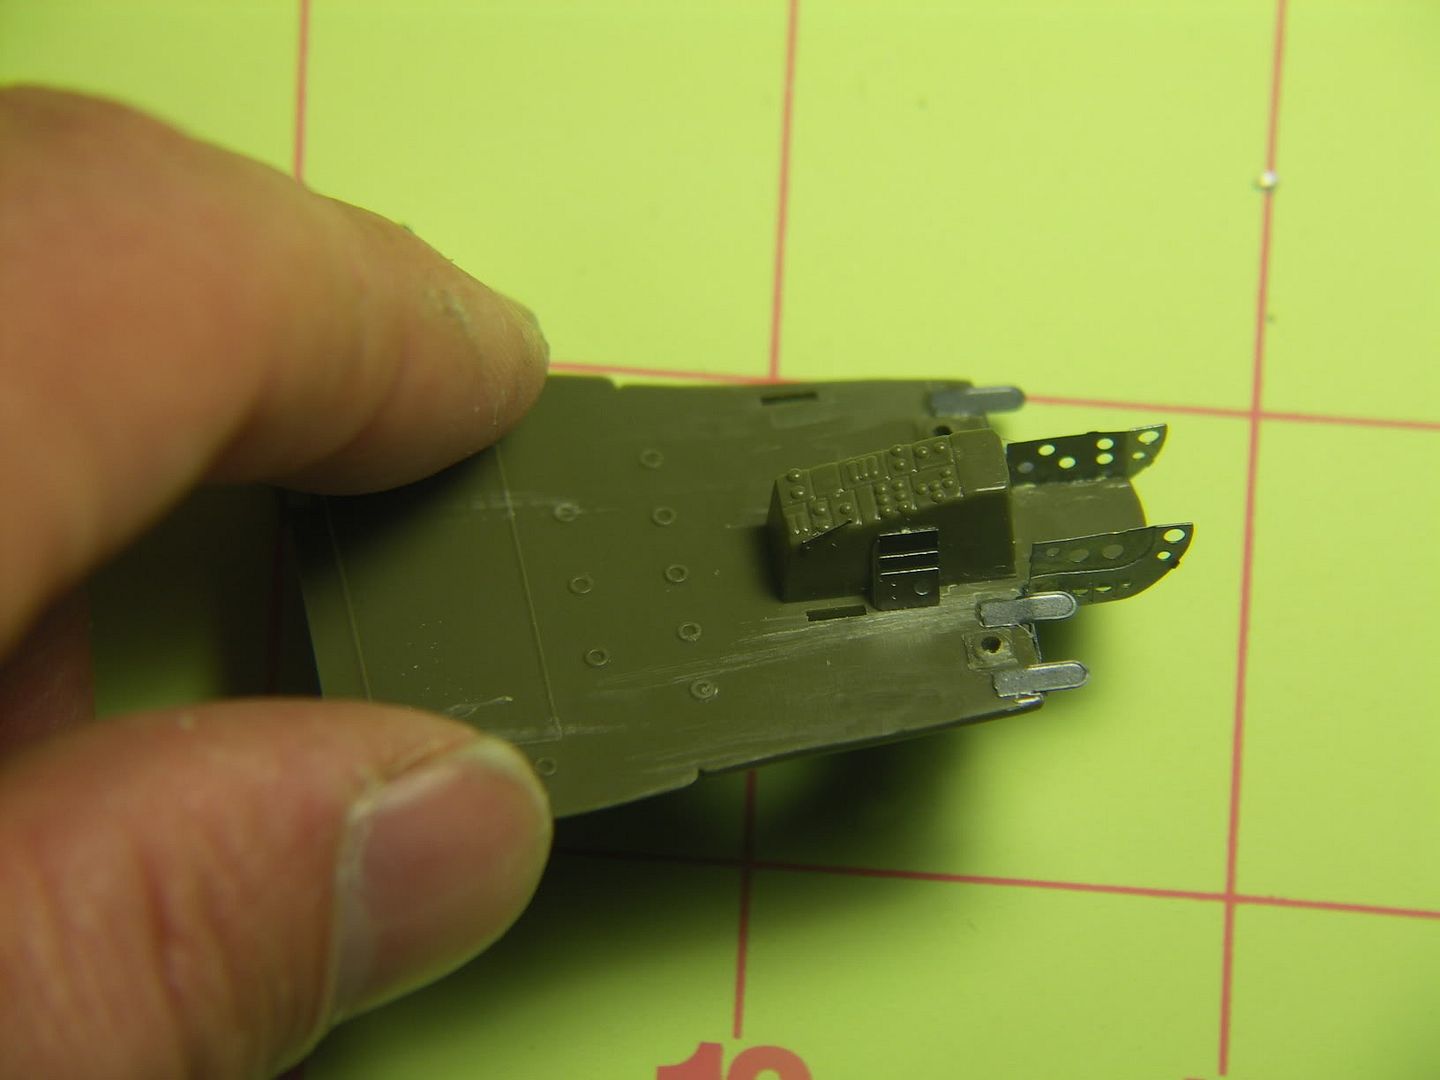
[img]http://PhotobucketSorry for the color on these next few. Anyway, then I added photoetch:
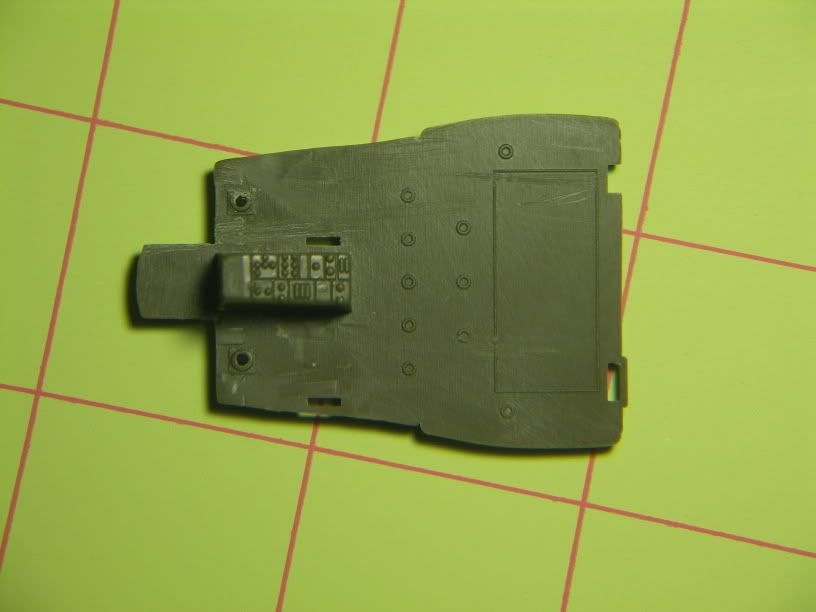
[img]http://Photobucket
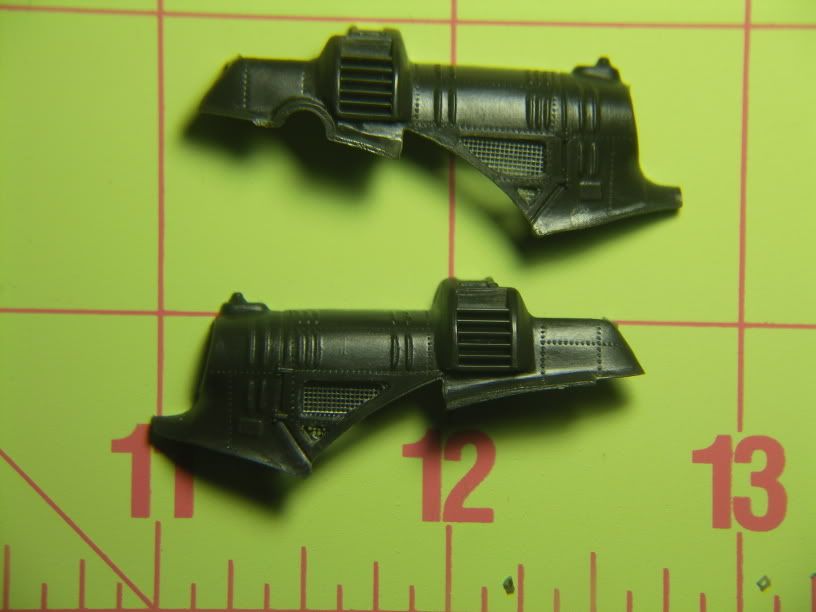
Next were the screens  in the transmission housing.  I just cut out the old ones and added the PE on the back.  Too bad my heavyhanded painting clogged some of the holes:

[img]http://Photobucket
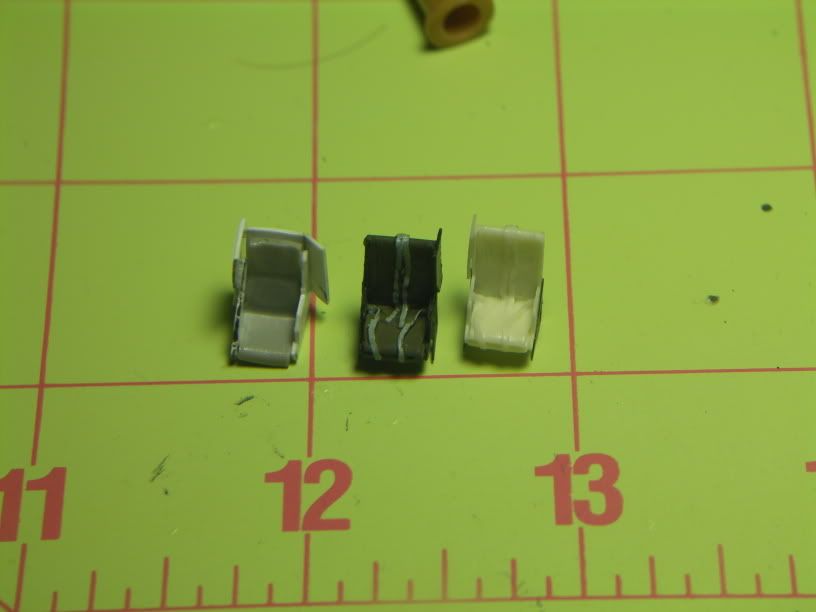
i first tried my hand at making a scatchbuilt armored seat using the seat from the Esci kit as a base.  It looked oK, but alas did not fit in the space provided by the kit.  So I used the resin seats instead and I think they looked pretty nice (scratchbuilt seat at left, partially built resin seat center, unpainted resin seat right:

[img]http://Photobucket
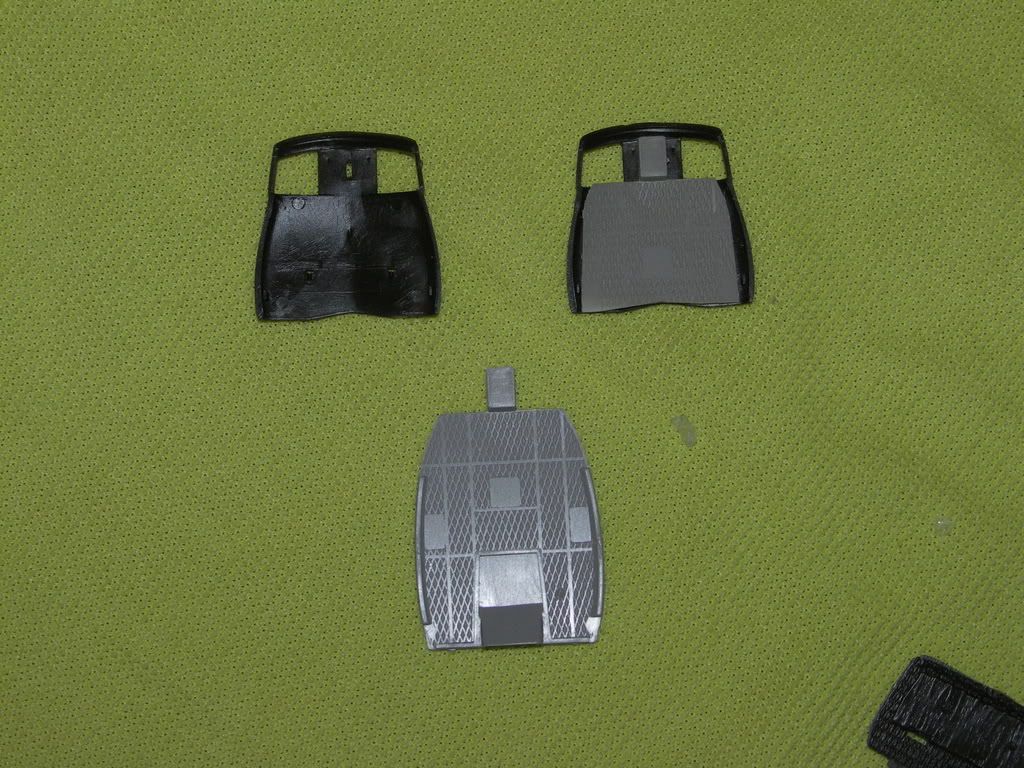
One of the shortcomings of the Italeri kit is the lack of a ceiling.  The Czech Masters set comes with a replacement roof, but I decided to use the ceiling from the Esci kit with the Italeri roof.  The overhead instrument panel will be a decal (Original kit roof left, original esci cieling bottom, merged roof and ceiling, right):

[img]http://Photobucket
Here is the control panal with the PE and acetate gauges added. too bad you can't really see it after it was all finished:

[img]http://Photobucket
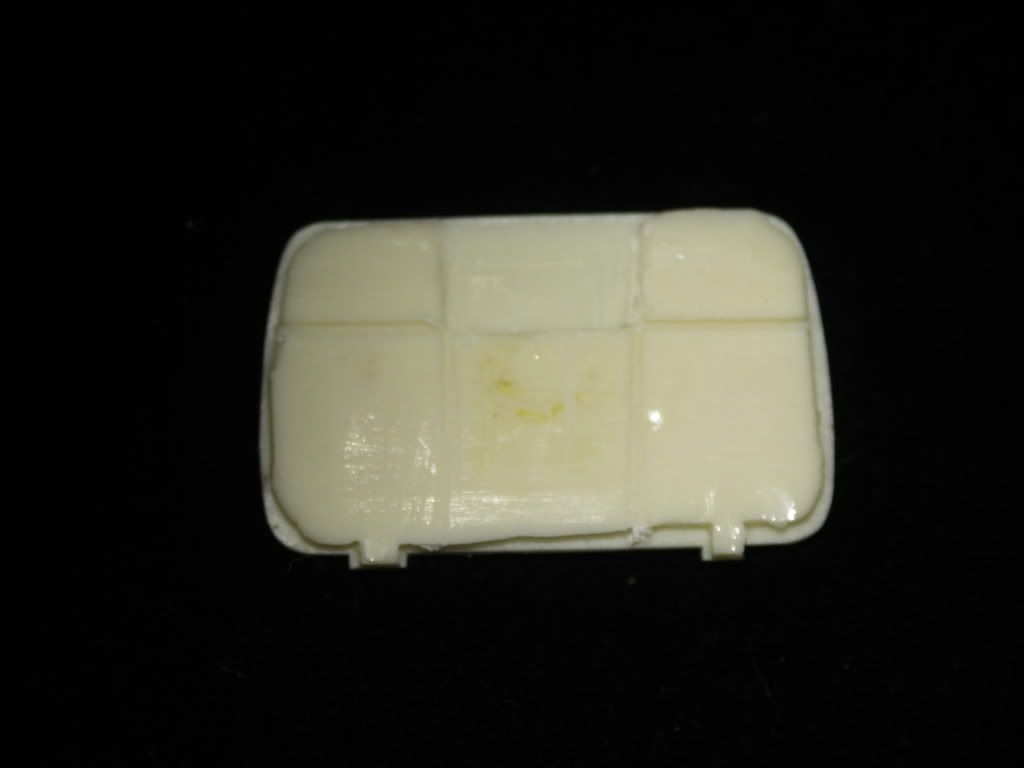
Here is the cabin floor with the ammo box from the Esci kit added and holes for the ammo chuts cut out.  An iteresting note here is that Italeri must have meant to release a kit armed with miniguns or twin 60s cause after i cut these holes, I turned the floor over and saw this:

[img]http://Photobucket
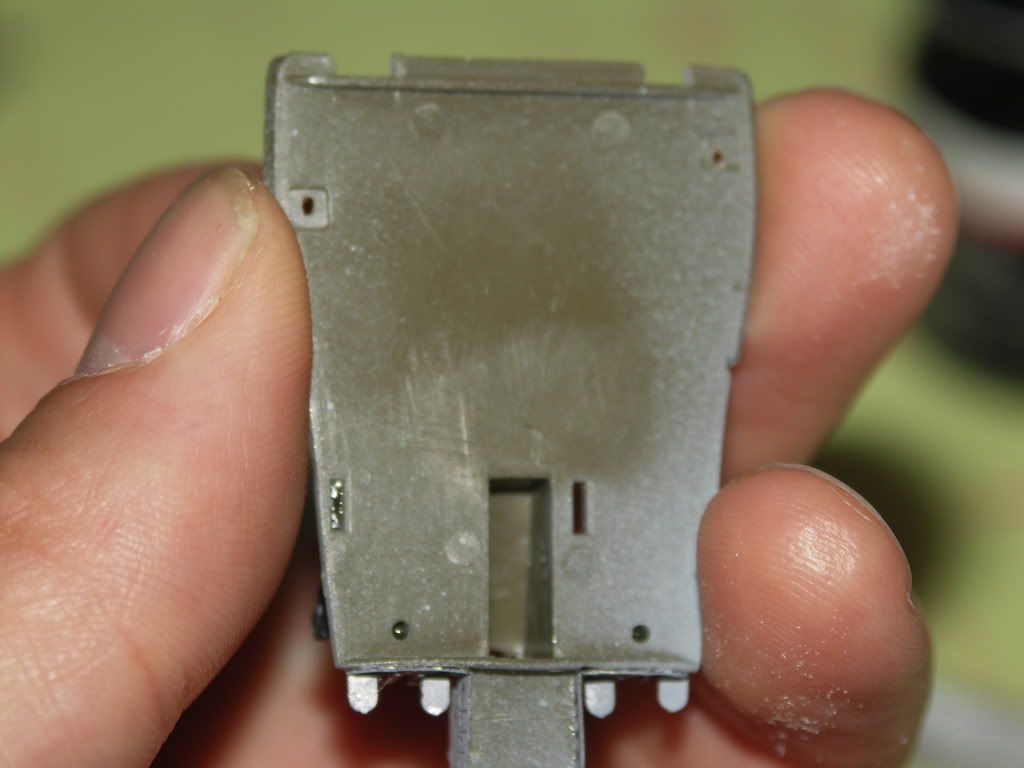
There were two small divits in the plastic exactly where i had placed the holes for the ammo chutes, assymetrical and in the correct positions!  To top it off the holes are also in the fuselage for the ammo chutes to exit.  A very pleasant surprise. 

The rear cabin wall is another area that i don't really like in the Italeri kit.  Those molded curtains are just aweful.  i originally planned to sand them off and scribe panel lines, but i decided to use the nice rear cabin bulkhead provided in the Czech Masters set (actually there are two in the set both with and without curtains).  The center panel was an access panel that was painted chromate green.  this gave me a chance to add a little color back there.  i also added smoke grenades made from pieces of cut plastic rod and painted OD on a piece of fine metal wire:

[img]http://Photobucket
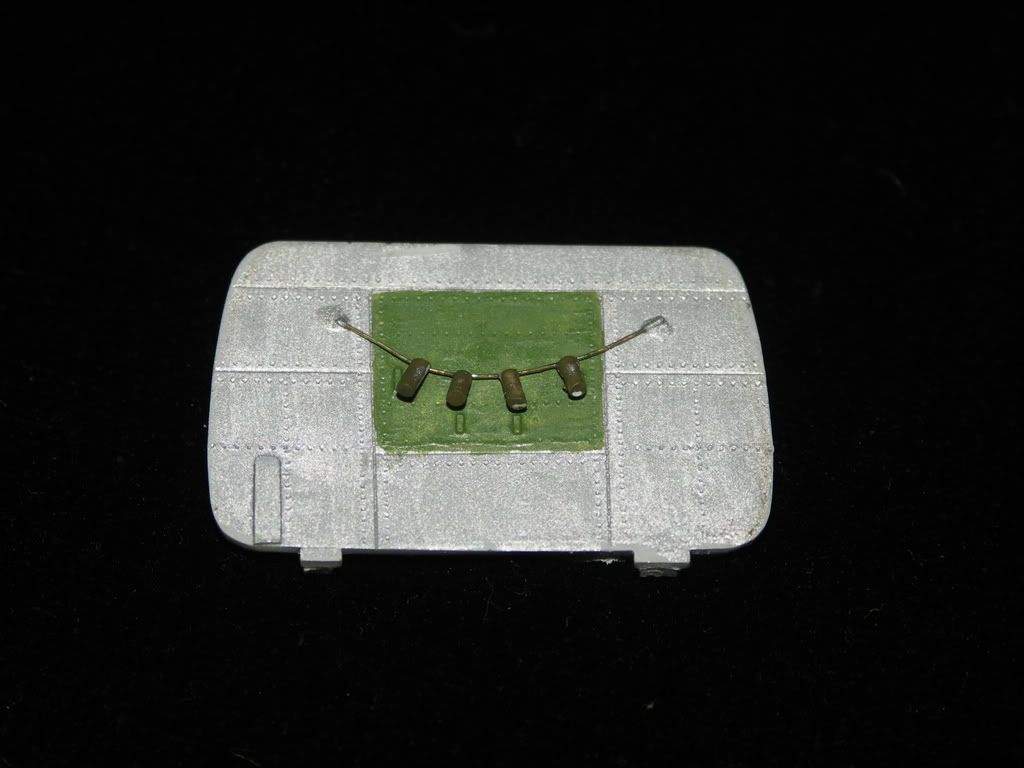

You will need to cut out a place for the transmission to sit if you use the replacement bulkhead:

[img]http://Photobucket
Next were the 60's.  here you can see the PE added to the OH-13 kit parts.  i put a tiny piece of styrene in between the handles to fill between the PE panels:

[img]http://Photobucket
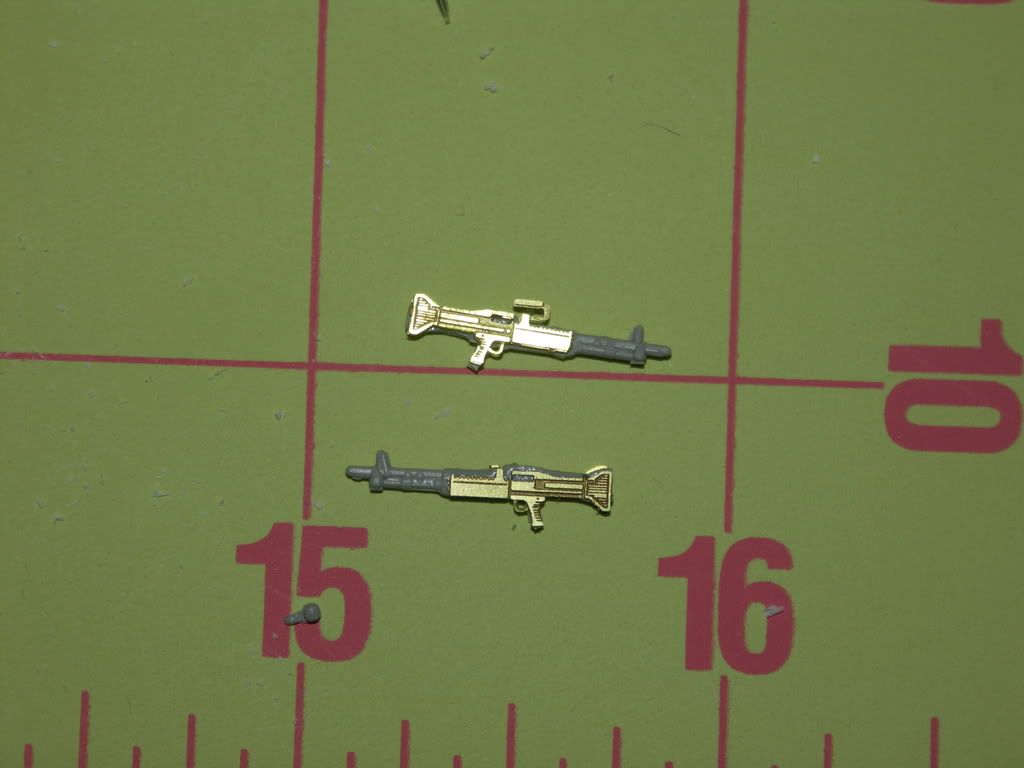
I painetd the 60's with MM gunmetal and flat black.

Here is the completed cocpit and cabin:

[img]http://Photobucket
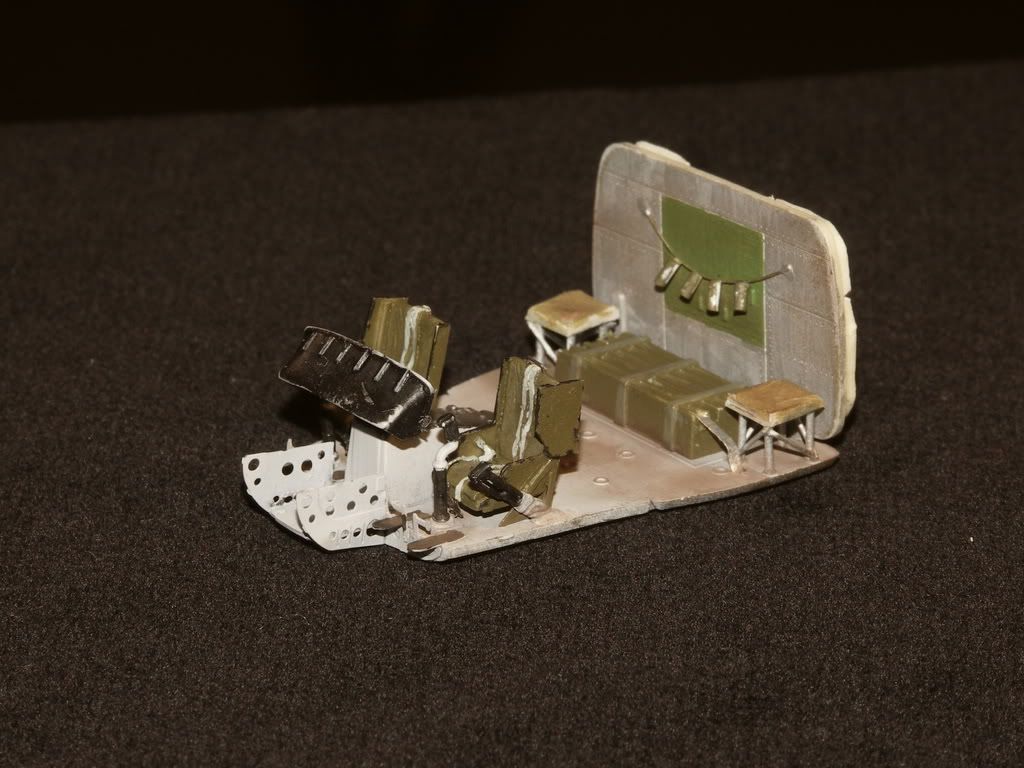
I weathered the cabin with dry patels and sealed with MM clear flat. Then i used a thinned gunmetal acrylic wash to help bring out details:

[img]http://Photobucket
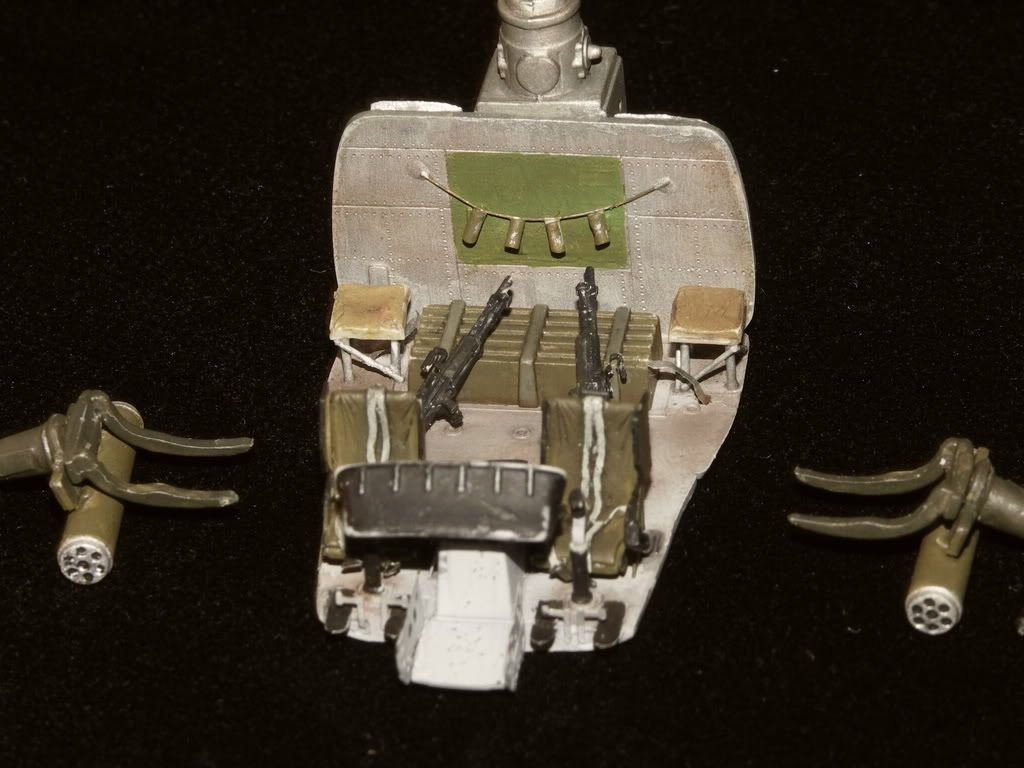
The gunner's seats are made from the Czech Masters bench seat which has four sections that are easy to cut apart.  all i did was add the legs and supports.  

I see this is getting way too long so I'll finish up with another post later if anyone is interested.  basically that finished up the cabin and closing it all up is next.

   Ray
 

  • Member since
    January 2007
  • From: Auburn, Alabama
Posted by rotorwash on Wednesday, April 9, 2008 7:21 AM

John,

   The four cylinders are supposed to be smoke grenades.  the gunner or CE would throw them out of the helo to mark targets.  i think thos emight be a little overscale though.  not real fancy, just cut pieces or styrene rod.

       Ray

Here's a restored Thunderbird showing the look I was going for:

Photobucket" border="0" />

  • Member since
    September 2003
  • From: Australia
Posted by Helo H-34 on Wednesday, April 9, 2008 3:55 AM
I really enjoy looking at all that detail and the wash certainly gives the cabin the proper well worn look . I was curious as to what the four little cylinder's hanging along the rear cabin wall are used for ?? . I sure do like all that detail Thumbs Up [tup] . Kind regards John

  • Member since
    January 2007
  • From: Auburn, Alabama
Posted by rotorwash on Wednesday, April 9, 2008 1:52 AM

Thanks for the encouragement guys!  Decided it was time to give the old girl some bite so here is the cabin (with a recommended wash) with M60A's and M134minis and XM157 rockets built up as well. The M60A's are from a Italeri OH-13 kit with Eduard photoetch parts and some styrene strip as well (closeups show they could use a little more paint). the miniguns and rockets are from the Esci/Italeri UH-1D kit, but the minigun pylons are from a Hasagawa/Revell UH-1H "Gunship" kit. I also scratchbuilt some of the mounting brace for the mini and added part of the feeder/delinker on the side. next step is the marriage of the fuselage and the cabin. test fitting indicates it's gonna be interesting.

    Ray

Photobucket[img]http://Photobucket[img]http://Photobucket[img]http://Photobucket" border="0" />[/img][/img][/img]
 

  • Member since
    September 2003
  • From: Australia
Posted by Helo H-34 on Tuesday, April 8, 2008 2:12 AM
The cabin looks perfect to me ray , The instrument panel detail is fantastic . I attempted to dry brush my instrument panel on my UH-1F and it comes no-where near as good as yours . The detail of the seats and belts are awesome . I'm quite envious at the level of detail you have gone to Bow [bow] . Best of luck with the rest of the build , Mine is coming along okay , everything is on track to start airbrushing by friday afternoon . Kind regards John

  • Member since
    December 2002
  • From: Modeling anything with "MARINES" on the side.
Posted by AH1Wsnake on Tuesday, April 8, 2008 1:51 AM

Very decent job so far, Ray. Thanks for sharing your progress and keep us updated!

Andy


"There are only two kinds of people that understand Marines: Marines and those who have met them in battle. Everyone else has a second-hand opinion."
  • Member since
    January 2007
  • From: Auburn, Alabama
UH-1B Gunship build
Posted by rotorwash on Monday, April 7, 2008 11:34 PM

after nearly three years of researching Hueys, I am finally getting around to building one! This is going to be my dad's ship Gladiator 36 of the 190th AHC.  Thanks to the AWESOME decals Joseph at Fireball made, I can finally attempt this thing. Here is the cabin after weathering.  It's the Italeri kit and I did a LOT of mods with PE, resin, and some scratchbuilding.  If your interested I have progress pics as well.  Anyway, ANY and all comments or crtiques are appreciated. I want to do a better job next time so lemme know what to do differently.

   Ray

Photobucket<a [img]http://Photobucket[img]http://Photobucket[img]http://Photobucket[img]http://Photobucket" border="0" />[/img][/img][/img]

JOIN OUR COMMUNITY!

Our community is FREE to join. To participate you must either login or register for an account.

SEARCH FORUMS
FREE NEWSLETTER
By signing up you may also receive reader surveys and occasional special offers. We do not sell, rent or trade our email lists. View our Privacy Policy.