SEARCH FINESCALE.COM

Enter keywords or a search phrase below:

Tamiya ChTZ Version T34/43 "OOB Build"

3891 views
23 replies
1 rating 2 rating 3 rating 4 rating 5 rating
  • Member since
    October 2007
  • From: Willow Oaks Compound / Model Bunker
Tamiya ChTZ Version T34/43 "OOB Build"
Posted by razorboy on Sunday, September 18, 2011 10:48 AM

A while back I purchased this Tamiya ChTZ T34/43 on sale at Squadron Mail Order.
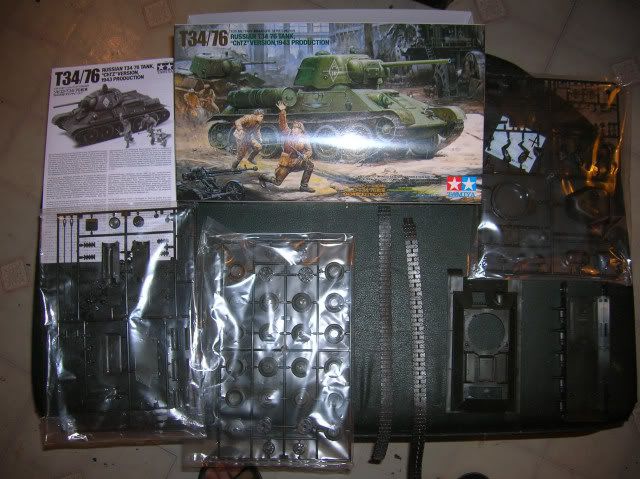

The kit went together well with only some minor filling and seam removal required ... the fuel tanks being the worse assemblies in the whole kit.
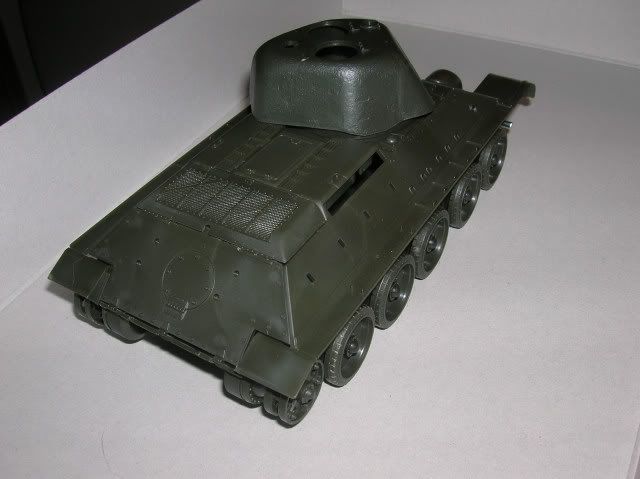

I determined to build this kit straight "Out of the Box" and have so far .... except for the addition of a styrene rod antennae which may or may not stay, I've yet to decide.
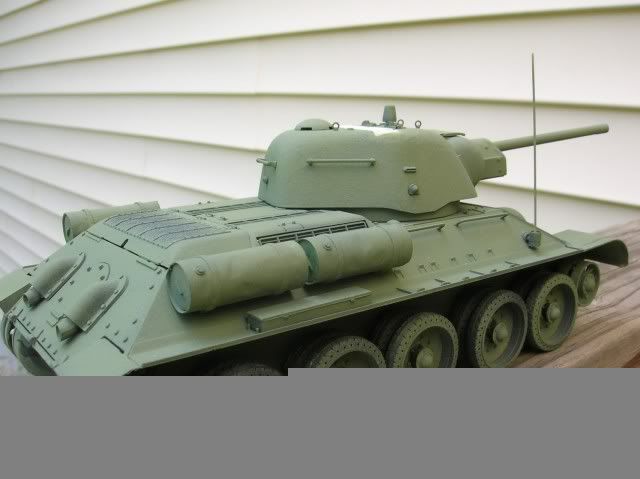

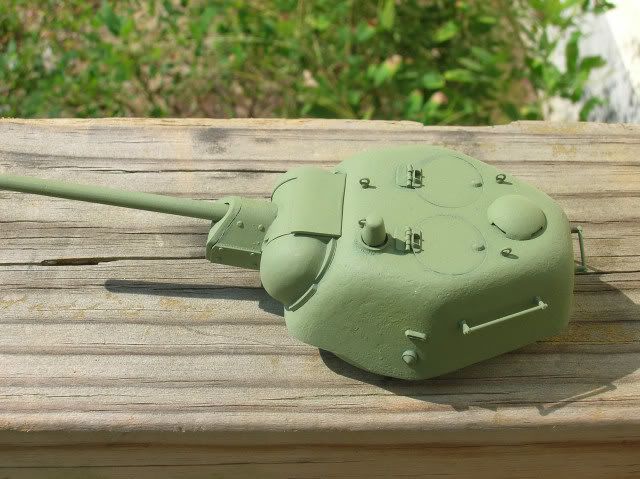
I use cheap ($1.00 / 4 oz. bottle) craft acrylics and mix my own colors. I have been doing this for the past several years and find that the resulting finish is as good as anything I ever bought pre-mixed, if handled properly. I use regular rubbing alcohol to thin it for my airbrush and as you can see, get a pretty good flat finish out of it.
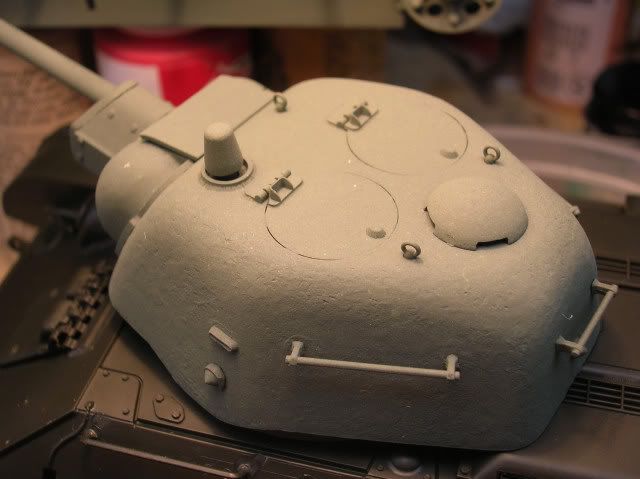

I wasn't happy at all with that first mix, so re-formulating with the addition of some bright leaf green, I came pretty close on the second try -

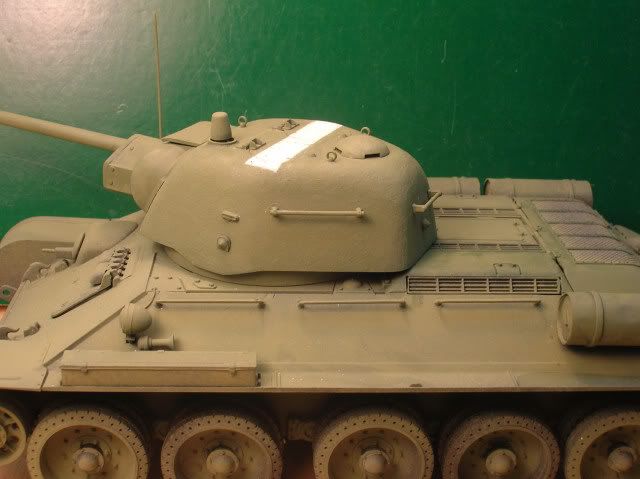
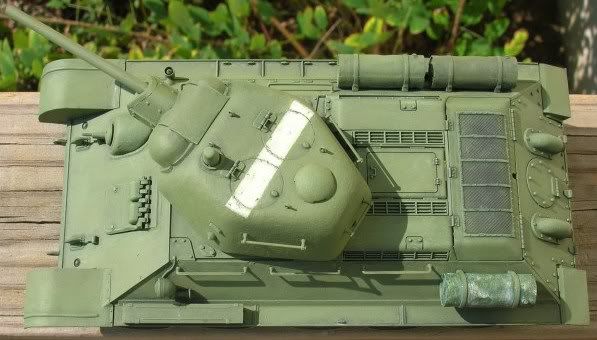
This particular T34 has a fairly narrow white, air recognition stripe atop the turret and this was achieved via 3M painter's "No stick" tape as a stencil, masking off the remaining surface and spraying three layers of really thin white -

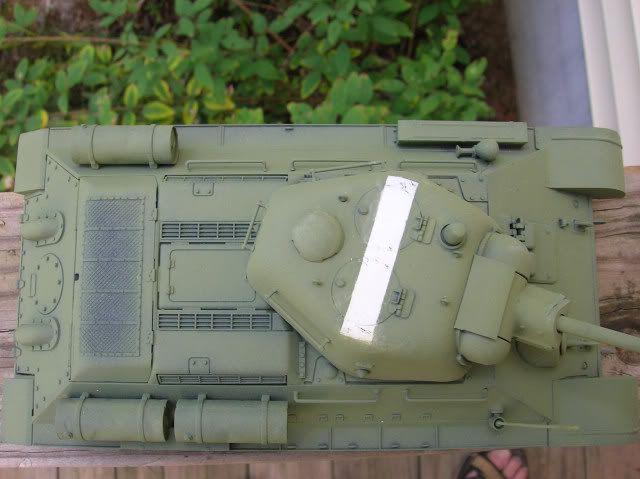
As you can see, I pre-shaded the engine deck area and rear plate with some thin, brushed on black paint. This should facilitate the final shading process in this area - 

I took the point of my #11 Exacto blade and "Chipped" the recognition band around the hatches and randomly here and there. A very light wash of dark green was applied over the stripe to simulate the tanks base coat showing through wear spots. Finally, I reapplied some white via brush in between the chips to accentuate the original white color.
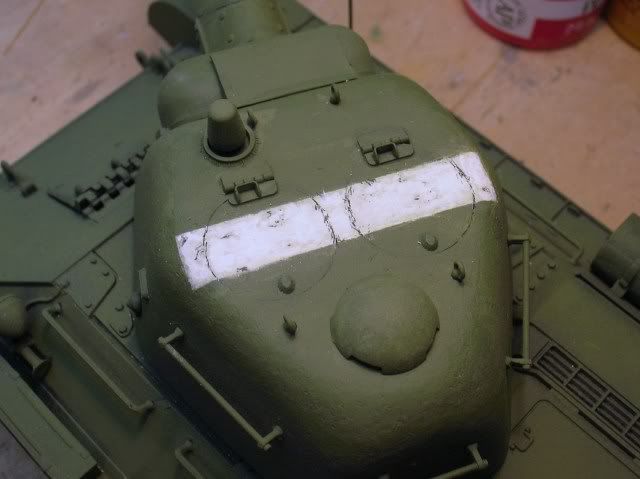

Here is the T34 with two progressively lighter shades dry-brushed over the dark wash -
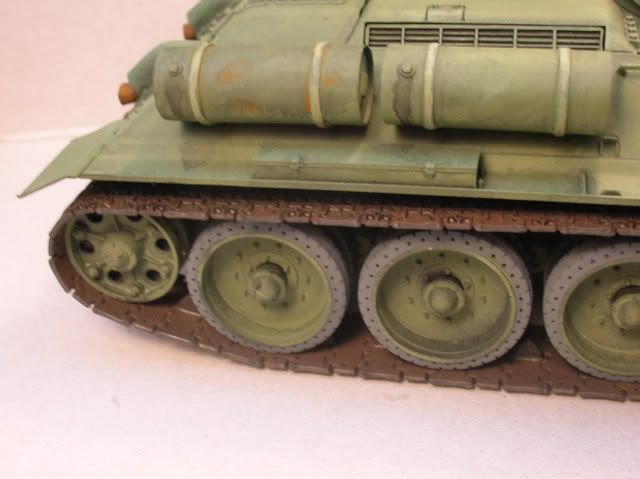
Got the track base coated and attached - I'm not concerned about making a "Sag" in the track as it will be displayed "In Motion" :

I started out to build this one OOB but I couldn't sleep nights if I didn't add a handle to that rear hull access hatch! Fashioned it from a bread bag twist tie wire -
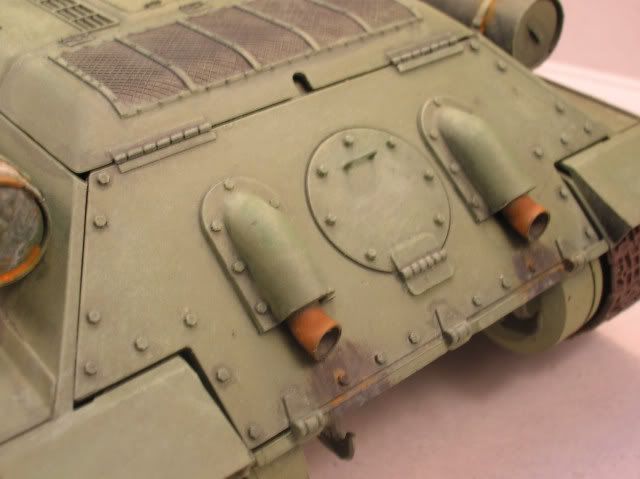
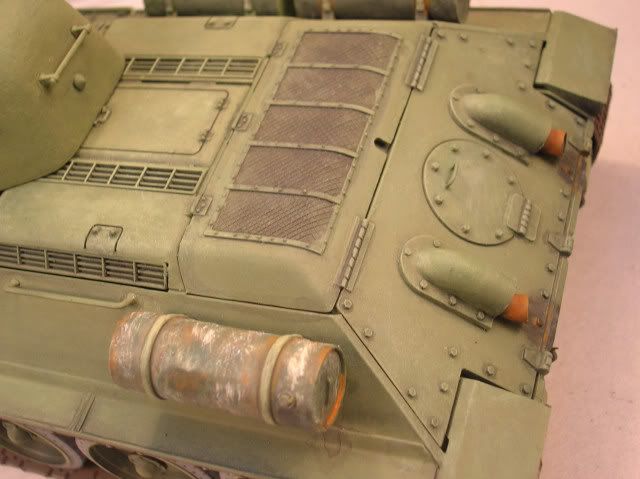
Still needs a bit of "Weld" (filling) on the rear plate but overall, she's pretty tight.  Washes will be added as the fine tuning continues - I got a bit liberal with the rust on that "Borrowed" fuel drum in the foreground.

rb


  • Member since
    December 2006
  • From: N. Georgia
Posted by Jester75 on Sunday, September 18, 2011 10:51 AM

That is a great finish, and you used the small bottles of craft paint thinned with achohol?? Nice work!! Will this be going into a dio?

Eric


  • Member since
    October 2008
  • From: SE Pennsylvania
Posted by padakr on Sunday, September 18, 2011 10:59 AM

I like the rust on the fuel barrel and exhaust.  How did you achieve that?

Paul

  • Member since
    October 2007
  • From: Willow Oaks Compound / Model Bunker
Posted by razorboy on Sunday, September 18, 2011 11:29 AM

Thanks guys, @Jester 75 - Yes, it will be in a dio. ... no figures, just the tank.  @ padakr - on the exhaust I first brushed on a liberal coat of medium brown.  Once this had dried I added a very thinned wash of orange / brown mixed.  Repeat these thin washes until satisfied with the finish.  You can darken or lighten by adding more orange or more brown or even a dab of black to your pallet.  It should be noted that I thin all paint applied by brush with water, I only use the alcohol when spraying. 

Thanks,

rb

  • Member since
    October 2007
  • From: Willow Oaks Compound / Model Bunker
Posted by razorboy on Sunday, September 18, 2011 11:30 AM

.... and on the fuel tanks the rust was applied in several applications of very thinned mixed rust.

  • Member since
    November 2005
Posted by Anonymous on Sunday, September 18, 2011 11:36 AM

Very nicely done...Tamiya T-34's can still hold up to today's standards if handled properly.  The casting texture on some of these are really impressive.  Of course, those pesky motorization holes have to be dealt with!  I actually bought Dragon's version of this tank not too long ago...

  • Member since
    October 2007
  • From: Willow Oaks Compound / Model Bunker
Posted by razorboy on Sunday, September 18, 2011 11:41 AM

Agreed, they really are nice kits.  As for the motorization holes in the hull sides and bottom ..... A bit of celluclay mud will cover those - http://www.razorboyminiatures.com/resources/Making%20Mud.pdf

  • Member since
    November 2005
Posted by Anonymous on Sunday, September 18, 2011 6:33 PM

razorboy

Agreed, they really are nice kits.  As for the motorization holes in the hull sides and bottom ..... A bit of celluclay mud will cover those - http://www.razorboyminiatures.com/resources/Making%20Mud.pdf

True enough...I usually glue some scrap styrene sheet in the interior then smooth over from the outside with putty...no more holes...

  • Member since
    December 2008
  • From: Northern Va
Posted by psstoff995's lbro on Sunday, September 18, 2011 9:22 PM

Looks great.

-Will young modeler Test fit master
  • Member since
    October 2007
  • From: Willow Oaks Compound / Model Bunker
Posted by razorboy on Saturday, September 24, 2011 4:43 PM


Bottle cap supports the body while the glue on the attaching rod (scrap sprue) dries.... This one will be in motion - "Getting some air" as it were.


rb

  • Member since
    March 2003
  • From: Rain USA, Vancouver WA
Posted by tigerman on Saturday, September 24, 2011 4:51 PM

I like the look of the color. 4oz for $1? Tamiya is what? A 1/2 oz. bottle for $3? I must be an idiot. LOL I guess the key is you make or mix your own. I'm too lazy to do that, but what you're doing makes some sense.

Nice build so far.

   http://i7.photobucket.com/albums/y269/wing_nut_5o/PANZERJAGERGB.jpg

 Eric 

  • Member since
    October 2007
  • From: Willow Oaks Compound / Model Bunker
Posted by razorboy on Saturday, September 24, 2011 4:57 PM

Actually I mis-spoke, they are about .98 cents for a 2 oz. bottle.  Still a good deal.

  • Member since
    January 2006
  • From: California
Posted by SprueOne on Saturday, September 24, 2011 5:00 PM

"getting air" yes I like that action 


I also need to look into the craft paints for that right price 


Anyone with a good car don't need to be justified - Hazel Motes


Iron Rails 2015 by Wayne Cassell Weekend Madness sprueone

  • Member since
    October 2007
  • From: Willow Oaks Compound / Model Bunker
Posted by razorboy on Sunday, September 25, 2011 5:35 PM

I started on the ground work today -

  • Member since
    October 2007
  • From: Willow Oaks Compound / Model Bunker
Posted by razorboy on Saturday, October 1, 2011 11:01 AM


There's still a bit of work left on the base and the T34 but these shots display the final position of the tank on the base .....

  • Member since
    October 2007
  • From: Willow Oaks Compound / Model Bunker
Posted by razorboy on Sunday, October 2, 2011 8:47 AM

... and with the base sides covered ..... 


  • Member since
    January 2006
  • From: California
Posted by SprueOne on Sunday, October 2, 2011 12:20 PM

Oh yeah, this is working !

great job capturing this action 


Anyone with a good car don't need to be justified - Hazel Motes


Iron Rails 2015 by Wayne Cassell Weekend Madness sprueone

  • Member since
    October 2007
  • From: Willow Oaks Compound / Model Bunker
Posted by razorboy on Sunday, October 2, 2011 12:50 PM

Done .....

rb

  • Member since
    January 2007
Posted by the doog on Thursday, October 6, 2011 6:12 PM

Great idea for a simple dio scene!

A nice job on that tank too, razorboy!

  • Member since
    October 2007
  • From: Willow Oaks Compound / Model Bunker
Posted by razorboy on Friday, October 7, 2011 3:46 AM

Thanks doog!

  • Member since
    December 2008
  • From: Northern Va
Posted by psstoff995's lbro on Friday, October 7, 2011 8:02 PM

Great work on the dio. I like the action portrayed in it with the 'jump' without needing making a large complex dio. Very nice.

-Will young modeler Test fit master
  • Member since
    September 2011
  • From: San Diego, California
Posted by GeneralDodonna on Friday, October 7, 2011 11:40 PM

Great Job!

that commander is in a hurry to get somewhere!

-Will

  • Member since
    October 2007
  • From: Willow Oaks Compound / Model Bunker
Posted by razorboy on Saturday, October 8, 2011 5:14 AM

Thanks All!

JOIN OUR COMMUNITY!

Our community is FREE to join. To participate you must either login or register for an account.

SEARCH FORUMS
FREE NEWSLETTER
By signing up you may also receive reader surveys and occasional special offers. We do not sell, rent or trade our email lists. View our Privacy Policy.