SEARCH FINESCALE.COM

Enter keywords or a search phrase below:

'Close Contact' - Iraqi Street Fight Scene (WIP)

19870 views
107 replies
1 rating 2 rating 3 rating 4 rating 5 rating
  • Member since
    July 2003
  • From: Sweden
'Close Contact' - Iraqi Street Fight Scene (WIP)
Posted by Tiking on Monday, March 17, 2014 4:59 AM

I have come a long way with this diorama and had not think to post it here but thought it might be helpful to some others. So here goes:

Hello everyone. It's been a long time and a new year. :) Thought you might like to see what I have been up to. I wanted to put a building together from scratch and wanted to test out using materials I have never used before. But I understand this method has been used many times before and still in use today. So nothing new here.

I do hope the pics I put will tell the story much clearer than me typing lots of fancy words. This is no way comparable to any of the dioramas here on Armorama that I have seen, so this build might just be boring to most. But it is a build that I have enjoyed doing so far because the method is new to me.

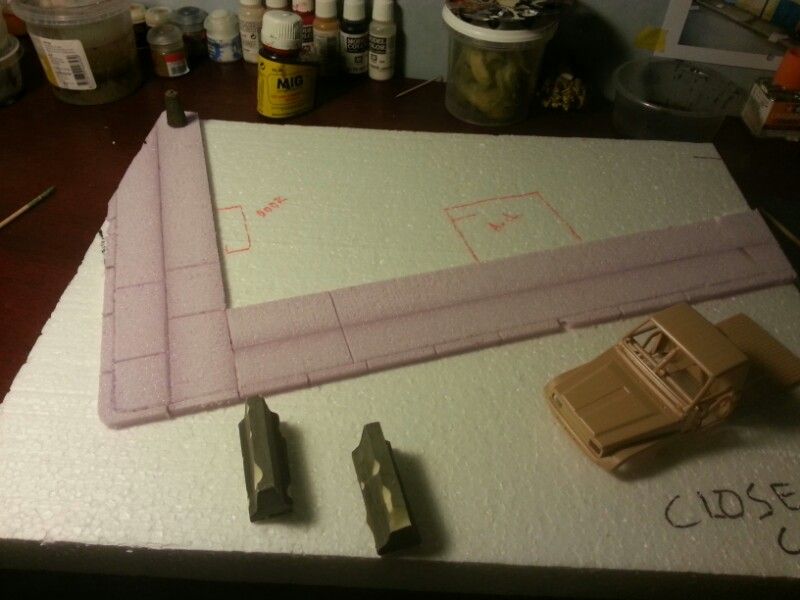
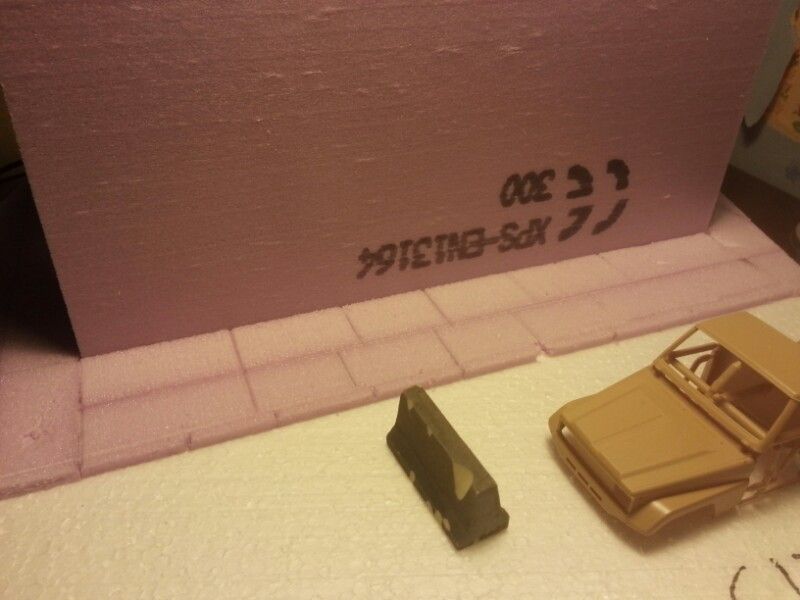
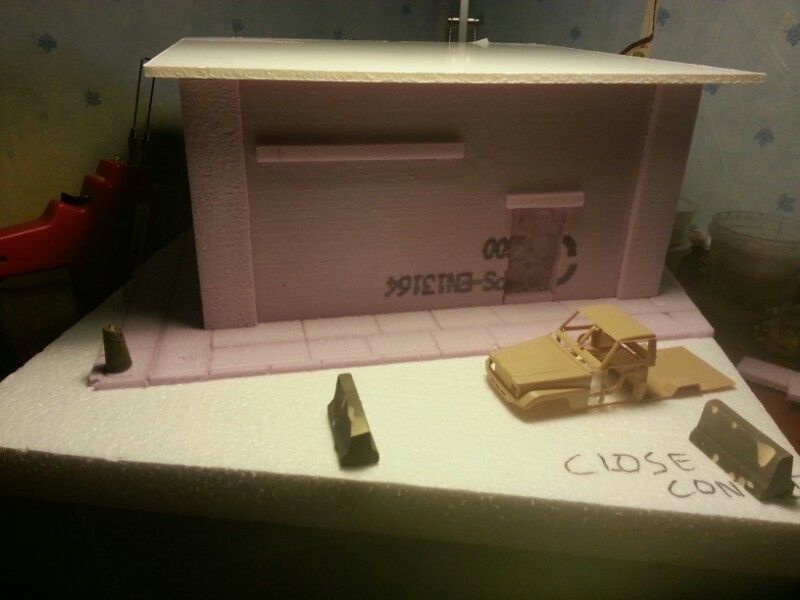
This time I am working on a 1/35 diorama which I am going to call; 'Close Contact' . Focus is going to be on figures( not that good. Still a beginner) and a pickup truck on the street in Iraq. As you may see, I have already started and well underway but there is much left to do. So join me for those who are interested in military subject matters .

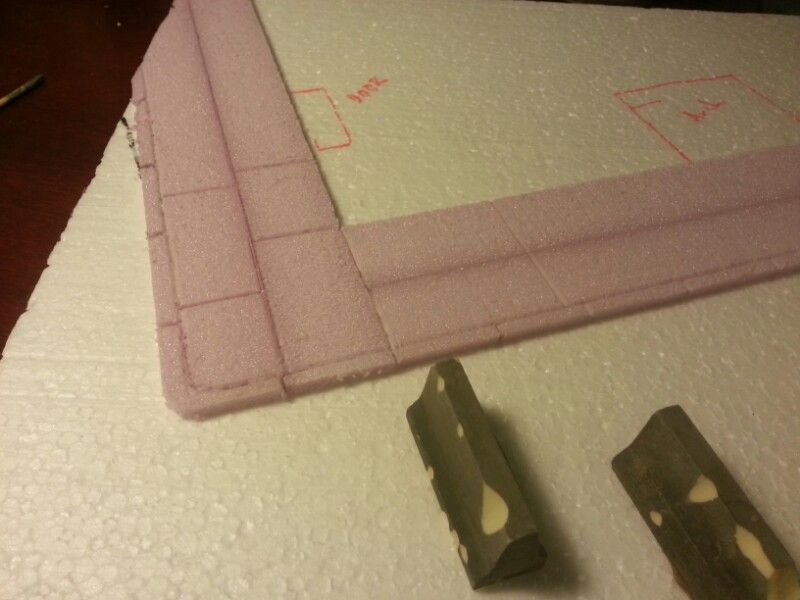
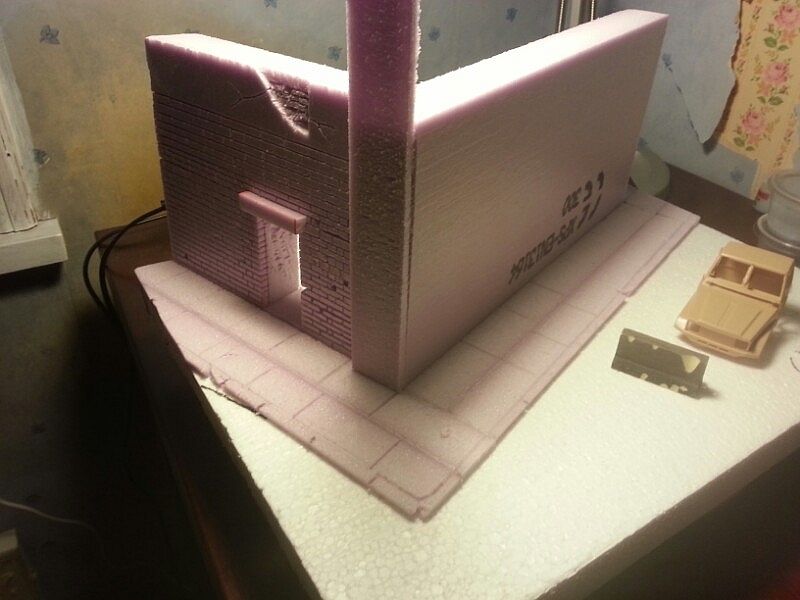
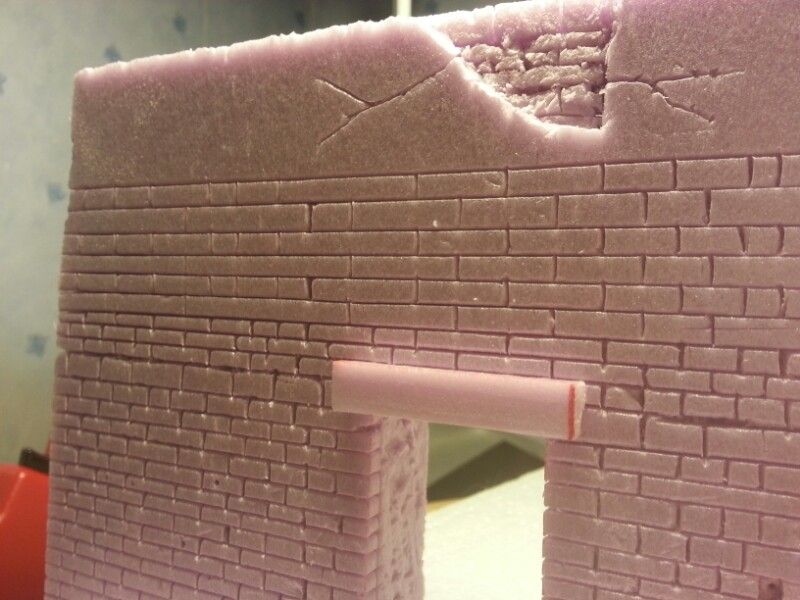
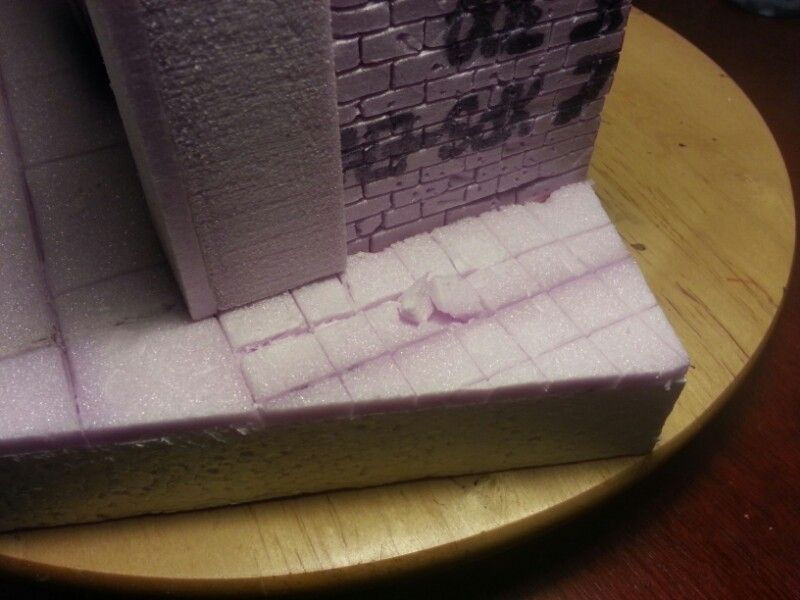
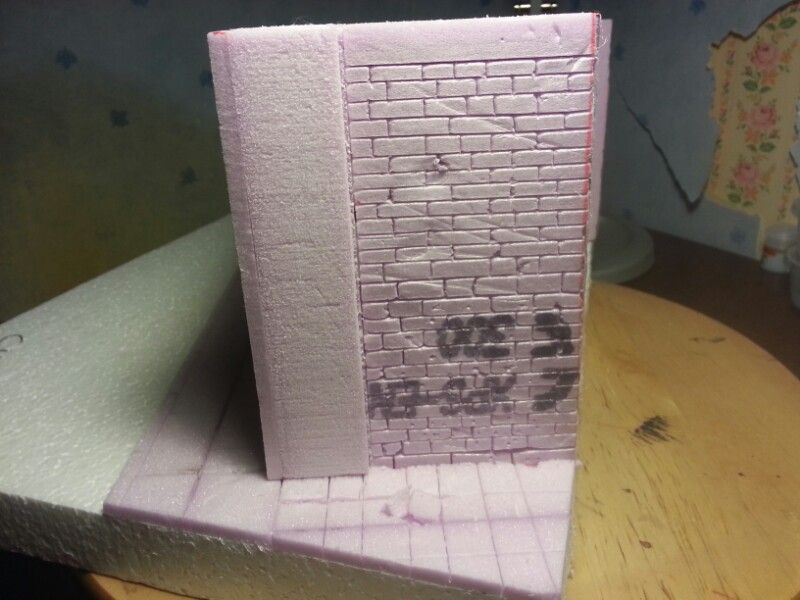
I decided to use pink form for the entire building facade . This is my first time working with pink form materials to build up a scene and I must say that I am pretty impressed with myself. I think it looks good but you can decide for yourselves.

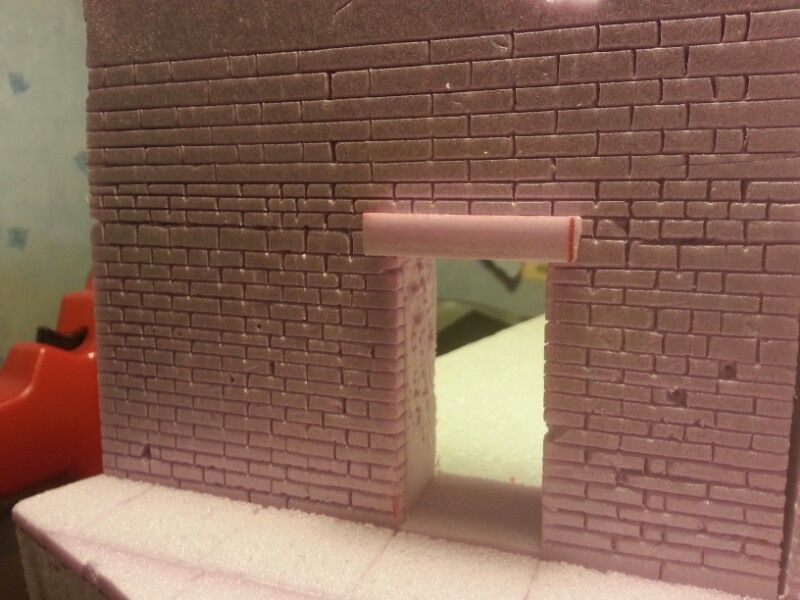
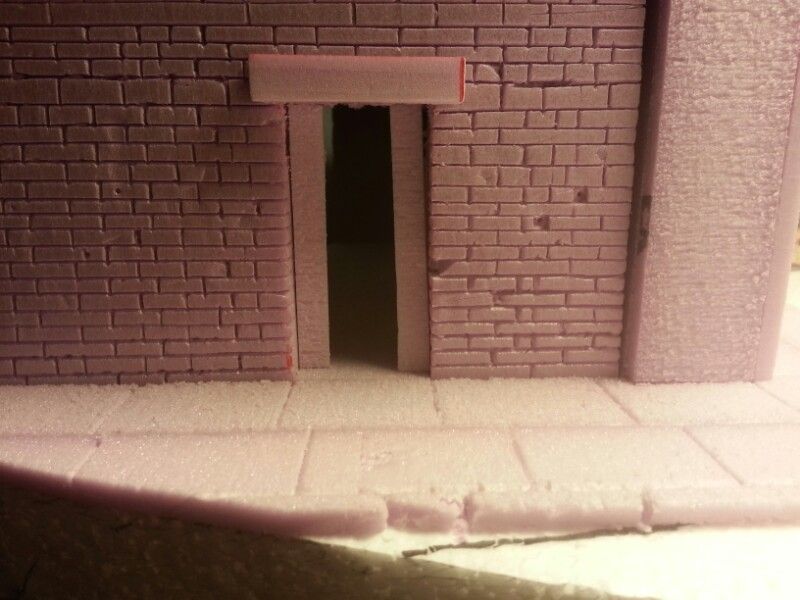
I used a xto knife and a ruler and made careful incisions into the foam and then took a pencil and scribed it to make the bricks more defined, which I am quite satisfied with the results.

Pictures say a thousand words. You be the judge :

The pictures are as it is. So forgive me for the quality:

Charles King ----------------------- You may think you know...but you don't

  • Member since
    July 2003
  • From: Sweden
Posted by Tiking on Monday, March 17, 2014 4:59 AM

Here I have painted the pink form with a concrete color that I had mixed at a paint store. I must say that the colors did much to the outlook of the facade. It made the foam look like concrete. After the concrete paint was dried I went over the form with a black wash which amazingly brought out the details and made the concrete even more believable. My not look like from your point of view. But I am happy eith the look.

Charles King ----------------------- You may think you know...but you don't

  • Member since
    July 2003
  • From: Sweden
Posted by Tiking on Monday, March 17, 2014 5:02 AM

The roll-down doors are made ​​of styrene. The I-beams is the one that I have on both sides of the doors to support it. The thick bar is the one I have at the bottom of the gate. Hope I was clear on that? Hard to explain in a good way. ;) The whole idea is to get an overall look that will look believable.

Charles King ----------------------- You may think you know...but you don't

  • Member since
    July 2003
  • From: Sweden
Posted by Tiking on Monday, March 17, 2014 5:04 AM

This is an interesting technique which seems to be easy to master. I've done a little more work. More wash and painting done on the walls and painted one side a yellowish color..

Charles King ----------------------- You may think you know...but you don't

  • Member since
    March 2012
  • From: Corpus Christi, Tx
Posted by mustang1989 on Monday, March 17, 2014 5:08 AM

This has certainly got the makings of something very interesting!! Good work so far.


 Forum | Modelers Social Club Forum (proboards.com) 

  • Member since
    July 2003
  • From: Sweden
Posted by Tiking on Monday, March 17, 2014 5:31 AM

Thanks for looking.

Charles King ----------------------- You may think you know...but you don't

  • Member since
    July 2003
  • From: Sweden
Posted by Tiking on Monday, March 17, 2014 5:31 AM

I've done a little more work. More wash and painting done on the walls. Added the tarmac roads, represented by using fine sand grain sand paper. Made holes for the drainage covers and Manholes. These are from Miniart. I then proceeded to paint the holes using a black color to give it depth. Then it was just a matter of fitting the covers over the holes. Making the holes were easy as the base is white form. Made cracks and small potholes which were easy. The cheap one. Added graffiti on the wall. Then I added real dust, real dirt, and earth pigments( from MIG) and mixed everything to blend it all in. on the roads.

Charles King ----------------------- You may think you know...but you don't

  • Member since
    January 2012
  • From: Hatfield
Posted by Misty on Monday, March 17, 2014 5:35 AM

theres something you dont see every day! looks great . ive never done a diorama so ill be watching.

  • Member since
    September 2007
  • From: Truro Nova Scotia, Canada
Posted by SuppressionFire on Monday, March 17, 2014 6:02 AM

First time working with extruded Styrofoam &  scratch building buildings?

Excellent results!

If not for the WIP pictures I would guess it was a expensive resin kit. Your eye for detail and realism is very good. Thanks for posting your work.;)

http://i6.photobucket.com/albums/y211/razordws/GB%20Badges/WMIIIGBsmall.jpg


  • Member since
    July 2003
  • From: Sweden
Posted by Tiking on Monday, March 17, 2014 6:21 AM

Thanks guys. This is also my first time working with extruded foarm. I wanted to test out this material and only work with cheap materails to show that you do not need expensive after market kits to achieve first class results. At least that is what I think. Others might feel different. But if money is an issue( for me it is), then why not experiment. :)

Charles King ----------------------- You may think you know...but you don't

  • Member since
    February 2011
  • From: St louis
Posted by Raualduke on Monday, March 17, 2014 8:09 AM

That's some damn fine work.I'll be keeping an on this one

  • Member since
    November 2008
  • From: Jefferson City, MO
Posted by iraqiwildman on Monday, March 17, 2014 8:33 AM

Good looking Haji-ville.

Tim Wilding

  • Member since
    January 2006
  • From: NW Washington
Posted by dirkpitt77 on Monday, March 17, 2014 10:31 AM

Very, very cool! You've got some skills, man. Looks great so far.

    "Some say the alien didn't die in the crash.  It survived and drank whiskey and played poker with the locals 'til the Texas Rangers caught wind of it and shot it dead."

  • Member since
    July 2003
  • From: Sweden
Posted by Tiking on Monday, March 17, 2014 10:40 AM

So far so good.

Charles King ----------------------- You may think you know...but you don't

  • Member since
    July 2003
  • From: Sweden
Posted by Tiking on Tuesday, March 18, 2014 1:35 AM

The over all look so far. This is view from the left side of the building:

Charles King ----------------------- You may think you know...but you don't

  • Member since
    July 2003
  • From: Sweden
Posted by Tiking on Tuesday, March 18, 2014 1:36 AM

Did some work on the roof. I glued sand paper to the sides and the top of the form to represent Stucco. At the top edges I used wall paste and then used the tip of paint brush to stipple the paste which in returned produced the Stucco effect. At on of the roof corners I chipped out pieces to represent broken concrete, maybe during a mortar attack or just simply worn out concrete. Either way, it looked the part. Then I painted everything with a concrete paint. Then, I used a sponged to dap a yellow paint. Then I went over everything with black wash to give it a worn aged look. Again, sorry for the bad pics:


Charles King ----------------------- You may think you know...but you don't

  • Member since
    January 2012
  • From: Hatfield
Posted by Misty on Tuesday, March 18, 2014 3:20 AM

theres not much wrong with the pics, it all looks very realistic.

  • Member since
    May 2009
  • From: Poland
Posted by Pawel on Tuesday, March 18, 2014 3:31 AM

Hello!

The dio is already looking very nice. What did you use to do the water stains on the tarmac? Good luck with your project and have a nice day

Paweł

All comments and critique welcomed. Thanks for your honest opinions!

www.vietnam.net.pl

  • Member since
    March 2012
  • From: Corpus Christi, Tx
Posted by mustang1989 on Tuesday, March 18, 2014 4:34 AM

DDDDDDDDDaaaaayuuum!! Breezin right through this and it looks very realistic!! Keep it comin'!


 Forum | Modelers Social Club Forum (proboards.com) 

  • Member since
    July 2003
  • From: Sweden
Posted by Tiking on Tuesday, March 18, 2014 7:16 AM

Thanks for the compliments gentlemen. Pawel, btw, your work is amazing. Big fan of your. I'm honored you dropped in to look at my work which is nothing compared to yours. THe water stain is simply thinner.

Charles King ----------------------- You may think you know...but you don't

  • Member since
    March 2014
Posted by DHSKEVIN on Tuesday, March 18, 2014 7:20 AM
Damn nice building , ive been over there during the war and looks spot on, although maybe its just the pic but the colors of alot of buildings over in iraq were ive been were a bit lighter shade and more sun washed (mosul area)


Wish i could make buildings like that, im just stuck buying pre sculpted kits :( lol
  • Member since
    July 2003
  • From: Sweden
Posted by Tiking on Tuesday, March 18, 2014 7:25 AM

Thanks. Yeah I realized that but thought there are some that are just concrete based as they are. But I will remember that for the next build. Thank you.

Charles King ----------------------- You may think you know...but you don't

  • Member since
    July 2003
  • From: Sweden
Posted by Tiking on Tuesday, March 18, 2014 7:26 AM

Did my first try at scratch building a satellite Dish. Nothing fancy or over complicated. I decided that I want the roof to be removable. So I added tooth-picks at the top of the lower wall. Then I will be able to push the roof directly on top of the lower piece, thus holding it in place without the need for gluing. Scratch built bracket supports for signs and what-nots, signs, air-conditioner...Detailed the broken tile on the sidewalk. Iraqi sign.Some weathering done to the inside cab of the driver side of the pickup. Added some wiring to give the impression that the air-conditioner is functional, so to speak.

Now, the look may not be 100% prototypical but it is the overall look I am looking for, especially when I am on a budget and do not have much to spend on commercial accessories. So for you nit-pickers, you can hold back your cries. :)


---------------------------


Charles King ----------------------- You may think you know...but you don't

  • Member since
    February 2011
  • From: St louis
Posted by Raualduke on Tuesday, March 18, 2014 7:33 AM

No nitpicking here,great work

  • Member since
    November 2009
  • From: SW Virginia
Posted by Gamera on Tuesday, March 18, 2014 7:48 AM

Hey looks great!!! I've heard of people using the pink foam for structures but really didn't know how they went about it. Thanks for showing us step by step how it's done!

"I dream in fire but work in clay." -Arthur Machen


  • Member since
    July 2003
  • From: Sweden
Posted by Tiking on Tuesday, March 18, 2014 8:06 AM

It has been my pleasure Gamera.

Charles King ----------------------- You may think you know...but you don't

  • Member since
    February 2003
Posted by Jim Barton on Tuesday, March 18, 2014 2:28 PM

Nice!Yes

"Whaddya mean 'Who's flying the plane?!' Nobody's flying the plane!"

  • Member since
    July 2003
  • From: Sweden
Posted by Tiking on Tuesday, March 18, 2014 3:50 PM

Thanks for the look guys.

Charles King ----------------------- You may think you know...but you don't

  • Member since
    March 2014
Posted by DHSKEVIN on Tuesday, March 18, 2014 7:35 PM

The Iraqi's are horrible electricians, there wiring over there is a complete mess. Heres some ref photos for you, my pictures from my deployment. our OP on the roof of a Iraqi police station in downtown Mosul.

the sat dish wiring with the A/C units was a spiderweb of loose wires and crap. hope this helps.

  • Member since
    July 2003
  • From: Sweden
Posted by Tiking on Wednesday, March 19, 2014 12:23 AM

Fantastic!!!! Thank you so much for these. Definitely will help with the rest of the dio.

Charles King ----------------------- You may think you know...but you don't

JOIN OUR COMMUNITY!

Our community is FREE to join. To participate you must either login or register for an account.

SEARCH FORUMS
FREE NEWSLETTER
By signing up you may also receive reader surveys and occasional special offers. We do not sell, rent or trade our email lists. View our Privacy Policy.