SEARCH FINESCALE.COM

Enter keywords or a search phrase below:

P2V-5 Lockheed Neptune Start-to-Finish

960 views
11 replies
1 rating 2 rating 3 rating 4 rating 5 rating
  • Member since
    March 2012
  • From: Louisville, KY
P2V-5 Lockheed Neptune Start-to-Finish
Posted by Builder 2010 on Tuesday, July 16, 2024 11:24 AM

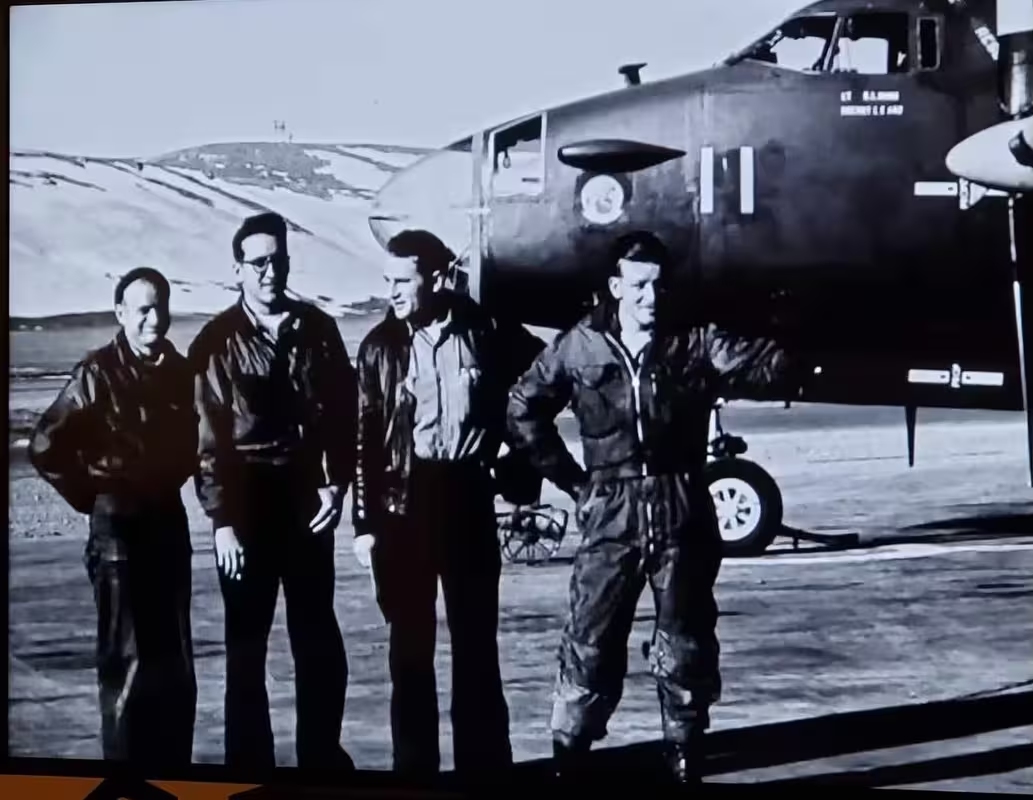
Unlike my many other entries, this one is a partiulary lower-tech one. In fact, it's the first kit I've done in a long time with only three sprues and raised panel lines. it's a Cold War aircraft that was one of the first to combine piston and jet engines along with the B-36. I normally don't do planes unless they're very special. This one is. My wife recently reconnected with several of her first cousins after a many-years hiatus (no real reason). One of which is Larry. Larry is 82 and was a flight chief on a P2V-5 during the early 60s. He flew the plane that first tested the nuclear depth charge (must less dramatic than one would imagine). His plane was also the first of the series that started using the ultra-powerful Wright R-3350 Turbo-compound, the last and most powerful radial aircraft developed. The 3350-30W produced about 4,000 hp. The addtion of the turbines directly geared to the engine crankshaft added about 500 hp with the aditional of about 500 pounds extra weight.

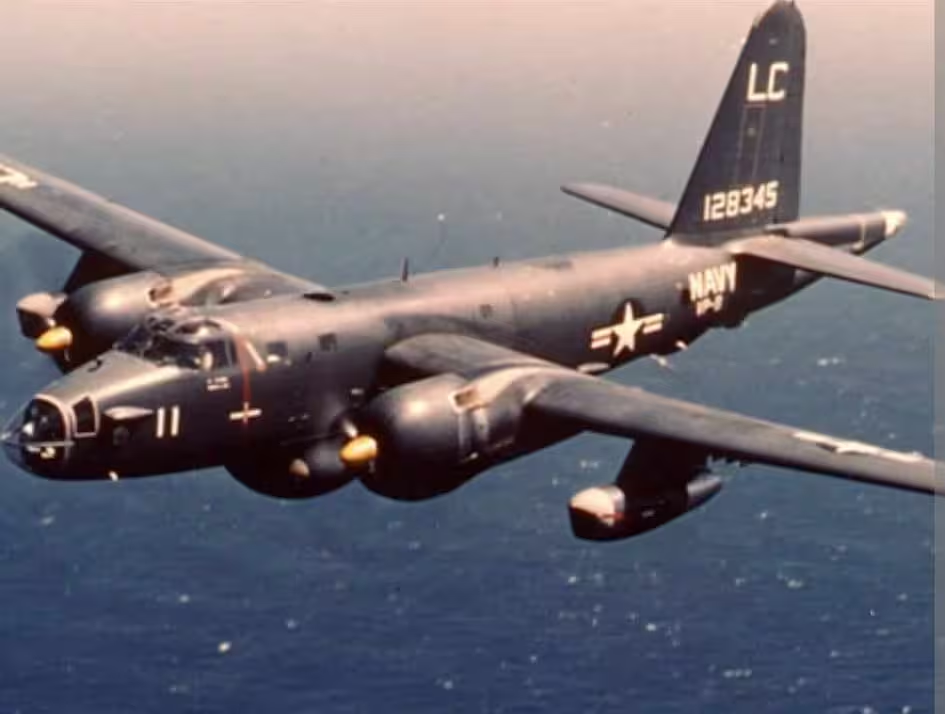
Larry sent me pictures of his plane that gave me the customization info. The kit instructions called out Glossy Sea Blue. I bought a bottle of Mission Model paint of that color. Then Larry told me his plane was gray. More research... the later color was FS18061, Glossy Engine Gray. I traded the one for the other.

This is another plane in his Squadron, VP-8, before they painted the upper fuze white. I'm going with the later color scheme.

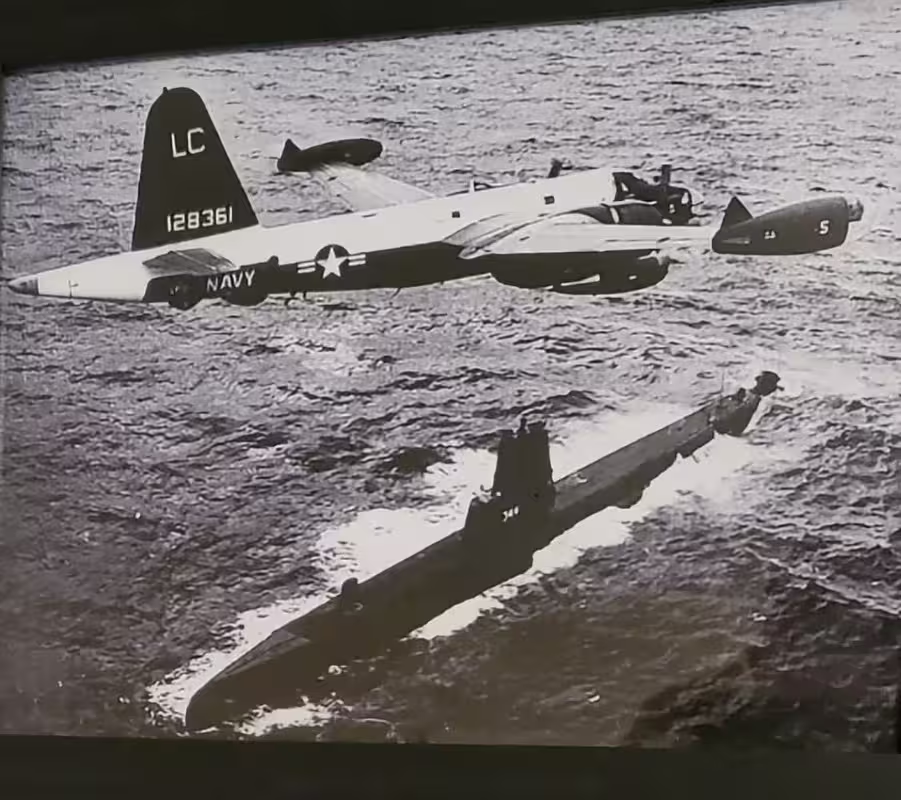
This is Larry's plane with the white color.

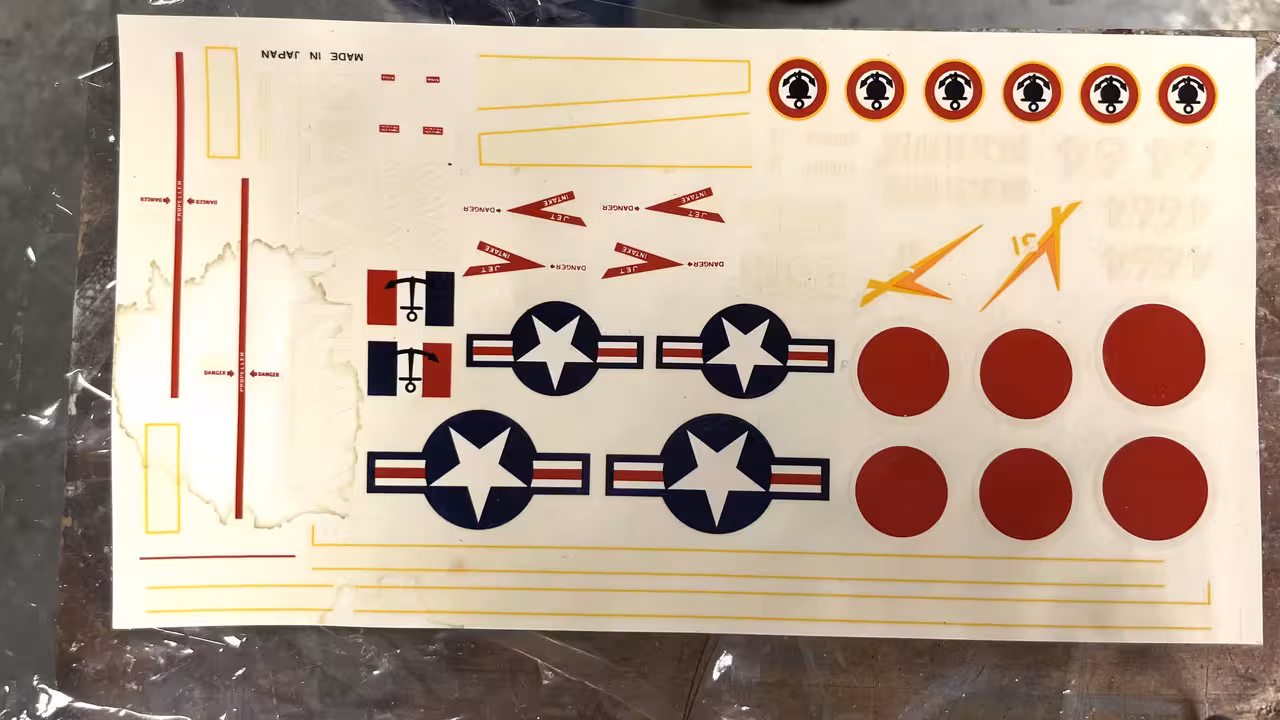
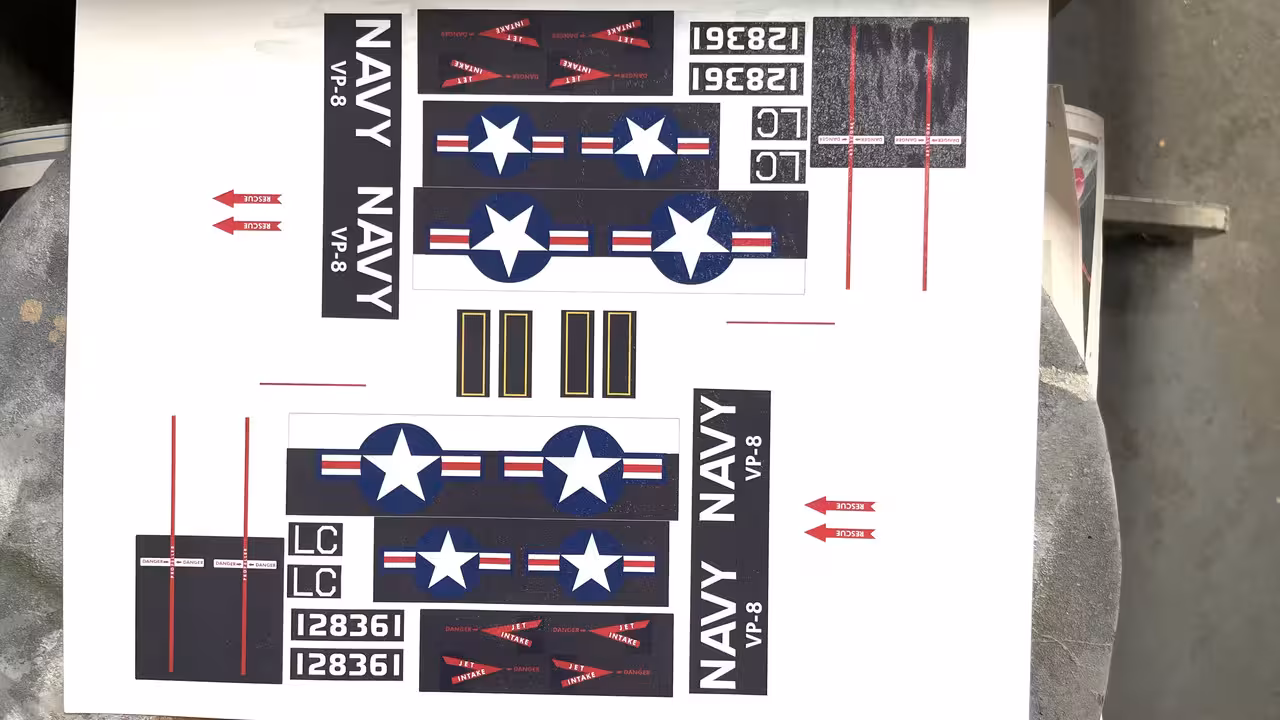
The kit's decals were a mess! They were terribly yellowed and didn't have things that I needed, so i scanned them and re-drew a full set in CorelDraw. 

Larry also sent me a photo of his squadron patch which he had mounted on a wood plaque. I couldn't use this in CorelDraw since it was distorted by photo angle.

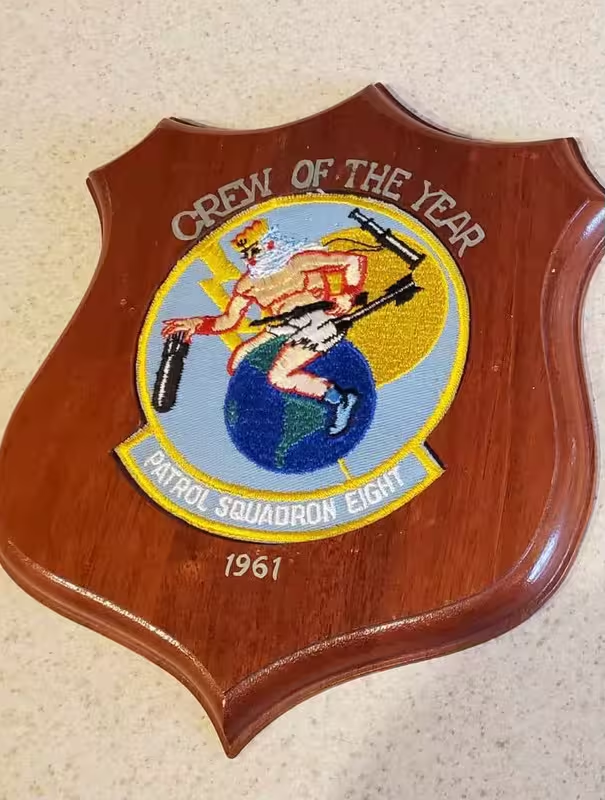
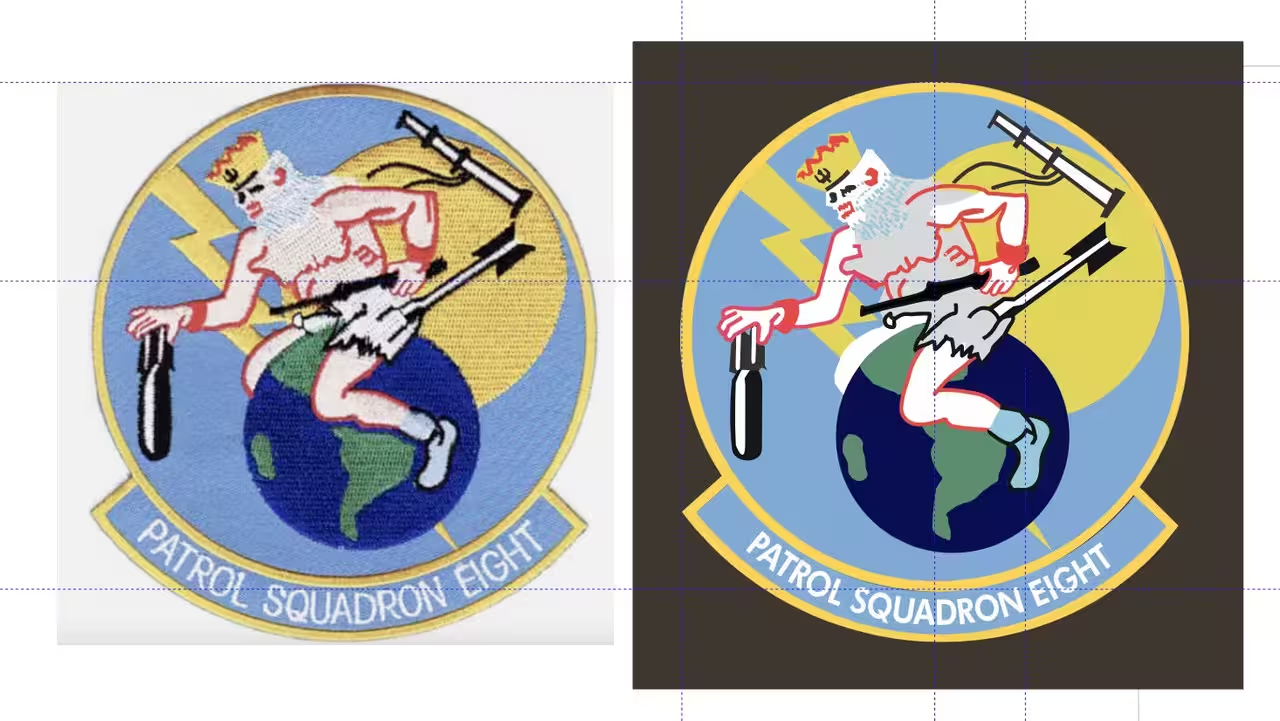
After a short Google search I found a great image of the patch, upon which I could draw it from scratch. The patch is embroidered. My drawing more normal line-wise.

This leads to a bigger challenge. I have to produce decals that have white on white decal paper. You can only print white on full ink printing presses or special machines that cost $$$. For simple decals that you can trim easily, white decal paper isn't a problem like Stars and Bars. However, when you're dealing with specific lettering like "NAVY", trimming and applying each letter in 1:72 is an exercise in futility. To work around this I print the decals on a matching color to the base color on which the decal is placed. This is as hard as it sounds.

I start by painting a test article, scanning the color and bringing it into CorelDraw. For some inexplicable reason, I can no longer print directly from CorelDraw. This gremlin appeared when I upgraded to the latest MAC OS Sonoma 14. To solve I would have to upgrade my CorelDraw from 2021 to 2024 for a couple hundred dollars. I don't need their new "Features". And I don't want to pay this money for just one function. The work around is exporting the drawing as a .PNG and printing out of MAC Finder. it works. 

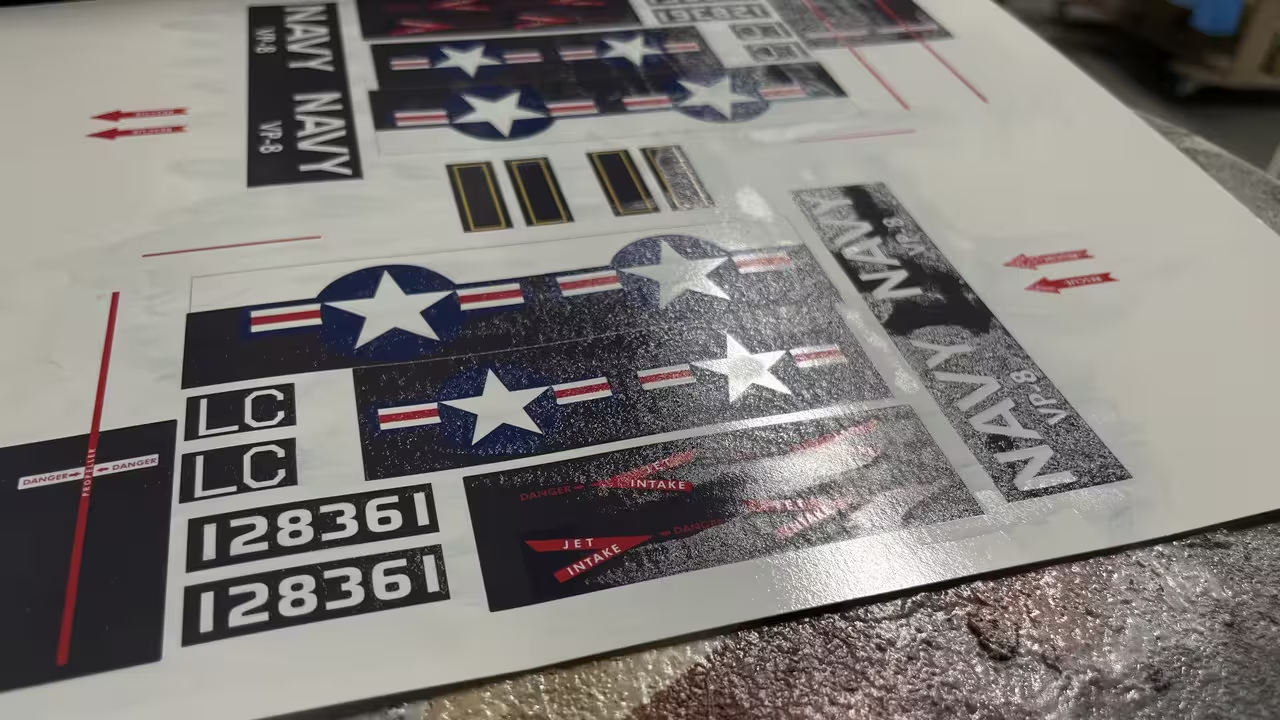
After printing out a test patch, the color was way off. It always is. I then had to, by trial and error, keep adjusting the CMYK mix numbers, creating test patches to find the blend that works. When I got what I thought was "right" I colored backgrounds behind each decal that was going over the gray portions of the plane and printed out the sheet. For the test pieces I was printing on Glossy Photo Paper and set the printer to that type. For the decals, I changed to "Specialty Photo Paper". What I got was way too purple. 

I adjusted by reducing magenta, and reprinted.

I overcoated with MicroScale Decal Coating and this happened. It dried terribly!

I think the ink wasn't fully cured when coated. I'm going to reprint and use something different to seal them. Inkjet ink is water soluable and must be sealed to work as a decal. I will use photo fixative. 

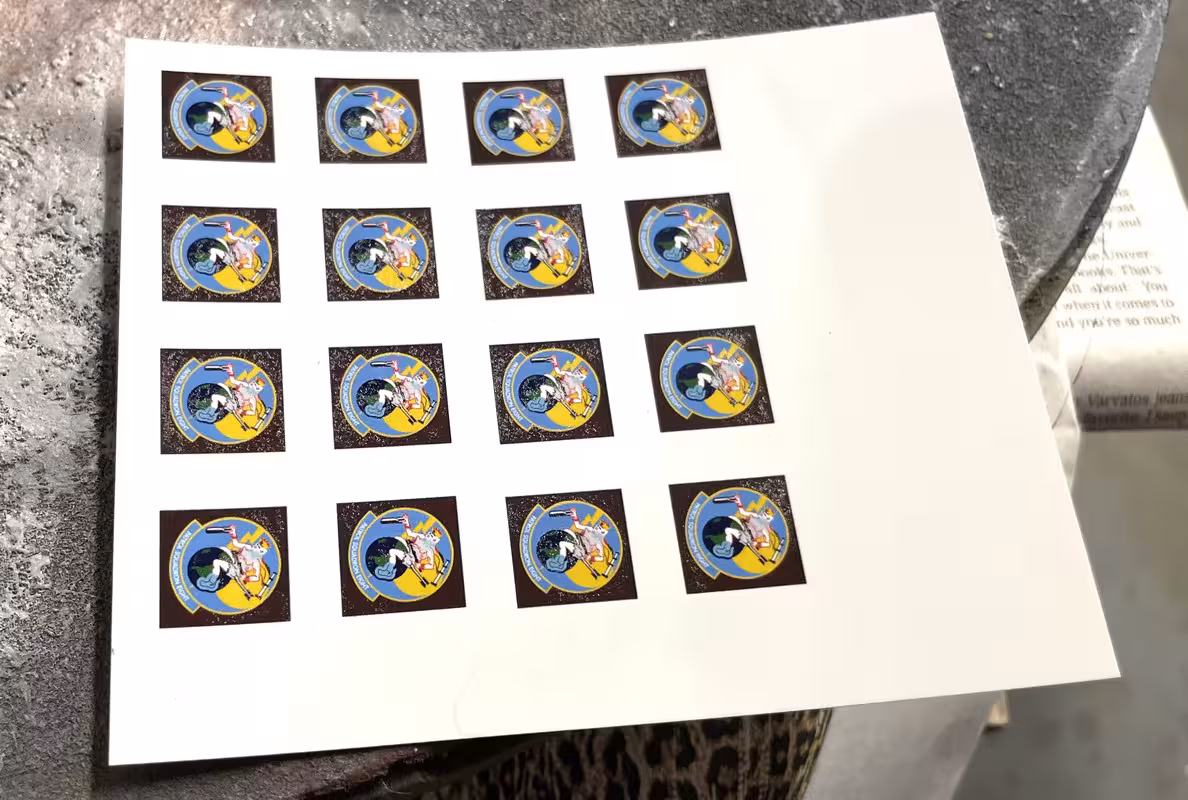
I did successfully coat the insignia decals. One goes on each side of the nose. I printed many.

Construction began with gluing fuze innerds. Details are so sparse that I'm leaving out the crew. 

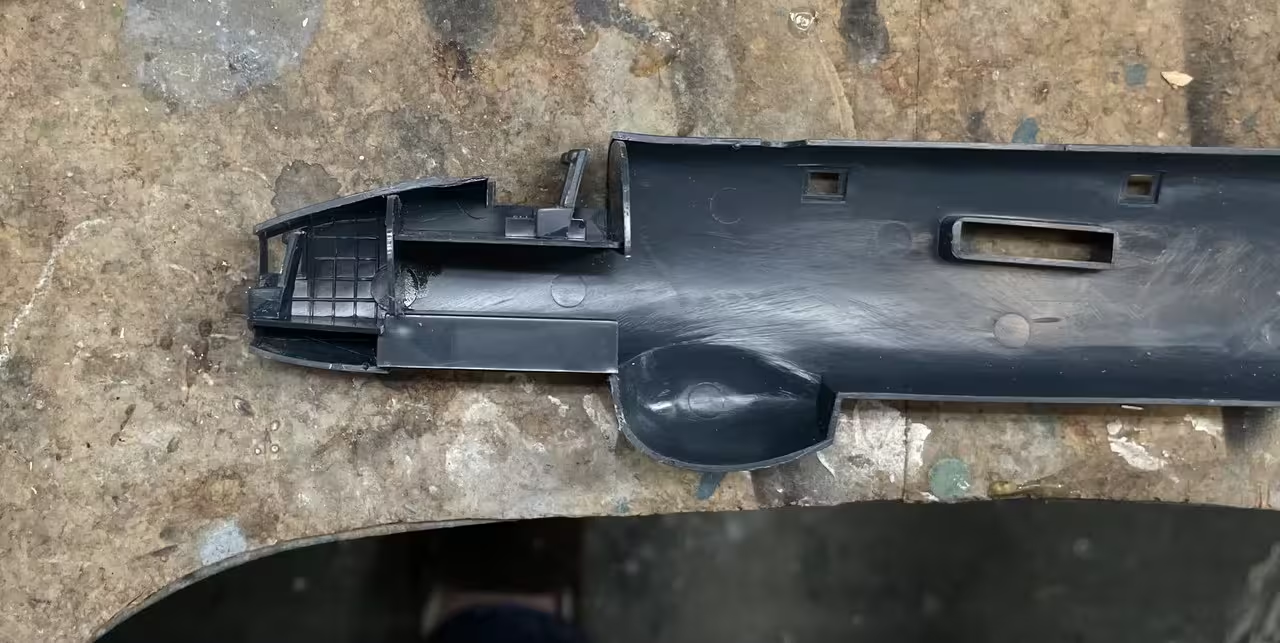
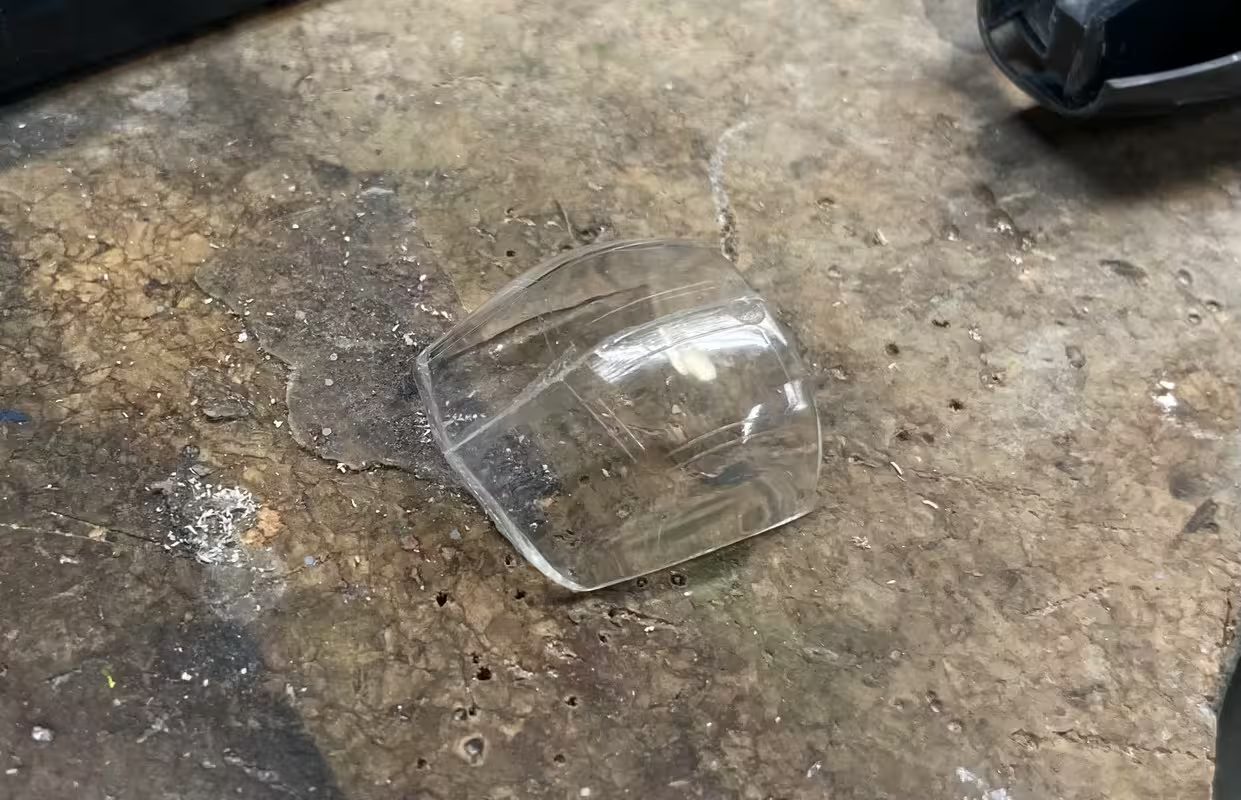
This kit is so old that the canopy is in two parts split down the middle. It's a terrible way to make glazing and is just asking for a gluey mess. I taped one one end and used Tamiya cement very gingerly on the other to tack it. I then removed the tape and finished it off. Any glue damage is on areas that will be painted. It will be an a "fun" job to mask, but as my wife says, "It's your hobby, not work, so stop complaining."

I want to deliver this model on our next trip to Philly in less than two weeks, so I will be working on it seriously. I'm also delivering the 5"38 turret model to the Battleship New Jersey during that trip.

  • Member since
    September 2012
Posted by GMorrison on Tuesday, July 16, 2024 11:45 AM

Following with interest.

Im guessing that this is the Hasegawa kit. Yes that's a real bear of a kit.

No images are showing up unfortunately. EDIT: I see them now.

The overhead canopy panels are tinted green and the throttles are up there I believe.

Bill

 Modeling is an excuse to buy books.


  • Member since
    March 2012
  • From: Louisville, KY
Posted by Builder 2010 on Tuesday, July 16, 2024 12:56 PM

Yes! it's that kit and it does appear to be a pain. I went to put this added info into the post, but for some reason, my keyboard wasn't inputting any letters. I had to reboot the MacBook Pro to get it to work again. I also lost the entire post when first writing it, when I inadvertantly opened another web page without hitting the plus sign. The new page overwrote the FSM page. I immediately realized what I had done, but the damage already occurred. All my wonderful words were gone. The second version was actually better than the first.

  • Member since
    September 2012
Posted by GMorrison on Tuesday, July 16, 2024 1:26 PM

I'm glad you went to the trouble because I always learn from your posts.

I built it- once was enough. My biggest challenge was getting the piston engine nacelles to go together.

It's a very interesting airplane and there was a gate guardian at Moffett NAS which was close to where I grew up.


Bill


 Modeling is an excuse to buy books.


  • Member since
    September 2012
Posted by GMorrison on Tuesday, July 16, 2024 3:01 PM

The last use of the Norden bombsite was in P2Vs in Operation Igloo White dropping aucoustic sensors on the Ho Chi Minh Trail.

Bill

 Modeling is an excuse to buy books.


  • Member since
    May 2009
  • From: Poland
Posted by Pawel on Tuesday, July 16, 2024 3:59 PM

Hello!

I'd love to take a look here, too!

Now I don't know how exact you want to be here, but please note the differences between the -5 and -7 variants. The canopy I can see in the pictures and the styrene kits I know are -7 version. I read for example, that in the -7 the pilot seat was raised and the canopy was made more "bubbly" to give the pilot better visibility.

Here's a good article on that - be careful, if you read it the build will get complicated!

https://tailspintopics.blogspot.com/2020/03/lockheed-p2v-5-vs-7-neptune.html

Good luck with your project and have a nice day!

Paweł

All comments and critique welcomed. Thanks for your honest opinions!

www.vietnam.net.pl

  • Member since
    March 2012
  • From: Louisville, KY
Posted by Builder 2010 on Tuesday, July 16, 2024 5:43 PM

Moving right along... Painted what I could, masked the canopy, and made another set of decals that could work, although the picture seems to show it's still biased towards the red end. That said, under different lighting it looks much better. I'm not going to sweat it any longer. My wife's cousin is not an IPMS judge and will love the model for the thought that went into its creation. The color match will be fine.

Normally, I would go nuts on detailing a cockpit, but I'm usually working in 1:32. In this case, and with the limited view in the canopy, I'm not going to do much. Interior is a dark gray, but not really dark.

I got the canopy masked. I started using Tamiya normal tape, but then switched to Tamiya curvy tape. It's vinyl and lets you bend it around compound curves without bucklng. I filled the remaining areas with MicroScale liguid mask. For some reason it wasn't wetting the transparent parts as well as I would like and I kept having to go back and fill in the blank spots. 

I also installed all the glazing that needed to be glued in from the inside. These too were masked with liquid mask.

I assembled the simply-detail 3350s which consisted of just two parts. The 3350s are cowled very tightly and you will see basically nothing inside. Even so, I painted the inside light ghost gray as called out by the FS number. I probably will pick out the pushrod tubes, but nothing else on the engines. I'd love to see someone do a model in large scale that had the turbo-compounds fully detailed.

Since I'm not spending a lot of time on this model, I airbrushed the gloss white on the inside wheel well doors, and the wheel wells while on the sprue. And then rattle-canned Tamiya Silver Leaf on the landing gear and the prop blades. By using a solvent-based paint, I can use acrylic for the detailing and not have to worry about color bleed. This will all be nicely dried by tomorrow.

The gear doors need red edging which I'll do later. The prop blades get black booting and white/red/white warning stripes at the their tips.

  • Member since
    February 2020
Posted by PhilliePhan79 on Tuesday, July 16, 2024 7:09 PM

Following.  The Neptune is one of my favorites.  Been wanting to get the Hasegawa for a while now.  

  • Member since
    March 2012
  • From: Louisville, KY
Posted by Builder 2010 on Thursday, July 18, 2024 6:33 PM

This post will cover two days of work. Yesterday I spent building subassemblies, and sanding and filling the terrific seams that occur on an old "vintage" kit. I'm a bit spoiled. The kits I generally build these days are current generation of highly detailed and engineered kits, with a zillion parts and generally good assembly (not counting the horror of building the Kitty Hawk Seahawk). I use my Tamiya 1:32 Corsair as the benchmark for how perfectly seams fit and molding is done. This kit was the antithesis. Flash was everywhere, parts are crudely molded, engineering is dubious. 

That said, it will be a nice model only because it has huge sentimental value and it's the only kit available of such a plane. I shared the descrepenicies with Larry between the -5 and -7 versions especially in the canopy shape and placement of the search radar bulge. Larry doesn't mind. It's going to be the right color and have all his squadron's correct insignia.

This shows the challenge.

And this...

And now filled.

Now... the biggest problem with old models is the raised panel lines and rivets. You can't sand the seams without obliterating them. And you can't rescribe them since they're in relief and would have to be applied, and I'm not doing that. The result is smooth seams but no texture around them. 

I got the nacelles, both fore and aft, and readied them for install. These parts were assembled without alignment pins or notches making it fussier than it should have been to get them aligned in two axes.

And the rear nacelles which had to include part of the landing gear that was captivated in the assembly. This sequence wasn't very clear in the instructions and I almost glued the halves together before realizing that it had to trap the gear brace.

I masked all the very-finely raised nose glazing frame and then glued it to the plane with Testor's canopy cement.

That finished yesterday's work. I went down to the shop before breakfast to glue on the main canopy so it would be cured for later in the day to do more work on the plane.

Later, I was pressing to get some painting done. I painted the tails of the jets first airbrushed with AllClad "Lightly Burned Metal" and then over-coated away from the tail pipe with AllClad Stainless Steel. I painted the intake side of the jets with Nato Black and then masked them both. I glued the rear nacelle with wheel wells to the wing with Tamiya Cement. I then glued on the front nacelle with engines to the rear with Testor's tube cement to the attached rear. I also airbrushed the fore portion of the radar blister NATO black.

After the jets dried I masked all the pre-painted engine parts in prep for overall plane painting. I glued the jets on with Tamiya cement. I then glued on the wing tip tanks with Testor's tube cement to provide grip if the joint was fully flush. The plane is ready for paint tomorrow.

I will start by masking the black area of the radar done, and fill the wheel wells with dampened paper towels to prevent spray entering. Then I will rattle-can spray the topside white with Tamiya white primer followed by Gloss white. When dry I'll mask it and spray the body color of Glossy Engine Gray.

I hope it's not tail heavy, since I haven't pre-installed any nose weights.

  • Member since
    December 2002
  • From: Northern California
Posted by jeaton01 on Thursday, July 18, 2024 8:02 PM

It will definitely be tail heavy!  You are making quick progress.

John

To see build logs for my models:  http://goldeneramodel.com/mymodels/mymodels.html


  • Member since
    March 2012
  • From: Louisville, KY
Posted by Builder 2010 on Monday, July 22, 2024 4:02 PM

I'll probably end up making a clear tail stand so it sits on three wheels. I am making great progress, but there are occasional setbacks that are annoying me. I painted the white primer, then Tamiya Gloss white for the surfaces that are white. My wife's cousin sent a better picture of his plane in flight that I could use for the masking and decal placement.

I had overlooked Larry's #5 Plane Number. I drew that up today, printed it, and overcoated it with Rust-oleum clear gloss. This stuff really dries shiny and fast.

I got the white surfaces masked. Took quite awhile since it follows the wing roots and I used the White Vinyl tape for that.

I painted all the Glossy Gray. When it went on I almost had a heart attack. It was many shades lighter than the decal color. But after force drying it a bit with the heat gun, it darkened considerably and will work okay.

Like Vallejo acrylic, the Mission Models paint flashes off pretty quickly, but stays tacky for a long time. I like Tamiya better. When it flashes off it's dry. I left it in this position for while until I could handle it with nitrile gloves on.

I then pulled the tape. Most was okay, but I found the difficulty of masking white paint with white vinyl tape. I missed a spot! Ugh!. I will mask the tail tomorrow and shoot some gloss white to repair. The paint will dry quick enough.

I also found upon further inspection, there were some light gray spots, which I brush painted. I may have to do more of this touchup tomorrow.

I'm finding that the Mission paint does not adhere as well as I would like. Again, I don't seem to have that problem with Tamiya. I've been using Tamiya for 50 years.

The jets look decent. I'm holding off de-masking the clear parts until all the touch up work is done.

I finished the session building (or should I say, "attempting to build") the propellers. Upon first glance it was nice that the blades and hub assembly were separate parts. In retrospect, it is NOT! The pins on the props are too small and the blades fit sloppily and flop around. I'm trying to find the correct glue to put it together. The spinner is two parts, and the back part fell off during all the fussing. I just put it aside until tomorrow before I wrecked it. For 1/72 a fully molded prop would have been just fine.

  • Member since
    September 2012
Posted by GMorrison on Monday, July 22, 2024 7:59 PM

Builder 2010
The spinner is two parts, and the back part fell off during all the fussing. I just put it aside until tomorrow before I wrecked it.

Like when it bounced off the wall?

You've done a great job so far.


Bill

 Modeling is an excuse to buy books.


JOIN OUR COMMUNITY!

Our community is FREE to join. To participate you must either login or register for an account.

SEARCH FORUMS
FREE NEWSLETTER
By signing up you may also receive reader surveys and occasional special offers. We do not sell, rent or trade our email lists. View our Privacy Policy.