SEARCH FINESCALE.COM

Enter keywords or a search phrase below:

ICM 1/72 Polikarpov I-5 [Finished! update 12-10-12]

9745 views
32 replies
1 rating 2 rating 3 rating 4 rating 5 rating
  • Member since
    September 2004
  • From: Utereg
ICM 1/72 Polikarpov I-5 [Finished! update 12-10-12]
Posted by Borg R3-MC0 on Monday, September 3, 2012 2:39 AM

Here are some pics of my current project, the ICM 1/72 Ploikarpov I-5. The kit looks beautiful on the sprues, surface detail is very good. Mayor compents also have a good fit but the instructons are a bit vague on the details. And getting all the cockpit details (including framework) is difficult.

  • Member since
    October 2008
  • From: italy
Posted by bsyamato on Monday, September 3, 2012 2:50 AM

Fine subject/kit. Following

  • Member since
    January 2012
  • From: Belgium, EU
Posted by Ninetalis on Monday, September 3, 2012 5:10 PM

That really looks like a cool subject Borg, are there any of these made in 1/48?

With regards, Ninetalis.

  • Member since
    February 2011
  • From: Bent River, IA
Posted by Reasoned on Monday, September 3, 2012 8:29 PM

Neato! so that is the I-5Hmm

Science is the pursiut of knowledge, faith is the pursuit of wisdom.  Peace be with you.

On the Tarmac: 1/48 Revell P-38

In the Hanger: A bunch of kits

  • Member since
    September 2004
  • From: Utereg
Posted by Borg R3-MC0 on Tuesday, September 4, 2012 1:12 AM
I have closed the fuselage. I used Micro Weld which worked fine. I had some trouble getting al the cockpit parts to fit but with some tweaking everything went in. I will post some pice shortly.

As for a 1/48 I-5. I only know of the Rest resin model. It is supposingly very good but expensive.

  • Member since
    October 2008
  • From: italy
Posted by bsyamato on Tuesday, September 4, 2012 3:53 AM

Actually i built only the ki-27 from icm (out of a truck) the detail level of the kit was high (engine fully reproduced with support structure) but lots of adjustments was needed to guel all pieces correctly Sad

  • Member since
    September 2004
  • From: Utereg
Posted by Borg R3-MC0 on Tuesday, September 4, 2012 5:53 AM

bsyamato

Actually i built only the ki-27 from icm (out of a truck) the detail level of the kit was high (engine fully reproduced with support structure) but lots of adjustments was needed to guel all pieces correctly Sad

Same here, all the minor/detail components take a lot of work to be made to fit.

  • Member since
    September 2004
  • From: Utereg
Posted by Borg R3-MC0 on Sunday, September 16, 2012 3:26 PM

Here is an update on my I-5 build. The mayor components fit quit nicely and requiered little filler:

My first attempt at glueing the top wing on has failed so I will have to try that again shortly.

In the mean time I painted the propellor:

a base of yellow:

Then the grain/layers with light brown pencil:

And a second one with darker pencil.

A coat of Tamiya Clear orange will be used to get that perfect wood like finish:

  • Member since
    October 2008
  • From: italy
Posted by bsyamato on Sunday, September 16, 2012 4:48 PM

Good progress Yes

Nice tecnique to simulate wood!! i have 3 biplanes on workbech, will try on one of them.

  • Member since
    September 2004
  • From: Utereg
Posted by Borg R3-MC0 on Monday, September 17, 2012 2:56 AM
Thanks Bsyamato, i will post a pic with the Clear Orange applied, it looks even better.

  • Member since
    September 2009
  • From: Guam
Posted by sub revolution on Monday, September 17, 2012 3:41 AM

Very cool! I want one now...

NEW SIG

  • Member since
    October 2008
  • From: italy
Posted by bsyamato on Monday, September 17, 2012 10:39 AM

Want me too one!!

  • Member since
    September 2004
  • From: Utereg
Posted by Borg R3-MC0 on Sunday, September 30, 2012 12:50 PM

Another shot update: using a jig I put the top wing one. It took two tries to get it right but its ok now. The jig is made from cardboard.

Almost all struts are properly alligned except for the outer right one. I will just glue it in place and fill the location hole:

Next up, painting!

  • Member since
    September 2004
  • From: Utereg
Posted by Borg R3-MC0 on Tuesday, October 2, 2012 4:15 AM

Here is the kit before painting: masking was easy because of the single color. The only thing I had to do was to put some tissue paper in the cockpit:

The prop: I scratched the Huck starter attachment on the prop using some sprue:

 I read some bad reviews on ICM decals so I used some spares from the decal sheet just to see how they behave. The decals are a bit fragile but react nicely to setting agent, in this case simple white vinegar.

The red is form a Duplicolor spray can, I put two thin coats on the plane. Red is a bit translucent so the places where I used putty can be seen. But putting on another coat would cover up all the nice surface detail so I choose to move on.

A pic of the finished prop, with the metal parts painted:

  • Member since
    October 2008
  • From: italy
Posted by bsyamato on Tuesday, October 2, 2012 5:24 AM

Well done Yes also nice wood prop Indifferent

  • Member since
    September 2009
  • From: Guam
Posted by sub revolution on Tuesday, October 2, 2012 5:55 AM

Wow. The prop is stunning!

NEW SIG

  • Member since
    November 2005
Posted by Anonymous on Tuesday, October 2, 2012 12:12 PM

Very cool build here...

  • Member since
    September 2004
  • From: Utereg
Posted by Borg R3-MC0 on Friday, October 5, 2012 6:04 AM

Thanks for all the kind comments. All the building and detailing has been done.

Of course, there was the obligatory "setback at the last moment".... When I put the wheels on I broke the gear:

The whole thing is fixed now. Up next...the dreaded rigging. I am going the classic method: stretched sprue, with CA glue. I have had my best results with that.


  • Member since
    October 2008
  • From: italy
Posted by bsyamato on Tuesday, October 9, 2012 5:57 PM

Great painting but seems that the camera flash ruined the red color!

  • Member since
    September 2004
  • From: Utereg
Posted by Borg R3-MC0 on Wednesday, October 10, 2012 4:27 AM

bsyamato

Great painting but seems that the camera flash ruined the red color!

You are right. I use my Iphone for pics (it is very easy because I have a Photobucket app installed) but under artificial light it does strange things with red. Since I cannot set the white scale I just have to take my pics during daylight.

I am working on the rigging now. That is going reasonably well, the double wires are giving me a hard time.

  • Member since
    October 2008
  • From: italy
Posted by bsyamato on Wednesday, October 10, 2012 5:19 AM

i'm near too to rigging the fokker, hope all these wires will going fine :)

  • Member since
    September 2004
  • From: Utereg
Posted by Borg R3-MC0 on Wednesday, October 10, 2012 5:29 AM

bsyamato

i'm near too to rigging the fokker, hope all these wires will going fine :)

I found that how you stretch the sprue is of importance. I soften (almost melt) the sprue over a candle. When you stretch the sprue it cools down and becomess hard again. This happens whilst you are stretching. It is my experience that you must stop stretching when you feel resistance. Otherwise you overstretch the sprue and it will curl instead of remaining straight. If you stretch the sprue right it will remain straight and all you have to do is to cut it to lenght and glue it in place. But that is easier said then done. Wink

  • Member since
    September 2004
  • From: Utereg
Posted by Borg R3-MC0 on Friday, October 12, 2012 3:27 AM

She is finished!

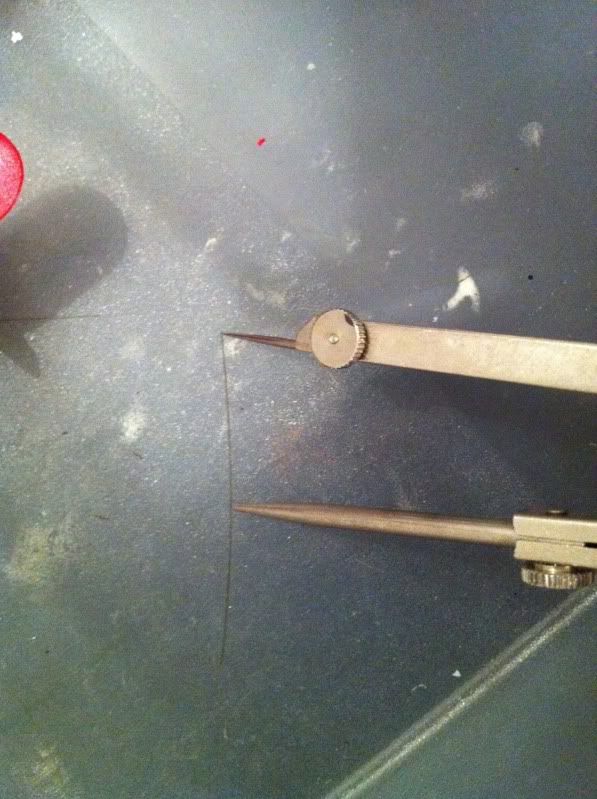
Here are the last pics of the build process. Firstly the rigging, I use a cheap drafting compass to measure the distance required:
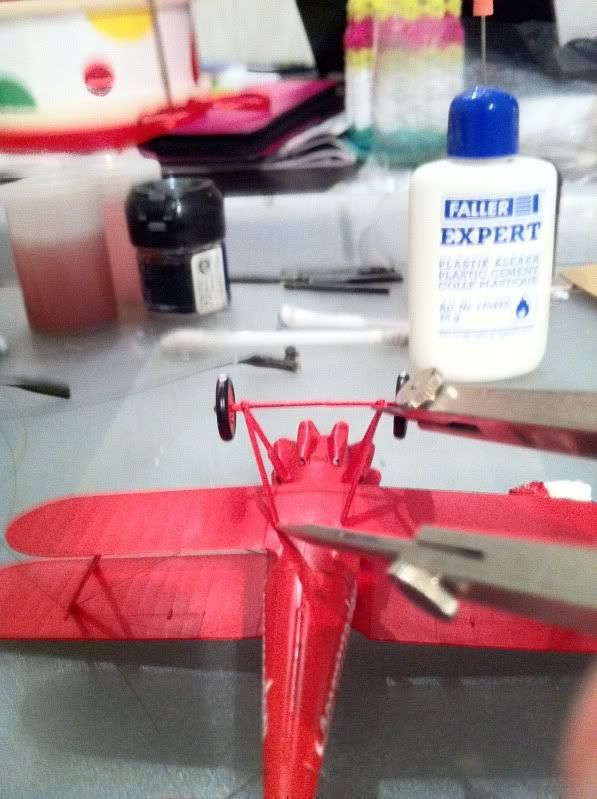
Then I cut the sprue. The sprue has been stretched, I like using a dark colour sprue so I do not have to paint the rigged wires.
And use CA glue (gel) to glue it into place:
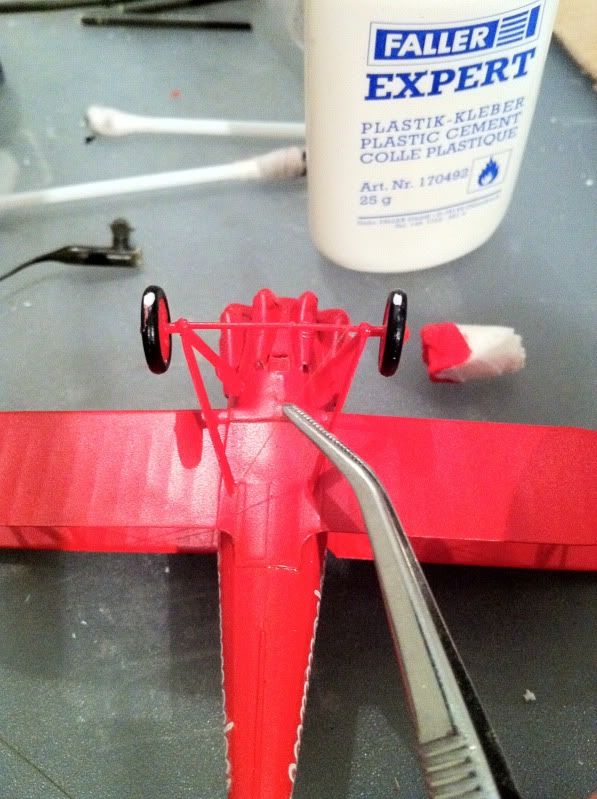
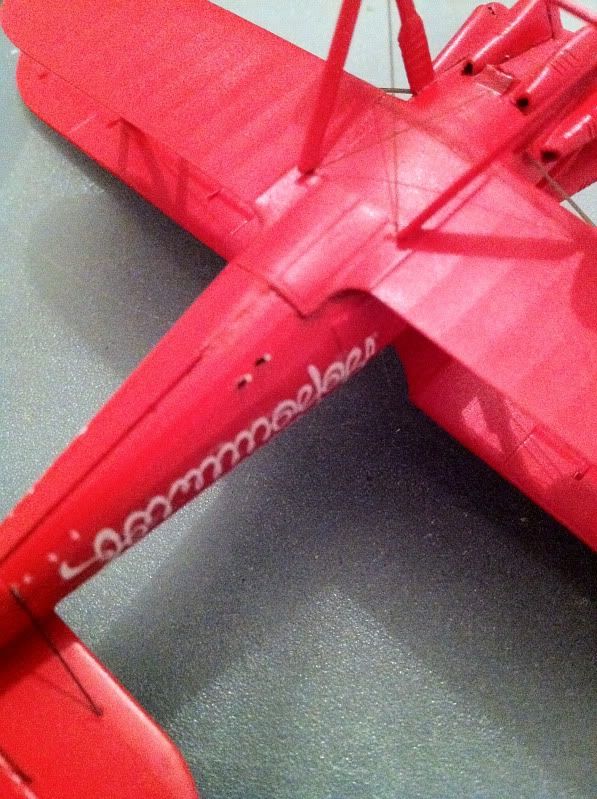
Some small details (a step and some aerials) where made with stretched sprue. Interestingly enough ICM shows those parts on the instruction notice stating that you should scratch build them. Maybe their moulding technology does not allow them to make such small pieces.
Making the step, the vertical rods have been placed:
Then the horizontal is glued, et voilá, a step:
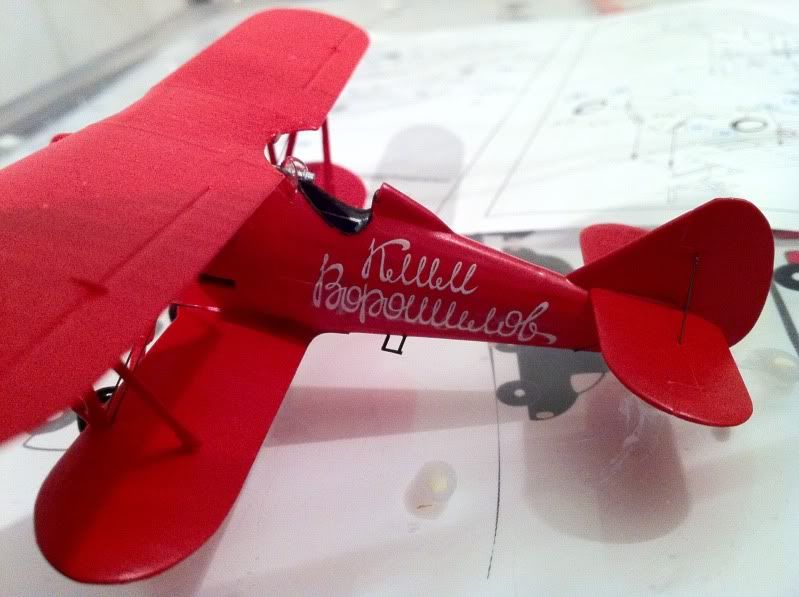
Same goes for the aerials (I think that is what they are) at the rear of the fuselage:
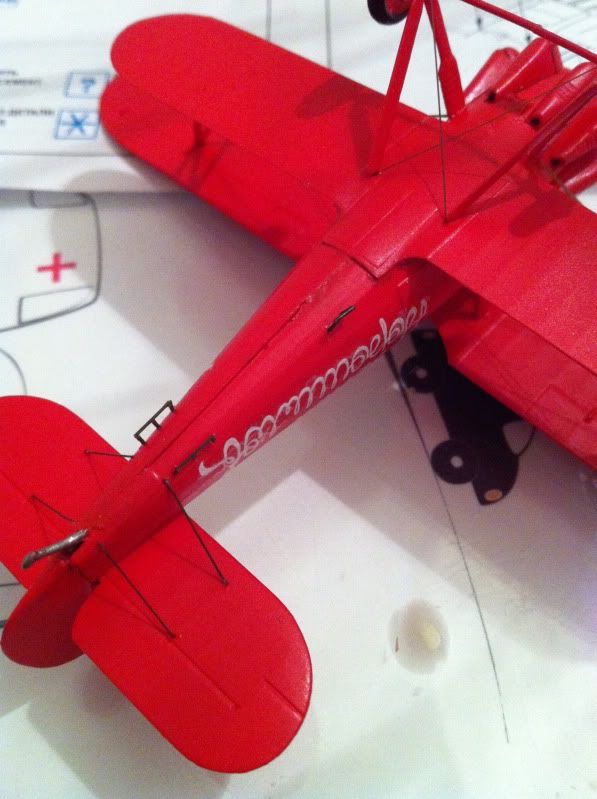
Here is the finished Polikarpov I-5! (the pics are not great, I will retake them with daylight)
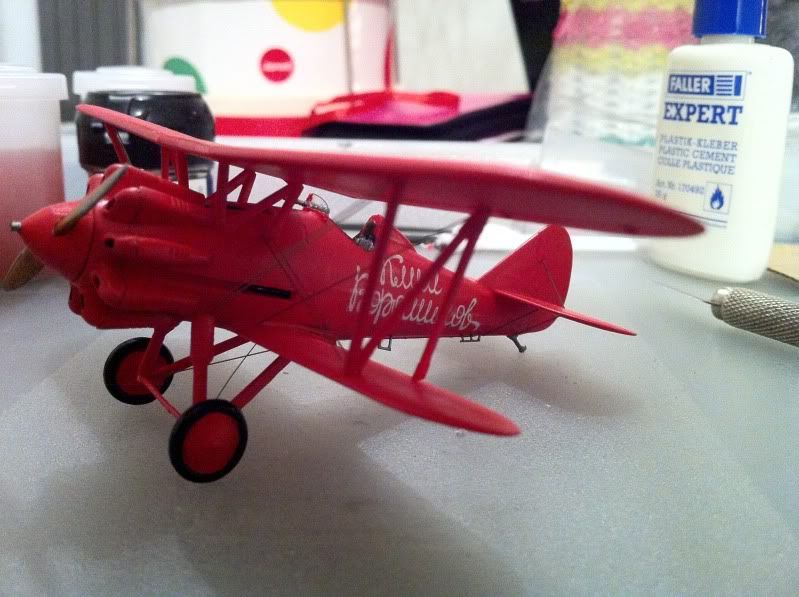
With a different colour setting:
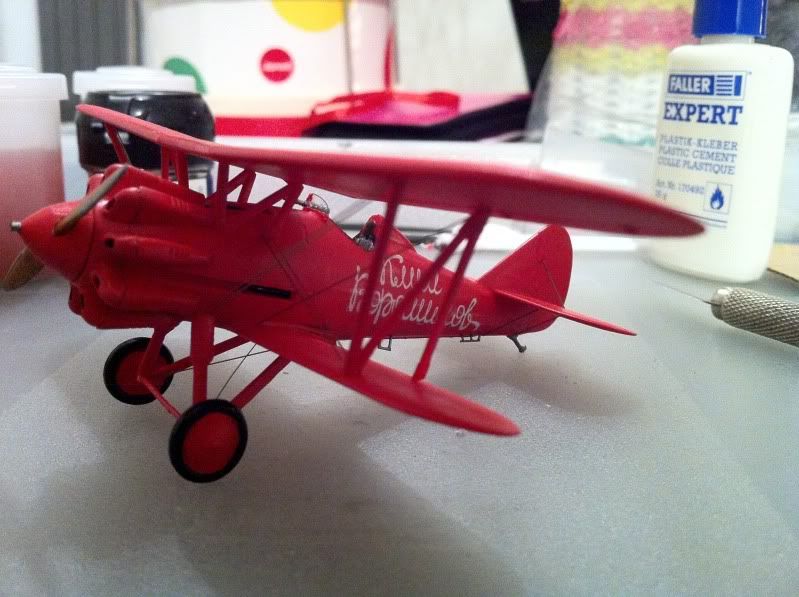
As said, I had some difficulty with the double wires. This was the second time I tried doubles wires and the first time I succeeded. But the ones in the middle of the fuselage are to far apart. The front double wires are good.

Anyway, all in all this I-5 has been a nice build. There where a few minor setbacks and the connection of the wings is quite fiddly but the overall fit is good and the surface details are outstanding. So I can definitely recommend this kit but due to the fiddly wings and the rigging I would say it is for the experienced modeller.

  • Member since
    October 2008
  • From: italy
Posted by bsyamato on Friday, October 12, 2012 6:04 AM

Really fine work Borg Toast waiting for final good pictures!

It's strange about the needed little pices not moulded by icm; actually smallest perfect moulded piece i never see in a kt is the gun sight from the icm ki-27!! Indifferent

  • Member since
    September 2004
  • From: Utereg
Posted by Borg R3-MC0 on Thursday, October 18, 2012 9:43 AM

As promised, better pics, taken in daylight. The red looks much better now.


  • Member since
    October 2008
  • From: italy
Posted by bsyamato on Thursday, October 18, 2012 10:08 AM

Excellent build Borg Toast now red really turning good on these pics.

Dre
  • Member since
    June 2007
  • From: here, not over there
Posted by Dre on Thursday, October 18, 2012 10:17 AM

Beautiful work.   It reminds of an old barnstormer from the '30's.

  • Member since
    April 2008
Posted by Von Alfalfa on Thursday, October 18, 2012 7:39 PM

That's a beauty! and really fast finished! I love the wood effect in the propeller.

Congrats for that very interesting subject and little bird!

  • Member since
    August 2009
  • From: Borlando Fla home of the rat
Posted by TREYZX10R on Thursday, October 18, 2012 9:14 PM

Fantastic looking build ,that rigging looks killer as does the rest of it! Very nicely done Sir!

  • Member since
    November 2009
  • From: SW Virginia
Posted by Gamera on Friday, October 19, 2012 11:15 AM

I-5? Looks A-1 to me!!!

Beautiful work there on the red, the prop, the rigging, everything!

"I dream in fire but work in clay." -Arthur Machen


JOIN OUR COMMUNITY!

Our community is FREE to join. To participate you must either login or register for an account.

SEARCH FORUMS
FREE NEWSLETTER
By signing up you may also receive reader surveys and occasional special offers. We do not sell, rent or trade our email lists. View our Privacy Policy.