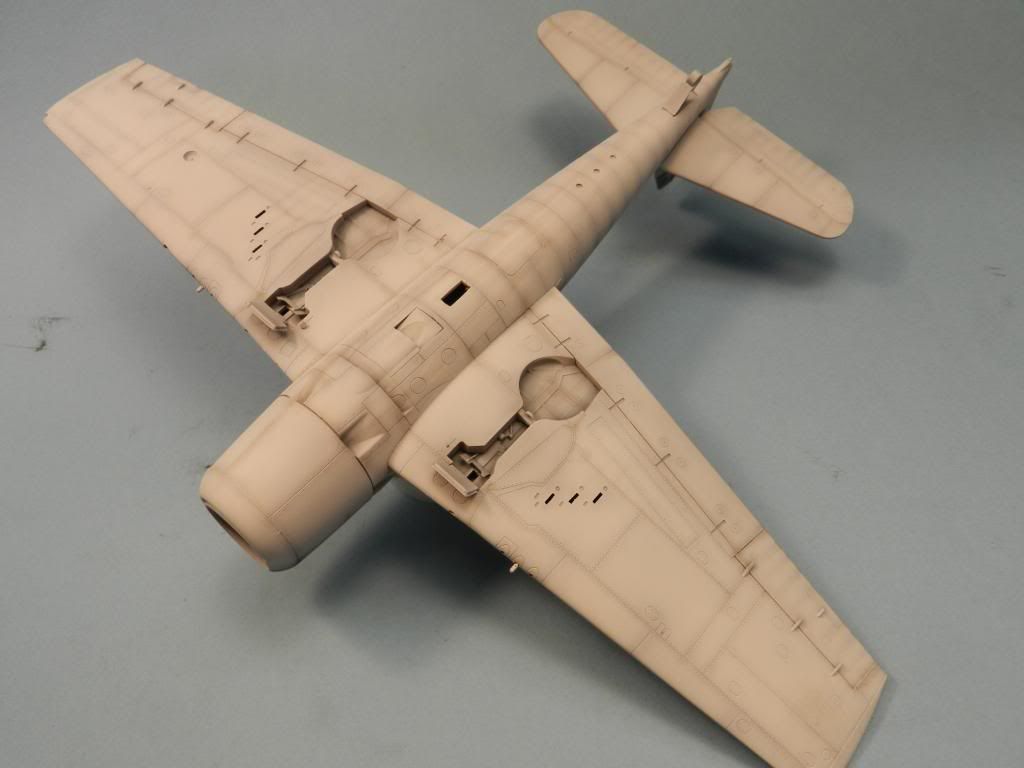
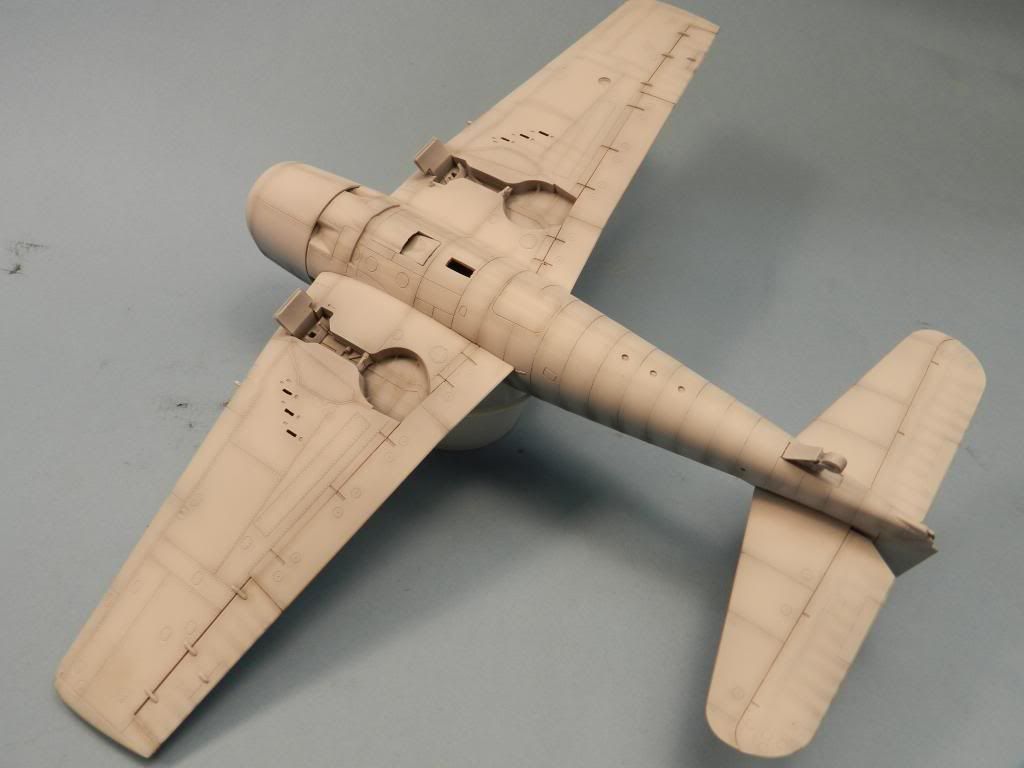
I shot the underside this morning. I started with Tamiya Flat White XF-2 but it was just too white, even over the pre-shading. I decided to cut it with a touch of Buff XF-57 to make it appear slightly "dirty". This improved the appearance considerably to my eye. I figured these turkeys got very dirty underneath, so, I used my concoction of diluted XF-69 NATO Black and XF-64 Red Brown and did some extreme post shading, more than I'm usually comfortable with. I added a smidgen of XF-1 Flat Black on a toothpick to the mixture in my airbrush cup to give it a bit more "substance" and sprayed some exhaust streaking and staining on the belly. I didn't want to overdo it so I stopped here for now....I may do more after decaling.
I should get to the blues soon.....but right now I'm just singing it.