SEARCH FINESCALE.COM

Enter keywords or a search phrase below:

Monogram B-58 Hustler WIP

7836 views
16 replies
1 rating 2 rating 3 rating 4 rating 5 rating
  • Member since
    May 2011
  • From: Bedford, Indiana
Posted by AceHawkDriver on Thursday, May 2, 2013 9:34 PM

Scorpr2:  Thanks!  It's coming along, slowly but surely.  

Devil Dawg:  Thanks!.  It's not quite a one piece fuselage.  The large fuselage section runs from the nose to just aft of the wings.  There is a shorter bottom section of the forward fuselage that runs from the nose to the leading edge of the wing, and then a separate empennage.

Gene:  You'll have to let me know how the technique works out for you.  I liked it pretty well.  My only issue was not having something substantial enough to roll out the milliput with.  It smooths out nicely using a brush and some water, and has held securely since being put in place.  

MR GMC:  Thanks!  I have no idea what the performance would be like in the aircraft.  I do know that we have a set of orders (or certificate, I can't remember) stating that he had broken Mach 1 (I think) in the aircraft.  It's nice, we actually have a picture of him geared up in the aircraft cockpit.  

No picture update tonight.  I probably won't have one until the weekend.  I managed to get one of the two main gear bays detailed.  A primer coat was put on the cockpit, nosegear assembly, ejection seat, and the interior of the engine intakes.  Hopefully, I'll have a chance to keep going this weekend!

Peace through superior firepower.

Brian


  • Member since
    January 2010
Posted by CrashTestDummy on Wednesday, May 1, 2013 12:47 PM

CrashTestDummy

AceHawkDriver

Gene:  I was searching Squadron's website looking for decals and stumbled across their Squadron TV link.  If you go to www.squadron.com scroll down until you see the Squadron TV link on the left side.  There are a couple of demo videos about halfway down the page.  I think they are named techniques and tactics, or something similar. For the demonstration they used fine Milliput, I used standard and didn't have too much of an issue.  

The most difficult part of the whole process was getting the Milliput to the right thickness.  Works really well though.

Hope it helps!

Brian,

Very much.  Thanks.  I have some 1/24 scale auto kits with 5-point harnesses that I'm having a real problem getting to attach properly and lay in the seats.  This Milliput tip may just do the trick.  I can actually visualize myself doing this, whereas, I continue to stop to try to figure out how to do it nicely with the ribbon harnesses.

I'm also watching your progress here.  I have one of these (as well as an old Lindberg ~1:100 scale versions), and hope to put it together one day, up-detailing as I go, of course! 

Gene Beaird,
Pearland, Texas

WooHoo!  I watched that video as well as the one on wiring.  I have to go home now and see exactly what Milliput I have.  I bought some a while back, but have yet to use it.  This is so cool.  I bet I end up getting one of my vehicles 'belted up' this weekend!!  I may even use it to wire up a 1/32 Roden Mercedes engine I'm currently working on.  Thanks for the link!

Gene Beaird,
Pearland, Texas

G. Beaird,

Pearland, Texas

  • Member since
    March 2008
Posted by MR GMC on Tuesday, April 30, 2013 4:51 PM

I loved this plane ever since I had the little aurora box scale model in the mid sixties.  Looks like its going a gazillion miles an hour, standing still.    Wonder what the performance would be like with late model engines?  Thanks for the views.  Have a happy build.  God bless your dad's memory.

  • Member since
    January 2010
Posted by CrashTestDummy on Tuesday, April 30, 2013 3:48 PM

AceHawkDriver

Gene:  I was searching Squadron's website looking for decals and stumbled across their Squadron TV link.  If you go to www.squadron.com scroll down until you see the Squadron TV link on the left side.  There are a couple of demo videos about halfway down the page.  I think they are named techniques and tactics, or something similar. For the demonstration they used fine Milliput, I used standard and didn't have too much of an issue.  

The most difficult part of the whole process was getting the Milliput to the right thickness.  Works really well though.

Hope it helps!

Brian,

Very much.  Thanks.  I have some 1/24 scale auto kits with 5-point harnesses that I'm having a real problem getting to attach properly and lay in the seats.  This Milliput tip may just do the trick.  I can actually visualize myself doing this, whereas, I continue to stop to try to figure out how to do it nicely with the ribbon harnesses.

I'm also watching your progress here.  I have one of these (as well as an old Lindberg ~1:100 scale versions), and hope to put it together one day, up-detailing as I go, of course! 

Gene Beaird,
Pearland, Texas

G. Beaird,

Pearland, Texas

  • Member since
    March 2005
  • From: Lancaster, South Carolina
Posted by Devil Dawg on Tuesday, April 30, 2013 12:25 PM

Looking good so far. Was that a one-piece fuselage in the first picture?

Devil Dawg

On The Bench: Tamiya 1/32nd Mitsubishi A6M5 Model 52 Zeke For Japanese Group Build

Build one at a time? Hah! That'll be the day!!

  • Member since
    July 2007
Posted by scorpr2 on Monday, April 29, 2013 11:24 PM

She's lookin' really good!  Keep up the great work!!!

  • Member since
    May 2011
  • From: Bedford, Indiana
Posted by AceHawkDriver on Monday, April 29, 2013 10:51 PM

Small update from last night and this evening.  No primer yet but I did manage to finish up the empennage and the nosegear.  There are still some details that will need to be added to the nosegear, but they will have to wait until the cockpit/wheel well assembly are installed into the fuselage.  Not as much progress as I had hoped for, but it's still coming along.

Empennage assembly

Nosegear

Wheel well

The landing lights have been drilled out and the interior will be smoothed with (hopefully) some Tamiya cement.  The messy ends of the wiring will be cleaned up when the gear is installed into the fuselage. 

Next up will be continuin work on the main gear and the main gear bays.

Comments and criticisms are always welcome! 


Peace through superior firepower.

Brian


  • Member since
    May 2011
  • From: Bedford, Indiana
Posted by AceHawkDriver on Monday, April 29, 2013 10:22 PM

Gene:  I was searching Squadron's website looking for decals and stumbled across their Squadron TV link.  If you go to www.squadron.com scroll down until you see the Squadron TV link on the left side.  There are a couple of demo videos about halfway down the page.  I think they are named techniques and tactics, or something similar. For the demonstration they used fine Milliput, I used standard and didn't have too much of an issue.  

The most difficult part of the whole process was getting the Milliput to the right thickness.  Works really well though.

Hope it helps!

Peace through superior firepower.

Brian


  • Member since
    January 2010
Posted by CrashTestDummy on Monday, April 29, 2013 2:12 PM

AceHawkDriver

Steve:  Thanks!  First time trying to replicate a harness with milliput.  Think I will have to keep that in my arsenal.

<SNIP>

Milliput?  Do tell, do tell.  :-)

Nice work!

Gene Beaird,
Pearland, Texas

G. Beaird,

Pearland, Texas

  • Member since
    May 2011
  • From: Bedford, Indiana
Posted by AceHawkDriver on Monday, April 29, 2013 12:27 AM

Steve:  Thanks!  First time trying to replicate a harness with milliput.  Think I will have to keep that in my arsenal.

Lonki:  Thanks!  They may not be overly visible unless you're looking for it, but the intakes just bugged me. 

Wayne:  Thanks for the pictures.  Definitely will use them. 

Eagle90:  Thanks!  I'll do my best to keep up to date with everything going on with it.

John:  Thanks! 

Spent most of the day working on a combination of the remaining three intakes and the nosegear.  I had planned on getting the gear and gear bays completed and the cockpit and gear primed but the day slipped away.  The nosegear bay is 3/4 detailed but some will have to wait until it's installed in the lower portion of the fuselage.  No pictures today, but I will try and get some loaded tomorrow! 

Peace through superior firepower.

Brian


  • Member since
    December 2002
  • From: Northern California
Posted by jeaton01 on Sunday, April 28, 2013 9:46 PM

Nice detailing, Brian.

John

To see build logs for my models:  http://goldeneramodel.com/mymodels/mymodels.html


  • Member since
    November 2010
  • From: Florida-West Central
Posted by Eagle90 on Sunday, April 28, 2013 6:02 PM

Acehawkdriver,

Great start on your build.  Awesome details!  Great dedication build for your dad.  Keep us posted on the progress!

Eagle90


  • Member since
    February 2003
  • From: Medina, Ohio
Posted by wayne baker on Sunday, April 28, 2013 1:55 PM

Took these at the Pima Museum several years ago.  Maybe they will help?  Lost the direct link when I previewed this.

http://img.photobucket.com/albums/v300/waynebaker/Pima%20Museum/209a9647.jpg

http://img.photobucket.com/albums/v300/waynebaker/Pima%20Museum/f8e32c0b.jpg

http://img.photobucket.com/albums/v300/waynebaker/Pima%20Museum/355f915e.jpg

http://img.photobucket.com/albums/v300/waynebaker/Pima%20Museum/e120be2e.jpg

http://img.photobucket.com/albums/v300/waynebaker/Pima%20Museum/62e0dcbe.jpg

http://img.photobucket.com/albums/v300/waynebaker/Pima%20Museum/8c1165b2.jpg

http://img.photobucket.com/albums/v300/waynebaker/Pima%20Museum/b6cbc94b.jpg

 I may get so drunk, I have to crawl home. But dammit, I'll crawl like a Marine.

  • Member since
    May 2004
  • From: Mount Bretherton Model Aircraft Observatory
Posted by f8sader on Sunday, April 28, 2013 11:25 AM

Thanks for posting your build.  Interesting idea for the turbine intake blades!  Go Monogram 1/48 scale "Big Planes!"

Lon-ski

  • Member since
    December 2003
  • From: Charleston, SC
Posted by sanderson_91 on Sunday, April 28, 2013 9:18 AM

Brian,

Nice looking so far - this will be a great tribute to your Dad!  I really like the way you detailed the seats and the intakes!  Looking foward to this build!

Steve


  • Member since
    May 2011
  • From: Bedford, Indiana
Posted by AceHawkDriver on Sunday, April 28, 2013 1:30 AM

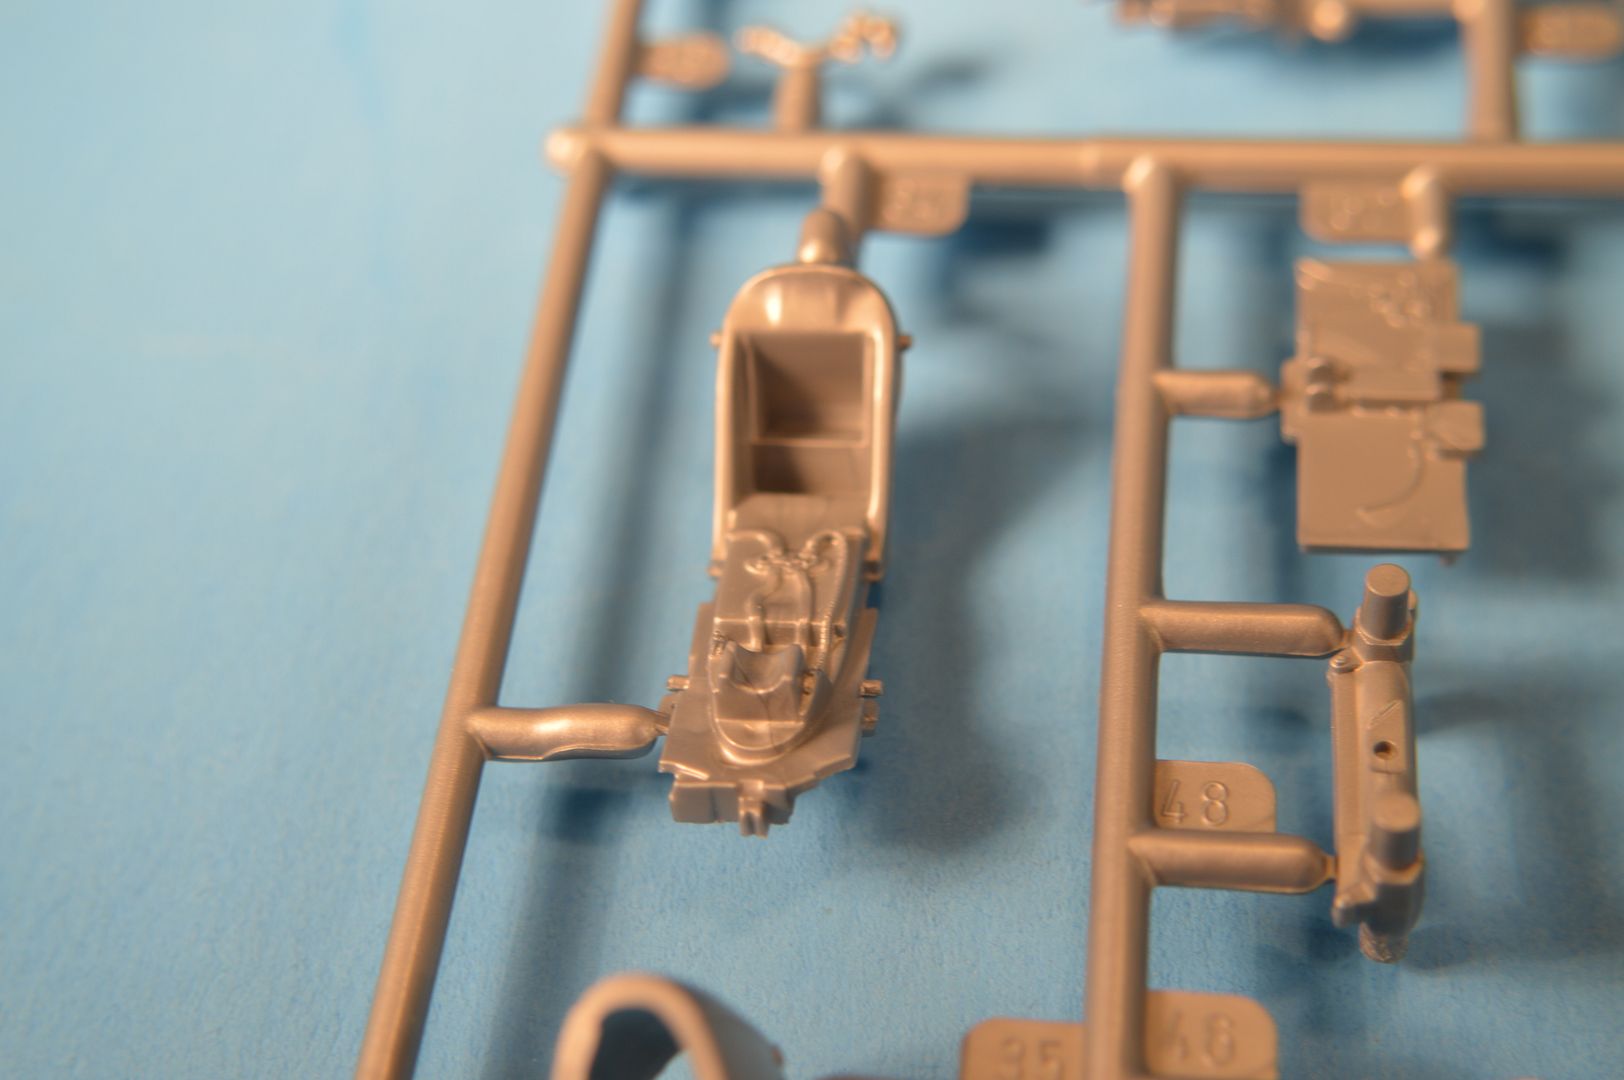
The instructions are pretty straightforward and I figured a few sub-assemblies would be best.  I decided to tackle the cokcpit first (as always).  Most of the detail won't be overly visible once the fuselage is buttoned up but I did a little work anyway. 

The kits seat left a little to be desired

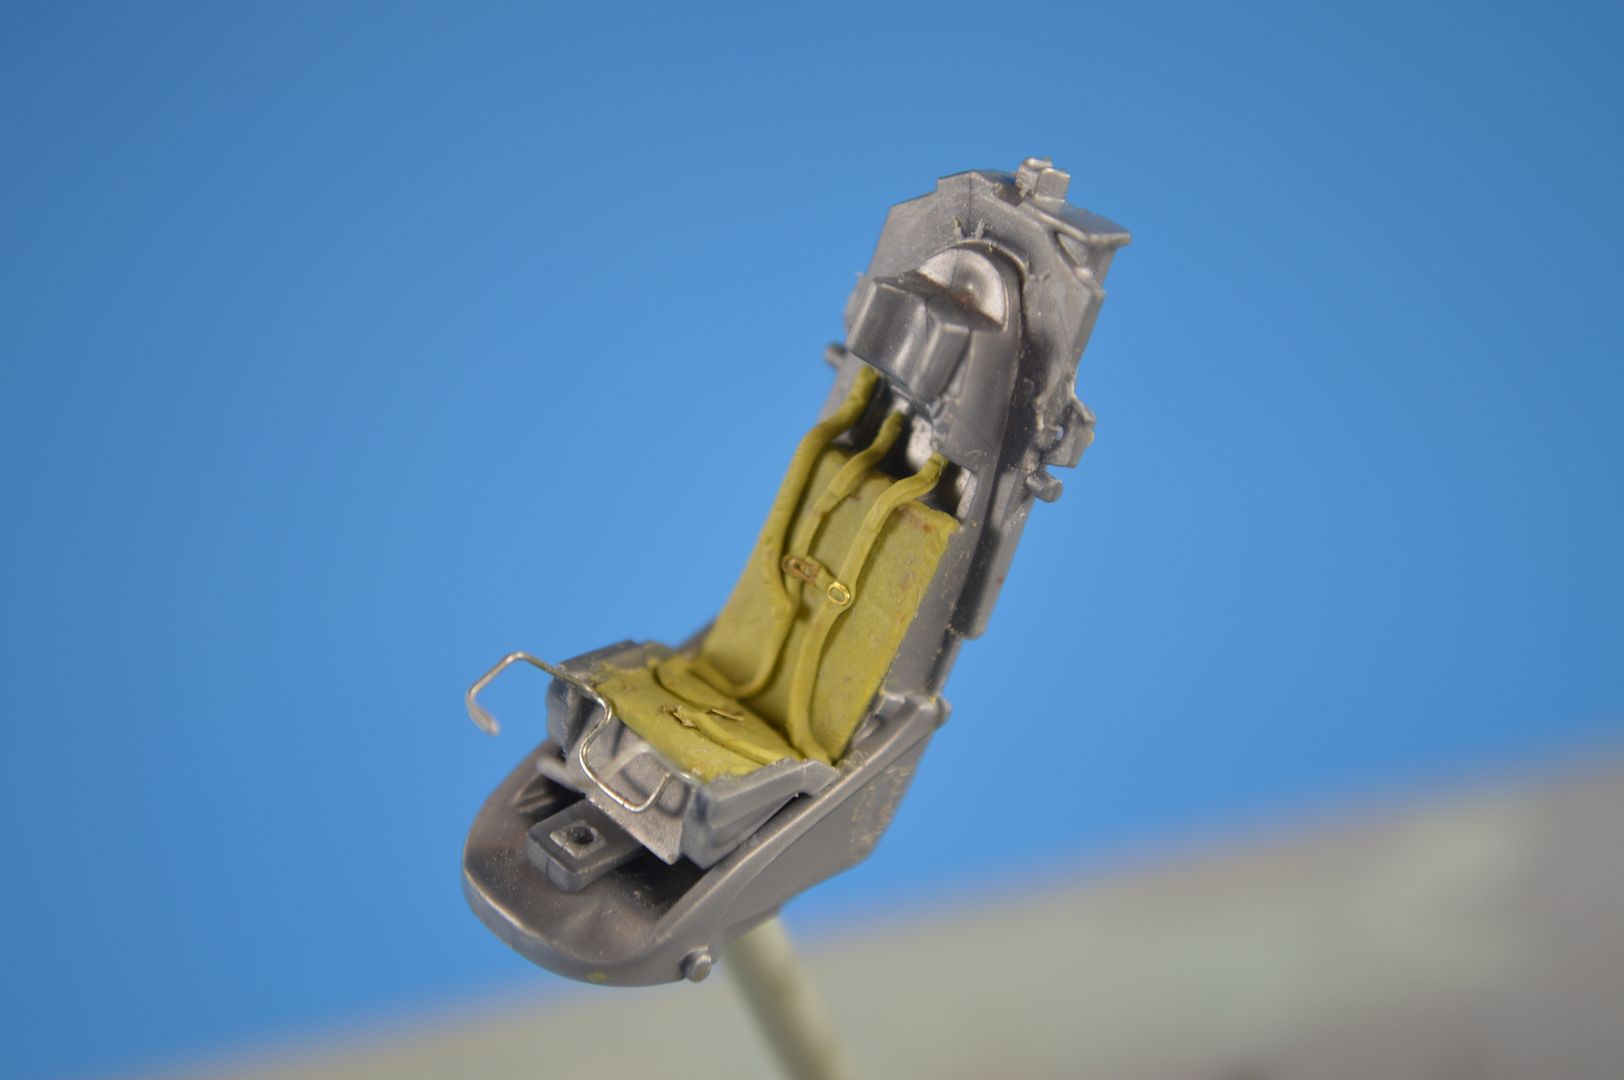
The seatbelts were carefully scraped away and Milliput was added for a smotther surface and to replicate the seat and seat back.  Also, Milliput harness were fashioned with spare PE used as the buckels and adjustment points.  The moulded leg retraction bar was replaced with wire from a twist tie.

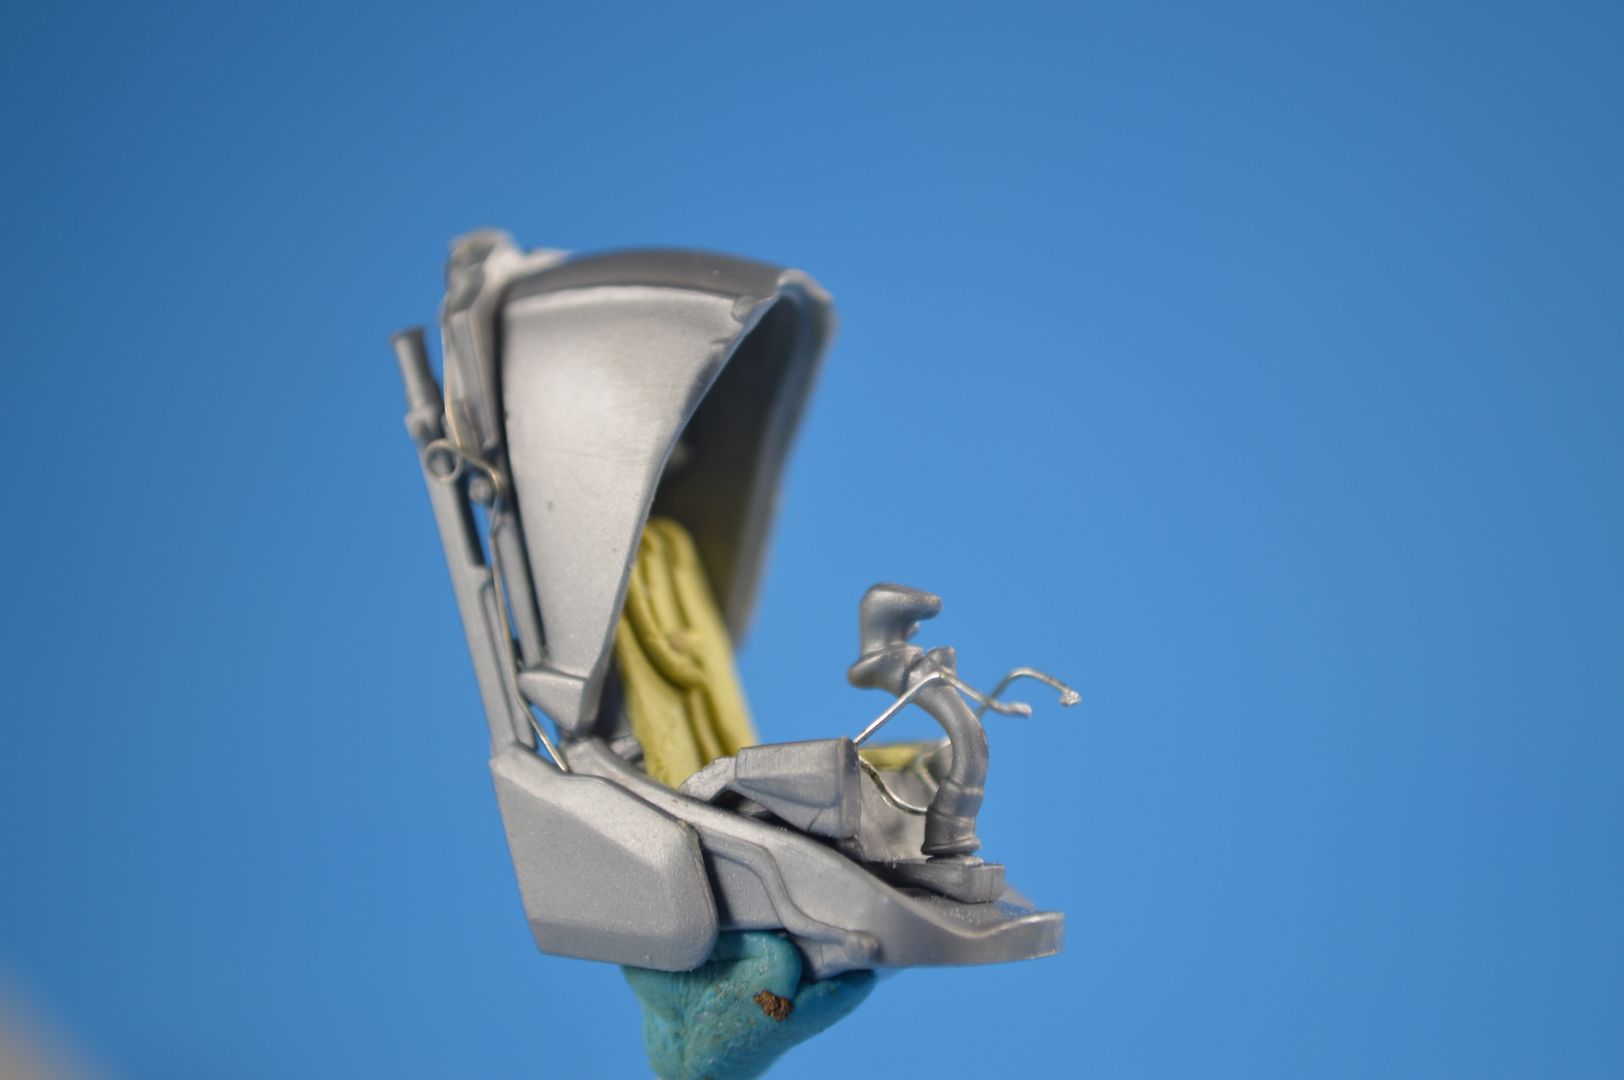
With the rails, stick, and hood added.  Also, wiring was added to the right side.

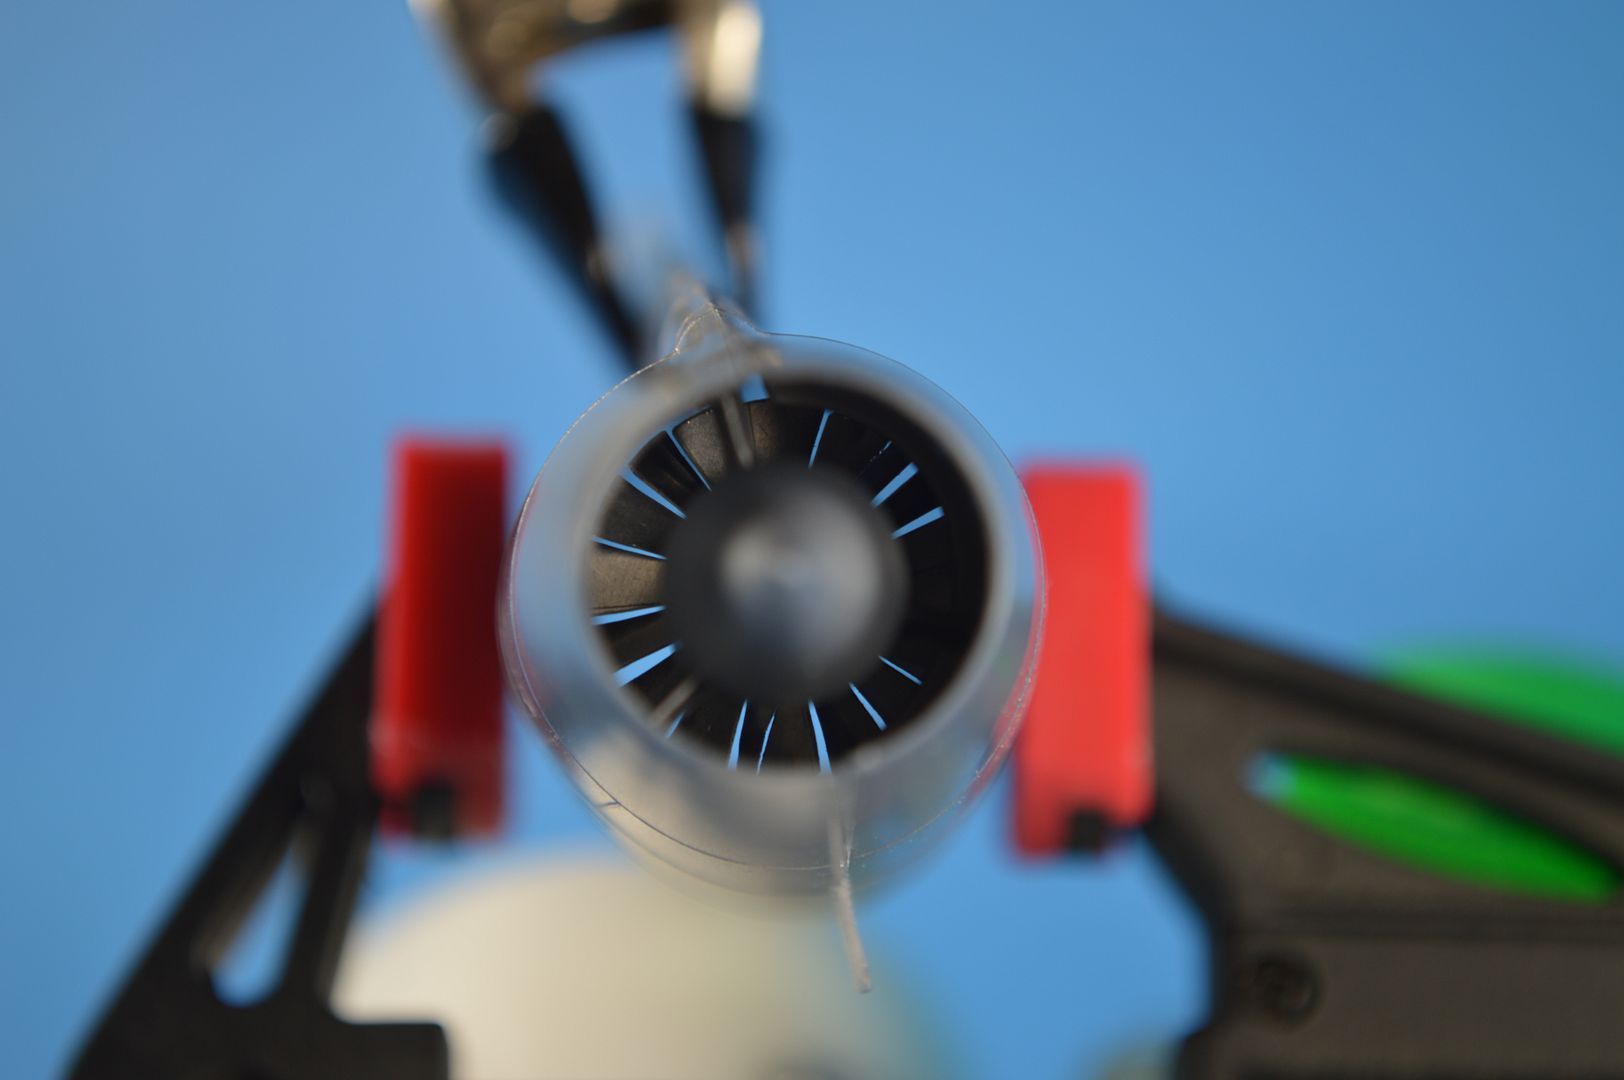
Detail was lacking on the kit engine intakes.  The intakes were moulded as one piece, but research indicated that the intake cones had three vanes and the first stage of the compressor was visible behind.  Aluminum from a soda can was cut to shape and the fan blades shaped using a pair of small wire cutters.  Unfortunately my Dremel's battery died halfway through the second intake.

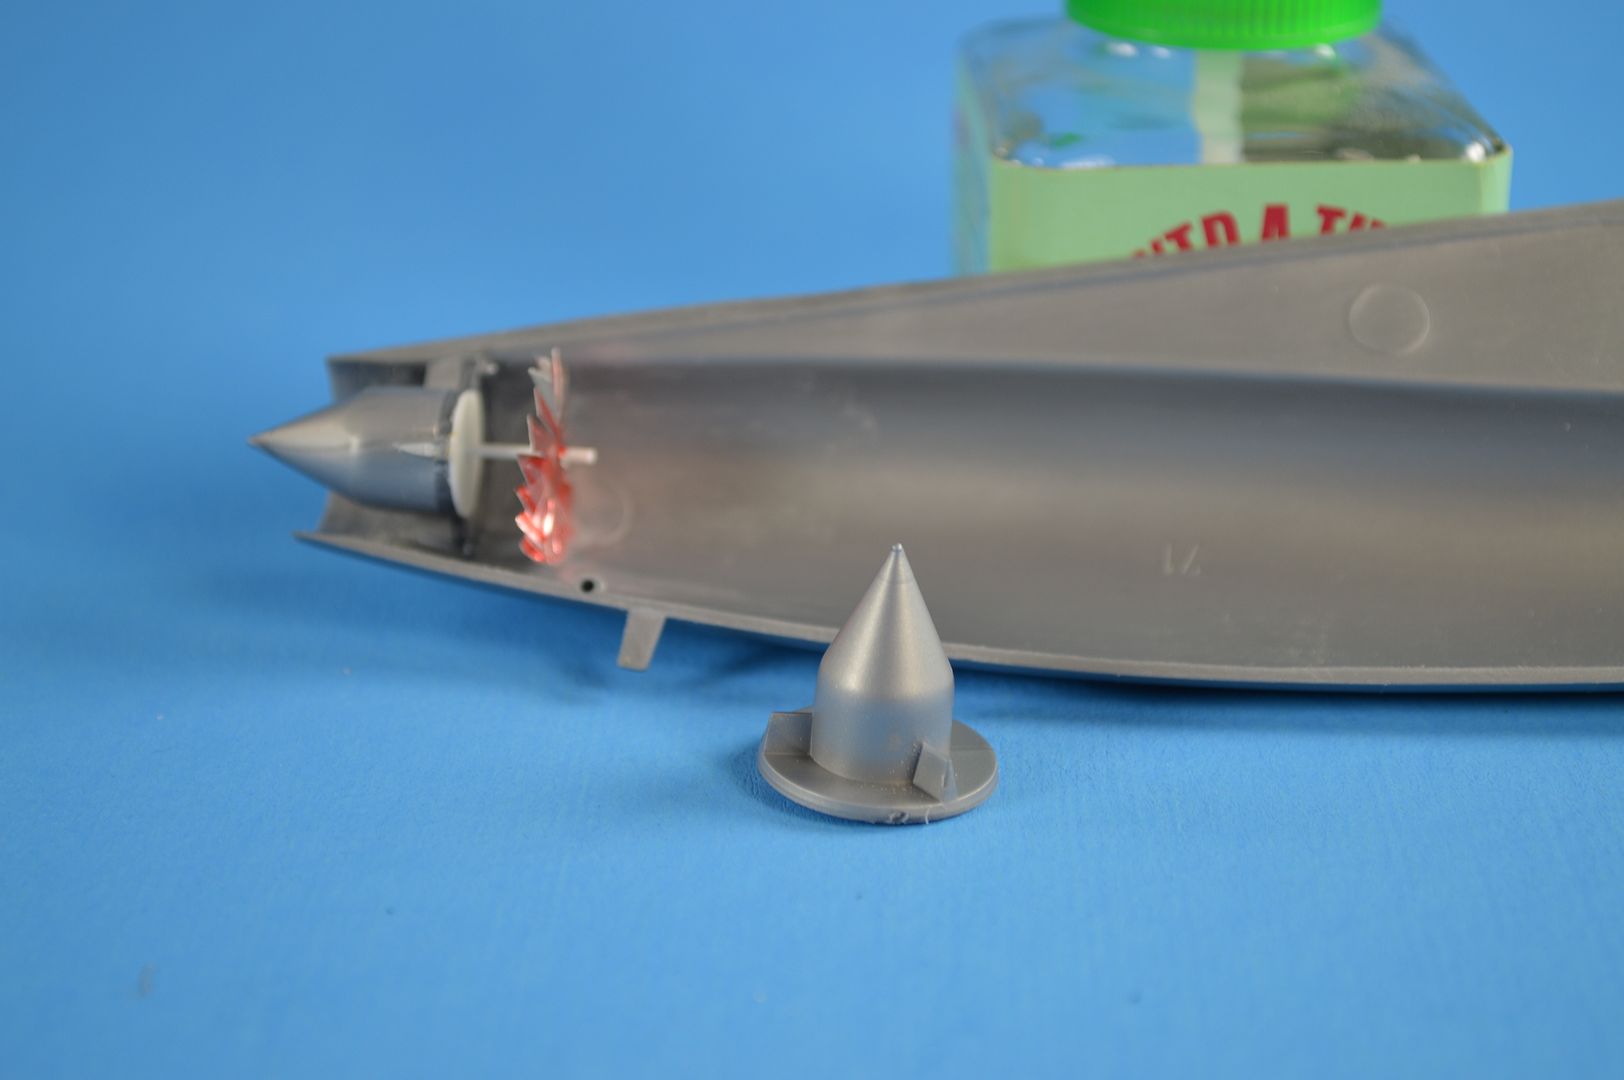
The result looking into the intake

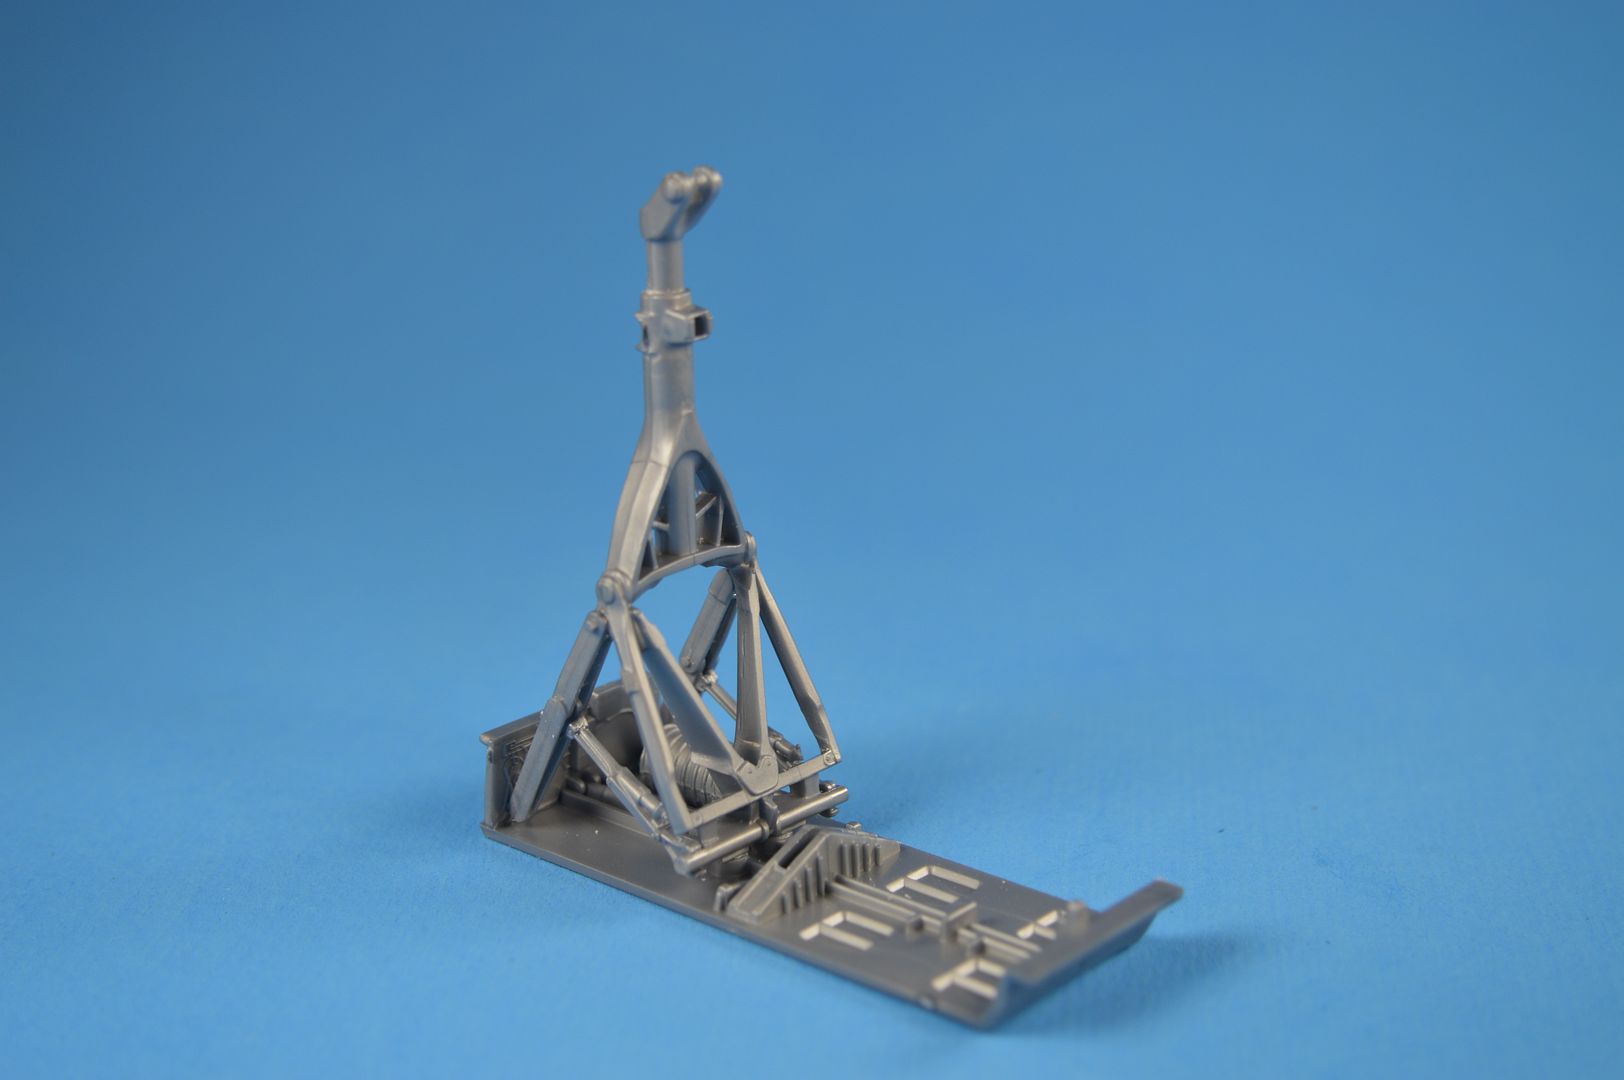
With the Dremel charging, I started on the main landing gear.  So far, the kit parts.  Details will be added tomorrow.

Other miscellaneous items have been completed.  The windows for the rear cockpits have been added, the tail assembly is drying and awaiting a lot of sanding, and cleanup is underway on the fuselage and wing components. 

Hopefully tomorrow the cockpit, main, and nosegear wheel wells will be detailed and ready for primer!

As always, comments and criticisms are always welcome!

Peace through superior firepower.

Brian


  • Member since
    May 2011
  • From: Bedford, Indiana
Monogram B-58 Hustler WIP
Posted by AceHawkDriver on Sunday, April 28, 2013 1:06 AM

Hey all!  It's been a little while since I've been on here.  Life has kept me pretty busy for the past few months and I haven't had much time to be at the bench.  On 18 April we lost my father after a five month battle with lung cancer.  He was a wonderful man, an excellent Dad, and an great example to follow. 

In dedication to my Dad, I have decided to build Monogram's 1/48 B-58 Hustler.  I had planned on building it for him as a gift one day, and had toyed with the idea of it being a Christmas gift last year.  Unfortunately, I wasn't able to do so.  My Dad's father flew B-17's (including Idiot's Delight) during WWII and was given the "Lucky Bastards Club" certificate for completing more than 25 missions.  He continued to fly with the USAF and retired as a Lt Col.  Out of all the airframes he flew (B-17, B-47, B-58, and the B-52), the Hustler was my Dad's favorite.  He was stationed with the 305th at Bunker Hill AFB, IN (now Grissom) during his time with the B-58.

Sorry for the long winded post, but wanted a little back story to go with the build.  On with the pictures. . . .

The build

Sprue shots


More pictures will follow.  Wanted to keep it shorter.

Comments and criticisms are always welcome!


Peace through superior firepower.

Brian


JOIN OUR COMMUNITY!

Our community is FREE to join. To participate you must either login or register for an account.

SEARCH FORUMS
FREE NEWSLETTER
By signing up you may also receive reader surveys and occasional special offers. We do not sell, rent or trade our email lists. View our Privacy Policy.